分享了iOS获取通讯录的4种方式
本文实例为大家分享了iOS获取通讯录的4种方式,供大家参考,具体内容如下
使用场景
一些App通过手机号码来推荐好友,如 微博、支付宝
首先客户端会获取通讯录中的所有手机号然后将这些手机号提交到App服务器中,服务器会查找每个手机号对应的App账号如QQ号码返回到客户端,然后客户端根据服务器返回的账号列表来推荐好友。
获取联系人方式
方案一:AddressBookUI.framework框架
提供了联系人列表界面、联系人详情界面、添加联系人界面等
一般用于选择联系人
方案二:AddressBook.framework框架:
没有提供UI界面,需要自己搭建联系人界面
纯C语言的API, 仅仅是获得联系人数据
大部分数据类型是Core Foundation
从iOS6 开始,需要得到用户的授权才能访问通讯录
方案三:第三方框架:RHAddressBook
对 AddressBook.framework 进行封装
方案四:iOS9.0最新通讯录框架
ContactsUI.framework : 方案1的替代品,特点: 面向对象,使用简单,有界面
Contacts.framework: 方案2的替代品, 特点:面向对象,使用简单,五界面
方案一:AddressBookUI.framework
实现步骤:
1.创建选择联系人的控制器
2.设置代理:用来接收用户选择的联系人信息
3.弹出联系人控制器
4.实现代理方法
5.在对应的代理方法中获取联系人信息
AddressBook.frame实现步骤:
1.请求授权
2.判断授权状态如果已授权则继续,如果未授权则提示用户
3.创建通讯录对象
4.从通讯录中获取所有的联系人
5.遍历所有的联系人
6.释放不再使用的对象
AddreesBook.framework具体实现:
1. AppDelegate 应用启动时请求授权
|
1
2
3
4
5
6
7
8
9
10
11
12
13
14
15
16
17
18
19
20
21
22
23
24
25
26
27
28
29
30
31
32
33
|
#import "AppDelegate.h"
#import <AddressBook/AddressBook.h>
@interface AppDelegate ()
@end
@implementation AppDelegate
- ( BOOL )application:(UIApplication *)application didFinishLaunchingWithOptions:(NSDictionary *)launchOptions {
// Override point for customization after application launch.
[self requestAuthorizationAddressBook];
return YES;
}
- ( void )requestAuthorizationAddressBook {
// 判断是否授权
ABAuthorizationStatus authorizationStatus = ABAddressBookGetAuthorizationStatus();
if (authorizationStatus == kABAuthorizationStatusNotDetermined) {
// 请求授权
ABAddressBookRef addressBookRef = ABAddressBookCreate();
ABAddressBookRequestAccessWithCompletion(addressBookRef, ^( bool granted, CFErrorRef error) {
if (granted) { // 授权成功
} else { // 授权失败
NSLog(@ "授权失败!" );
}
});
}
}
@end
|
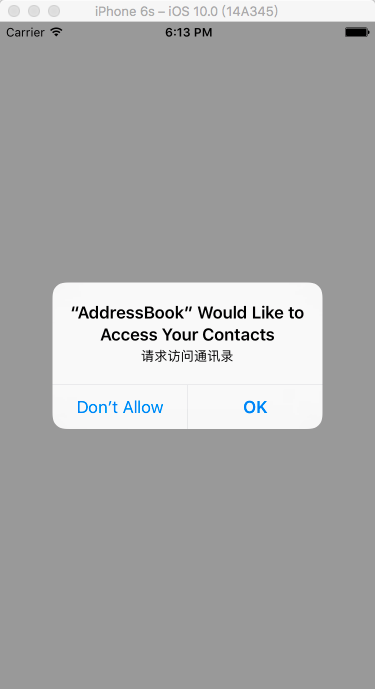
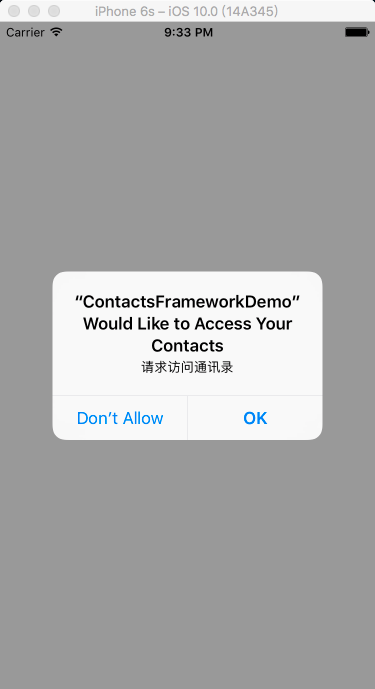
2. iOS10 需要在Info.plist配置NSContactsUsageDescription
|
1
2
|
<key>NSContactsUsageDescription</key>
<string>请求访问通讯录</string>
|
3. ViewController
|
1
2
3
4
5
6
7
8
9
10
11
12
13
14
15
16
17
18
19
20
21
22
23
24
25
26
27
28
29
30
31
32
33
34
35
36
37
38
39
40
41
42
43
44
45
46
47
48
49
50
51
52
53
54
55
56
57
58
59
60
61
62
63
64
65
66
67
68
69
70
71
72
73
74
75
76
77
78
79
80
81
82
83
84
85
86
87
88
89
90
91
92
93
94
95
96
97
98
99
100
101
102
103
104
105
106
107
108
109
110
111
112
113
114
115
116
117
118
119
120
121
122
123
124
|
#import "ViewController.h"
#import <AddressBook/AddressBook.h>
@interface ViewController ()
@end
@implementation ViewController
- ( void )viewDidLoad {
[super viewDidLoad];
}
- ( void )touchesBegan:(NSSet<UITouch *> *)touches withEvent:(UIEvent *)event {
// 1. 判读授权
ABAuthorizationStatus authorizationStatus = ABAddressBookGetAuthorizationStatus();
if (authorizationStatus != kABAuthorizationStatusAuthorized) {
NSLog(@ "没有授权" );
return ;
}
// 2. 获取所有联系人
ABAddressBookRef addressBookRef = ABAddressBookCreate();
CFArrayRef arrayRef = ABAddressBookCopyArrayOfAllPeople(addressBookRef);
long count = CFArrayGetCount(arrayRef);
for ( int i = 0; i < count; i++) {
//获取联系人对象的引用
ABRecordRef people = CFArrayGetValueAtIndex(arrayRef, i);
//获取当前联系人名字
NSString *firstName=(__bridge NSString *)(ABRecordCopyValue(people, kABPersonFirstNameProperty));
//获取当前联系人姓氏
NSString *lastName=(__bridge NSString *)(ABRecordCopyValue(people, kABPersonLastNameProperty));
NSLog(@ "--------------------------------------------------" );
NSLog(@ "firstName=%@, lastName=%@" , firstName, lastName);
//获取当前联系人的电话 数组
NSMutaleArray *phoneArray = [[NSMutableArray alloc]init];
ABMultiValueRef phones = ABRecordCopyValue(people, kABPersonPhoneProperty);
for (NSInteger j=0; j<ABMultiValueGetCount(phones); j++) {
NSString *phone = (__bridge NSString *)(ABMultiValueCopyValueAtIndex(phones, j));
NSLog(@ "phone=%@" , phone);
[phoneArray addObject:phone];
}
//获取当前联系人的邮箱 注意是数组
NSMutableArray *emailArray = [[NSMutableArray alloc]init];
ABMultiValueRef emails= ABRecordCopyValue(people, kABPersonEmailProperty);
for (NSInteger j=0; j<ABMultiValueGetCount(emails); j++) {
NSString *email = (__bridge NSString *)(ABMultiValueCopyValueAtIndex(emails, j));
NSLog(@ "email=%@" , email);
[emailArray addObject:email];
}
//获取当前联系人中间名
NSString *middleName=(__bridge NSString*)(ABRecordCopyValue(people, kABPersonMiddleNameProperty));
//获取当前联系人的名字前缀
NSString *prefix=(__bridge NSString*)(ABRecordCopyValue(people, kABPersonPrefixProperty));
//获取当前联系人的名字后缀
NSString *suffix=(__bridge NSString*)(ABRecordCopyValue(people, kABPersonSuffixProperty));
//获取当前联系人的昵称
NSString *nickName=(__bridge NSString*)(ABRecordCopyValue(people, kABPersonNicknameProperty));
//获取当前联系人的名字拼音
NSString *firstNamePhoneic=(__bridge NSString*)(ABRecordCopyValue(people, kABPersonFirstNamePhoneticProperty));
//获取当前联系人的姓氏拼音
NSString *lastNamePhoneic=(__bridge NSString*)(ABRecordCopyValue(people, kABPersonLastNamePhoneticProperty));
//获取当前联系人的中间名拼音
NSString *middleNamePhoneic=(__bridge NSString*)(ABRecordCopyValue(people, kABPersonMiddleNamePhoneticProperty));
//获取当前联系人的公司
NSString *organization=(__bridge NSString*)(ABRecordCopyValue(people, kABPersonOrganizationProperty));
//获取当前联系人的职位
NSString *job=(__bridge NSString*)(ABRecordCopyValue(people, kABPersonJobTitleProperty));
//获取当前联系人的部门
NSString *department=(__bridge NSString*)(ABRecordCopyValue(people, kABPersonDepartmentProperty));
//获取当前联系人的生日
NSString *birthday=(__bridge NSDate*)(ABRecordCopyValue(people, kABPersonBirthdayProperty));
//获取当前联系人的备注
NSString *notes=(__bridge NSString*)(ABRecordCopyValue(people, kABPersonNoteProperty));
//获取创建当前联系人的时间 注意是NSDate
NSDate *creatTime=(__bridge NSDate*)(ABRecordCopyValue(people, kABPersonCreationDateProperty));
//获取最近修改当前联系人的时间
NSDate *alterTime=(__bridge NSDate*)(ABRecordCopyValue(people, kABPersonModificationDateProperty));
//获取地址
ABMultiValueRef address = ABRecordCopyValue(people, kABPersonAddressProperty);
for ( int j=0; j<ABMultiValueGetCount(address); j++) {
//地址类型
NSString *type = (__bridge NSString *)(ABMultiValueCopyLabelAtIndex(address, j));
NSDictionary * tempDic = (__bridge NSDictionary *)(ABMultiValueCopyValueAtIndex(address, j));
//地址字符串,可以按需求格式化
NSString *adress = [NSString stringWithFormat:@ "国家:%@\n省:%@\n市:%@\n街道:%@\n邮编:%@" ,[temDic valueForKey:(NSString*)kABPersonAddressCountryKey],[tempDic valueForKey:(NSString*)kABPersonAddressStateKey],[tempDic valueForKey:(NSString*)kABPersonAddressCityKey],[tempDic valueForKey:(NSString*)kABPersonAddressStreetKey],[tempDic valueForKey:(NSString*)kABPersonAddressZIPKey]];
}
//获取当前联系人头像图片
NSData *userImage=(__bridge NSData*)(ABPersonCopyImageData(people));
//获取当前联系人纪念日
NSMutableArray *dateArr = [[NSMutableArray alloc]init];
ABMultiValueRef dates= ABRecordCopyValue(people, kABPersonDateProperty);
for (NSInteger j=0; j<ABMultiValueGetCount(dates); j++) {
//获取纪念日日期
NSDate *data =(__bridge NSDate*)(ABMultiValueCopyValueAtIndex(dates, j));
//获取纪念日名称
NSString *str =(__bridge NSString*)(ABMultiValueCopyLabelAtIndex(dates, j));
NSDictionary *tempDic = [NSDictionary dictionaryWithObject:data forKey:str];
[dateArr addObject:tempDic];
}
}
}
@end
|
4. 运行结果

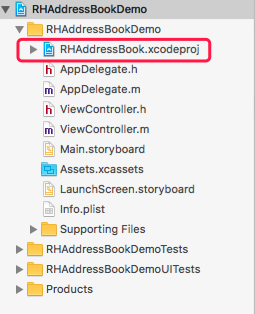
第三方框架:RHAddressBook
https://github.com/heardrwt/RHAddressBook
该框架使用的MRC来管理内存的,如果直接将源代码拖入进去需要为每个文件设置编译标记:-fno-objc-arc, 设置完还会报错,该项目使用的一些方法过于古老,很多都不支持了,所以这种方式不采用; 可以将该项目打成静态库的方式;也可以直接将项目拖入到自己的工程中作为一个依赖
1.直接将RHAddressBook.xcodeproj拖入到工程中
2.添加Target Dependencies和Link Binary With Libraries

3.Build Settings—> Other Linker Flags : -ObjC
用于解决系统分类找不到方法的错误

4.iOS10 需要在Info.plist配置NSContactsUsageDescription
|
1
2
|
<key>NSContactsUsageDescription</key>
<string>请求访问通讯录</string>
|
App启动时请求授权访问通讯录
|
1
2
3
4
5
6
7
8
9
10
11
12
13
14
15
16
17
18
19
20
21
22
23
24
25
26
27
28
29
30
|
#import "AppDelegate.h"
#import <RHAddressBook/RHAddressBook.h>
@interface AppDelegate ()
@end
@implementation AppDelegate
- ( BOOL )application:(UIApplication *)application didFinishLaunchingWithOptions:(NSDictionary *)launchOptions {
// Override point for customization after application launch.
[self requestAuthorizationForAddressBook];
return YES;
}
- ( void )requestAuthorizationForAddressBook {
RHAddressBook *ab = [[RHAddressBook alloc] init];
if ([RHAddressBook authorizationStatus] == RHAuthorizationStatusNotDetermined){
[ab requestAuthorizationWithCompletion:^( bool granted, NSError *error) {
if (granted) {
} else {
NSLog(@ "请求授权拒绝" );
}
}];
}
}
@end
|
获取所有联系人的信息:姓名、手机号等
|
1
2
3
4
5
6
7
8
9
10
11
12
13
14
15
16
17
18
19
20
21
22
23
24
25
26
27
28
29
30
31
32
33
34
35
36
37
|
#import "ViewController.h"
#import <RHAddressBook/RHAddressBook.h>
#import <RHAddressBook/AddressBook.h>
@interface ViewController ()
@end
@implementation ViewController
- ( void )viewDidLoad {
[super viewDidLoad];
}
- ( void )touchesBegan:(NSSet<UITouch *> *)touches withEvent:(UIEvent *)event {
RHAddressBook *addressBook = [[RHAddressBook alloc] init];
if ([RHAddressBook authorizationStatus] != RHAuthorizationStatusAuthorized){
NSLog(@ "没有授权" );
return ;
}
NSArray *peopleArray= addressBook.people;
for ( int i = 0; i < peopleArray.count; i++) {
RHPerson *people = (RHPerson *)peopleArray[i];
NSLog(@ "%@" , people.name);
RHMultiStringValue *phoneNumbers = people.phoneNumbers;
for ( int i = 0; i < phoneNumbers.count; i++) {
NSString* label= [phoneNumbers labelAtIndex:i];
NSString* value= [phoneNumbers valueAtIndex:i];
NSLog(@ "label=%@, value=%@" , label, value);
}
NSLog(@ "----------------------------------------------" );
}
}
@end
|
运行结果:

ContactsUI.framework
|
1
2
3
4
5
6
7
8
9
10
11
12
13
14
15
16
17
18
19
20
21
22
23
24
25
26
27
28
29
30
31
32
33
34
35
36
37
38
39
40
41
42
43
44
45
46
47
48
49
50
51
|
#import "ViewController.h"
#import <ContactsUI/ContactsUI.h>
@interface ViewController () <CNContactPickerDelegate>
@end
@implementation ViewController
- ( void )viewDidLoad {
[super viewDidLoad];
CNContactPickerViewController *contactPickerViewController = [[CNContactPickerViewController alloc] init];
contactPickerViewController.delegate = self;
[self presentViewController:contactPickerViewController animated:YES completion:nil];
}
// 如果实现该方法当选中联系人时就不会再出现联系人详情界面, 如果需要看到联系人详情界面只能不实现这个方法,
- ( void )contactPicker:(CNContactPickerViewController *)picker didSelectContact:(CNContact *)contact {
NSLog(@ "选中某一个联系人时调用---------------------------------" );
[self printContactInfo:contact];
}
// 同时选中多个联系人
- ( void )contactPicker:(CNContactPickerViewController *)picker didSelectContacts:(NSArray<CNContact *> *)contacts {
for (CNContact *contact in contacts) {
NSLog(@ "================================================" );
[self printContactInfo:contact];
}
}
- ( void )printContactInfo:(CNContact *)contact {
NSString *givenName = contact.givenName;
NSString *familyName = contact.familyName;
NSLog(@ "givenName=%@, familyName=%@" , givenName, familyName);
NSArray * phoneNumbers = contact.phoneNumbers;
for (CNLabeledValue<CNPhoneNumber*>*phone in phoneNumbers) {
NSString *label = phone.label;
CNPhoneNumber *phonNumber = (CNPhoneNumber *)phone.value;
NSLog(@ "label=%@, value=%@" , label, phonNumber.stringValue);
}
}
// 注意:如果实现该方法,上面那个方法就不能实现了,这两个方法只能实现一个
//- (void)contactPicker:(CNContactPickerViewController *)picker didSelectContactProperty:(CNContactProperty *)contactProperty {
// NSLog(@"选中某个联系人的某个属性时调用");
//}
@end
|
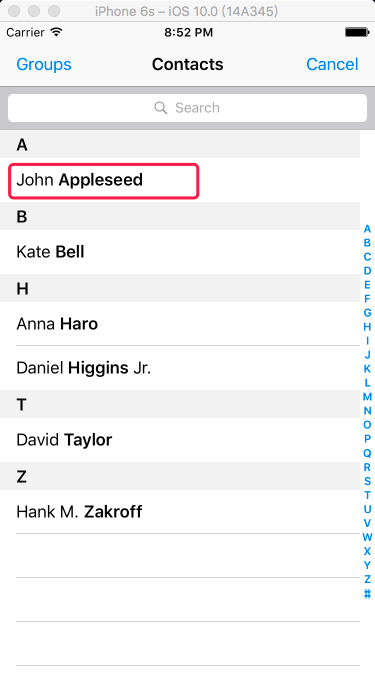
选择单个联系人时运行效果:

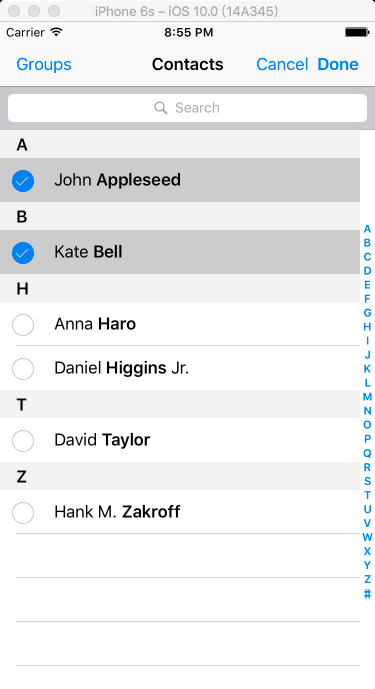
选择多个联系人的界面:

Contact.framework
iOS10 需要在Info.plist配置NSContactsUsageDescription
|
1
2
|
<key>NSContactsUsageDescription</key>
<string>请求访问通讯录</string>
|
应用启动时请求授权:
|
1
2
3
4
5
6
7
8
9
10
11
12
13
14
15
16
17
18
19
20
21
22
23
24
25
26
27
28
29
30
31
32
|
#import "AppDelegate.h"
#import <Contacts/Contacts.h>
@interface AppDelegate ()
@end
@implementation AppDelegate
- ( BOOL )application:(UIApplication *)application didFinishLaunchingWithOptions:(NSDictionary *)launchOptions {
// Override point for customization after application launch.
[self requestAuthorizationForAddressBook];
return YES;
}
- ( void )requestAuthorizationForAddressBook {
CNAuthorizationStatus authorizationStatus = [CNContactStore authorizationStatusForEntityType:CNEntityTypeContacts];
if (authorizationStatus == CNAuthorizationStatusNotDetermined) {
CNContactStore *contactStore = [[CNContactStore alloc] init];
[contactStore requestAccessForEntityType:CNEntityTypeContacts completionHandler:^( BOOL granted, NSError * _Nullable error) {
if (granted) {
} else {
NSLog(@ "授权失败, error=%@" , error);
}
}];
}
}
@end
|
获取通讯录信息
|
1
2
3
4
5
6
7
8
9
10
11
12
13
14
15
16
17
18
19
20
21
22
23
24
25
26
27
28
29
30
31
32
33
34
35
36
37
38
39
40
41
42
43
44
|
#import "ViewController.h"
#import <Contacts/Contacts.h>
@interface ViewController ()
@end
@implementation ViewController
- ( void )viewDidLoad {
[super viewDidLoad];
}
- ( void )touchesBegan:(NSSet<UITouch *> *)touches withEvent:(UIEvent *)event {
CNAuthorizationStatus authorizationStatus = [CNContactStore authorizationStatusForEntityType:CNEntityTypeContacts];
if (authorizationStatus == CNAuthorizationStatusAuthorized) {
NSLog(@ "没有授权..." );
}
// 获取指定的字段,并不是要获取所有字段,需要指定具体的字段
NSArray *keysToFetch = @[CNContactGivenNameKey, CNContactFamilyNameKey, CNContactPhoneNumbersKey];
CNContactFetchRequest *fetchRequest = [[CNContactFetchRequest alloc] initWithKeysToFetch:keysToFetch];
CNContactStore *contactStore = [[CNContactStore alloc] init];
[contactStore enumerateContactsWithFetchRequest:fetchRequest error:nil usingBlock:^(CNContact * _Nonnull contact, BOOL * _Nonnull stop) {
NSLog(@ "-------------------------------------------------------" );
NSString *givenName = contact.givenName;
NSString *familyName = contact.familyName;
NSLog(@ "givenName=%@, familyName=%@" , givenName, familyName);
NSArray *phoneNumbers = contact.phoneNumbers;
for (CNLabeledValue *labelValue in phoneNumbers) {
NSString *label = labelValue.label;
CNPhoneNumber *phoneNumber = labelValue.value;
NSLog(@ "label=%@, phone=%@" , label, phoneNumber.stringValue);
}
// *stop = YES; // 停止循环,相当于break;
}];
}
@end
|
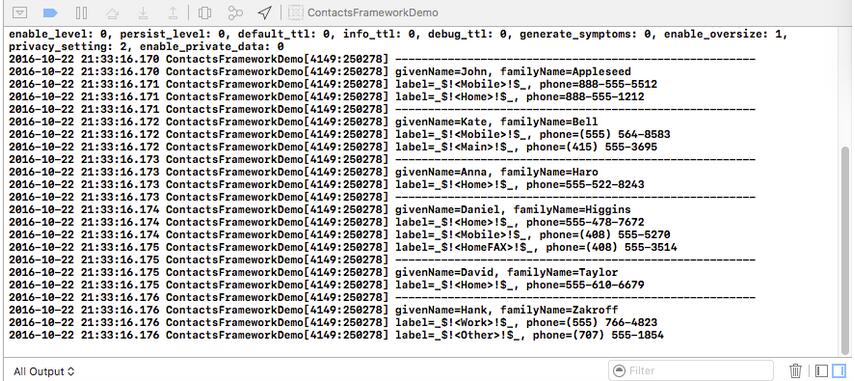
运行效果:
分享了iOS获取通讯录的4种方式相关推荐
- iOS 获取通讯录的4种方式详解
分享一个朋友的人工智能教程.比较通俗易懂,风趣幽默,感兴趣的朋友可以去看看. 使用场景 一些App通过手机号码来推荐好友,如 微博.支付宝 首先客户端会获取通讯录中的所有手机号然后将这些手机号提交到A ...
- aes key长度_原创 | 浅谈Shiro反序列化获取Key的几种方式
点击"关注"了解更多信息 关于Apache Shiro反序列化 在shiro≤1.2.4版本,默认使⽤了CookieRememberMeManager,由于AES使用的key泄露, ...
- python 执行shellcode_简述获取shellcode的几种方式
原标题:简述获取shellcode的几种方式 0×00 shellcode简介 在攻击中,shellcode是一段用于利用软件漏洞的有效负载,shellcode是16进制的机器码,以其经常让攻击者获得 ...
- linux系统怎么拿shell,简述获取shellcode的几种方式
原标题:简述获取shellcode的几种方式 0×00 shellcode简介 在攻击中,shellcode是一段用于利用软件漏洞的有效负载,shellcode是16进制的机器码,以其经常让攻击者获得 ...
- SpringBoot静态获取 bean的三种方式,你学会了吗?
欢迎关注方志朋的博客,回复"666"获面试宝典 来源:blog.csdn.net/showchi/article/details/97005720 注意:调用者要被spring管理 ...
- Spring读取配置文件,获取bean的几种方式
Spring读取配置文件,获取bean的几种方式 方法一:在初始化时保存ApplicationContext对象 代码: ApplicationContext ac = new FileSystemX ...
- Spring Boot 获取 Bean 的 3 种方式!还有谁不会?
作者 | chilx 来源 | https://blog.csdn.net/showchi/article/details/97005720 注意:调用者要被spring管理 方式一 注解@PostC ...
- android获取自定义属性,android 自定义控件中获取属性的三种方式(转)
第一种方法,直接设置属性值,通过attrs.getAttributeResourceValue拿到这个属性值. (1)在xml文件中设置属性值 android:layout_width="f ...
- SpringMVC获取参数的几种方式
SpringMVC获取参数的几种方式 前言: 年末了,忙了一年了却发现系统的整理的东西很少,一些基础的东西都未做整理,这里就将它随便整理一下,增加一些印象,当然在网上看到一些好的资料也会整理下来以备后 ...
最新文章
- R语言ggplot2可视化:置信区间与分组具有相同色彩、自定义置信区间带的色彩、Make confidence intervals the same color as line by group
- 如何为网站项目添加子项目
- Sql Server 连接池
- 4-spark学习笔记-spark运行模式与原理
- 详解sentinel:分布式系统的流量防卫兵
- linux查询服务器cpu核数_如何查看linux服务器的cpu数量,内核数,和cpu线程数
- 什么是类加载器,类加载器有哪些?
- UVA - 699 The Falling Leaves
- icem密度盒怎么设置_哪种外卖盒最健康?常吃外卖的必知!
- python标准库6张思维导图学明白
- oblog后台管理问题
- 苹果邮箱怎么登录qq邮箱_邮箱格式怎么写 电子邮箱格式怎么写
- MobaXterm上方工具栏显示
- 软件设计的七大原则 --开闭原则 里氏替换原则 依赖倒置原则
- Beta阶段站立会议-01
- 美元和人民币 货币转换
- 基于UGUI实现类似Excel表格功能
- 后台管理系统项目搭建
- c语言和python区别,python和c语言的区别是什么
- cvc 降噪_耳机降噪技术-ANC、ENC、DSP、CVC