卷积神经网络 svm分类器_使用卷积神经网络的狗品种分类器
卷积神经网络 svm分类器
介绍 (Introduction)
Do you know the breed of the dog in the picture above? If you don’t then it’s completely fine because I don’t know either. Well, we come across a lot of different breeds of dogs while walking on the street and the second thing that we want to know is his breed (wondering what’s the first thing?! His name!). Why waste time then and let’s take some help from one of the most popular machine learning methods namely Convolutional Neural Network (CNN) to detect the breed of the dog. In this article, we will review a full algorithm to detect the breed of the dog using the given Dataset. We will also see how to use a pre-trained ResNet50 model to use it to detect the breed of the dog.
您知道上图中的狗的品种吗? 如果您不这样做,那完全没问题,因为我也不知道。 好吧,我们在街上散步时遇到了许多不同品种的狗,我们想知道的第二件事是他的品种(想知道第一件事是什么!!他的名字!)。 为什么浪费时间,然后让我们从最流行的机器学习方法之一(即卷积神经网络(CNN))中寻求帮助,以检测狗的品种。 在本文中,我们将回顾使用给定的数据集来检测狗的品种的完整算法。 我们还将看到如何使用经过预训练的ResNet50模型来检测狗的品种。
一步步! (Step by Step!)
- Import the Dataset导入数据集
- Detect Humans using CV2使用CV2检测人类
- Detect Dogs检测狗
- Create a CNN to classify Dog Breeds (from Scratch)创建CNN对狗的品种进行分类(从头开始)
- Use a CNN to Classify Dog Breeds (using Transfer Learning)使用CNN对狗的品种进行分类(使用转移学习)
- Create a CNN to Classify Dog Breeds (using Transfer Learning)创建CNN对狗的品种进行分类(使用转移学习)
- Write the Algorithm编写算法
- Test the Algorithm测试算法
STEP-1导入数据集 (STEP-1 Import the Dataset)
Our dataset contains 8351 total dog images with 133 different categories of breed.
我们的数据集包含8351张狗图像,其中包含133个不同类别的犬种。
def load_dataset(path): data = load_files(path) dog_files = np.array(data['filenames']) dog_targets = np_utils.to_categorical(np.array(data['target']), 133) return dog_files, dog_targetsAfter calling the above function and passing the path of the images where it is stored, the dog_files would contain the path of all the images in the whole dataset and the dog_targets would contain the one-hot encoded 133 variables. Let’s load the train, test, and validation sets using the above function.
调用上述函数并传递存储图像的路径后,dog_files将包含整个数据集中所有图像的路径,而dog_targets将包含一键编码的133个变量。 让我们使用上述功能加载训练,测试和验证集。
train_files, train_targets = load_dataset('../../../data/dog_images/train')valid_files, valid_targets = load_dataset('../../../data/dog_images/valid')test_files, test_targets = load_dataset('../../../data/dog_images/test')步骤2检测人类 (STEP-2 Detect Humans)
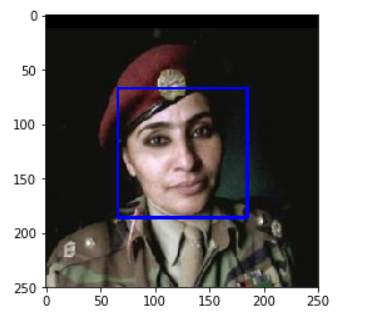
To add a feature to our model where any human disguised in a dog’s costume does not fool our classification results, we will detect humans through OpenCV’s implementation of Haar feature-based cascade classifiers. To implement this, the following is the code:
为了在我们的模型中增加一个伪装成狗装的人不会欺骗我们分类结果的功能,我们将通过OpenCV实施基于Haar特征的级联分类器来检测人。 为了实现这一点,下面是代码:
import cv2# extract pre-trained face detector# cv2.CascadeClassifier is the model for detecting facesface_cascade = cv2.CascadeClassifier('haarcascades/haarcascade_frontalface_alt.xml')# load color (BGR) image# cv2.imread(image_file_name) reads an imageimg = cv2.imread(human_files[3])# convert BGR image to grayscalegray = cv2.cvtColor(img, cv2.COLOR_BGR2GRAY)# find faces in imagefaces = face_cascade.detectMultiScale(gray)# print number of faces detected in the imageprint('Number of faces detected:', len(faces))You can expect to have something like this:
您可以期望有这样的东西:
The result on the test data predicted 11% of the dogs to be human faces.
测试数据的结果预测11%的狗是人脸。
STEP-3检测狗 (STEP-3 Detect Dogs)
In this section, we will implement one of the most powerful CNN architecture available namely ResNet50. It is pre-trained on ImageNet, a very large, very popular dataset used for image classification and other vision tasks. We will use this pre-trained model to detect whether the image contains a dog or not.
在本节中,我们将实现可用的最强大的CNN架构之一,即ResNet50。 它在ImageNet上进行了预训练,ImageNet是一个非常大,非常受欢迎的数据集,用于图像分类和其他视觉任务。 我们将使用这种预先训练的模型来检测图像是否包含狗。
# This line will download the ResNet-50 model, along with weights that have been trained on ImageNetfrom keras.applications.resnet50 import ResNet50# define ResNet50 modelResNet50_model = ResNet50(weights='imagenet')数据预处理 (Data Pre-processing)
When using TensorFlow as backend, Keras CNNs require a 4D array (which we’ll also refer to as a 4D tensor) as input, with shape:
当使用TensorFlow作为后端时,Keras CNN需要一个4D数组(我们也将其称为4D张量)作为输入,其形状为:
(nb_samples,rows,columns,channels)where nb_samples corresponds to the total number of images (or samples), and rows, columns, and channels correspond to the number of rows, columns, and channels for each image, respectively.
其中nb_samples对应于图像(或样本)的总数,而rows , columns和channels对应于每个图像的行数,列数和通道数。
The path_to_tensor function below takes a string-valued file path to a color image as input and returns a 4D tensor suitable for supplying to a Keras CNN. The function first loads the image and resizes it to a square image that is 224×224224×224 pixels. Next, the image is converted to an array, which is then resized to a 4D tensor. In this case, since we are working with color images, each image has three channels. Likewise, since we are processing a single image (or sample), the returned tensor will always have shape
下面的path_to_tensor函数将彩色图像的字符串值文件路径作为输入,并返回适合提供给Keras CNN的4D张量。 该函数首先加载图像并将其调整为224×224224×224像素的正方形图像。 接下来,将图像转换为数组,然后将其调整为4D张量。 在这种情况下,由于我们正在处理彩色图像,因此每个图像都有三个通道。 同样,由于我们正在处理单个图像(或样本),因此返回的张量将始终具有形状
(1,224,224,3)The paths_to_tensor function takes a numpy array of string-valued image paths as input and returns a 4D tensor with shape
paths_to_tensor函数将一串字符串值的图像路径的numpy数组作为输入,并返回具有形状的4D张量
(nb_samples,224,224,3)Here, nb_samples is the number of samples, or number of images, in the supplied array of image paths. It is best to think of nb_samples as the number of 3D tensors (where each 3D tensor corresponds to a different image) in your dataset!
在此, nb_samples是所提供的图像路径数组中的样本数或图像数。 最好将nb_samples视为数据集中3D张量的数量(每个3D张量对应于不同的图像)!
The following code performs the data pre-processing:
以下代码执行数据预处理:
from keras.preprocessing import image from tqdm import tqdmdef path_to_tensor(img_path): # loads RGB image as PIL.Image.Image type img = image.load_img(img_path, target_size=(224, 224)) # convert PIL.Image.Image type to 3D tensor with shape (224, 224, 3) x = image.img_to_array(img) # convert 3D tensor to 4D tensor with shape (1, 224, 224, 3) and return 4D tensor return np.expand_dims(x, axis=0)def paths_to_tensor(img_paths): list_of_tensors = [path_to_tensor(img_path) for img_path in tqdm(img_paths)] return np.vstack(list_of_tensors)Predicting using ResNet50:
使用ResNet50进行预测:
from keras.applications.resnet50 import preprocess_input, decode_predictionsdef ResNet50_predict_labels(img_path): # returns prediction vector for image located at img_path img = preprocess_input(path_to_tensor(img_path)) return np.argmax(ResNet50_model.predict(img))# returns "True" if a dog is detected in the image stored at img_pathdef dog_detector(img_path): prediction = ResNet50_predict_labels(img_path) return ((prediction <= 268) & (prediction >= 151))Note: The above function returns the probability for only those categories which are related to dogs. As the ImageNet database is a huge dataset, we are only concerned about the breed of dogs. Also, the test results were as expected and we got 100% accuracy in detecting whether the given image is of a dog or not.
注意:以上函数仅返回与狗有关的类别的概率。 由于ImageNet数据库是一个庞大的数据集,因此我们只关注狗的品种。 此外,测试结果符合预期,并且在检测给定图像是否为狗时,我们获得了100%的准确性。
STEP-3从头开始创建自己的CNN (STEP-3 Creating your own CNN from scratch)
Now, it’s time to create our own CNN architecture right from the number of convolutional layers, max pooling layers, and deciding other parameters too. The following is the architecture that you can build:
现在,是时候根据卷积层数,最大池化层数以及确定其他参数来创建我们自己的CNN架构了。 以下是可以构建的体系结构:
model = Sequential()model.add(Conv2D(filters = 6, kernel_size=5, strides=1, padding='same', activation='relu', input_shape = (224,224,3)))model.add(MaxPooling2D(pool_size=2))model.add(Conv2D(filters=16, kernel_size=5, activation='relu', padding='same', strides=1))model.add(MaxPooling2D(pool_size=2))model.add(Dropout(0.2))model.add(Flatten())model.add(Dense(200, activation='relu'))model.add(Dropout(0.4))model.add(Dense(133,activation='softmax'))model.summary()Features of my architecture:
我的架构的特点:
- My architecture contains two Convolutional layers to extract the features from the images.我的体系结构包含两个卷积层,以从图像中提取特征。
- The first convolutional layer is made up of 6 filters of size 5x5 with ReLu as the activation function as it solves the problem of vanishing gradient that we face in Sigmoid. Similarly, in the second Convolutional layer we have 16 filters of same size and same activation function.第一卷积层由6个大小为5x5的滤镜组成,具有ReLu作为激活函数,因为它解决了我们在Sigmoid中面临的梯度消失的问题。 同样,在第二个卷积层中,我们有16个大小相同且激活函数相同的滤波器。
- In order to reduce the number of parameters and extract only the most important features, two Max Pooling layers of size 2x2 are added after each Convolutional layer.为了减少参数的数量并仅提取最重要的特征,在每个卷积层之后添加了大小为2x2的两个最大池化层。
- Further, a Dropout layer with a probability of 0.2 is added in order to prevent overfitting.此外,为了防止过度拟合,添加了概率为0.2的Dropout层。
- Towards the end, we have a fully connected layer with 200 input number of nodes and ReLu activation function.最后,我们有一个完全连接的层,其中包含200个输入节点数和ReLu激活功能。
- Another dropout layer of 0.4 is added to speed up the process and prevent overfitting.添加了另一个0.4的滤除层,以加快该过程并防止过拟合。
- Finally, we have the output layer with the number of nodes equal to the number of dog breeds that we have in the dataset with softmax activation function to predict the probabilities of the different breeds.最后,我们的输出层的节点数等于我们在数据集中具有softmax激活函数的狗品种的数量,以预测不同品种的概率。

训练CNN (Training the CNN)
For training our model, we will take number of epochs = 20 with batch size = 20 and saving the best model weights using the ModelCheckpoint. The following is the code:
为了训练我们的模型,我们将历时= 20,批处理大小= 20,并使用ModelCheckpoint保存最佳模型权重。 以下是代码:
# Compile the modelmodel.compile(optimizer='rmsprop', loss='categorical_crossentropy', metrics=['accuracy'])epochs = 20checkpointer = ModelCheckpoint(filepath='saved_models/weights.best.from_scratch.hdf5', verbose=1, save_best_only=True)model.fit(train_tensors, train_targets, validation_data=(valid_tensors, valid_targets), epochs=epochs, batch_size=20, callbacks=[checkpointer], verbose=1)# load the best weightsmodel.load_weights('saved_models/weights.best.from_scratch.hdf5')# Test the model# get index of predicted dog breed for each image in test setdog_breed_predictions = [np.argmax(model.predict(np.expand_dims(tensor, axis=0))) for tensor in test_tensors]# report test accuracytest_accuracy = 100*np.sum(np.array(dog_breed_predictions)==np.argmax(test_targets, axis=1))/len(dog_breed_predictions)print('Test accuracy: %.4f%%' % test_accuracy)The test accuracy that I got was 5.8612%. However, you can increase the number of epochs and try hyperparameter tuning to tune the parameters further and increase the accuracy.
我得到的测试准确度是5.8612%。 但是,您可以增加时期数,并尝试超参数调整以进一步调整参数并提高准确性。
STEP-4使用转移学习对品种进行分类 (STEP-4 Using Transfer learning to classify breeds)
Transfer learning is a technique which saves the time of building a CNN from scratch and we can just extract the bottleneck features from a pre-trained classifier and make a few modifications to that model to use it for a different dataset. For e.g. we can remove the final dense layer from that model and add another dense layer with a different number of outputs using a softmax activation function. Here, we are going to use VGG16 and extract features from it and feed it to a global average pooling layer to decrease the number of parameters and finally add the fully connected layer with 133 output nodes using a softmax activation function.
转移学习是一种节省从头开始构建CNN的时间的技术,我们可以从预先训练的分类器中提取瓶颈特征,并对模型进行一些修改以将其用于其他数据集。 例如,我们可以从该模型中删除最终的密集层,并使用softmax激活函数添加另一个具有不同数量输出的密集层。 在这里,我们将使用VGG16并从中提取特征,并将其馈送到全局平均池层以减少参数数量,最后使用softmax激活函数添加具有133个输出节点的完全连接层。
瓶颈功能 (Bottleneck features)
bottleneck_features = np.load('bottleneck_features/DogVGG16Data.npz')train_VGG16 = bottleneck_features['train']valid_VGG16 = bottleneck_features['valid']test_VGG16 = bottleneck_features['test']在最后添加图层 (Add layers at the end)
VGG16_model = Sequential()VGG16_model.add(GlobalAveragePooling2D(input_shape=train_VGG16.shape[1:]))VGG16_model.add(Dense(133, activation='softmax'))Similarly, after compiling the model and testing the model at the test dataset, you should get accuracy around 43%
同样,在编译模型并在测试数据集上测试模型之后,您应该获得约43%的准确性
STEP-5使用转移学习创建自己的CNN来对狗的品种进行分类 (STEP-5 Create your own CNN to classify Dog breeds using Transfer learning)
For this section, let’s use ResNet50. The steps that were followed in the previous step remains the same but this time the model will be different and hopefully, the accuracy too. The ResNet50 contains 50 convolutional layers and hence, is very powerful in image classification problems as discussed earlier too.
在本节中,我们使用ResNet50。 上一步中遵循的步骤保持不变,但是这次模型将有所不同,希望准确性也将有所不同。 ResNet50包含50个卷积层,因此,在图像分类问题中也非常强大,如前所述。
模型架构 (Model Architecture)
ResNet50_model_transfer = Sequential()ResNet50_model_transfer.add(GlobalAveragePooling2D(input_shape=train_ResNet.shape[1:]))ResNet50_model_transfer.add(Dense(133, activation='softmax'))ResNet50_model_transfer.summary()
After running it with 20 epochs and batch size = 20, you will observe a test accuracy of 82%.
以20个纪元运行且批次大小= 20后,您将观察到82%的测试准确性。
Other models that you can try are the following:
您可以尝试的其他模型如下:
VGG-19
VGG-19
Inception
起始时间
Xception
Xception
步骤6编写算法 (STEP-6 Write your Algorithm)
Now, we will combine all the above steps to convert it into a complete algorithm that would do the following:
现在,我们将结合以上所有步骤,将其转换为可以执行以下操作的完整算法:
if a dog is detected in the image, return the predicted breed.
如果在图像中检测到狗 ,则返回预测的品种。
if a human is detected in the image, return the resembling dog breed.
如果在图像中检测到人 ,则返回类似狗的品种。
if neither is detected in the image, provide output that indicates an error.
如果图像中未检测到任何一个,请提供指示错误的输出。
The following are the series of functions that does the above tasks:
以下是完成上述任务的一系列功能:
from PIL import Imagedef dog_classifier(img_path):    if dog_detector(img_path):        print('Lemme guess, Hey! You are a Dog!')        image = Image.open(img_path)        plt.imshow(image, interpolation='nearest')        plt.axis('off')        plt.show()        breed = Resnet_predict_breed(img_path)        print('OMG! You are {}\n\n'.format(breed))

    elif face_detector(img_path):        print('Lemme guess, Hey! You are Human!')        image = Image.open(img_path)        plt.imshow(image, interpolation='nearest')        plt.axis('off')        plt.show()        breed = Resnet_predict_breed(img_path)        print('Hahahha! You look like {}\n\n'.format(breed))

    else:        print('Sorry, you are neither a dog nor a human')        image = Image.open(img_path)        plt.imshow(image, interpolation='nearest')        plt.axis('off')        plt.show()
STEP-7测试时间! (STEP-7 Testing Time!)
Let’s test some images and see the results:
让我们测试一些图像并查看结果:


改进领域 (Areas of improvement)
- There are a few cat breeds which resembles one of the dog breeds which we can see in the last picture. However, the model predicted it to be a dog and hence, we can improve this feature using better hyperparameters and/or growing deeper CNN.在上一张照片中,我们可以看到一些猫的品种与狗的品种之一相似。 但是,该模型预测它是一只狗,因此,我们可以使用更好的超参数和/或增长更深的CNN来改善此功能。
- Detecting a dog and a human together in an image even if they are not facing the image would be a great feature to add. We can do this by Data augmentation in the training set by adding the images when a dog is not facing the camera and similarly for the human as well.即使在狗和人没有面对图像的情况下一起检测它们,将是一个很棒的功能。 我们可以通过训练集中的数据增强来做到这一点,方法是在狗没有面对相机时添加图像,对人类也是如此。
- I tried an animated dog image which the model did not recognise. Predicting the breed of an animated image of a dog would be quite interesting to see.我尝试了模型无法识别的动画狗图像。 预测狗的动画图像的种类将非常有趣。
结论 (Conclusion)
I hope you enjoyed going through my article and must have learnt something new today. The whole code of this project is uploaded onto my github. Please feel free to have a look at it.
我希望您喜欢阅读我的文章,并且一定今天学到了一些新知识。 该项目的整个代码已上传到我的github上 。 请随时查看。
翻译自: https://medium.com/swlh/dog-breed-classifier-using-convolutional-neural-networks-6052edfab487
卷积神经网络 svm分类器
http://www.taodudu.cc/news/show-4407284.html
相关文章:
- 【狗狗分类项目】(3)扩展数据集:斯坦福kaggle数据库
- 【深度学习图像识别课程】毕业项目:狗狗种类识别(2)代码实现
- 用卷积神经网络实现对小狗品种的识别
- 沐神《动手学深度实战Kaggle比赛:狗的品种识别(ImageNet Dogs)
- 狗狗图片识别分类的CNN(卷积网络)实现
- 基于mobileNet实现狗的品种分类(迁移学习)
- 联想小新pad安装Google Play教程
- Google play上架规则_谷歌应用商店上架审核
- 宏观经济学gdp计算方法_宏观经济学GDP中存货是怎么算的,能说一下吗
- “宏观经济学”练习题1
- 宏观经济学-计算题(一)
- 开放经济的宏观经济学:基本概念 - 异想天开
- 宏观经济学gdp计算方法_宏观经济学gdp计算方法
- Win11 解决 资源管理器和右键问题
- CLSID {10020200-E260-11CF-AE68-00AA004A34D5} failed due to the following error: 80040154. 错误的解决办法
- SQL Server 异常 COM 类公司中CLSID 为 {10021F00-E260-11CF-AE68-00AA004A34D5} 的组件时失败,原因是出现以下错误: 80070005
- Git push错误,Unauthorized fatal: Could not read from remote repository.未验证不能提交
- autojs悬浮窗点击穿透
- 悬浮窗开发设计实践
- Swagger2.0和resful规范
- ODrive0.5.1程序分析#3 FOC算法程序
- ATF源码篇(十):docs文件夹-Components组件(9)Measured Boot Driver (MBD)
- Issues:Frequency out of range: (expecting between 112.50Hz and 275.00Hz, measured 99.85Hz)
- matlab中的measure,Matlab中 awgn 函数输入参数带有‘measured’ 时snr的含义
- 代理模式(静态代理和动态代理)
- 腾讯云一元服务器搭建个人网站详细教程
- linux 无法解析配置文件,Linux无法解析域名的解决办法
- 【CMD全集】
- nodejs中cmd命令大全
- WPF写入剪切板时报异常
卷积神经网络 svm分类器_使用卷积神经网络的狗品种分类器相关推荐
- 深度学习分类pytorch_pytorch使用转移学习的狗品种分类器
深度学习分类pytorch So have you heard the word deep learning before? Or have you just started learning it? ...
- 卷积神经网络图片滤镜_使用深度神经网络创建艺术性的实时视频滤镜
卷积神经网络图片滤镜 将CoreML用于iPhone的复杂视频滤镜和效果 (Using CoreML for complex video filters and effects for iPhone) ...
- python bp神经网络 异或_两层神经网络输出异或
简单形象又有趣地讲解神经网络是什么 神经元 先来认识下真正的神经元. 图 1: 典型神经元的结构(来自维基百科 "树突" 词条) 神经元大致可以分为树突.突触.细胞体和轴突.树突为 ...
- 机器学习工程师 — Udacity 基于CNN和迁移学习创建狗品种分类器
卷积神经网络(Convolutional Neural Network, CNN) 项目:实现一个狗品种识别算法App 推荐你阅读以下材料来加深对 CNN和Transfer Learning的理解: ...
- 深度神经网络课程总结_了解深度神经网络如何工作(完整课程)
深度神经网络课程总结 Even if you are completely new to neural networks, this course from Brandon Rohrer will g ...
- python狗品种识别_使用python+keras来识别狗的品种
在这篇文章中,将教大家实现一个网页应用程序,该程序可以接收狗的图片,然后输出其品种,其准确率超过80%! 我们将使用深度学习来训练一个识别狗品种的模型,数据集是狗图像与他们的品种信息,通过学习图像的特 ...
- 深度学习狗图片_狗品种分类的深度学习
深度学习狗图片 深度学习 (Deep Learning) Stuck behind the paywall? Click here to read the full story with my fri ...
- 深度学习与计算机视觉系列(10)_细说卷积神经网络
转载自: 深度学习与计算机视觉系列(10)_细说卷积神经网络 - 龙心尘 - 博客频道 - CSDN.NET http://blog.csdn.net/longxinchen_ml/article/d ...
- 卷积层数据放大_卷积神经网络重要回顾
上世纪60年代,Hubel等人通过对猫视觉皮层细胞的研究,提出了感受野这个概念,到80年代,Fukushima在感受野概念的基础之上提出了神经认知机的概念,可以看作是卷积神经网络的第一个实现网络,神经 ...
最新文章
- [转]Entity Framework4.0 (七) EF4的存储过程
- 阿里云 Ubuntu16.04 部署 LAMP
- mariadb 和mysql主从_MariaDB主从同步
- java异步处理_SpringBoot异步开发之异步请求,在高并发的情况下,提高性能
- MyEclipse6.5配置反编译插件
- BZOJ3437 小P的牧场
- 校验php语法是否正确,PHP正则校验email语法详解
- html缩放背景不缩放_缩放并不可怕。
- 访谈 | 币圈量化群英会——寻找适合你的量化基金!
- 硬盘GPT和MBR分区表转换方法
- [生存志] 第50节 七穆掌郑国
- 二十岁、我的青春散场
- Jest 组件库单元测试【基础语法篇】
- 鸿蒙系统手势导航,4D 成像雷达、400+TOPS 算力计算平台、鸿蒙 OS,Huawei Inside 继续放大招!...
- UNI-APP隐私政策问题无法上架
- 实施工程师主要工作职则
- 《嫌疑人X的献身》读后感
- 计算机毕业设计 SSM汽车维修保养平台 汽车维修维护平台 汽车信息管理系统Java Vue MySQL数据库 远程调试 代码讲解
- form.submit() 提交部分浏览器不管用
- 开源|手把手教你造一个火星车