adobe air管理员_了解Adobe AIR,第二部分:构建客户管理应用
adobe air管理员
In our previous tutorial, we created a personal notes storage database using HTML, CSS, and JavaScript. In this tutorial, we’re going to explore the UI features of the AIR platform by building a simple Customer Relationship Management (CRM) application. We’ll use those same technologies, as well as a local SQLite database.
在上一教程中,我们使用HTML,CSS和JavaScript创建了个人笔记存储数据库。 在本教程中,我们将通过构建一个简单的客户关系管理(CRM)应用程序来探索AIR平台的UI功能。 我们将使用相同的技术以及本地SQLite数据库。
Just as we did with Part 1, there’ll be another quiz to test you on what you’ve learned. Again, the first 100 people to undergo the quiz will receive, free-of-charge, the Adobe AIR For JavaScript Developers pocket guide in the post. Remember, the book can be downloaded free as a PDF for a short time too, so get cracking!
就像我们在第1部分中所做的一样,还将进行另一个测验以测试您所学的知识 。 同样,前100名参加测验的人员将免费获得该帖子中的Adobe AIR For JavaScript Developers袖珍指南。 请记住,这本书也可以在短时间内免费以PDF格式下载 ,因此请放心使用!
在AIR中构建用户界面 (Building User Interfaces in AIR)
Our standard web technologies – HTML, CSS, JavaScript – provide a solid foundation to build rich interfaces within the browser. However, sometimes we need to extend beyond the browser; this way we can take advantage of the standard interactions users are accustomed to with their desktop applications. This is especially important for any kind of data entry and reporting – and what better way to explore this than with a business data entry application.
我们的标准Web技术(HTML,CSS,JavaScript)为在浏览器中构建丰富的界面提供了坚实的基础。 但是,有时我们需要扩展到浏览器之外。 这样,我们就可以利用用户习惯于其桌面应用程序的标准交互。 这对于任何类型的数据输入和报告尤为重要-还有什么比使用业务数据输入应用程序更好的探索方法。
In this article, we’ll explore the user interface possibilities that AIR provides. We’ll implement drag-and-drop functionality, work with native windows, communicate between windows, construct menus, and more. Once we’re finished, we’ll have built a simple yet powerful application for managing a customer records database.
在本文中,我们将探讨AIR提供的用户界面可能性。 我们将实现拖放功能,使用本机窗口,在窗口之间进行通信,构造菜单等等。 完成后,我们将构建一个简单而强大的应用程序来管理客户记录数据库。
假设知识 (Assumed Knowledge)
Throughout this tutorial, I’ll assume you’ve read through the first article in this series, Learn Adobe AIR, Part 1: Build a Note Storage App, or at least are comfortable with creating simple applications in Adobe AIR. Once again, you’ll need the AIR SDK, Aptana, jQuery, the AIR menu builder, and the AIR Introspector. If you haven’t set these up, do so now. I covered how to do this in my first article, in the section: A Powerful Tool for Building AIR Apps.
在本教程中,我假设您已阅读本系列的第一篇文章, 了解Adobe AIR,第1部分:构建Note存储应用程序 ,或者至少对在Adobe AIR中创建简单应用程序感到满意。 再一次,您将需要AIR SDK ,Aptana,jQuery,AIR菜单构建器和AIR Introspector。 如果尚未设置,请立即进行设置。 我在第一篇文章“构建AIR应用程序的强大工具 ”部分中介绍了如何执行此操作。
设置示例项目 (Setting up the Example Project)
To play along at home, download the skeleton AIR project for this tutorial and import it into Aptana.
要在家中进行游戏,请下载本教程的基本AIR项目并将其导入Aptana。
If you’d rather create your project from scratch, make sure that you import jQuery by checking the Import Javascript Library option in the New Project wizard. Once the project has been created, you can safely remove the following files:
如果您想从头开始创建项目,请确保通过选中“新建项目”向导中的“导入Javascript库”选项来导入jQuery。 创建项目后,可以安全地删除以下文件:
AIRLocalizer.js
AIRLocalizer.js
AIRSourceViewer.js
AIRSourceViewer.js
jquery_sample (note there are two files with this name)
jquery_sample (请注意有两个具有此名称的文件)
CRMTest.html (this filename may differ, depending on what you called your project)
CRMTest.html (此文件名可能会有所不同,具体取决于您对项目的名称)
LocalFile.txt
LocalFile.txt
sample.css
sample.css
We’re using jQuery 1.2.3, but any newer 1.2.x release should work fine. Add the contents of the zip file to the project directory, refresh the folder (right click the project name in the Project view and select Refresh), and you’re good to go.
我们正在使用jQuery 1.2.3,但是任何较新的1.2.x版本都可以正常工作。 将zip文件的内容添加到项目目录中,刷新文件夹(在Project视图中右键单击项目名称,然后选择Refresh ),一切顺利。
在AIR上运行 (Running on AIR)
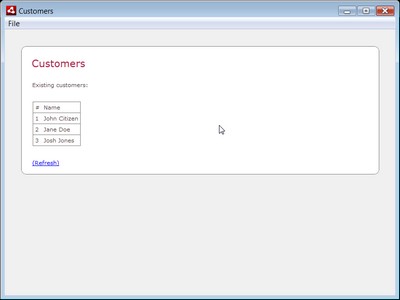
Now that you’ve got the example project setup, let’s get started. As I mentioned, we’re going to build a simple CRM application. Here’s how the app looks in Windows Vista:
现在您已经有了示例项目的设置,让我们开始吧。 如前所述,我们将构建一个简单的CRM应用程序。 该应用在Windows Vista中的外观如下:
Here’s the plan of attack:
以下是攻击计划:
- construct our menus构建我们的菜单
- establish a database connection to an SQLite database建立与SQLite数据库的数据库连接
- read our initial customer records阅读我们的初始客户记录
- create a form to view each record创建一个表格来查看每条记录
- create a form to create new records创建表单以创建新记录
Along the way, we’ll learn how to manually construct menu trees, read directly from the file system, use prepared statements on SQL databases, and even implement native drag-and-drop functionality (which will work on any AIR-supported platform).
在此过程中,我们将学习如何手动构建菜单树,直接从文件系统读取,在SQL数据库上使用准备好的语句,甚至实现本机拖放功能(该功能可在任何AIR支持的平台上运行) 。
创建菜单 (Creating Menus)
In our previous AIR article, we used the menu builder framework to automatically create menus from an XML document. However, there are some limitations to this approach. This time around, we’ll make use of the native menu API to construct our menus.
在之前的AIR文章中,我们使用菜单构建器框架从XML文档自动创建菜单。 但是,这种方法有一些局限性。 这次,我们将利用本机菜单API来构建菜单。
The main factor to consider when building menus at this level is the location of the menu that you’ll create. Options include the window menu, which is available at the top of the window in a Windows application, and the application menu, which sits at the top of the screen in most OS X applications. We can also use the same native menu system to create context menus, menus for dock icons (OS X), and menus for system tray icons (Windows). Luckily, regardless of the type of menu we want to build on, the syntax is the same, thanks to JavaScript’s object oriented nature. In Aptana, open the menus.js file and add the following code:
在此级别上构建菜单时要考虑的主要因素是要创建的菜单的位置 。 选项包括窗口菜单 (在Windows应用程序中位于窗口顶部),以及应用程序菜单 (在大多数OS X应用程序中位于屏幕顶部)。 我们还可以使用相同的本机菜单系统来创建上下文菜单,用于停靠图标的菜单(OS X)和用于系统任务栏图标的菜单(Windows)。 幸运的是,由于JavaScript具有面向对象的特性,因此无论我们要构建的菜单类型如何,其语法都是相同的。 在Aptana中,打开menus.js文件并添加以下代码:
$(document).ready(function(){if (air.NativeWindow.supportsMenu) { nativeWindow.menu = new air.NativeMenu(); targetMenu = nativeWindow.menu; } if (air.NativeApplication.supportsMenu) { targetMenu = air.NativeApplication.nativeApplication.menu; }
});
The code above creates an object named targetMenu. This refers either to a menu on the nativeWindow (which, in a Win32 environment, is the current window), or the global application window (OS X). An AIR menu is a collection of objects for all menu items, governed by a main air.NativeMenu class. We can check the supportsMenu property of an AIR window or application object to determine what is supported by the current platform. Note that on OS X, the application menu already exists, regardless of whether a window exists or not. The Adobe AIR manual has further information on AIR menus.
上面的代码创建一个名为targetMenu的对象。 这指的是nativeWindow上的菜单(在Win32环境中为当前窗口),或全局应用程序窗口(OS X)。 AIR菜单是所有菜单项的对象的集合,由主air.NativeMenu类控制。 我们可以检查AIR窗口或应用程序对象的supportsMenu属性,以确定当前平台支持什么。 请注意,在OS X上,无论是否存在窗口,应用程序菜单都已经存在。 Adobe AIR手册具有有关AIR菜单的更多信息 。
Also remember that we’re using jQuery, which executes the following line of code whenever our page’s DOM has completed loading:
还要记住,我们使用的是jQuery,只要页面的DOM完成加载,它就会执行以下代码行:
$(document).ready()We’ve already created this function; let’s add to it now. Modify your menus.js file so that it looks as follows (the new lines are shown in bold below):
我们已经创建了这个函数; 让我们现在添加它。 修改menus.js文件,使其看起来如下所示(新行在下面以粗体显示):
$(document).ready(function(){if (air.NativeWindow.supportsMenu) { nativeWindow.menu = new air.NativeMenu(); targetMenu = nativeWindow.menu; } if (air.NativeApplication.supportsMenu) { targetMenu = air.NativeApplication.nativeApplication.menu; } var fileMenu; fileMenu = targetMenu.addItem(new air.NativeMenuItem("File")); fileMenu.submenu = new air.NativeMenu(); newCustomer = fileMenu.submenu.addItem(new air.NativeMenuItem("Create   Record")); newCustomer.addEventListener(air.Event.SELECT, Menu_NewCustomer); newCustomer = fileMenu.submenu.addItem(new air.NativeMenuItem("Exit")); newCustomer.addEventListener(air.Event.SELECT, Menu_Exit);
});
These few lines of code create a simple file menu, which contains two menu items: Create Record and Exit. We create new objects for each item manually, although this could be automated to suit the application.
这几行代码创建了一个简单的文件菜单,其中包含两个菜单项: Create Record和Exit 。 我们可以手动为每个项目创建新对象,尽管可以自动将其适应应用程序。
There are a number of advantages to this approach, including the flexibility to add custom keyboard shortcuts, and perform custom actions when a menu item is selected. More importantly, however, we now have a basic infrastructure in place for our menu, to which we can easily add, remove, or modify items on the fly.
此方法有很多优点,包括添加自定义键盘快捷键以及选择菜单项时执行自定义操作的灵活性。 但是,更重要的是,我们现在已经拥有菜单的基本基础结构,我们可以在其中快速轻松地添加,删除或修改项目。
The last line specifies the callback function that will be executed when the Exit menu item is selected. (Note there’s also a DISPLAY event that is fired when the user opens the menu but hasn’t selected it yet). Those callback functions don’t exist yet, so let’s go ahead and write them now:
最后一行指定在选择“ 退出”菜单项时将执行的回调函数。 (请注意,当用户打开菜单但尚未选择菜单时,还会触发DISPLAY事件)。 这些回调函数尚不存在,因此让我们继续编写它们:
function Menu_NewCustomer() {document.location = "new_customer.html";
}
function Menu_Exit() { var event = new air.Event(air.Event.EXITING, false, true); air.NativeApplication.nativeApplication.dispatchEvent(event); if (!event.isDefaultPrevented()) { air.NativeApplication.nativeApplication.exit(); }
}
The Menu_Exit method simply checks whether another part of the application (or the AIR runtime itself) is attempting to delay termination of the current application. In this way, it’s similar to the exit function in the previous article I wrote about Adobe AIR. It’s possible to override any delay that’s detected by this method, but it’s not recommended; that’s because it’s best practice to respect any code that is executing alongside yours in such a high-level framework.
Menu_Exit方法仅检查应用程序的另一部分(或AIR运行时本身)是否正在尝试延迟当前应用程序的终止。 这样,它类似于我在上一篇关于Adobe AIR的文章中的exit函数。 可以覆盖此方法检测到的任何延迟,但是不建议这样做; 这是因为最好的做法是尊重在这样一个高级框架中与您一起执行的任何代码。
连接到SQL数据库 (Connecting to the SQL Database)
In the skeleton project archive, I’ve included a sample SQLite database, named crm.sqlite. This database consists of just one table, which contains the following sample data (to view this database, I recommend SQLite Manager, a Firefox extension):
在框架项目档案库中,我包括一个示例SQLite数据库,名为crm.sqlite 。 该数据库仅包含一个表,该表包含以下示例数据(要查看此数据库,建议使用Firefox扩展SQLite Manager ):
| ID | Name | Phone | Notes |
|---|---|---|---|
| 1 | John Citizen | (123) 456-7890 | ==Orders==nnCustomer ordered … |
| 2 | Jane Doe | (123) 456-7899 | Signed customer on 1/1. |
| ID | 名称 | 电话 | 笔记 |
|---|---|---|---|
| 1个 | 约翰·西铁岑 | (123)456-7890 | ==订单== nn客户订购了… |
| 2 | 简·多伊 | (123)456-7899 | 在1/1上签署了客户。 |
The example application that we’ll build in this tutorial will provide the user with an interface for accessing this information. We’ll build functionality for viewing individual records, importing data into the Notes column, and more. While the completed application will be quite simple, it would certainly be feasible to use it as a base for building a fully-fledged CRM application.
我们将在本教程中构建的示例应用程序将为用户提供访问此信息的界面。 我们将构建用于查看单个记录,将数据导入“ 注释”列等的功能。 尽管完成的应用程序将非常简单,但将其用作构建成熟的CRM应用程序的基础当然是可行的。
As we saw in the first tutorial, connecting from a single window to a local database is relatively easy. In this application, however, we’re using multiple windows, and each will operate independently. This means we’ll need to share this database connection among the various scripts throughout our application.
正如我们在第一个教程中看到的那样,从单个窗口连接到本地数据库相对容易。 但是,在此应用程序中,我们使用多个窗口,每个窗口将独立运行。 这意味着我们需要在整个应用程序的各个脚本之间共享此数据库连接。
With this in mind, let’s establish a standard database connection – add the following code to your database.js file:
考虑到这一点,让我们建立一个标准的数据库连接–将以下代码添加到您的database.js文件中:
function SetupDB() {var db = new air.SQLConnection(); var dbFile = air.File.applicationStorageDirectory.resolvePath("crm.sqlite"); //if (!dbFile.exists) { var dbTemplate = air.File.applicationDirectory.resolvePath("crm.sqlite"); dbTemplate.copyTo(dbFile, true); //} try { db.open(dbFile, air.SQLMode.UPDATE); } catch (error) { air.trace("DB error:", error.message); air.trace("Details:", error.details); } return db;
}
The code above defines a simple function, SetupDB(), which creates a connection to the local SQL database. As you’ll recall, the application directory is read-only (on a Windows machine this is the Program Files folder). You should therefore copy the skeleton database to the application storage directory (on Windows this is the AppData folder).
上面的代码定义了一个简单的函数SetupDB() ,它创建了与本地SQL数据库的连接。 您会记得,应用程序目录是只读的(在Windows计算机上,这是Program Files夹)。 因此,您应该将框架数据库复制到应用程序存储目录 (在Windows上,这是AppData文件夹)。
During the development phase, we’ll be making potentially destructive changes to our database, so it’s convenient to be able to recreate it each time we relaunch our application. When we deploy our app to production, we can simply uncomment the dbFile.exists condition, to prevent our database from being replaced.
在开发阶段,我们将对数据库进行潜在的破坏性更改,因此每次重新启动应用程序时都可以重新创建数据库。 当我们将应用程序部署到生产环境时,我们可以简单地取消注释dbFile.exists条件,以防止替换我们的数据库。
检索我们的第一笔记录 (Retrieving Our First Records)
Now that we have an interface and a data source, it’s time to start reading records from our CRM database. The fun begins with the customers.html file, which is included in the skeleton code archive and contains some sample static output. We’ll use jQuery to remove this static data and replace it with real records from the database. Open your behaviour.js file and insert the following code:
现在我们有了界面和数据源,是时候开始从CRM数据库中读取记录了。 有趣的地方是customers.html文件,该文件包含在框架代码存档中,并包含一些示例静态输出。 我们将使用jQuery删除此静态数据,并将其替换为数据库中的真实记录。 打开您的behaviour.js文件,并插入以下代码:
$(document).ready(function(){db = SetupDB();  read_customers();  $("#refresh").click(function(){ read_customers(); });
});
function read_customers() {  dbQuery = new air.SQLStatement();  dbQuery.sqlConnection = db;  dbQuery.text = "SELECT * FROM customers";  try { dbQuery.execute(); } catch (error) {  air.trace("Could not retrieve customers from DB.", error.message);  }  results = dbQuery.getResult();  $("#customerlist tbody").empty();  for (i = 0; i < results.data.length; i++) {  row = results.data[i];  $("#customerlist tbody").append('<tr><td>'+row.id+'</td><td>'  +row.name+'</td></tr>');  }  $("#customerlist tbody tr").each(function(){  $(this).click(function(){  view($(this).children("td:first").text())  })  });
The first part of this code is fairly self-explanatory:
该代码的第一部分是不言自明的:
- Call the database connection function we defined earlier.调用我们前面定义的数据库连接函数。
- Read our list of customers.阅读我们的客户清单。
- For each record, instruct the click handler to invoke the view function.对于每个记录,指示单击处理程序调用视图函数。
Binding information to elements in the DOM like this is always a bit tricky, so we’ve used the td:first selector to grab the value of the first cell – the ID – and passed that as a parameter to the view function. This function will launch a new window and provide the user with greater detail about the selected record, including a phone number and some associated notes. Let’s define that function now; add the following code to the bottom of the behaviour.js file:
像这样将信息绑定到DOM中的元素总是有些棘手,因此我们使用了td:first选择器来获取第一个单元格(即ID)的值,并将其作为参数传递给view函数。 此功能将启动一个新窗口,并向用户提供有关所选记录的更多详细信息,包括电话号码和一些相关的注释。 让我们现在定义该函数; 将以下代码添加到behaviour.js文件的底部:
function view(id) {current_id = id;  customerWindow = air.HTMLLoader.createRootWindow(true, null, true, new air.Rectangle(0,0,640,480));  customerWindow.addEventListener(air.Event.COMPLETE, passDbId);  customerWindow.load(new air.URLRequest("app:/view_customer.html"));
}
function create() {  createWindow = air.HTMLLoader.createRootWindow(true, null, true, new air.Rectangle(0,0,640,480));  createWindow.addEventListener(air.Event.COMPLETE, passDb);  createWindow.load(new air.URLRequest("app:/new_customer.html"));
}
function passDbId(event) {  event.target.window.receiveDb(db);  event.target.window.display_customer(current_id);
}
function passDb(event) { event.target.window.receiveDb(db); }
In the code above, the view function (and the related create function), work with the passDb and passDbId functions; these then launch new windows that render an appropriate HTML page. Remember that we need to share our database connection across multiple pages, so we’ll define a receiveDb function within the target pages. However, as our custom JavaScript function for connecting to the database is called from within the page, we need to wait for the parent page to load first!
在上面的代码中,视图函数(和相关的create函数)与passDb和passDbId函数一起使用; 然后,它们会启动新窗口,以呈现适当HTML页面。 请记住,我们需要在多个页面之间共享数据库连接,因此我们将在目标页面中定义一个receiveDb函数。 但是,由于从页面内部调用了用于连接数据库的自定义JavaScript函数,因此我们需要等待父页面首先加载!
The HTML Loader APIs in AIR permit these kinds of window logistics quite easily. Let’s break it down:
AIR中HTML Loader API可以很轻松地实现这些类型的窗口物流。 让我们分解一下:
As you can see in the code above, the createRootWindow constructor accepts a few parameters, including an air.Rectangle() object that represents the dimensions of the window to be created. This function provides us with a window object, to which we add a new event listener for the COMPLETE event. This event listener will be triggered whenever a new page has finished loading. You’ll note in the view method that we store the current ID temporarily before loading the page using a URL request. Once the page has loaded, the callback function passes along the database connection and instructs the new page to display the customer details.
如您在上面的代码中看到的, createRootWindow构造函数接受一些参数,包括一个air.Rectangle()对象,该对象表示要创建的窗口的尺寸。 此函数为我们提供了一个窗口对象,在其中添加了用于COMPLETE事件的新事件侦听器。 每当新页面完成加载时,都会触发此事件侦听器。 您会在view方法中注意到,在使用URL请求加载页面之前,我们会暂时存储当前ID。 页面加载后,回调函数将传递数据库连接,并指示新页面显示客户详细信息。
You may recall from the previous article that we used a hash string in the URL to pass information around between pages (for example, view_customer.html#id/1). This is a reliable hack, given AIR is a controlled environment that does not make use of an address bar – at which point our magic would be revealed! That said, taking advantage of the HTML loader system – as we’ve done here – is a much more stable and useful approach, as it allows us to pass entire objects around as needed.
您可能还记得上一篇文章,我们在URL中使用了哈希字符串在页面之间传递信息(例如, view_customer.html#id/1 )。 鉴于AIR是一个不使用地址栏的受控环境,因此这是一个可靠的技巧,这时我们的魔力就会显现出来! 就是说,利用HTML加载程序系统(如我们在此所做的那样)是一种更加稳定和有用的方法,因为它允许我们根据需要传递整个对象。
查看记录和接收信息 (Viewing Records and Receiving Information)
Right! We’ve set up a system to read records from the database, but now we need to view individual customer records. We already know we’ll need two functions – receiveDB and display_customer – both of which receive information from our main customers.html window. Our view_customer.html file is also populated with sample data, but once again we’ll use jQuery to replace this with real information from the database.
对! 我们已经建立了一个从数据库中读取记录的系统,但是现在我们需要查看单个客户记录。 我们已经知道我们需要两个函数receiveDB和display_customer两者都从我们的customers.html窗口接收信息。 我们的view_customer.html文件中也填充了示例数据,但是我们将再次使用jQuery将其替换为数据库中的真实信息。
Edit your view_behaviour.js file so that it looks like this:
编辑您的view_behaviour.js文件,使其看起来像这样:
dbConn = null;
function receiveDb(dbFromParent) {  dbConn = dbFromParent;
}
function display_customer(id) {  dbQuery = new air.SQLStatement();  dbQuery.sqlConnection = dbConn;  dbQuery.text = "SELECT * FROM customers WHERE id=:id";  dbQuery.parameters[":id"] = id;  try {  dbQuery.execute();  dbQuery.clearParameters();  }   catch (error) {  air.trace("Error retrieving notes from DB:", error);  air.trace(error.message);  return;  }  var customerData = dbQuery.getResult();  $("#cust_name").val(customerData.data[0].name);  $("#cust_phone").val(customerData.data[0].phone);  $("#cust_notes").text(customerData.data[0].notes);
}
Here we’ve defined a receiveDb function, which simply accepts the handle to the database connection as a parameter and stores it in a local variable. Our display_customer function is where the real work happens, retrieving the record in question and outputting it to the page.
在这里,我们定义了一个receiveDb函数,该函数简单地接受数据库连接的句柄作为参数并将其存储在局部变量中。 我们的display_customer函数是实际工作发生的地方,它检索有问题的记录并将其输出到页面。
Note that we’re using a textarea for the notes information, as opposed to creating input fields for the individual name and phone fields. While I won’t cover how to add “edit” functionality in this tutorial, the logic is much the same as for the record retrieval we just wrote; the only difference, is you would obviously use an UPDATE statement instead of a SELECT statement.
请注意,我们在注释信息中使用的是textarea ,而不是为个人名称和电话字段创建输入字段。 尽管在本教程中我将不介绍如何添加“编辑”功能,但其逻辑与我们刚刚编写的记录检索非常相似。 唯一的区别是,您显然将使用UPDATE语句而不是SELECT语句。
Note: Limitations with AIR and SQL If you ever find you have to do some serious information manipulating in local SQL databases, keep in mind that there are many constraints to the AIR implementation – the Adobe AIR Language Reference has more information.
注意:AIR和SQL的局限性如果您发现必须在本地SQL数据库中进行一些严肃的信息处理,请记住AIR实施存在很多约束-Adobe AIR语言参考提供了更多信息 。
The database logic is quite similar to our logic that retrieved all customer records, only this time we’re making use of parameterized statements – as demonstrated by the following two lines:
数据库逻辑与我们检索所有客户记录的逻辑非常相似,只是这次我们使用参数化语句-如以下两行所示:
dbQuery.text = "SELECT * FROM customers WHERE id=:id";
dbQuery.parameters[":id"] = id;
This is fairly straightforward; first we define a named parameter, :id, then we supply the value of that parameter separately. While we could achieve the same thing using literal values in SQL queries, prepared statements like this are much more reliable, so I prefer them. While it may be slightly overkill for this tutorial, using a prepared statement is safer (it provides SQL injection-proofing out of the box) and faster (queries can be reused without having to recompile them each time). For further details, consult the AIR manual, specifically the section on using parameters in statements.
这非常简单; 首先,我们定义一个命名参数:id ,然后分别提供该参数的值。 尽管我们可以在SQL查询中使用文字值来实现相同的目的,但是像这样的预备语句更加可靠,因此我更喜欢它们。 虽然对于本教程来说可能有点过大,但是使用预准备的语句更安全(开箱即用提供SQL注入证明)并且速度更快(可以重复使用查询而不必每次都重新编译它们)。 有关更多详细信息,请查阅AIR手册,尤其是有关在声明中使用参数的部分。
创建新记录 (Creating New Records)
Now that we have a stable interface with which to view our data, we need to be able to create records. As a business, it’s important to be able to attach existing data to a customer record. AIR’s native drag-and-drop functionality is great for this – using pure JavaScript, our application can accept multiple files quite easily. Once we have the files, we can copy or move them, read them, upload them to a server, or even display them in our application. In this example, we’re just reading a text file, but we could easily extend this as needed for more complex file types.
现在我们有了一个稳定的界面来查看我们的数据,我们需要能够创建记录。 作为企业,能够将现有数据附加到客户记录很重要。 AIR的本机拖放功能非常适合–使用纯JavaScript,我们的应用程序可以很容易地接受多个文件。 拥有文件后,我们可以复制或移动它们,阅读它们,将它们上传到服务器,甚至在我们的应用程序中显示它们。 在此示例中,我们只是在读取文本文件,但是我们可以根据需要轻松扩展此文件,以获取更复杂的文件类型。
In the previous article, we built a simple creation form as part of our Note Storage application, and the logic is much the same for this app. We’ll read data from text fields, construct an SQL INSERT statement, and execute it against our database. To implement the drag-and-drop functionality, though, we need to specify a target area, or drop zone, for our files. A drop zone is an area on the window that responds to certain mouse events (such as a group of files being dropped onto it). We’ll build this drop zone so that it stores the data received in a variable for later use.
在上一篇文章中,我们在Note Storage应用程序中构建了一个简单的创建表单,此应用程序的逻辑基本相同。 我们将从文本字段中读取数据,构造一个SQL INSERT语句,然后对我们的数据库执行它。 但是,要实现拖放功能,我们需要为文件指定目标区域或放置区域 。 放置区是窗口上对某些鼠标事件做出响应(例如,将一组文件放置到其上)的区域。 我们将构建此放置区,以便将接收到的数据存储在变量中以供以后使用。
The AIR APIs allow us to explicitly check for files being dropped onto the target area (as opposed to plain text, URLs, HTML, or other Clipboard data). These files then become available for us to manipulate as air.File objects. Similar to the way in which we manipulated our database file, we can manipulate these “dropped” files using a set of generic interfaces.
AIR API使我们可以显式检查是否将文件拖放到目标区域(与纯文本,URL,HTML或其他剪贴板数据相对)。 这些文件随后可供我们作为air.File对象进行操作。 与处理数据库文件的方式类似,我们可以使用一组通用接口来处理这些“删除的”文件。
Open the new_behaviour.js file in your editor, and add the following:
在编辑器中打开new_behaviour.js文件,并添加以下内容:
notes = "";
dbConn = null;
function receiveDb(dbFromParent) {   dbConn = dbFromParent;
}
$(document).ready(function(){   $("#create").click(function(){ create(); });   $("#clear").click(function(){ clear(); });   var dropbox = document.getElementById("filedrop");   dropbox.addEventListener("dragenter", dragEnterOver);   dropbox.addEventListener("dragover", dragEnterOver);   dropbox.addEventListener("drop", dropHandler);
});
The important part of this code is the various interface-related functions that we’ve bound to specific events. We’ll create those functions in a moment; for now let’s build our drop zone.
该代码的重要部分是我们绑定到特定事件的各种与接口相关的功能。 稍后我们将创建这些功能; 现在,让我们建立拖放区。
Open up the new_customer.html file, and take a quick look at the structure of the document. You’ll see that we have a div with an id of “filedrop” that contains an empty span element. As a user drags files onto the application page, AIR asks each of the DOM elements that form part of the page if they will accept a file drop; this gives our div the opportunity to tell AIR that it will!
打开new_customer.html文件,并快速浏览文档的结构。 您会看到我们有一个id为“ filedrop ”的div ,其中包含一个空的span元素。 当用户将文件拖到应用程序页面上时,AIR会询问构成页面一部分的每个DOM元素是否接受文件删除; 这使我们的div有机会告诉AIR它将!
There are actually three events here, but the first two (dragenter and dragover) can be handled by the same event handler. Here’s the code for that function:
这里实际上有三个事件,但是前两个事件( dragenter和dragover )可以由同一事件处理程序处理。 这是该函数的代码:
function dragEnterOver(event) {for (var t = 0; event.dataTransfer.types && t < event.dataTransfer.types.length; t++)   {   if (event.dataTransfer.types[t] == "application/x-vnd.adobe.air.file-list")   {   event.preventDefault();   }   }
}
The code above will simply confirm that the drop zone is receiving a list of files and using the appropriate MIME type (there are a few other options documented on the Adobe help pages). If the drop zone is indeed going to accept any files dragged onto it, we need to first disable the default event that rejects the file drop. This will allow the operating system to display a nice “drop allowed” visual indicator: on Windows Vista, this indicator is a blue plus symbol (+), while a red X indicates that the drop is not allowed.
上面的代码将仅确认放置区域正在接收文件列表并使用适当的MIME类型( Adobe帮助页面上记录了一些其他选项)。 如果放置区域确实要接受任何拖放到其上的文件,则需要首先禁用拒绝文件放置的默认事件。 这将使操作系统显示一个不错的“允许放置”视觉指示器:在Windows Vista上,该指示器为蓝色加号(+),而红色X表示不允许放置。
Next we need to handle the actual drop:
接下来,我们需要处理实际的下降:
function dropHandler(event) {var files = event.dataTransfer.getData("application/x-vnd.adobe.air.file-list");   for (var num = 0; num < files.length; num++) {   fileStream = new air.FileStream();   fileStream.addEventListener(air.Event.COMPLETE, readFile);   fileStream.openAsync(files[num], air.FileMode.READ);   }
}
function readFile(event) {   notes = fileStream.readMultiByte(fileStream.bytesAvailable, "iso-8859-1");   $("#filedrop span").text(notes.substr(0,100) + "...");
}
Just as we did for the HTMLLoader COMPLETE event, we’ve used a handler for the FileStream event that indicates that the opening of a file is complete. As you can see from the code above, we’re listening for this event asynchronously. We’re taking this approach because reading a file can take a while, and we don’t want to lock up the application in the meantime.
就像我们对HTMLLoader COMPLETE事件所做的一样,我们对FileStream事件使用了一个处理程序,该处理程序指示文件的打开已完成。 从上面的代码中可以看到,我们正在异步侦听此事件。 我们之所以采用这种方法,是因为读取文件可能需要一段时间,并且我们不想同时锁定该应用程序。
As you can see, we use the callback for the event listener to read data directly from the file into a string object. The manual has further information on file read/write workflow and FileStream’s open modes.
如您所见,我们使用事件侦听器的回调将数据直接从文件读入字符串对象。 该手册提供有关文件读/写工作流程和FileStream的打开模式的更多信息。
We need to specify a character encoding type here – for plain text, the option we’ve used (Western European – ISO) is usually appropriate; check out the AIR manual’s list of supported character sets.
我们需要在此处指定一个字符编码类型-对于纯文本,通常使用我们使用的选项(西欧– ISO); 请查看AIR手册中支持的字符集列表 。
It’s always good to give the user some indication that their action has been successful. In this case, we’re displaying a sample of the file that they dropped (the first 100 characters) to let them know that their files were dropped successfully.
给用户一些表明他们的操作成功的指示总是很好的。 在这种情况下,我们将显示他们删除的文件的样本(前100个字符),以使他们知道文件已成功删除。
Finally, we need our actual record creation routine, and the clear method to which we referred earlier. Add the following code to the end of your new_behaviour.js file:
最后,我们需要实际的记录创建例程以及我们之前提到的clear方法。 将以下代码添加到new_behaviour.js文件的末尾:
function create() {dbQuery = new air.SQLStatement();   dbQuery.sqlConnection = dbConn;   dbQuery.text = "INSERT INTO customers (name,phone,notes) VALUES (:name,:phone,:notes)";   dbQuery.parameters[":name"] = $("#name").val();   dbQuery.parameters[":phone"] = $("#phone").val();   dbQuery.parameters[":notes"] = notes;   try { dbQuery.execute(); } catch (error) {   air.trace("Could not create new customer record.");   }
}
function clear() {   notes = ""; $("#filedrop span").text("");
}
The majority of this code should be fairly familiar to you by now – an SQL INSERT statement, with named parameters. Note that we used a JavaScript escaping routine in our previous AIR article; such steps are not necessary here, as this functionality is taken care of by using named parameters.
到目前为止,这些代码中的大多数应该对您来说已经相当熟悉了-带有命名参数SQL INSERT语句。 请注意,我们在之前的AIR文章中使用了JavaScript转义例程。 此处无需执行此类步骤,因为使用命名参数即可完成此功能。
To test the app, try dragging a sample data file onto the drop zone: customerdata.txt, which exists in the project folder, has been included in the skeleton code archive for this purpose.
要测试该应用程序,请尝试将示例数据文件拖到放置区:为此,项目代码文件夹中存在的customerdata.txt已包含在框架代码归档中。
而且我们完成了! (And We’re Done!)
Save all open files in Aptana and select your project name from the Run button menu, and your CRM app should appear. Try adding an entry (via the File menu) and refreshing the main screen to view your newly-created record.
将所有打开的文件保存在Aptana中,然后从“ 运行”按钮菜单中选择项目名称,然后将出现CRM应用程序。 尝试添加一个条目(通过“ 文件”菜单)并刷新主屏幕以查看您新创建的记录。
You can download my completed project files (including Aptana project data) here.
您可以在此处下载我完成的项目文件(包括Aptana项目数据)。
进一步阅读 (Further Reading)
If you’re interested in further exploring the topics covered in this article, Adobe has a number of fantastic online resources that you may find handy:
如果您有兴趣进一步探索本文介绍的主题,则Adobe提供了许多很棒的在线资源,您可能会发现它们很方便:
Drag and drop
拖放
Working with native windows
使用本机Windows
Reading and writing files
读写文件
AIR 1.1 HTML/AJAX guide for developers
AIR 1.1 HTML / AJAX开发人员指南
AIR 1.1 HTML/AJAX Language Reference
AIR 1.1 HTML / AJAX语言参考
If you aren’t quite sure about any of the code samples in this article, feel free to post a comment below and I’ll see how I can help.
如果您不太确定本文中的任何代码示例,请随时在下面发表评论,我将为您提供帮助。
测试自己 (Test Yourself)
You can test your comprehension of this tutorial with a short quiz, and stand to receive a FREE copy of the pocket guide, Adobe AIR For JavaScript Developers, for your efforts. The guide will be delivered FREE, courtesy of Adobe Systems, but this offer is only available to the first 100 people, so get in quick! (If you do miss out, you can still download the book in PDF format for free for a limited time only.)
您可以通过简短的测验来测试对本教程的理解,并为您的工作免费获得袖珍指南Adobe AIR for JavaScript Developers的免费副本。 该指南将免费提供(由Adobe Systems提供),但是此优惠仅适用于前100人,因此请尽快入手! (如果您错过了,您仍然可以在有限的时间内免费下载PDF格式的图书 。)
Take the quiz!
参加测验 !
翻译自: https://www.sitepoint.com/learn-adobe-air-part-2/
adobe air管理员
adobe air管理员_了解Adobe AIR,第二部分:构建客户管理应用相关推荐
- adobe air 工程师_使用Adobe AIR将CSS带到桌面!
adobe air 工程师 So, I've been issued a challenge at SitePoint to develop a piece of software in order ...
- adobe air 工程师_了解Adobe AIR,第I部分:构建Note存储应用
adobe air 工程师 The Adobe Integrated Runtime (AIR) platform changes the game for web developers, takin ...
- adobe app语言_在Adobe Photoshop中设计Web App UI Kit
adobe app语言 样式指南驱动的开发为现代Web设计提供了非常灵活的方法. 在本教程中,我将引导您设计UI(用户界面)工具包,同时还将解释使UI工具包保持一致和可重用的决策. 教程资产 为了继续 ...
- ria开发_使用Adobe Flash Platform构建RIA
ria开发 The Flash that you thought you knew has changed. It's grown up. 您以为自己知道的Flash已更改. 长大了 In this ...
- 完全卸载Adobe CS4 (Premiere/After Effects) – Adobe CS4 Clean Script绿色版
前段时间发布过Adobe Premiere Pro CS4绿色版和After Effects CS4绿色版,但是这两个绿色软件有比较多的问题,由于没有集成Adobe Media Encoder组件,导 ...
- Adobe官方旗舰店,现已上线“Adobe国际认证”专家证书
原标题:Adobe官方旗舰店,现已上线Adobe国际认证专家证书+Adobe中国摄影计划套餐 4月1日下午,Adobe官方旗舰店正式上线Adobe国际认证专家证书,吸引了许多用户的关注.据悉,Adob ...
- 是高通芯片好还是洛达芯片好_iPad Air 4比上一代iPad Air好在哪里?A14芯片性能介绍[多图]-软件教程...
据官方的说辞,相比上一代 iPad Air 搭载的 7nm 的 A12 仿生处理器,A14 仿生的 CPU 运行速度提升 40%,图形处理能力提升了 30%.新一代神经网络引擎也让机器学习性能快达两倍 ...
- Learning Adobe Animate CC: Animation 学习Adobe Animate CC:动画 Lynda课程中文字幕
Learning Adobe Animate CC: Animation 中文字幕 学习Adobe Animate CC:动画 中文字幕Learning Adobe Animate CC: Anima ...
- adobe xd_60秒内完成Adobe XD
adobe xd Adobe XD允许您设计和原型化应用程序: 从线框到多屏体验,一应俱全. 让我们看看它提供的内容,只需60秒! 打开应用程序后,您可以从创建具有各种预设尺寸的新画板开始,然后为设计 ...
最新文章
- YOLOv5是真的吗?并不比YOLOv4强,不配这个名字
- QT4到QT5的变化!
- Python有哪些好用的语言翻译方法
- fetch用英语解释_初中英语重点知识点,初中三年必须掌握!
- [BZOJ4182]Shopping
- mysql update 顺序_MySQL的Update语句Set顺序问题
- Linux 环境下 Git 安装与基本配置
- php mysql交互实例_php基于session实现数据库交互的类实例
- WPF中同一窗口下的界面切换
- 极客大学产品经理训练营:数据分析 第16课总结
- Java将数字金额转换为中文大写
- mysql远程备份_mysql实现自动远程备份一办法
- 隐马尔可夫模型(HMM:Hidden Markov Models)
- 移动mm 话费支付接入过程(ane)
- 【计算机毕业设计】123网上商城系统的设计与实现
- 智变·人工智能革新客服行业
- DR和DIS的区别?
- css字号 h5_你应该知道的CSS文字大小单位PX、EM、PT
- 图的建立——邻接矩阵
- 洛谷P1460 [USACO2.1]健康的荷斯坦奶牛 Healthy Holsteins