使用WRLD 3D建立动态3D地图
This article was sponsored by WRLD 3D. Thank you for supporting the partners who make SitePoint possible.
本文由WRLD 3D赞助。 感谢您支持使SitePoint成为可能的合作伙伴。
The following takes place between 7:00am and 8:00am, on Christmas Eve. Events occur in real time.
以下活动在圣诞节前夕的7:00 am至8:00 am之间进行。 事件是实时发生的。
For all our data-gathering capabilities, we’re still hopeless when it comes to visualising that data in the 3D world we live in. We stare at 2D charts and log entries, but much of the data we pluck out of the world has meaning in a 3D context. And, it can be useful to visualise this data when it is applied back into a 3D model.
对于我们所有的数据收集功能,在可视化我们所居住的3D世界中的数据时,我们仍然抱有希望。我们盯着2D图表和日志条目,但是我们从世界中拔出的许多数据都具有意义在3D环境中。 并且,当将数据重新应用到3D模型中时,可视化该数据可能会很有用。
This is the problem Augmented Reality seeks to solve. In contrast to the fictional environments of Virtual Reality, Augmented Reality can help us solve many real problems; by applying the data we would otherwise consume through a 2D medium to the real world around us. Mapping is the first-born amongst Augmented Reality’s children.
这是增强现实寻求解决的问题。 与虚拟现实的虚构环境相比,增强现实可以帮助我们解决许多现实问题。 通过应用数据,否则我们将通过2D媒体将其消耗到我们周围的现实世界中。 映射是增强现实的孩子中的长子。
When WRLD approached us, to write about their platform, I was immediately taken by their platform’s graphics and performance. Yet, the more I use their platform; the more I am fascinated by the usefulness of their API and fidelity of their mapping data.
当WRLD与我们联系时,写他们的平台时,我立即被他们平台的图形和性能所吸引。 但是,我越是使用他们的平台; 我对API的实用性和映射数据的保真度更加着迷。
We’re going to publish a series of tutorials, which demonstrate how to use this platform to bring information into the world it applies to. Each tutorial is themed according to a popular T.V. show. As you may have guessed, this first one is about 24.
我们将发布一系列教程,以演示如何使用该平台将信息带入适用的世界。 每个教程的主题均根据受欢迎的电视节目而定。 您可能已经猜到,第一个大约是24 。
In this tutorial, we’re going to learn how to get started with the WRLD platform. We’ll follow the documentation examples to render the simplest map. Then, we’ll create a local environment for compiling our code; and start to tell a story with it.
在本教程中,我们将学习如何开始使用WRLD平台。 我们将按照文档示例来呈现最简单的地图。 然后,我们将创建一个本地环境来编译代码。 并开始讲一个故事。
We’ll cover these topics:
我们将讨论以下主题:
- Rendering maps based on the name of a place
根据地点名称渲染地图 - Moving through a map, for a sequence of events
遍历地图,了解一系列事件 - Highlighting buildings and designing events at each building
突出建筑物并在每个建筑物上设计活动 - Playing sound files with the HTML5 Audio API
使用HTML5音频API播放声音文件 - Changing weather conditions and time of day for the map
更改天气状况和一天中的时间
The code for this tutorial can be found on Github. It has been tested with a modern versions or Firefox, Node, and macOS.
可以在Github上找到本教程的代码。 它已经过现代版本或Firefox,Node和macOS的测试。
入门 (Getting Started)
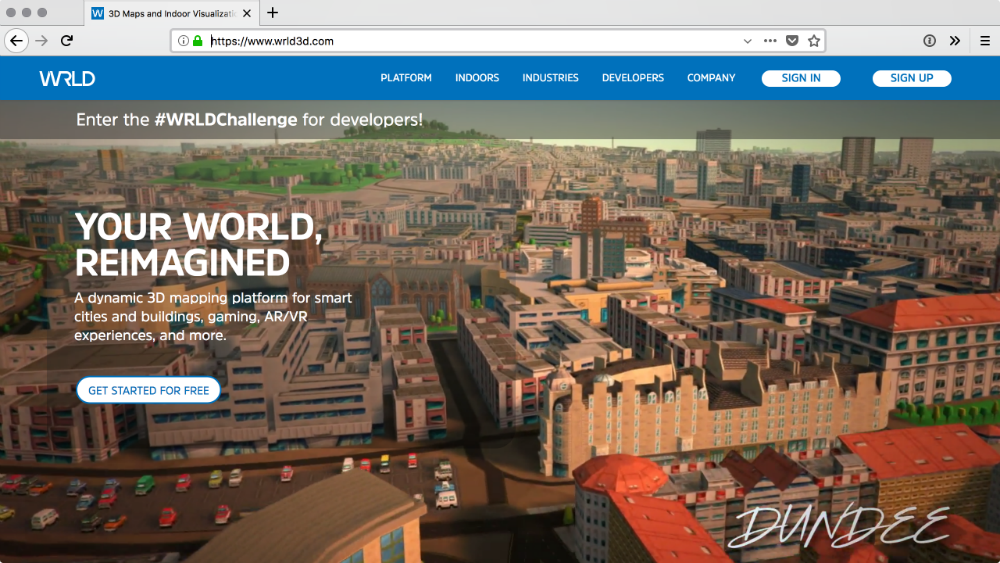
The easiest way to get started is to follow the first example, in the documentation. Before we can do that, we need an account. Head over to https://www.wrld3d.com and click “Sign Up”.
最简单的入门方法是遵循文档中的第一个示例。 在此之前,我们需要一个帐户。 转到https://www.wrld3d.com ,然后单击“注册”。
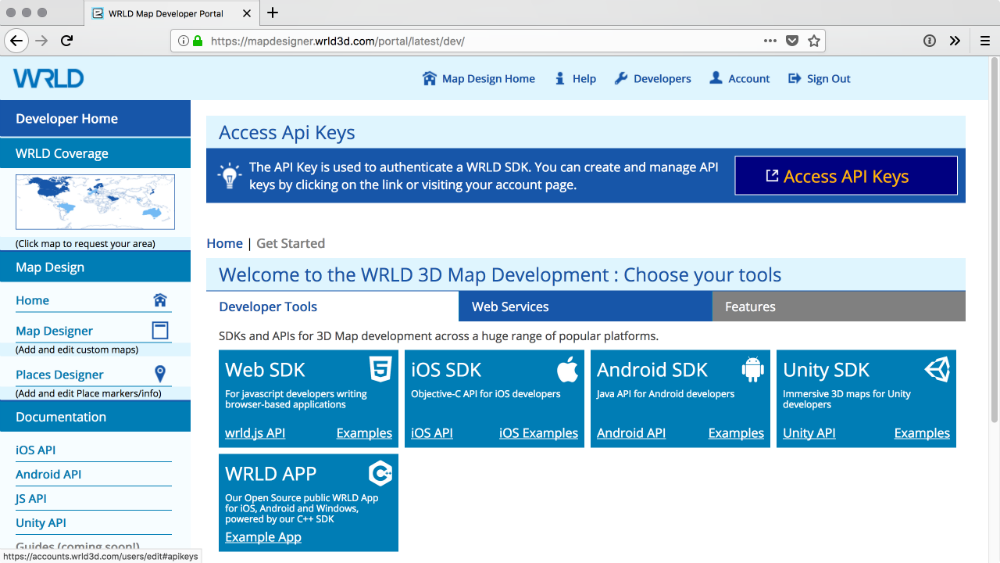
Once you’re logged in, click “developers” and “Access API Keys”.
登录后,单击“开发人员”和“访问API密钥”。
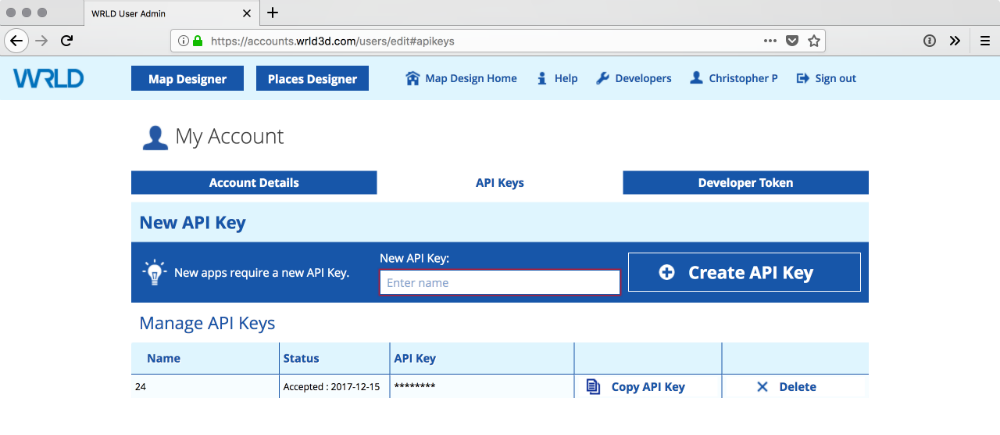
Create a new API key for your application. You can call it anything, but you’ll need to copy the generated key later…
为您的应用程序创建一个新的API密钥。 您可以调用任何名称,但是稍后需要复制生成的密钥…
We can get the code, for the first example, from the official documentation site. I’ve put it in CodePen, and replaced the coordinates with those for New York:
对于第一个示例,我们可以从官方文档站点获得代码。 我将其放在CodePen中,并用纽约的坐标替换了坐标:
WRLD.js is based on Leaflet.js, which makes it familiar to anyone who has done a bit of map-based work before. It also means the maps are mobile-friendly and interactive.
WRLD.js基于Leaflet.js ,这使以前做过一些基于地图的工作的任何人都熟悉。 这也意味着地图具有移动友好性和交互性。
Click and drag, with the left mouse button, to pan around the map. Click and drag, with the right mouse button, to rotate the map. Click and drag, with the middle mouse button to change the perspective angle. Scrolling the mouse wheel will affect the zoom. The map can also be controlled on touch devices.
使用鼠标左键单击并拖动以在地图上平移。 用鼠标右键单击并拖动以旋转地图。 单击并拖动,用鼠标中键更改视角。 滚动鼠标滚轮将影响缩放。 也可以在触摸设备上控制地图。
Apart from including the Javascript SDK and stylesheet; we only needed about 5 lines of formatted code to render a sweet map of New York! The first parameter, map, is the ID of the element into which WRLD should render the map. The second is the API key we generated. The third is a configuration object. This object contains the coordinates for the centre of the map, and an optional zoom level.
除了包括Javascript SDK和样式表之外; 我们只需要大约5行格式的代码即可绘制出精美的纽约地图! 第一个参数map是WRLD将地图渲染到的元素的ID。 第二个是我们生成的API密钥。 第三个是配置对象。 该对象包含地图中心的坐标,以及可选的缩放级别。
建立构建链 (Setting up a Build Chain)
CodePen is great for a quick demo; but we need something more robust and presentable. Let’s set up something simple, that will compile all our modern Javascript into a version most browsers can understand.
CodePen非常适合快速演示。 但是我们需要更强大,更美观的东西。 让我们设置一些简单的东西,它将所有现代Javascript编译成大多数浏览器可以理解的版本。
ParcelJS was recently announced; as a fast, zero-configuration web bundler. Let’s put that to the test. Firstly, we need to install Parcel as a global application, through NPM:
ParcelJS是最近宣布的; 作为快速的零配置Web捆绑器。 让我们测试一下。 首先,我们需要通过NPM将Parcel安装为全局应用程序:
npm install -g parcel-bundlerNext, we can create a handful of files for our project. We’ll need a Javascript file, a CSS file, and an HTML entry-point file:
接下来,我们可以为项目创建一些文件。 我们将需要一个Javascript文件,一个CSS文件和一个HTML入口点文件:
const Wrld = require("wrld.js")
const map = Wrld.map("map", "[your API key here]", {
center: [40.73061, -73.935242],
zoom: 16,
})
This is from
tutorial/app.js这是来自
tutorial/app.js
@import "https://cdnjs.cloudflare.com/ajax/libs/leaflet/1.0.1/leaflet.css";
html,
body {
margin: 0;
padding: 0;
width: 100%;
height: 100%;
}
#map {
width: 100%;
height: 100%;
background-color: #000000;
}
This is from
tutorial/app.css这是来自
tutorial/app.css
<!doctype html>
<html lang="en">
<head>
<meta charset="utf-8" />
<link rel="stylesheet" href="./app.css" />
<title>Getting started with WRLD</title>
</head>
<body>
<div id="map"></div>
<script src="./app.js"></script>
</body>
</html>
This is from
tutorial/index.html这是来自
tutorial/index.html
Notice how app.js is requiring wrld.js? We need to install the WRLD Javascript SDK:
注意app.js如何要求wrld.js吗? 我们需要安装WRLD Javascript SDK:
npm init -y
npm install --save wrld.js
Then, we can start to build and run the local files using Parcel:
然后,我们可以开始使用Parcel构建和运行本地文件:
parcel index.htmlThis starts a local development server, and bundles the JS and CSS files. The process looks something like this:
这将启动本地开发服务器,并捆绑JS和CSS文件。 该过程如下所示:
Open up the URL is shows in a browser, and you should once again see the map of New York. As we make changes to the JS and CSS files, these will automatically be recompiled and reloaded in the browser. Parcel certainly seems to live up to its claims.
打开URL会显示在浏览器中,您应该再次看到纽约地图。 当我们更改JS和CSS文件时,这些文件将自动重新编译并重新加载到浏览器中。 包裹似乎确实符合其要求。
And, that’s exactly what we need – a low-effort build chain that will let us focus on getting stuff done with WRLD!
而且,这正是我们所需要的—省力的构建链,使我们可以专注于使用WRLD完成工作!
Parcel is still quite new. You may have difficulty with highly customised workflows or build requirements; and the documentation still has a ways to go to explain what to do in those situations. Still, I think this simple build chain will suit our needs, and Parcel has delivered on its promise here.
包裹仍然很新。 您可能难以满足高度定制的工作流程或构建要求; 并且文档仍然可以解释这些情况下的处理方法。 不过,我认为这个简单的构建链将满足我们的需求,Parcel在这里已兑现了诺言。
将名称转换为坐标 (Converting Names to Coordinates)
Sometimes we know the exact coordinates of the place we’re thinking of. Sometimes we only know the name of the place. Let’s quickly sidetrack, and look at how to work discover the coordinates of the place when we only know its name.
有时,我们知道我们要考虑的位置的确切坐标。 有时我们只知道地点的名称。 让我们快速回避,看看当我们只知道它的名字时如何发现该位置的坐标。
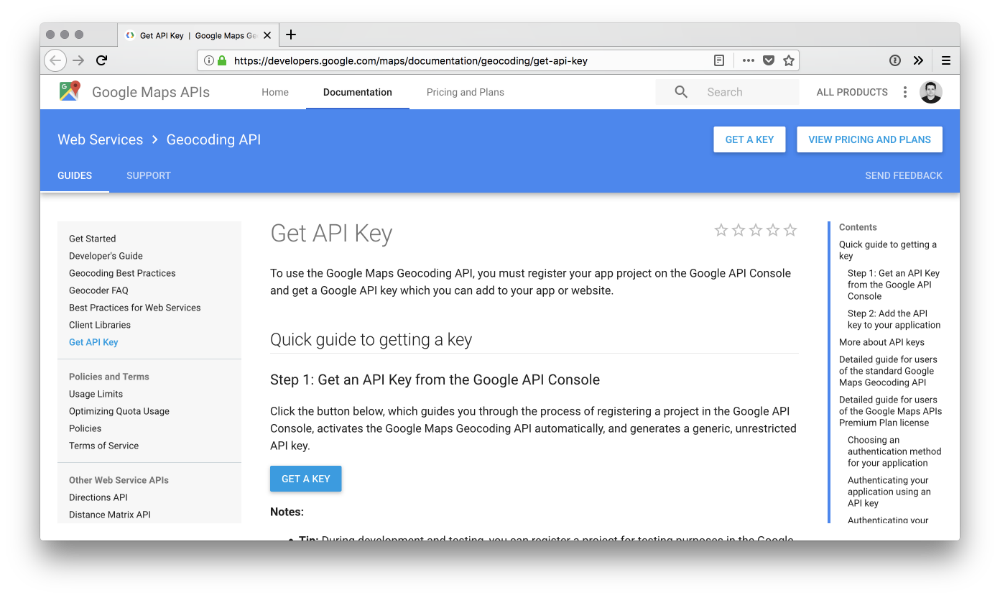
This is one of the few services not yet available on the WRLD platform. So, let’s use a Google API to work it out. We’ll need another API key, so head over to https://developers.google.com/maps/documentation/geocoding/get-api-key and click “Get a key”:
这是WRLD平台上尚不可用的少数服务之一。 因此,让我们使用Google API进行计算。 我们需要另一个API密钥,因此请转到https://developers.google.com/maps/documentation/geocoding/get-api-key并单击“获取密钥”:
Next, we can use the Google Geocoding service to look up the coordinates for an address, by altering our Javascript a bit:
接下来,我们可以使用Google Geocoding服务,通过稍微更改Javascript来查找地址的坐标:
const Wrld = require("wrld.js")
const keys = {
wrld: "[your WRLD API key]",
google: "[your Google API key]",
}
window.addEventListener("load", async () => {
const address = encodeURIComponent("empire state building, new york")
const endpoint = "https://maps.googleapis.com/maps/api/geocode/json?"
+ "key=" + keys.google + "&address=" + address
// console.log(endpoint)
const response = await fetch(endpoint)
const lookup = await response.json()
// console.log(lookup)
const { lat, lng } = lookup.results[0].geometry.location
const map = Wrld.map("map", keys.wrld, {
center: [lat, lng],
zoom: 12,
})
})
This is from
tutorial/app.js这是来自
tutorial/app.js
I’ve refactored the keys into an object. We could even move these to an environment variables file, and exclude that file from Git. That way the keys could be useful but hidden to the public. I’ve also moved my code into an async short arrow function, so that I can use async and await; and so that it happens once the document is loaded.
我已经将键重构为一个对象。 我们甚至可以将它们移至环境变量文件,并从Git中排除该文件。 这样,密钥可能有用但对公众隐藏。 我还将代码移动到异步短箭头函数中,以便可以使用async和await ; 这样一来,一旦加载文档,它就会发生。
Next, we can define an address to look up. It’s best to encode the address so that it can be used as a query string parameter. We can feed this into the geocoding API endpoint, along with the Google API key, to get a result.
接下来,我们可以定义一个地址来查找。 最好对地址进行编码,以便可以将其用作查询字符串参数。 我们可以将其与Google API密钥一起输入地理编码API端点,以获取结果。
Go ahead and uncomment the console log statements, so you can see what the encoded URI looks like, and what the result Google gives back to us looks like. We get quite a detailed result from Google, but the bits we want are inside results[0].geometry.location. Using object destructuring, we can extract just the lat and lng keys of that object.
继续并取消注释控制台日志语句,这样您就可以看到编码后的URI的样子,以及Google返回给我们的结果。 我们从Google得到了相当详细的结果,但是我们想要的位在results[0].geometry.location 。 使用对象分解,我们可以仅提取该对象的lat和lng键。
Finally, we can feed those into the map function, and the map will render the Empire State Building. As I said, we’ll often know the coordinates for the centre of the map already. But, when we don’t: this service and code will help us to find them out.
最后,我们可以将其输入到map函数中,地图将渲染帝国大厦。 正如我所说,我们通常已经知道地图中心的坐标。 但是,当我们不这样做时:此服务和代码将帮助我们找到它们。
在地图上移动 (Moving Through a Map)
Let’s start working on our immersive map experience. We want to take someone through a series of events, and move the map to each new event, so we can tell them a story. A good way to separate the story content from the story mechanics is to create a separate “data” Javascript import:
让我们开始进行沉浸式地图体验。 我们想带某人进行一系列事件,然后将地图移至每个新事件,以便我们向他们讲述一个故事。 将故事内容与故事机制分开的一种好方法是创建一个单独的“数据” JavaScript导入:
module.exports = [
{
// start at Empire State Building
lat: 40.7484405,
lng: -73.98566439999999,
seconds: 15,
image: ".jack-1",
text: "What a lovely day...<phone rings>",
},
{
// stay in the same place but update story
lat: 40.7484405,
lng: -73.98566439999999,
seconds: 15,
image: ".chloe-1",
text: "Jack, we have a problem...",
},
// ...more events
]
This is from
tutorial/story.js这是来自
tutorial/story.js
We can divide the story up into map events. Each even has a lat and lng, though some events may happen at a previous location. For each event, we’ll show a picture of someone speaking, as well as what they’re saying. After a few seconds, we’ll move the camera to a new location and/or speaker.
我们可以将故事分为地图事件。 每个事件甚至都有lat和lng ,尽管某些事件可能在先前的位置发生。 对于每个事件,我们将显示某人讲话的图片以及他们在说什么。 几秒钟后,我们会将相机移到新的位置和/或扬声器。
We can import this file into our main Javascript file, and change the map to show the first story event. We can even highlight the building in which the event is taking place:
我们可以将该文件导入到主要的Javascript文件中,并更改地图以显示第一个故事事件。 我们甚至可以突出显示事件发生的建筑物:
const story = require("./story")
window.addEventListener("load", async () => {
// ...old code commented out here
const { lat, lng } = story[0]
const map = Wrld.map("map", keys.wrld, {
center: [lat, lng],
zoom: 15,
})
map.on("initialstreamingcomplete", () => {
Wrld.buildings
.buildingHighlight(
Wrld.buildings
.buildingHighlightOptions()
.highlightBuildingAtLocation([lat, lng])
.color([125, 255, 125, 128]),
)
.addTo(map)
})
})
This is from
tutorial/app.js这是来自
tutorial/app.js
This code demonstrates how to highlight a building, once the initial map rendering/streaming is complete. Wrld.buildings.buildingHighlightOptions creates a template options object, to which we add the location and colour of the highlight. We pass this options object to Wrld.buildings.buildingHighlight to create the highlight, and add it to the map. The color array is an RGBA value, which means the fourth integer is an opacity value (128 is about half of the 255 limit, or 50% transparent).
该代码演示了初始地图渲染/流式处理完成后如何突出显示建筑物。 Wrld.buildings.buildingHighlightOptions创建一个模板选项对象,向其中添加突出显示的位置和颜色。 我们将此选项对象传递给Wrld.buildings.buildingHighlight以创建高光,并将其添加到地图。 颜色数组是RGBA值,这意味着第四个整数是不透明度值( 128约为255限制的一半,或50%透明)。
This isn’t the only way to highlight buildings. We could also use ray casting to select a building, but that’s a but more advanced than what we need here. You can find documentation for it, at https://wrld3d.com/wrld.js/latest/docs/api/L.Wrld.buildings.BuildingHighlightOptions
这不是突出建筑物的唯一方法。 我们还可以使用射线投射来选择建筑物,但这比我们这里需要的要先进。 您可以在https://wrld3d.com/wrld.js/latest/docs/api/L.Wrld.buildings.BuildingHighlightOptions中找到有关它的文档。
In fact, while we’re at it; we can abstract this building highlights into a reusable function. We can even add specific highlight colors for each event, and remove previous building highlights each time we add a new one:
实际上,当我们这样做时; 我们可以将建筑物的亮点抽象为可重用的功能。 我们甚至可以为每个事件添加特定的突出显示颜色,并在每次添加新事件时删除以前的建筑物突出显示:
const { lat, lng, color } = story[0]
const map = Wrld.map("map", keys.wrld, {
center: [lat, lng],
zoom: 15,
})
map.on("initialstreamingcomplete", () => {
highlightBuildingAt(lat, lng, color)
})
let highlight = null
const highlightBuildingAt = (lat, lng, color) => {
if (highlight) {
highlight.remove()
}
highlight = Wrld.buildings
.buildingHighlight(
Wrld.buildings
.buildingHighlightOptions()
.highlightBuildingAtLocation([lat, lng])
.color(color),
)
.addTo(map)
}
This is from
tutorial/app.js这是来自
tutorial/app.js
This way, Jack and Chloe can have their own highlight colors, to show when they’re speaking. Removing building highlights is even easier than adding them. We just need to save a reference to the highlight we created, and call the remove method on it.
这样,Jack和Chloe可以拥有自己的突出显示颜色,以在说话时显示出来。 删除建筑物高亮比添加高光更容易。 我们只需要保存对我们创建的突出显示的引用,并在其上调用remove方法。
移动地图 (Moving the Map)
Ok, now we need to move the map to each new event. We’ll highlight the building for each event, so we know which one we’re looking at:
好的,现在我们需要将地图移至每个新事件。 我们将突出显示每个事件的建筑物,因此我们知道我们正在查看哪个事件:
const { lat, lng, zoom, color, seconds } = story[0]
const map = Wrld.map("map", keys.wrld, {
center: [lat, lng],
zoom,
})
map.on("initialstreamingcomplete", () => {
highlightBuildingAt(lat, lng, color)
if (story.length > 1) {
setTimeout(() => showNextEvent(1), seconds * 1000)
}
})
let highlight = null
const highlightBuildingAt = (lat, lng, color) => {
if (highlight) {
highlight.remove()
}
highlight = Wrld.buildings
.buildingHighlight(
Wrld.buildings
.buildingHighlightOptions()
.highlightBuildingAtLocation([lat, lng])
.color(color),
)
.addTo(map)
}
const showNextEvent = index => {
const { lat, lng, zoom, degrees, color, seconds } = story[index]
map.setView([lat, lng], zoom, {
headingDegrees: degrees,
animate: true,
durationSeconds: 2.5,
})
setTimeout(() => {
highlightBuildingAt(lat, lng, color)
if (story.length > index + 1) {
setTimeout(() => showNextEvent(index + 1), seconds * 1000)
}
}, 2.5 * 1000)
}
This is from
tutorial/app.js这是来自
tutorial/app.js
There’s a lot going on here, so let’s break it down:
这里有很多事情,所以让我们分解一下:
We’ve added a
zoomproperty to each event. This means we can animate the level of zoom between events, which adds a lot of dynamism to the story. We’ve also added adegreesproperty, to all but the first event. We could modify the first event’s camera heading, but I’m fine with how it looks by default (360 degrees). Adding degrees to events allows us to animate the heading in much the same way as the zoom.我们向每个事件添加了
zoom属性。 这意味着我们可以对事件之间的缩放级别进行动画处理,从而使故事更具动感。 除了第一个事件外,我们还为所有事件添加了一个degrees属性。 我们可以修改第一个事件的摄影机方向,但默认情况下(360度)我觉得很好。 在事件中添加度数可以使标题动画与缩放动画大致相同。If there are multiple events (it’s safe to assume this but I’ve added the check anyway) then we use the
secondsproperty of the first event to delay the transition to event #2. We create ashowNextEventfunction, with a hard-coded index value of1.如果存在多个事件(可以放心地假设这样做,但是无论如何我都添加了检查),那么我们将使用第一个事件的
seconds属性来延迟向事件2的过渡。 我们创建一个showNextEvent函数,其硬编码索引值为1。In
showNextEvent, we use thesetViewmethod to animate the position, zoom, and heading of the camera. The animations will take2.5seconds, so we set a timeout for that long. In the timeout callback function, we highlight the new building (so that the highlight only happens after the camera is done moving) and queue up the next event.在
showNextEvent,我们使用setView方法对摄像机的位置,缩放和航向进行动画处理。 动画将花费2.5秒,因此我们将超时设置为该时间。 在超时回调函数中,我们突出显示新建筑物(以便突出显示仅在摄像机完成移动之后发生)并排队下一个事件。
Feel free to add more events and/or change the story entirely. Make it your own, and have fun!
随时添加更多事件和/或完全更改故事。 自己制作,玩得开心!
添加音频 (Adding Audio)
Our story is a little quiet. We need some suspenseful background music to put us in the zone. Head over to a site like Epidemic Sound and find some suspenseful music tracks, for your story. I’ve downloaded a few, and put them in a tutorial/tracks folder.
我们的故事有点安静。 我们需要一些悬念的背景音乐才能进入该区域。 前往Epidemic Sound之类的网站,并为您的故事找到一些可疑的音乐曲目。 我已经下载了一些文件,并将它们放在了tutorial/tracks文件夹中。
Now, let’s create an invisible audio player, and have it play tracks at random. For that to work, we need a list of tracks:
现在,让我们创建一个不可见的音频播放器,并使其随机播放曲目。 为此,我们需要一个曲目列表:
<!doctype html>
<html lang="en">
<head>
<meta charset="utf-8" />
<link rel="stylesheet" href="./app.css" />
<title>Getting started with WRLD</title>
</head>
<body>
<div id="map"></div>
<audio class="track-1" src="./tracks/track-1.mp3" />
<audio class="track-2" src="./tracks/track-2.mp3" />
<audio class="track-3" src="./tracks/track-3.mp3" />
<audio class="track-4" src="./tracks/track-4.mp3" />
<audio class="track-5" src="./tracks/track-5.mp3" />
<audio class="track-6" src="./tracks/track-6.mp3" />
<audio class="track-7" src="./tracks/track-7.mp3" />
<audio class="track-8" src="./tracks/track-8.mp3" />
<audio class="track-9" src="./tracks/track-9.mp3" />
<audio class="track-10" src="./tracks/track-10.mp3" />
<script src="./app.js"></script>
</body>
</html>
This is from
tutorial/index.html这是来自
tutorial/index.html
Parcel is watching index.html and rewrites all static file references to files it copies into the dist folder. If we create the HTML4 audio tags in this HTML file, Parcel will copy those files to the list folder, and serve them through the development server. We don’t have to do things this way, but it’s simpler for testing as we develop.
Parcel正在监视index.html并将所有静态文件引用重写为其复制到dist文件夹中的文件。 如果我们在此HTML文件中创建HTML4 audio标签,Parcel会将这些文件复制到列表文件夹,然后通过开发服务器提供这些文件。 我们不必以这种方式做事,但是随着我们的开发,它对于测试来说更加简单。
One alternative would be to reference these files from somewhere on the internet. Another would be to not use the development server.
一种替代方法是从Internet上的某个地方引用这些文件。 另一个可能是不使用开发服务器。
module.exports = [
".track-1",
".track-2",
".track-3",
".track-4",
".track-5",
".track-6",
".track-7",
".track-8",
".track-9",
".track-10",
]
This is from
tutorial/tracks.js这是来自
tutorial/tracks.js
We can use this list to find the HTML elements, linked to each *.mp3 file we want to play. We’re just about to use this list in our main JS file:
我们可以使用此列表查找与要播放的每个*.mp3文件链接HTML元素。 我们将在主要的JS文件中使用此列表:
const nextTrack = () => {
const index = Math.floor(Math.random() * tracks.length)
const audio = new Audio(document.querySelector(tracks[index]).src)
audio.addEventListener("ended", () => nextTrack())
audio.play()
}
nextTrack()
This is from
tutorial/app.js这是来自
tutorial/app.js
We want to play a track at random, so we find a random index. Then, we fetch the audio element matching that index and create a new Audio object with its src attribute value. When the track has finished playing, we call the nextTrack function again (so the next random track starts playing, in a loop) and start the randomly chosen track.
我们想随机播放曲目,因此我们找到一个随机索引。 然后,我们获取与该索引匹配的audio元素,并使用其src属性值创建一个新的Audio对象。 当曲目结束播放后,我们再次调用nextTrack函数(因此,下一个随机曲目将开始循环播放)并开始随机选择的曲目。
Unfortunately, I can’t include the tracks I’m using in the Github repository. Firstly, they would grow the size of the repo immensely. Secondly, I have the rights to use them for YouTube productions but not to distribute them for any other reason. If you want to get the tracks I’ve used, you can find them on this Epidemic Sound search results page.
不幸的是,我无法在Github存储库中包含正在使用的曲目。 首先,它们将极大地增加回购规模。 其次,我有权将其用于YouTube作品,但不得出于任何其他原因分发它们。 如果要获取我使用过的曲目,可以在“ 流行声音”搜索结果页面上找到它们。
为活动添加信息卡 (Adding Info Cards for Events)
I mentioned before; WRLD.js is based on LeafletJS. This is great because we can do everything Leaflet allows us to, while working with WRLD maps. In fact, we can use Leaflet popups to narrate story events. A Leaflet popup looks like this:
我之前提到过; WRLD.js基于LeafletJS。 这很棒,因为在使用WRLD地图时,我们可以做Leaflet允许的所有事情。 实际上,我们可以使用Leaflet弹出窗口来叙述故事事件。 Leaflet弹出窗口如下所示:
L.popup()
.setLatLng(latlng)
.setContent("I am a popup!")
.openOn(map)
We’re going to embed each event’s image and text in the popup. It would also be cool if we could position the popup in relation to the elevation of the building. Not right at the top, but…say…half way up the building. We could use something like this:
我们将在弹出窗口中嵌入每个事件的图像和文本。 如果我们可以将弹出窗口相对于建筑物的高度定位,那也很酷。 不是在顶部,而是……说……沿着建筑物的一半。 我们可以这样使用:
let popup = null
const showPopup = (lat, lng, image, text, elevation) => {
const src = document.querySelector(image).src
const element1 = "<img class='image' src='" + src + "' />"
const element2 = "<span class='text'>" + text + "</span>"
const element3 = "<div class='popup'>" + element1 + element2 + "</div>"
popup = L.popup({
closeButton: false,
autoPanPaddingTopLeft: 100,
elevation: Math.max(20, elevation / 2),
})
.setLatLng(L.latLng(lat, lng))
.setContent(element3)
.openOn(map)
}
This is from
tutorial/app.js这是来自
tutorial/app.js
L.popup accepts an options object. The options we’re setting are:
L.popup接受一个options对象。 我们设置的选项是:
- We want to hide the close button that usually shows on Leaflet popups.
我们想隐藏通常在Leaflet弹出窗口中显示的关闭按钮。 - We want the camera to allow enough space between the top/left of the screen, when the camera is finished panning to show the popup.
当摄像机完成平移以显示弹出窗口时,我们希望摄像机在屏幕的顶部/左侧之间留出足够的空间。 - We want the popup to be at least 20 meters from the ground floor and at most half the other elevation of the building.
我们希望弹出窗口距离地面至少20米,并且最多为建筑物其他高度的一半。
We’re also constructing an HTML string; which places the event’s image and text inside a .popup element. We can use the following styles for these elements:
我们还在构造一个HTML字符串。 将事件的图像和文本放在.popup元素内。 我们可以对这些元素使用以下样式:
.hidden {
display: none;
}
.image {
display: flex;
width: auto;
height: 100px;
}
.text {
display: flex;
padding-left: 10px;
font-size: 16px;
}
.popup {
display: flex;
flex-direction: row;
align-items: flex-start;
}
This is from
tutorial/app.css这是来自
tutorial/app.css
.popup is a Flexbox container element. The flex styles we’re applying to it are that the children should be displayed in a row and that they should be aligned to the top of the container. There are many great Flexbox guides. Take a look at Flexbox Zombies for a fun way to learn…
.popup是Flexbox容器元素。 我们应用于它的flex样式是,子级应该连续显示,并且它们应该与容器的顶部对齐。 有很多很棒的Flexbox指南。 看看Flexbox Zombies ,这是一种有趣的学习方式。
Notice that we’re also defining the
.hiddenstyle, for the images inindex.html. We don’t want them to be displayed – they’re there so that Parcel will copy and reference them correctly.注意,我们还为
index.html的图像定义了.hidden样式。 我们不希望它们显示-它们在那里,因此Parcel将正确复制和引用它们。
The question is: how do we get the elevation of each building? We can listen for building information events, and work out the elevation from there. Unfortunately, there’s no per-highlight way to do this, so we’ll have to hook into “global” events and add/remove listeners sneakily:
问题是:我们如何获得每座建筑物的标高? 我们可以收听建筑信息事件,并从那里计算出海拔。 不幸的是,没有突出显示方法,因此我们必须陷入“全局”事件并偷偷地添加/删除侦听器:
let elevation = 0
const waitForElevation = onElevation => {
const listener = event => {
map.buildings.off("buildinginformationreceived", listener)
const information = event.buildingHighlight.getBuildingInformation()
if (!information) {
onElevation(0)
} else {
const dimensions = information.getBuildingDimensions()
const ground = dimensions.getBaseAltitude()
const elevation = dimensions.getTopAltitude() - ground
onElevation(elevation)
}
}
map.buildings.on("buildinginformationreceived", listener)
}
This is from
tutorial/app.js这是来自
tutorial/app.js
waitForElevation creates and adds a listener function to the buildinginformationreceived map event. The moment the listener is triggered, it removes itself. This way, we can trigger a per-highlight kind of event: add listener → building is highlighted → listener is invoked → listener is removed.
waitForElevation创建并将侦听器功能添加到buildinginformationreceived地图事件。 触发侦听器的那一刻,它会自行删除。 这样,我们可以触发每个事件:添加侦听器→突出显示建筑物→调用侦听器→删除侦听器。
buildinginformationreceived receives an event, which has a getBuildingInformation method. If the building has any information, we get the ground altitude and work out the elevation from that. If not, we call the onElevation function parameter. So, onElevation gets called with an integer, 0 or greater.
收到的buildinginformationreceived会接收一个事件,该事件具有getBuildingInformation方法。 如果建筑物有任何信息,我们将获取地面海拔高度并据此计算出海拔高度。 如果不是,我们调用onElevation函数参数。 因此, onElevation会以0或更大的整数来调用。
All that’s left to do is add an onElevation callback to each highlightBuildingAt call; and call waitForElevation inside that function:
剩下要做的就是向每个highlightBuildingAt调用添加一个onElevation回调; 并在该函数内调用waitForElevation :
map.on("initialstreamingcomplete", () => {
highlightBuildingAt(
lat, lng, color,
elevation => showPopup(lat, lng, image, text, elevation)
)
if (story.length > 1) {
setTimeout(() => showNextEvent(1), seconds * 1000)
}
})
let highlight = null
const highlightBuildingAt = (lat, lng, color, onElevation) => {
waitForElevation(onElevation)
// ...rest of highlightBuildingAt
}
const showNextEvent = index => {
// ...rest of showNextEvent
setTimeout(() => {
highlightBuildingAt(
lat, lng, color,
elevation => showPopup(lat, lng, image, text, elevation)
)
if (story.length > index + 1) {
setTimeout(() => showNextEvent(index + 1), seconds * 1000)
}
}, 2.5 * 1000)
}
This is from
tutorial/app.js这是来自
tutorial/app.js
改变天气和一天中的时间 (Changing Weather and Time of Day)
Jack’s story plays out in winter; but the map is sunny and bright. Let’s change the weather to be a little more in keeping with the season:
杰克的故事在冬天播出。 但地图晴朗而明亮。 让我们将天气更改为与季节保持一致:
map.themes.setWeather(Wrld.themes.weather.Snowy)This is from
tutorial/app.js这是来自
tutorial/app.js
It’s ridiculously easy to change the weather. Here, we’re making it snowy; but we could make it any of the following:
改变天气很容易。 在这里,我们正在下雪; 但是我们可以做到以下任何一种:
Wrld.themes.weather.ClearWrld.themes.weather.ClearWrld.themes.weather.OvercastWrld.themes.weather.OvercastWrld.themes.weather.FoggyWrld.themes.weather.FoggyWrld.themes.weather.RainyWrld.themes.weather.RainyWrld.themes.weather.SnowyWrld.themes.weather.Snowy
Similarly, we want to make the passage of time a little more realistic. Each 24 episode is supposed to happen over the course of 1 hour. It would be great if we could make each location be 1 hour apart, but we only have these times to work with:
同样,我们希望使时间流逝更加真实。 每24集应该在1小时内发生一次。 如果我们可以将每个位置相隔1小时,那就太好了,但我们只有以下时间可以配合使用:
Wrld.themes.time.DawnWrld.themes.time.DawnWrld.themes.time.DayWrld.themes.time.DayWrld.themes.time.DuskWrld.themes.time.DuskWrld.themes.time.NightWrld.themes.time.Night
Let’s change the time of day depending on each event:
让我们根据每个事件更改一天中的时间:
const { lat, lng, zoom, color, seconds, image, text, time } = story[0]
const map = Wrld.map("map", keys.wrld, {
center: [lat, lng],
zoom,
})
if (time) {
map.themes.setTime(time)
}
// ...later
const showNextEvent = index => {
const {
lat, lng, zoom, degrees, color, seconds, image, text, time
} = story[index]
map.setView(...)
setTimeout(() => {
if (time) {
map.themes.setTime(time)
}
highlightBuildingAt(...)
if (story.length > index + 1) {
setTimeout(...)
}
}, 2.5 * 1000)
}
This is from
tutorial/app.js这是来自
tutorial/app.js
摘要 (Summary)
We’re done for today. I hope you had as much fun, following along, as I did putting this together. Take some time to embellish your story; adding new characters, new music, and whatever bits you think will make your story great. We’d love to see what you come up with.
今天完成了。 希望您以后能像我把它们放在一起一样开心。 花一些时间修饰你的故事; 添加新角色,新音乐以及您认为可以使您的故事精彩的任何内容。 我们很乐意看到您的想法。
Here’s a video of the final product. I’ll be adding more events to this, but I’m super proud of what we managed:
这是最终产品的视频。 我将为此添加更多事件,但是我为我们的管理感到骄傲:
Next time, we’re going to learn more about the presentation, animation, and automation the WRLD platform allows. In fact, we’re going to use WRLD to create a useful, saleable mobile friendly application. See you next time!
下次,我们将学习有关WRLD平台允许的演示,动画和自动化的更多信息。 实际上,我们将使用WRLD创建有用的,可出售的移动友好型应用程序。 下次见!
翻译自: https://www.sitepoint.com/building-dynamic-3d-maps/
使用WRLD 3D建立动态3D地图相关推荐
- 如何使用WRLD建立室内办公室地图
This article was created in partnership with WRLD. Thank you for supporting the partners who make Si ...
- iPhone开发 - 3D - 建立3D界面(下)
iPhone开发 - 3D - 建立3D界面(下) 前面主要写了iPhone开发的一些基本知识,有iPhone设备的介绍,iPhoneSDK开发的流程和文件的组成等,下面就据上部分介绍EAG ...
- 数据可视化——绘制3D图表和绘制地图
一.使用mplot3d绘制3D图表 1.1.mplot3d概述 matplotlib不仅专注于二维图表的绘制,也具有绘制3D图表.统计地图的功能,并将这些功能分别封装到工具包mpl_toolkits. ...
- Qt文档阅读笔记-最简单的动态3D圆环实例
程序的逻辑如下: 正常显示逻辑: 1.场景中要存在一个根实体: 2.为根实体加载材质: 3.在根实体下添加其他实体: 4.为其他实体添加额外的数据(比如画圆环等): 5.放置摄像机,设置前景等属性. ...
- java3d翻转纪念相册_抖音上很火的3D立体动态相册实现代码!
前言: 圣诞节快到了,是不是要给女朋友或者正在追求的妹子一点小惊喜呢,今天这篇博客就分享下前端代码如何实现3D立体动态相册.赶紧学会了,来制作属于我们程序员的浪漫吧!先上效果图,来引起下你们的兴趣. ...
- iPhone开发 - 3D - 建立3D界面(上)
iPhone开发 - 3D - 建立3D界面(上) 苹果公司于07年发布的iPhone是手机业一大革命性的手机终端,iPhone操作系统是:Mac OS X,固件升级由去年发布1.0到现在的2.0固件 ...
- ❤表白❤相册——动态3D图片墙
❤表白❤相册--动态3D图片墙 一.前言 1.相册的意义什么 答:相册在于记忆.回忆.生活.旅游等的记录,在于可以保留生命中的精彩一瞬间,感动一刹那,让时间永久定格在那一时刻.时间一去不复返,珍藏的记 ...
- 用 matplotlib 绘制 3D 时间序列动态图
时间序列动态图是显示时间演变的非常强大的工具,但 matplotlib 的默认动态图很简单,不太适合用于比较多个时间序列. 动态图被广泛使用:从解释神经网络如何训练,到显示合成时间序列统计数据或波动率 ...
- Digital Clock 3D for Mac(3D机械时钟动态桌面壁纸)
Digital Clock 3D是一款非常实用的3D时钟动态桌面壁纸.享受复古管时钟,最新的OLED时计,以及与此动态壁纸之间的一切. 选择你最喜欢的风格或者让它变得偶然,品味超逼真的3D图形! Di ...
最新文章
- 大家眼中的桌面技术支持是什么样的?
- XtraGrid实现checkbox全选功能
- POJ 1961 KMP(当前重复次数)
- uwsgi: error while loading shared libraries: libicui18n.so.58: cannot open shared object file
- 【Linux】一步一步学Linux——date命令(81)
- zabbix2.0安装与配置
- QT 开发openSSL CSR证书请求工具
- 大东电报与雷格斯在全球部署宝利通高清系统
- Java数据结构Map List Set及Queue相关的类图
- PairSCL:句子对级别的有监督对比学习方法
- C#操作Excel数据库方法
- 会计与计算机融合的会计论文,管理会计与财务会计融合浅析论文
- 功能测试常见的测试方法有哪些?
- video.js插件的使用
- 鸿蒙系统如何设置字体,图解鸿蒙OS独特的字体系统!
- 无穷积分 ∫e^(-x^2)dx 的几种巧妙解法
- Python NLPIR(中科院汉语分词系统)的使用 十五分钟快速入门与完全掌握
- sql server之T-SQL语句创建数据库创建表
- 怎么把好几行弄成一行_【excle 如何多行变一行】excel中怎么把多行同一个人的数据变成一行?...
- lua的userdata的生存周期