nginx编译安装与配置使用
第一部分----nginx基本应用
源码编译安装nginx
1、安装pcre软件包(使nginx支持http rewrite模块)
yum install -y pcre
yum install -y pcre-devel
2、安装openssl-devel(使nginx支持ssl)
yum install -y openssl-devel
3、创建用户nginx
useradd nginx
passwd nginx
4、安装nginx
[root@localhost ~]tar -vzxf nginx-1.11.3.tar.gz -C /usr/local
[root@localhost ~]cd nginx-1.11.3/
[root@localhost nginx-1.11.3]# ./configure \
> --group=nginx \
> --user=nginx \
> --prefix=/usr/local/nginx \
> --sbin-path=/usr/sbin/nginx \
> --conf-path=/etc/nginx/nginx.conf \
> --error-log-path=/var/log/nginx/error.log \
> --http-log-path=/var/log/nginx/access.log \
> --http-client-body-temp-path=/tmp/nginx/client_body \
> --http-proxy-temp-path=/tmp/nginx/proxy \
> --http-fastcgi-temp-path=/tmp/nginx/fastcgi \
> --pid-path=/var/run/nginx.pid \
> --lock-path=/var/lock/nginx \
> --with-http_stub_status_module \
> --with-http_ssl_module \
> --with-http_gzip_static_module \
> --with-pcre
[root@localhost nginx-1.11.3]# make &&make install
5、修改配置文件/etc/nginx/nginx.conf
#全局参数设置
worker_processes  1;     #设置nginx启动进程的数量,一般设置成与逻辑cpu数量相同
error_log  logs/error.log;    #指定错误日志
worker_rlimit_nofile 102400;    #设置一个nginx进程能打开的最大文件数
pid        /var/run/nginx.pid;events {worker_connections  1024;   #设置一个进程的最大并发连接数
}#http服务相关设置
http {include       mime.types;default_type  application/octet-stream;log_format  main  '$remote_addr - $remote_user [$time_local] "$request" ''$status $body_bytes_sent "$http_referer" ''"$http_user_agent" "$http_x_forwarded_for"';access_log  /var/log/nginx/access.log  main;    #设置访问日志的位置和格式sendfile        on; #是否调用sendfile函数输出文件,一般设置为on,若nginx是用来进行磁盘IO负载应用时,可以设置为off,降低系统负载gzip            on; #是否开启gzip压缩keepalive_timeout  65;      #设置长连接的超时时间
#虚拟服务器的相关设置server {listen       80;        #设置监听的端口server_name  localhost;         #设置绑定的主机名、域名或ip地址charset koi8-r;    #设置编码字符location / {root   /var/www/nginx;      #设置服务器默认网站的根目录位置index  index.html index.htm;        #设置默认打开的文档}error_page   500 502 503 504  /50x.html;        #设置错误信息返回页面location = /50x.html {root   html;        #这里的绝对位置是/var/www/nginx/html}}}
6、检测nginx配置文件是否正确
nginx -t
7、启动nginx服务
nginx
8、通过nginx -s控制nginx服务
nginx -s stop     #停止服务
nginx -s quit     #退出服务
nginx -s reopen    #重新打开日志文件
nginx -s reload    #重新加载配置文件
9、实现nginx开机自启
1、vim /etc/init.d/nginx
#!/bin/sh
#
# nginx - this script starts and stops the nginx daemon
#
# chkconfig:   - 85 15
# description:  Nginx is an HTTP(S) server, HTTP(S) reverse \
#               proxy and IMAP/POP3 proxy server
# processname: nginx
# config:      /etc/nginx/nginx.conf
# config:      /etc/sysconfig/nginx
# pidfile:     /var/run/nginx.pid# Source function library.
. /etc/rc.d/init.d/functions# Source networking configuration.
. /etc/sysconfig/network# Check that networking is up.
[ "$NETWORKING" = "no" ] && exit 0nginx="/usr/sbin/nginx"
prog=$(basename $nginx)NGINX_CONF_FILE="/etc/nginx/nginx.conf"[ -f /etc/sysconfig/nginx ] && . /etc/sysconfig/nginxlockfile=/var/lock/subsys/nginxmake_dirs() {# make required directoriesuser=`nginx -V 2>&1 | grep "configure arguments:" | sed 's/[^*]*--user=\([^ ]*\).*/\1/g' -`options=`$nginx -V 2>&1 | grep 'configure arguments:'`for opt in $options; doif [ `echo $opt | grep '.*-temp-path'` ]; thenvalue=`echo $opt | cut -d "=" -f 2`if [ ! -d "$value" ]; then# echo "creating" $valuemkdir -p $value && chown -R $user $valuefifidone
}start() {[ -x $nginx ] || exit 5[ -f $NGINX_CONF_FILE ] || exit 6make_dirsecho -n $"Starting $prog: "daemon $nginx -c $NGINX_CONF_FILEretval=$?echo[ $retval -eq 0 ] && touch $lockfilereturn $retval
}stop() {echo -n $"Stopping $prog: "killproc $prog -QUITretval=$?echo[ $retval -eq 0 ] && rm -f $lockfilereturn $retval
}restart() {configtest || return $?stopsleep 1start
}reload() {configtest || return $?echo -n $"Reloading $prog: "killproc $nginx -HUPRETVAL=$?echo
}force_reload() {restart
}configtest() {$nginx -t -c $NGINX_CONF_FILE
}rh_status() {status $prog
}rh_status_q() {rh_status >/dev/null 2>&1
}case "$1" instart)rh_status_q && exit 0$1;;stop)rh_status_q || exit 0$1;;restart|configtest)$1;;reload)rh_status_q || exit 7$1;;force-reload)force_reload;;status)rh_status;;condrestart|try-restart)rh_status_q || exit 0;;*)echo $"Usage: $0 {start|stop|status|restart|condrestart|try-restart|reload|force-reload|configtest}"exit 2
esac--------------------------------------------------------------------------
2、添加权限
chmod +x /etc/init.d/nginx
3、设置开机自启
chkconfig nginx on
10、nginx日志文件详解
nginx日志文件分为log_format和access_log两部分
log_format定义记录的格式,其语法格式为
log_format 样式名称 样式详情
配置文件中默认有
log_format main '$remote_addr - $remote_user [$time_local] "$request" ''$status $body_bytes_sent "$http_referer" ''"$http_user_agent" "$http_x_forwarded_for"';
| 变量 | 说明 |
|
$remote_addr和$http_x_forwarded_for |
客户端的ip |
| $remote_user | 客户端的名称 |
| $time_local | 访问时的本地时间 |
| $request | 请求的URL和http协议 |
| $status | 访问的状态码 |
| $body_bytes_sent | 发送给客户端的主体内容大小 |
| $http_referer | 记录客户端是从哪个页面链接访问过来的,若没有链接,则访问‘-’ |
| $http_user_agent | 记录客户端使用的浏览器的相关信息 |
access_log主要指定使用哪种格式记录和日志文件的位置,其语法格式为
access_log 日志文件路径 样式名称
如:
access_log /var/log/nginx/access.log main;
下面是日志内容的截图示例

第二部分-----nginx高级应用
1、使用alias实现虚拟目录
location /lzs {alias /var/www/lzs;index index.html; #访问http://x.x.x.x/lzs时实际上访问的是/var/www/lzs/index/html
2、通过stub_status模块监控nginx的工作状态
1、通过nginx -V命令查看是否已安装stnb_status模块
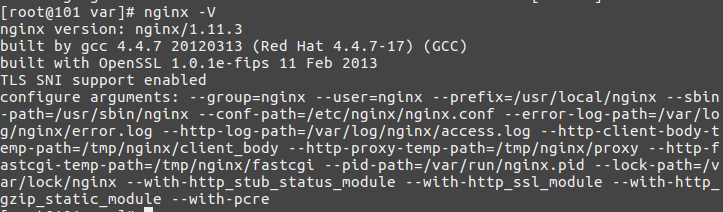
(可以发现已经安装了~~~)
2、编辑/etc/nginx/nginx.conf配置文件
#添加以下内容~~
location /nginx-status {stub_status on;access_log    /var/log/nginx/nginxstatus.log;    #设置日志文件的位置auth_basic    "nginx-status";    #指定认证机制(与location后面的内容相同即可)auth_basic_user_file    /etc/nginx/htpasswd;        #指定认证的密码文件}
3、创建认证口令文件并添加用户lzs和zsgg,密码用md5加密
htpasswd -c -m /etc/nginx/htpasswd lzs
htpasswd -m /etc/nginx/htpasswd zsgg
4、重启服务
5、客户端访问http://x.x.x.x/nginx-status即可
3、使用limit_rate限制客户端传输数据的速度
1、编辑/etc/nginx/nginx.conf
location / {root /var/www/nginx;index index.html;limit_rate 2k; #对每个连接的限速为2k/s
2、重启服务
注意要点:
1、配置文件中的每个语句要以;结尾
2、使用htpasswd命令需要先安装httpd
转载于:https://blog.51cto.com/lzs66/1844964
nginx编译安装与配置使用相关推荐
- Nginx编译安装与配置
目录 引言 一.Nignx简介 二.简述Nginx和Apache的差异 三.编译安装Nginx服务 四.新版本升级 五.添加 Nginx 系统服务 六.基于域名的 Nginx 虚拟主机 七.基于IP ...
- LNMP平台搭建之一:nginx编译安装
参考博客:https://www.cnblogs.com/zhang-shijie/p/5294162.html jack.zhang 一.环境说明 系统环境:centos6.5 [root@lo ...
- Linux下Nginx编译安装后的开机自启动设置
Linux下Nginx编译安装后的开机自启动设置 一.查看当前Nginx启动状态 二.而配置Nginx相关服务文件 三 .设置nginx命令 四.设置开机启动 五.测试开机启动 一.查看当前Nginx ...
- php编译安装与配置
[html] view plain copy php编译安装与配置 =========================================== 官网:http://php.net/ 官网下 ...
- nginx的安装与配置
1.nginx的安装与配置 编译安装nginx需要实现安装开发包组"Development tools"和"Server Platform Development&quo ...
- linux nginx编译详解,Linux下nginx编译安装教程和编译参数详解
这篇文章主要介绍了Linux下nginx编译安装教程和编译参数详解,需要的朋友可以参考下 一.必要软件准备 1.安装pcre 为了支持rewrite功能,我们需要安装pcre 复制代码 代码如下:# ...
- Ubuntu20.04中fastdfs,nginx的安装和配置(apt-get安装nginx添加fastdfs-nginx-module模块)
Ubuntu20.04中fastdfs,nginx的安装和配置 环境准备: 编译环境: Ubuntu20.04 使用的系统软件: fastdfs-6.07 fastdfs-nginx-module-1 ...
- Nginx的安装基础配置(windows、linux)以及搭建图片服务器(windows、阿里云),文件上传
Nginx的安装基础配置(windows.linux)以及搭建图片服务器(windows.阿里云),文件上传 本文目录 文章目录 Nginx的安装基础配置(windows.linux)以及搭建图片服务 ...
- 【nginx】nginx编译安装
nginx编译安装 nginx介绍 为什么要使用编译安装 编译安装详细步骤 解决软件的依赖关系,需要安装相关软件包 新建管理nginx的用户和组 下载并解压nginx 配置自己所需要的nginx的功能 ...
最新文章
- 在MFC中使用AFXBEGINTHREAD的方法
- P4343-[SHOI2015]自动刷题机【二分答案】
- linux下启动与关闭oracle监听与实例
- html 为什么ul不撑开,给li设置float浮动属性之后,无法撑开外层ul的问题。
- 【hadoop】Apach Hdoop 安全模式
- shell-脚本入门【转】
- jquery知识点总结(转)
- 【数据库】SQL建表
- App测试实战:测试内容、测试工具、测试效果
- linux磁盘扩容不影响原数据,linux 升级磁盘后扩容数据盘大小
- Auto病毒,落雪病毒,威金病毒,U盘病毒,魔波病毒,arp病毒,QQ病毒,熊猫烧香病毒,rose病毒清除方法
- Kotlin 中的 by lazy
- 关于eWebEditor-在线HTML编辑器控…
- hdu 校赛 油菜花王国
- 2022-05-14 ubuntu下OpenCV环境搭建成功
- 在python中使用matplotlib画简单折线图
- OPPOX9007_官方线刷包_救砖包_解账户锁
- U盘文件莫名丢失?这样做可轻松找回!
- 公司新来了个00后测试工程师,一副毛头小子的样儿,哪想到是新一代卷王...
- linux内核usleep,Linux下的usleep函数