如何在Ubuntu上安装MySQL
In this article, it will be shown how to install MySQL 5.7 and 8.0.19 versions on an Ubuntu 18.04 machine.
在本文中,将展示如何在Ubuntu 18.04计算机上安装MySQL 5.7和8.0.19版本。
MySQL is one of the most popular open-source relational database management systems and can be run on almost all platforms such as MS Windows, Linux, UNIX.
MySQL是最流行的开源关系数据库管理系统之一,可以在几乎所有平台上运行,例如MS Windows,Linux和UNIX。
先决条件 (Prerequisite)
To follow this article, Linux Ubuntu 18.04 must be installed on the machine.
要遵循本文,必须在计算机上安装Linux Ubuntu 18.04 。
By default, the latest MySQL version is included in the APT package repository. At the time of writing this article, it is MySQL 5.7 version. To install MySQL 8 version, you must manually add MySQL’s repository.
默认情况下,最新MySQL版本包含在APT软件包存储库中。 在撰写本文时,它是MySQL 5.7版本。 要安装MySQL 8版本,必须手动添加MySQL的存储库。
安装MySQL 5.7服务器 (Install MySQL 5.7 server)
The first command that needs to be executed via the terminal is:
需要通过终端执行的第一个命令是:
sudo apt update
This command will update the local repository index.
该命令将更新本地存储库索引。
To install MySQL from the APT repository, run the following command:
要从APT存储库安装MySQL,请运行以下命令:
sudo apt install MySQL-server

During the process of the installation, the [Y/n] question to continue with the installation may appear, press the Y key from the keyboard, and hit Enter. This will install MySQL on the system.
在安装过程中,可能会出现[Y / n]问题以继续安装,请按键盘上的Y键,然后按Enter键 。 这将在系统上安装MySQL。
To verify the version of installed MySQL, execute the following command:
要验证已安装MySQL版本,请执行以下命令:
mysql --version

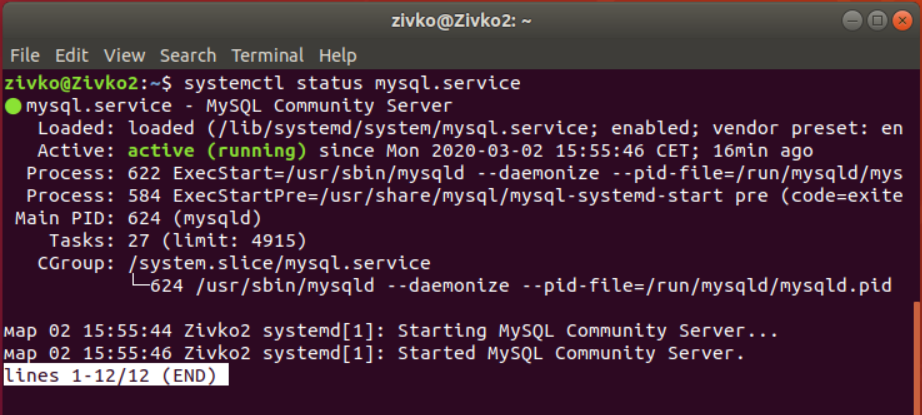
After the installation, the MySQL server should start automatically. To check if it’s running, execute the following command:
安装后,MySQL服务器应自动启动。 要检查它是否正在运行,请执行以下命令:
systemctl status mysql.service
If, for some reasons, MySQL server is not running, execute the following command to start the MySQL server:
如果由于某些原因MySQL服务器未运行,请执行以下命令以启动MySQL服务器:
sudo systemctl start mysql
配置MySQL服务器 (Configure MySQL server)
To improve the security of MySQL installation, use the mysql_secure_installation command:
为了提高MySQL安装的安全性,请使用mysql_secure_installation命令:
sudo mysql_secure_installation
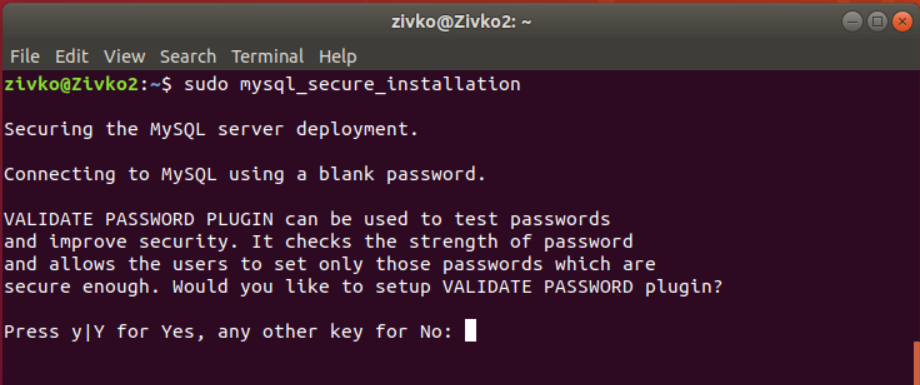
After you press the Enter key, the first thing that will appear is the VALIDATE PASSWORD plugin prompt window:
在按Enter键之后,将出现的第一件事是VALIDATE PASSWORD插件提示窗口:
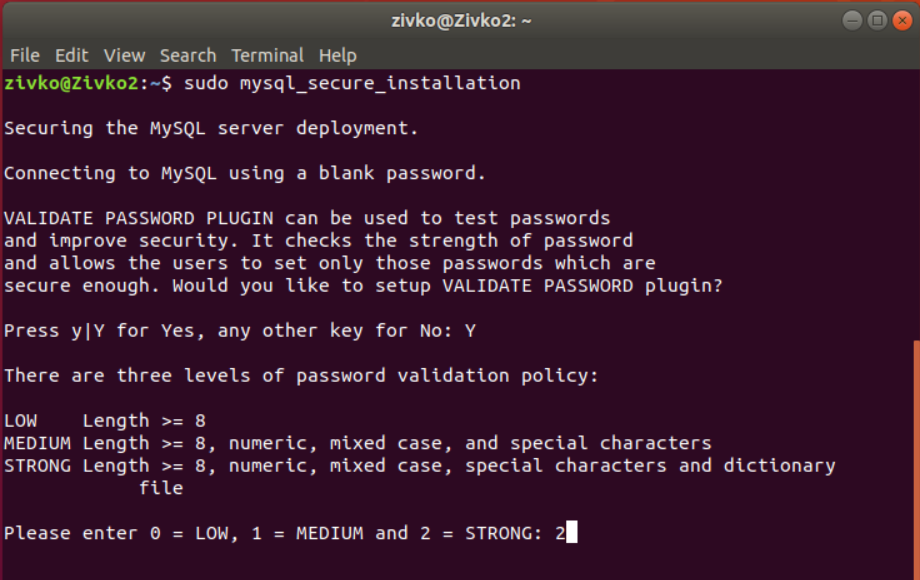
This step is to set up a secure password for the root user, depending on which type of password is chosen. Type the Y and press Enter. Enter the number for the password strength and press the Enter key:
此步骤是为root用户设置安全密码,具体取决于选择的密码类型。 输入 Y并按Enter键 。 输入密码强度数字,然后按Enter键:
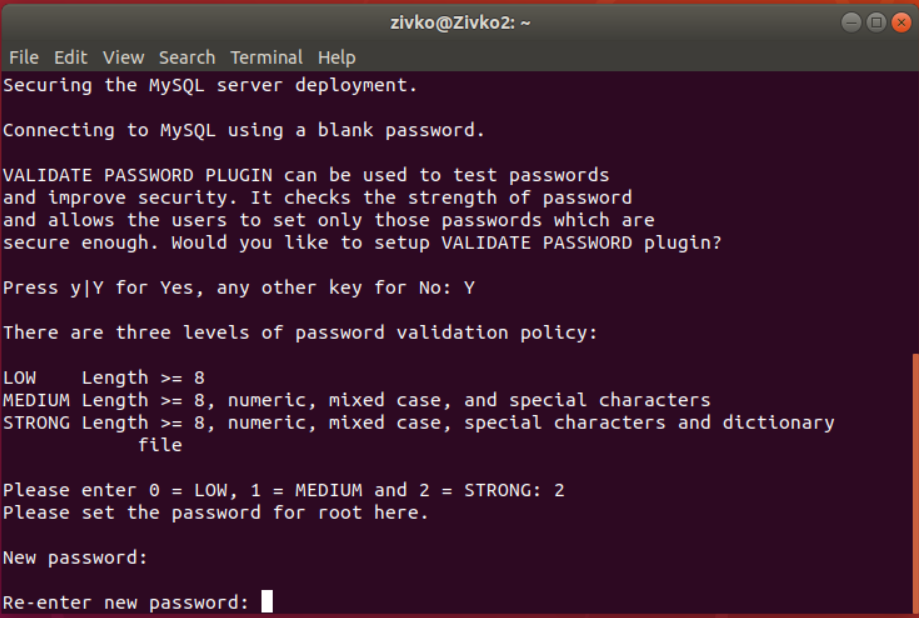
On the next screen, enter and re-enter the password:
在下一个屏幕上,输入并重新输入密码:
On the next step, the strength of the entered password will be shown and also will be prompted with the question to continue with the provided password. Chose Y and press the Enter key:
下一步,将显示输入密码的强度,并提示您输入密码以继续输入的密码。 选择Y并按Enter键:
In the next couple of steps, you will be prompted with the questions and, depending on the answers you provide, the security on your system will be set.
在接下来的两个步骤中,将提示您一些问题,并根据您提供的答案来设置系统的安全性。
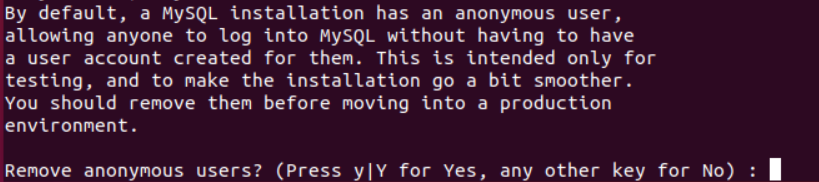
The first question is about removing anonymous test users. Press Y and hit the Enter key:
第一个问题是有关删除匿名测试用户的信息。 按Y并按Enter键:
The next question is about forbidding root login from remote systems. It is recommended for a root user to allow the connection from the local system and deny it from the remote connections. Chose Y and hit the Enter key:
下一个问题是关于禁止远程系统的root登录。 建议root用户允许来自本地系统的连接,并拒绝来自远程连接的连接。 选择Y并按Enter键:

The next question will be to remove the ‘test’ database. If you want to remove it, press Y and hit the Enter key:
下一个问题是删除“测试”数据库。 如果要删除它,请按Y并按Enter键:
In the last step, you will be asked to reload privilege tables in order for the above-mentioned changes to take effect. Press Y and hit Enter and all security settings will be committed:
在最后一步中,将要求您重新加载特权表,以使上述更改生效。 按Y 键,然后按Enter键 ,所有安全设置将被提交:
After the privilege tables are reloaded, the “All done!” message should appear:
重新加载特权表后,“全部完成!” 消息应该出现:
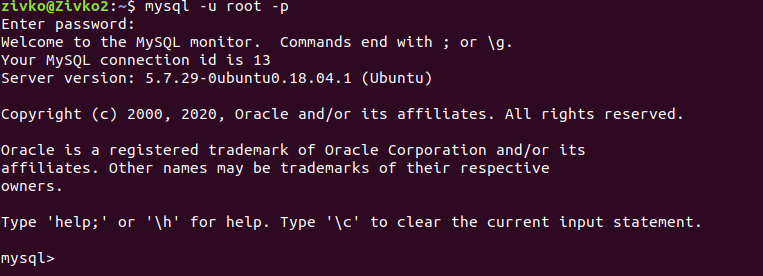
Now, when all is set, let’s login to MySQL with the root user. In the terminal, type the following command:
现在,完成所有设置后,让我们以root用户登录MySQL。 在终端中,键入以下命令:
mysql -u root -p
Insert a password for the root user and hit Enter. Instead of login to the MySQL instance, you will get the following message:
输入 root用户的密码,然后按Enter 。 您将收到以下消息,而不是登录MySQL实例:
zivko@Zivko2:~$ mysql -u root -p
Enter password:
ERROR 1698 (28000): Access denied for user ‘root’@’localhost’
zivko @ Zivko2:〜$ mysql -u root -p
输入密码:
错误1698(28000):用户'root'@'localhost'的访问被拒绝
By default, the root user is to use the auth_socket plugin authentication method rather than the password. To set the root user to use a password to connect to MySQL instance, the authentication method needs to be changed from the auth_socket to the mysql_native_password method.
默认情况下, root用户将使用auth_socket插件身份验证方法,而不是密码。 要设置root用户使用密码连接到MySQL实例,需要将身份验证方法从auth_socket更改为mysql_native_password方法。
To do this, firstly, connect to the MySQL instance using the sudo command in front of the MySQL user:
为此,首先,在MySQL用户前面使用sudo命令连接到MySQL实例:
sudo mysql -u root -p
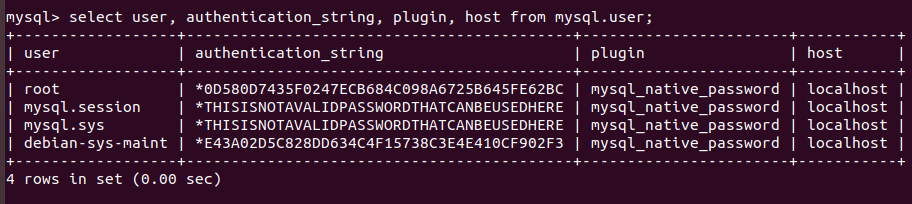
To check which authentication method each MySQL user uses, type the following command:
要检查每个MySQL用户使用哪种身份验证方法,请键入以下命令:
SELECT user,authentication_string,plugin,host FROM mysql.user;
As can be seen from the image above, the root user uses the auth_socket plugin. To set to root user authenticate with a password, execute the following command:
从上图可以看出, root用户使用auth_socket插件。 要设置使用密码对root用户进行身份验证,请执行以下命令:
ALTER USER 'root'@'localhost' IDENTIFIED WITH mysql_native_password BY '<set password>';
After executing the ALTER USER command, run the following command:
执行ALTER USER命令后,运行以下命令:
FLUSH PRIVILEGES;
This command will reload the grant tables and make the changes take effect. When checking which authentication method is used by the root user, you’ll get this:
此命令将重新加载授权表并使更改生效。 在检查root用户使用哪种身份验证方法时,您将获得以下信息:
Now, when trying to login to MySQL using the root user, you’ll be logged without any problems:
现在,当尝试使用root用户登录MySQL时,您将被顺利登录:
安装MySQL 8服务器 (Install MySQL 8 server)
If you want to install the latest MySQL version, in this case, MySQL 8 version, the first thing that needs to be done is to download the latest release package using the wget command from the MySQL APT Repository:
如果要安装最新MySQL版本(在这种情况下为MySQL 8版本),则需要做的第一件事是使用MySQL APT存储库中的wget命令下载最新的发行包:
wget -c https://dev.mysql.com/get/mysql-apt-config_0.8.15-1_all.deb
To install MySQL package, execute the command below:
要安装MySQL软件包,请执行以下命令:
sudo dpkg -i mysql-apt-config_0.8.15-1_all.deb
In the first window that will be shown, select the first line and hit the Enter key:
在将显示的第一个窗口中,选择第一行并按Enter键:
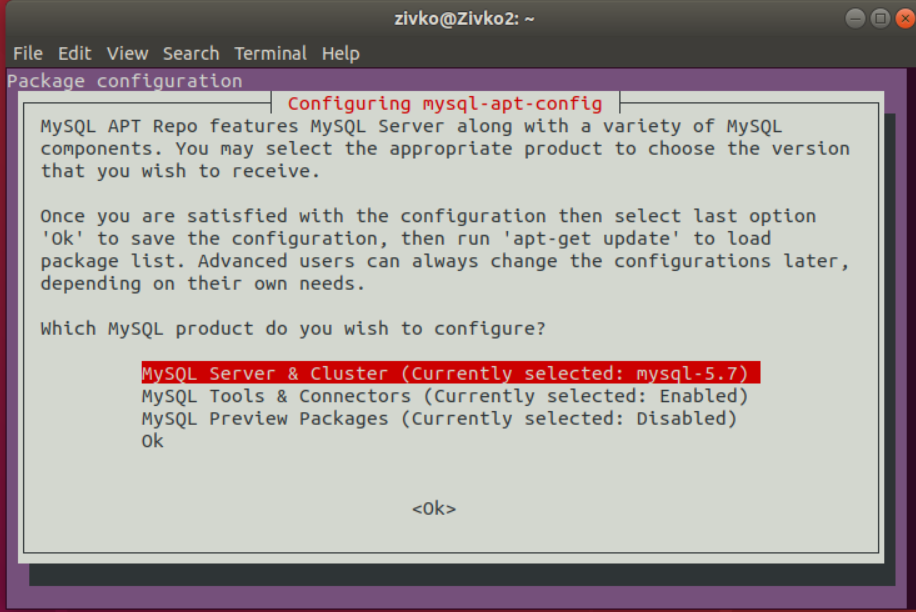
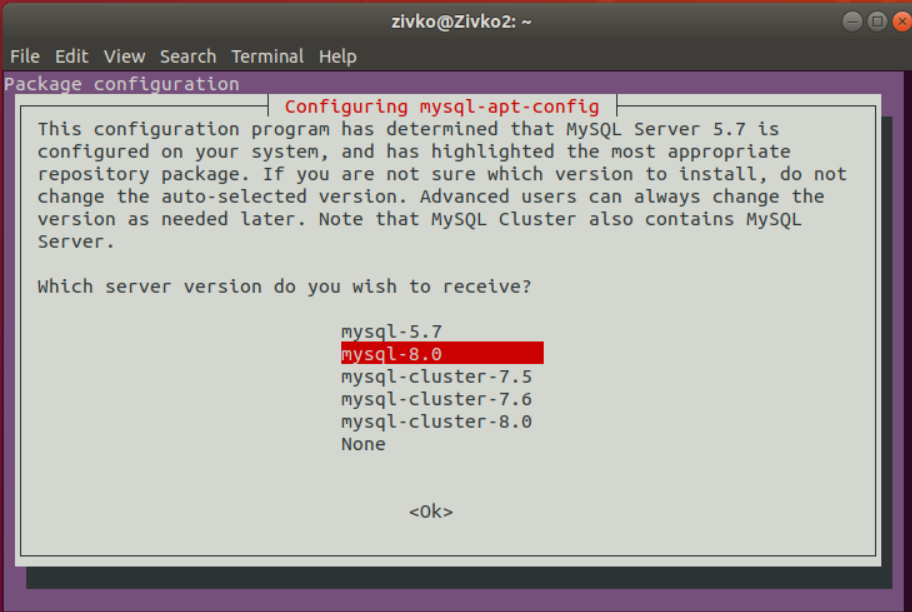
In the second window, the MySQL version can be selected. Here, you can choose between MySQL 8.0 or 5.7 version. Choose MySQL 8.0 version and press the Enter key to proceed:
在第二个窗口中,可以选择MySQL版本。 在这里,您可以选择MySQL 8.0或5.7版本。 选择MySQL 8.0版本,然后按Enter键继续:
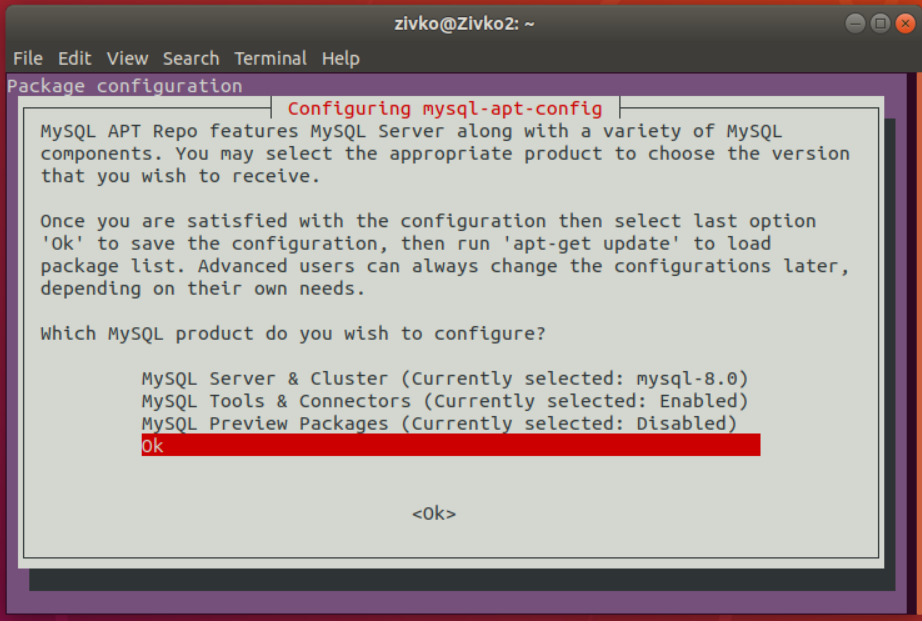
Now, select the last line with the Ok text and press the Enter key to continue:
现在,选择带有“ 确定”文本的最后一行,然后按Enter键继续:
Now, in terminal to download the latest package information from all repositories including the recently added MySQL repository, execute the following command:
现在,在终端上从所有存储库下载最新的软件包信息,包括最近添加MySQL存储库,执行以下命令:
sudo apt update
To install MySQL 8, execute again the command that we used to install MySQL 5.7 version:
要安装MySQL 8,再次执行用于安装MySQL 5.7版本的命令:
sudo apt install MySQL-server
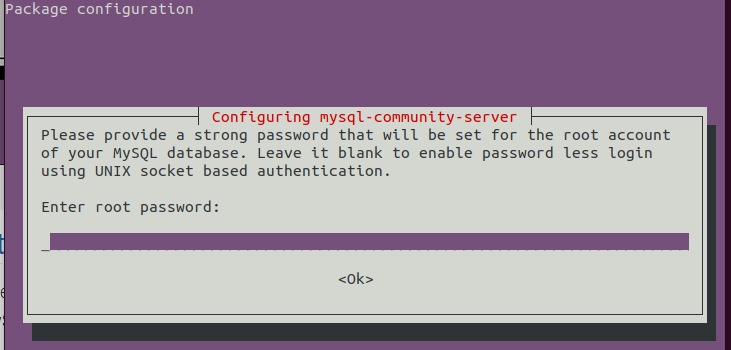
In the beginning, it will be prompted to insert a password for the root user. Enter the password and press Enter:
首先,将提示您为root用户插入密码。 输入密码,然后按Enter键 :
In the next window, insert the password again for the root user and hit Enter:
在下一个窗口中,再次输入 root用户的密码,然后按Enter键 :
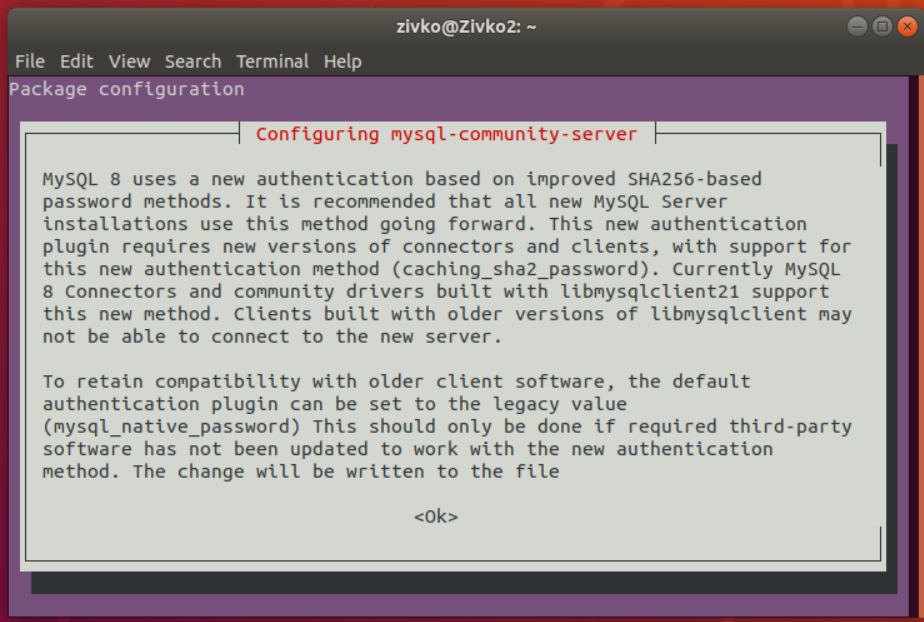
Next, some information about the new authentication system based on SHA256-based password methods will be shown, use the right arrow to select the Ok button and hit Enter to proceed:
接下来,将显示有关基于基于SHA256的密码方法的新身份验证系统的一些信息,使用向右箭头选择“ 确定”按钮,然后按Enter继续:
In the next window, you will be asked to choose the authentication plugin, select the first one, and hit Enter:
在下一个窗口中,将要求您选择身份验证插件,选择第一个,然后按Enter :
After this step, the installation of MySQL 8 will proceed, and the server will be installed in your system. To check the installed MySQL version, use the following command:
完成此步骤后,将继续安装MySQL 8,并将服务器安装在您的系统中。 要检查已安装MySQL版本,请使用以下命令:
mysql -V
To see more information about MySQL server, execute the following command:
要查看有关MySQL服务器的更多信息,请执行以下命令:
mysqladmin -u root -p version
卸载MySQL服务器 (Uninstall MySQL server)
To remove MySQL from Ubuntu 18.04, firstly, MySQL server needs to be stopped from services by executing the command below:
要从Ubuntu 18.04中删除MySQL,首先,需要通过执行以下命令从服务中停止MySQL服务器:
sudo service mysql stop
Then, use the purge command to uninstall:
然后,使用purge命令进行卸载:
sudo apt-get purge mysql-server mysql-client
In the prompted window, select the Yes button and press Enter:
在提示的窗口中,选择“ 是”按钮,然后按Enter :
Then type and execute these two commands:
然后键入并执行以下两个命令:
sudo apt-get autoremove
sudo apt-get autoclean
翻译自: https://www.sqlshack.com/how-to-install-mysql-on-ubuntu-18-04/
如何在Ubuntu上安装MySQL相关推荐
- 如何在Ubuntu上安装MariaDB
We can install MariaDB on Ubuntu from the Ubuntu repositories or the official MariaDB repositories. ...
- pip安装deb_技术|如何在 Ubuntu 上安装 pip
pip 是一个命令行工具,允许你安装 Python 编写的软件包. 学习如何在 Ubuntu 上安装 pip 以及如何使用它来安装 Python 应用程序. 有许多方法可以在 Ubuntu 上安装软件 ...
- 如何在Ubuntu上安装GCC编译器
如何在Ubuntu上安装GCC编译器 1.首先更新包列表 sudo apt update 2.安装build-essential软件包: sudo apt install build-essentia ...
- 如何在Ubuntu上安装最新版本的Node js
如何在Ubuntu上安装最新版本的Node.js 作者:chszs,转载需注明.博客主页:http://blog.csdn.net/chszs Node.js是一个软件平台,通常用于构建大规模的服务器 ...
- 在没有密码提示的情况下在Ubuntu上安装MySQL
本文翻译自:Install MySQL on Ubuntu without a password prompt How do I write a script to install MySQL ser ...
- ubuntu ftp服务器_如何在Ubuntu上安装FTP服务器?
ubuntu ftp服务器 In this tutorial, let's learn how to install FTP server on Ubuntu. FTP or File Transfe ...
- couchdb 安装_如何在Ubuntu上安装CouchDB –分步指南
couchdb 安装 In this tutorial, we'll go over how to install CouchDB on Ubuntu. CouchDB is a NoSQL data ...
- ubuntu的web服务器_如何在Ubuntu上安装OpenLiteSpeed Web服务器?
ubuntu的web服务器 Want to install OpenLiteSpeed Webserver on Ubuntu? Today we're going to do just that. ...
- 如何在 ubuntu 上安装 mercury mw150us 网卡驱动
如何在 ubuntu 上安装 mercury mw150us 网卡驱动 为笔记本购买了这种无线网卡,下面去驱动安装方式 应为lsusb 可以看出obda:8179 这个类型,查了一下这个驱动就是818 ...
最新文章
- ubuntu如何设置环境变量,方便log输出路径?(shell文件)
- Sqlserver:sp_recompile的副作用
- 变量的定义 声明和初始化和static
- 物理隔离已是过去 工控网络如何更好地保护SCADA
- 【转】javax.xml.transform.TransformerFactoryConfigurationError
- Oren NayarModel
- LeetCode 1230. 抛掷硬币(DP)
- 2使用教学_建水三中智能交互式液晶一体机设备投入使用
- SyntaxError: invalid syntax-python报错
- 2019 6.30学习笔记
- 使用crypt生成用户密码-Tested on RedHat SuSE Platform
- 4x4矩阵键盘c语言,4X4键盘矩阵键盘程序
- python 手机号码归属地 软件,Python查询手机号码归属地几种方法
- 计算机主板测评,性能测试及评测室总结
- AWS宣布计划在加拿大开设第二个区域
- 唤起Android手机中已安装的地图应用
- 命令行解析模块 以及 metavar 和dest的理解
- 关于一句英文句子的词数的判断
- Eloquent: 修改器
- python处理数据