python程序实例源代码-Python 神经网络手写识别实例源码
深度学习和神经网络对很多初学者来说都是摸不着头脑,今天分享一个完整的手写识别的实例,学习和理解了这个实例代码和过程就基本上掌握了神经网络。
1、构建神经网络类 network_claas.py
#!/usr/bin/env python3
# -*- coding: utf-8 -*-
# neural network class definition
import scipy.special
import numpy
# library for plotting arrays
import matplotlib.pyplot
# helper to load data from PNG image files# helpe
import imageio
# glob helps select multiple files using patterns
import glob
class neuralNetwork :
# initialise the neural network
def __init__(self, inputnodes, hiddennodes, outputnodes, learningrate) :
#set number of nodes in each input , hidden , output
#初始化网络,设置输入层,中间层,和输出层节点数
self.inodes = inputnodes
self.hnodes = hiddennodes
self.onodes = outputnodes
# link weight matrices, wih and who
# weights inside the arrays are w_ i_ j, where link is from node i to node j in the next layer
# w11 w21
# w12 w22 etc
# 初始化权重矩阵,我们有两个权重矩阵,一个是wih表示输入层和中间层节点间链路权重形成的矩阵一个是who,表示中间层和输出层间链路权重形成的矩阵
self. wih = numpy.random.normal( 0.0, pow( self. hnodes, -0.5), (self. hnodes, self. inodes))
self. who = numpy.random.normal( 0.0, pow( self. onodes, -0.5), (self. onodes, self. hnodes))
# learning rate
self.lr = learningrate
# activation function is the sigmoid function
# 设置激活函数的反函数
self.activation_function = lambda x:scipy.special.expit(x)
pass
# train the neural network
def train(self, inputs_list, targets_list) :
# convert inputs list to 2d array
#根据输入的训练数据更新节点链路权重
#把inputs_list, targets_list转换成numpy支持的二维矩阵.T表示做矩阵的转置
inputs = numpy.array(inputs_list, ndmin=2).T
targets = numpy.array(targets_list, ndmin=2).T
# calculate signals into hidden layer
#计算信号经过输入层后产生的信号量
hidden_inputs = numpy.dot(self.wih, inputs)
# calculate the signals emerging from hidden layer
#中间层神经元对输入的信号做激活函数后得到输出信号
hidden_outputs = self.activation_function(hidden_inputs)
# calculate signals into final output layer
#输出层接收来自中间层的信号量
final_inputs = numpy.dot(self.who, hidden_outputs)
# calculate the signals emerging from final output layer
#输出层对信号量进行激活函数后得到最终输出信号
final_outputs = self.activation_function(final_inputs)
# output layer error is the (target - actual)
#计算误差
output_errors = targets - final_outputs
# hidden layer error is the output_errors, split by weights, recombined at hidden nodes
hidden_errors = numpy.dot(self.who.T, output_errors)
#根据误差计算链路权重的更新量,然后把更新加到原来链路权重上
# update the weights for the links between the hidden and output layers
self.who += self.lr * numpy.dot((output_errors * final_outputs * (1.0 - final_outputs)), numpy.transpose(hidden_outputs))
# update the weights for the links between the input and hidden layers
self.wih += self.lr * numpy.dot((hidden_errors * hidden_outputs * (1.0 - hidden_outputs)), numpy.transpose(inputs))
pass
# query the neural network
def query(self, inputs_list) :
#根据输入数据计算并输出答案
# convert inputs list to 2d array
inputs = numpy.array(inputs_list, ndmin=2).T
#计算中间层从输入层接收到的信号量
# calculate signals into hidden layer
hidden_inputs = numpy.dot(self.wih, inputs)
#计算中间层经过激活函数后形成的输出信号量
# calculate the signals emerging from hidden layer
hidden_outputs = self.activation_function(hidden_inputs)
#计算最外层接收到的信号量
# calculate signals into final output layer
final_inputs = numpy.dot(self.who, hidden_outputs)
# calculate the signals emerging from final output layer
final_outputs = self.activation_function(final_inputs)
return final_outputs
2、初始化及训练测试该网络
#!/usr/bin/env python3
# -*- coding: utf-8 -*-
from network_claas import neuralNetwork
import numpy
import matplotlib
import glob
import imageio
# library for plotting arrays
import matplotlib.pyplot as plt
import pylab
# ensure the plots are inside this notebook, not an external window
#初始化网络
# number of input, hidden and output nodes
input_nodes = 784
hidden_nodes = 100
output_nodes = 10
#初始化学习率
# learning rate is 0.3
learning_rate = 0.3
# create instance of neural network
# 初始化神经网络
n = neuralNetwork(input_nodes,hidden_nodes,output_nodes, learning_rate)
# load the mnist training data CSV file into a list
training_data_file = open("mnist_dataset/mnist_train_100.csv", 'r')
training_data_list = training_data_file.readlines()
training_data_file.close()
# train the neural network
# epochs is the number of times the training data set is used for training
epochs = 5
for e in range( epochs):
# go through all records in the training data set
for record in training_data_list:
# split the record by the ',' commas
all_values = record.split(',')
# scale and shift the inputs
inputs = (numpy.asfarray( all_values[1:]) / 255.0 * 0.99) + 0.01
# create the target output values (all 0.01, except the desired label which is 0.99)
targets = numpy.zeros(output_nodes) + 0.01
# all_values[0] is the target label for this record
targets[int(all_values[0])] = 0.99
n.train(inputs, targets)
pass
# load the mnist test data CSV file into a list
test_data_file = open("mnist_dataset/mnist_test_10.csv", 'r')
test_data_list = test_data_file.readlines()
test_data_file.close()
# test the neural network
# scorecard for how well the network performs, initially empty
scorecard = []
# go through all the records in the test data set
for record in test_data_list:
# split the record by the ',' commas
all_values = record.split(',')
# correct answer is first value
correct_label = int( all_values[ 0])
# scale and shift the inputs
inputs = (numpy.asfarray( all_values[ 1:]) / 255.0 * 0.99) + 0.01
# query the network
outputs = n.query( inputs)
# the index of the highest value corresponds to the label
label = numpy.argmax( outputs)
# append correct or incorrect to list
if (label == correct_label):
# network' s answer matches correct answer, add 1 to scorecard
scorecard.append( 1)
else:
# network' s answer doesn' t match correct answer, add 0 to scorecard
scorecard.append( 0)
pass
pass
# calculate the performance score, the fraction of correct answers
scorecard_array = numpy.asarray( scorecard)
print ("performance = ", scorecard_array.sum() / scorecard_array.size)
# our own image test data set# our o
our_own_dataset = []
# load the png image data as test data set
for image_file_name in glob.glob('my_own_images/2828_my_own_?.png'):
# use the filename to set the correct label
label = int(image_file_name[-5:-4])
# load image data from png files into an array
print ("loading ... ", image_file_name)
img_array = imageio.imread(image_file_name, as_gray=True)
# reshape from 28x28 to list of 784 values, invert values
img_data = 255.0 - img_array.reshape(784)
# then scale data to range from 0.01 to 1.0
img_data = (img_data / 255.0 * 0.99) + 0.01
print(numpy.min(img_data))
print(numpy.max(img_data))
# append label and image data to test data set
record = numpy.append(label,img_data)
our_own_dataset.append(record)
pass
# record to test
item = 2
# plot image
plt.imshow(our_own_dataset[item][1:].reshape(28,28), cmap='Greys', interpolation='None')
# correct answer is first value
correct_label = our_own_dataset[item][0]
# data is remaining values
inputs = our_own_dataset[item][1:]
# query the network
outputs = n.query(inputs)
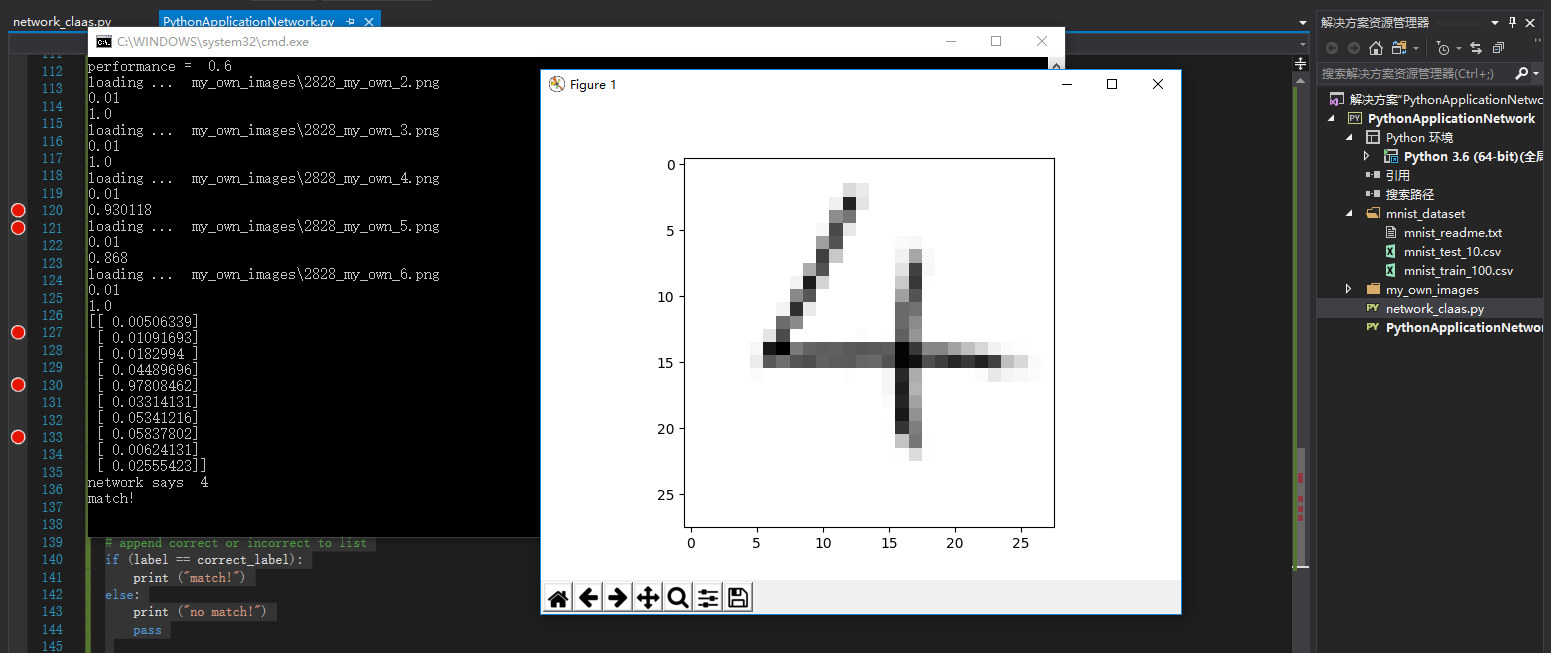
print (outputs)
# the index of the highest value corresponds to the label
label = numpy.argmax(outputs)
print("network says ", label)
# append correct or incorrect to list
if (label == correct_label):
print ("match!")
else:
print ("no match!")
pass
pylab.show()
3,输出如下:
4,完整代码如下:
python程序实例源代码-Python 神经网络手写识别实例源码相关推荐
- python手写板,机器语言之手写识别_源码时代Python公开课|Python培训
课程介绍 当我们在手写设备(例如我们输入法中的手写模式),使用手写的文字,我们计算机是如何快速准确的识别出来的?每个人,甚至是同一个人,每次手写的字都不是完全一样,计算机不是人,它是怎么做到的呢?难道 ...
- “手写识别”实例介绍
图像识别: 图像识别(Image Recognition)是指利用计算机对图像进行处理.分析 和理解,以识别各种不同模式的目标和对像的技术. 图像识别的发展经历了三个阶段:文字识别.数字图像处 ...
- android米聊手写和涂鸦源码,Android访米聊手写和涂鸦源码
Android访米聊手写和涂鸦源码 \请下载源代码,只上传Android访米聊手写和涂鸦源码源程序列表内容,如果需要此程序,请点击-下载,下载需要资料源代码. Android访米聊手写和涂鸦源码.ra ...
- 前端进阶-手写Vue2.0源码(三)|技术点评
前言 今天是个特别的日子 祝各位女神女神节快乐哈 封面我就放一张杀殿的帅照表达我的祝福 哈哈 此篇主要手写 Vue2.0 源码-初始渲染原理 上一篇咱们主要介绍了 Vue 模板编译原理 它是 Vue ...
- 【Python】基于kNN算法的手写识别系统的实现与分类器测试
基于kNN算法的手写识别系统 1. 数据准备 使用windows画图工具,手写0-9共10个数字,每个数字写20遍,共200个BMP文件. 方法如下,使用画图工具,打开网格线,调整像素为32 ...
- Python纯手动搭建BP神经网络--手写数字识别
1 实验介绍 实验要求: 实现一个手写数字识别程序, 如下图所示, 要求神经网络包含一个隐层, 隐层的神经元个数为 15. 整体思路:主要参考西瓜书第五章神经网络部分的介绍,使用批量梯度下降对神经网络 ...
- 【214情人节】低调奢华有内涵的python程序猿撒狗粮的正确姿势(附源码)
目录 一. 效果演示 1. 原图-效果图对比 2. 看出两张图片的区别了吗? 二. 代码架构 三. 功能实现 3.1 图片处理 3.2 html 使用form表单,真心话和图片文件的布局 3.3 js ...
- android米聊手写和涂鸦源码,涂鸦手写齐上阵 新版米聊将快乐进行到底
"米聊"是由小米科技出品的一款多平台,跨移动.联通.电信运营商的手机端免费即时通讯工具,通过手机网络(WiFi.3G.GPRS),可以跟你的米聊联系人进行无限量的免费的实时的语音对 ...
- android米聊手写和涂鸦源码,米聊Android新版发布 广播也能玩涂鸦
[IT168 应用]想让朋友知道你在哪儿?简单的文字无法表达此时的心情?想和好友一起互动,评论对方的最新广播?米聊Android新版轻松搞定! 米聊Android新版特色 广播也涂鸦:米聊Androi ...
最新文章
- oracl 、mysql在线查看文档
- 从MyEclipse到IntelliJ IDEA ——让你脱键盘,全键盘操作
- 【 FPGA 】UltraFast设计方法学:时序约束
- windows 安装python-pcl 测试ok
- Spring AOP + AspectJ Annotation Example---reference
- hacktoberfest_我第一次参加Hacktoberfest中学到了什么
- 大数据处理系统关键层次架构
- 线性代数 : 方程组的几何解释
- Unity插件-HighlightingSystem(边缘光)
- antd table input 失焦的问题
- OA系统(海信集团)双因素身份认证解决方案
- 如何将域名和网站转入香港主机
- 关键词、词库、关键词词库
- 域名可以修改绑定的服务器么,域名备案绑定的服务器可以改么
- Android中ListView下拉刷新的实现
- 五子棋(含较高级的人机对战)
- web前端基础——超链接(dw笔记版)
- ios上查看html源码,如何在ios手机端的Safari浏览器中“查看网页源代码”
- 接入Google Sdk 遇到的坑
- 2010 Esri中国区域用户大会9月14日开幕