使用Javascript的跨浏览器支持的图像偏斜效果
Image shaking effect with javascript. Today’s lesson quite entertaining, we’ll learn how to construct a shaking effect. For clarity, we will apply this effect to the picture. You will need to hold down by mouse a certain area in the image and move it to another location (drag). Now, I sure that better to see our online demonstration. How did it achieve? In principle, simply enough, the entire ‘image’ divided into 4 sectors. Place, where we will begin to drag by mouse – is the boundary separating of our four pictures. And shaking effect itself – will only change the sizes of our sectors and pictures in them. Read more.
图像抖动与javascript。 今天的课程非常有趣,我们将学习如何构建震撼效果。 为了清楚起见,我们将这种效果应用于图片。 您将需要用鼠标按住图像中的某个区域,然后将其移动到另一个位置(拖动)。 现在,我相信最好看一下我们的在线演示。 它是如何实现的? 原则上,很简单,整个“图像”分为四个部分。 我们将开始用鼠标拖动的地方–是四张图片的边界。 抖动效果本身–只会更改我们的扇区和其中的图片的大小。 。
Here are samples and downloadable package:
以下是示例和可下载的软件包:
现场演示
[sociallocker]
[社交储物柜]
打包下载
[/sociallocker]
[/ sociallocker]
Ok, download the example files and lets start coding !
好的,下载示例文件并开始编码!
步骤1. HTML (Step 1. HTML)
As usual, we start with the HTML. This is source code of our sample:
和往常一样,我们从HTML开始。 这是我们示例的源代码:
index.html (index.html)
<html>
<head><title>Image shaking effect using pure JavaScript</title><link rel="stylesheet" type="text/css" href="css/main.css" /><script type="text/javascript" src="js/main.js"></script>
</head><body><div class="example"><div id="main_object"><div class="tl"><img alt="" src="data:image.jpg"></div><div class="tr"><img alt="" src="data:image.jpg"></div><div class="bl"><img alt="" src="data:image.jpg"></div><div class="br"><img alt="" src="data:image.jpg"></div></div></div></body>
</html>
Here are main object with 4 images inside
这是里面有4张图像的主要对象
步骤2. CSS (Step 2. CSS)
Here are single CSS file with all necessary styles:
这是具有所有必要样式的单个CSS文件:
css / main.css (css/main.css)
body{background:#eee;margin:0;padding:0}
.example{background:#FFF;width:900px;border:1px #000 solid;margin:20px auto;padding:15px;-moz-border-radius: 3px;-webkit-border-radius: 3px}
#main_object{position:relative;width:900px;height:675px;overflow:hidden;cursor:pointer}
#main_object div{position:absolute;overflow:hidden}
#main_object img{position:absolute;-ms-interpolation-mode:nearest-neighbor}
#main_object .tl,#main_object .tl img{top:0;left:0}
#main_object .tr,#main_object .tr img{top:0;right:0}
#main_object .bl,#main_object .bl img{bottom:0;left:0}
#main_object .br,#main_object .br img{right:0;bottom:0}
步骤3. JS (Step 3. JS)
Here are our main Javascript:
这是我们的主要Javascript:
js / main.js (js/main.js)
var ishk = {// variablesspeedD : .98, // degree of attenuationspeedX : 50, // speed by XspeedY : 60, // speed by X// inner variablesxm   : 0,ym   : 0,sx   : 1,sy   : 1,svx  : 0,svy  : 0,xd   : 1,yd   : 1,drag : false,// initializationinit : function() {// firstly we will pass through all inner div`s and its images and collect stylesthis.mobj = document.getElementById('main_object');var div = this.mobj.getElementsByTagName('div');this.d = [];this.i = [];for (var i = 0; i<4; i++) {this.d[i] = div[i].style;this.i[i] = div[i].getElementsByTagName('img')[0].style;}// set initial params of our generated resultthis.resize();// prevent text selection in IEdocument.onselectstart = function() {return false;}// prevent IE from trying to drag an imagethis.mobj.ondrag = function() {return false;}// mouse down event, we will set 'drag flag to true, change cursor and positionsthis.mobj.onmousedown = function() {ishk.drag = true;ishk.mobj.style.cursor = 'move';ishk.xd = ishk.xm - ishk.nx;ishk.yd = ishk.ym - ishk.ny;return false;}// on mouse up - release 'drag' flag, change pointerdocument.onmouseup = function() {ishk.drag = false;ishk.mobj.style.cursor = 'pointer';return false;}// set max sizes to last imagethis.i[3].width =  ishk.nw;this.i[3].height = ishk.nh;// and initial positions tooishk.sx = ishk.nx;ishk.sy = ishk.ny;// start loopingthis.shake();},// refreshing mouse positionsmousemove : function(e) {this.xm = e.clientX;this.ym = e.clientY;},// sub init of initial positions, plus, in case of window resizing - repeat tooresize : function() {var o = ishk.mobj;for (ishk.nx = 0, ishk.ny = 0; o != null; o = o.offsetParent)ishk.nx += o.offsetLeft, ishk.ny += o.offsetTop;ishk.nw = ishk.mobj.offsetWidth;ishk.nh = ishk.mobj.offsetHeight;},// main shaking functionshake : function() {// in case of mouse move and dragging - change center positionif (ishk.drag) {ishk.sx = ishk.xm;ishk.sy = ishk.ym;} else { // otherwise - attenuationishk.svx = ishk.speedD * ishk.svx - (ishk.sx - ishk.xd - ishk.nx) / ishk.speedX;ishk.svy = ishk.speedD * ishk.svy - (ishk.sy - ishk.yd - ishk.ny) / ishk.speedY;ishk.sx += ishk.svx;ishk.sy += ishk.svy;}// calculation new widths and heights of our div`s and imagesvar w0 = Math.max(0, Math.round(ishk.sx) - ishk.nx);var h0 = Math.max(0, Math.round(ishk.sy) - ishk.ny);var w1 = Math.max(0, ishk.nw - (Math.round(ishk.sx) - ishk.nx));var h1 = Math.max(0, ishk.nh - (Math.round(ishk.sy) - ishk.ny));var w2 = Math.max(0, Math.round((w0 * ishk.nw) / ishk.xd));var h2 = Math.max(0, Math.round((h0 * ishk.nh) / ishk.yd));var w3 = Math.max(0, Math.round((w1 * ishk.nw) / (ishk.nw - ishk.xd)));var h3 = Math.max(0, Math.round((h1 * ishk.nh) / (ishk.nh - ishk.yd)));// apply new widthsishk.d[0].width = w0 + 'px';ishk.d[1].width = w1 + 'px';ishk.d[2].width = w0 + 'px';ishk.d[3].width = w1 + 'px';ishk.d[0].height = h0 + 'px';ishk.d[1].height = h0 + 'px';ishk.d[2].height = h1 + 'px';ishk.d[3].height = h1 + 'px';ishk.i[0].width = w2 + 'px';ishk.i[1].width = w3 + 'px';ishk.i[2].width = w2 + 'px';ishk.i[3].width = w3 + 'px';ishk.i[0].height = h2 + 'px';ishk.i[1].height = h2 + 'px';ishk.i[2].height = h3 + 'px';ishk.i[3].height = h3 + 'px';// looping current functionsetTimeout(ishk.shake, 20); // 1/50*1000 = 20ms (for 50 fps) :)}
};
window.onload = function() {ishk.init(); // first initialization// binding mouse move eventdocument.onmousemove = function(e) {if (window.event) e = window.event; // for IEishk.mousemove(e);}// binding onresize eventwindow.onresize = ishk.resize;
}
It is rather simple. When the page loads – I initialize our main object, and link all the necessary events. Then, after initialization, I loop our main ‘shake’ function, which changing sizes of all our 4 images (sectors).
这很简单。 页面加载时–我初始化我们的主对象,并链接所有必要的事件。 然后,在初始化之后,我循环我们的主要“摇动”功能,该功能会更改所有4个图像(扇区)的大小。
步骤4.图片 (Step 4. Images)
For our demo I used only one image:
对于我们的演示,我只使用了一张图像:
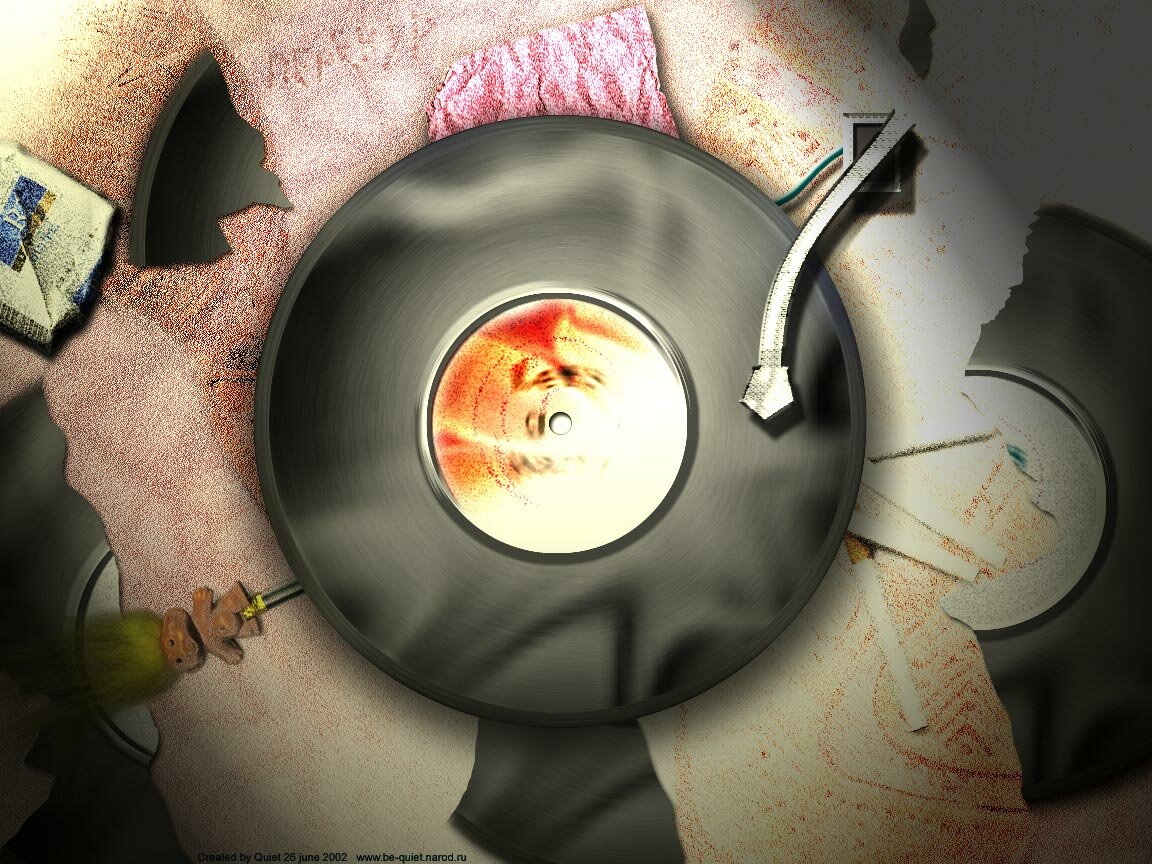
现场演示
结论 (Conclusion)
Today I told you how to create easy shaking effect to images. Commonly – you can try to play with any another objects too. Hope our javascript lessons still interesting for you. Good luck!
今天,我告诉您如何对图像创建轻松的抖动效果。 通常-您也可以尝试与其他任何物体一起玩。 希望我们JavaScript课程对您仍然很有趣。 祝好运!
翻译自: https://www.script-tutorials.com/cross-browser-image-shaking-effect-using-javascript/
使用Javascript的跨浏览器支持的图像偏斜效果相关推荐
- 跨浏览器和跨平台甘特图dhtmlxGantt,选择它的6个理由!
产品上新啦!对甘特图感兴趣的小伙伴可以看过来啦!慧都最新上线了一款甘特图产品--dhtmlxGantt! dhtmlxGantt是用于跨浏览器和跨平台应用程序的功能齐全的Gantt图表.可满足项目管理 ...
- CSS实现跨浏览器兼容性的盒阴影效果
2019独角兽企业重金招聘Python工程师标准>>> CSS实现跨浏览器兼容性的盒阴影效果 一.无关紧要碎碎念 在web页面的ui表现中,投影效果可以说是非常常见的一种表现效果了. ...
- html 禁止页面回弹,JavaScript禁止微信浏览器下拉回弹效果
本文实例为大家分享了JavaScript禁止微信浏览器下拉回弹的效果,供大家参考,具体内容如下 方法1: var overscroll = function(el){ el.addEventListe ...
- Firefox Quantum支持跨浏览器插件架构
最新发布的Firefox 57 "Quantum"加入到Chrome和Edge的行列,现在只支持基于WebExtensions API的扩展插件,也就是基于跨浏览器的扩展架构,使用 ...
- 《JavaScript忍者秘籍》——1.3 跨浏览器注意事项
本节书摘来自异步社区<JavaScript忍者秘籍>一书中的第1章,第1.3节,作者:[美]John Resig(莱西格) , Bear Bibeault(贝比奥特) 译者: 徐涛 更多章 ...
- html5图片灰度显示,实现各浏览器html图像灰度 跨浏览器图像灰度(grayscale)解决方案...
实现图像灰度(grayscale)最初有ie6推出的专属属性filter实现,后来在css3里w3c实现了标准的filter,但是在不同浏览器的实现程度不一样,因此需要一种浏览器兼容的解决方案. IE ...
- jQuery一步一步实现跨浏览器的可编辑表格,支持IE、Firefox、Safari、
脚 本 之 家 www.jb51.net 脚本云 专题 素材下载 电子书 软件下载 源码下载 服务器常用软件 a5交易 首页 网页制作 脚本专栏 脚本下载 网络编程 数据库 CMS教程 电子书籍 平面 ...
- swfobject java_swfsound基于SWFObject,允许跨平台、跨浏览器的声音支持HTML / JavaScri...
swfsound基于SWFObject,允许跨平台.跨浏览器的声音支持HTML / JavaScri 2016-08-23 0 0 0 暂无评分 其他 1 积分下载 如何获取积分? **SWFSoun ...
- marbin mysql_跨浏览器图像灰度(grayscale)解决方案
首先,你需要在一个svg里声明滤镜,该svg可以内嵌到html文件里,也可以单独保存. [html] view plaincopy 如果该文件保存成了单独的文件gray.svg,我们可以在html文件 ...
最新文章
- owc_绘图区(PlotArea)背景显示多种颜色
- 旅游网站的主页代码_山西太原网站SEO优化推广联系电话
- 中国人写的编译器-值得看看
- 7-9 输出大写英文字母 (15 分)
- 触发日期spring3整合quartz实现任务调度功能
- H5页面快速搭建之高级字体应用实践
- 数据结构-阶段性理解
- Unity 手动下载汉化包并安装
- 光网络时代网络工程师成长路线图
- excel冻结窗口_东莞黄江办公自动化培训零基础电脑Excel培训中心
- java开根号函数_如何在Java中计算平方根和平方根?
- CAD图纸打印自动排版
- ps计算机内存不足请保存文件并关闭,保存技巧,如何解决PS内存不足无法存储的错误提示情况...
- html自定义指针,如何自定义鼠标指针 怎样在wpf中自定义鼠标指针
- 将EXCEL插入SOLIDWORKS工程图的方法简介
- mysql客户端如何登录_MySQL-客户端登录问题
- bzoj1146整体二分+树链剖分+树状数组
- 关于UEM 统一终端管理
- 普通程序员真实的各个面试心酸历程——愿世界没有Java技术面试
- 2022危险化学品经营单位安全管理人员考试试题及在线模拟考试