vue 分步引导组件_引导卡组件:完整介绍
vue 分步引导组件
In this article, I’m going to introduce you to the Bootstrap card component and walk you through its many features and uses. By the end of this tutorial, you’ll be able to incorporate Bootstrap cards in your web projects for great layouts and page content organization.
在本文中,我将向您介绍Bootstrap卡组件,并逐步介绍其许多功能和用法。 在本教程结束时,您将能够在您的Web项目中合并Bootstrap卡,以实现出色的布局和页面内容组织。
Bootstrap is the most popular HTML, CSS, and JavaScript framework for quickly creating responsive and mobile-first web layouts.
Bootstrap是最流行HTML,CSS和JavaScript框架,用于快速创建响应式和移动优先的Web布局。
Using Bootstrap offers many advantages to developers, including the following:
使用Bootstrap为开发人员提供了许多优势,其中包括:
- you can easily and quickly build a responsive layout by having only some knowledge of HTML and CSS 您只需了解一些HTML和CSS即可轻松快速地构建响应式布局
- the library was built to be mobile-first from the core该库从核心构建为移动优先
- it’s compatible with all modern browsers etc.它与所有现代浏览器等兼容。
- it uses Flexbox for its grid system它在其网格系统中使用了Flexbox
- it provides tons of features and components.它提供了大量的功能和组件。
The latest release of Bootstrap offers many new, modern features — such as the support for Flexbox, and the new card component, which replaces panels, thumbnails and wells from earlier versions of the library.
最新版本的Bootstrap提供了许多新的现代功能,例如对Flexbox的支持以及新的card组件 ,该组件将替换库的早期版本中的面板,缩略图和Kong。
引导卡组件是什么? (What Is the Bootstrap Card Component?)
Bootstrap introduces a new UI component for creating cards which provides a flexible and stylish container for showing content. Cards come with minimal styling, but you can easily extend them with extra styling options.
Bootstrap引入了一个新的用于创建卡的UI组件,该组件提供了一个灵活而时尚的容器来显示内容。 卡具有最小的样式,但是您可以使用其他样式选项轻松扩展它们。
This component is built on top of Flexbox, and you can use the Bootstrap spacing utility classes for margins and padding.
该组件建立在Flexbox的基础上,您可以将Bootstrap 间隔实用程序类用于边距和填充。
Cards can conveniently accommodate different types of content like title, subtitle, body copy, and images etc., and optional header and footer sections. You can also include different sections (card blocks) to construct different types of cards depending on your use.
卡片可以方便地容纳不同类型的内容,例如标题,字幕,正文和图像等,以及可选的页眉和页脚部分。 您还可以包括不同的部分(卡块),以根据用途构造不同类型的卡。
在项目中包含Bootstrap (Including Bootstrap in Your Project)
You can very easily start using Bootstrap in your website by either including it from a CDN or downloading it from getbootstrap.com.
通过从CDN包含它或从getbootstrap.com下载它,您可以非常轻松地在网站中开始使用Bootstrap。
For the sake of introducing the new Bootstrap card component, you’re going to create a simple HTML page with Bootstrap styling to demonstrate the basic elements of the card component. Go ahead and create the index.html file inside your project folder, then add the following content from the docs starter template:
为了引入新的Bootstrap卡组件,您将使用Bootstrap样式创建一个简单HTML页面,以演示卡组件的基本元素。 继续,在您的项目文件夹中创建index.html文件,然后从docs starter模板添加以下内容:
<!doctype html>
<html lang="en">
<head>
<!-- Required meta tags -->
<meta charset="utf-8">
<meta name="viewport" content="width=device-width, initial-scale=1, shrink-to-fit=no">
<!-- Bootstrap CSS -->
<link rel="stylesheet" href="https://maxcdn.bootstrapcdn.com/bootstrap/4.0.0/css/bootstrap.min.css" integrity="sha384-Gn5384xqQ1aoWXA+058RXPxPg6fy4IWvTNh0E263XmFcJlSAwiGgFAW/dAiS6JXm" crossorigin="anonymous">
<title>Bootstrap Card Example</title>
</head>
<body>
<div class="container">
</div>
<!-- Optional JavaScript -->
<!-- jQuery first, then Popper.js, then Bootstrap JS -->
<script src="https://code.jquery.com/jquery-3.2.1.slim.min.js" integrity="sha384-KJ3o2DKtIkvYIK3UENzmM7KCkRr/rE9/Qpg6aAZGJwFDMVNA/GpGFF93hXpG5KkN" crossorigin="anonymous"></script>
<script src="https://cdnjs.cloudflare.com/ajax/libs/popper.js/1.12.9/umd/popper.min.js" integrity="sha384-ApNbgh9B+Y1QKtv3Rn7W3mgPxhU9K/ScQsAP7hUibX39j7fakFPskvXusvfa0b4Q" crossorigin="anonymous"></script>
<script src="https://maxcdn.bootstrapcdn.com/bootstrap/4.0.0/js/bootstrap.min.js" integrity="sha384-JZR6Spejh4U02d8jOt6vLEHfe/JQGiRRSQQxSfFWpi1MquVdAyjUar5+76PVCmYl" crossorigin="anonymous"></script>
</body>
</html>
We’ve included Bootstrap files and their dependencies (jQuery and popper.js) from different CDNs, then created a container division.
我们包含了来自不同CDN的Bootstrap文件及其依赖项(jQuery和popper.js),然后创建了一个容器分区。
卡的最小样式 (Minimal Styling for Cards)
In order to create a basic card, we need to —
为了创建基本卡,我们需要-
use
.cardwith adivtag to create the outer container使用
.card和div标签创建外部容器add the
.card-bodyclass to an innerdivtag to create the card body将
.card-body类添加到内部div标签中以创建卡体use
.card-titleandcard-subtitleclasses with heading tags for adding the title and the subtitle使用带有标题标签的
.card-title和card-subtitle类添加标题和字幕use the
card-textclass with<p>tags to add textual content使用带
<p>标记的card-text类添加文本内容use the
card-img-topclass with the<img>tag to add an image to the top of the card.使用具有
<img>标签的card-img-top类将图像添加到卡的顶部。
These are the basic elements that constitute a full but basic card layout, as we can see from the following example:
这些是构成完整但基本的卡布局的基本元素,如下面的示例所示:
<div class="card">
<img class="card-img-top" src="https://source.unsplash.com/daily" alt="Card image top">
<div class="card-body">
<h3 class="card-title">Card title</h3>
<h4 class="card-subtitle">Card subtitle</h4>
<p class="card-text">This is a simple Card example</p>
</div>
</div>
This is a screenshot of the result:
这是结果的屏幕截图:
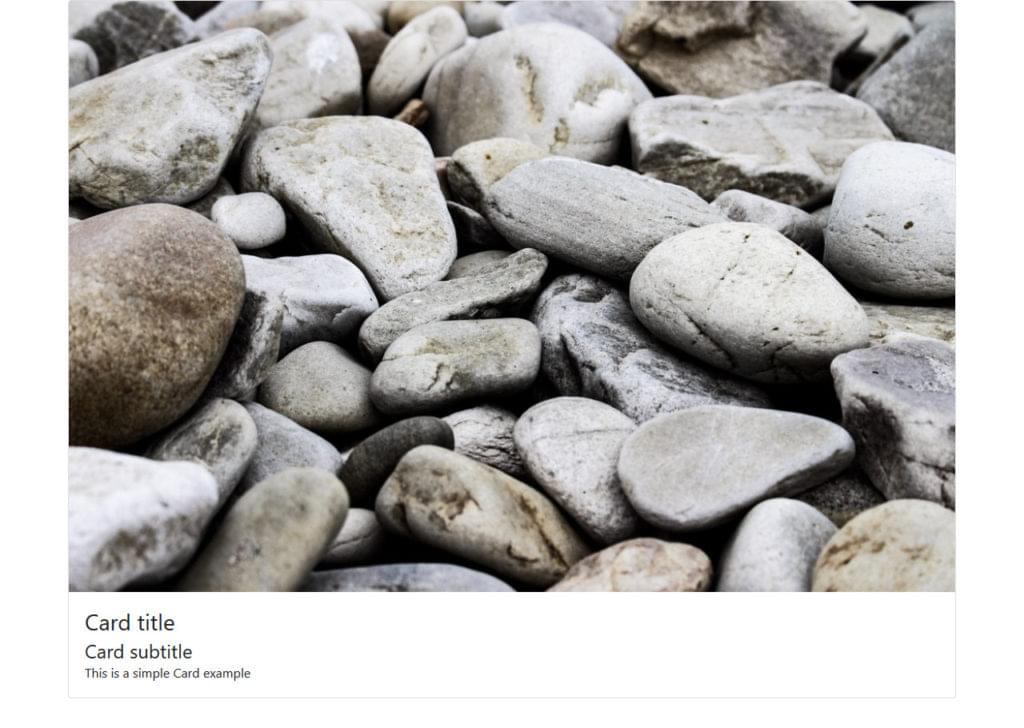
As can be seen, the card takes the full width of its container div.
可以看出,卡片占据了容器div的整个宽度。
By simply switching the card-body class with the card-img-overlay class, we can use the image as an overlay:
通过简单地将card-body类与card-img-overlay类切换,我们可以将图像用作叠加层:

We can also use the class .card-img-bottom with the <img> tag to add the image at the bottom of the card:
我们还可以将类.card-img-bottom与<img>标记一起使用,以将图像添加到卡的底部:
<div class="card">
<div class="card-header">
This is a header
</div>
<img class="card-img-top" src="https://source.unsplash.com/daily" alt="Card image top">
<div class="card-body">
<p class="card-text">A Card with a top and bottom images</p>
</div>
<img class="card-img-bottom" src="https://source.unsplash.com/daily" alt="Card image top">
<div class="card-footer">
This is a footer
</div>
</div>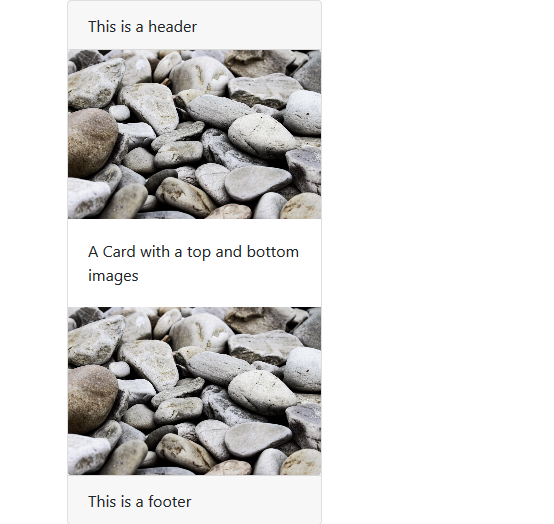
The card top and bottom images are called image caps.
卡的顶部和底部图像称为图像上限 。
控制引导卡组件的宽度和高度 (Controlling Bootstrap Card Component Width and Height)
By default, cards take all the available width in their parent container, but you can use the width and max-width classes to control take control of the card’s dimensions. So, let’s change the previous example by reducing the width of the card:
默认情况下,卡片采用其父容器中所有可用的宽度,但是您可以使用width和max-width类来控制卡片的尺寸。 因此,让我们通过减小卡的宽度来更改前面的示例:
<div class="card" style="width:20rem;">
<img class="card-img-top" src="https://source.unsplash.com/daily" alt="Card image top">
<div class="card-body">
<h3 class="card-title">Card title</h3>
<h4 class="card-subtitle">Card subtitle</h4>
<p class="card-text">This is a simple Card example</p>
</div>
</div>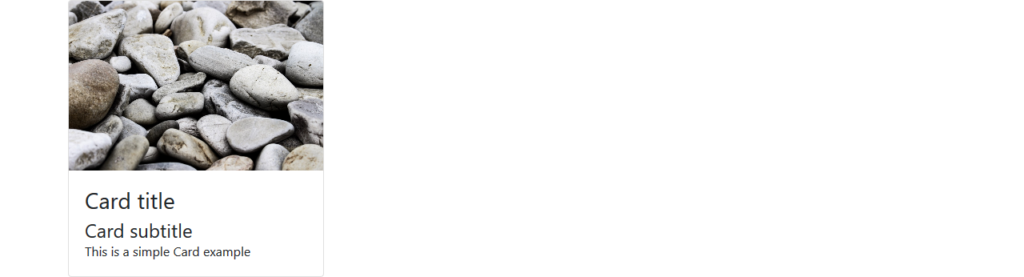
Normally, the height of the card will be adjusted to vertically fit the content of the card, but we can also control it using custom CSS (for example, style=" height: 10rem;") or Bootstrap’s sizing utilities (for examle, <div class="card h-200">).
通常,将调整卡的高度以使其垂直适合卡的内容,但是我们也可以使用自定义CSS(例如, style=" height: 10rem;" )或Bootstrap的大小调整实用程序(例如, <div class="card h-200"> )。
Please, note that the latest release of Bootstrap has switched to rem units instead of px units because rem is a scalable measurement unit — so it works better with user settings, which makes text much more accessible. The result is that all elements in the page will scale with the screen size. (You can find out more about the new features of Bootstrap in SitePoint’s “Bootstrap: Super Smart Features to Win You Over” article.
请注意,最新版本的Bootstrap已切换为rem单位,而不是px单位,因为rem是可扩展的度量单位-因此,它与用户设置更好地配合使用,使文本更易于访问 。 结果是页面中的所有元素都将随着屏幕尺寸缩放。 (您可以在SitePoint的“ Bootstrap:超级智能功能来吸引您”中找到有关Bootstrap的新功能的更多信息。
Another option for controlling the width of the Bootstrap card component is to use the Bootstrap grid (rows and columns):
控制Bootstrap卡组件宽度的另一个选项是使用Bootstrap网格 (行和列):
<div class="row">
<div class="col-sm-3">
<div class="card">
<img class="card-img-top" src="https://source.unsplash.com/daily" alt="Card image top">
<div class="card-body">
<h3 class="card-title">Card title</h3>
<h4 class="card-subtitle">Card subtitle</h4>
<p class="card-text">This is a simple Card example</p>
</div>
</div>
</div>
</div>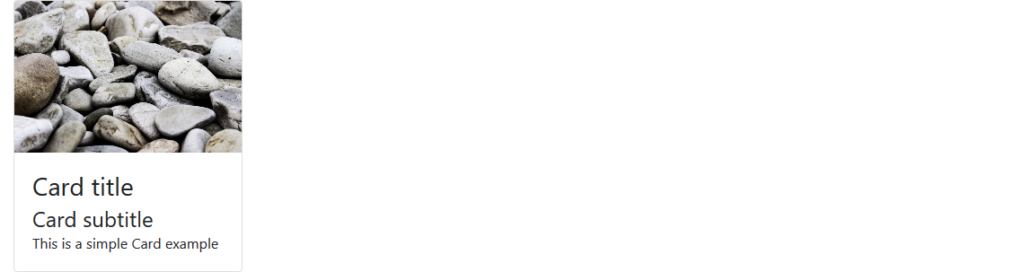
引导卡组件页眉和页脚 (Bootstrap Card Component Header and Footer)
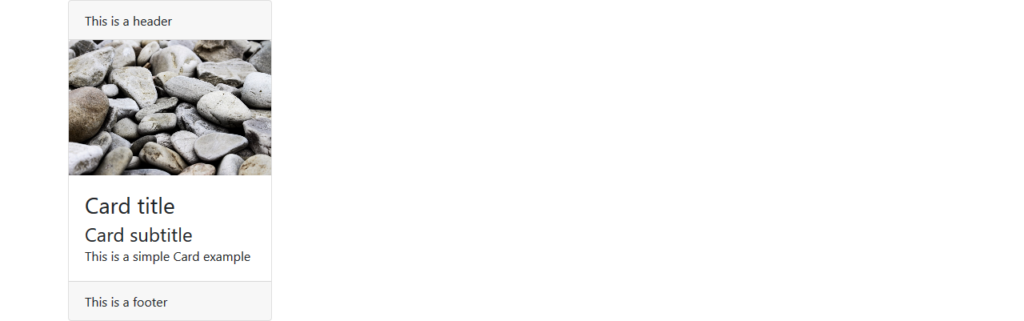
A Bootstrap card component can optionally have a header and footer by adding heading (<h*>) and div tags with .card-header and .card-footer classes respectively.
通过分别为.card-header和.card-footer类添加标题( <h*> )和div标签,Bootstrap卡组件可以选择具有页眉和页脚。
Continuing with our example, let’s add a header and footer to our Bootstrap card component:
继续我们的示例,让我们在Bootstrap卡组件中添加页眉和页脚:
<div class="row">
<div class="col-sm-3">
<div class="card">
<div class="card-header">
This is a header
</div>
<img class="card-img-top" src="https://source.unsplash.com/daily" alt="Card image top">
<div class="card-body">
<h3 class="card-title">Card title</h3>
<h4 class="card-subtitle">Card subtitle</h4>
<p class="card-text">This is a simple Card example</p>
</div>
<div class="card-footer">
This is a footer
</div>
</div>
</div>
</div>
This is the screenshot of the result:
这是结果的屏幕截图:
添加导航 (Adding Navigation)
Another nice feature of the Bootstrap card component is the possibility of adding advanced navigation patterns to the header section such as tabs and navigation pills.
Bootstrap卡组件的另一个不错的功能是可以在页眉部分添加高级导航模式,例如标签和导航标签。
So let’s change our simple example by adding a tabbed navigation element to the header section of the card with the .nav-tabs and .card-header-tabs classes on the <ul> tag:
因此,我们通过在<ul>标记上具有.nav-tabs和.card-header-tabs类的卡的标题部分添加带标签的导航元素来更改我们的简单示例:
<div class="card-header">
<ul class="nav nav-tabs card-header-tabs">
<li class="nav-item">
<a class="nav-link active" href="#">Tab 1</a>
</li>
<li class="nav-item">
<a class="nav-link" href="#">Tab 2</a>
</li>
</ul>
</div>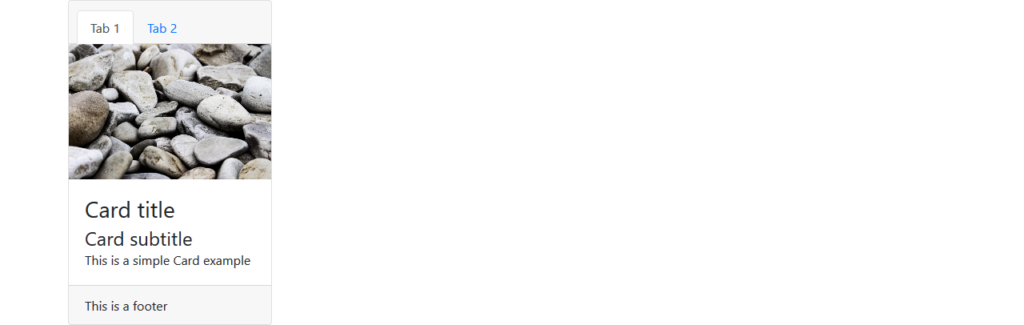
In the same way, we can add navigation pills by simply replacing .nav-tabs with nav-pills and .card-header-tabs with card-header-pill on the <ul> list tag:
以同样的方式,我们可以通过简单的更换添加导航丸.nav-tabs带nav-pills和.card-header-tabs与card-header-pill对<ul>列表标签:
<div class="card-header">
<ul class="nav nav-pills card-header-pill">
<li class="nav-item">
<a class="nav-link active" href="#">Tab 1</a>
</li>
<li class="nav-item">
<a class="nav-link" href="#">Tab 2</a>
</li>
</ul>
</div>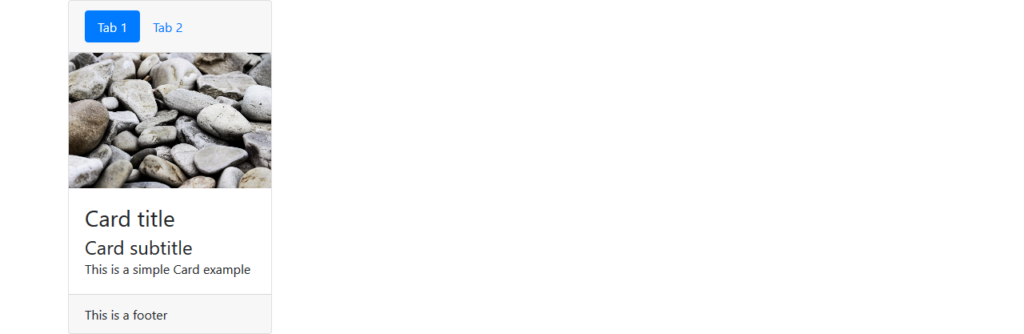
You can find out more information about this in the Bootstrap navigation components documentation.
您可以在Bootstrap导航组件文档中找到有关此信息的更多信息。
将链接添加到引导卡组件 (Adding Links to the Bootstrap Card Component)
We can quickly add links inside cards using the <a> tag with a .card-link class:
我们可以使用<a>标记和.card-link类在卡内快速添加链接:
<div class="card">
<div class="card-body">
<h3 class="card-title">Adding Links</h3>
<p class="card-text">These are simple links</p>
<a href="#" class="card-link">Link 1</a>
<a href="#" class="card-link">Link 2</a>
</div>
<div class="card-footer">
This is a footer
</div>
</div>
引导卡组件中的文本对齐和转换 (Aligning and Transforming Text in Bootstrap Card Components)
We can use different Bootstrap classes (text utilities) to align text within a card component such as .text-left (align text to left), .text-right (align text to right), .text-center (center text), .text-justify (justify text) and .text-nowrap (prevent text from wrapping).
我们可以使用不同的Bootstrap类( 文本实用程序 )在卡组件内对齐文本,例如.text-left (将文本向左对齐) .text-right text .text-right (将文本向右对齐) .text-center text .text-center (中心文本), .text-justify (对齐文本)和.text-nowrap (防止自动换行)。
We can also apply text transformation with .text-lowercase (transform text to lowercase), .text-uppercase (transform text to uppercase) and .text-capitalize (transform the first letter of each word to uppercase).
我们还可以使用.text-lowercase (将文本转换为小写) .text-uppercase text .text-uppercase (将文本转换为大写)和.text-capitalize (将每个单词的首字母转换为大写)进行文本转换。
自定义引导卡组件的背景色,前景和边框颜色 (Customizing Bootstrap Card Component Background, Foreground and Border Colors)
A Bootstrap card component’s background and foreground colors can be fully customized using Bootstrap text and background color utilities — text-primary, text-white, bg-primary and so on.
可以使用Bootstrap文本和背景颜色实用程序完全自定义Bootstrap卡组件的背景色和前景色- text-primary, text-white, bg-primary等。
Using the Bootstrap’s border utilities (for example, border-primary) we can quickly set the border color of a card.
使用Bootstrap的边框工具(例如border-primary ),我们可以快速设置卡的边框颜色。
The CodePen demo below shows all the different kinds of cards we can create with Bootstrap. Feel free to experiment with it on your own:
下面的CodePen演示显示了我们可以使用Bootstrap创建的所有不同种类的卡。 随意自己尝试:
See the Pen Bootstrap 4 Card Examples by SitePoint (@SitePoint) on CodePen.
请参阅CodePen上的SitePoint ( @SitePoint )的Pen Bootstrap 4卡示例 。
使用引导卡组件创建高级布局 (Creating Advanced Layouts with the Bootstrap Card Component)
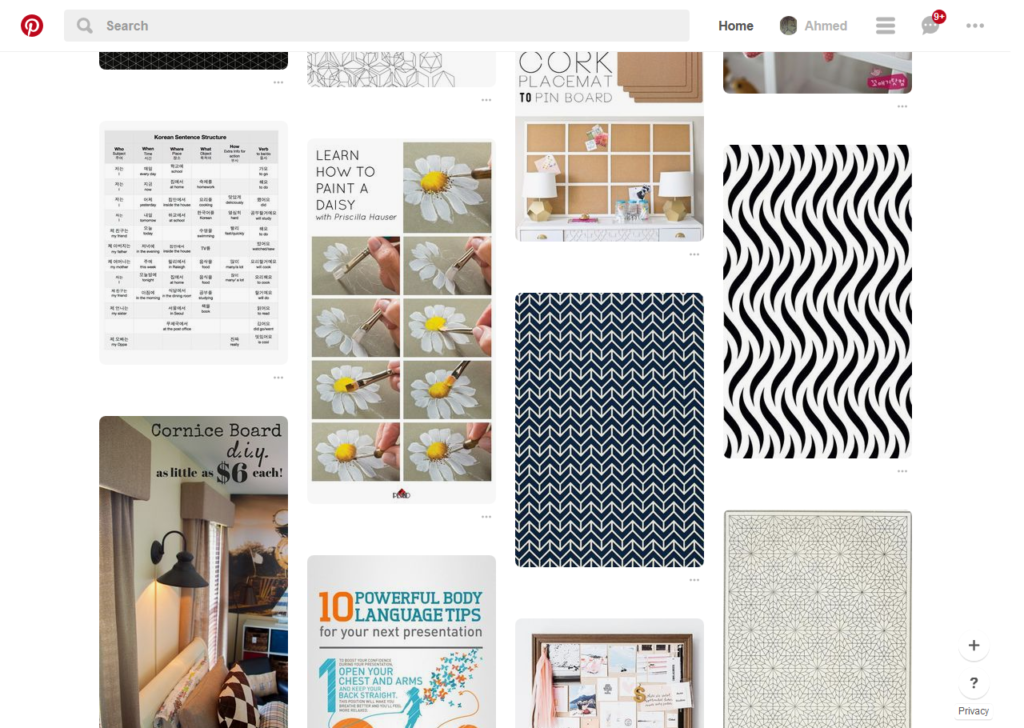
The card is a modern UI component that’s utilized in many websites as a way to display items of mixed and different content types (such as text and images etc.) as a single/grouped entity, but more commonly as a collection of similar items with a different or the same width and height. A popular layout where cards can be used is the Masonry layout, also called the Pinterest-like Layout
该卡是一种现代的UI组件,已在许多网站中使用,以一种方式将混合和不同内容类型的项(例如文本和图像等)显示为单个/分组的实体,但更常见的是将类似项的集合显示为不同或相同的宽度和高度。 可以使用卡片的流行布局是Masonry布局 ,也称为Pinterest式布局
Cards can be used for creating layouts for image albums, blog posts, ecommerce products etc. Big companies like Google and Facebook are making use of cards for their different web platforms.
卡可以用于创建相册,博客文章,电子商务产品等的布局。像Google和Facebook这样的大公司正在将卡用于其不同的Web平台。
Normally, if we want to create complex layouts based on cards, we’d need to have deep knowledge of CSS and HTML. However, thanks to the latest features of Bootstrap, we can quickly build such layouts by wrapping our set of cards inside divs with some special classes such as .card-group, .card-deck and .card-columns.
通常,如果我们要基于卡片创建复杂的布局,则需要对CSS和HTML有深入的了解。 但是,由于使用了Bootstrap的最新功能,我们可以通过将卡片集包装在div内并使用.card-group , .card-deck和.card-columns类的特殊类来快速构建此类布局。
分组/嵌套卡 (Grouping/Nesting Cards)
Groups are used to display multiple Bootstrap card components as single and attached elements with uniform sizing — that is, cards have the same width and height. This is achieved using the display: flex; property.
组用于将多个Bootstrap卡组件显示为具有统一大小的单个元素和附加元素-也就是说,卡具有相同的宽度和高度。 这可以通过以下display: flex;来实现display: flex; 属性。
We can create a group of cards using the .card-group class with a wrapper div that contains the child cards.
我们可以使用.card-group类以及包含子卡的包装div创建一组卡。
Let’s add the following code to create a group with three cards:
让我们添加以下代码来创建包含三张卡片的组:
<div class="card-group">
<div class="card text-white">
<img class="card-img-top" src="https://source.unsplash.com/featured/" alt="Card image top">
<div class="card-img-overlay">
<h3 class="card-title">Card title</h3>
<h4 class="card-subtitle">Card subtitle</h4>
<p class="card-text">This is a simple Card example</p>
</div>
</div>
</div>
This is a screenshot of the result:
这是结果的屏幕截图:

As can be seen, the three cards are attached and have the same width and height.
可以看出,这三张卡已连接并具有相同的宽度和高度。
卡座 (Card Decks)
Decks provide you with a layout similar to the previous one (that is, same width and height for each card) but with the one difference that cards are not attached to each other.
甲板为您提供的布局与上一个布局相似(即,每张卡的宽度和高度均相同),但不同之处在于,卡未相互连接。
We can simply add a .card-deck class to a parent div element to create a card deck:
我们可以简单地在父div元素中添加.card-deck类来创建卡片组:

As we can see, the cards are of the same size with some margin between them.
如我们所见,卡的大小相同,并且之间有一定的余量。
卡列 (Card Columns)
Just like groups and decks, card columns can be used to lay out a set of cards in a Masonry-like style. We can achieve this popular layout style simply by wrapping our cards in a div and adding the .card-columns class. That’s all we need to do and Bootstrap will take care of the rest without having to use a JavaScript/jQuery plugin.
就像组和卡片组一样,卡片列可用于以砖石风格布置一组卡片。 我们只需将卡片包装在div并添加.card-columns类,就可以实现这种流行的布局样式。 这就是我们需要做的,Bootstrap将负责其余的工作,而无需使用JavaScript / jQuery插件。
Bootstrap uses CSS columns to create the Masonry-like layout where cards are added from top to bottom and left to right. However, if we need a different kind of behavior based on some algorithm, we’ll have to resort to a JavaScript library or a jQuery plugin like Masonry.
Bootstrap使用CSS列来创建类似于Masonry的布局,在该布局中,卡片从上到下以及从左到右添加。 但是,如果我们需要基于某种算法的其他行为 ,则必须诉诸JavaScript库或Masonry之类的jQuery插件。
Here’s a Masonry layout demo using Bootstrap cards in action:
这是一个实际使用Bootstrap卡的砌体布局演示:
See the Pen Bootstrap 4 Masonry Layout by SitePoint (@SitePoint) on CodePen.
请参阅CodePen上SitePoint ( @SitePoint )的Pen Bootstrap 4砌体布局 。
结论 (Conclusion)
The Bootstrap card component is a powerful addition to the Bootstrap framework, which allows developers to create modern-style web pages without going deeply into how CSS works. You can add card layouts to represent image galleries, dashboard widgets, to display blog posts or products for an ecommerce website, by just adding a bunch of CSS classes.
Bootstrap卡组件是Bootstrap框架的强大功能,它使开发人员无需深入研究CSS的工作原理即可创建现代风格的网页。 您只需添加一堆CSS类,即可添加卡布局来表示图像库,仪表板小部件,以显示电子商务网站的博客文章或产品。
As a result of the new features and components, Bootstrap continues to be a powerful CSS framework available to everyone, particularly to developers who need to create their own responsive and modern-style layouts but lack enough time and budget, or the deep knowledge of CSS, necessary to produce custom code.
由于有了新的功能和组件,Bootstrap仍然是每个人都可以使用的强大CSS框架,特别是对于需要创建自己的响应式和现代风格的布局但缺少足够的时间和预算或对CSS缺乏深入了解的开发人员,是生成自定义代码所必需的。
If you’ve got the basics of Bootstrap under your belt but are wondering how to take your Bootstrap skills to the next level, check out our Building Your First Website with Bootstrap 4 course for a quick and fun introduction to the power of Bootstrap.
如果您掌握了Bootstrap的基础知识,但又想知道如何将Bootstrap技能提高到一个新的水平,请查看我们的使用Bootstrap 4建立您的第一个网站课程,以快速,有趣地介绍Bootstrap的功能。
翻译自: https://www.sitepoint.com/bootstrap-card-component-introduction/
vue 分步引导组件
vue 分步引导组件_引导卡组件:完整介绍相关推荐
- vue_组件_监听组件事件
1.$emit 的使用 在组件中注册自定义事件 $emit(事件名, 参数) //该参数会当作第一个参数传入绑定的函数中 下面用一个菜单栏例子来说明,如下图所示 组件 Vue.component ...
- axure web组件_主流设计组件规范amp;下载地址汇编
本文616字 预计阅读时间:2分钟 大家好! 在上篇文章<如何用项目思维,从0-1建立设计组件库>里,我从项目管理思维的角度,分享了如何在公司里推动设计组件库工作.不少读者在网络上留言希望 ...
- MIS通用管理组件_通用管理组件V2.1.0发布
MIS通用管理组件是一个基于.NET4.0的MIS微型框架,实现单点登录,MIS类管理系统集群化管理配置,操作权限细化,数据集权限逐级授权:提供C/S代码生成器,丰富的类库:提供全部相关的源代码,为广 ...
- 监控组件_分布式监控组件Cat,如何实现万亿级消息的高效存储?
CAT(Central Application Tracking),是基于 Java 开发的分布式实时监控系统.CAT 目前在美团点评的产品定位是应用层的统一监控组件,在中间件(RPC.数据库.缓存. ...
- mysql分表组件_利用Sharding-Jdbc组件实现分表
看到了当当开源的Sharding-JDBC组件,它可以在几乎不修改代码的情况下完成分库分表的实现.摘抄其中一段介绍: Sharding-JDBC直接封装JDBC API,可以理解为增强版的JDBC驱动 ...
- 图片上传组件_配置Django-TinyMCE组件 实现上传图片功能
Django自带的Admin后台,好用,TinyMCE作为富文本编辑器,也蛮好用的,这两者结合起来在做博客的时候很方便(当然博客可能更适合用Markdown来写),但是Django-TinyMCE这个 ...
- vue入门到启动_一篇超完整的Vue新手入门指导教程
前言 新建项目近些年前端开发快速发展,现在学习前端已经不像以前那样仅仅学习一个语法就可以了,它已经是一门编程技术了,它们有自己独立的类似Main函数的入口,有像MVC一样规范好的层次结构,有自己的开发 ...
- 时间序列 线性回归 区别_时间序列分析的完整介绍(带R)::线性过程I
时间序列 线性回归 区别 In the last tutorial , we saw how we could express the probabilistic form of the best l ...
- 概率编程编程_概率编程语言的温和介绍
概率编程编程 I recently started a new newsletter focus on AI education. TheSequence is a no-BS( meaning no ...
最新文章
- “System.Transactions.Diagnostics.DiagnosticTrace”的类型初始值设定项引发异常。
- Linux学习笔记-基本操作2
- STL中的priority_queue(优先队列)
- 苏宁的另类“存在感”
- Java 源码赏析 - java.lang - Void
- 万元大奖,FlyAI算法新赛事,心理卡牌目标检测
- 算法高级(24)-一致性哈希算法在分布式系统中的使用场景
- Segment Model.
- 微软反向 RDP 漏洞补丁不当,第三方 RDP 客户端易受攻击
- 语音特征参数MFCC的提取过程
- [osg][原创]osg多屏幕显示,会出现透明需要设置的问题
- string与wstring转换
- openGL之API学习(一四七)实时渲染、光线追踪渲染和栅格化渲染
- 一、rsync +cwrsync实现windows和linux的文件同步
- 基金常用的分析指标:跟踪误差率、信息比率、夏普比率到底是什么意思?
- Chromium浏览器扩展JS对象方法
- 014基于SSH航空订票系统air
- 程序员必须收藏的网站整理(持续更新)
- 十一月组队学习报名啦!
- [WriteUp]unctf-web-fuzz_md5