lightbox使用_如何使用CSS和JavaScript创建Lightbox Ultra
lightbox使用
How to Create a Lightbox Ultra Using CSS and JavaScript Lightbox css. The creation of CSS animation has brought an amazing feature for the web designers and coders to tinker on to show their own creativity. With the advent of Lightbox, they have a better tool to use in creating their own images with 3D animation effects as well as background dimming capability that removes the distraction of viewing the image better. Combining Lightbox with CSS and JavaScript does offer web coders a valuable tool to enhance their techniques in creating great 3D animation with Lightbox using the following concepts to use in your own coding design projects
如何使用CSS和JavaScript灯箱CSS 创建灯箱Ultra 。 CSS动画的创建为Web设计师和编码人员提供了一个了不起的功能,他们可以不断发挥自己的创造力。 随着Lightbox的出现,他们有了更好的工具来创建具有3D动画效果的自己的图像以及背景调光功能,从而更好地消除了观看图像的干扰。 将Lightbox与CSS和JavaScript结合使用确实为Web编码人员提供了一种有价值的工具,可增强他们使用Lightbox使用以下概念在自己的编码设计项目中使用它们创建出色的3D动画的技术。
使用CSS和灯箱 (Using CSS and Lightbox)
You can creatively achieve this design using this coding technique with Lightbox and CSS from the ingenuity of Emanuele Feronato which is worth sharing to those who want to learn the basics on creating Lightbox effects with CSS. The Lightbox effect is pre-loaded and static and best for a beginner to learn.
您可以使用Emanuele Feronato的独创性,使用Lightbox和CSS的这种编码技术来创造性地实现此设计,这与那些想学习使用CSS创建Lightbox效果的基础知识的人值得分享。 灯箱效果已预先加载且是静态的,最适合初学者学习。

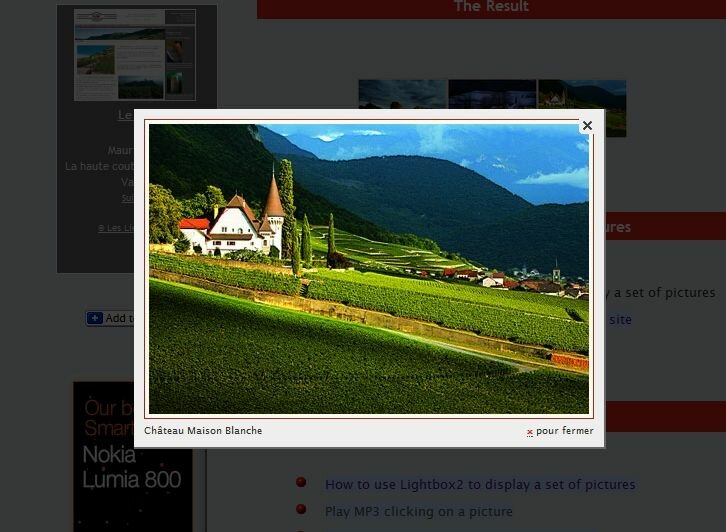
The image above shows a black overlay that makes the web page appears to fade with 80% black opaque background. It is as wide as the entire browser. The white content on the other hand provides a layer where you want the Lightbox overlay to appear which can be a layer for your login screen or photo.
上图显示了一个黑色的覆盖层,使网页在80%黑色不透明背景下显得褪色。 它与整个浏览器一样宽。 另一方面,白色内容提供了一个要在其中显示灯箱叠加层的图层,该图层可以是您的登录屏幕或照片的图层。
To begin, you have to start using the CSS code below:
首先,您必须开始使用以下CSS代码:
.black_overlay{display: none;position: absolute;top: 0%;left: 0%;width: 100%;height: 100%;background-color: black;z-index:1001;-moz-opacity: 0.8;opacity:.80;filter: alpha(opacity=80);
}
.white_content {display: none;position: absolute;top: 25%;left: 25%;width: 50%;height: 50%;padding: 16px;border: 16px solid orange;background-color: white;z-index:1002;overflow: auto;
}
Through the HTML file, you need put this code before the tag:
通过HTML文件,您需要将此代码放在标记之前:
<div id="light" class="white_content">This is lightbox object</div><div id="fade" class="black_overlay"></div>
<div id="light" class="white_content">This is lightbox object</div><div id="fade" class="black_overlay"></div>
Then insert this code on the part where you want the Lightbox to open:
然后将此代码插入您要打开灯箱的部分:
document.getElementById('light').style.display='block';
document.getElementById('fade').style.display='block';
document.getElementById('light').style.display='block';
document.getElementById('fade').style.display='block';
For instance, you will find a link like this:
例如,您会找到这样的链接:
<a href="javascript:void(0)" onclick="document.getElementById('light').style.display='block';document.getElementById('fade').style.display='block';">Click it</a>
<a href="javascript:void(0)" onclick="document.getElementById('light').style.display='block';document.getElementById('fade').style.display='block';">Click it</a>
Then in order to close the Lightbox, you should include the code like this:
然后,为了关闭灯箱,您应该包含以下代码:
<a href="javascript:void(0)" onclick="document.getElementById('light').style.display='none';document.getElementById('fade').style.display='none';">Hide it</a>
<a href="javascript:void(0)" onclick="document.getElementById('light').style.display='none';document.getElementById('fade').style.display='none';">Hide it</a>
Overall, you have to generate these codes as a result of integrating the codes above:
总体而言,由于集成了上述代码,因此您必须生成以下代码:
<!DOCTYPE html PUBLIC "-//W3C//DTD HTML 4.01 Transitional//EN">
<html><head><title>LIGHTBOX EXAMPLE</title><style>.black_overlay{display: none;position: absolute;top: 0%;left: 0%;width: 100%;height: 100%;background-color: black;z-index:1001;-moz-opacity: 0.8;opacity:.80;filter: alpha(opacity=80);}.white_content {display: none;position: absolute;top: 25%;left: 25%;width: 50%;height: 50%;padding: 16px;border: 16px solid orange;background-color: white;z-index:1002;overflow: auto;}</style></head><body><p>This is the main content. To display a lightbox click <a href="javascript:void(0)" onclick="document.getElementById('light').style.display='block';document.getElementById('fade').style.display='block'">here</a></p><div id="light" class="white_content">This is the lightbox content. <a href="javascript:void(0)" onclick="document.getElementById('light').style.display='none';document.getElementById('fade').style.display='none'">Close</a></div><div id="fade" class="black_overlay"></div></body>
</html>
JavaScript上的灯箱 (Lightbox on JavaScript)
This Lightbox script will help you create a simple Lightbox overlay effect using this link:
此灯箱脚本将帮助您使用以下链接创建简单的灯箱叠加效果:
<a href="lightbox.jpg" class="lightbox">open lightbox!</a>
<a href="lightbox.jpg" class="lightbox">open lightbox!</a>
Then use this code:
然后使用以下代码:
$(".lightbox").click(function() {window.startOverlay();
});
$(".lightbox").click(function() {window.startOverlay();
});
To specify the link to be clicked, you need to work out in getting the href attribute and send it as a content parameter and use this code:
要指定要单击的链接,您需要弄清楚获取href属性并将其作为内容参数发送并使用以下代码:
$(".lightbox").click(function(){overlayLink = $(this).attr("href");window.startOverlay(overlayLink);
});
$(".lightbox").click(function(){overlayLink = $(this).attr("href");window.startOverlay(overlayLink);
});
We need to prepare a DOM in order to have two elements that will prevent the scrolling of the viewport so add the code below:
我们需要准备一个DOM,以使其具有两个元素来防止视口滚动,因此请添加以下代码:
function startOverlay(overlayLink) {$("body").append('<div class="overlay"></div><div class="container"></div>').css({"overflow-y":"hidden"});.....
}
function startOverlay(overlayLink) {$("body").append('<div class="overlay"></div><div class="container"></div>').css({"overflow-y":"hidden"});.....
}
With the two elements needed already in place in the DOM, you need to add more CSS coding in order to add more style on these elements by using this code:
有了DOM中已经需要的两个元素,您需要添加更多CSS编码,以便通过使用以下代码在这些元素上添加更多样式:
.overlay {position:absolute;top:0;left:0;height:100%;width:100%;background:#000;opacity:0;filter:alpha(opacity=0);z-index:50;
}
.container {position:absolute;opacity:0;filter:alpha(opacity=0);left:-9999em;z-index:51;
}
.overlay {position:absolute;top:0;left:0;height:100%;width:100%;background:#000;opacity:0;filter:alpha(opacity=0);z-index:50;
}
.container {position:absolute;opacity:0;filter:alpha(opacity=0);left:-9999em;z-index:51;
}
To make the overlay visible, you need to use a fading effect using this code:
为了使覆盖可见,您需要使用以下代码使用淡入淡出效果:
function startOverlay(overlayLink) {.....$(".overlay").animate({"opacity":"0.6"}, 200, "linear");.....
}
function startOverlay(overlayLink) {.....$(".overlay").animate({"opacity":"0.6"}, 200, "linear");.....
}
In effect, the code will animate the opacity to the value of 0.6 within 200 milliseconds. This will also result in a linear transition. The next step is to load the content into the Lightbox. We will use an image that will be added to the DOM and the browser will actually download it automatically using this code.
实际上,该代码将在200毫秒内将不透明度动画化为0.6的值。 这也将导致线性过渡。 下一步是将内容加载到灯箱中。 我们将使用将添加到DOM中的图像,并且浏览器实际上将使用此代码自动下载它。
function startOverlay(overlayLink) {.....$(".container").html('<img src="'+overlayLink+'" alt="" />');.....
}
function startOverlay(overlayLink) {.....$(".container").html('<img src="'+overlayLink+'" alt="" />');.....
}
Then you have to actually display the image and make the adjustments on its width and height. Then position the Lightbox in the middle of screen and fade it in using this code:
然后,您必须实际显示图像并对其宽度和高度进行调整。 然后将灯箱放置在屏幕中间,并使用以下代码淡入:
function startOverlay(overlayLink) {.....$(".container img").load(function() {var imgWidth = $(".container img").width();var imgHeight = $(".container img").height();$(".container").css({"top":        "50%","left:        "50%","width":      imgWidth,"height":     imgHeight,"margin-top": -(imgHeight/2), // the middle position"margin-left":-(imgWidth/2)}).animate({"opacity":"1"}, 200, "linear");});
}
Once the image is loaded successfully, the load function will then execute. While you are almost done, don’t forget to add this code to make sure the browser will not also load the link itself:
成功加载映像后,将执行加载功能。 当您快完成时,请不要忘记添加以下代码,以确保浏览器不会同时加载链接本身:
$(".lightbox").click(function() {window.startOverlay();return false;
});
$(".lightbox").click(function() {window.startOverlay();return false;
});
As the last step, to enable the user of to close the Lightbox, you need add this code:
最后,要使的用户能够关闭灯箱,您需要添加以下代码:
$(".overlay").click(function(){$(".container, .overlay").animate({"opacity":"0"}, 200, linear, function(){$(".container, .overlay").remove();})
});
$(".overlay").click(function(){$(".container, .overlay").animate({"opacity":"0"}, 200, linear, function(){$(".container, .overlay").remove();})
});
To give the user a visual clue that they can click it, you need to tweak the CSS by adding the cursor:pointer; to the element of .overlay and then you are finally done. You can create an image overlay like this:
为了向用户提供可以单击的视觉提示,您需要通过添加cursor:pointer;来调整CSS。 到.overlay元素,然后您终于完成了。 您可以像这样创建图像叠加层:
翻译自: https://www.script-tutorials.com/how-to-create-a-lightbox-ultra-using-css-and-javascript/
lightbox使用
lightbox使用_如何使用CSS和JavaScript创建Lightbox Ultra相关推荐
- 使用 HTML CSS 和 JavaScript 创建星级评分系统
各位读者好,今天在本博客中,您将学习如何使用 HTML CSS 和 JavaScript 创建星级评分系统 (Widget).早些时候,我还分享了一篇关于Star Rating Widget 的博客, ...
- 三角灯箱 css_如何使用HTML,CSS和JavaScript创建灯箱
三角灯箱 css 介绍 (Introduction) A lightbox is a combination of two components, a modal and a slide show. ...
- css grid布局_如何使用CSS Grid重新创建Medium的文章布局
css grid布局 When people think of CSS Grid they normally envision image grid layouts and full web page ...
- 用HTML,CSS和JavaScript创建iPhone/iPad应用程序
象大多数iPad粉丝和程序员一样,我有一个梦想,那就是如果不需要昂贵的Apple设备,不要繁琐的审批程序,不要为发布应用交钱就能开发iPad 应用程序该多好.现在这个梦想就要实现了,那就是网页应用程序 ...
- css 幻灯片_如何使用HTML,CSS和JavaScript创建幻灯片
css 幻灯片 A web slideshow is a sequence of images or text that consists of showing one element of the ...
- 如何使用HTML,CSS和JavaScript创建 二进制计算器?
HTML或超文本标记语言以及CSS(级联样式表)和JavaScript可用于开发可执行某些功能的交互式用户应用程序.同样, 可以完全使用HTML, CSS和JS开发二进制计算器. 二进制计算器: 对二 ...
- css画布背景_如何使用CSS和触摸JavaScript构建画布外菜单
css画布背景 在本教程中,我们将介绍一种简单而有效的方法,以使用HTML,CSS和JavaScript创建画布菜单. 要初步了解我们将要构建的内容,请查看相关的CodePen演示(请查看较大的版本以 ...
- 如何使用CSS和JavaScript构建简单的甘特图
到目前为止,在我们CSS图表系列教程中,我们已经学习了如何创建不同类型的图表,包括条形图,温度计图和饼图. 今天,我们将通过在甘特图中构建和呈现数据来继续这一旅程. 与其他图表教程不同,我们将大量使用 ...
- css菜单缓慢滑动_如何使用HTML,CSS和JavaScript构建滑动菜单栏
css菜单缓慢滑动 by Supriya Shashivasan 由Supriya Shashivasan 如何使用HTML,CSS和JavaScript构建滑动菜单栏 (How to build a ...
- html计算器_学习HTML、CSS和JavaScript的最佳方法是什么?
与其他后端语言相比,HTML.CSS和JavaScript无论从阅读角度还是编写的角度来说都更加容易一点.所以新手在学习前端知识的时候不必有太大的心理压力 ,心态摆正后,大部分人都可以将前端学好.下面 ...
最新文章
- 人脸检测识别文献阅读总结
- 老赵谈IL(3):IL可以看到的东西,其实大都也可以用C#来发现
- windows系统中,在当前目录下打开cmd命令行的两种方法
- pandas 知识点补充:绘图plot
- java设计模式6--适配器模式(Adapter )
- erwin 不能输入中文_国产开源建模软件PDMan与国外商业建模软件ERwin的主要功能比较...
- 我要搬家到csdn,大家到那里来看我吧,平台更大,看到的人更多!
- ajax datatype_jQuery中的 AJAX
- unity打开excel表格_Excel电子表格需要双击两次才能打开问题的解决方案
- 如何在计算机命令内转换操作盘,如何在命令行窗口中从驱动器C切换到驱动器D...
- JAVA动态申请数组
- RecyclerView 实现横向滚动效果
- 帮你写出更好的python代码:python函数应用进阶(一)——函数是对象
- 使用PreTranslateMessage(MSG* pMsg)截获键盘数字键
- 60020:not allow to access from your ip
- Web Workers API
- 网格化垃圾监控管理系统介绍
- bat脚本中如何多次键盘输入并判断_万花筒自动发布信息脚本【操作简单】
- 爱签:行业利好不断 电子签章、电子合同将扩大应用
- 树莓派配置无线网络(补充) 【for_wind】