openwrt 做二级路由 同网段无线桥接教程 relayd
网址:http://trac.gateworks.com/wiki/OpenWrt/wireless/relayd
Gateworks Single Board Computers
Gateworks offers powerful, flexible, low power ARM single board computers for transmitting data, audio, and video.
Please see more information at http://www.gateworks.com
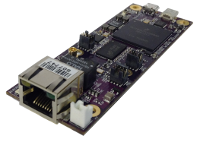
Gateworks Wireless Client Bridge using Relayd
Gateworks manufactures single board computers (SBCs) that are used in many networking applications. One such application is a wireless bridge. This is where a Gateworks SBC is connected as a client to an existing wireless access point (AP) and the Ethernet port is used as a bridge to provide access to other devices over the wireless. Unfortunately, this scenario isn't supported by traditional wireless networks. The 802.11 standard only uses 3 MAC Addresses per frame and the source MAC gets replaced by the transmitting wireless AP. This then prevents any returned packets from being delivered to the actual host because the host is now believed to be the wireless client.
One method to address this issue is to use the Wireless Distribution System (WDS) which implements 4 MAC addresses in the header thus allowing the returned packet to be delivered to the correct end point. For WDS to be used both the AP and the client must support WDS. In many cases, an existing AP (ie. Linksys, Netgear) may be used which does not support WDS. For these situations, a special piece of solftware called relayd can be used. Relayd is able to relay packets and achieve the same results.
Below is a tutorial explaining how to configure a Gateworks SBC to create a wireless bridge without using WDS.
How To - Relayd
It is possible to acheive a bridge-like client mode configuration with the help of relayd for Gateworks Single Board Computers. With this method you can bridge a standard Wireless AP to a wired LAN or a wireless WLAN. This is useful in the following configurations:
- extend the range of a wireless Access Point (by relaying between a local virtual AP and client attached to an upstream AP)
- provide a bridge between a wired LAN and a wireless Access Point (by relaying between local LAN port and client attached to an upstream AP)
Note, if WDS is available on the Access Point and Client(for example if you were using Gateworks SBCs for both the AP and client), then WDS is recommended and the preferred method. Relayd is only recommended when WDS is not available. The WDS Tutorial is located here: WDS Bridge
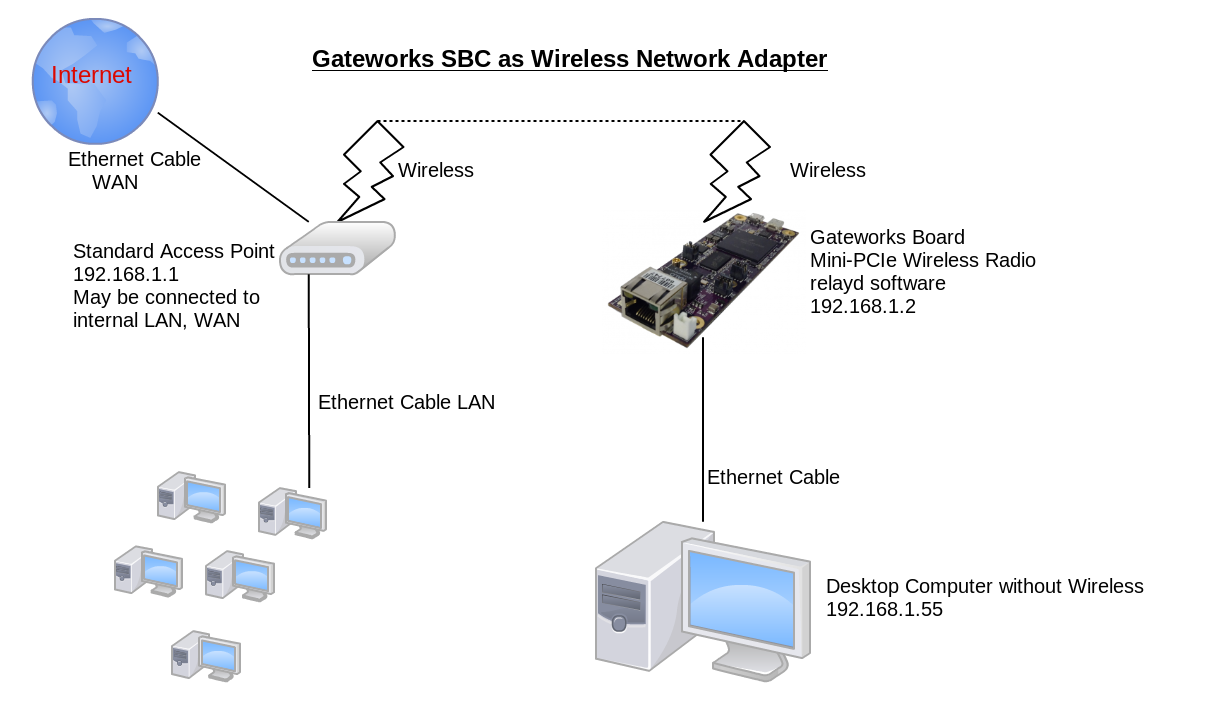
The following steps need to be done for OpenWRT:
- Configure a managed network interface to connect (with encryption if needed) to your 'upstream' Access Point
- (Optional) Add a new wireless interface configured in AP mode with desired encryption
- Add a new network interface using the protocol of 'relayd' bridging the upstream and downstream networks
- Change firewall settings so that Input/Output? packets are accepted for both upstream and downstream networks
Requirements
- relayd package
- luci-proto-relay package
Find these by doing an opkg list on the target and seeing if they are there. If they are not, they will need to be added. Instructions for compiling and adding packages can be located here: Package Installation
Luci package management is shown belown with relay packages:

Configuration via Web-Admin on OpenWrt:Barrier Breaker
The GUI has been updated and thus the instructions have slightly changed.
- Click on the Network tab, then the Wifi tab.
- Click on the icon with alt text "Edit this network" next to the Wireless Controller you wish to use.
- Check the box next to Enable device to enable the Wifi. Click on Save & Apply at the bottom of the page.
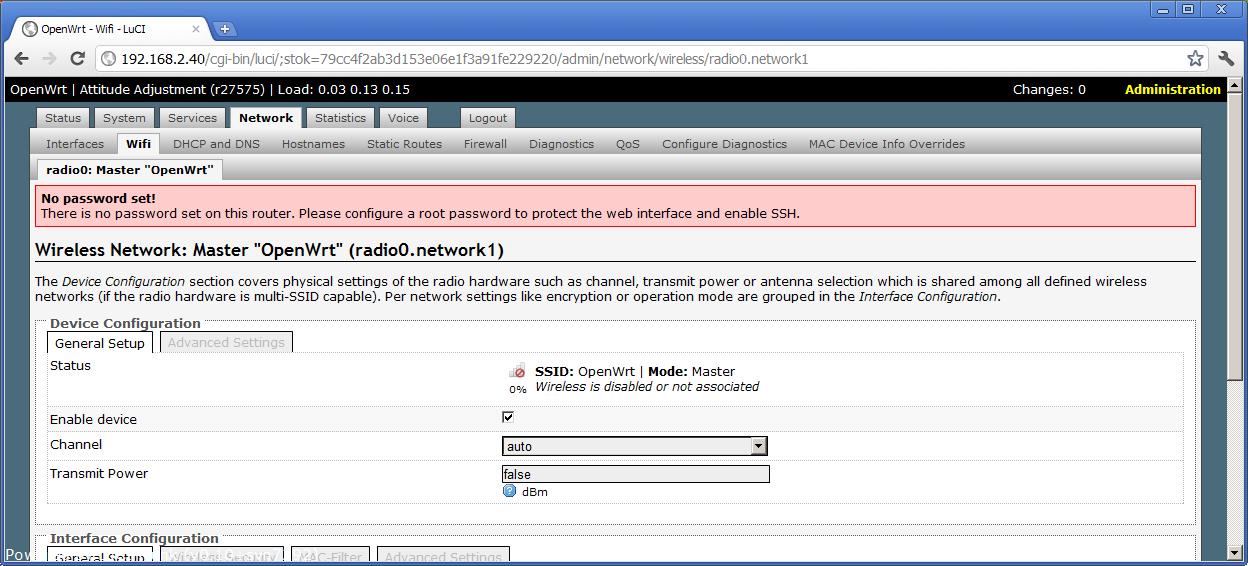
- Go back to the wifi page by clicking on the Wifi tab again.
- Click on the icon with alt text "Find and join network" that is above the "Edit this network icon"
- Click on "Join Network" next to the network you wish to join.
- Enter the Passphrass for the network and select "lan" under the Create/Assign? firewall-zone field. Click on submit at the bottom of the page.
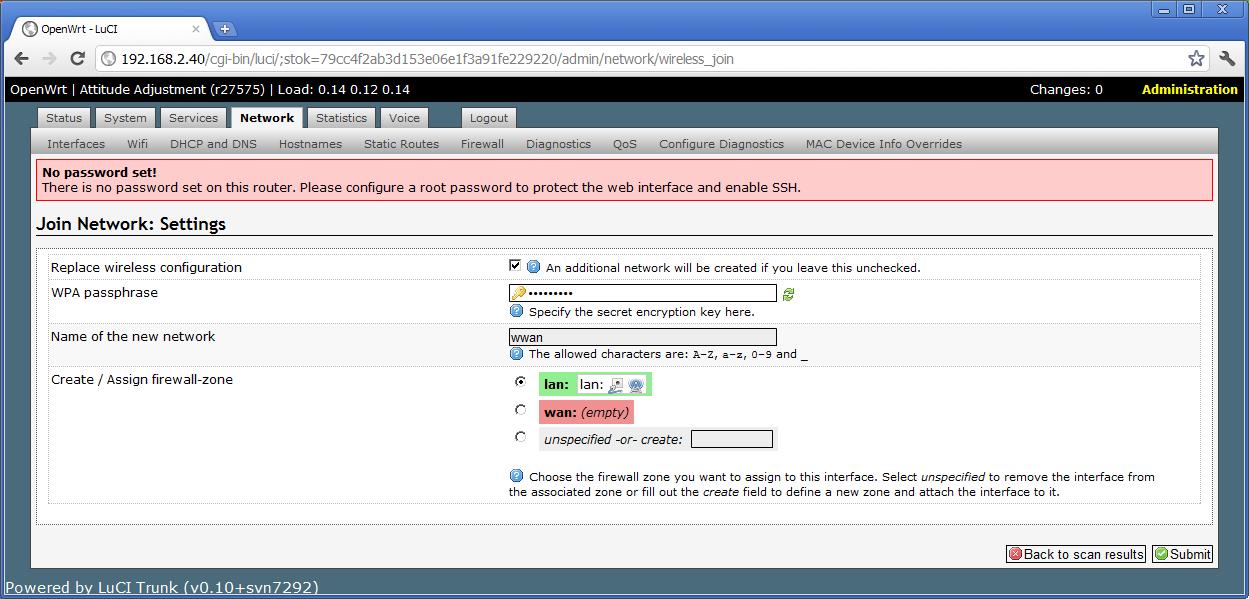
- Click on the Interfaces tab under the Network tab.
- Click on Add new interface.
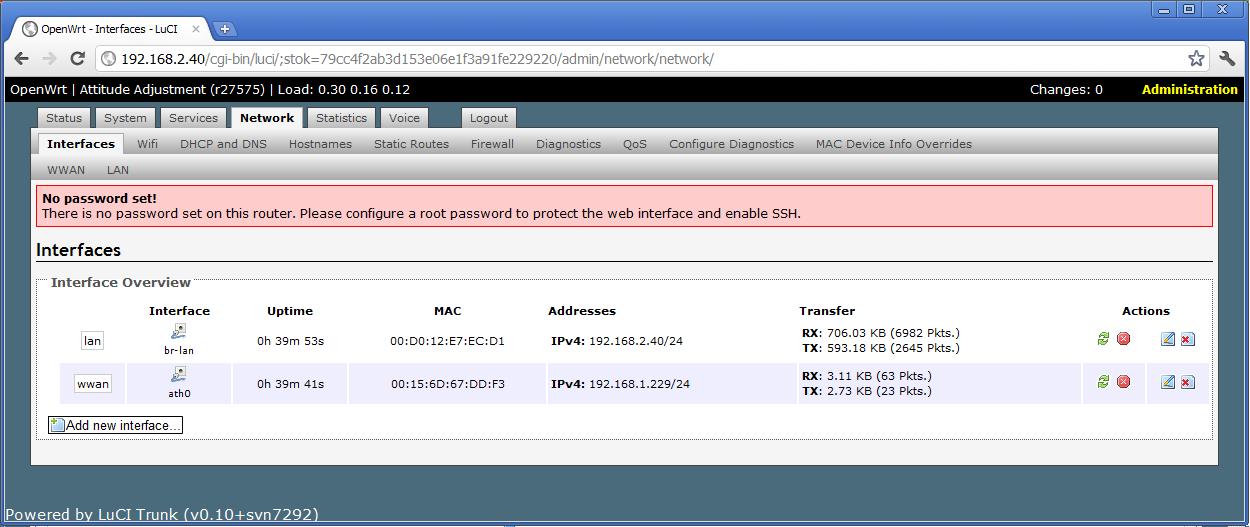
- Name the interface. (Here it is named "stabridge")
- Leave "Create a bridge over multiple interfaces" unchecked.
- Click on submit.

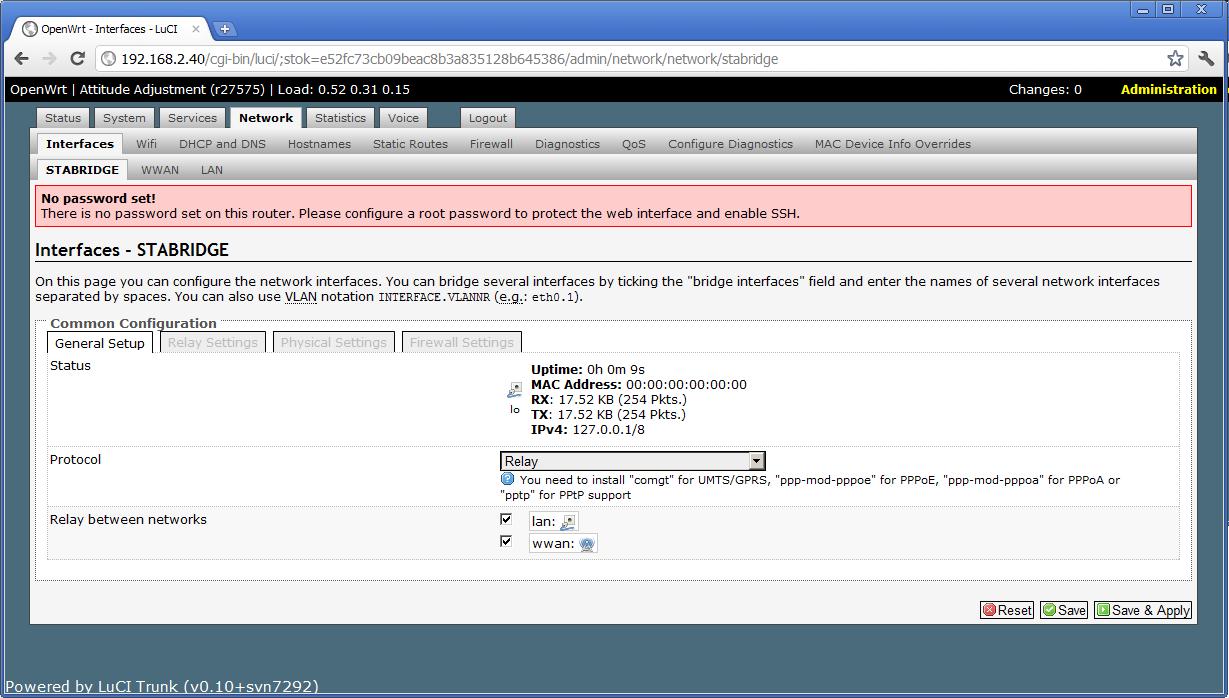
- Select "Relay" from the drop down menu for the Protocol.
- Under "Relay between networks" check both lan and wwan. You can leave IP address blank or adjust if desired.
- Click on Save & Apply at the bottom of the screen.
- Under the Network tab, click on the Firewall tab.
- Under Zones, change the forwarding for lan and wwan to "accept"
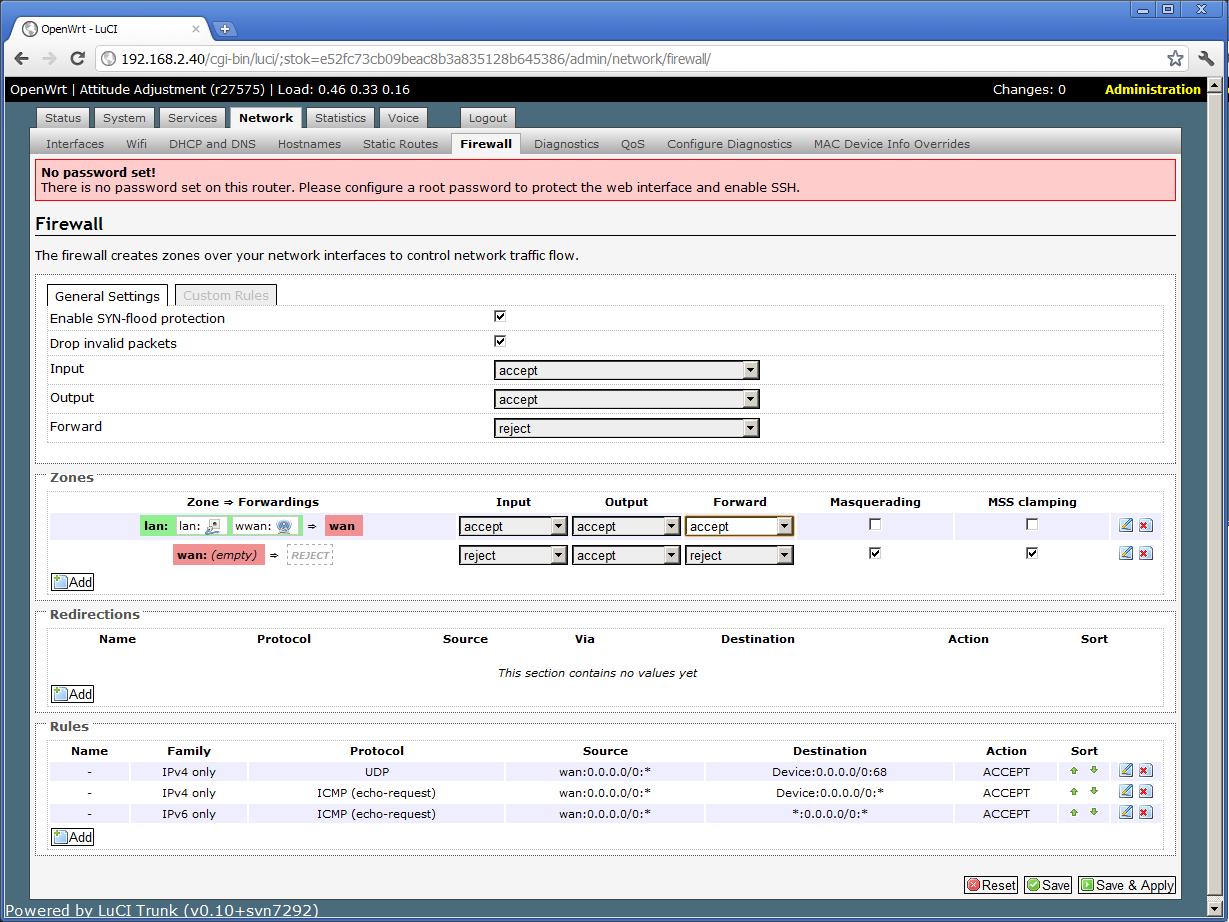
- Click on Save & Apply at the bottom of the screen.
- This step seems optional. Please adjust to your liking. Make sure the IP address of the lan interface is in a different subnet as the wwan network.
- Additionally, be sure that a bridge does not exist (which may be turned on by default)

Configuration Files Barrier Breaker
- Note the new stabridge interface of type relay in /etc/config/network
- Note the wireless is a station (aka client) to a regular access point Netgear101
Below are sample files. Items may change depending on different network configurations such as IP addresses, etc
root@OpenWrt:/# cat /etc/config/network config interface 'loopback'option ifname 'lo'option proto 'static'option ipaddr '127.0.0.1'option netmask '255.0.0.0'config globals 'globals'option ula_prefix 'fde7:c973:4a6d::/48'config interface 'lan'option ifname 'eth0'option proto 'static'option ipaddr '192.168.43.55'option netmask '255.255.255.0'option ip6assign '60'config interface 'wwan'option proto 'dhcp'config interface 'stabridge'option proto 'relay'list network 'lan'list network 'wwan'
root@OpenWrt:/# cat /etc/config/wireless config wifi-device 'radio0'option type 'mac80211'option hwmode '11ng'option phy 'phy0'list ht_capab 'LDPC'list ht_capab 'SHORT-GI-20'list ht_capab 'SHORT-GI-40'list ht_capab 'TX-STBC'list ht_capab 'RX-STBC1'list ht_capab 'DSSS_CCK-40'option htmode 'HT20'option disabled '0'option txpower '27'option country 'US'option channel '6'config wifi-ifaceoption network 'wwan'option ssid 'Netgear101'option encryption 'psk2'option device 'radio0'option mode 'sta'option bssid '5C:0A:5B:C5:AF:23'option key 'abc123'
Configuration via Web-Admin on OpenWrt:Attitude Adjustment
- Click on the Network tab, then the Wifi tab.
- Click on the icon with alt text "Edit this network" next to the Wireless Controller you wish to use.
- Check the box next to Enable device to enable the Wifi. Click on Save & Apply at the bottom of the page.

- Go back to the wifi page by clicking on the Wifi tab again.
- Click on the icon with alt text "Find and join network" that is above the "Edit this network icon"
- Click on "Join Network" next to the network you wish to join.
- Enter the Passphrass for the network and select "lan" under the Create/Assign? firewall-zone field. Click on submit at the bottom of the page.

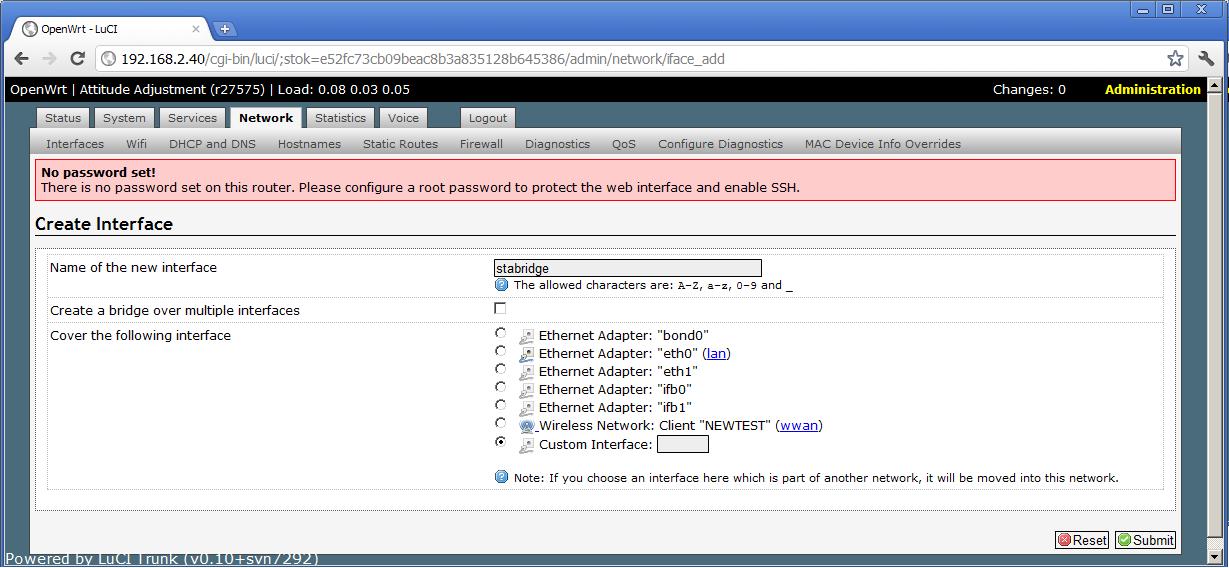
- Click on the Interfaces tab under the Network tab.
- Click on Add new interface.

- Name the interface. (Here it is named "stabridge")
- Leave "Create a bridge over multiple interfaces" unchecked.
- Check "Custom Interface" for the interface to cover and click on submit.
- Select "Relay" from the drop down menu for the Protocol.
- Under "Relay between networks" check both lan and wwan.
- Click on Save & Apply at the bottom of the screen.

- Under the Network tab, click on the Firewall tab.
- Under Zones, change the forwarding for lan and wwan to "accept"

- Click on Save & Apply at the bottom of the screen.
- Make sure the IP address of the lan interface is in a different subnet as the wwan network.
参考网址:https://www.right.com.cn/FORUM/thread-190115-1-1.html
步骤如下:(所有步骤均是在二级路由下操作,主路由不需要动)
1,请给二级路由安装一个插件 插件名是 luci-proto-relay (有些固件是已安装的就不用再装了)
2,在 网络--接口 中把 lan 地址 改成 与主路由不同网段 比如192.168.34.1,
3,关闭 lan 的DHCP功能 同时给自己的网卡改成与二级路由同网段的ip 比如192.168.34.2
4,打开网络--无线 界面 点击搜索 出现 主路由 信号,然后连接之,
5,在输入密码界面下方有个 创建/分配 防火墙区域 ,请选择 lan 然后点击提交 ,最后保持其他选项默认保存 应用

6,在 网络--接口 中添加新接口 名称自拟 比如stabridge 接口协议选中继桥,英文是 Realy bridge 然后点提交

7,网络--接口 修改刚刚建的 stabridge 接口 在 下方有很多接口,你只要在 lan 和 wwan 前打勾即可。

8,打开防火墙界面,检查一下第一行 lan wwan-->wan 那一行是不是都选择了允许。没允许的改一下

9,最后 打开网络--无线 添加一个新的Ap 信号即可。然后重启 再连接二级路由试试看 是不是得到了主路由分配的ip
参考链接
http://trac.gateworks.com/wiki/OpenWrt/wireless/relayd
openwrt 做二级路由 同网段无线桥接教程 relayd相关推荐
- 老毛子的二级路由,通过无线中继方式设置与主路由在同一网段
以极路由作为示例root过程各有不同step3开始其他路由器也适用 **Step1: **路由器复位,有线/无线连接路由器进入后台(192.168.199.1/hiwifi.com),设置WiFi联网 ...
- M401a系列:armbian下docker安装openwrt做旁路由
在armbian下,输入armbian-software,下面就有openwrt的安装选项.直接会安装opub大佬的openwrt. 但是这个openwrt没有我需要的插件,所以直接用别的openwr ...
- tplink886n变无线打印服务器,TP-Link TL-WR886N V2-V3无线桥接教程设置方法
本文主要介绍了TP-Link TL-WR886N V2.0和V3.0路由器无线桥接设置方法.在面积较大的家庭或办公环境(如别墅.写字间等),路由器无线覆盖范围有限,部分区域信号较弱到或存在信号盲点.无 ...
- tplink886n变无线打印服务器,TP-Link TL-WR886N V4-V5无线桥接教程设置方法
本文主要介绍了TP-Link TL-WR886N V4.0和V5.0路由器无线桥接设置方法.在面积较大的家庭或办公环境(如别墅.写字间等),路由器无线覆盖范围有限,部分区域信号较弱到或存在信号盲点.无 ...
- 树莓派4b OpenWrt做旁路由
主要分为以下几步: 一.下载并刷入OpenWrt固件 OpenWrt固件用的是Lean大的最新编译好的固件,按照正常的步骤在GitHub上下载并将系统烧录进去,用的是如下图所示的img文件. 格式化T ...
- 玩转软路由 篇五:ROS和OpenWRT的软路由方案中IPTV融合教程
目录 一. 网络拓扑和相关教程 1. 我的网络拓扑图 2. 有关教程 3. 光猫
- 怎样串联两台无线路由器:[1]二级路由设置
路由器和路由器之间的串联分两种,第二个路由器做二级路由使用或者做交换机/无线交换机使用. 工具/原料 无线路由器两台 网线若干 方法/步骤 设置说明: 1) 将直接连接宽带的路由定义为R1 ...
- 小米路由器开启DDNS并支持二级路由
小米路由器开启DDNS具体的设置步骤可以参见这篇连接 [路由达人]简单两步搞定小米路由新增功能-DDNS(解析域名地址转向在线工具) - *(00)* - 博客园 由于路由器版本升级,web界面有所改 ...
- 极路由虚拟服务器设置,极路由初始化设置详细图文教程
如今物联网的发展,无线路由器已经成为每家每户的生活必需品.类似宅女.小白等对路由器接触不深的用户们,对于如何设置路由器,那可谓是"一窍不通".为了让用户们都能熟练的掌握路由器的上网 ...
最新文章
- Opencv-python 图像处理基础知识
- 如何转换指定 波长 到 RGB 颜色?
- 知识点实用梳理:广播地址、10 BASE T、介质访问控制、ATM信元与HTTP状态码
- npm WARN build `npm build` called with no arguments. Did you mean to `npm run-script build`
- [剑指offer]面试题第[57-2]题[JAVA][和为s的连续正数序列][数学法][滑动窗口]
- 27岁博士毕业,32岁成清华博导!黄高助理教授:DenseNet发明者
- 解决JS文件页面加载时的阻塞
- 432.全O(1)的数据结构
- 5G应用加速落地,酷雷曼VR直播应时而生。
- 网站备案信息真实性核验单
- 怎么用计算机看亲戚关系,小米亲戚计算器怎么用?如何利用小米计算器查询亲戚关系...
- Microsemi Libero SoC 教程2 (点亮LED闪烁)
- 北京智源大会 | AI + 医疗的下一个十年:从公共卫生预警到人类基因密码解析 道翰天琼认知智能api机器人接口。
- 关于python的各个常用软件——python、pycharm、anaconda
- JS实现视频录制-以Cesium为例
- android 获取 meid 代码,Android 各个版本获取IMEI、MEID
- JFinal AOP与Enhancer
- 【IPTV】烽火通信再次中标上海电信高清视讯平台项目
- Learning to Learn
- 移动端车牌识别算法开发与技术应用
