Oracle10gR5GridControl InstallOnLinux
2019独角兽企业重金招聘Python工程师标准>>> 
Home » Articles » 10g » Here
Oracle 10g Release 5 Grid Control Installation On Oracle Enterprise Linux (OEL 4.8 64-bit)
In this article I'll describe the installation of Oracle 10g Release 5 (10.2.0.5 64-bit) Grid Control on Oracle Enterprise Linux (OEL 4.8 64-bit). The article is based on a server installation with a minimum of 2G RAM, 4G swap, firewall and secure Linux disabled and the following package groups installed.
- X Window System
- GNOME Desktop Environment
- Editors
- Graphical Internet
- Server Configuration Tools
- Development Tools
- Legacy Software Development
- Administration Tools
- System Tools
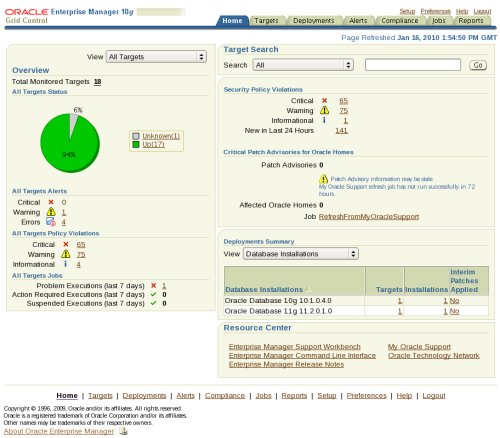
The Oracle 10g Grid Control allows you to monitor all aspects of your infrastructure including database and application servers. Like the Oracle9i Management Server it replaces, the grid control requires a database repository. A complete installation includes a repository in a 10g database. It is possible to install the repository in an existing database of a different version, but I try to install the product as it is shipped.
The grid control uses agents on each server to enable monitoring and interaction. As a result, once the grid control is installed it is necessary to install an agent on each server you wish to monitor. The installation of an agent is described in it's owner section. All other tasks relate only to the grid control.
- Download Software
- Unpack Files
- Hosts File
- Set Kernel Parameters
- Setup
- Grid Control Installation (10.2.0.3)
- Grid Control Patch (10.2.0.5)
- Configure Grid Control
- Check the Status of the Grid Control
- Starting and Stopping Grid Control Services
Download Software
Download the following software from here.
- Linux_x86_64_Grid_Control_full_102030_disk1.zip
- Linux_x86_64_Grid_Control_full_102030_disk2.zip
- gc_x86_64_10205_part1of2.zip
- gc_x86_64_10205_part2of2.zip
Notice we've downloaded the base release (10.2.0.3) and the patch (10.2.0.5).
For convenience you may want to download the agent distribution separately. If you are monitoring servers on different platforms the relevant agents must be downloaded.
Unpack Files
First unzip the grid control installation files.
cd /host/software/oracle/GridControlmkdir 10203
cd 10203
unzip ../Linux_x86_64_Grid_Control_full_102030_disk1.zip
unzip ../Linux_x86_64_Grid_Control_full_102030_disk2.zipcd ..
mkdir 10205
cd 10205
unzip ../gc_x86_64_10205_part1of2.zip
unzip ../gc_x86_64_10205_part2of2.zip
unzip p3731593_10205_Linux-x86-64.zip
Hosts File
The "/etc/hosts" file must contain a fully qualified name for the server.
<IP-address> <fully-qualified-machine-name> <machine-name>
Set Kernel Parameters
Modify the "/etc/sysctl.conf" file to include the lines appropriate to your operating system.
kernel.shmall = 2097152
kernel.shmmax = 536870912
kernel.shmmni = 4096
kernel.sem = 250 32000 100 128
fs.file-max = 65536
# semaphores: semmsl, semmns, semopm, semmni
net.ipv4.ip_local_port_range = 1024 65000
net.core.rmem_default = 262144
net.core.rmem_max = 262144
net.core.wmem_default = 262144
net.core.wmem_max = 262144
Run the following command to change the current kernel parameters.
/sbin/sysctl -p
Add the following entries to the "/etc/security/limits.conf" file.
*               soft    nproc   2047
*               hard    nproc   16384
*               soft    nofile  1024
*               hard    nofile  65536
Append the following entry to the "/etc/pam.d/login" file.
session required pam_limits.so
Disable secure linux by editing the "/etc/selinux/config" file, making sure the SELINUX flag is set as follows.
SELINUX=disabled
Alternatively, this alteration can be done using the GUI tool (Applications > System Settings > Security Level). Click on the SELinux tab and disable the feature.
Setup
Install the required packages, some of which may already be present.
# From OEL 4.8 X86_64 DVD
cd /media/cdrom/Enterprise/RPMS
rpm -Uvh glibc-2*
rpm -Uvh make-3*
rpm -Uvh binutils-2*
rpm -Uvh gcc-3*
rpm -Uvh libaio-0*
rpm -Uvh glibc-common-2*
rpm -Uvh setarch-1*
rpm -Uvh pdksh-5*
rpm -Uvh openmotif21*
rpm -Uvh sysstat-5*
rpm -Uvh gnome-libs-1*
rpm -Uvh compat-db-4*
rpm -Uvh compat-db-4.1.25-9.i386.rpm
rpm -Uvh control-center-2*
rpm -Uvh xscreensaver-4*
rpm -Uvh glibc-devel-2*
rpm -Uvh glibc-devel-2.3.4-2.43.i386.rpm
rpm -Uvh libgcc-3*
rpm -Uvh compat-gcc*
rpm -Uvh compat-glibc*
rpm -Uvh compat-libgcc-296*
rpm -Uvh libstdc++-devel-3*
rpm -Uvh libgcc-3.4.6-11.0.1.i386.rpm
rpm -Uvh compat-libstdc++-296*
rpm -Uvh compat-libstdc++-33-3.2.3-47.3.i386.rpm
rpm -Uvh libstdc++-3*
rpm -Uvh openmotif2*
rpm -Uvh freetype-devel*
rpm -Uvh fontconfig-devel*
rpm -Uvh xorg-x11-devel*
rpm -Uvh --force xorg-x11-deprecated-libs*
Create the new groups and users.
groupadd oinstall
groupadd dba
groupadd operuseradd -g oinstall -G dba -s /bin/ksh oracle
passwd oracle
Create the directories in which the Oracle software will be installed.
mkdir -p /u01/app/oracle/product
chown -R oracle.oinstall /u01
Login as root and issue the following command.
xhost +<machine-name>
Login as the oracle user and add the following lines at the end of the ".bash_profile" file.
# Oracle Settings
TMP=/tmp; export TMP
TMPDIR=$TMP; export TMPDIRORACLE_BASE=/u01/app/oracle; export ORACLE_BASE
ORACLE_HOME=$ORACLE_BASE/product/db10g; export ORACLE_HOME
AGENT_HOME=$ORACLE_BASE/product/agent10g; export AGENT_HOME
OMS_HOME=$ORACLE_BASE/product/oms10g; export OMS_HOME
ORACLE_HOSTNAME=grid.localdomain; export ORACLE_HOSTNAME
ORACLE_SID=emrep; export ORACLE_SID
ORACLE_TERM=xterm; export ORACLE_TERM
PATH=/usr/sbin:$PATH; export PATH
PATH=$ORACLE_HOME/bin:$PATH; export PATHLD_LIBRARY_PATH=$ORACLE_HOME/lib:/lib:/usr/lib; export LD_LIBRARY_PATH
CLASSPATH=$ORACLE_HOME/JRE:$ORACLE_HOME/jlib:$ORACLE_HOME/rdbms/jlib; export CLASSPATHif [ $USER = "oracle" ]; thenif [ $SHELL = "/bin/ksh" ]; thenulimit -p 16384ulimit -n 65536elseulimit -u 16384 -n 65536fi
fi
Grid Control Installation (10.2.0.3)
The quickest way to install a fully patched version of the grid control on a clean system is to perform software-only silent install with no configuration steps. First take a copy of the "em_with_new_db.rsp" response file from the "10203" software directory.
cp /host/software/oracle/GridControl/10203/Disk1/response/em_with_new_db.rsp /tmp
Amend the entries in the "/tmp/em_with_new_db.rsp" response file to suit your installation requirements. For this installation I used the following values. All other values in the response file were left unchanged.
UNIX_GROUP_NAME="oinstall"
FROM_LOCATION="/host/software/oracle/GridControl/10203/Disk1/rdbms/Disk1/stage/products.xml"
BASEDIR="/u01/app/oracle/product"
INSTALLATION_NAME="oms10g"
s_gdbName="emrep.localdomain"
s_mountPoint="/u01/app/oracle/oradata"
s_operGroup="dba"
s_adminGroup="dba"
b_emailSelected=true
s_emailAddress="me@example.com"
s_emailServer="localhost"
s_securePassword="oms10gPassword"
s_securePasswordConfirm="oms10gPassword"
b_lockedSelected=false
b_passwordsDifferent=false
b_passwordsSame=true
s_reposPwd="oms10gPassword"
s_reposPwdConfirm="oms10gPassword"
The installation was then started in silent mode using the response file as follows.
$ cd /host/software/oracle/GridControl/10203/Disk1/
$ ./runInstaller -noconfig -ignoreSysPrereqs -silent -responseFile /tmp/em_with_new_db.rsp use_prereq_checker=false
On completion of the installation, the following configuration scripts were run as root.
# /u01/app/oracle/oraInventory/orainstRoot.sh
# cd /u01/app/oracle/product/db10g
# ./allroot.sh
At this point the software installation is complete, but the database and Oracle Management Server (OMS) have not been configured. Before patching, all OMS processes must be stopped using the following command.
$ $OMS_HOME/opmn/bin/opmnctl stopall
Grid Control Patch (10.2.0.5)
Both the Oracle Management Server (OMS) and the Agent are patched separately using variations on the same "patchset.rsp" response file from the "10205" software. Take a copy of the "patchset.rsp" response file.
cp /host/software/oracle/GridControl/10205/3731593/Disk1/response/patchset.rsp /tmp/patchset_oms.rsp
Amend the contents of the "/tmp/patchset_oms.rsp" file, changing only the values listed below. Leave all other values unchanged.
UNIX_GROUP_NAME="oinstall"
FROM_LOCATION="/host/software/oracle/GridControl/10205/3731593/Disk1/stage/products.xml"
ORACLE_HOME="/u01/app/oracle/product/oms10g"
b_softwareonly=true
b_startOMS=false
s_sysPassword="oms10gPassword"
sl_pwdInfo={ "oms10gPassword" }
oracle.iappserver.st_midtier:szl_InstanceInformation={ "oms10gPassword" }
Start the silent installation of the patch software for the OMS with the following command.
$ cd /host/software/oracle/GridControl/10205/3731593/Disk1
$ ./runInstaller -noconfig -silent -responseFile /tmp/patchset_oms.rsp
Once the installation is complete, run the configuration script as the root user.
# cd /u01/app/oracle/product/oms10g
# ./root.sh
This script does not produce any output.
To patch the Agent, copy the "patchset_oms.rsp" file.
cp /tmp/patchset_oms.rsp /tmp/patchset_agent.rsp
Only the following value needs to be changed in the "/tmp/patchset_agent.rsp". All other settings match those for the OMS patch.
ORACLE_HOME="/u01/app/oracle/product/agent10g"
Start the silent installation of the patch software for the Agent with the following command.
$ cd /host/software/oracle/GridControl/10205/3731593/Disk1
$ ./runInstaller -noconfig -silent -responseFile /tmp/patchset_agent.rsp
Once the installation is complete, run the configuration script as the root user.
# cd /u01/app/oracle/product/agent10g
# ./root.sh
Configure Grid Control
Assuming all the installations and patches have completed with no errors we can now configure the database and the OMS.
Configure the database using the following command.
$ cd $ORACLE_HOME/oui/bin
$ ./runConfig.sh ORACLE_HOME=/u01/app/oracle/product/db10g ACTION=configure MODE=perform
Once the database is configured, issue the following command to configure the OMS.
$ export PERL5LIB=$OMS_HOME/perl/lib/5.6.1
$ $OMS_HOME/perl/bin/perl $OMS_HOME/sysman/install/ConfigureGC.pl /u01/app/oracle/product
Both configuration steps can take quite some time, so be patient.
The OMS configuration includes configuration of the Agent. The last part of this configuration is an attempt to start the Agent. If the agent fails to start with a timezone error, enter the correct value for the "agentTZRegion" parameter in the "$AGENT_HOME/sysman/config/emd.properties" file, delete the following files and start the agent.
$ rm -r $AGENT_HOME/sysman/emd/state/*
$ rm -r $AGENT_HOME/sysman/emd/collection/*
$ rm -r $AGENT_HOME/sysman/emd/upload/*
$ rm $AGENT_HOME/sysman/emd/lastupld.xml
$ rm $AGENT_HOME/sysman/emd/agntstmp.txt
$
$ $AGENT_HOME/bin/emctl start agent
The Grid control is now configured.
Check the Status of the Grid Control
The following command checks the status of the OMS.
$ $OMS_HOME/bin/emctl status oms
Oracle Enterprise Manager 10g Release 5 Grid Control
Copyright (c) 1996, 2009 Oracle Corporation.  All rights reserved.
Oracle Management Server is Up.
$
The following command check the status of the agent on the Grid Control server.
$ $AGENT_HOME/bin/emctl status agent
Oracle Enterprise Manager 10g Release 5 Grid Control 10.2.0.5.0.
Copyright (c) 1996, 2009 Oracle Corporation.  All rights reserved.
---------------------------------------------------------------
Agent Version     : 10.2.0.5.0
OMS Version       : 10.2.0.5.0
Protocol Version  : 10.2.0.5.0
Agent Home        : /u01/app/oracle/product/agent10g
Agent binaries    : /u01/app/oracle/product/agent10g
Agent Process ID  : 29246
Parent Process ID : 29230
Agent URL         : https://grid.localdomain:3872/emd/main/
Repository URL    : https://grid.localdomain:1159/em/upload
Started at        : 2010-01-15 15:59:34
Started by user   : oracle
Last Reload       : 2010-01-15 15:59:34
Last successful upload                       : 2010-01-15 16:18:53
Total Megabytes of XML files uploaded so far :    14.65
Number of XML files pending upload           :        0
Size of XML files pending upload(MB)         :     0.00
Available disk space on upload filesystem    :    64.90%
Last successful heartbeat to OMS             : 2010-01-15 16:18:44
---------------------------------------------------------------
Agent is Running and Ready
$
To access the grid control, use the URL specified in the "$OMS_HOME/sysman/setupinfo.txt" file. In my case the URL is shown below.
https://grid.localdomain:1159/em
Starting and Stopping Grid Control Services
The following script shows how the whole grid control is started and stopped.
# Start everything
$ORACLE_HOME/bin/dbstart $ORACLE_HOME
$OMS_HOME/opmn/bin/opmnctl startall
$AGENT_HOME/bin/emctl start agent# Stop everything
$AGENT_HOME/bin/emctl stop agent
$OMS_HOME/opmn/bin/opmnctl stopall
$ORACLE_HOME/bin/dbshut $ORACLE_HOME
The dbstart and dbshut commands require the "/etc/oratab" file to be editied to allow auto startup/shutdown.
By default, the database supporting the repository is in NOARCHIVELOG mode.
For more information see:
转载于:https://my.oschina.net/rootliu/blog/1944666
Oracle10gR5GridControl InstallOnLinux相关推荐
- Splunk组件和架构详解
本文主要讲解的是Splunk组件和架构! Splunk主要解决的问题:统一管理分布在不同机器上的数据(比如日志数据).如下图所示: Splunk是一个功能完备的企业级产品,提供了命令行窗口,web图形 ...
- Linux平台安装MongoDB(亲测)
MongoDB 提供了 linux 各个发行版本 64 位的安装包,你可以在官网下载安装包. 安装前我们需要安装各个 Linux 平台依赖包. Red Hat/CentOS: sudo yum ins ...
- linux(CentOS)下安装mongodb
前言 在mongodb的官网中有linux各个系统的安装配置说明 https://docs.mongodb.com/master/administration/install-on-linux/ 本文 ...
- 【Python3网络爬虫开发实战】1.4.2-MongoDB安装
[摘要] MongoDB是由C++语言编写的非关系型数据库,是一个基于分布式文件存储的开源数据库系统,其内容存储形式类似JSON对象,它的字段值可以包含其他文档.数组及文档数组,非常灵活. Mongo ...
- HBase超级详细总结
1-HBase的安装 HBase是什么? HBase是Apache Hadoop中的一个子项目,Hbase依托于Hadoop的HDFS作为最基本存储基础单元,通过使用hadoop的DFS工具就可以看到 ...
- 容器编排-Docker Compose
介绍 Compose 是 Docker 官方的开源项目,负责实现对 Docker 容器集群的快速编排. 官网:Overview of Docker Compose | Docker Documenta ...
- 玩转Linux操作系统
目录 操作系统发展史 Linux概述 Linux系统优点 Linux系统发行版本 基础命令 实用程序 用户管理 文件系统 编辑器 - vim 软件安装和配置 配置服务 计划任务 网络访问和管理 进程管 ...
- install logicalDoc
数据库配置 create database logicaldoc; GRANT ALL PRIVILEGES ON logicaldoc.* TO logicaldoc@'%' identified ...
- python3数据库MongoDB的全面安装教程
MongoDB 是由C++语言编写的非关系型数据库,是一个基于分布式文件存储的开源数据库系统其内容存储形式类似 JSON 对象,它的字段值可以包含其他文档.数组及文档数组,非常灵活. MongoDB支 ...
最新文章
- 洛谷 P1636 Einstein学画画
- Android Studio问题集锦
- 基于hibernate实现的分页技术
- 图片跟着鼠标_刷完几百张网易云Banner,我发现了2个PPT图片处理的大招!
- EventTrigger接管所有事件导致其他事件无法触发
- 手把手教你用ESP32制作一个游戏机
- python 多线程就这么简单(续)
- Pytorch和Torchvision版本对应
- 制作windows7虚拟机镜像并配置网络
- 《Python金融大数据风控建模实战》 第8章 Logistic回归模型
- 简单明了的线程生命周期图
- python并行计算
- 新浪登陆按钮三种方式解析
- 计算机类专业必备的软件,拿来把你
- 献给爱折腾的你:虚拟机VMware安装macOS15 Catalina 附已经装好的系统(打开即用)
- 液体特效文字AE标题模板免费下载
- Thoth多因子策略
- 柜台管理系统(1.3)
- PostgreSQL中的约束
- 音悦台php,php获取音悦台视频