Virgo与Maven整合开发环境搭建(四)
4.web
接下来是这次demo的另一个bundle.而且是个拥有spring-mvc能力的web-bundle(WAB).先来看一下结构

首先来看一下web.xml
<?xml version="1.0" encoding="UTF-8"?>
<web-appxmlns:xsi="http://www.w3.org/2001/XMLSchema-instance"xmlns="http://java.sun.com/xml/ns/javaee"xmlns:web="http://java.sun.com/xml/ns/javaee/web-app_2_5.xsd"xsi:schemaLocation="http://java.sun.com/xml/ns/javaee http://java.sun.com/xml/ns/javaee/web-app_2_5.xsd"version="2.5"><display-name>Search Web Module</display-name><servlet><servlet-name>search</servlet-name><servlet-class>org.phantom.web.virgo.servlet.DispatcherServlet</servlet-class><init-param><param-name>contextClass</param-name><param-value>org.eclipse.virgo.web.dm.ServerOsgiBundleXmlWebApplicationContext</param-value></init-param></servlet><servlet-mapping><servlet-name>search</servlet-name><url-pattern>/*</url-pattern></servlet-mapping>
</web-app>
在这个demo中,我们使用的是Spring-MVC,所以,这里加入Spring-MVC支持.这里用到了一个自定义扩展类org.phantom.web.virgo.servlet.DispatcherServlet。说明一下这个类的作用。在OSGI中,每个bundle都是独立的,它拥有独立的ClassLoad,独立的Spring ApplicationContext.但是我们要通过spring从一个bundle中获取另一个bundle的服务,即我们需要这些applicationContext互相认识.怎么做到呢?virgo对这事做了支持.它提供了一个类org.eclipse.virgo.web.dm.ServerOsgiBundleXmlWebApplicationContext.这个类就相当于一个OSGI全局的applicationContext.我们这里就是要将这个类注入到Spring-MVC的DispatcherServlet中.这里通过扩展默认的DispatcherServlet来达到目的
public class DispatcherServlet extends org.springframework.web.servlet.DispatcherServlet{@Overridepublic void init(ServletConfig config) throws ServletException {String contextClass = config.getInitParameter("contextClass");if (contextClass != null) {try {setContextClass(Class.forName(contextClass));} catch (ClassNotFoundException e) {throw new ServletException(String.format("Context class %s not found", contextClass), e);}}super.init(config);}
}
然后来看一下OSGI描述.
Manifest-Version: 1.0
Bundle-ManifestVersion: 2
Bundle-Name: search web module
Bundle-SymbolicName: org.phantom.demo.web
Bundle-Version: 1.0.0.SNAPSHOT
Import-Template: org.springframework.*;version="[3.0.5,4)"
Import-Package: org.springframework.context.config;version="[3.0.5,4)",org.springframework.web.servlet.config;version="[3.0.5,4)"
Excluded-Imports: org.phantom.demo.web
Snap-Host: org.phantom.demo.host;version="1.0.0.SNAPSHOT"
Snap-ContextPath: /search
这里要介绍Snap-ContextPath:/search.前文已经介绍过Host-Snap,这一句配置就是配置当前bundle的请求路径,即第二级路径.还有一句Snap-Host:org.org.phantom.demo.host.这句配置将当前snap挂载到了某个host上.于是,根据前文的介绍,当进入到/demo后,SnapHostFilter开始工作,拿到请求的第二级/search,分发到当前bundle.
<?xml version="1.0" encoding="UTF-8"?>
<beans xmlns="http://www.springframework.org/schema/beans"xmlns:xsi="http://www.w3.org/2001/XMLSchema-instance"xmlns:context="http://www.springframework.org/schema/context"xmlns:mvc="http://www.springframework.org/schema/mvc"xmlns:util="http://www.springframework.org/schema/utils"xmlns:osgi="http://www.springframework.org/schema/osgi"xsi:schemaLocation="http://www.springframework.org/schema/beans http://www.springframework.org/schema/beans/spring-beans-3.0.xsd http://www.springframework.org/schema/context http://www.springframework.org/schema/context/spring-context-3.0.xsdhttp://www.springframework.org/schema/mvc http://www.springframework.org/schema/mvc/spring-mvc-3.0.xsdhttp://www.springframework.org/schema/util http://www.springframework.org/schema/util/spring-util-3.0.xsdhttp://www.springframework.org/schema/osgi http://www.springframework.org/schema/osgi/spring-osgi-1.2.xsd"><context:component-scan base-package="org.phantom.demo.web" /><mvc:annotation-driven/><mvc:resources location="/" mapping="*.html"/><mvc:resources location="/resources/" mapping="/resources/**" /><osgi:reference id="pictureSearch" interface="org.phantom.demo.api.SearchHandler" bean-name="pictureSearch"/></beans>
一句句解释一下.第一句,打开包扫描,将Controller加入到Spring管理中
<context:component-scan base-package="org.phantom.demo.web" />接下来打开mvc的支持.将一些Spring-MVC默认的View、Convertor加入进来。
<mvc:annotation-driven/>后面两句,是对一些静态资源放行的配置,因为我们servlet的拦截模式是/*,所以,静态资源直接放行
<mvc:resources location="/" mapping="*.html"/><mvc:resources location="/resources/" mapping="/resources/**" />这句就是通过Spring-DM获取一个OSGI服务的配置.这里我们只获取图片搜索的实现,MP3的我们留在后续章节,用来说明OSGI的动态性如何体现.
<osgi:reference id="pictureSearch" interface="org.phantom.demo.api.SearchHandler" bean-name="pictureSearch"/>同样,我们与普通OSGI进行一下对比.在普通OSGI中,想要或者一个服务如何编写
try {SearchHandler handler = null;ServiceReference<SearchHandler>[] srs = (ServiceReference<SearchHandler>[]) bundleContext.getServiceReferences(SearchHandler.class.getName(),"(bean-name='picutreSearch')");if(srs!=null && srs.length>0)handler = bundleContext.getService(srs[0]);} catch (InvalidSyntaxException e) {e.printStackTrace();}最后来看一下Controller如何编写
package org.phantom.demo.web;import java.util.List;import javax.annotation.Resource;import org.phantom.demo.api.SearchBean;
import org.phantom.demo.api.SearchHandler;
import org.springframework.http.HttpStatus;
import org.springframework.http.ResponseEntity;
import org.springframework.stereotype.Controller;
import org.springframework.web.bind.annotation.RequestMapping;
import org.springframework.web.bind.annotation.RequestMethod;@Controller
@RequestMapping("/_s")
public class SearchController {@Resourceprivate SearchHandler handler = null;@RequestMapping(method = RequestMethod.GET)public ResponseEntity<List<? extends SearchBean>> doSearch(String key) {List<? extends SearchBean> list = handler.doSearch(key);return new ResponseEntity<List<? extends SearchBean>>(list, HttpStatus.OK);}
}
在Controller中,将获取到的服务注入进来.
@Resourceprivate SearchHandler handler = null;ok,然后编写一个很简单的页面.点击按钮发送请求页面上发送一个get请求到Controller,Controller调用service完成整个流程.
<!DOCTYPE html PUBLIC "-//W3C//DTD HTML 4.01 Transitional//EN" "http://www.w3.org/TR/html4/loose.dtd">
<html>
<head>
<meta http-equiv="Content-Type" content="text/html; charset=UTF-8">
<script type="text/javascript" src="../resources/jquery-1.6.min.js"></script>
<script type="text/javascript">
$(function(){
$(":button").click(function(){$.ajax({url:'_s',type:'get',data:{key:$(":text").val()},success:function(result){alert(result);}});
});
});
</script>
</head>
<body>
<input/><input type="button" value="search"/>
</body>
</html>
所有bundle开发完后,按照依赖关系,依次执行mvn install安装到本地maven仓库.之前已经配置了maven仓库与virgo关联.所以这种开发流程基本是:开发完—install—启动virgo.
然后到${virgo_home}/pickup/新建一个plan,即一次部署计划.
<?xml version="1.0" encoding="UTF-8"?>
<plan name="com.faben.demo.plan" version="1.0.0.SNAPSHOT" scoped="false" atomic="false"xmlns="http://www.eclipse.org/virgo/schema/plan"xmlns:xsi="http://www.w3.org/2001/XMLSchema-instance"xsi:schemaLocation="http://www.eclipse.org/virgo/schema/plan http://www.eclipse.org/virgo/schema/plan/eclipse-virgo-plan.xsd"><artifact type="bundle" name="org.phantom.demo.host" version="1.0.0.SNAPSHOT"/><artifact type="bundle" name="org.phantom.demo.web" version="1.0.0.SNAPSHOT"/><artifact type="bundle" name="org.phantom.demo.search.picture" version="1.0.0.SNAPSHOT"/>
</plan>
部署计划中只需要写实现包和web包,被依赖的包比如api不用写,Virgo会根据MANIFEST.MF中的依赖定义,在maven库中找到api并加载.
做完这些后,启动virgo,访问http://localhost:8080/demo/search/index.html.
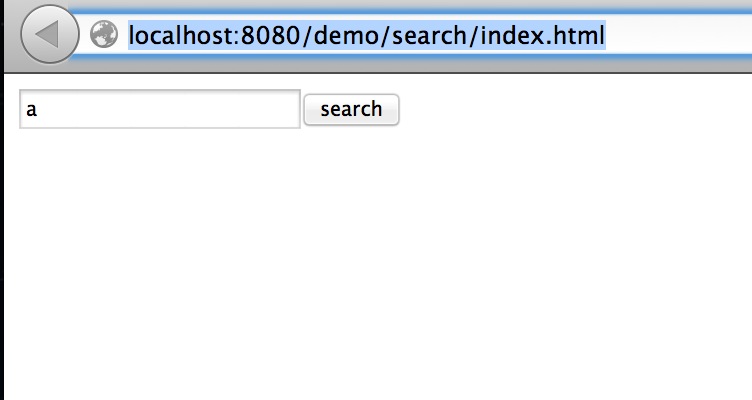
点击按钮,通过firebug查看请求和返回的数据

转载于:https://my.oschina.net/u/725579/blog/529862
Virgo与Maven整合开发环境搭建(四)相关推荐
- Virgo与Maven整合开发环境搭建(一)
OSGI的技术渐渐被采用到互联网应用的开发中.这里不讨论OSGI,即我们熟悉的Equinox,Felix是如何进.Java Web应用开发,这里讨论的是一个目前看来较新的方案--Eclipse Vir ...
- Virgo与Maven整合开发环境搭建(二)
二.开发集成. 配置好Maven和Virgo后,我们动手写一个demo.demo的场景是页面有一个搜索框,输入搜索条件,显示出匹配项.为了体现OSGI的特性,我们搜索内容分为图片和MP3两个bundl ...
- Virgo与Maven整合开发环境搭建(三)
3.MP3.Picture 先来看picture搜索实现. pom中,打包规则可以继承自应用类bundle打包规则.除了打包规则,还需要加入spring的依赖和api包的依赖. <depende ...
- spark1.6 maven java_Spark+ECLIPSE+JAVA+MAVEN windows开发环境搭建及入门实例【附详细代码】...
前言 本文旨在记录初学Spark时,根据官网快速入门中的一段Java代码,在Maven上建立应用程序并实现执行. 首先推荐一个很好的入门文档库,就是CSDN的Spark知识库,里面有很多spark的从 ...
- IDEA Git Maven 基础开发环境搭建
bin下修改 idea64.exe.vmoptions -Xms500m -Xmx1500m -XX:ReservedCodeCacheSize=500m idea只有Project(工程)和 Mod ...
- 使用Maven搭建Struts2+Spring3+Hibernate4的整合开发环境
做了三年多的JavaEE开发了,在平时的JavaEE开发中,为了能够用最快的速度开发项目,一般都会选择使用Struts2,SpringMVC,Spring,Hibernate,MyBatis这些开源框 ...
- 视觉SLAM十四讲学习笔记-第二讲-开发环境搭建
专栏系列文章如下: 视觉SLAM十四讲学习笔记-第一讲_goldqiu的博客-CSDN博客 视觉SLAM十四讲学习笔记-第二讲-初识SLAM_goldqiu的博客-CSDN博客 lin ...
- Spark Idea Maven 开发环境搭建(转载)
mark一下,感谢作者分享! Spark Idea Maven 开发环境搭建 一.安装jdk jdk版本最好是1.7以上,设置好环境变量,安装过程,略. 二.安装Maven 我选择的Maven版本是3 ...
- 开发指南专题四:JEECG微云快速开发平台--JEECG开发环境搭建
开发指南专题四:JEECG微云快速开发平台开发环境搭建 1. JEECG开发环境搭建 JEECG推荐的开发环境为Myeclipse8.5/Eclipse3.7+JDK1.6+Tomcat6.0 1.1 ...
最新文章
- linux中system清屏命令,Linux磁盘管理命令
- Roger Ver:BCH也可成为价值储备
- JavaWeb--数据库添加
- qtdesigner 组件全吗_显示屏种类这么多,你知道怎么分类吗?
- 坑:找到LoadRunner中Recording Options和 Run Time Settings配置选项确实的原因
- 首届CSS开发者大会|七牛助力前端开发
- Bailian2965 玛雅历【日期计算】
- Windows 2003网络负载均衡的实现
- python字符串左_Python去除字符串左边指定字符
- SAP UI5 在 PC 端浏览器和移动设备使用摄像头进行条形码扫描的几种解决方案介绍
- ipd敏捷开发_IPD+敏捷开发
- python新建代码编辑文档快捷键大全_Python IDE PyCharm的快捷键大全
- QT版用QLCDnumber显示时间
- GPS测量中四参数、七参数的概念及意义
- 计算机网络 之 P2P架构
- 动态iptables 防火墙
- 为什么在马云成功前就有那么多影像留下来?
- c/c++函数参数的缺省值使用要点:
- CentOS7日志审计
- linux .gz文件 解压缩命令的简单使用