matplotlib动态图和视频保存
2019独角兽企业重金招聘Python工程师标准>>> 
FuncAnimation类
class matplotlib.animation.FuncAnimation(fig, func, frames=None, init_func=None, fargs=None, save_count=None, **kwargs)
参数
fig : matplotlib.figure.Figure对象,可以理解为画布
func : 函数(callable),每一帧被调用一次
函数签名大概是这样的:def func(frame, *fargs) -> iterable_of_artists
第一个参数是frames中的元素,第二个是fargs参数设置的附件参数
返回值是可迭代的图形对象
frames : 可迭代对象, 整数, 生成函数或者None,传递给动画函数func的帧
如果是可迭代对象,可迭代对象的长度将覆盖save_count参数
如果是个整数,值就是range(frames)
如果是生成函数,签名必须是def gen_function() -> obj:
如果是None,frames=itertools.count,相当于整数从0开始步长1无限迭代
init_func : 函数(callable)
用来画一个完整的帧,如果没有给,使用的是frames中的第一个元素,在第一帧之前被调用
如果If blit == True, init_func 必须返回一个可迭代的图形对象 签名像:def init_func() -> iterable_of_artists:
fargs : 元组或None,每一次调用func的附加参数
save_count : 整数,缓存的帧的数量
interval : number, 2帧之间的延迟,默认200毫秒
repeat_delay : number, 重复延迟,默认None
repeat : bool, 是否重复,默认True
blit : bool, 是否使用blitting优化,默认False
blitting的含义是内存中图像的位块传输,指的是将某一表面的全部或部分图像复制到另一表面上
动图存储配置
# print matplotlib.matplotlib_fname()
# matplotlib\mpl-data\matplotlibrcanimation.writer : ffmpeg         ## MovieWriter 使用
animation.ffmpeg_path:  ffmpeg    ## 可执行文件ffmpeg路径,会搜索$PATH
animation.convert_path:  magick   ## 可执行文件magick路径,会搜索$PATH
animation.convert_args:  convert  ## 执行magick的附件参数,因为新ImageMagick的没有convert命令了,所以使用的是convert参数
要保存动图和视频需要使用ImageMagick,后面有下载链接,下载安装之后的目录大概如下:
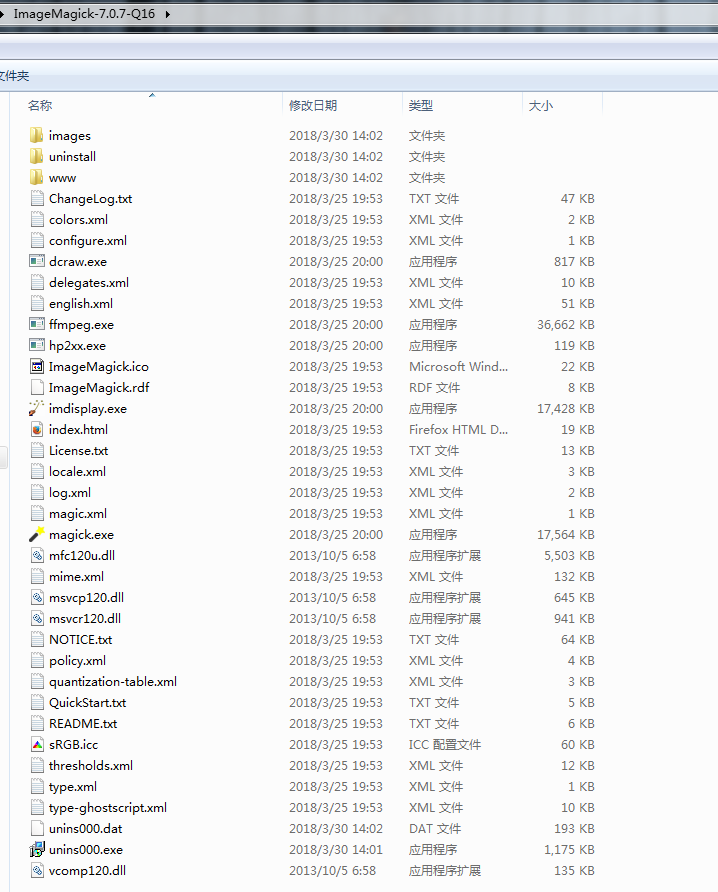
下载页面:
sin实例
# -*- coding:utf-8 -*-
import numpy as np
from matplotlib import pyplot as plt
from matplotlib import animation
import matplotlib# print matplotlib.matplotlib_fname()fig = plt.figure()
ax = plt.axes(xlim=(0, 2), ylim=(-2, 2))
line, = ax.plot([], [], lw=2)def init():line.set_data([], [])return line,def animate(i):#linespace(起始值(start),终止值(stop),数量(num)=50,是否包含终止值(endpoint)=True,是否返回步长(retstep)=False,数据类型(dtype)=None)x = np.linspace(0, 2, 1000)y = np.sin(2 * np.pi * (x - 0.01 * i))line.set_data(x, y)return line,anim = animation.FuncAnimation(fig, animate, init_func=init,frames=200, interval=20, blit=True)
anim.save('sin.gif', fps=75, writer='imagemagick')
plt.show()
circle实例
# -*- coding:utf-8 -*-
import numpy as np
import matplotlib.pyplot as plt
import matplotlib.animation as animation
import matplotlib.path as mpath
import matplotlib.patches as mpatch
from matplotlib.patches import Circle
import randomfig,ax = plt.subplots()
ax.set_xticks([])
ax.set_yticks([])
ax.spines["left"].set_color("none")
ax.spines["top"].set_color("none")
ax.spines["right"].set_color("none")
ax.spines["bottom"].set_color("none")
ax.axis([-5,5,-5,5])
# ax.add_patch(mpatch.PathPatch(mpath.Path.circle()))
circle = Circle(xy = (0.0, 0.0), radius=0.5, alpha=0.5)ax.add_patch(circle)def init():return Circle(xy = (0.0, 0.0), radius=0.5, alpha=0.5),def animate(i):circle.set_radius(i*0.5)circle.set_facecolor(random.choice("rmcky"))return circle,# fig = plt.gcf()
# fg = range(1,11)
# fgr = range(1,11)
# fgr.reverse()
# fs = fg + fgr
fs = [1, 2, 3, 4, 5, 6, 7, 8, 9, 10, 10, 9, 8, 7, 6, 5, 4, 3, 2, 1]
ani = animation.FuncAnimation(fig, animate, init_func=init,frames=fs,interval=1000, blit=True)
# ani = animation.FuncAnimation(fig, animate, frames=360, init_func=init, interval=0.1, blit=True, save_count=50)
# ani = animation.FuncAnimation(fig, animate, frames=10, init_func=init, interval=0.1, blit=True, save_count=50,repeat=False)ani.save('circle.gif', fps=2, writer='imagemagick')
plt.show()

rain实例
# -*- coding:utf-8 -*-
import numpy as np
import matplotlib.pyplot as plt
from matplotlib.animation import FuncAnimation# Fixing random state for reproducibility
np.random.seed(19680801)# Create new Figure and an Axes which fills it.
fig = plt.figure(figsize=(7, 7))
ax = fig.add_axes([0, 0, 1, 1], frameon=False)
ax.set_xlim(0, 1), ax.set_xticks([])
ax.set_ylim(0, 1), ax.set_yticks([])# Create rain data
n_drops = 50
rain_drops = np.zeros(n_drops, dtype=[('position', float, 2),('size',     float, 1),('growth',   float, 1),('color',    float, 4)])# Initialize the raindrops in random positions and with
# random growth rates.
rain_drops['position'] = np.random.uniform(0, 1, (n_drops, 2))
rain_drops['growth'] = np.random.uniform(50, 200, n_drops)# Construct the scatter which we will update during animation
# as the raindrops develop.
scat = ax.scatter(rain_drops['position'][:, 0], rain_drops['position'][:, 1],s=rain_drops['size'], lw=0.5, edgecolors=rain_drops['color'],facecolors='none')def update(frame_number):# Get an index which we can use to re-spawn the oldest raindrop.current_index = frame_number % n_drops# Make all colors more transparent as time progresses.rain_drops['color'][:, 3] -= 1.0/len(rain_drops)rain_drops['color'][:, 3] = np.clip(rain_drops['color'][:, 3], 0, 1)# Make all circles bigger.rain_drops['size'] += rain_drops['growth']# Pick a new position for oldest rain drop, resetting its size,# color and growth factor.rain_drops['position'][current_index] = np.random.uniform(0, 1, 2)rain_drops['size'][current_index] = 5rain_drops['color'][current_index] = (0, 0, 0, 1)rain_drops['growth'][current_index] = np.random.uniform(50, 200)# Update the scatter collection, with the new colors, sizes and positions.scat.set_edgecolors(rain_drops['color'])scat.set_sizes(rain_drops['size'])scat.set_offsets(rain_drops['position'])# Construct the animation, using the update function as the animation director.
animation = FuncAnimation(fig, update, interval=10)
animation.save('rain.gif', fps=75, writer='imagemagick')
plt.show()

保存为mp4
# -*- coding:utf-8 -*-
import numpy as np
import matplotlib
matplotlib.use("Agg")
import matplotlib.pyplot as plt
from matplotlib.animation import FFMpegWriter# Fixing random state for reproducibility
np.random.seed(19680801)metadata = dict(title='Movie Test', artist='Matplotlib',comment='Movie support!')
writer = FFMpegWriter(fps=15, metadata=metadata)fig = plt.figure()
l, = plt.plot([], [], 'k-o')plt.xlim(-5, 5)
plt.ylim(-5, 5)x0, y0 = 0, 0with writer.saving(fig, "writer_test.mp4", 100):for i in range(100):x0 += 0.1 * np.random.randn()y0 += 0.1 * np.random.randn()l.set_data(x0, y0)writer.grab_frame()
画心型mp4
# -*- coding:utf-8 -*-
import numpy as np
import matplotlib
matplotlib.use("Agg")
import matplotlib.pyplot as plt
from matplotlib.animation import FFMpegWriter
import mathmetadata = dict(title='heart', artist='Matplotlib',comment='draw heart')
writer = FFMpegWriter(fps=15, metadata=metadata)figure = plt.figure()
axes = plt.gca()
axes.set_xticks([])
axes.set_yticks([])
axes.spines["left"].set_color("none")
axes.spines["top"].set_color("none")
axes.spines["right"].set_color("none")
axes.spines["bottom"].set_color("none")line1, = axes.plot([], [], color='red', linewidth=2,)
line2, = axes.plot([], [], color='red', linewidth=2,) plt.xlim(-5, 5)
plt.ylim(-5, 5)x0, y0 = 0, 0with writer.saving(figure, "heart.mp4", 100):for i in range(15):t = np.linspace(0, i/math.pi, 100)x = np.sin(t)y = np.cos(t) + np.power(x, 2.0/3)line1.set_data(x, y)line2.set_data(-x, y)writer.grab_frame()
视频没有办法上传,如果感兴趣可以自己尝试一下。
参考
ImageMagick下载
animation
matplotlib.animation.MovieWriter
Frame grabbing
matplotlib.animation.FFMpegWriter
matplotlib.animation.FuncAnimation
matplotlib.animation.Animation
转载于:https://my.oschina.net/u/2474629/blog/1794311
matplotlib动态图和视频保存相关推荐
- python动图存储为视频_matplotlib动态图和视频保存
FuncAnimation类 class matplotlib.animation.FuncAnimation( fig, func, frames=None, init_func=None, far ...
- Python matplotlib动态图
matplotlib动态图 1.依赖python包 2.使用matplotlib.animation.FuncAnimation 3.使用celluloid.Camera 参考文献 优美的动态图对写b ...
- Photoshop CS6将多张图片合成GIF动态图或视频,并将其保存导出
(0)从Mini Bridge中拖入多张图片(制作原材料),形成多个图层. (1)从"窗口"中打开"时间轴" 从"时间轴"的选项中" ...
- python动态图片转字符画_GIF动态图,视频?都能用Python转换成字符画图像
字符画是一种由字母.标点或其他字符组成的图画,它产生于互联网时代,在聊天软件中使用较多,本文我们看一下如何将自己喜欢的图片转成字符画. 静态图片 首先,我们来演示将静态图片转为字符画,功能实现主要用到 ...
- canvas全局合成画月牙_GIF动态图,视频?都能用Python转换成字符画图像
字符画是一种由字母.标点或其他字符组成的图画,它产生于互联网时代,在聊天软件中使用较多,本文我们看一下如何将自己喜欢的图片转成字符画. 静态图片 首先,我们来演示将静态图片转为字符画,功能实现主要用到 ...
- MoviePy 数据动态可视化 图像转动态图或者视频
转载自: 点击打开链接 Data Animations With Python and MoviePy Nov 29th, 2014 | Comments Python has some great ...
- 【Matlab 控制】模仿绘制动态图像 保存动态图 GIF
模仿绘制动态图像 模仿绘制动态图像 保存为动态图 GIF 视频转 GIF 模仿绘制动态图像 clc;clear a=[1 2 3 4 5 6 7 8 9 ]; b=[2 4 8 16 30 40 50 ...
- 用HBuilder插入图片、动态图、音乐、视频、上传文件
一.插入图片.动态图.音乐.视频 第一步将带插入的静态图.动态图.视频放在Hbuilder的img目录下 第二步代码如下: <!DOCTYPE html> <html>< ...
- python animation 轨迹_Matplotlib animation模块实现动态图
matplotlib 画图功能非常强大,目前也只能根据官网提供的例子简单地画几张图.最近学习了能画动态图的animation模块,作个简单地记录. 在matplotlib作图中,比较常用的是matpl ...
最新文章
- “电商+金融”融合发展 开辟金融创新新路径
- 从Blue Pill、硬件虚拟化谈安全防护完备性上的一个小原则
- mysql错误1451_mysql错误代号-J(1451~1494)
- iis php mysql 一键安装_LNMP(Nginx服务,MySQL 服务,安装PHP服务 手动安装技术文档)
- 读书笔记_java设计模式深入研究 第八章 状态模式 State
- C算法--入门 2.3
- Raft协议安全性保证
- redis将散裂中某个值自增_0基础掌握Django框架(49)Redis
- Linux批量删除文件
- 【今日CS 视觉论文速览】Fri, 18 Jan 2019
- linux基础(十一)--系统初始化的简谈
- (22)css3新增边框圆角属性border-radius
- fastapi学习(二):路径参数获取与GET、POST参数获取
- MFC下运行控制台不显示黑屏
- 详解: Spark 相对于MapReduce的优势(为什么MapReduce性能不理想)
- jQuery Deferred对象
- 手机输入法并一不一定要横向充满
- 16进制发送 mqtt客户端调试工具_MQTT客户端调试工具(MQTT Simulate Device)
- mysql数据库 添加字段,修改字段,修改注释
- oracle价格的数据类型,oracle数据库中的number类型
热门文章
- 19) maven 项目结构:聚集
- 查看daemon使用技巧
- 如何进行需求矩阵管理
- SmartDial - 简单你的生活
- socket中的几个数据结构
- 大数据之-Hadoop环境搭建_hadoop官网手册---大数据之hadoop工作笔记0020
- 大数据之-Hadoop环境搭建_hadoop目录结构---大数据之hadoop工作笔记0019
- ES6新特性_ES6_Symbol的介绍与创建---JavaScript_ECMAScript_ES6-ES11新特性工作笔记015
- k8s核心技术-Pod(健康检查)_健康检查的方式_以及pod崩溃后如何处理---K8S_Google工作笔记0023
- 常用开发术语及工具001---NGF_TPS_墨刀手机原型页面设计工具