iOS 11之Vision人脸检测
代码地址如下:
http://www.demodashi.com/demo/11783.html大道如青天,我独不得出
前言
在上一篇iOS Core ML与Vision初识中,初步了解到了vision的作用,并在文章最后留了个疑问,就是类似下面的一些函数有什么用
- (instancetype)initWithCIImage:(CIImage *)image options:(NSDictionary<VNImageOption, id> *)options;- (instancetype)initWithCVPixelBuffer:(CVPixelBufferRef)pixelBuffer options:(NSDictionary<VNImageOption, id> *)options;在查阅一些资料后,最终通过这些函数得到了如下的效果

对,没错,这就是通过initWithCVPixelBuffer函数来实现的。当然vision的作用远不于此,还有如下的效果
1、图像匹配(上篇文章中的效果)
2、矩形检测
3、二维码、条码检测
4、目标跟踪
5、文字检测
6、人脸检测
7、人脸面部特征检测
由于对人脸识别比较感兴趣,所以这里就主要简单了解了下人脸部分,下面就针对人脸检测和面部检测写写
Vision支持的图片类型
通过查看VNRequestHandler.h文件,我们可以看到里面的所有初始化函数,通过这些初始化函数,我们可以了解到支持的类型有:
1、CVPixelBufferRef
2、CGImageRef
3、CIImage
4、NSURL
5、NSData
Vision使用
在使用vision的时候,我们首先需要明确自己需要什么效果,然后根据想要的效果来选择不同的类,最后实现自己的效果
1、需要一个RequestHandler,在创建RequestHandler的时候,需要一个合适的输入源,及图片类型
2、需要一个Request,在创建Request的时候,也需要根据实际情况来选择,Request大概有如下这么些

3、通过requestHandler将request联系起来,然后得到结果
[handler performRequests:@[requset] error:&error];4、处理结果VNObservation,在VNRequest的results数组中,包含了VNObservation结果,VNObservation也分很多种,这和你Request的类型是相关联的

在完成上述步骤后,我们就可以根据结果来实现一些我们想要的效果
人脸矩形检测
这里我们需要用到VNDetectFaceRectanglesRequest
requset = [[VNDetectFaceRectanglesRequest alloc] initWithCompletionHandler:completionHandler];在得到结果后,我们需要处理下坐标
for (VNFaceObservation *faceObservation in observations) {//boundingBoxCGRect transFrame = [self convertRect:faceObservation.boundingBox imageSize:image.size];[rects addObject:[NSValue valueWithCGRect:transFrame]];}// 转换Rect
- (CGRect)convertRect:(CGRect)boundingBox imageSize:(CGSize)imageSize{CGFloat w = boundingBox.size.width * imageSize.width;CGFloat h = boundingBox.size.height * imageSize.height;CGFloat x = boundingBox.origin.x * imageSize.width;CGFloat y = imageSize.height * (1 - boundingBox.origin.y - boundingBox.size.height);//- (boundingBox.origin.y * imageSize.height) - h;return CGRectMake(x, y, w, h);
}在返回结果中的boundingBox中的坐标,我们并不能立即使用,而是需要进行转换,因为这里是相对于image的一个比例,这里需要注意的是y坐标的转换,因为坐标系的y轴和UIView的y轴是相反的。
最后就是通过返回的坐标进行矩形的绘制
+ (UIImage *)gl_drawImage:(UIImage *)image withRects:(NSArray *)rects
{UIImage *newImage = nil;UIGraphicsBeginImageContextWithOptions(image.size, NO, [UIScreen mainScreen].scale);CGContextRef context = UIGraphicsGetCurrentContext();CGContextSetLineCap(context,kCGLineCapRound); //边缘样式CGContextSetLineJoin(context, kCGLineJoinRound);CGContextSetLineWidth(context,2); //线宽CGContextSetAllowsAntialiasing(context,YES); //打开抗锯齿CGContextSetStrokeColorWithColor(context, [UIColor redColor].CGColor);CGContextSetFillColorWithColor(context, [UIColor clearColor].CGColor);//绘制图片[image drawInRect:CGRectMake(0, 0,image.size.width, image.size.height)];CGContextBeginPath(context);for (int i = 0; i < rects.count; i ++) {CGRect rect = [rects[i] CGRectValue];CGPoint sPoints[4];//坐标点sPoints[0] = CGPointMake(rect.origin.x, rect.origin.y);//坐标1sPoints[1] = CGPointMake(rect.origin.x + rect.size.width, rect.origin.y);//坐标2sPoints[2] = CGPointMake(rect.origin.x + rect.size.width, rect.origin.y + rect.size.height);//坐标3sPoints[3] = CGPointMake(rect.origin.x , rect.origin.y + rect.size.height);CGContextAddLines(context, sPoints, 4);//添加线CGContextClosePath(context); //封闭}CGContextDrawPath(context, kCGPathFillStroke); //根据坐标绘制路径newImage = UIGraphicsGetImageFromCurrentImageContext();UIGraphicsEndImageContext();return newImage;
}
效果如下

人脸特征识别
这里我们需要用到VNDetectFaceLandmarksRequest
requset = [[VNDetectFaceLandmarksRequest alloc] initWithCompletionHandler:completionHandler];
处理结果
    for (VNFaceObservation *faceObservation in observations) {//boundingBoxCGRect transFrame = [self convertRect:faceObservation.boundingBox imageSize:image.size];[rects addObject:[NSValue valueWithCGRect:transFrame]];}pointModel.faceRectPoints = rects;return pointModel;
}- (GLDiscernPointModel *)handlerFaceLandMark:(NSArray *)observations image:(UIImage *)image
{GLDiscernPointModel *pointModel = [[GLDiscernPointModel alloc] init];NSMutableArray *rects = @[].mutableCopy;for (VNFaceObservation *faceObservation in observations) {VNFaceLandmarks2D *faceLandMarks2D = faceObservation.landmarks;[self getKeysWithClass:[VNFaceLandmarks2D class] block:^(NSString *key) {if ([key isEqualToString:@"allPoints"]) {return ;}VNFaceLandmarkRegion2D *faceLandMarkRegion2D = [faceLandMarks2D valueForKey:key];NSMutableArray *sPoints = [[NSMutableArray alloc] initWithCapacity:faceLandMarkRegion2D.pointCount];for (int i = 0; i < faceLandMarkRegion2D.pointCount; i ++) {CGPoint point = faceLandMarkRegion2D.normalizedPoints[i];CGFloat rectWidth = image.size.width * faceObservation.boundingBox.size.width;CGFloat rectHeight = image.size.height * faceObservation.boundingBox.size.height;CGPoint p = CGPointMake(point.x * rectWidth + faceObservation.boundingBox.origin.x * image.size.width, faceObservation.boundingBox.origin.y * image.size.height + point.y * rectHeight);[sPoints addObject:[NSValue valueWithCGPoint:p]];}[rects addObject:sPoints];}];}在这里,我们需要注意到landmarks这个属性,这是一个VNFaceLandmarks2D类型的对象,里面包含着许多面部特征的VNFaceLandmarkRegion2D对象,如:faceContour,leftEye,nose….分别表示面部轮廓、左眼、鼻子。这些对象中,又包含下面这么一个属性
@property (readonly, assign, nullable) const CGPoint* normalizedPoints这是一个包含该面部特征的的数组,所以我们可以通过下面的方式取出里面的坐标
CGPoint point = faceLandMarkRegion2D.normalizedPoints[i];当然这里面也存在坐标的转换,见上面代码
最后也是画线,代码如下
+ (UIImage *)gl_drawImage:(UIImage *)image faceLandMarkPoints:(NSArray *)landMarkPoints
{UIImage * newImage = image;for (NSMutableArray *points in landMarkPoints) {CGPoint sPoints [points.count];for (int i = 0;i <points.count;i++) {NSValue *pointValue = points[i];CGPoint point = pointValue.CGPointValue;sPoints[i] = point;}//画线UIGraphicsBeginImageContextWithOptions(newImage.size, NO, [UIScreen mainScreen].scale);CGContextRef context = UIGraphicsGetCurrentContext();CGContextSetLineCap(context,kCGLineCapRound); //边缘样式CGContextSetLineJoin(context, kCGLineJoinRound);CGContextSetLineWidth(context,2); //线宽CGContextSetAllowsAntialiasing(context,YES); //打开抗锯齿// 设置翻转CGContextTranslateCTM(context, 0, newImage.size.height);CGContextScaleCTM(context, 1.0, -1.0);CGContextSetStrokeColorWithColor(context, [UIColor redColor].CGColor);CGContextSetFillColorWithColor(context, [UIColor clearColor].CGColor);CGContextDrawImage(context, CGRectMake(0, 0,newImage.size.width,newImage.size.height), newImage.CGImage);CGContextBeginPath(context);CGContextAddLines(context, sPoints,points.count);//添加线CGContextClosePath(context); //封闭CGContextDrawPath(context, kCGPathFillStroke); //根据坐标绘制路径newImage = UIGraphicsGetImageFromCurrentImageContext();UIGraphicsEndImageContext();}return newImage;
}
效果如下

动态人脸矩形检测
要动态来检测,那么我们肯定需要通过相机来实时取出资源,然后再实现,所以我们这里选择了AVCapture,关于相机的初始化及使用方法这里就不在累赘了,我们直接上代码
在AVCaptureVideoDataOutputSampleBufferDelegate中,通过下面的方法
- (void)captureOutput:(AVCaptureOutput *)output didOutputSampleBuffer:(CMSampleBufferRef)sampleBuffer fromConnection:(AVCaptureConnection *)connection
我们可以进行这么一个转换
CVPixelBufferRef cvpixeBufferRef = CMSampleBufferGetImageBuffer(sampleBuffer);然后通过
VNImageRequestHandler *handler = [[VNImageRequestHandler alloc] initWithCVPixelBuffer:cvpixeBufferRef options:@{}];
将相机返回的图片与request进行关联了。
后续操作如下
request = [[VNDetectFaceRectanglesRequest alloc] initWithCompletionHandler:^(VNRequest * _Nonnull request, NSError * _Nullable error) {NSLog(@" 打印信息:%lu",request.results.count);NSArray *vnobservations = request.results;dispatch_async(dispatch_get_main_queue(), ^{//先移除之前的矩形框[self.rectLayers makeObjectsPerformSelector:@selector(removeFromSuperlayer)];AVCaptureDevicePosition position = [[self.avInput device] position];for (VNFaceObservation *faceObservation in vnobservations) {//boundingBoxCGRect transFrame = [[GLTools sharedInstance] convertRect:faceObservation.boundingBox imageSize:self.view.frame.size];//前置摄像头的时候 记得转换if (position == AVCaptureDevicePositionFront){transFrame.origin.x = self.view.frame.size.width - transFrame.origin.x - transFrame.size.width;}CALayer *rectLayer = [CALayer layer];rectLayer.frame = transFrame;rectLayer.borderColor = [UIColor purpleColor].CGColor;rectLayer.borderWidth = 2;[self.view.layer addSublayer:rectLayer];[self.rectLayers addObject:rectLayer];}});}];在这里存在一个问题,就是摄像头分为前后摄像头,所以在前置摄像头和后置摄像头切换的时候,需要重新配置下
//需要重新进行配置输出 特别是下面的输出方向AVCaptureConnection *captureConnection = [self.avOutput connectionWithMediaType:AVMediaTypeVideo];if ([captureConnection isVideoOrientationSupported]) {[captureConnection setVideoOrientation:AVCaptureVideoOrientationPortrait];}// 视频稳定设置if ([captureConnection isVideoStabilizationSupported]) {captureConnection.preferredVideoStabilizationMode = AVCaptureVideoStabilizationModeAuto;}// 设置输出图片方向captureConnection.videoOrientation = AVCaptureVideoOrientationPortrait;还有个问题就是在坐标转化的时候,前置摄像头的x轴和UIView的x轴也是相反的,所以这里也需要在进行一次转化
transFrame.origin.x = self.view.frame.size.width - transFrame.origin.x - transFrame.size.width;
效果如下

动态添加场景
关于动态添加场景,其实就像我们平时用的美颜相机那样,在适当的位置添加些帽子、眼镜等各种搞笑的图片。这里我们还是需要用到AVCapture,并且和动态添加矩形的方法类似,只是在request上和处理方式上不一样
下面我们先看代码
            request = [[VNDetectFaceLandmarksRequest alloc] initWithCompletionHandler:^(VNRequest * _Nonnull request, NSError * _Nullable error) {NSArray *vnobservations = request.results;for (VNFaceObservation *faceObservation in vnobservations) {VNFaceLandmarks2D *faceLandMarks2D = faceObservation.landmarks;VNFaceLandmarkRegion2D *leftEyefaceLandMarkRegion2D = faceLandMarks2D.leftEye;VNFaceLandmarkRegion2D *rightEyefaceLandMarkRegion2D = faceLandMarks2D.rightEye;dispatch_async(dispatch_get_main_queue(), ^{//                        //先移除之前的矩形框
//                        [self.rectLayers makeObjectsPerformSelector:@selector(removeFromSuperlayer)];
//
//                        AVCaptureDevicePosition position = [[self.avInput device] position];
//
//                        CGRect transFrame = [[GLTools sharedInstance] convertRect:faceObservation.boundingBox imageSize:self.view.frame.size];
//                        //前置摄像头的时候 记得转换
//                        if (position == AVCaptureDevicePositionFront){
//                            transFrame.origin.x = self.view.frame.size.width - transFrame.origin.x - transFrame.size.width;
//                        }
//
//                        CALayer *rectLayer = [CALayer layer];
//                        rectLayer.frame = transFrame;
//                        rectLayer.borderColor = [UIColor purpleColor].CGColor;
//                        rectLayer.borderWidth = 2;
//                        [self.view.layer addSublayer:rectLayer];
//
//                        [self.rectLayers addObject:rectLayer];AVCaptureDevicePosition position = [[self.avInput device] position];CGPoint sPoints[leftEyefaceLandMarkRegion2D.pointCount + rightEyefaceLandMarkRegion2D.pointCount];NSMutableArray *pointXs = [[NSMutableArray alloc] init];NSMutableArray *pointYs = [[NSMutableArray alloc] init];for (int i = 0; i < leftEyefaceLandMarkRegion2D.pointCount; i ++) {CGPoint point = leftEyefaceLandMarkRegion2D.normalizedPoints[i];CGFloat rectWidth = self.view.bounds.size.width * faceObservation.boundingBox.size.width;CGFloat rectHeight = self.view.bounds.size.height * faceObservation.boundingBox.size.height;CGFloat boundingBoxY = self.view.bounds.size.height * (1 - faceObservation.boundingBox.origin.y - faceObservation.boundingBox.size.height);CGPoint p = CGPointZero;if (position == AVCaptureDevicePositionFront){CGFloat boundingX = self.view.frame.size.width - faceObservation.boundingBox.origin.x * self.view.bounds.size.width - rectWidth;p = CGPointMake(point.x * rectWidth + boundingX, boundingBoxY + (1-point.y) * rectHeight);}else{p = CGPointMake(point.x * rectWidth + faceObservation.boundingBox.origin.x * self.view.bounds.size.width, boundingBoxY + (1-point.y) * rectHeight);}sPoints[i] = p;[pointXs addObject:[NSNumber numberWithFloat:p.x]];[pointYs addObject:[NSNumber numberWithFloat:p.y]];}for (int j = 0; j < rightEyefaceLandMarkRegion2D.pointCount; j ++) {CGPoint point = rightEyefaceLandMarkRegion2D.normalizedPoints[j];CGFloat rectWidth = self.view.bounds.size.width * faceObservation.boundingBox.size.width;CGFloat rectHeight = self.view.bounds.size.height * faceObservation.boundingBox.size.height;CGFloat boundingBoxY = self.view.bounds.size.height * (1 - faceObservation.boundingBox.origin.y - faceObservation.boundingBox.size.height);CGPoint p = CGPointZero;if (position == AVCaptureDevicePositionFront){CGFloat boundingX = self.view.frame.size.width - faceObservation.boundingBox.origin.x * self.view.bounds.size.width - rectWidth;p = CGPointMake(point.x * rectWidth + boundingX, boundingBoxY + (1-point.y) * rectHeight);}else{p = CGPointMake(point.x * rectWidth + faceObservation.boundingBox.origin.x * self.view.bounds.size.width, boundingBoxY + (1-point.y) * rectHeight);}sPoints[leftEyefaceLandMarkRegion2D.pointCount + j] = p;[pointXs addObject:[NSNumber numberWithFloat:p.x]];[pointYs addObject:[NSNumber numberWithFloat:p.y]];}//                        for (UIView *view in self.view.subviews) {
//                            if ([view isKindOfClass:[UIImageView class]]) {
//                                [view removeFromSuperview];
//                            }
//                        }
//
//                        for (int i = 0; i < rightEyefaceLandMarkRegion2D.pointCount + leftEyefaceLandMarkRegion2D.pointCount; i++) {//                            CGFloat x = sPoints[i].x;
//                            CGFloat y = sPoints[i].y;
//                            UIImageView *view = [[UIImageView alloc] initWithFrame:CGRectMake(x, y, 2, 2)];
//                            view.backgroundColor = [UIColor redColor];
//                            [self.view addSubview:view];
//                        }//排序 得到最小的x和最大的xNSArray *sortPointXs = [pointXs sortedArrayWithOptions:NSSortStable usingComparator:^NSComparisonResult(id  _Nonnull obj1, id  _Nonnull obj2) {int value1 = [obj1 floatValue];int value2 = [obj2 floatValue];if (value1 > value2) {return NSOrderedDescending;}else if (value1 == value2){return NSOrderedSame;}else{return NSOrderedAscending;}}];NSArray *sortPointYs = [pointYs sortedArrayWithOptions:NSSortStable usingComparator:^NSComparisonResult(id  _Nonnull obj1, id  _Nonnull obj2) {int value1 = [obj1 floatValue];int value2 = [obj2 floatValue];if (value1 > value2) {return NSOrderedDescending;}else if (value1 == value2){return NSOrderedSame;}else{return NSOrderedAscending;}}];UIImage *image =[UIImage imageNamed:@"eyes"];CGFloat imageWidth = [sortPointXs.lastObject floatValue] - [sortPointXs.firstObject floatValue] + 40;CGFloat imageHeight = (imageWidth * image.size.height)/image.size.width;self.glassesImageView.frame = CGRectMake([sortPointXs.firstObject floatValue]-20, [sortPointYs.firstObject floatValue]-5, imageWidth, imageHeight);});}}];
由于时间关系,代码有点乱,将就将就
先说说思路,我是想动态添加一个眼镜的,所以我必须先得到两个眼睛的位置,然后在计算出两个眼睛的宽高,最后适当的调整眼镜的大小,再动态的添加上去
这里必须要说的一个问题,就是我在实现过程中遇到的—坐标
首先是y坐标,如果还是按照静态图片的那种获取方式,那么得到的结果将会是完全相反的。
faceObservation.boundingBox.origin.y * image.size.height + point.y * rectHeight这里我做了 一个假设,估计是由于摄像机成像的原因造成的,所以必须反其道而行,于是我如下改造了下
CGFloat boundingBoxY = self.view.bounds.size.height * (1 - faceObservation.boundingBox.origin.y - faceObservation.boundingBox.size.height);p = CGPointMake(point.x * rectWidth + faceObservation.boundingBox.origin.x * self.view.bounds.size.width, boundingBoxY + (1-point.y) * rectHeight);从中可以看到,所有的point.y都用1减去了,这个试验的过程有点恼火,我还没怎么相通,若有知道的,希望可以告诉我下,当然我也会再研究研究。
再说完y坐标后,就是x坐标了,x坐标在前置摄像头的时候一切正常,然而在切换成后置摄像头的时候,又反了。心累啊,所以没办法,我就只要加判断,然后进行测试,有了如下代码
CGFloat boundingX = self.view.frame.size.width - faceObservation.boundingBox.origin.x * self.view.bounds.size.width - rectWidth;最后终于大功告成!
效果就是文章最顶的那个效果
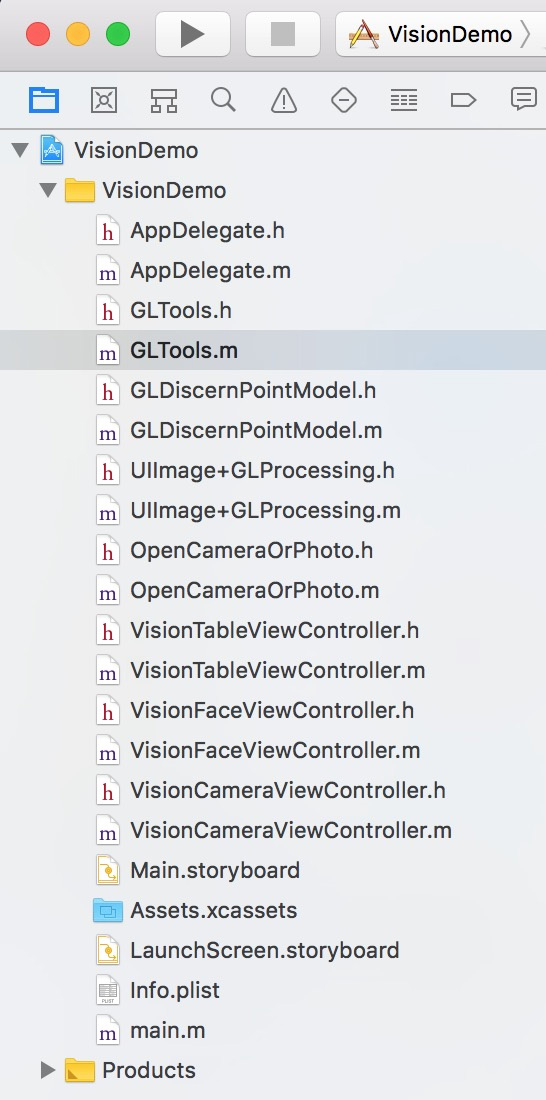
项目文件截图如下
注意
1、在使用过程中,我发现当检测图片的时候内存和cpu的消耗还是很高的,比如我的5s就成功的崩溃过…..
2、图片方向是有要求的….
- (instancetype)initWithCVPixelBuffer:(CVPixelBufferRef)pixelBuffer options:(NSDictionary<VNImageOption, id> *)options;/*!@brief initWithCVPixelBuffer:options creates a VNImageRequestHandler to be used for performing requests against the image passed in as buffer.@param pixelBuffer A CVPixelBuffer containing the image to be used for performing the requests. The content of the buffer cannot be modified for the lifetime of the VNImageRequestHandler.@param orientation The orientation of the image/buffer based on the EXIF specification. For details see kCGImagePropertyOrientation. The value has to be an integer from 1 to 8. This superceeds every other orientation information.@param options A dictionary with options specifying auxilary information for the buffer/image like VNImageOptionCameraIntrinsics*/
- (instancetype)initWithCVPixelBuffer:(CVPixelBufferRef)pixelBuffer orientation:(CGImagePropertyOrientation)orientation options:(NSDictionary<VNImageOption, id> *)options;
通过对比上面两个函数,我们可以发现,多了一个CGImagePropertyOrientation类型的参数,没错,这就是指定传入图片的方向,如果指定了方向,而图片方向却不一致,那么恭喜你,检测不出来….这里我用的都是第一个方法,及没有参数,好像默认是up的。
iOS 11之Vision人脸检测
代码地址如下:
http://www.demodashi.com/demo/11783.html注:本文著作权归作者,由demo大师发表,拒绝转载,转载需要作者授权
iOS 11之Vision人脸检测相关推荐
- IOS 集成SeetaFace6框架,实现从采集到图像格式转换再到人脸检测,活体检测,人脸识别
目录 前言 1.准备工作 2.开敲 2.1采集32BGRA图像,并转换成24BGR图像 2.2 加载模型,初始化,实现人脸检测,关键点提取,活体检测 3.报错集合 4.效果 前言 前脚把讯飞的语音唤醒 ...
- OpenCV图像处理——iOS端人脸检测
前言 1.OpenCV有专门的iOS平台的包,可以真接下载导入工程,也可以用cmake把OpenCV源码编成.a文件,以静态库的形式导入工程. 2.我这里用的Xcode11,OpenCV用的是最4.2 ...
- android人脸检测开发——使用GMV API(google mobile vision library)开发人脸检测功能
授人以鱼不如授人以渔:建议看以下官网资料! 从一张图片中检测人脸及脸部器官的教程:https://developers.google.cn/vision/android/detect-faces-tu ...
- 利用Google的Vision库实现人脸检测
利用的Google的vision library实现人脸检测功能 本篇文章已授权微信公众号 guolin_blog (郭霖)独家发布 前言 之前写了一篇人脸检测的文章是基于OpenCV的Cascade ...
- 机器学习-caffe实现人脸检测-11
文章目录 前言 开始实现人脸检测 1·数据格式 1·1制作人脸图片 2·生成lmdb文件 3·编辑神经图层文件 4·网络训练 5·人脸位置检测 6·训练速度优化 7·精确度优化 8·数据增强策略 9· ...
- iOS 11: CORE ML—浅析
本文来自于腾讯Bugly公众号(weixinBugly),未经作者同意,请勿转载,原文地址:https://mp.weixin.qq.com/s/OWD5UEiVu5JpYArcd2H9ig 作者:l ...
- 基于iOS用CoreImage实现人脸识别
2018-09-04更新: 很久没有更新文章了,工作之余花时间看了之前写的这篇文章并运行了之前写的配套Demo,通过打印人脸特征CIFaceFeature的属性,发现识别的效果并不是很好,具体说明见文 ...
- 一种用于人脸检测的设备上的深度神经网络
欢迎大家前往云加社区,获取更多腾讯海量技术实践干货哦~ 译者:QiqiHe 苹果公司开始在iOS 10中使用深度学习进行人脸检测.随着Vision框架的发布,开发人员现在可以在他们的应用程序中使用这种 ...
- 人脸检测/识别的API、库和软件--转载
49 款人脸检测/识别的API.库和软件 . 文章来源http://blog.csdn.net/kexiuyi/article/details/52281117 2016-08-22 22:42 40 ...
最新文章
- javascript中window.event事件用法详解
- “请先做自我介绍”:高手都是这样做自我介绍,这样介绍最加分
- 【转】foreach for each for_each引发的探讨:c++世界中的循环语句
- android应用控制百度地图,Android中应用百度地图API开发地图APP实例-显示百度地图...
- 最详细的SLAM综述
- 专题_期权交易必备知识
- pythonjam安装库_python及pycharm的安装
- Bailian2886 能被3除尽的数之和【进制】
- hook监控限制_**CodeIgniter通过hook的方式实现简单的权限控制
- SuperPoint学习---demo代码理解
- 第009讲 初识css 类选择器 id选择器 html选择器
- 使用tomcat7-maven-plugin部署Web项目
- 云计算的三大挑战:安全性、合规性和成本控制
- 热腾腾的鸡汤,趁热。
- python opc
- 如何快速搭建自己的github.io博客
- Java入门需要了解(面向对象之接口-十四)
- 安卓编程基础——列表
- 上传MacOS APP到AppStore
- 用Python编写一个电子考勤系统