Java-J2SE专题复习
为什么80%的码农都做不了架构师?>>> 
J2SE-->J2EE
由于一些类非常的常用,所以将其放置在java.lang包中,并且自动导入java.lang中的所有类。
1、数组和集合类
1.1、数组
数组的定义
//定义了一个num1变量可以存储3个int类型的数字int[] num1 = new int[3]; //定义的时候确定大小int num[] = new int[4]; //不建议使用num1[0] = 10;num1[1] = 11;num1[2] = 12;System.out.println(num1[0]+","+num1[1]+","+num1[2]);int[] num2 = {13,14,15}; //定义的时候直接赋初始值System.out.println(num2[0]+","+num2[1]+","+num2[2]);
数组的遍历
//num2.length获取数组的长度for(int i=0;i<num2.length;i++) {System.out.println(num2[i]);}1.2、集合类
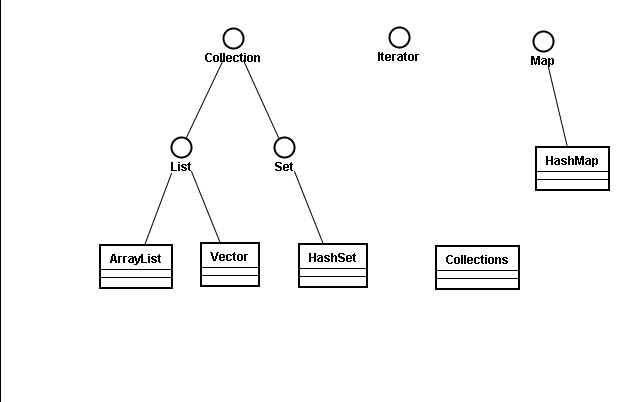
集合类可以提供一些方便的操作来替代数组,集合类都在java.util包中,主要的结构
List简介
List list = new ArrayList();//通过add()添加元素list.add("123");list.add("234");list.add("345");list.add("456");list.remove("345");//通过size()可以获取列表的长度,注意size()是方法for(int i=0;i<list.size();i++) {//通过get()可以获取某一位置的元素//get()的元素是Object的,所以需要进行强制类型转换String str = (String)list.get(i);System.out.println(str);}以上操作是有风险的
list.add("456");
list.add(111);
由于是基于Object来添加的,所以也可以添加其它类型的值,这个时候在进行强制类型转换
的时候,就会抛出异常。
泛型:使用泛型可以有效的解决基于Object添加的问题,泛型是在JDK1.5之后才出现的。
//使用了泛型后,说明这个list中只能添加String类型的值List<String> list = new ArrayList<String>();list.add("123");list.add("abc");list.add("456");for(int i=0;i<list.size();i++) {//使用了泛型,就不用进行强制类型转换了String str = list.get(i);System.out.println(str);}封装类
对于8种基本数据类型,都提供了相应的封装类来将这些基本数据类型封装为对象。
特别注意:在JDK1.5之后提供了自动的封装和解封装,如果是1.4之前均需要手动解封装。
Integer num1 = 10; //JDK1.5之后提供了自动封装Integer num2 = new Integer(10); //JDK1.5之前的版本要创建Integer需要通过构造函数int num3 = num1; //JDK1.5之后会自动将Integer转换为intint num4 = num2.intValue(); //JDK1.5之前需要使用Integer的intValue()方法转换String str = "123";System.out.println(str+1);//parseInt是一个static的方法,可以将字符串转换为整型int a = Integer.parseInt(str);/** 对于其他封装类而言均有相应的parseXXX来将字符串转换为其它类型的值*/List<Integer> list = new ArrayList<Integer>();list.add(1);list.add(2);list.add(3);list.add(4);list.add(5);//此处如果仅仅使用remove(2)会移除下标为2的元素//如果要移除对象需要将2转换为Integerlist.remove(new Integer(2));Iterator迭代器
对于所有的集合类,都提供了一个基于迭代器的遍历方式。
//创建一个迭代器,由于Collection通过iterator方法创建迭代器,所以所有集合类都拥有这个方法Iterator<String> it = str.iterator();//Iterator中有hasNext()来检查元素是否存在while(it.hasNext()) {//通过next()方法可以获取下一个元素String s = it.next();System.out.println(s);}/** Set没有顺序,所以没有get()方法* for(int i=0;i<str.size();i++) {String s = str.g}*/ //List也可以使用迭代器Iterator<Integer> it = list.iterator();for(;it.hasNext();) {int num = it.next();System.out.println(num);}1、使用迭代器会有一个问题,不太方便获取下标;
2、在列表数据的时侯,需要删除元素时,不建议使用迭代器的方式。
//List也可以使用迭代器Iterator<Integer> it = list.iterator();for(;it.hasNext();) {int num = it.next();//删除时会报错/*if(num==3) {list.remove(new Integer(num));}*/System.out.println(num);}在JDK1.5之后又提供一种增强的for循环来遍历列表和数组,原理基于迭代器。
List<String> strs = new ArrayList<String>();strs.add("abc");strs.add("def");strs.add("ghj");//会使用str来遍历集合中的每一个元素for(String str:strs) {System.out.println(str);}System.out.println("===============忧伤的分割线===================");Set<String> sets = new HashSet<String>();sets.add("qwe");sets.add("asd");sets.add("zxc");for(String str:sets) {System.out.println(str);}System.out.println("--------------------傲娇的分割线---------------------");Integer[] nums = {2,3,4,5,6,7};for(Integer num:nums) {System.out.println(num);}Set和List
/** List和Set的区别* 1、List有序而Set无序* 2、Set不能添加重复的元素,List可以添加重复的元素*/
public class TestListSet {public static void main(String[] args) {List<String> list = new ArrayList<String>();list.add("aaaa");list.add("bbbb");list.add("cccc");list.add("dddd");list.add("aaaa");for(String str:list) {System.out.println(str);}System.out.println("---------------------------------");Set<String> set = new HashSet<String>();set.add("abcd");set.add("acbd");set.add("adbc");set.add("cabd");set.add("abcd");for(String str:set) {System.out.println(str);}//去掉List中重复的元素List<Integer> ls = Arrays.asList(1,2,3,4,5,6,5,4,3,2,1);
//      Set<Integer> ss = new HashSet(ls);Set<Integer> ss = new HashSet<Integer>();ss.addAll(ls);for(Integer num:ss) {System.out.println(num);}}
Map
//Map存储的是键值对,key和valueMap<Integer,String> maps = new HashMap<Integer,String>();//使用put方法添加值maps.put(1, "张三");maps.put(2, "李四");maps.put(3, "王五");maps.put(4, "赵六");//使用get(key)可以得到valueSystem.out.println(maps.get(3));//keySet可以将maps中的key转换为Set的一组列表Set<Integer> keys = maps.keySet();//遍历Set可以得到相应的key,使用maps.get(key)可以得到valuefor(Integer i:keys) {System.out.println(maps.get(i));}//此时不会增加,会覆盖maps.put(4, "老七");System.out.println("----------------------");//keySet可以将maps中的key转换为Set的一组列表keys = maps.keySet();//遍历Set可以得到相应的key,使用maps.get(key)可以得到valuefor(Integer i:keys) {System.out.println(maps.get(i));}System.out.println(maps.containsKey(4));System.out.println(maps.containsValue("老七"));2、异常处理
使用异常的原因
传统的处理方式是使用if else来进行判断,这样将会有大量的if嵌套,会严重影响代码的编写效率和可读性。
Java的异常处理方式
try {//把可能发生异常的代码放到try语句块中
} catch() {  //为不同的异常使用不同的catch来进行捕获
} catch() {
} catch() {}
2.1、异常的概念
Java中所有的异常都是class,并且都继承于Exception。
异常都是对象,有两个重要的方法。
try {result = a/b;System.out.println("有异常,这里不输出!");} catch(ArithmeticException e) {//打印相应的异常错误信息,message是exception的一个属性System.out.println(e.getMessage());//打印异常发生的轨迹e.printStackTrace();}2.2、异常的产生
异常全部都是类,它是通过在代码中使用throw抛出的。

2.3、异常的创建
写一个类让其继承Exception。
//写一个类继承Exception
public class MyException extends Exception {//覆盖父类的构造方法public MyException() {super();}public MyException(String message, Throwable cause, boolean enableSuppression, boolean writableStackTrace) {super(message, cause, enableSuppression, writableStackTrace);}public MyException(String message, Throwable cause) {super(message, cause);}public MyException(String message) {super(message);}public MyException(Throwable cause) {super(cause);}
2.4、异常的处理
有两种方式可以处理异常
1、try catch
2、声明为抛出(声明方法会有异常,方法上面的异常声明使用异常的类型来声明)
非运行时刻异常,需要程序员手动处理。
try {//此处依然会有异常,如果不处理,需要在main函数上声明抛出,//但是强烈建议不要在main函数上面抛出异常buyCoffeeAndWater(-300,500);buyWater(1);buyCola(-1);} catch (MyException e) {System.out.println(e.getMessage());} catch (MyRunException e) {System.out.println(e.getMessage());}}//方法上面是声明该方法可能产生的异常public static void buyWater(int size) throws MyException {//非运行时刻异常,不会自动抛出,得程序员手动处理if(size<0) {//此处抛出的是一个异常对象throw new MyException("瓶里没水了!!!");}System.out.println("买了一瓶"+size+"ml的水");}运行时刻异常
public static void buyCola(int size) {if(size<0) {//运行时刻异常,不用程序员手动处理,虚拟机会自动抛出throw new MyRunException("可乐过期了!!!");}System.out.println("买了一瓶"+size+"L的可乐");}2.5、异常的多态
//抛出异常可以通过多态来处理public static void buyCoffeeAndWater(int coffeeSize,int waterSize) throws Exception {if(coffeeSize<0) {throw new MyException2("咖啡凉了!!!");}if(waterSize<0) {throw new MyException("水喝完了");}System.out.println("买了一杯"+coffeeSize+"ml的咖啡和一瓶"+waterSize+"ml的水");} try {buyCoffeeAndWater(-300,500);buyWater(1);buyCola(-1);//捕获和抛出异常都支持多态,//但是捕获顺序如果先捕获了父类异常就无法再捕获子类异常了} catch (MyException e) {System.out.println(e.getMessage());} catch (MyRunException e) {System.out.println(e.getMessage());} catch (MyException2 e) {System.out.println(e.getMessage());} catch (Exception e) {System.out.println(e.getMessage());2.6、finally
finally是不管怎么样都会被执行的代码,所以一般用来释放资源。
} catch (Exception e) {System.out.println(e.getMessage());} finally {//finally语句块中的内容不管怎么样都会被执行//所以finally中的代码一般用来释放资源System.out.println("一直运行");}//可以不要catch直接加finallytry {System.out.println("hello");} finally {System.out.println("可以运行");}3、I/O
File类:用来处理文件夹和创建删除文件的,不能用来编辑文件。
常用方法:
//创建文件f.createNewFile();//判断文件是否存在System.out.println(f.exists());//删除文件//f.delete();//获取文件名System.out.println(f.getName());//获取文件夹路径System.out.println(f.getParent());//可以获取该文件的父类文件夹对象File pf = f.getParentFile();//判断文件是否是文件夹System.out.println(pf.isDirectory());File f2 = new File("d:/test/a");//创建一个目录f2.mkdir();File f3 = new File("d:/test/b/c/d/e/f");//如果父目录不存在,会先创建父目录再创建相应的子目录f3.mkdirs();//如果删除的是目录,目录不为空就无法删除/** 正确删除文件夹的操作是递归删除所有的文件和子文件夹*/f3.delete();//重命名文件--->可以用来做剪切,但是不建议使用f.renameTo(new File("d:/test/a/1.txt"));文件列表:
      //list()用来列表一组文件名,可以传入一个实现FilenameFilter的类完成文件的过滤String[] fns = f.list(new JavaFileFilter());for(String fn:fns) {System.out.println(fn);}System.out.println("------------------------");//列表一组文件对象File[] fs = f.listFiles();for(File file:fs) {System.out.println(file.getName()+":"+file.length());}}
}/*** 写一个类实现FilenameFilter专门用来过滤文件* @author PM**/
class JavaFileFilter implements FilenameFilter {@Overridepublic boolean accept(File dir, String name) {// 过滤的结果是返回为true的值if(name.endsWith(".java")) return true;return false;}
}
内部类:有些类在外部是不被允许访问的,可以把这些类写在类的内部,提高安全性。
普通内部类:
public void run() {//在非static的方法中才能访问内部类File f = new File("D:\\test\\j2se");String[] fns = f.list(new JavaFileFilter());for(String fn:fns) {System.out.println(fn);}System.out.println("------------------------");}/*** 如果这个类仅仅只是在某个类的内部可以访问,可以直接将该类写在类的内部* 这个类在外部就无法访问,这种类叫做内部类.* 内部类要在static之后才能声明,所以不能在static的方法中使用内部类* @author PM**/private class JavaFileFilter implements FilenameFilter {@Overridepublic boolean accept(File dir, String name) {// 过滤的结果是返回为true的值if(name.endsWith(".java")) return true;return false;}匿名内部类:
File f = new File("D:\\test\\j2se");/*** 匿名的内部类,该类没有名称,是在代码返回之前就给它实现了* 这种方式存在的唯一意义就是只有一个方法会涉及到该类才建议这样写* 如果有两个或者多个方法会使用,均建议使用内部类*/String[] fns = f.list(new FilenameFilter(){//实现的开始//特别注意:是在语句返回之前就完成了实现的@Overridepublic boolean accept(File dir, String name) {if(name.endsWith(".java")) return true;return false;}});//实现的结束for(String fn:fns) {System.out.println(fn);}过滤文件夹:
File[] fs = f.listFiles(new FileFilter(){//过滤文件夹,可以使用FileFilter,操作方式和FilenameFilter类似@Overridepublic boolean accept(File pathname) {if(pathname.isDirectory()) return true;return false;}});流
流的分类:按照方向分类、按照类型分类、按照操作方式分类、转换流。
按照方向分类:输入流、输出流。
输入流:这是一个字节流操作的非常标准过程
FileInputStream fis = null;try {//1、创建一个文件输入流fis = new FileInputStream("D:\\test\\j2se\\aaa.txt");//2、创建一个字节数组用来存储读取的信息byte[] buf = new byte[1024];//3、使用len读取的长度int len = 0;//4、循环读取数据//只要len>=0说明就读取到元素,可以直接对元素进行操作while((len=fis.read(buf))>=0) {//5、通过控制台输出数据,必须说明输出的长度//如果输出文件乱码,要修改文件输入流编码格式与输出格式编码一致System.out.write(buf, 0, len);}//6、读取完成之后必须关闭流释放资源fis.close();} catch (FileNotFoundException e) {e.printStackTrace();} catch (IOException e) {e.printStackTrace();} finally {try {//在这个位置关闭流if(fis!=null) fis.close();} catch (IOException e) {e.printStackTrace();}}输出流:
FileInputStream fis = null;FileOutputStream fos = null;try {fis = new FileInputStream("D:\\RmDownloads\\WeChat2.0.exe");//创建一个文件输出流fos = new FileOutputStream("D:\\test\\j2se\\mm.exe");byte[] buf = new byte[1024];int len = 0;//将数据通过输入流读取到程序while((len=fis.read(buf))>=0) {//将数据通过输出流输出,此时是一个文件输出流,就把数据输出到了文件fos.write(buf,0,len);}} catch (FileNotFoundException e) {e.printStackTrace();} catch (IOException e) {e.printStackTrace();} finally {try {if(fis!=null) fis.close();} catch (IOException e) {e.printStackTrace();}try {if(fos!=null) fos.close();} catch (IOException e) {e.printStackTrace();}}按照类型分类:字节流、字符流
字节流:通过字节读取数据,通常是通过XXXStream
字符流:通过字符来读取数据,Writer和Reader
只要处理的数据是字符数据,全部使用字符流。
BufferedReader br = null;PrintWriter out = null;try {/*字符流用来读取字符数据,对于输入字符流而言,最为常用操作方法是使用BufferedRead* 因为该流有一个readLine()方法*/br = new BufferedReader(new FileReader("D:\\test\\read.txt"));//BufferedWriter bw = new BufferedWriter(new FileWriter("D:\\test\\1.txt"));out = new PrintWriter(new BufferedWriter(new FileWriter("D:\\test\\1.txt")));String str = null;//BufferedReader中有一个方法叫做readLine()//可以一行一行的读取数据并且返回字符串while((str=br.readLine())!=null) {System.out.println(str);//使用bw输出不会换行,得再调用bw.newLine()才能换行//bw.write(str);//bw.newLine();//对于字符流而言,读数据用BufferedReader,写数据用PrintWriterout.println(str);}//bw.flush();} catch (FileNotFoundException e) {e.printStackTrace();} catch (IOException e) {e.printStackTrace();} finally {try {if(br!=null) br.close();} catch (IOException e) {e.printStackTrace();}if(out!=null) out.close();}按照操作方式分类:节点流、过滤流
节点流:可以直接创建的流
过滤流:可以装饰节点流,增加相应的功能
FileInputStream fis = null;//过滤流不能独立的创建对象,过滤流都需要依赖于已经创建好的节点流BufferedInputStream bis = null;BufferedOutputStream bos = null;try {fis = new FileInputStream("D:\\RmDownloads\\WeChat2.0.exe");//在文件输入流的基础上创建一个缓存流,以此提高效率bis = new BufferedInputStream(fis);//输出流也可以用过滤流bos = new BufferedOutputStream(new FileOutputStream("D:\\test\\j2se\\11.exe"));byte[] buf = new byte[1024];int len = 0;while((len=bis.read(buf))>=0) {bos.write(buf,0,len);}} catch (FileNotFoundException e) {e.printStackTrace();} catch (IOException e) {e.printStackTrace();} finally {/** 对于缓冲流一定要关闭,不然如果缓冲区不满就不会刷新,* 很多时候就没有值,可以通过bos.flush()刷新缓冲区*///当关闭流的时候会自动flushtry {if(bis!=null) bis.close();} catch (IOException e) {e.printStackTrace();}try {if(bos!=null) bos.close();} catch (IOException e) {e.printStackTrace();}}转换流:将字节流转换为字符流 InputStreamReader OutputStreamWriter
BufferedReader br = null;try {//把字节流转换为字符流,方便进行字符的处理br = new BufferedReader(new InputStreamReader(System.in));String str = null;while((str=br.readLine())!=null) {if(str.equals("exit")) break;System.out.println(str);}} catch (IOException e) {e.printStackTrace();} finally {try {if(br!=null) br.close();} catch (IOException e) {e.printStackTrace();}}流的操作
字节流的常用操作:
读:
byte[] buf = new byte[1024];int len = 0;//将数据通过输入流读取到程序while((len=fis.read(buf))>=0) { //将数据都入到缓冲区//将数据通过输出流输出,此时是一个文件输出流,就把数据输出到了文件fos.write(buf,0,len);}写:
//将数据通过输出流输出,此时是一个文件输出流,就把数据输出到了文件fos.write(buf,0,len); //写的长度一定要加字符流的常用操作:
读数据使用BufferedRead,因为有readLine()方法,写数据使用PrintWriter,可以使用println.
具体使用参照字符流的操作介绍。
标准流的常用操作:
System.in是标准输入流,但是由于是字节流,不方便操作,所以通常情况会将其转换为字符流
来处理,通过转换流转换,然后再使用BufferedReader来封装。
BufferedReader br = null;try {//把字节流转换为字符流,方便进行字符的处理br = new BufferedReader(new InputStreamReader(System.in)); //标准输入流String str = null;//一行一行的读取数据,并且输出输入的数据//直到数据是exit表示退出while((str=br.readLine())!=null) {if(str.equals("exit")) break;System.out.println(str);}} catch (IOException e) {e.printStackTrace();} finally {try {if(br!=null) br.close();} catch (IOException e) {e.printStackTrace();}}常用流
文件流(File):非常常用,进行文件的读写操作
缓冲流(Buffered):过滤流用来提高效率的
数据流:用来读取基本数据类型DataOutputStream和DataInputStream,数据流是过滤流
FileOutputStream fos = null;DataOutputStream dos = null;DataInputStream dis = null;try {fos = new FileOutputStream("D:\\test\\j2se\\num.data");//如果希望存储基本数据类型就使用DataOutputStream,也是过滤流dos = new DataOutputStream(fos);dos.writeInt(1231231231);dos.writeInt(1111);dos.writeInt(2222);dos.writeInt(3333);dos.writeInt(4444);dos.writeInt(5555);//从文件读取基本数据类型使用DataInputStream,同样是过滤流dis = new DataInputStream(new FileInputStream("D:\\test\\j2se\\num.data"));int a = dis.readInt();System.out.println(a);//通过一个指针在文件中读取System.out.println(dis.readInt());System.out.println(dis.readInt());System.out.println(dis.readLong());System.out.println(dis.readInt());//System.out.println(dis.readInt()); //读到头就会报错} catch (FileNotFoundException e) {e.printStackTrace();} catch (IOException e) {e.printStackTrace();} finally {try {if(dos!=null) dos.close();} catch (IOException e) {e.printStackTrace();}}对象流(Object):对象流可以完成对对象的存储。
1、必须实现Serializable接口
/*** 如果希望把一个对象通过ObjectOutputStream写到文件中,* 这个对象必须实现Serializable接口* 该接口没有任何方法,只是告诉java可以存储该对象* @author OS**/
public class Student implements Serializable {private static final long serialVersionUID = 5839862437697748379L;private int id;private String name;//只要一个属性通过transient设置之后这个属性就不会被存储private transient int money;
2、可以把一些属性设置为transient,此时这个属性就不会被存储
//只要一个属性通过transient设置之后这个属性就不会被存储private transient int money;读取和存储对象可以使用ObjectOutputStream和ObjectInputStream读取,如果要从文件中读取,需要用这两个流封装一下文件流。
ObjectOutputStream oos = null;try {//创建一个文件输出流,并且把这个对象输出到文件stu.save中去oos = new ObjectOutputStream(new FileOutputStream("d:/test/stu.save"));//直接将对象写到文件中//注意:对象必须实现Serializable接口oos.writeObject(stu);4、GUI
Frame和JFrame
1、Frame:Frame是整个图用户界面的主要窗口,这个是基于awt的。
//所有的组件都是放在frame中的Frame frame = new Frame();//设置标题frame.setTitle("hello world");//设置窗口大小frame.setSize(200, 100);//设置窗口位置frame.setLocation(100, 100);//将窗口显示frame.setVisible(true);//注意:无法关闭窗口2、JFrame
/*** JFrame的操作和Frame的操作基本一样,但是这个是基于swing这个包的* @author os**/
//基于Swing的图形组件都是以J开头的,操作方式和awt基本类似
public class TestJFrame extends JFrame {public static void main(String[] args) {new TestJFrame();}public TestJFrame() {this.setTitle("sdfdsfds");this.setSize(200, 200);this.setLocation(200, 200);this.setBackground(Color.RED);//JFrame提供这个方法来关闭窗口this.setDefaultCloseOperation(JFrame.EXIT_ON_CLOSE);this.setVisible(true);
3、常见的编写方式
/*** 对于Frame的编程而言,比较常用的方式是继承Frame类* 并且在构造函数或者新编写一个函数来设置Frame的信息* @author os**/
public class TestFrame02 extends Frame {public static void main(String[] args) {new TestFrame02();}//在这个方法中来设置相应的窗口属性public TestFrame02() {this.setTitle("hello xm");this.setSize(200, 200);this.setLocation(300, 500);this.setVisible(true);
4、添加组件:所有的图形组件都可以在容器上通过add添加
public class TestJButton extends JFrame {//常用的编写方式是,统一把相应的容器组件设置为属性private JButton jb1,jb2;public static void main(String[] args) {new TestJButton();}public TestJButton() {this.setTitle("按钮测试");this.setSize(500, 500);this.setLocation(100, 100);this.setDefaultCloseOperation(JFrame.EXIT_ON_CLOSE);//创建两个按钮jb1 = new JButton("hello");jb2 = new JButton("world");//将按钮加到frame中this.add(jb2);this.add(jb1);this.setVisible(true);布局
BorderLayout:Frame的默认布局是BorderLayout
直接执行add方法,默认会添加到center中。
public TestBorderLayout() {this.setTitle("按钮测试");this.setSize(500, 500);this.setLocation(100, 100);this.setDefaultCloseOperation(JFrame.EXIT_ON_CLOSE);//设置该Frame的布局为BorderLayout,默认布局就是BorderLayout。//但是如果希望设置垂直和水平间距,需要创建一个BorderLayout设置。this.setLayout(new BorderLayout(10,5));//创建两个按钮jb1 = new JButton("北方");jb2 = new JButton("南方");jb3 = new JButton("西方");jb4 = new JButton("东方");jb5 = new JButton("正中");//将按钮加到frame中//第二个参数用来设置这个组件放置到哪个位置this.add(jb1,BorderLayout.NORTH);this.add(jb2,BorderLayout.SOUTH);this.add(jb3,BorderLayout.WEST);this.add(jb4,BorderLayout.EAST);this.add(jb5,BorderLayout.CENTER);this.setVisible(true);FlowLayout
public TestFlowLayout() {this.setTitle("测试按钮");this.setSize(500, 500);this.setLocation(100, 100);this.setDefaultCloseOperation(JFrame.EXIT_ON_CLOSE);//FlowLayout是通过流式布局来显示组件,第一个参数是对齐方式//第二个参数是水平间距,第三个参数是垂直间距this.setLayout(new FlowLayout(FlowLayout.CENTER,20,30));jb1 = new JButton("添加");jb2 = new JButton("修改");jb3 = new JButton("删除");jb4 = new JButton("列表");jb5 = new JButton("查询");this.add(jb1);this.add(jb2);this.add(jb3);this.add(jb4);this.add(jb5);this.setVisible(true);}GridLayout
public TestGridLayout() {this.setTitle("表格布局");this.setSize(500, 500);this.setLocation(100, 100);this.setDefaultCloseOperation(JFrame.EXIT_ON_CLOSE);//表格布局,一共两行三列this.setLayout(new GridLayout(2, 3,10,15));常见简单布局和常用组件
JPanel:用JPanel可以完成特定的布局,JPanel是一个容器对象,可以添加元素和设定布局,
默认布局是FlowLayout。
this.setTitle("用户登录");this.setSize(320, 150);this.setLocation(100, 100);this.setDefaultCloseOperation(JFrame.EXIT_ON_CLOSE);this.setResizable(false);//三个JPanel,每个JPanel中放置不同的元素//整个frame是GridLayoutthis.setLayout(new GridLayout(3, 1));JLabel:文本标签只能使用JLabel。
JTextField:文本域组件,可以输入内容。
初始化时可以定义有多少个字符。
jtf = new JTextField(20);JPasswordField:密码域,操作和JTextField类似,只是输入的是密码。
JTextArea和JScrollPane
JTextArea:表示多行文本域。
JScrollPane:表示滚动条,在GUI中滚动条需要自己定义。
jta = new JTextArea();//创建滚动条时直接将需要滚动的对象通过构造函数传入jsp = new JScrollPane(jta);//直接添加滚动条就等于添加了滚动条中的组件this.add(jsp);JComboBox:表示下拉列表框。
传入一个对象数组:
jcb = new JComboBox<String>(new String[]{"ABC","DEF","GHI"});菜单的操作

JMenuBar JMenu JMenuItem
事件处理
窗口事件:
//定义了一个监听器的类,专门用来实现WindowListener
class MyWindowListener implements WindowListener {@Overridepublic void windowOpened(WindowEvent e) {System.out.println("Opened");}@Overridepublic void windowClosing(WindowEvent e) {System.out.println("Closing");System.exit(0);}
//为frame添加窗口监听事件,此时,当窗口发生改变时,会自动执行相应的操作frame.addWindowListener(new MyWindowListener());内部类实现
public TestFrameEvent01() {this.setTitle("hello");this.setSize(200, 200);this.setLocation(100, 100);this.addWindowListener(new MyWindowListener());this.setVisible(true);}//由于这个类其实没有任何被外部所访问的意义,所以直接使用内部类class MyWindowListener implements WindowListener {适配器
//如果直接实现WindowListener,会导致实现里面的所有方法,但是很多方法都没用,//此时JAVA就提供了一种适配器(Adapter)的方案来解决这种问题,//每一个监听器接口都存在一个适配器的类,这个类中对所有的方法进行空的实现class MyWindowListener extends WindowAdapter {@Overridepublic void windowClosing(WindowEvent e) {System.out.println("Closing");System.exit(0);}匿名内部类
//WindowListener除了关闭之外,其它地方都用不到,可以直接设置为匿名内部类this.addWindowListener(new WindowAdapter() {@Overridepublic void windowClosing(WindowEvent e) {System.exit(0);}});ActionListener:ActionListener事件是按钮按下的事件。
//没有adapter,因为只有一个需要实现的方法,actionPerformed()class MyBtnListener implements ActionListener {@Overridepublic void actionPerformed(ActionEvent e) {System.out.println("aaa");}} jb1 = new JButton("登录");jb1.addActionListener(new MyBtnListener());jb2 = new JButton("取消");jb2.addActionListener(new MyBtn2Listener());事件的统一处理方式
class MyBtnListener implements ActionListener {@Override//定义一个事件监听类,通过参数e.getSource()来获取事件源,//并且进行判断做不同的处理public void actionPerformed(ActionEvent e) {//e.getSource()可以获取哪个监听对象触发事件//System.out.println(e.getSource());if(e.getSource()==jb1) {//System.out.println("login");System.out.println("Username:"+jtf.getText());System.out.println("Password:"+new String(jpf.getPassword()));} else if(e.getSource()==jb2) {//System.out.println("cancel");jtf.setText("");jpf.setText("");}//相同的监听对象jb1 = new JButton("登录");jb1.addActionListener(new MyBtnListener());jb2 = new JButton("取消");jb2.addActionListener(new MyBtnListener());键盘事件:KeyListener是键盘事件
private class MyKeyEvent extends KeyAdapter {@Overridepublic void keyPressed(KeyEvent e) {super.keyPressed(e);//e的getKeyCode用来获取究竟按下了哪一个键//KeyEvent对象的一组常量可以获取具体的键if(e.getKeyCode()==KeyEvent.VK_UP) {System.out.println("上");} else if(e.getKeyCode()==KeyEvent.VK_DOWN) {System.out.println("下");} else if(e.getKeyCode()==KeyEvent.VK_LEFT) {System.out.println("左");} else if(e.getKeyCode()==KeyEvent.VK_RIGHT) {System.out.println("右");}//为窗口增加这个事件this.addKeyListener(new MyKeyEvent());绘图
步骤:
1、创建一个内部类继承JPanel
private class MyPanel extends JPanel {//覆盖paint方法@Overridepublic void paint(Graphics g) {super.paint(g);g.setColor(Color.BLACK);g.drawRect(10, 10, 200, 200);g.setColor(Color.BLUE);g.fillOval(20, 20, 40, 40);}}2、覆盖整个JPanel的paint()方法
private class MyPanel extends JPanel {//覆盖paint方法//Graphics g 一支画笔,用它来画图@Overridepublic void paint(Graphics g) {super.paint(g);g.setColor(Color.BLACK);g.drawRect(10, 10, 200, 200);g.setColor(Color.BLUE);g.fillOval(20, 20, 40, 40);}}3、将这个panel添加到Frame中
mp = new MyPanel();this.add(mp);捕获键盘事件
1、定义一个面板,并且画一个小球
private class MyPanel extends JPanel {//把x和y坐标定义成变量private int x;private int y;public MyPanel(int x, int y) {//super();this.x = x;this.y = y;}@Overridepublic void paint(Graphics g) {super.paint(g);g.setColor(Color.RED);g.fillOval(x, y, 20, 20);}} 2、将画板添加到窗口
mp = new MyPanel(10,10);this.add(mp);3、为窗口添加键盘事件
private class MyKeyEvent extends KeyAdapter {//监听键盘的按下事件@Overridepublic void keyPressed(KeyEvent e) {//根据键盘的按钮来确定画板中圆球的坐标if(e.getKeyCode()==KeyEvent.VK_UP) { mp.y-=5;} else if(e.getKeyCode()==KeyEvent.VK_DOWN) {mp.y+=5;} else if(e.getKeyCode()==KeyEvent.VK_LEFT) {mp.x-=5;} else if(e.getKeyCode()==KeyEvent.VK_RIGHT) {mp.x+=5;}4、重画画板
//让面板刷新mp.repaint();//最重要的步骤,画完之后一定要重画面板5、完整代码
public TestMoveCircle() {this.setTitle("移动的小球");this.setSize(500, 500);this.setLocation(100, 100);this.setDefaultCloseOperation(EXIT_ON_CLOSE);mp = new MyPanel(10,10);this.add(mp);this.addKeyListener(new MyKeyEvent());this.setVisible(true);}private class MyKeyEvent extends KeyAdapter {//监听键盘的按下事件@Overridepublic void keyPressed(KeyEvent e) {//根据键盘的按钮来确定画板中圆球的坐标if(e.getKeyCode()==KeyEvent.VK_UP) { mp.y-=5;} else if(e.getKeyCode()==KeyEvent.VK_DOWN) {mp.y+=5;} else if(e.getKeyCode()==KeyEvent.VK_LEFT) {mp.x-=5;} else if(e.getKeyCode()==KeyEvent.VK_RIGHT) {mp.x+=5;}//让面板刷新mp.repaint();//最重要的步骤,画完之后一定要重画面板}} private class MyPanel extends JPanel {//把x和y坐标定义成变量private int x;private int y;public MyPanel(int x, int y) {//super();this.x = x;this.y = y;}@Overridepublic void paint(Graphics g) {super.paint(g);g.setColor(Color.RED);g.fillOval(x, y, 20, 20);}} 5、多线程:多线程指的是有多条分支在同时进行。
5.1、多线程的编写:
第一种方式
一、让一个类继承相应的Thread类,这个类就是多线程的类。
class FirstThread extends Thread {@Overridepublic void run() {for(int i=0;i<100;i++) {System.out.println("first:"+i);}}
}
二、覆盖这个类的run()方法,run()方法中的代码就是基于多线程的代码。
class FirstThread extends Thread {@Overridepublic void run() {for(int i=0;i<100;i++) {System.out.println("first:"+i);}}
}三、创建这个对象,并且使用start()开启线程(特别注意不是使用run())
public static void main(String[] args) {FirstThread ft = new FirstThread();//此处是使用start()来开始启动线程,不是使用runft.start();//此时是函数调用//ft.run();for(int i=0;i<100;i++) {System.out.println("main:"+i);}}第二种方式
实现Runnable接口
/** 第二种方式,是让一个实现Runnable接口。并且实现run()方法。*/class MyThread implements Runnable {@Overridepublic void run() {for(int i=0;i<100;i++) {System.out.println("mt:"+i);}}public void begin() {/** 该方式的使用,由于MyThread没有start()方法,* 所以需要将其放置到一个Thread类中运行*/MyThread mt = new MyThread();//放到一个Thread类中Thread t = new Thread(mt);//依然是使用start()方法启动t.start();for(int i=0;i<100;i++) {System.out.println("main:"+i);}5.2、多线程的名称
class ThirdThread extends Thread {//Thread都有一个名称,只要继承Thread就可以调用super的方法设置名称public ThirdThread(String name) {super(name);}@Overridepublic void run() {for(int i=0;i<100;i++) {//Thread的名称System.out.println(this.getName()+":"+i);}}public void begin() {/** 该方式的使用,由于MyThread没有start()方法,* 所以需要将其放置到一个Thread类中运行*/MyThread mt = new MyThread();//放到一个Thread类中,构造函数的第二个参数就是线程的名称Thread t = new Thread(mt,"小二");t.start();for(int i=0;i<100;i++) {System.out.println("main:"+i);}}/** 第二种方式,是让一个实现Runnable接口。并且实现run()方法。*/class MyThread implements Runnable {@Overridepublic void run() {for(int i=0;i<100;i++) {//没有name属性,可以通过Thread.currentThread()来获取当前线程System.out.println(Thread.currentThread().getName()+":"+i);}}5.3、线程的调度
public static void main(String[] args) {new TestStatus().run();}public void run() {MyThread mt = new MyThread("abcde");mt.start();new MyThread02("dddddddddddd").start();/*try {//一直等待该线程执行完才去执行其他线程mt.join();} catch (InterruptedException e) {e.printStackTrace();}*/for(int i=0;i<20;i++) {System.out.println("main:"+i);Thread.yield();}}class MyThread extends Thread {public MyThread(String name) {super(name);}@Overridepublic void run() {for(int i=0;i<10;i++) {System.out.println(this.getName()+":"+i);try {Thread.sleep(100);} catch (InterruptedException e) {e.printStackTrace();}}}}class MyThread02 extends Thread {public MyThread02(String name) {super(name);}@Overridepublic void run() {for(int i=0;i<100;i++) {System.out.println(this.getName()+":"+i);}}}5.4、两种线程的区别
public void run() {//每个成员变量都有不同的存储空间MyThread mt1 = new MyThread("mt1");//每个线程都是独享相应的存储空间mt1.start();MyThread mt2 = new MyThread("mt2");//每个线程都是独享相应的存储空间mt2.start();/*for(int i=0;i<10;i++) {System.out.println("main:"+i);}*/}class MyThread extends Thread {private int index = 0;//每个线程都是独享相应的存储空间public MyThread(String name) {super(name);}@Overridepublic void run() {for(;index<10;index++) {System.out.println(Thread.currentThread().getName()+":"+index);}}public void run() {//共享mt的成员变量//只有一个MyThread对象,所以每个线程都是共享这个MyThread类的空间的MyThread mt = new MyThread();new Thread(mt,"mt1").start();new Thread(mt,"mt2").start();/*for(int i=0;i<10;i++) {System.out.println("main:"+i);}*/}private class MyThread implements Runnable {//只有一个MyThread对象,所以每个线程都是共享这个MyThread类的空间的private int index;@Overridepublic void run() {for(;index<10;index++) {System.out.println(Thread.currentThread().getName()+":"+index);}}5.5、线程的停止
public void run() {MyThread mt = new MyThread();Thread tmt = new Thread(mt);tmt.start();while(true) {if(mt.index>=500) {System.out.println("----");//让线程停止mt.stopThread();//调用停止的方法break;}}}class MyThread implements Runnable {int index = 0;//通过一个变量来控制线程的停止private boolean flag = true;@Overridepublic void run() {for(index=0;index<1000;index++) {if(!flag) {break;}System.out.println("index:"+index);}}public void stopThread() {//在这个位置释放资源flag = false;//通过这个变量控制线程的停止}}5.6、线程的同步
//同步方法,默认使用this作为钥匙public synchronized void getMoney() {//也可以直接使用this来作为钥匙,任何一个对象都可以做钥匙//synchronized (this) {System.out.println(Thread.currentThread().getName()+"取了"+getMoney+"元");curMoney+=getMoney;//当两个线程同时修改某个变量时就会出现同步的问题,//需要使用同步块进行同步。//如果使用同步块会影响效率int temp = saveMoney - getMoney;try {Thread.sleep(100);} catch (InterruptedException e) {e.printStackTrace();}saveMoney = temp;times++;System.out.println("3:"+times);//}}/** 使用同步方法其实就等于* public void getMoney() {*直接传入一个对象作为同步块的钥匙synchronized (this) {System.out.println(Thread.currentThread().getName()+"取了"+getMoney+"元");curMoney+=getMoney;int temp = saveMoney - getMoney;try {Thread.sleep(100);} catch (InterruptedException e) {e.printStackTrace();}saveMoney = temp;times++;System.out.println("3:"+times);}*/5.7、死锁
/** 避免死锁的最佳方式,不要出现同步的嵌套,* 让同步块尽可能大(效率会降低)*/
public class TestDeadLock {public static void main(String[] args) {new TestDeadLock().run();}public void run() {MyThread mt = new MyThread();new Thread(mt,"张三").start();new Thread(mt,"李四").start();}class MyThread implements Runnable {private Object k1 = new Object();private Object k2 = new Object();private boolean flag = true;@Overridepublic void run() {if(flag) {flag = false;synchronized (k1) {System.out.println(Thread.currentThread().getName()+":k1");try {Thread.sleep(100);} catch (InterruptedException e) {e.printStackTrace();}synchronized (k2) {System.out.println(Thread.currentThread().getName()+":k2");}}} else {flag = true;synchronized (k2) {System.out.println(Thread.currentThread().getName()+":k2");try {Thread.sleep(100);} catch (InterruptedException e) {e.printStackTrace();}synchronized (k1) {System.out.println(Thread.currentThread().getName()+":k1");}}}}}
5.8、生产者和消费者
第一:后台线程
第二:notify和wait
public void make() {synchronized (d) {if(d.isEmpty()) {int index = ran.nextInt(foods.length);String f = foods[index];System.out.println(name+"制作了"+f);d.setFood(f);d.setEmpty(false);d.notify();try {Thread.sleep(2000);d.wait();} catch (InterruptedException e) {e.printStackTrace();}/*不能依赖于sleep来控制线程* try {Thread.sleep(10);} catch (InterruptedException e) {e.printStackTrace();}*/} else {try {d.wait();} catch (InterruptedException e) {e.printStackTrace();}}}}public void eat() {synchronized (d) {if(!d.isEmpty()) {String food = d.getFood();System.out.println(name+"正在享受"+food);d.setEmpty(true);d.notify();try {Thread.sleep(2000);d.wait();} catch (InterruptedException e) {e.printStackTrace();}} else {try {d.wait();} catch (InterruptedException e) {e.printStackTrace();}}}}Disk d = new Disk();Cooker co = new Cooker("厨神",d);Custom cu = new Custom("吃货",d);Thread cot = new Thread(co);Thread cut = new Thread(cu);//cut为后台线程,只要所有的线程结束,这个线程就自动结束cut.setDaemon(true);cot.start();cut.start();public class Clock implements Runnable {private boolean wakeup;public boolean isWakeup() {return wakeup;}public void setWakeup(boolean wakeup) {this.wakeup = wakeup;}public Clock() {wakeup = false;}@Overridepublic void run() {for(int i=0;i<10;i++) {wake();}}public synchronized void wake() {try {if(!wakeup) {for(int i=0;i<3;i++) {System.out.println("起床了!");}wakeup = true;this.notify();this.wait();} else {this.wait();}} catch (InterruptedException e) {e.printStackTrace();}}public class Person implements Runnable {private Clock c;public Clock getC() {return c;}public void setC(Clock c) {this.c = c;}public Person(Clock c) {this.c = c;}@Overridepublic void run() {while(true) {operator();}}public void operator() {synchronized(c) {try {if(c.isWakeup()) {//System.out.println(c.isWakeup());System.out.println("知道了!");c.setWakeup(false);Thread.sleep(3000);c.notify();c.wait();} else {c.wait();}} catch (InterruptedException e) {e.printStackTrace();}}}public static void main(String[] args) {Clock c = new Clock();Person p = new Person(c);Thread ct = new Thread(c);Thread pt = new Thread(p);pt.setDaemon(true);ct.start();pt.start();}public class Answer implements Runnable {private String name;private Asker asker;private String[] answers;public String getName() {return name;}public void setName(String name) {this.name = name;}public Asker getAsker() {return asker;}public void setAsker(Asker asker) {this.asker = asker;}public Answer(String name, Asker asker) {this.name = name;this.asker = asker;answers = new String[]{"好热啊!","大圣,等等我!","上帝笑了!","吃俺老孙一棒!","师傅!师傅","睡觉好舒服!","请你严肃点!","逗你玩!","天亮了!","好好好!"};}@Overridepublic void run() {while(true) {answer();}}public void answer() {synchronized (asker) {try {if(asker.isAsk()) {String q = asker.getQuestion();if(q.indexOf("王八蛋")>0) {System.out.println("你丫才是王八蛋呢!!!");} else {int index = Asker.ran.nextInt(answers.length);String a = answers[index];System.out.println(name+":'"+a+"'");}asker.setAsk(false);Thread.sleep(2000);asker.notify();asker.wait();} else {asker.wait();}} catch (InterruptedException e) {e.printStackTrace();}}}public class Asker implements Runnable {private String name;private String[] questions;private String question;private boolean isAsk;public static Random ran = new Random();public String getQuestion() {return question;}public void setQuestion(String question) {this.question = question;}public String getName() {return name;}public void setName(String name) {this.name = name;}public String[] getQuestions() {return questions;}public void setQuestions(String[] questions) {this.questions = questions;}public boolean isAsk() {return isAsk;}public void setAsk(boolean isAsk) {this.isAsk = isAsk;}public Asker(String name) {this.name = name;questions = new String[]{"你好吗?","你吃了吗?","你是猴子派来的救兵吗?","你是王八蛋吗?","今天天气好吗?","中国足球队赢了吗?","朝鲜人民奔小康了吗?","汽油又涨价了吗"};isAsk = false;}@Overridepublic void run() {for(int i=0;i<20;i++) {ask();}}public void ask() {synchronized (this) {try {if(!isAsk) {int index = ran.nextInt(questions.length);question = questions[index];System.out.println(name+":'"+question+"'");Thread.sleep(2000);isAsk = true;this.notify();this.wait();} else {this.wait();}} catch (InterruptedException e) {e.printStackTrace();}}}public static void main(String[] args) {Asker asker = new Asker("春哥");Answer ans = new Answer("凤姐",asker);Thread ast = new Thread(asker);Thread ant = new Thread(ans);ant.setDaemon(true);ast.start();ant.start();}6、网络编程
6.1网络编程步骤
1、建立服务端和客户端
两个类,一个是客户端,一个是服务端

2、编写server端的程序
public static void main(String[] args) {//服务器端就是创建相应的ServerSocketServerSocket ss = null;Socket s = null;try {ss = new ServerSocket(5858);//因为服务器端一般都是不停止工作的,所以需要使用死循环while(true) {try{//此处就接收了一个客户端的请求s = ss.accept();String name = s.getInetAddress().getHostAddress()+":"+s.getPort();//System.out.println("a client connect:"+s.getPort()+","+s.getInetAddress());BufferedReader br = new BufferedReader(new InputStreamReader(s.getInputStream()));String str = br.readLine();System.out.println(name+"--"+str);PrintWriter out = new PrintWriter(s.getOutputStream(),true);out.println("Receive:"+str);} finally {if(s!=null) s.close();}}} catch (IOException e) {e.printStackTrace();} finally {try {//结束之后要关闭socketif(ss!=null) ss.close();} catch (IOException e) {e.printStackTrace();}}}3、创建客户端
public static void main(String[] args) {Socket s = null;try {/*** 客户端通过Socket连接服务器端*/s = new Socket("127.0.0.1",5858);PrintWriter out = new PrintWriter(s.getOutputStream(),true);out.println("你好");BufferedReader br = new BufferedReader(new InputStreamReader(s.getInputStream()));String str = br.readLine();System.out.println(str); } catch (UnknownHostException e) {e.printStackTrace();} catch (IOException e) {e.printStackTrace();} finally {try {if(s!=null) s.close();} catch (IOException e) {e.printStackTrace();}}4、在服务器端接收客户端的连接
//此处就接收了一个客户端的请求s = ss.accept();String name = s.getInetAddress().getHostAddress()+":"+s.getPort();//System.out.println("a client connect:"+s.getPort()+","+s.getInetAddress());5、两端进行通信
服务器端和客户端建立了连接之后可以获取这个Socket的InputStream和OutputStream,
通过这两个流就可以完成相应的操作。
客户端
try {/*** 客户端通过Socket连接服务器端*/s = new Socket("127.0.0.1",5858);//如果要输出字符数据,都是用PrintWriterPrintWriter out = new PrintWriter(s.getOutputStream(),true);out.println("你好");服务器的接收端
try {ss = new ServerSocket(5858);//因为服务器端一般都是不停止工作的,所以需要使用死循环while(true) {try{//此处就接收了一个客户端的请求s = ss.accept();String name = s.getInetAddress().getHostAddress()+":"+s.getPort();//System.out.println("a client connect:"+s.getPort()+","+s.getInetAddress());//只要操作的是字符数据,统一用BufferedReaderBufferedReader br = new BufferedReader(new InputStreamReader(s.getInputStream()));String str = br.readLine();System.out.println(name+"--"+str);6.2、基于TCP的编程操作
服务端和客户端连接完成之后,通过socket可以完成两段的通信,因为使用socket可以获取相应
的输入流和输出流。
1、建议最佳操作
通过socket获取的输入流或者输出流都是基于字节数据的,所以需要通过基于字节数据的流
完成。
建议在写数据时使用PrintWriter,在读数据时使用BufferedReader。
/*** 客户端通过Socket连接服务器端*/s = new Socket("127.0.0.1",5858);//如果要输出字符数据,都是用PrintWriter//写数据使用PrintWriterPrintWriter out = new PrintWriter(s.getOutputStream(),true);out.println("你好");//读数据使用BufferedReader,通过转换流进行转换BufferedReader br = new BufferedReader(new InputStreamReader(s.getInputStream()));String str = br.readLine();System.out.println(str); 2、服务器端的编写
//服务器端就是创建相应的ServerSocketServerSocket ss = null;Socket s = null;try {ss = new ServerSocket(5858);//因为服务器端一般都是不停止工作的,所以需要使用死循环while(true) {try{//此处就接收了一个客户端的请求s = ss.accept();String name = s.getInetAddress().getHostAddress()+":"+s.getPort();//System.out.println("a client connect:"+s.getPort()+","+s.getInetAddress());//只要操作的是字符数据,统一用BufferedReaderBufferedReader br = new BufferedReader(new InputStreamReader(s.getInputStream()));String str = br.readLine();System.out.println(name+"--"+str);PrintWriter out = new PrintWriter(s.getOutputStream(),true);out.println("Receive:"+str);} finally {if(s!=null) s.close();}}} catch (IOException e) {e.printStackTrace();} finally {try {//结束之后要关闭socketif(ss!=null) ss.close();} catch (IOException e) {e.printStackTrace();}6.3、基于UDP的编程操作
UDP通常是通过接收端和发送端完成通信的。
接收端的编写
DatagramSocket ds = null;try {//UDP接收端连接ds = new DatagramSocket(9999);//定义将UDP的数据包接收到什么地方byte[] buf = new byte[1024];//定义UDP的数据接收包DatagramPacket dp = new DatagramPacket(buf, buf.length);while (true) {//接收数据包ds.receive(dp);String str = new String(dp.getData(),0,dp.getLength());System.out.println(str);}发送端的编写
DatagramSocket ds = null;try {//定义一个UDP的Socket来发送数据ds = new DatagramSocket();//假设发送的数据是个字符串String hello = "hello world";//定义一个UDP的数据发送包来发送数据,InetSocketAddress表示要接收的地址DatagramPacket dp = new DatagramPacket(hello.getBytes(), hello.getBytes().length, new InetSocketAddress("127.0.0.1",9999));for(int i=0;i<10;i++) {ds.send(dp);Thread.sleep(1000);}7、正则表达式
正则表达式是用来处理字符串的。
一、用来进行字符串的匹配。
二、用来进行替换操作。
三、用来提取信息。
7.1、基础表达式
一、基本匹配
.:所有字符
\d:所有数字
\D:所有非数字
\s:空白字符
\S:非空白字符
\w:[a-zA-Z_0-9]
\W:非\w
//.表示任意字符System.out.println("a".matches("."));System.out.println("aa".matches(".a"));System.out.println("\\d");//\\d表示是否是数字System.out.println("123".matches("\\d\\d\\d"));System.out.println("1a23c4".matches("\\d\\D\\d\\d\\D\\d"));//\\s表示是否是空白字符System.out.println("1 2 d".matches("\\d\\s\\s\\d\\s\\sd"));//\\w表示常用输入字符:a-z,A-Z,0-9,_System.out.println("aa b1 22".matches("\\w\\w\\s\\w\\w\\s\\w\\w"));//[abcd]表示是否是abcd这四个字符中的某一个System.out.println("a".matches("[abcd]"));//[a-z]表示是否是a-z之间的字符System.out.println("D".matches("[a-zA-Z]"));//[^a-z]表示不在a-z之间System.out.println("h".matches("[^a-z]"));//也支持&&和||System.out.println("e".matches("[a-z&&[def]]"));System.out.println("H".matches("[a-z]||[A-D]"));7.2、?*+
二、.、*、+
X? X,once or not at all
X* X,zero or more times
X+ X,one or more times
三、范围匹配
X{n} X,exactly n times
X{n,} X,at least n times
X{n,m} X,at least n but not more than m times
[abc] a,b or c (simple class)
//*表示任意多个字符(0个或多个)System.out.println("aaaa".matches("a*"));//输出结果为false,因为*表示的多个System.out.println("abcd".matches("a*"));System.out.println("abcd".matches("a.*"));System.out.println("abcd".matches("a[a-z]*"));System.out.println("".matches("a*"));//+表示一个或者多个System.out.println("aa".matches("a+"));System.out.println("a".matches("a+"));System.out.println("".matches("a+"));//?表示0个或者1个System.out.println("a".matches("a?"));System.out.println("aa".matches("a?"));System.out.println("".matches("a?"));//{n,m}表示至少出现n次,最多出现m次System.out.println("2016-7-20".matches("\\d{4}-\\d{1,2}-\\d{1,2}"));//第一个:检测一个字符串是否是数字System.out.println("3423.43".matches("\\d+\\.?\\d+"));//第二个:检测一个字符串是否是一个电话号码 010-8898989-01System.out.println("0101-2345678-03".matches("\\d{3,4}-\\d{7}-\\d{2}"));System.out.println("0101-2345678".matches("\\d{3,4}-\\d{7}-*\\d*"));//第三个:匹配一个IP地址:192.168.1.123System.out.println("192.168.1.123".matches("\\d{1,3}\\.\\d{1,3}\\.\\d{1,3}\\.\\d{1,3}"));//第四个:匹配一个身份证号System.out.println("12345678998765432X".matches("\\d{15}||\\d{18}||\\d{17}[X]"));//匹配一个电子邮件System.out.println("qw@al.com.cn".matches("[\\w-\\.]*\\w+@[\\w\\.-]*\\w+\\.\\w{2,6}"));7.3、边界处理
//^不在[]中就表示以xx为开头,特别注意:[^abc]表示除了abc之外的字符System.out.println("helloworld".matches("^h\\w+"));System.out.println("h".matches("^h\\w+"));System.out.println("1you".matches("\\d\\w+"));//$表示以XX结尾System.out.println("1you1d".matches("\\w*\\d$"));7.4、Pattern和Matcher
//可以先将一个正则表达式编译成为一个Pattern对象,可以提高效率Pattern p = Pattern.compile("\\d{4}");//通过Pattern可以获取一个Matcher对象,通过Matcher对象可以获取大量的有用信息Matcher m = p.matcher("23458888-6789-1234");//判断是否匹配System.out.println(m.matches());//将查找的指针重置m.reset();//以下会报错,必须在find之后才能执行group//System.out.println(m.group());/*//find指的是顺序匹配相应的字符串System.out.println(m.find());//每进行一次find,就可以将字符串通过group获取,一定要执行了find之后才能执行groupSystem.out.println(m.group());System.out.println(m.find());System.out.println(m.group());System.out.println(m.find());System.out.println(m.group());*/while(m.find()) {//m.start和m.end可以获取匹配字符串的开始位置和结束位置System.out.println(m.group()+"["+m.start()+","+m.end()+"]");}7.5、替换
String str = "23456asdfg2343sdfds343";//第一个参数是正则表达式,第二个参数是要替换的值System.out.println(str.replaceAll("\\d", "*"));System.out.println(str.replaceAll("\\d+", "*"));//替换后4位System.out.println("12345678909".replaceAll("\\d{4}$", "****"));7.6、分组和查找
分组
String str = "222333199812030001,222333199902030002,222333198804050003";//使用括号进行分组//此处分成了三个组,每一个左括号就是一个组Pattern p = Pattern.compile("((\\d{6})(\\d{8}))\\d{4}");Matcher m = p.matcher(str);while(m.find()) {System.out.println(m.group());//根据group(xx)来输出某个组的内容System.out.println("出生地:"+m.group(2)+"出生日期:"+m.group(3));}贪婪模式
String h = "<table><td>你好</td><td>我好</td><td>大家好</td></table>";//贪婪模式,指的是.*会匹配所有的信息,此处会找整个信息p = Pattern.compile("<td>(.*)</td>");m = p.matcher(h);while(m.find()) {//找到的结果:你好</td><td>我好</td><td>大家好System.out.println(m.group(1));System.out.println(m.start()+","+m.end());}非贪婪模式
//非贪婪模式,仅仅只是匹配第一个结尾,特别注意:?接在*+之后就表示使用了非贪婪模式p = Pattern.compile("<td>(.*?)</td>");m = p.matcher(h);while(m.find()) {System.out.println(m.group(1));System.out.println(m.start()+","+m.end());}(完)
转载于:https://my.oschina.net/pmos/blog/673578
Java-J2SE专题复习相关推荐
- 计算机网络专题复习——运输层
文章目录 计算机网络专题复习(传输层) 一,传输层概述 二,UDP协议 1,UDP的主要特点 三,TCP协议 1,TCP协议特点 2,TCP报文段首部格式 3,TCP连接管理 三次握手 四次挥手 4, ...
- 宏观经济学思维导图_巧用思维导图,提升初三化学专题复习课实效
旭东化学,你的教学助手 你关注的 正是我们专注的 关注教育 | 关注教学 | 关注化学 立即关注 初中化学知识分布比较零散,内容较为抽象,学生复习记忆比较困难.而思维导图作为 ...
- Java基础知识复习(一)
Java基础知识复习(一) 目录 Java简介 命名规则 八种基本的数据类型 字面量 类型转换 变量的形态 逻辑运算符 位运算 移位运算 习题知识点 目录 Java简介 Java是由Sun公司在199 ...
- 【备战NOIP】专题复习1-动态规划-背包问题
[备战NOIP]专题复习1-动态规划-背包问题 在阅读本文之前,建议先阅读背包九讲.本文通过相关的题目来讨论一些常见的背包套路,其中包括,01背包的模板以及应用,完全背包的模板以及应用,多重背包的模板 ...
- Java String知识复习及补充和包装类
Java String知识复习及补充和包装类 1. String类 1.1 String API复习 1.2 正则表达式 1.3 StringBuffer 和 StringBuilder 1.4 St ...
- java基础知识复习(上半)
java基础知识复习 java为什么被发明? Green项目的确立,应用于像电视盒一样的消费类电子产品,语言本身本身中立. java的三大版本? javaSE的定位在于客户端,只要用于桌面应用软件的编 ...
- JAVA集合专题+源码分析
文章目录 Java集合专题 集合和数组的区别 数组 集合 区别 集合体系结构介绍 单列集合 [Collection ] Collection接口 迭代器 迭代器原理 增强for循环 List接口 对集 ...
- JAVA面经复习(二十六)面试难度:☆☆☆☆
JAVA面经复习(二十六)面试难度:☆☆☆☆ 面试难度:☆☆☆☆ 推荐指数:☆☆☆☆☆ 推荐原因:总体来说本篇面经难度不高,且基本都是基础知识,不涉及复杂的分布式应用的工具,适合新手复习. 声明:答案 ...
- Java集合专题(含源码)
Java集合专题 一.集合是什么? 1.集合和数组的区别 2.Collection体系的继承树 2.1 Collection接口常用方法 2.2 Collection常用遍历方式 2.2.1 迭代器I ...
- 【笔记】Java反射专题
反射专题 链接:[韩顺平讲Java]Java反射专题 1. 引出反射 需求: (1)根据配置文件re.properties指定信息,创建Cat对象并调用方法hi classfullpath=com.q ...
最新文章
- 常见分布式理论(CAP、BASE)和一致性协议(Gosssip协议、Raft一致性算法)
- mySQL建表允许最多多少字段?
- ClickHouse 数据存储原理:MergeTree引擎
- python udp客户端 服务器实现方式_python3实现UDP协议的简单服务器和客户端
- 前端学习(624):小结
- 盘点一下结构体标签在Go中的应用
- python安装第三方库时报错 SyntaxError: invalid syntax
- 左右伸缩_OPPO概念机将至!横向卷轴+左右伸缩,你期待吗
- Java微信授权登陆
- 启动计算机键盘没反应,为什么键盘没反应了 键盘没反应原因分析及解决方法...
- STM32的Flash地址空间的数据读取
- [经验] 系统封装常见问题大总结(非官方)
- 以一次失败的沟通,来聊聊技术人员沟通中常见的几个问题
- 串口转以太网关键技术
- 配置环境变量path
- 硬盘引导二合一安装黑群晖
- JAVA常用基础API(经典实例)
- kingston datatravere 101误删加密软件的解决办法(U盘空间变小)
- Java设计模式(三)——工厂模式
- python 写入excel数字格式_从Pandas写入Excel时设置默认数字格式