最全的iOS物理引擎demo
概述
详细
代码下载:http://www.demodashi.com/demo/11021.html
一、准备工作
1、需要Xcode8+iOS8的运行环境
2、本例子实现重力、碰撞、推力、摆动、碰撞+重力、重力弹跳、仿摩拜单车贴纸效果、防iMessage滚动效果、防百度外卖首页重力感应效果等功能!
二、程序实现
1、这是此demo的文件结构
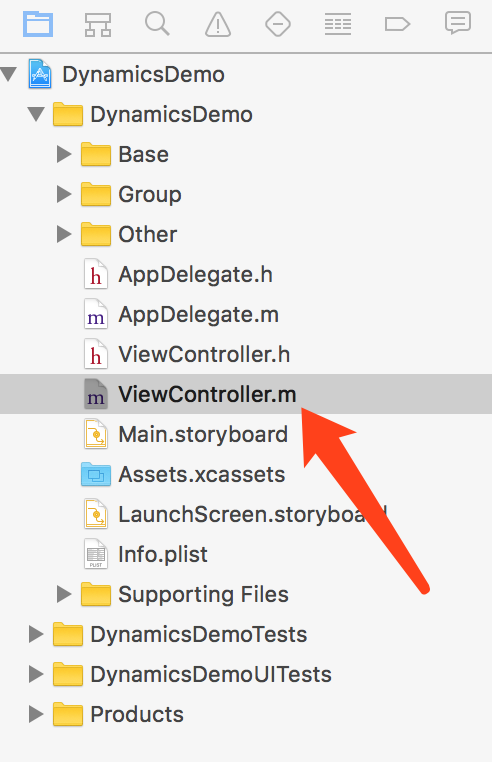
文件夹说明:
Base:存放控制器的基类和单个效果的控制器
Group:存放组合效果的控制器
Other:存放一些其他文件,如需要用到的自定义cell和CollectionViewLayout
图片中箭头所指的文件ViewController.m是此项目首页控制器。
2、iOS物理引擎UIDynamic是在iOS7引入的一项新技术,隶属于UIKit框架,可以让制作物理动画更简单;
主要步骤:
(1)、创建一个物理仿真器,设置作用的视图;
(2)、创建物理仿真行为,并且添加元素;
(3)、将仿真行为添加到仿真器内,开始执行;
3、所有物理行为的对象下载BaseViewController中,如图:
/**运动管理对象*/
@property (nonatomic, strong) CMMotionManager *motionManager;/**物理仿真器(相当于一个存放运动行为的容器)*/
@property (nonatomic, strong) UIDynamicAnimator *animator;/**重力行为*/
@property (nonatomic, strong) UIGravityBehavior *gravity;/**碰撞行为*/
@property (nonatomic, strong) UICollisionBehavior *collision;/**吸附行为*/
@property (nonatomic, strong) UIAttachmentBehavior *attach;/**迅猛移动弹跳摆动行为*/
@property (nonatomic, strong) UISnapBehavior *snap;/**推动行为*/
@property (nonatomic, strong) UIPushBehavior *push;/**物体属性,如密度、弹性系数、摩擦系数、阻力、转动阻力等*/
@property (nonatomic, strong) UIDynamicItemBehavior *dynamicItem;
然后将这些对象在BaseViewController.m中懒加载初始化,其他控制器均需要继承这个控制器,以便需要用到这些对象的地方直接加载:
#pragma mark - lazy
- (UILabel *)descLabel
{if (!_descLabel) {_descLabel = [[UILabel alloc] init];[self.view addSubview:_descLabel];_descLabel.textColor = [UIColor lightGrayColor];}return _descLabel;
}- (NSMutableArray *)pointViews
{if (!_pointViews) {_pointViews = [NSMutableArray array];}return _pointViews;
}- (UIDynamicAnimator *)animator
{if (!_animator) {_animator = [[UIDynamicAnimator alloc] initWithReferenceView:self.view];}return _animator;
}- (UIGravityBehavior *)gravity
{if (!_gravity ) {_gravity = [[UIGravityBehavior alloc] init];[self.animator addBehavior:_gravity];}return _gravity;
}- (UICollisionBehavior *)collision
{if (!_collision) {_collision = [[UICollisionBehavior alloc] init];[self.animator addBehavior:_collision];_collision.translatesReferenceBoundsIntoBoundary = YES;}return _collision;
}/*
- (UIAttachmentBehavior *)attach
{if (!_attach) {_attach = [[UIAttachmentBehavior alloc] init];_attach.damping = 0;_attach.frequency = 0.5;吸附类型:连接到视图View,至少需要两个动力项_attach.attachedBehaviorType = UIAttachmentBehaviorTypeItems;UIAttachmentBehaviorTypeAnchor 连接到锚点(只有一个动力项)}return _attach;
}
*/- (UIPushBehavior *)push
{if (!_push) {_push = [[UIPushBehavior alloc] init];// mode : 推力模式,UIPushBehaviorModeContinuous:持续型。UIPushBehaviorModeInstantaneous:一次性推力。
//        _push.mode = UIPushBehaviorModeContinuous;// 推力是否被激活,在激活状态下,物体才会受到推力效果_push.active = YES;// 推力的大小和方向, 是一个平面向量,表示推力的力和方向
//        _push.pushDirection = CGVectorMake(<#CGFloat dx#>, <#CGFloat dy#>);[self.animator addBehavior:_push];}return _push;
}//- (UISnapBehavior *)snap
//{
//    if (!_snap) {
//        _snap = [[UISnapBehavior alloc] initWithItem:nil snapToPoint:CGPointZero];
//        // 设置item要在哪个点上震动
//        _snap.snapPoint = CGPointZero;
//        // 减震系数,弹性的迅猛度,范围在0.0~1.0,默认值为0.5
//        _snap.damping = 0.5;
//    }
//    return _snap;
//}- (UIDynamicItemBehavior *)dynamicItem
{if (!_dynamicItem) {_dynamicItem = [[UIDynamicItemBehavior alloc] init];[self.animator addBehavior:_dynamicItem];// 弹力, 通常0~1之间_dynamicItem.elasticity = 1;// 摩擦力,0表示完全光滑无摩擦
//        _dynamicItem.friction = 0;// 密度,一个 100x100 points(1 point 在 retina 屏幕上等于2像素,在普通屏幕上为1像素。)大小的物体,密度1.0,在上面施加 1.0 的力,会产生 100 point/平方秒 的加速度。
//        _dynamicItem.density = 1;// 线性阻力,物体在移动过程中受到的阻力大小
//        _dynamicItem.resistance = 1;// 旋转阻力,物体旋转过程中的阻力大小
//        _dynamicItem.angularResistance = 1;// 是否允许旋转
//        _dynamicItem.allowsRotation = YES;}return _dynamicItem;
}- (CMMotionManager *)motionManager {if (!_motionManager) {_motionManager = [[CMMotionManager alloc] init];// 设备状态更新帧率_motionManager.deviceMotionUpdateInterval = 0.01;}return _motionManager;
}
1、重力行为非常简单,只需要把需要设置重力效果的view添加到重力行为对象UIGravityBehavior中即可:
UIView *view = [self getLeadingActorView:(CGRect){point, 50, 50} backgroundColor:[UIColor redColor]];[self.view addSubview:view];[self.gravity addItem:view];2、碰撞行为,和重力效果一样,把需要设置碰撞行为的view添加到碰撞行为对象UICollisionBehavior中即可:
// 创建ViewUIView *view = [self getLeadingActorView:[frames[i] CGRectValue] backgroundColor:[self randomColor]];[self.view addSubview:view];// 添加碰撞效果[self.collision addItem:view];3、吸附效果,一个view想要拥有吸附效果,除了需要设置吸附行为外,还有一个锚点的概念,通俗点讲就是,这个view以后会吸附在这个点上,通过改变这个点的位置,这个view也在跟着锚点不断移动:
self.attach = [[UIAttachmentBehavior alloc] initWithItem:self.squareView offsetFromCenter:UIOffsetZero attachedToAnchor:self.anchorView.center];// anchorPoint : 类型的依赖行为的锚点,锚点与行为相关的动力动画的坐标系统有关// items : 与吸附行为相连的动态项目,当吸附行为类型是UIAttachmentBehaviorTypeItems时有2个元素,当吸附行为类型是UIAttachmentBehaviorTypeAnchor时只有一个元素。// 吸附行为中的两个吸附点之间的距离,通常用这个属性来调整吸附的长度,可以创建吸附行为之后调用。系统基于你创建吸附行为的方法来自动初始化这个长度self.attach.length = 60;// 吸附行为震荡的频率self.attach.frequency = .3;// 描述吸附行为减弱的阻力大小self.attach.damping = .3;[self.animator addBehavior:self.attach];4、推力行为,一个view添加推力后,这个view在推力的方向上就会产生一个力,从而往这个方向移动:
UIView *square = self.pointViews.firstObject;// 创建推力行为UIPushBehavior *push = [[UIPushBehavior alloc] initWithItems:@[square] mode:UIPushBehaviorModeInstantaneous];CGPoint location = [touches.anyObject locationInView:self.view];CGPoint itemCenter = square.center;// 设置推力方向push.pushDirection = CGVectorMake((location.x - itemCenter.x) / 300, (location.y - itemCenter.y) / 300);[self.animator addBehavior:push];5、摆动行为:也叫捕捉行为,因为捕捉行为比较抽象,不好理解,我一般会叫摆动行为。其实效果就是在某个作用点上震动。UISnapBehavior初始化时需要设置一个点,存在一个防震系数,值越大振幅越小。如果想多次操作一个behavior可以使用removeAllBehaviors移除所有的行为在添加即可。我这里只添加了一次,然后不断改变它的作用点
    // 创建一个viewUIView *view = [self getLeadingActorView:CGRectMake(20, 66, 20, 20) backgroundColor:[self randomColor]];[self.view addSubview:view];// 创建震动行为,snapPoint是它的作用点self.snap = [[UISnapBehavior alloc] initWithItem:self.pointViews.firstObject snapToPoint:view.center];[self.animator addBehavior:self.snap];// 设置震动量,范围从0到1,默认为0.5self.snap.damping = 1;// 移动的时候改变作用点
- (void)touchesMoved:(NSSet<UITouch *> *)touches withEvent:(UIEvent *)event
{// 更改作用点[self changeSnapPoint:[touches.anyObject locationInView:self.view]];
}- (void)changeSnapPoint:(CGPoint)snapPoint
{self.snap.snapPoint = snapPoint;
}
以上是独立效果,我们还可以稍加组合,做些组合效果,看起来会很酷~
1、重力加碰撞:
// 创建一个viewUIView *view = [self getLeadingActorView:(CGRect){point, 20 + (arc4random() % 61), 40 + (arc4random() % 41)} backgroundColor:[self randomColor]];[self.view addSubview:view];// 为view添加重力效果[self.gravity addItem:view];// 为view添加碰撞效果[self.collision addItem:view];2、重力加弹跳
UIView *square = [self getLeadingActorView:(CGRect){point, wh % 50, wh % 50} backgroundColor:[self randomColor]];
[self.view addSubview:square];// 动态媒介UIDynamicAnimator *animator = [[UIDynamicAnimator alloc] initWithReferenceView:self.view];[self.animators addObject:animator];// 重力UIGravityBehavior *gravity = [[UIGravityBehavior alloc] initWithItems:@[square]];[animator addBehavior:gravity];// 碰撞UICollisionBehavior *collision = [[UICollisionBehavior alloc] initWithItems:@[square]];collision.collisionDelegate = self;[collision addBoundaryWithIdentifier:@"barrier" forPath:[UIBezierPath bezierPathWithRect:self.view.bounds]];collision.translatesReferenceBoundsIntoBoundary = YES;[animator addBehavior:collision];// 动力学属性UIDynamicItemBehavior *itemBehavior = [[UIDynamicItemBehavior alloc] initWithItems:@[square]];itemBehavior.elasticity = 1;[animator addBehavior:itemBehavior];
除此之外,咱们还可以模仿一些大厂利用这种技术作出的效果:
1、防摩拜单车贴纸效果
这种效果说白了就是重力加互相碰撞,然后根据监听设备倾斜方向动态改变view的重力方向实现的。
// 创建viewfor (NSInteger i = 0; i < 40; i++) {UIImageView *imageView = [[UIImageView alloc] initWithImage:[UIImage imageNamed:@"MobikeTest"]];imageView.frame = CGRectMake(100, 0, 50, 50);imageView.layer.masksToBounds = YES;imageView.layer.cornerRadius = 25;[self.view addSubview:imageView];// 添加重力效果[self.gravity addItem:imageView];// 碰撞效果[self.collision addItem:imageView];self.dynamicItem.elasticity = .7;// 添加动力学属性[self.dynamicItem addItem:imageView];}// 开始监听[self.motionManager startDeviceMotionUpdatesToQueue:NSOperationQueue.mainQueue withHandler:^(CMDeviceMotion * _Nullable motion, NSError * _Nullable error) {// 设置重力方向self.gravity.gravityDirection = CGVectorMake(motion.gravity.x * 3, -motion.gravity.y * 3);}];2、防iMessage滚动效果
另外iPhone系统应用iMessage中消息滑动的时候添加了一个动画效果,其实是利用吸附效果实现的,这个实现参考了喵神的博客,在自定义collectionViewLayout中重写prepareLayout方法并为每个item添加吸附行为,再重写shouldInvalidateLayoutForBoundsChange方法,根据滚动的位移,改变吸附行为的anchorPoint:
- (void)prepareLayout
{[super prepareLayout];if (!_animator) {_animator = [[UIDynamicAnimator alloc] initWithCollectionViewLayout:self];CGSize contentSize = [self collectionViewContentSize];NSArray *items = [super layoutAttributesForElementsInRect:CGRectMake(0, 0, contentSize.width, contentSize.height)];for (UICollectionViewLayoutAttributes *item in items) {UIAttachmentBehavior *spring = [[UIAttachmentBehavior alloc] initWithItem:item attachedToAnchor:item.center];spring.length = 0;spring.damping = .8;spring.frequency = .5;[_animator addBehavior:spring];}}
}- (BOOL)shouldInvalidateLayoutForBoundsChange:(CGRect)newBounds {UIScrollView *scrollView = self.collectionView;CGFloat scrollDeltaY = newBounds.origin.y - scrollView.bounds.origin.y;CGFloat scrollDeltaX = newBounds.origin.x - scrollView.bounds.origin.x;CGPoint touchLocation = [scrollView.panGestureRecognizer locationInView:scrollView];for (UIAttachmentBehavior *spring in _animator.behaviors) {CGPoint anchorPoint = spring.anchorPoint;CGFloat distanceFromTouch = fabs(touchLocation.y - anchorPoint.y);CGFloat scrollResistance = distanceFromTouch / 2000;UICollectionViewLayoutAttributes *item = (id)[spring.items firstObject];CGPoint center = item.center;center.y += (scrollDeltaY > 0) ? MIN(scrollDeltaY, scrollDeltaY * scrollResistance): MAX(scrollDeltaY, scrollDeltaY * scrollResistance);CGFloat distanceFromTouchX = fabs(touchLocation.x - anchorPoint.x);center.x += (scrollDeltaX > 0) ? MIN(scrollDeltaX, scrollDeltaX * distanceFromTouchX / 2000): MAX(scrollDeltaX, scrollDeltaX * distanceFromTouchX / 2000);item.center = center;[_animator updateItemUsingCurrentState:item];}return NO;
}
3、百度外卖首页重力感应
用过百度外卖的可能都注意到了,在它的首页,有个collectionView可以根据重力去滚动,我这里简单实现了下:
// 加速计更新频率,我这里设置每隔0.06s更新一次,也就是说,每隔0.06s会调用一次下边这个监听的blockself.motionManager.accelerometerUpdateInterval = 0.06;// 开始监听[self.motionManager startAccelerometerUpdatesToQueue:NSOperationQueue.mainQueue withHandler:^(CMAccelerometerData * _Nullable accelerometerData, NSError * _Nullable error) {// 获取加速计在x方向上的加速度CGFloat x = accelerometerData.acceleration.x;// collectionView的偏移量CGFloat offSetX = self.collectionView.contentOffset.x;CGFloat offSetY = self.collectionView.contentOffset.y;// 动态修改偏移量offSetX -= 15 * x;CGFloat maxOffset = self.collectionView.contentSize.width + 15 - self.view.frame.size.width;// 判断最大和最小的偏移量if (offSetX > maxOffset) {offSetX = maxOffset;} else if (offSetX < -15) {offSetX = -15;}// 动画修改collectionView的偏移量[UIView animateWithDuration:0.06 animations:^{[self.collectionView setContentOffset:CGPointMake(offSetX, offSetY) animated:NO];}];}];三、运行效果
1、用Xcode8打开demo,然后按快捷键command+r运行
2、运行时截图
1、重力行为
2、碰撞行为
3、吸附行为
4、推力行为

5、摆动行为
6、重力+碰撞
7、酷炫的重力弹跳
8、防摩拜单车贴纸效果
9、防iMessage滚动效果
10、防百度外卖首页重力感应
四、其他补充
1、最后几张GIF压缩之后有点失真,真实效果可以下载demo来看。
2、下载这个demo,绝对能玩一天。
代码下载:http://www.demodashi.com/demo/11021.html
注:本文著作权归作者,由demo大师发表,拒绝转载,转载需要作者授权
最全的iOS物理引擎demo相关推荐
- 物理引擎demo (4) —— 力、关节和马达
demo地址:http://www.adanghome.com/js_demo/26/ 小车由一个多边形和两个轮子组成,轮子和车身是由revoluteJoint关节组合在一起的.车的后轮有个自动的马达 ...
- creator物理引擎 /RPG运动类型 /坦克
1 applyForce/ToCenter(). 这个力怎么计算 (牛顿第二定律F=ma) 2 .linearVelocity()是像素/米 (看源码) 3 why到第四帧才有速度 CocosCrea ...
- 基于APE物理引擎的管线容积率计算方法
容积率一般应用在房地产开发中,是指用地范围内地上总建筑面积与项目总用地面积的比值,这个参数是衡量建设用地使用强度的一项非常重要的指标.在其他行业,容积率的计算也非常重要,如产品利用率.管道使用率等等. ...
- 游戏开发物理引擎PhysX研究系列:运行官方较完整的demo
一.介绍: 官方本身就自带几个demo,包括RPG和Racing Game 二.操作步骤: 下载DXSDK_Jun10.exe Download DirectX Software De ...
- papervision3d和物理引擎Box2DFlash的一个超酷且好玩的DEMO
原文:http://pv3d.org/2008/12/20/papervision3d-with-box2dflash-part-3-adding-mouse-interaction/ 运行效果: 这 ...
- 史上最全的iOS开源项目分类汇总
学了这么久,还是抽时间把github上比较好用的第三方总结了一下: Category/Util sstoolkit 一套Category类型的库,附带很多自定义控件 功能不错- BFKit 又一套Ca ...
- 最全面的iOS和Mac开源项目和第三方库汇总
标签: UI 下拉刷新 EGOTableViewPullRefresh – 最早的下拉刷新控件. SVPullToRefresh – 下拉刷新控件. MJRefresh – 仅需一行代码就可以为UIT ...
- 【AwayPhysics学习笔记】:Away3D物理引擎的简介与使用
首先我们要了解的是AwayPhysics这个物理引擎并不是重头开始写的新物理引擎,而是使用Flascc技术把一个已经很成熟的Bullet物理引擎引入到了Flash中,同时为了让as3可以使用这个C++ ...
- 游戏引擎开发和物理引擎_视频游戏开发的最佳游戏引擎
游戏引擎开发和物理引擎 In this article, we'll look at some of the most popular game engines for video game deve ...
最新文章
- Maven学习总结(八)——使用Maven构建多模块项目
- 全方位讲解硬件防火墙的选择
- asp.net源碼坊論壇上線
- gitlab的搭建与汉化
- 鸿蒙操作系统手机什么时候上市,[财经]鸿蒙手机来了!2021华为鸿蒙手机系统发布会上线时间出炉(2) - 南方财富网...
- 调用微信和支付宝调三方接口扫描二维码?
- sklearn自学指南(part32)--保序回归
- pat 乙级 1003 我要通过!(C++)
- C语言代码规范(八)使用const修饰值不允许改变的变量
- C#网站发布在IIS10上,Access数据库读取为空白的解决方案
- 《Windows游戏编程大师技巧》五、DirectX基础知识和令人生畏的COM
- Struts2常用标签总结
- uni-app 快速入门 从零开始实现新闻资讯类跨端应用(更新中)
- 用yolov5训练kitti数据集
- 流利阅读12.23 The 'great dying': rapid warming caused largest extinction event ever, report says
- 武林传奇之七剑下天山java游戏开发商_宝3武林传奇之七剑下天山的配方
- 学习笔记——共阳数码管的静态显示
- 《评人工智能如何走向新阶段》后记(再续22)
- 互联网时代颠覆的传统行业
- H5-扫描二维码及条形码