.net swf 上传组件
引用:http://www.codeproject.com/Articles/15742/Multiple-File-Upload-With-Progress-Bar-Using-Flash
Multiple File Upload With Progress Bar Using Flash and ASP.NET
|

- Download source code - 475.86 KB

Introduction
It is difficult to find a decent upload control that handles large files, shows a progress bar, and still works in a medium-trust hosting environment. The problem with these controls is that medium-trust does not allow Reflection. But this does not mean that we are out of luck. One of the problems these controls strive to overcome is the server running out of memory when large files are uploaded by streaming the uploaded file to disk. But the HttpPostedFile class description states that "By default, all requests, including form fields and uploaded files, larger than 256 KB are buffered to disk, rather than held in server memory." So, we don't have to worry about this problem. The other issue is feedback to the user by way of progress bar. Enter Flash's fileReference API, which allows you to upload a file from Flash, and also keep track of it. FileReferenceList allows the user to select multiple files.
Using the Code
Please read the article and the comments in the source code before asking questions in the forums.
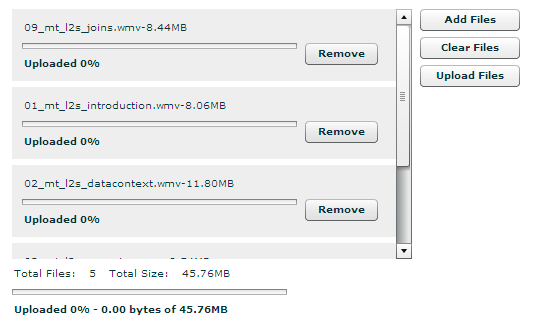
I have finally gotten around to updating the Flash component of this article. I have re-written it using Flex, and have tried to add some of the suggestions from the message board. Some of the new features include adding files without clearing previously added files, removing individual files, individual progress bar as well as total progress bar, cancelling and then uploading does not re-upload previously uploaded files, ability to add and remove files while uploading files. The code is written using code behind and should be easier to modify. Moreover, all you need to make changes is a text editor and then you can compile it using the Flex 2 SDK, which is a free download from Adobe. Error handling should be better as well, though additional code may need to be added to handle it better. I have left the oldfileUpload.swf and fileUpload.fla file in the source code in case anyone still wanted it. The source for the newFlashFileUpload.swf is contained in the FlashFileUpload_src.zip file and contains five files:
- FlashFileUpload.mxml - Main application GUI
- components\ApplicationClass.as - Main application code behind
- components\FileUpload.as -
FileUploadclass used for individual file uploading - components\FileUploadEvent.as - A custom event class
- components\FileUploadProgressChangedEvent.as - A custom event class
I won't put the file's code in the article, you can download it and read the comments in the code. Also, a small declaration: I have little ActionScript experience, only from the first upload control and this one. Neither do I have any Flex experience. This is the first time I have looked at Flex. So if I did something in the code that is not best practice, or if it could have been done better another way, it is due to my inexperience with Flex and ActionScript and the small amount of time I put into writing it. I give no guarantees for this control. I hope you find this article helpful.
The code isn't very complicated, and is pretty well commented. I have now encapsulated the Flash object generation into a server control and embedded the FlashFileUpload.swf file in the DLL. See the comments in Default.aspx in theUploadPage folder for options and usage. I've included options to limit the file types to upload as well as limiting individual file size and total file size and can all be set using the server control. Also, setting the upload page, query parameters, and the JavaScript function called when completed are easily set using the server control.
I have included a number of examples for doing things with the upload control. This includes using a HttpHandler as the upload page (lighter than using an ASPX page), using forms based authentication, and using sessions. I'll go over each real quick here, but will refer you to the source code for the actual code.
The uploading of the files are done using Flash (FlashFileUpload.swf) and can be used in any server side language, such as PHP, Java, Coldfusion, ASP, etc. If it can handle file uploads, it can use the Flash control. What the source code goes over is how to use it in ASP.NET.
The first step in using it in ASP.NET is to add the server control to a Web form (see UploadPage/Default.aspx) and setting the upload page in the server control's properties. The upload page can be any page that can handle uploaded pages, even another ASPX page. The preferred method is to use a HttpHandler because it is lighter than an ASPX page. For an HttpHandler, all that is required is a class that implements IHttpHandler and some settings in the<httpHandlers> section of the web.config. Also setting the maxRequestLength in the <httpRuntime /> section would also be a good idea since this limits the size of file that can be uploaded to the server. The default is something like 2 or 4 megabytes. So you want to set this to the maximum allowed file size you want uploaded. That is all that is needed to use the upload control. The rest of the code is for the examples stated above.
Cookies and Flash
There is a bug in Flash and non-Internet Explorer browsers. From what I have read, Flash does not send cookies that were set in the browser with the uploaded file. This means that anything that uses cookies will not be accessible in the upload page. This means that sessions and forms authentication break using their default implementation, because they use cookies. This usually results in the dreaded #2038 error. There are some workarounds.
Forms Authentication
To get around the Flash bug problem using forms authentication, create a folder and add a Web form to the folder. This will be the upload page so add the upload control. Add a web.config file marking the folder accessible to anonymous users. Then in the page load of the Web form, check if the user is authenticated, sending them to the login page if they aren't. Then use the following code to encode the users identity ticket and put it in the query parameters of the upload control:
FormsIdentity cIdentity = User.Identity as FormsIdentity;
string encryptString = FormsAuthentication.Encrypt(cIdentity.Ticket);
flashUpload.QueryParameters = string.Format("User={0}", encryptString);
Then in the upload page, the identity can be extracted:
string EncryptString = context.Request.QueryString["User"];
FormsAuthenticationTicket UserTicket = FormsAuthentication.Decrypt(EncryptString);
And we can check if it is expired, or even get the user's username:
if(!UserTicket.Expired)
{string username = UserTicket.Name;
}
Sessions
Unfortunately sessions aren't quite as clean. In order to use them, sessions must be set to be cookieless. Doing this adds some gibberish to the URL. Usually it is transparent to the user. Set it in the web.config:
<sessionState cookieless="UseUri" />
If using an HttpHandler, it needs to implement IRequiresSessionState as well.
Quick Note
The source code solution was built using Visual Studio 2008, but is .NET 2.0 based. If you do not have Visual Studio 2008 (not sure if the free Web developer studio can open the solution or not), you can still open the Web project under FlashUpload_Web in Visual Studio 2005 or the free Web developers by going to 'File' and selecting 'Open Web Site' and browsing to the FlashUpload_Web folder.
History
- 09.28.2006 -- Initial post
- 07.10.2008 -- Source updated
License
This article, along with any associated source code and files, is licensed under The Code Project Open License (CPOL)
About the Author
转载于:https://www.cnblogs.com/sode/archive/2013/04/09/3009476.html
.net swf 上传组件相关推荐
- java swf 上传文件_Flash上传组件之SWFUpload文件上传
SWFUpload是一个客户端文件上传工具,最初由Vinterwebb.se开发,它通过整合Flash与JavaScript技术为WEB开发者提供了一个具有丰富功能继而超越传统标签的文件上传模式. 由 ...
- Plupload文件上传组件使用API
Plupload有以下功能和特点: 1.拥有多种上传方式:HTML5.flash.silverlight以及传统的<input type="file" />.Plupl ...
- 从零开始编写自己的C#框架(23)——上传组件使用说明
文章导航 1.前言 2.上传组件功能说明 3.数据库结构 4.上传配置管理 5.上传组件所使用到的类 6.上传组件调用方法 7.效果演示 8.小结 1.前言 本系列所使用的是上传组件是大神July开发 ...
- (转)基于MVC4+EasyUI的Web开发框架形成之旅--附件上传组件uploadify的使用
http://www.cnblogs.com/wuhuacong/p/3343967.html 大概一年前,我还在用Asp.NET开发一些行业管理系统的时候,就曾经使用这个组件作为文件的上传操作,在随 ...
- Flash上传组件之SWFUpload文件上传
2019独角兽企业重金招聘Python工程师标准>>> 一.什么是SWFUpload? SWFUpload是一个客户端文件上传工具,最初由Vinterwebb.se开发,它通过整合F ...
- php+flash头像上传组件
有会员系统的网站一般都会有一个头像上传组件,一般做的最简单的是 这种方式优点是代码写的简单,只要判断图片大小和类型,然后更新数据库.但是用户体验不高.而且网站其他页面如果要使用较小的20X20或148 ...
- JS - 文件上传组件WebUploader使用详解1(带进度的文件上传
一.基本介绍 1,什么是 WebUploader? WebUploader 是由百度公司团队开发的一个以 HTML5 为主,FLASH 为辅的现代文件上传组件. 官网地址:http://fex.bai ...
- webuploader php版,功能强大的文件上传组件-WebUploader
使用WebUploader还可以批量上传文件.支持缩略图等等众多参数选项可设置,以及多个事件方法可调用,你可以随心所欲的定制你要的上传组件. 接下来我以图片上传实例,给大家讲解如何使用WebUploa ...
- 我是如何设计 Upload 上传组件的
Upload 组件设计的目标是解决用户上传文件的便利性,但是中后台 Upload 组件的场景是多种多样的,所以可扩展能力是 Upload 组件不可忽视的另一方面. 同样为了大家能够更加容易的理解,我会 ...
最新文章
- 2022-2028年中国廉价航空行业深度调研及投资前景预测报告
- Access denied for user 'root'@'localhost' (using password:YES) 解决方案
- Java并发编程—Thread类的start()方法是如何启动一个线程的?
- php验证ip地址的函数,php使用preg_match()函数验证ip地址的方法
- ubuntu16.04安装metasploit+postgresql
- ORA-20000: ORU-10027: buffer overflow, limit of 2000 bytes
- 任务计划程序设置软件在电脑重启后启动
- LTE学习:CCE(control channel element)控制信道单元(1)
- [转载] opencv学习笔记7:图像加法与图像融合
- TQ2440实现触摸屏和qt图形 解决segmentation fault
- php 调用永中云,永中优云:是时候给大家介绍真正的云端Office了
- 使用xshell-ssh连接服务器被经常意外中断(Disconnected from remote host)
- 用java中的map解析微信MicroMsg里的CompatibleInfo.cfg和systemInfo.cfg
- 步进电机转速 与 pwm 关系
- ArcGIS 10 SP5 (Desktop, Engine, Server)中文版 补丁
- 伟创ac80b变频器故障代码_安川变频器故障代码和安川变频器报警详解
- qt清空qtablew_qt项目:员工信息管理系统
- 我的世界服务器修改spawn,《我的世界》1.8命令方块原版/spawn指令教程
- 遇到模糊照片怎么变清晰?教你几招解决这个问题
- hihoCoder - 1353 满减优惠