swift 自定义滑动视图_在Swift中创建一个向上滑动菜单视图(以编程方式)
swift 自定义滑动视图
This is a quick tutorial on how to create a slide-up menu view in iOS
这是有关如何在iOS中创建向上滑动菜单视图的快速教程
We’ll start from scratch with a button and its IBAction.Our goal: tapping on the button will display a splendid view sliding up from the bottom and displaying menu options.
我们将从一个按钮及其IBAction开始,我们的目标是:点击该按钮将显示一个出色的视图,该视图从底部向上滑动并显示菜单选项。
1.创建容器视图 (1. Create the container view)
Our slide-up view will need a container.
我们的向上滑动视图将需要一个容器。
// Create the container viewvar containerView = UIView()Inside our buttonTapped() we’ll set up the container view.
在buttonTapped()内部,我们将设置容器视图。
@IBAction func buttonTapped(_ sender: UIButton) {  let window = UIApplication.shared.keyWindow  containerView.backgroundColor = UIColor.                                  black.withAlphaComponent(0.9)  containerView.frame = self.view.frame

  window?.addSubview(containerView)}
Since this view will be closed on tapping, we’ll also add a gesture recognizer
由于点击后该视图将关闭,因此我们还将添加一个手势识别器
@IBAction func buttonTapped(_ sender: UIButton) { ... let tapGesture = UITapGestureRecognizer(target: self, action: #selector(slideUpViewTapped)) containerView.addGestureRecognizer(tapGesture)}@objc func slideUpViewTapped() {}So far so good, let’s add some animation to it for spice up the experience.We’ll animate the view with spring damping using animate(withDuration:)
到目前为止,到目前为止,让我们添加一些动画以丰富体验。我们将使用animate(withDuration :)使用弹簧阻尼对视图进行动画处理。
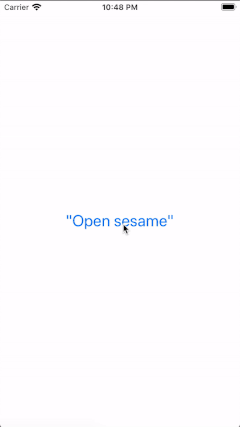
// On opening@IBAction func buttonTapped(_ sender: UIButton) { ... containerView.alpha = 0 UIView.animate(withDuration: 0.5, delay: 0, usingSpringWithDamping: 1.0, initialSpringVelocity: 1.0, options: .curveEaseInOut, animations: { self.containerView.alpha = 0.8 }, completion: nil)}// On closing@objc func slideUpViewTapped() { let screenSize = UIScreen.main.bounds.size UIView.animate(withDuration: 0.5, delay: 0, usingSpringWithDamping: 1.0, initialSpringVelocity: 1.0, options: .curveEaseInOut, animations: { self.containerView.alpha = 0 }, completion: nil)}The result:
结果:
2.创建向上滑动视图 (2. Create the slide-up View)
Now, we’ll deal with the main part of our view: the slide-up View.For this tutorial, we’ll be using a Table View to display 4 menu items.
现在,我们将处理视图的主要部分:滑动视图。在本教程中,我们将使用表视图显示4个菜单项。
var slideUpView = UITableView()let slideUpViewHeight: CGFloat = 200Again, inside our buttonTapped() we’ll set up the slide-up view. The view will be on the bottom, as wide as the screen’s width, and as high as needed to contain 4 menu items (we’ll start with 200).
同样,在我们的buttonTapped()内部,我们将设置向上滑动视图。 该视图将在底部,与屏幕的宽度相同,并根据需要包含四个菜单项(我们将从200开始)的高度。
@IBAction func buttonTapped(_ sender: UIButton) { ... let screenSize = UIScreen.main.bounds.size slideUpView.frame = CGRect(x: 0, y: screenSize.height, width: screenSize.width, height: slideUpViewHeight) slideUpView.separatorStyle = .none window?.addSubview(slideUpView)}Update the animations on opening and closing
在打开和关闭时更新动画
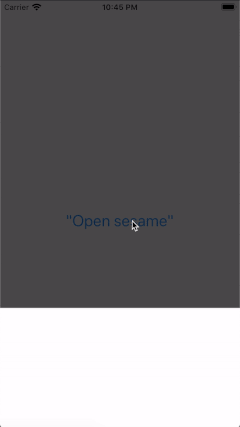
// On opening@IBAction func buttonTapped(_ sender: UIButton) { ... UIView.animate(withDuration: 0.5, delay: 0, usingSpringWithDamping: 1.0, initialSpringVelocity: 1.0, options: .curveEaseInOut, animations: { self.containerView.alpha = 0.8 self.slideUpView.frame = CGRect(x: 0, y: screenSize.height - self.slideUpViewHeight, width: screenSize.width, height: self.slideUpViewHeight) }, completion: nil)}// On closing@objc func slideUpViewTapped() { ... let screenSize = UIScreen.main.bounds.size UIView.animate(withDuration: 0.5, delay: 0, usingSpringWithDamping: 1.0, initialSpringVelocity: 1.0, options: .curveEaseInOut, animations: { self.containerView.alpha = 0 self.slideUpView.frame = CGRect(x: 0, y: screenSize.height, width: screenSize.width, height: self.slideUpViewHeight) }, completion: nil)}The Result:
结果:
3.创建菜单项(表格单元格) (3. Create menu items (Table cells))
We’ll first need a custom table cell
我们首先需要一个自定义表格单元
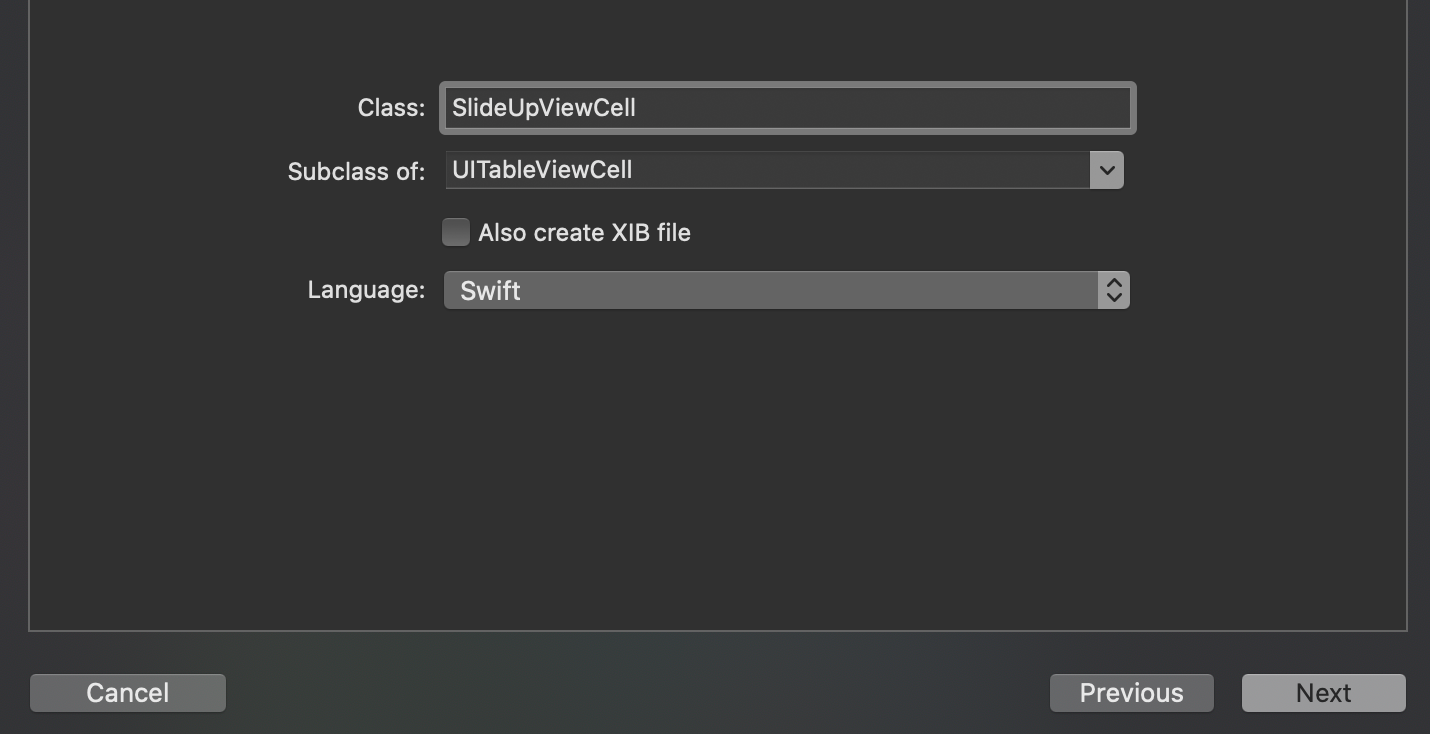
class SlideUpViewCell: UITableViewCell { lazy var backView: UIView = { let view = UIView(frame: CGRect(x: 0, y: 0, width: self.frame.width, height: 50)) return view}() lazy var iconView: UIImageView = { let view = UIImageView(frame: CGRect(x: 15, y: 10, width: 30, height: 30)) return view}() lazy var labelView: UILabel = { let view = UILabel(frame: CGRect(x: 60, y: 10, width: self.frame.width - 75, height: 30)) return view}() override func awakeFromNib() { super.awakeFromNib() } override func setSelected(_ selected: Bool, animated: Bool) { super.setSelected(selected, animated: animated) addSubview(backView) backView.addSubview(iconView) backView.addSubview(labelView) // Configure the view for the selected state }}Back to the View Controller, we’ll add a simple data source and configure our slideUpView(I added some icon images to the project, for the purpose of this tutorial)
回到视图控制器,我们将添加一个简单的数据源并配置我们的slideUpView (出于本教程的目的,我在项目中添加了一些图标图像)
// our simple data sourcelet slideUpViewDataSource: [Int: (UIImage?, String)] = [ 0: (UIImage(named: "star"), "Save this tutorial"), 1: (UIImage(named: "share"), "Share it"), 2: (UIImage(named: "copy"), "Make a copy"), 3: (UIImage(named: "applaud"), "Applaud it")]override func viewDidLoad() { ... slideUpView.isScrollEnabled = true slideUpView.delegate = self slideUpView.dataSource = self slideUpView.register(SlideUpViewCell.self, forCellReuseIdentifier: "SlideUpViewCell")}Conforming to the UITableViewDelegate and UITableViewDataSource
符合UITableViewDelegate和UITableViewDataSource
extension ViewController: UITableViewDelegate, UITableViewDataSource {  func tableView(_ tableView: UITableView, numberOfRowsInSection          section: Int) -> Int {    slideUpViewDataSource.count  }  func tableView(_ tableView: UITableView, cellForRowAt indexPath:           IndexPath) -> UITableViewCell {    guard let cell = tableView      .dequeueReusableCell(withIdentifier: "SlideUpViewCell",       for: indexPath) as? SlideUpViewCell     else { fatalError("unable to deque SlideUpViewCell") }

  cell.iconView.image = slideUpViewDataSource[indexPath.row]?.0  cell.labelView.text = slideUpViewDataSource[indexPath.row]?.1  return cell}  func tableView(_ tableView: UITableView, heightForRowAt          indexPath: IndexPath) -> CGFloat {    return 50  }}
Tada!
多田
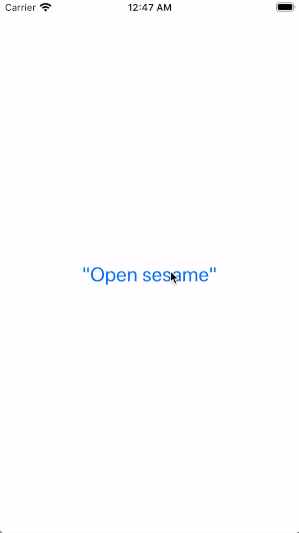
We have successfully created a slide-up menu view. I’ll leave the rest for your creativity to shine ✨ ✨ and hope you enjoyed this quick tutorial.
我们已经成功创建了一个向上滑动菜单视图。 我会把剩下的一切留给您发挥创意,shine✨希望您喜欢本快速教程。
翻译自: https://medium.com/swlh/create-a-slide-up-menu-view-in-swift-programmatically-4ec1297c2f56
swift 自定义滑动视图
http://www.taodudu.cc/news/show-5569135.html
相关文章:
- BZOJ 4873 [Shoi2017]寿司餐厅 | 网络流 最大权闭合子图
- 汪星人怎么画?宠物怎么画?
- 最新寿司美食
- [Noip模拟题]寿司
- 自学日记:设计模式-工厂模式
- 学习笔记(1):QT/C++从新手到老手系列之QT基础篇-Qt基础篇关于源代码、开发环境下载及使用...
- MySQL快速下载地址
- 想成为职场老手就用这几款办公软件
- html和css还有js表白网页大总结,小白老手都能看
- phpStudy下载(安装)-图文详解(windows)
- php 2013,phpStudy 2013 下载 phpStudy2013
- redis linux 安装包下载,redis linux安装包
- Python下载及环境
- 下载的python为什么安装不了软件_Python怎么下载安装
- 下载安装MySQL
- 正版python怎么下载_python怎么下载安装
- Excel 转义单引号
- 解决文本搜索框输入中文出现单引号报错问题
- 已解决Python向数据库插入数据的字符串中含有单引号或双引号报错
- oracle输出单引号,oracle – 在PLSQL中转义单引号
- mybatis 没有引号_mybatis的单引号
- ElementUI选择时间组件年月日时分秒
- element 时间选择器禁用 秒 选项
- 关于bootstrap日期选择器显示时分秒的问题
- 网页弹出提示框3秒后自动消失
- Linux定时任务crontab 实现每秒执行一次的方法
- 【Elasticsearch选主流程】
- c语言倒计时10秒linux,单片机10秒倒计时c语言汇编语言程序
- Vant时间控件精确到秒
- antd DatePicker RangePicker限制时间范围,其中结束时间限制时分秒不可选
swift 自定义滑动视图_在Swift中创建一个向上滑动菜单视图(以编程方式)相关推荐
- python中point什么意思_在Python中创建一个Point类
我正在尝试在python中创建一个名为"Point"的类.我试图在坐标平面x和y上创建一个点并跟踪它们.以及找到点之间的距离.我必须使用函数和方法.我已经开始了,这是我的代码.我执 ...
- python如何创建问答窗口_在tkin中创建一个新的单独窗口
我想创建一个新的单独窗口,比如在记事本中打开一个新页面.在 我写的是:import tinter from tkinter import Tk, Frame, Menu class Example(F ...
- python 生成可执行文件_在Cython中创建一个可执行文件
你想要的是Cython编译器的–embed标志. 关于它没有大量的文档,但this是我能找到的.它确实链接到一个简单的工作示例. 要将Cython源代码编译为可以编译为可执行文件的C文件,可以使用cy ...
- python网格划分_在python中创建一个2d网格
我真的很喜欢编程-- 但这是我的问题: 我不能发布图像,但我想要的图是一个"冠"(两个半径为a的同心圆) 我的意思是,在数学上讲这很容易定义,但我怎么能用python程序呢? 我想 ...
- python添加一个球_在Python中创建一个旋转球体
我已经做了这个代码,在一个球形的方式应用球谐函数,因为我正在尝试建立恒星脉动模式的模型.理想情况下,我希望能够有一个可以旋转的图像,可以保存为gif图像.我已经找到了一些代码示例,但是这些示例似乎都不 ...
- 怎么在java中创建一个自定义的collector
文章目录 简介 Collector介绍 自定义Collector 总结 怎么在java中创建一个自定义的collector 简介 在之前的java collectors文章里面,我们讲到了stream ...
- fritzing导入元件_在Fritzing中创建自定义元件
Fritzing是一个开源的原型制作平台,用户可通过此软件轻松创建电路.与其他免费电路设计工具(比如Eagle或KiCAD EDA)相比,Fritzing的主要优势是能够在"面包板" ...
- power bi自定义地图_如何使用自定义形状图在Power BI中创建地理图
power bi自定义地图 介绍 (Introduction) This is the third article of a series dedicated to discovering geogr ...
- java中collector使用_怎么在java中创建一个自定义的collector
怎么在java中创建一个自定义的collector 简介 在之前的java collectors文章里面,我们讲到了stream的collect方法可以调用Collectors里面的toList()或 ...
最新文章
- Python3中Pillow(PIL)介绍
- Java学习笔记(5)——泛型
- VDI序曲十七 RDVH虚拟主机中开启RemoteFX的硬件配置要求
- 宠物乘机的三种模式【转】
- 吴恩达机器学习笔记:(三)梯度下降法
- DML、DDl、DQL实战
- 计算几何 -- 旋转坐标系
- C++ Web 编程 CGI公共网关接口(CGI):第一个 CGI 程序
- mysql 5.6 登录 警告_解决mysql登录出现警告问题的简单方法
- Retrofit2源码解析(一)
- 在.net framework程序中承载asp.net core
- Android adb shell命令详解及实例
- 系统应用和第三方应用跳转
- 我的计算机梦想作文,我的梦想作文600字
- phython day1
- 优秀班级答辩PPT模板
- ABB机器人模块加密软件,代模块加密,加密之后别人就看不见你 写的程序,也无法打开,但是可以正常运行
- 快速合并多个文件内容到一个文件中
- 人工智能时代的自我修炼之-有效沟通
- 基于采样的规划算法之RRT家族(六):总结