Android自定义View之仿QQ运动步数进度效果
文章目录
- 前言
- 先看效果图 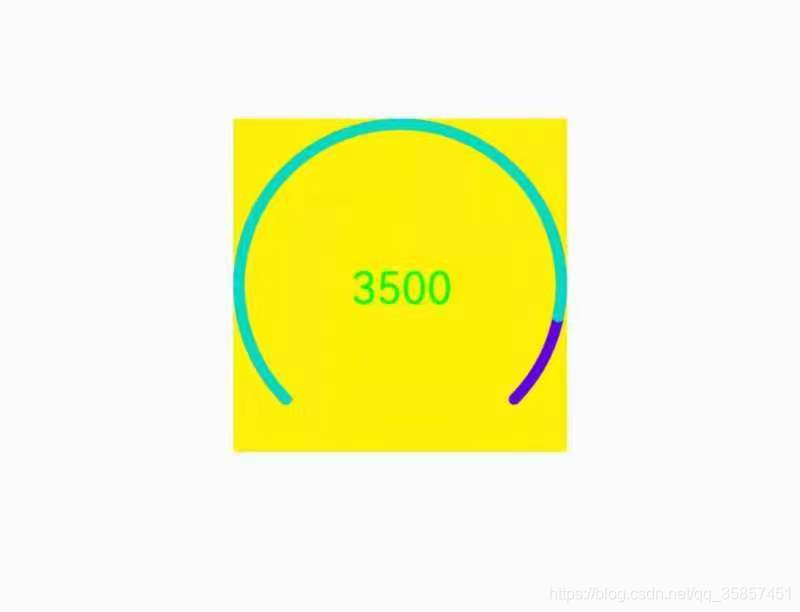
- 一、实现思路
- 二、实现步骤
- 1、分析效果
- 2、确定自定义属性,编写attrs.xml
- 3、在布局中使用
- 4、在自定义View中获取自定义属性
- 5、onMeasure 确定大小
- 6、 画外圆弧,内圆弧,文字
- 6.1 画外圆弧(总进度)
- 6.2. 画内圆弧(已走进度条)
- 6.3 画文本
- 7、其他 设置方法
- 7.1 设置最大值
- 7.2 设置已走进度条
- 7.1 设置已走进度条,实现动画效果
- 完整代码
- 总结
前言
关于自定义View,仿QQ运动步数,
提示:以下是本篇文章正文内容,下面案例可供参考
先看效果图 
一、实现思路
由图片可以看出,主要分为三个部分,总进度条,已走进度条,已走步数。但是又有许多可自行设置的属性,如线条宽度,总进度条颜色,已走进度条颜色,字体颜色等等。所以需要自定义属性Attrs.xml。下来可以慢慢实现效果。
二、实现步骤
1、分析效果
代码如下(示例):
2、确定自定义属性,编写attrs.xml
<declare-styleable name="QQStepView"><attr name="outerColor" format="color"/><attr name="innerColor" format="color"/><attr name="borderWidget" format="dimension"/><attr name="stepText" format="string"/><attr name="stepTextSize" format="dimension"/><attr name="stepTextColor" format="color"/></declare-styleable>
3、在布局中使用
<com.joekai.customview.views.QQStepViewandroid:id="@+id/step_view"android:layout_width="150dp"android:layout_height="150dp"app:outerColor="@color/colorPrimary"app:innerColor="@color/colorAccent"app:textColor="@color/colorPrimaryDark"app:borderWidget="5dp"app:textSize="18sp"android:background="@color/red"/>
4、在自定义View中获取自定义属性
//获取attrs.xml中设置的属性TypedArray ta = context.obtainStyledAttributes(attrs, R.styleable.QQStepView);mStepText = ta.getString(R.styleable.QQStepView_stepText);mOuterColor = ta.getColor(R.styleable.QQStepView_outerColor, mOuterColor);mInnerColor = ta.getColor(R.styleable.QQStepView_innerColor, mInnerColor);mBorderWidget = ta.getDimension(R.styleable.QQStepView_borderWidget, mBorderWidget);mTextSize = ta.getDimensionPixelSize(R.styleable.QQStepView_stepTextSize, sp2px(mTextSize));mTextColor = ta.getColor(R.styleable.QQStepView_stepTextColor, mTextColor);//回收ta.recycle();///在此处将所有画笔进行初始化//创建画笔mOuterPaint = new Paint();//取消锯齿mOuterPaint.setAntiAlias(true);//设置颜色mOuterPaint.setColor(mOuterColor);//设置圆弧宽度mOuterPaint.setStrokeWidth(mBorderWidget);//设置圆弧StylemOuterPaint.setStyle(Paint.Style.STROKE);//设置起始,结束圆角mOuterPaint.setStrokeCap(Paint.Cap.ROUND);mInnerPaint = new Paint();//取消锯齿mOuterPaint.setAntiAlias(true);//设置颜色mInnerPaint.setColor(mInnerColor);//设置圆弧宽度mInnerPaint.setStrokeWidth(mBorderWidget);//设置圆弧StylemInnerPaint.setStyle(Paint.Style.STROKE);//设置起始,结束圆角mInnerPaint.setStrokeCap(Paint.Cap.ROUND);mTextPaint = new Paint();//抗锯齿mTextPaint.setAntiAlias(true);mTextPaint.setTextSize(mTextSize);mTextPaint.setColor(mTextColor);5、onMeasure 确定大小
@Overrideprotected void onMeasure(int widthMeasureSpec, int heightMeasureSpec) {super.onMeasure(widthMeasureSpec, heightMeasureSpec);//在布局文件中,可能是wrap_content ,也可能宽高不一致//宽高不一致时,取最小值,确保是个正方形//获取宽高的模式int widgetMode = MeasureSpec.getMode(widthMeasureSpec);int heightMode = MeasureSpec.getMode(heightMeasureSpec);//获取宽高的大小int widgetSize = MeasureSpec.getSize(widthMeasureSpec);int heightSize = MeasureSpec.getSize(heightMeasureSpec);switch (MeasureSpec.getMode(widthMeasureSpec)) {}setMeasuredDimension(widgetSize > heightSize ? heightSize : widgetSize, widgetSize > heightSize ? heightSize : widgetSize);}
6、 画外圆弧,内圆弧,文字
6.1 画外圆弧(总进度)
遇到的问题: 边缘显示不全
原因: 描边的时候设置了画笔宽度mBorderWidget,所以导致边缘超出限制。
设置画布区域:
//因为区域超出画布,所以将画笔起始点从新设置。RectF rectF = new RectF(mBorderWidget / 2, mBorderWidget / 2, getWidth() - mBorderWidget / 2, getHeight() - mBorderWidget / 2);
//画圆弧
//1、画布区域,2、起始角度,3、结束角度 4、是否填充 5、画笔
canvas.drawArc(rectF, mStartAngle, mEndAngle, false, mOuterPaint);
6.2. 画内圆弧(已走进度条)
//未设置最大值时,返回,不进行绘画。
if (mMaxStep == 0) return;
//计算百分比,用于绘画已走进度条;
float sweepAngle = (float) mStep / mMaxStep;
canvas.drawArc(rectF, mStartAngle, sweepAngle * mEndAngle, false, mInnerPaint);
6.3 画文本
mStepText = mStep + "";//计算的宽度 与 字体的长度有关 与字体的大小 用画笔来测量//获取文本的Rect//mTextPaint.getTextBounds(mStepText, 0, mStepText.length(), mTextBounds);//获取文本宽度//mTextBounds.width();//获取文本宽度float textWidget = mTextPaint.measureText(mStepText);//计算X起始位置int dx = (int) (getWidth() / 2 - textWidget / 2);//计算基线位置//dy代表的是:高度的一半到baseLine的距离//获取文字排版信息Paint.FontMetricsInt fontMetricsInt = mTextPaint.getFontMetricsInt();int dy = (fontMetricsInt.bottom - fontMetricsInt.top) / 2 - fontMetricsInt.bottom;//基线int baseLine = getHeight() / 2 + dy;canvas.drawText(mStepText, dx, baseLine, mTextPaint);
7、其他 设置方法
7.1 设置最大值
public synchronized void setMaxStep(int maxStep) {this.mMaxStep = maxStep;}
7.2 设置已走进度条
public synchronized void setStep(int step){this.mStep = step;//不断绘制invalidate();}
7.1 设置已走进度条,实现动画效果
public synchronized void setAnimatorStep(int step){//属性动画ValueAnimator valueAnimator = ObjectAnimator.ofFloat(0, step);valueAnimator.setDuration(1000);valueAnimator.addUpdateListener(new ValueAnimator.AnimatorUpdateListener() {@Overridepublic void onAnimationUpdate(ValueAnimator valueAnimator) {float step = (float) valueAnimator.getAnimatedValue();setStep((int) step);}});valueAnimator.start();}
完整代码
/*** 仿QQ运动步数*/
public class QQStepView extends View {private int mOuterColor = Color.RED;//总进度条颜色private int mInnerColor = Color.BLUE;//已走颜色private float mBorderWidget = 20;//圆弧宽度private int mTextSize = 20;//字体大小private String mStepText;private int mTextColor = Color.GREEN;//字体颜色private Paint mOuterPaint;//总画笔private Paint mInnerPaint;//已走画笔private Paint mTextPaint;//已走画笔private int mStartAngle = 135;private int mEndAngle = 270;private int mMaxStep = 2000;private int mStep = 1000;private Rect mTextBounds ;public QQStepView(Context context) {this(context, null);}public QQStepView(Context context, @Nullable AttributeSet attrs) {this(context, attrs, 0);}public QQStepView(Context context, @Nullable AttributeSet attrs, int defStyleAttr) {super(context, attrs, defStyleAttr);// 1 分析效果// 2 确定自定义属性,编写attrs.xml// 3 在布局中使用// 4 在自定义View中获取自定义属性// 7 其他TypedArray ta = context.obtainStyledAttributes(attrs, R.styleable.QQStepView);mStepText = ta.getString(R.styleable.QQStepView_stepText);mOuterColor = ta.getColor(R.styleable.QQStepView_outerColor, mOuterColor);mInnerColor = ta.getColor(R.styleable.QQStepView_innerColor, mInnerColor);mBorderWidget = ta.getDimension(R.styleable.QQStepView_borderWidget, mBorderWidget);mTextSize = ta.getDimensionPixelSize(R.styleable.QQStepView_stepTextSize, sp2px(mTextSize));mTextColor = ta.getColor(R.styleable.QQStepView_stepTextColor, mTextColor);//回收ta.recycle();//创建画笔mOuterPaint = new Paint();//取消锯齿mOuterPaint.setAntiAlias(true);//设置颜色mOuterPaint.setColor(mOuterColor);//设置圆弧宽度mOuterPaint.setStrokeWidth(mBorderWidget);//设置圆弧StylemOuterPaint.setStyle(Paint.Style.STROKE);//设置起始,结束圆角mOuterPaint.setStrokeCap(Paint.Cap.ROUND);mInnerPaint = new Paint();//取消锯齿mOuterPaint.setAntiAlias(true);//设置颜色mInnerPaint.setColor(mInnerColor);//设置圆弧宽度mInnerPaint.setStrokeWidth(mBorderWidget);//设置圆弧StylemInnerPaint.setStyle(Paint.Style.STROKE);//设置起始,结束圆角mInnerPaint.setStrokeCap(Paint.Cap.ROUND);mTextPaint = new Paint();//抗锯齿mTextPaint.setAntiAlias(true);mTextPaint.setTextSize(mTextSize);mTextPaint.setColor(mTextColor);mTextBounds = new Rect();}/*** 将sp值转换为px值,保证文字大小不变** @param spValue* @return*/public static int sp2px(int spValue) {final float fontScale = BaseApplication.getInstance().getResources().getDisplayMetrics().scaledDensity;return (int) (spValue * fontScale + 0.5f);}// 5 onMeasure@Overrideprotected void onMeasure(int widthMeasureSpec, int heightMeasureSpec) {super.onMeasure(widthMeasureSpec, heightMeasureSpec);//在布局文件中,可能是wrap_content ,也可能宽高不一致//高度不一致,取最大值,确保是个正方形//获取宽高的模式int widgetMode = MeasureSpec.getMode(widthMeasureSpec);int heightMode = MeasureSpec.getMode(heightMeasureSpec);//获取宽高的大小int widgetSize = MeasureSpec.getSize(widthMeasureSpec);int heightSize = MeasureSpec.getSize(heightMeasureSpec);switch (MeasureSpec.getMode(widthMeasureSpec)) {}setMeasuredDimension(widgetSize > heightSize ? heightSize : widgetSize, widgetSize > heightSize ? heightSize : widgetSize);}// 6 画外圆弧,内圆弧,文字@Overrideprotected void onDraw(Canvas canvas) {super.onDraw(canvas);//6.1 画外圆弧//问题:边缘显示不全   描边有宽度  mBorderWidget//获取圆点int center = getWidth() / 2;//获取半径int radius = (int) (center - mBorderWidget / 2);RectF rectF = new RectF(mBorderWidget / 2, mBorderWidget / 2, getWidth() - mBorderWidget / 2, getHeight() - mBorderWidget / 2);canvas.drawArc(rectF, mStartAngle, mEndAngle, false, mOuterPaint);//6.2 画内圆弧if (mMaxStep == 0) return;float sweepAngle = (float) mStep / mMaxStep;canvas.drawArc(rectF, mStartAngle, sweepAngle * mEndAngle, false, mInnerPaint);//6.3 画文本mStepText = mStep + "";//计算的宽度 与 字体的长度有关  与字体的大小  用画笔来测量//获取文本的Rect
//        mTextPaint.getTextBounds(mStepText, 0, mStepText.length(), mTextBounds);//获取文本宽度float textWidget =  mTextPaint.measureText(mStepText);int dx = (int) (getWidth() / 2 - textWidget / 2);//dy代表的是:高度的一半到baseLine的距离//获取文字排版信息Paint.FontMetricsInt fontMetricsInt = mTextPaint.getFontMetricsInt();int dy = (fontMetricsInt.bottom - fontMetricsInt.top) / 2 - fontMetricsInt.bottom;//基线int baseLine = getHeight() / 2 + dy;canvas.drawText(mStepText, dx, baseLine, mTextPaint);}// 7 其他public synchronized void setMaxStep(int maxStep) {this.mMaxStep = maxStep;}public synchronized void setStep(int step){this.mStep = step;//不断绘制invalidate();}public synchronized void setAnimatorStep(int step){//属性动画ValueAnimator valueAnimator = ObjectAnimator.ofFloat(0, step);valueAnimator.setDuration(1000);valueAnimator.addUpdateListener(new ValueAnimator.AnimatorUpdateListener() {@Overridepublic void onAnimationUpdate(ValueAnimator valueAnimator) {float step = (float) valueAnimator.getAnimatedValue();setStep((int) step);}});valueAnimator.start();}
}
总结
提示:这里对文章进行总结:
以上就是今天要讲的内容,本文仅仅简单介绍了自定义仿QQ运动步数,扩展效果可自己再去实现。
Android自定义View之仿QQ运动步数进度效果相关推荐
- android 自定义view实现仿QQ运动步数进度效果
最近公司在策划一个新的项目,原型还没出来,再说这公司人都要走没了,估计又要找工作了,所以必须要学习,争取每个写个关于自定义view方面的,这样几个月积累下来,也能学习到东西,今天就带来简单的效果,就是 ...
- 自定义View之仿QQ运动步数进度效果
前言 今天接着上一篇来写关于自定义View方面的东西,我是近期在学习整理这方面的知识点,所以把相关的笔记都放到这个Android自定义View的专栏里了,方便自己下次忘记的时候能回来翻翻,今天的内容是 ...
- 自定义View | 仿QQ运动步数进度效果
项目GitHub地址 思路 固定不动的蓝色大圆弧 动画变动的红色小圆弧 中间的步数文字显示 相关的自定义属性 比如固定不动的大圆弧, 我们不能写死他的蓝色颜色属性, 要提供一个颜色的自定义属性给用户自 ...
- 自定义View学习之仿QQ运动步数进度效果
自定义View学习的小记录之第一篇 自定义View学习之QQ计步器 如何实现 1.分析想要得到什么效果 2.确定自定义属性,编写attrs.xml 3.在布局中使用 4.在自定义View中获取自定义属 ...
- 自定义View 仿QQ运动步数进度效果
1. 概述 我记得QQ之前是有一个,运动步数的进度效果,今天打开QQ一看发现没有了.具体效果我也不清楚了,我就按照自己大概的印象写一下,这一期我们主要是熟悉Paint画笔的使用: 2. 效果 ...
- 3.Android 仿QQ运动步数进度效果 keep运动效果(从入门到巅峰)
1.自定义控件的步骤 2.构造函数有什么用 3.自定义属性有什么用 4.初始化一些画笔放在哪里 5.onmesure()如何写 6.invalide源码分析 1.写一个类继承view或者其他控件 pu ...
- android 自定义园动画,Android 自定View实现仿QQ运动步数圆弧及动画效果
在之前的Android超精准计步器开发-Dylan计步中的首页用到了一个自定义控件,和QQ运动的界面有点类似,还有动画效果,下面就来讲一下这个View是如何绘制的. 1.先看效果图 2.效果图分析 功 ...
- Android自定义View分享——仿网易云音乐留声机效果
写在前面 这是笔者自学习自定义View以来,分享的第五篇效果,之前分享过一篇动态时钟效果的自定义View,如果有兴趣的可以看看: Android自定义View分享--一个时钟 之前的博客笔者一般都会说 ...
- Android自定义View实现仿QQ实现运动步数效果
效果图: 1.attrs.xml中 <declare-styleable name="QQStepView"><attr name="outerColo ...
最新文章
- MLIR: Infrastructure架构
- 【内网福音】如何离线部署Rancher
- 2017年软件工程第七次作业-每周例行报告
- java程序设计 第2版 唐大仕_《Java程序设计(第2版)》唐大仕 源代码
- Angular介绍、安装Angular Cli、创建Angular项目入门教程
- how can you save more space at home?
- h3c GR5200路由器上如何设置公网ip可以访问
- mysql scope runtime_Maven依赖scope属性详解-一个报错引发的问题 - 老郭种树
- Python XML 解析
- ceph架构/IO原理分析(齐全)
- ELK日志分析平台.1-搭建
- ubuntu 国内源
- 项目分层思路——管家婆
- JAVA设计模式-委派模式(Delegate)
- import torch 找不到模块_Python零基础入门:关于Python模块与包的详细解读和使用...
- hikaricp 连接池分析_Spring Boot如何使用HikariCP连接池详解
- oracle实际是什么意思,Oracle遇到的应用实际教程
- html页面数学公式添加(附图)
- 正版python软件多少钱-有奖|这 18 个好用的正版软件、热门的付费教程限时超低价了...
- 字节跳动面试题 问题定位