Android污点分析工具flowdroid源码简析
flowdroid是一款对Android app进行风险分析的应用,下面深入其源码对其工作的流程进行相关的探究。
1、准备
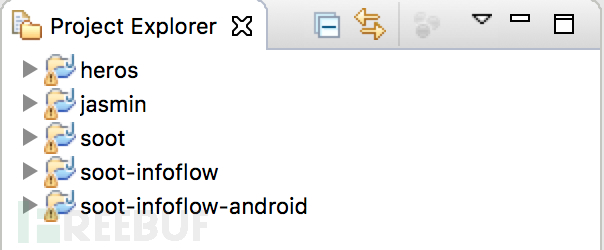
a)下载相关源码(包括soot、heros、jasmin、soot-infoflow、soot-infoflow、soot-infoflow-android)到同一文件夹中,使用eclipse将源码依次导入就完成了整体项目的导入,尽量使用最新版eclipse,如果版本太老,导入后可能会出现各种问题;完成导入后整体项目结构如下所示:
b)本次测试使用的APK是flowdroid本身提供的一个apk:enriched1.apk,位于soot-infoflow-android/testAPKs目录下,该应用包含一个主Activity,下图展示了Mainfest.xml文件的具体内容:

主要的操作是在主Activity的onCreate方法中获取设备ID(DeviceId)然后通过短信的形式发送出去,使用Jimple代码表示如下:
$r6 = virtualinvoke $r4.<android.telephony.TelephonyManager: java.lang.String getDeviceId()>() virtualinvoke $r10.<android.telephony.SmsManager: void sendTextMessage(java.lang.String,java.lang.String,java.lang.String,android.app.PendingIntent,android.app.PendingIntent)>($r6, $r11, $r12, $r13, $r14)c)source(风险产生点)与sink(风险触发点)点,使用flowdroid源码中提供的:SourceAndSink.txt,位于soot-infoflow-android根目录下;下面展示本次使用的source点、sink点,从中可以看出source、sink的定义不仅包含了Jimple格式的方法声明,也包含了调用该方法需要声明的权限,从上图的Manifest文件中可以看出,这两个方法需要使用的权限均已声明;
<android.telephony.SmsManager: void sendTextMessage(java.lang.String,java.lang.String,java.lang.String,android.app.PendingIntent,android.app.PendingIntent)> android.permission.SEND_SMS -> _SINK_ <android.telephony.TelephonyManager: java.lang.String getDeviceId()> android.permission.READ_PHONE_STATE -> _SOURCE_d)回调函数(执行某些回调操作将调用的函数)使用soot-infoflow-android根目录下的AndroidCallbacks.txt;
e)污染易传播点,表示当source(风险产生点)经过该函数后,新产生的变量将会成为新的source点,如list = List.add(source1),list将会成为新的source源;该文件使用soot-infoflow根目录下的EasyTaintWrapperSource.txt文件;
f)本地运行的主函数位于soot-infoflow-android/src/soot.jimple.infoflow.android.TestApps目录下的Test.java文件中,在Run Configurations中配置待扫描apk文件地址及android.jar目录地址,配置详情如下图所示:

至此一切配置就绪,点击上图Run按钮运行,就会看到flowdroid运行起来了,经过不到一分钟(这是demo的时间,复杂的应用就呵呵吧)的分析,就能够看到运行输入的结果,先来一张运行结果图:

由于结果太长,不能完全展示结果的内容,下面将结果拷贝下来,用文字进行展示:
Found a flow to sink virtualinvoke $r10.<android.telephony.SmsManager: void sendTextMessage(java.lang.String,java.lang.String,java.lang.String,android.app.PendingIntent,android.app.PendingIntent)>($r6, $r11, $r12, $r13, $r14), from the following sources:- $r6 = virtualinvoke $r4.<android.telephony.TelephonyManager: java.lang.String getDeviceId()>() (in <de.ecspride.reflectionprivacyleak1.ReflectionPrivacyLeak1: void onCreate(android.os.Bundle)>)Maximum memory consumption: 141.144008 MBAnalysis has run for 5.030271649 seconds
至此我们已经完成了项目导入及运行一个demo程序,下面正式进入源码的分析。
2、收集source点、sink点、入口点(Entrypoint)
这个题目是根据执行的第一个关键函数(如下)取的,但是这个函数实际的作用其实有一些名不副实,该函数位于soot-infoflow-android/src/soot.jimple.infoflow.android.TestApps/Test.java的642行:
app.calculateSourcesSinksEntrypoints("SourcesAndSinks.txt");从main()函数的起始点到该函数之间的一些操作,主要是变量初始化、赋值的一些操作,在此不再详述;进入该函数,该函数主要进行一个操作,根据source、sink文件定义类型,对文件中的内容进行提取,然后进入calculateSourcesSinksEntrypoints(parser)函数,其参数parser就是对source、sink点进行解析后的变量,解析函数:
parser = PermissionMethodParser.fromFile(sourceSinkFile)这个函数是对txt文件进行解析;进入calculateSourcesSinksEntrypoints这个函数,大致浏览下该函数,函数应该是这个本次操作的主函数,对其操作进行拆解,首先执行操作的代码如下所示:
ProcessManifest processMan = new ProcessManifest(apkFileLocation); this.appPackageName = processMan.getPackageName(); this.entrypoints = processMan.getEntryPointClasses();
上面代码的主要作用是反编译并解析该APK的Manifest.xml文件,生成变量processMan,获取其packagename并赋值给this.appPackageName=”de.ecspride.reflectionprivacyleak1″,并获取其程序的入口点,Android应用的入口点实际上就是其定义的四大组件(Activity、Broadcast、Provider、Service),此应用只定义了一个Activity,因此
this.entrypoints=[de.ecspride.reflectionprivacyleak1.ReflectionPrivacyLeak1];然后使用ARSCFileParser类反编译apk文件,并赋值给变量resParser,然后进入calculateCallbackMethods(resParser, lfp)函数,其参数resParser表示刚反编译的apk文件,lfp表示对布局文件的反编译,属于类LayoutFileParser,进入calculateCallbackMethods函数,首先看到的就是对soot的一些操作,如下所示:
soot.G.reset();initializeSoot(true);createMainMethod();
第一个语句soot.G.reset()是一个标准的soot操作,用于清空soot之前所有操作遗留下的缓存值,后面的代码中将会多次使用该操作;
第二个语句initializeSoot(true)的完整函数如下所示,参数true表示是否构建程序调用图(控制流图);该函数主要作用是反编译.dex文件,反编译生成jimple文件,为查看方便,函数的说明将会在代码注解中详细给出;
private void initializeSoot(boolean constructCallgraph) {      //相当于soot命令:-no-bodies-for-excluded,表示不加载未被包含的类      Options.v().set_no_bodies_for_excluded(true);      //相当于soot命令:-allow-phantom-refs,表示是否加载未被解析的类      Options.v().set_allow_phantom_refs(true);      //相当于soot命令:-f FORMAT -output-format FORMAT,设置输出的格式,此处设置为不输出,因此不会输出反编译后的jimple文件      Options.v().set_output_format(Options.output_format_none);      //相当于soot命令:-w -whole-program,以全局应用的模式运行      Options.v().set_whole_program(constructCallgraph);      //相当于soot命令:-process-path DIR -process-dir DIR,待反编译文件所在的文件夹,此处是apk文件地址      Options.v().set_process_dir(Collections.singletonList(apkFileLocation));      if (forceAndroidJar)         //相当于soot命令:-android-jars PATH,表示在该路径下寻找android.jar文件         Options.v().set_force_android_jar(androidJar);      else         //相对于soot命令:-force-android-jar PATH,表示强制在该路径下寻找android.jar文件         Options.v().set_android_jars(androidJar);      //相当于soot命令:-src-prec FORMAT,表示反编译后文件的生成文件类型,此处为jimple类型      Options.v().set_src_prec(Options.src_prec_apk_class_jimple);      //是否记录代码所在行      Options.v().set_keep_line_number(false);      //是否记录代码偏移量      Options.v().set_keep_offset(false);

      //设置上述另一的变量类型,该设置需要保证在soot反编译之前进行      if (sootConfig != null)         sootConfig.setSootOptions(Options.v());

      Options.v().set_soot_classpath(getClasspath());      Main.v().autoSetOptions();

      // 构建控制流图选项,默认是SPARK      if (constructCallgraph) {         switch (config.getCallgraphAlgorithm()) {         case AutomaticSelection:         case SPARK:            Options.v().setPhaseOption("cg.spark", "on");            break;         case GEOM:            Options.v().setPhaseOption("cg.spark", "on");            AbstractInfoflow.setGeomPtaSpecificOptions();            break;         case CHA:            Options.v().setPhaseOption("cg.cha", "on");            break;         case RTA:            Options.v().setPhaseOption("cg.spark", "on");            Options.v().setPhaseOption("cg.spark", "rta:true");            Options.v().setPhaseOption("cg.spark", "on-fly-cg:false");            break;         case VTA:            Options.v().setPhaseOption("cg.spark", "on");            Options.v().setPhaseOption("cg.spark", "vta:true");            break;         default:            throw new RuntimeException("Invalid callgraph algorithm");         }      }      //使用soot反编译dex文件,并将反编译后的文件加载到内存中      Scene.v().loadNecessaryClasses();   }
初始化soot完成后,进入第三个语句createMainMethod(),其代码如下所示;其主要的操作是构造一个虚拟的main方法,并将入口点(entrypoint)相关类添加到这个虚方法中;
private void createMainMethod() {      // Always update the entry point creator to reflect the newest set      // of callback methods      SootMethod entryPoint = createEntryPointCreator().createDummyMain();      Scene.v().setEntryPoints(Collections.singletonList(entryPoint));      if (Scene.v().containsClass(entryPoint.getDeclaringClass().getName()))         Scene.v().removeClass(entryPoint.getDeclaringClass());      Scene.v().addClass(entryPoint.getDeclaringClass());

      // addClass() declares the given class as a library class. We need to      // fix this.      entryPoint.getDeclaringClass().setApplicationClass();   }
此处在将entrypoint塞入虚拟main方法中的时候,由于entryponit是Android的四大组件,因此在塞入main方法中的时候需要对组件进行建模,建模的方法是根据组件的生命周期(onCreate、onStart、onResume、onPause、onStop、onRestart、onDestory),依次塞入其相关的方法,下面给出生成的dummyMainMethod方法主体函数,可以从中感受下。
public static void dummyMainMethod(java.lang.String[]) { java.lang.String[] $r0; int $i0; de.ecspride.reflectionprivacyleak1.ReflectionPrivacyLeak1 $r1; $r0 := @parameter0: java.lang.String[]; $i0 = 0; label1: if $i0 == 0 goto label5; $r1 = new de.ecspride.reflectionprivacyleak1.ReflectionPrivacyLeak1; specialinvoke $r1.<de.ecspride.reflectionprivacyleak1.ReflectionPrivacyLeak1: void <init>()>(); if $i0 == 1 goto label5; virtualinvoke $r1.<de.ecspride.reflectionprivacyleak1.ReflectionPrivacyLeak1: void onCreate(android.os.Bundle)>(null); label2: virtualinvoke $r1.<de.ecspride.reflectionprivacyleak1.ReflectionPrivacyLeak1: void onStart()>(); label3: virtualinvoke $r1.<de.ecspride.reflectionprivacyleak1.ReflectionPrivacyLeak1: void onResume()>(); virtualinvoke $r1.<de.ecspride.reflectionprivacyleak1.ReflectionPrivacyLeak1: void onPause()>(); if $i0 == 3 goto label3; virtualinvoke $r1.<de.ecspride.reflectionprivacyleak1.ReflectionPrivacyLeak1: void onStop()>(); if $i0 == 4 goto label4; virtualinvoke $r1.<de.ecspride.reflectionprivacyleak1.ReflectionPrivacyLeak1: void onRestart()>(); if $i0 == 5 goto label2; label4: virtualinvoke $r1.<de.ecspride.reflectionprivacyleak1.ReflectionPrivacyLeak1: void onDestroy()>(); label5: if $i0 == 7 goto label1; return; }
接下来便是进行回调函数的收集,主要的操作函数如下所示:
  for (Entry<String, Set<SootMethodAndClass>> entry : jimpleClass.getCallbackMethods().entrySet()) {            Set<SootMethodAndClass> curCallbacks = this.callbackMethods.get(entry.getKey());            if (curCallbacks != null) {               if (curCallbacks.addAll(entry.getValue()))                  hasChanged = true;            } else {               this.callbackMethods.put(entry.getKey(), new HashSet<>(entry.getValue()));               hasChanged = true;            }      }

      if (entrypoints.addAll(jimpleClass.getDynamicManifestComponents()))         hasChanged = true;   }   // Collect the XML-based callback methods   collectXmlBasedCallbackMethods(resParser, lfp, jimpleClass);
其操作是遍历entrypoint,然后将entry中的回调函数添加到this.callbackMethods变量中,这里执行的函数在else中,添加到this.callbackMethods中的值为:
{de.ecspride.reflectionprivacyleak1.ReflectionPrivacyLeak1=[<de.ecspride.reflectionprivacyleak1.ReflectionPrivacyLeak1: void onStart()>, <de.ecspride.reflectionprivacyleak1.ReflectionPrivacyLeak1: void onDestroy()>, <de.ecspride.reflectionprivacyleak1.ReflectionPrivacyLeak1: void onPause()>, <de.ecspride.reflectionprivacyleak1.ReflectionPrivacyLeak1: void onRestart()>, <de.ecspride.reflectionprivacyleak1.ReflectionPrivacyLeak1: void onResume()>, <de.ecspride.reflectionprivacyleak1.ReflectionPrivacyLeak1: void onStop()>, <de.ecspride.reflectionprivacyleak1.ReflectionPrivacyLeak1: void onCreate(android.os.Bundle)>]},
从中可以看出添加的回调函数主要是该Activity生命周期中的函数,这样在上面生成的虚main方法调用到onCreate这些方法时,就会到this.callbackMethods中寻找相关的方法;随后还会进入xml文件中分析相关的回调函数,这里没有涉及。
calculateCallbackMethods(resParser, lfp)函数执行完成后,跳转回calculateSourcesSinksEntrypoints()函数,至此完成了对Entry point、回调函数的收集,下一步就是完成source、sink的收集,这一步的操作并不涉及soot的相关操作,只是将SourceAndSink.txt文件中包含的source、sink点,封装到sourceSinkManager中,具体在代码中搜索source、sink点,在数据流追踪中完成;
{ Set<SootMethodAndClass> callbacks = new HashSet<>(); for (Set<SootMethodAndClass> methods : this.callbackMethods.values()) callbacks.addAll(methods); sourceSinkManager = new AccessPathBasedSourceSinkManager( this.sourceSinkProvider.getSources(), this.sourceSinkProvider.getSinks(), callbacks, config.getLayoutMatchingMode(), lfp == null ? null : lfp.getUserControlsByID()); sourceSinkManager.setAppPackageName(this.appPackageName); sourceSinkManager.setResourcePackages(this.resourcePackages); sourceSinkManager.setEnableCallbackSources(this.config.getEnableCallbackSources()); }
到此已经完成了第一步的操作,主要是做一些分析前的准备工作,包括收集入口点(entrypoint)、回调函数(callback)、source点、sink点,为后面的数据流分析做准备。
3、数据流分析
数据流的分析主要依赖heros工具,可能大家有些时候对heros、jasmin与soot的关系理不大清,heros、jasmin是基于soot开发的工具,相当于soot的插件,不能独立运行,因为没有自己的main调用方法,目前下载最新版的编译后的soot.jar里面默认是包含这两个工具的。
上面进行初步的分析工作,下面将正式进行数据流的分析,即执行完Test.java/runAnalysis()方法的642行app.calculateSourcesSinksEntrypoints(“SourcesAndSinks.txt”)后,继续向下执行,然后执行到数据流分析的入口点,651行:
final InfoflowResults res = app.runInfoflow(new MyResultsAvailableHandler()),进入runInfoflow()函数,函数的前半部分主要进行一些赋值、初始化的操作,其中比较重要的是实例化一个info变量,该变量是Infoflow类的实例对象,然后使用info.computeInfoflow(apkFileLocation, path, entryPointCreator, sourceSinkManager)进行实际的分析,四个参数的含义为:
apkFileLocation:待分析apk文件的地址;
path:android.jar文件的地址,用于后面反编译使用;
entryPointCreator:前面获得的应用的入口函数;
sourceSinkManager:从SourceAndSink.txt文件中获取的source点与sink点,一共包括89个source点、133个sink点;
进入该函数,其代码如下所示,从diamante中可以看出,其操作跟2中的操作相类似:初始化soot,然后构造虚拟main方法并设置为入口点,最后使用runAnalysis()方法进行分析。
public void computeInfoflow(String appPath, String libPath, IEntryPointCreator entryPointCreator, ISourceSinkManager sourcesSinks) { if (sourcesSinks == null) { logger.error("Sources are empty!"); return; } initializeSoot(appPath, libPath, entryPointCreator.getRequiredClasses()); // entryPoints are the entryPoints required by Soot to calculate Graph - if there is no main method, // we have to create a new main method and use it as entryPoint and store our real entryPoints Scene.v().setEntryPoints(Collections.singletonList(entryPointCreator.createDummyMain())); // Run the analysis runAnalysis(sourcesSinks, null); }
进入runAnalysis函数,首先第一个比较重要的操作就是使用soot构造控制流图:constructCallgraph();先进入该函数,为方便说明,将在代码中对关键部分进行注解;通过该方法生成控制流图(callgraph)后,获取控制流图变量:
CallGraph appCallGraph = Scene.v().getCallGraph();控制流图在整个分析中非常关键,后面将有独立的章节介绍控制流图。
 protected void constructCallgraph() {      // Allow the ICC manager to change the Soot Scene before we continue      ipcManager.updateJimpleForICC();      // Run the preprocessors        for (PreAnalysisHandler tr : preProcessors)            tr.onBeforeCallgraphConstruction();

        // Patch the system libraries we need for callgraph construction        LibraryClassPatcher patcher = new LibraryClassPatcher();        patcher.patchLibraries();

        // To cope with broken APK files, we convert all classes that are still        // dangling after resolution into phantoms        // 将所有未定义(dangling)的类转化成虚类        for (SootClass sc : Scene.v().getClasses())         if (sc.resolvingLevel() == SootClass.DANGLING) {            sc.setResolvingLevel(SootClass.BODIES);            sc.setPhantomClass();         }

      // We explicitly select the packs we want to run for performance        // reasons. Do not re-run the callgraph algorithm if the host        // application already provides us with a CG.      if (config.getCallgraphAlgorithm() != CallgraphAlgorithm.OnDemand            && !Scene.v().hasCallGraph()) {           PackManager.v().getPack("wjpp").apply();           // 生成控制流图(callgraph)的关键步骤           PackManager.v().getPack("cg").apply();      }

      // If we don't have a FastHierarchy, we need to create it      // 构造整个应用的层级关系      hierarchy = Scene.v().getOrMakeFastHierarchy();

      // Run the preprocessors        for (PreAnalysisHandler tr : preProcessors)            tr.onAfterCallgraphConstruction();   }
下面就是构建最关键的ICFG图,我把它叫做数据流图,数据流图的构成推荐大家看flowdroid推荐的相关论文,很经典的算法,想要把它讲明白需要很大的篇幅,如果有机会,我会单独写一篇关于数据流图构成的文章,原论文中的数据流图在图形展示上会给人造成一些误解,容易造成混淆。生成ICFG代码如下所示,此处不再深入此代码。
iCfg = icfgFactory.buildBiDirICFG(config.getCallgraphAlgorithm(), config.getEnableExceptionTracking());使用ICFG进行数据流分析,其代码是非常冗长的,但是这些代码大部分都是一些初始化的工作,看多了很容易把你绕晕,个人觉得这里面的关键操作主要在于两点:
一是对于source、sink点的统计,其代码如下所示;遍历应用所有的方法,然后使用scanMethodForSourcesSinks函数对方法内的source、sink进行统计,并返回该方法中包含的sink点的数量;
for (SootMethod sm : getMethodsForSeeds(iCfg)) sinkCount += scanMethodForSourcesSinks(sourcesSinks, forwardProblem, sm);
进入scanMethodForSourcesSinks方法,源码如下所示;其主要操作是通过判断方法是否存在方法体,如果存在方法体,则遍历方法体中的所有语句,soot中定义为Unit对象,可以将其强制转化为Stmt对象,可以理解为jimple形式的java语句,然后判断该语句是否在source、sink中包含,被包含的话,如果是source点,则首先将其作为初始0向量(ICFG图起始点)存入zeroValue中,然后保存到collectedSources容器中;如果是sink点则直接存储到collectedSinks容器中,这个寻找source点的方法,在后面介绍控制流图的时候会使用到。
private int scanMethodForSourcesSinks(final ISourceSinkManager sourcesSinks, InfoflowProblem forwardProblem, SootMethod m) {      if (getConfig().getLogSourcesAndSinks() && collectedSources == null) {         collectedSources = new HashSet<>();         collectedSinks = new HashSet<>();      }

      int sinkCount = 0;      if (m.hasActiveBody()) {         // Check whether this is a system class we need to ignore         final String className = m.getDeclaringClass().getName();         if (config.getIgnoreFlowsInSystemPackages()               && SystemClassHandler.isClassInSystemPackage(className))            return sinkCount;         // Look for a source in the method. Also look for sinks. If we         // have no sink in the program, we don't need to perform any         // analysis         PatchingChain<Unit> units = m.getActiveBody().getUnits();         for (Unit u : units) {            Stmt s = (Stmt) u;            if (sourcesSinks.getSourceInfo(s, iCfg) != null) {               forwardProblem.addInitialSeeds(u, Collections.singleton(forwardProblem.zeroValue()));               if (getConfig().getLogSourcesAndSinks())                  collectedSources.add(s);               logger.debug("Source found: {}", u);            }            if (sourcesSinks.isSink(s, iCfg, null)) {               sinkCount++;               if (getConfig().getLogSourcesAndSinks())                  collectedSinks.add(s);               logger.debug("Sink found: {}", u);            }         }      }      return sinkCount;   }
二是调用前向追踪方法:forwardSolver.solve(),确认source点到sink点是否存在联通的数据路径,如果存在则认为是一个风险点。前向追踪的算法主要在heros中实现,此处不再展开;最终分析的结果保存在results变量中,通过以下方法将结果打印出来,源码如下所示:
for (ResultSinkInfo sink : results.getResults().keySet()) { logger.info("The sink {} in method {} was called with values from the following sources:", sink, iCfg.getMethodOf(sink.getSink()).getSignature() ); for (ResultSourceInfo source : results.getResults().get(sink)) { logger.info("- {} in method {}",source, iCfg.getMethodOf(source.getSource()).getSignature()); if (source.getPath() != null) { logger.info("\ton Path: "); for (Unit p : source.getPath()) { logger.info("\t -> " + iCfg.getMethodOf(p)); logger.info("\t\t -> " + p); } } } }
至此我们比较简单的介绍了flowdroid的执行流程,对于控制流图的算法及heros的具体实现并没有做更深入的介绍,后续可能作为独立的文章进行分析。
4、优化
flowdroid无论从算法、实现上,还是从效果上都堪称是一款非常牛逼的产品,但是他也有个非常大的问题就是,太耗内存,分析时间太长,实际使用的价值很低,因此我常常称它为一个实验室的产品。那么有什么优化方法呢,首先需要明白造成flowdroid分析耗时的原因,其实无非就是apk较大时,代码量太大,造成数据流图(ICFG)呈现爆炸式增长,那么很明显的一条思路就是削减ICFG图的体量,我曾经的一个方法是只对几个相关联的文件构造ICFG图,这样就使得ICFG图体量呈现几何式的下降,分析速度肯定明显提升,但是这个方法比较适用于对风险进行验证,并不适用于分析。
最近在研究其他源码扫描工具(如我上篇文章的RIPS)的时候发现,这些工具在进行源码扫描的时候并没有进行所谓的数据流分析,更多的只是对调用关系进行分析。诚然数据流分析能够减少很多误报,但是这些误报在我们进行漏洞验证的时候可能很容易就排除掉,这样只使用控制流图进行风险分析看起来也是个不错的想法。进行控制流分析首先要获取Android应用的控制流图,下面的代码展示如何使用soot构造Android应用的控制流图,相关说明上文均有提及,此处不再进行详细说明。
SetupApplication app = new SetupApplication(androidPlatformPath, appPath); app.calculateSourcesSinksEntrypoints("SourcesAndSinks.txt"); soot.G.reset(); Options.v().set_src_prec(Options.src_prec_apk); Options.v().set_process_dir(Collections.singletonList(appPath)); Options.v().set_android_jars(androidPlatformPath); Options.v().set_whole_program(true); Options.v().set_allow_phantom_refs(true); Options.v().setPhaseOption("cg.spark", "on"); Scene.v().loadNecessaryClasses(); SootMethod entryPoint = app.getEntryPointCreator().createDummyMain(); Options.v().set_main_class(entryPoint.getSignature()); Scene.v().setEntryPoints(Collections.singletonList(entryPoint)); System.out.println(entryPoint.getActiveBody()); PackManager.v().runPacks(); CallGraph appCallGraph = Scene.v().getCallGraph();
获取控制流图后,下一步就是确定图中的两个点是否存在连线,假设这两个点为我们定义的source点、sink点,如果存在连线,即source点与sink点之间存在调用关系,那么就可以作为一个风险点抛出。那么如何确定是否存在调用关系,查看CallGraph的源码中是否定义了相关方法,发现存在findEdge这个方法,该方法用于寻找某个语句对于某个方法是否存在调用调用关系,如果把第一个参数u定义为一个sink点,即调用点,第二个参数callee定义为一个source点,那么便定义了他们之间的一种调用关系。unit的获取可以通过上面介绍的获取应用内source、sink点的方法获取。
public Edge findEdge( Unit u, SootMethod callee ) { Edge e = srcUnitToEdge.get(u); while ( e.srcUnit() == u && e.kind() != Kind.INVALID ) { if ( e.tgt() == callee ) return e; e = e.nextByUnit(); } return null; }
注:使用控制流分析本人并没有亲自试验,可能存在问题,望见谅。
原文地址: http://www.freebuf.com/sectool/137435.html
Android污点分析工具flowdroid源码简析相关推荐
- php 简析对象,PHP白盒审计工具RIPS源码简析
RIPS是一款对PHP源码进行风险扫描的工具,其对代码扫描的方式是常规的正则匹配,确定sink点:还是如flowdroid构建全局数据流图,并分析存储全局数据可达路径:下面就从其源码上略探一二. 1. ...
- php设计一个盒子类代码_PHP白盒审计工具RIPS源码简析
RIPS是一款对PHP源码进行风险扫描的工具,其对代码扫描的方式是常规的正则匹配,确定sink点:还是如flowdroid构建全局数据流图,并分析存储全局数据可达路径:下面就从其源码上略探一二. 1. ...
- 【Android项目】本地FM收音机开发及源码简析
[Android项目]本地FM收音机开发及源码简析 目录 1.概述 2.收音机的基本原理 3.收音机其他信息 RDS功能 4.Android开发FM收音机源码解析 5.App层如何设计本地FM应用 6 ...
- 【Golang源码分析】Go Web常用程序包gorilla/mux的使用与源码简析
目录[阅读时间:约10分钟] 一.概述 二.对比: gorilla/mux与net/http DefaultServeMux 三.简单使用 四.源码简析 1.NewRouter函数 2.HandleF ...
- django源码简析——后台程序入口
django源码简析--后台程序入口 这一年一直在用云笔记,平时记录一些tips或者问题很方便,所以也就不再用博客进行记录,还是想把最近学习到的一些东西和大家作以分享,也能够对自己做一个总结.工作中主 ...
- (Ajax)axios源码简析(三)——请求与取消请求
传送门: axios源码简析(一)--axios入口文件 axios源码简析(二)--Axios类与拦截器 axios源码简析(三)--请求与取消请求 请求过程 在Axios.prototype.re ...
- java ArrayList 概述 与源码简析
ArrayList 概述 与源码简析 1 ArrayList 创建 ArrayList<String> list = new ArrayList<>(); //构造一个初始容量 ...
- ffmpeg实战教程(十三)iJKPlayer源码简析
要使用封装优化ijk就必须先了解ffmpeg,然后看ijk对ffmpeg的C层封装! 这是我看ijk源码时候的笔记,比较散乱.不喜勿喷~ ijk源码简析: 1.ijkplayer_jni.c 封装的播 ...
- Log-Pilot 源码简析
Log-Pilot 源码简析 简单介绍 源码简析 Pilot结构体 Piloter接口 main函数 Pilot.Run Pilot.New Pilot.watch Pilot.processEven ...
最新文章
- jpa的批量修改_SpringDataJpa的批量 保存 修改 操作
- 去除标题_资深运营导师-云中教你轻松写标题
- 三星android rom开发者,六年老机吃上奥利奥:第三方三星S2安卓8.0刷机包发布
- 中内连和外联的去区别_外联福利 || 卡西欧计算器
- 基于IBM Bluemix的数据缓存应用实例
- java反射 获取方法_java反射——获取类的方法信息
- 恶意软件分析(二)玩出花的批处理(中)
- 怎么把PDF转换成图片?推荐6个终极解决方法!
- 华为 USG 双机热备
- 内外盘期货市场的介绍(一)
- SQLite管理软件 - SQLiteSpy
- 经典卷积网络--InceptionNet
- 关于我装黑苹果的那些事儿
- c语言int转换成float,int怎么转化为float 将 int型变量n转换成float型变量的方法是...
- Anchor-based 与 Anchor-free 优缺点
- 大学毕业论文指导-内容陈述
- 神经网络中的反向传播
- 2020计算机网络管理员,2020计算机软考网络管理员模拟选择题及答案.pdf
- 物联网时代的工控机防病毒/主机加固需求分析
- 鸿蒙系统用什么用,【图片】华为鸿蒙系统的厉害之处在于 你可能非用不可 !【手机吧】_百度贴吧...