Carla 开源自动驾驶仿真软件使用指南 [AD simulator]


introdution:
- 开源软件
- unreal engine 4
- 用户通过Python API 调用, server --client 的形式- REF: https://carla.readthedocs.io/en/latest/python_api/
let's start:
The API has been significantly changed in the latest versions starting at 0.9.0. We commonly refer to the new API as 0.9.X API as opposed to the previous 0.8.X API
Section 1 API 学习
官网下载软件包,解压, shit+右键,解压路径下打开shell窗口 .\CarlaUE4.exe 运行
通过鼠标+ AWSD 控制运行,
![]()
打开路径:D:\study\codes\CARLA_0.9.5\PythonAPI\examples
打开另一个shell, 运行官网
创建(spawn) 场景元素,demo命令
python spawn_npc.py -n 80
With this script we are adding 80 vehicles to the world driving in "autopilot" mode. Back to the simulator window we should see these vehicles driving around the city. They will keep driving randomly until we stop the script. Let's leave them there for now
这个命令实现了添加80个车辆,随机的自主运动。 CTR+C 结束演示。 脚本有难度,Lesson2 后,查看API
修改天气
- 天气自动变化
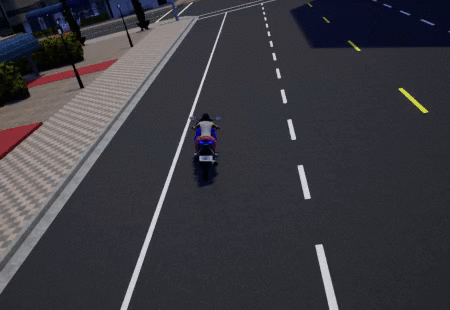
python dynamic_weather.py手动控制车辆
python manual_control.py
![]()
运行窗口如下:第三视角
![]()
第一课时结束。下课!:)
Lesson2 :
几个概念:
创建Client 对象:
client = carla.Client('localhost', 2000)
client.set_timeout(10.0) # seconds
模拟世界:
world = client.get_world()
actor (模拟器中的演员对象-比如汽车)
blueprints--actor对应的属性(比如颜色,车型 etc),在构造蓝图blueprints中设置。--所有的属性都包含在 一个库中。
blueprint_library = world.get_blueprint_library()
The library allows us to find specific blueprints by ID, filter them with wildcards, or just choosing one at random
# Find specific blueprint.
collision_sensor_bp = blueprint_library.find('sensor.other.collision')
# Chose a vehicle blueprint at random.
vehicle_bp = random.choice(blueprint_library.filter('vehicle.bmw.*'))
Some of the attributes of the blueprints can be modified while some other are just read-only. For instance, we cannot modify the number of wheels of a vehicle but we can change its color
vehicles = blueprint_library.filter('vehicle.*')
bikes = [x for x in vehicles if int(x.get_attribute('number_of_wheels')) == 2]
for bike in bikes:bike.set_attribute('color', '255,0,0')
Modifiable attributes also come with a list of recommended values
for attr in blueprint:if attr.is_modifiable:blueprint.set_attribute(attr.id, random.choice(attr.recommended_values))了解了属性设置后,开始创建actor,
Once we have the blueprint set up, spawning an actor is pretty straightforward
transform = Transform(Location(x=230, y=195, z=40), Rotation(yaw=180))# 生成点坐标创建
actor = world.spawn_actor(blueprint, transform) #这个时候会检查生成点坐标是否会发生碰撞。如果有碰撞,会报错
shen
The spawn actor function comes in two flavours, spawn_actor and try_spawn_actor. The former will raise an exception if the actor could not be spawned, the later will return None instead. The most typical cause of failure is collision at spawn point, meaning the actor does not fit at the spot we chose; probably another vehicle is in that spot or we tried to spawn into a static object.
To ease the task of finding a spawn location, each map provides a list of recommended transforms
推荐
spawn_points = world.get_map().get_spawn_points() #返回所有的可用collision-free points.
We'll add more on the map object later in this tutorial.
Finally, the spawn functions have an optional argument that controls whether the actor is going to be attached to another actor. This is specially useful for sensors. In the next example, the camera remains rigidly attached to our vehicle during the rest of the simulation
camera = world.spawn_actor(camera_bp, relative_transform, attach_to=my_vehicle)# (附加参数,可以控制物体是否和其他的actor绑定)--适用于传感器Note that in this case, the transform provided is treated relative to the parent actor.
讲了有点多,开始动手练习。直接在 calar解压路径下,创建练习code.(其他地方需要添加环境变量。要不然 下面会报缺少相关文件。
import carla
首先打开模拟器(server), 否则会报错
![]()
创建一个client. 创建actor, blueprints. 调用生成函数,在世界中生成。
代码在spyder中编译会报错。报“calra 没有 client这个属性!”---TB fix
偶尔发现可以正常运行。
暂时通过shell 命令行来执行。运行OK
参考官方example: spawn_npc.py ,尝试练习
import glob
import os
import sys
#import future
#import pygame
#添加系统变量
try:sys.path.append(glob.glob('../carla/dist/carla-*%d.%d-%s.egg' % (sys.version_info.major,sys.version_info.minor,'win-amd64' if os.name == 'nt' else 'linux-x86_64'))[0])
except IndexError:passimport carla
import argparse
import logging
import randomclient=carla.Client('127.0.0.1',2000)
print ('create client')
client.set_timeout(2.0)
world=client.get_world()
print ('crated VR world')
![]()
都放到一起! 如下code
#!/usr/bin/env python# Copyright (c) 2019 Computer Vision Center (CVC) at the Universitat Autonoma de
# Barcelona (UAB).
#
# This work is licensed under the terms of the MIT license.
# For a copy, see <https://opensource.org/licenses/MIT>."""Spawn NPCs into the simulation"""import glob
import os
import sys
#import future
#import pygame
#添加系统变量
'''
try
finally 函数体格式def 函数名():
定义函数
'''
try:sys.path.append(glob.glob('../carla/dist/carla-*%d.%d-%s.egg' % (sys.version_info.major,sys.version_info.minor,'win-amd64' if os.name == 'nt' else 'linux-x86_64'))[0])
except IndexError:passimport carla
import argparse
import logging
import randomdef main():try:client=carla.Client('127.0.0.1',2000) #默认地址print ('create client')client.set_timeout(2.0)world=client.get_world()print ('crated VR world')bp_library = world.get_blueprint_library()'''#获得blueprints 库-API 如下#carla.BlueprintLibrary#find(id)#filter(wildcard_pattern)#__getitem__(pos)#__len__()#__iter__()'''bps=bp_library.filter('vehicle.*')'''#获得了所有车的属性集合--matrix#进一步筛选'''bps = [x for x in bps if int(x.get_attribute('number_of_wheels')) == 4]'''获得所有的2轮车'''bps = [x for x in bps if not x.id.endswith('isetta')]bps = [x for x in bps if not x.id.endswith('carlacola')]'''获得可用生成点'''spoints=world.get_map().get_spawn_points()number_of_spawn_points = len(spoints)print (number_of_spawn_points)batch=[]actor_list=[]i=0while i <10 :spoint=random.choice(spoints)bp=random.choice(bps)  actorlist=world.spawn_actor(bp,spoint).set_autopilot(enabled=True)batch.append(actorlist)# set_autopilot-- 设置这些车辆自动行驶i =i +1'''记录生成的actor 对象,提供摧毁他们的途径,下面的代码有问题,报错。TypeError: No registered converter was able to produce a C++ r'''
####       for response in client.apply_batch_sync(batch):if response.error:logging.error(response.error)else:        actor_list.append(response.actor_id)    print('spawned %d vehicles, press Ctrl+C to exit.' % len(actor_list))
#        while True:world.wait_for_tick()
#    finally:
#    print('\ndestroying %d actors' % len(batch))client.apply_batch([carla.command.DestroyActor(x) for x in actor_list])####     if __name__ == '__main__':try:main()except KeyboardInterrupt:passfinally:print('\ndone.')
OK, 第一次尝试,成功创建了汽车对象,并设置他们自动有序形式。构成了一个虚拟的交通流。
总结一下API 调用过程:
![]()
Lession 3:
操作actor.--代码运行OK, 但是无法验证,在模拟器里面观察。 1.是坐标,不知道如何定义原点。2. 通过中断方式destory目标。
车辆目标
#显示位置,速度,加速度信息
location = actor.get_location()
location.z += 10.0
actor.set_location(location)
print(actor.get_acceleration())
print(actor.get_velocity())
#销毁目标--主页代码有问题carla.command.DestroyActor(actor)
#操控车辆
vehicle.apply_control(carla.VehicleControl(throttle=1.0, steer=-1.0))#全部的属性API:
carla.VehicleControl(throttle = 0.0steer = 0.0brake = 0.0hand_brake = Falsereverse = Falsemanual_gear_shift = Falsegear = 0)
# 车辆的动力性特性--调整质量,力矩图,最大RPM
vehicle.apply_physics_control(carla.VehiclePhysicsControl(max_rpm = 5000.0,center_of_mass = carla.Vector3D(0.0, 0.0, 0.0), torque_curve=[[0,400],[5000,400]]))
#API 结构体定义
carla.VehiclePhysicsControl(torque_curve,max_rpm,moi,damping_rate_full_throttle,damping_rate_zero_throttle_clutch_engaged,damping_rate_zero_throttle_clutch_disengaged,use_gear_autobox,gear_switch_time,clutch_strength,mass,drag_coefficient,center_of_mass,steering_curve, # 转向maximum steering for a specific forward speedwheels)
#轮胎的特性API 定义carla.WheelPhysicsControl(tire_friction,damping_rate,steer_angle,disable_steering)#actor 自动驾驶
vehicle.set_autopilot(True)
#获得车辆的bounding box
box = vehicle.bounding_box
print(box.location)         # Location relative to the vehicle.
print(box.extent)           # XYZ half-box extents in meters.
传感器对象
camera_bp = blueprint_library.find('sensor.camera.rgb')
#relative_transform 如何定义--应该是个R|t matrix.
camera = world.spawn_actor(camera_bp, relative_transform, attach_to=my_vehicle)#把传感器的数据存到本地
camera.listen(lambda image: image.save_to_disk('output/%06d.png' % image.frame_number))
TBC待专题里面 展开!!!????
其他对象-道路标志,交通灯 ,车道线 ,etc
Apart from vehicles and sensors, there are a few other actors in the world. The full list can be requested to the world with
actor_list = world.get_actors()
The actor list object returned has functions for finding, filtering, and iterating actors
# Find an actor by id.
actor = actor_list.find(id)
# Print the location of all the speed limit signs in the world.
for speed_sign in actor_list.filter('traffic.speed_limit.*'):print(speed_sign.get_location())
Among the actors you can find in this list are --哪里可以找到详细的API 定义,所有属性etc.???
- Traffic lights with a
stateproperty to check the light's current state. - Speed limit signs with the speed codified in their type_id.
- The Spectator actor that can be used to move the view of the simulator window.
修改天气:
carla.WeatherParameters
cloudyness
precipitation
precipitation_deposits
wind_intensity
sun_azimuth_angle
sun_altitude_angle
__eq__(other)
__ne__(other)
get_weather() 获取
set_weather(weather_parameters) 设置
Static presets 定义好的天气。
carla.WeatherParameters.ClearNoon
carla.WeatherParameters.CloudyNoon
carla.WeatherParameters.WetNoon
carla.WeatherParameters.WetCloudyNoon
carla.WeatherParameters.MidRainyNoon
carla.WeatherParameters.HardRainNoon
carla.WeatherParameters.SoftRainNoon
carla.WeatherParameters.ClearSunset
carla.WeatherParameters.CloudySunset
carla.WeatherParameters.WetSunset
carla.WeatherParameters.WetCloudySunset
carla.WeatherParameters.MidRainSunset
carla.WeatherParameters.HardRainSunset
carla.WeatherParameters.SoftRainSunset
地图对象
- 获得生成点
- 获得路标!-to be test!
import carla
#import random
client=carla.Client('127.0.0.1',2000) #默认地址
print ('create client')
client.set_timeout(2.0)
world=client.get_world()
print ('crated VR world')map=world.get_map()
print ('map name--',map.name)
sps=map.get_spawn_points()
print (' map first avaliable spawn points--',sps[0])
获得路标!
real power of this map API comes apparent when we introduce waypoints. We can tell the map to give us a waypoint on the road closest to our vehicle
waypoint = map.get_waypoint(vehicle.get_location())
This waypoint's transform is located on a drivable lane, and it's oriented according to the road direction at that point.
Waypoints also have function to query the "next" waypoints; this method returns a list of waypoints at a certain distance that can be accessed from this waypoint following the traffic rules. In other words, if a vehicle is placed in this waypoint, give me the list of posible locations that this vehicle can drive to--让车辆跟随路标前进!TBT. Let's see a practical example
# Retrieve the closest waypoint.
waypoint = map.get_waypoint(vehicle.get_location())# Disable physics, in this example we're just teleporting the vehicle.
vehicle.set_simulate_physics(False)while True:# Find next waypoint 2 meters ahead.waypoint = random.choice(waypoint.next(2.0))# Teleport the vehicle.vehicle.set_transform(waypoint.transform)
The map object also provides methods for generating in bulk waypoints all over the map at an approximated distance between them
waypoint_list = map.generate_waypoints(2.0)
For routing purposes, it is also possible to retrieve a topology graph of the roads
waypoint_tuple_list = map.get_topology()
this method returns a list of pairs (tuples) of waypoints, for each pair, the first element connects with the second one. Only the minimal set of waypoints to define the topology are generated by this method, only a waypoint for each lane for each road segment in the map.
Finally, to allow access to the whole road information, the map object can be converted to OpenDrive format, and saved to disk as such.
记录和回放--传感器数据
1.actor 生成销毁的事件。 actor的多维度状态
2.world里面actor 的属性,比如交通灯。etc
数据记录地点:根目录 下 CarlaUE4/Saved. --数据空间占用:a simulation with about 150 actors (50 traffic lights, 100 vehicles) for 1h of recording takes around 200 Mb in size
client.start_recorder("recording01.log")#to stop- 其它的API ,参数定义,使用时再深入
client.stop_recorder()
client.replay_file("recording01.log")
client.replay_file("recording01.log", start, duration, camera)
client.set_replayer_time_factor(2.0) #快进,快退
client.show_recorder_file_info("recording01.log")
回放功能可以分析碰撞,等等
Sample PY scripts to use with the recording / replaying system
There are some scripts you could use:start_recording.py: this will start recording, and optionally you can spawn several actors and define how much time you want to record.
-f: filename of write
-n: vehicles to spawn (optional, 10 by default)
-t: duration of the recording (optional)
start_replaying.py: this will start a replay of a file. We can define the starting time, duration and also an actor to follow.
-f: filename of write
-s: starting time (optional, by default from start)
-d: duration (optional, by default all)
-c: actor to follow (id) (optional)
show_recorder_collisions.py: this will show all the collisions hapenned while recording (currently only involved by hero actors).
-f: filename of write
-t: two letters definning the types of the actors involved, for example: -t aa
h = Hero
v = Vehicle
w = Walker
t = Traffic light
o = Other
a = Any
show_recorder_actors_blocked.py: this will show all the actors that are blocked (stopped) in the recorder. We can define the time and distance to be considered as blocked.
-f: filename of write
-t: minimum seconds stopped to be considered as blocked (optional)
-d: minimum distance to be considered stopped (optional)
API 的基本学习暂告一段路。
Section 2--仿真配置
- CARLA 支持固定fps和可变fps. 推荐使用固定,更快。 fps >=10fps!
$ ./CarlaUE4.sh -benchmark -fps=10window:
.\CarlaUE4.exe -benchmark -fps=10- 更换地图:+其它参数 test OK
 Linux
./CarlaUE4.sh /Game/Carla/Maps/Town01
rem Windows
.\CarlaUE4.exe /Game/Carla/Maps/Town05- 同步工作模式:
Always run the simulator at fixed time-step when using the synchronous mode.
# Example: Synchronizing a camera with synchronous mode.settings = world.get_settings()
settings.synchronous_mode = True
world.apply_settings(settings)camera = world.spawn_actor(blueprint, transform)
image_queue = queue.Queue()
camera.listen(image_queue.put)while True:world.tick()timestamp = world.wait_for_tick()image = image_queue.get()
Other command-line options
-carla-port=NListen for client connections at port N, streaming port is set to N+1.-quality-level={Low,Epic}Change graphics quality level, "Low" mode runs significantly faster.-no-renderingDisable rendering.- Full list of UE4 command-line arguments.
camera & sensors
传感器有一个监听的回调函数,但捕捉到视频时,会调用。看下面的例子,TBT
# Find the blueprint of the sensor.
blueprint = world.get_blueprint_library().find('sensor.camera.rgb')
# Modify the attributes of the blueprint to set image resolution and field of view.
blueprint.set_attribute('image_size_x', '1920')
blueprint.set_attribute('image_size_y', '1080')
blueprint.set_attribute('fov', '110')
# Set the time in seconds between sensor captures
blueprint.set_attribute('sensor_tick', '1.0')
# Provide the position of the sensor relative to the vehicle.
transform = carla.Transform(carla.Location(x=0.8, z=1.7))
# Tell the world to spawn the sensor, don't forget to attach it to your vehicle actor.
sensor = world.spawn_actor(blueprint, transform, attach_to=my_vehicle)
# Subscribe to the sensor stream by providing a callback function, this function is
# called each time a new image is generated by the sensor.
sensor.listen(lambda data: do_something(data))
数据的基本属性:
| Sensor data attribute | Type | Description |
|---|---|---|
frame_number
|
int | Frame number when the measurement took place |
timestamp
|
double | Timestamp of the measurement in simulation seconds since the beginning of the epispode |
transform
|
carla.Transform | Transform in world coordinates of the sensor at the time of the measurement |
传感器类型:
- sensor.camera.rgb
- sensor.camera.depth
- sensor.camera.semantic_segmentation
- sensor.lidar.ray_cast
- sensor.other.collision
- sensor.other.lane_invasion
- sensor.other.obstacle
具体说明参考官网。
API:
carla.Sensor(carla.Actor)
is_listeninglisten(callback_function)stop()
carla.SensorData
frame_numbertimestamptransform
carla.Image(carla.SensorData)
widthheightfovraw_dataconvert(color_converter)save_to_disk(path, color_converter=None)__len__()__iter__()__getitem__(pos)__setitem__(pos, color)
carla.LidarMeasurement(carla.SensorData)
horizontal_anglechannelsraw_dataget_point_count(channel)save_to_disk(path)__len__()__iter__()__getitem__(pos)__setitem__(pos, location)
carla.CollisionEvent(carla.SensorData)
actorother_actornormal_impulse
carla.LaneInvasionEvent(carla.SensorData)
actorcrossed_lane_markings
carla.GnssEvent(carla.SensorData)
latitudelongitudealtitude
carla.ObstacleDetectionSensorEvent(carla.SensorData)
actorother_actordistancecarla.LaneTypeNONEDrivingStopShoulderBikingSidewalkBorderRestrictedParkingBidirectionalMedianSpecial1Special2Special3RoadWorksTramRailEntryExitOffRampOnRampAnycarla.LaneChangeNONERightLeftBothcarla.LaneMarkingColorStandard = WhiteBlueGreenRedWhiteYellowOthercarla.LaneMarkingTypeNONEOtherBrokenSolidSolidSolidSolidBrokenBrokenSolidBrokenBrokenBottsDotsGrassCurbcarla.LaneMarkingtype-> carla.LaneMarkingcolor-> carla.RoadMarkColorlane_change-> carla.LaneChangewidth
QA
Is it possible to dump images from the CARLA simulator view?
Yes, this is an Unreal Engine feature. You can dump the images of the spectator camera (simulator view) by running CARLA with $ ./CarlaUE4.sh -benchmark -fps=30 -dumpmovie Images are saved to "CarlaUE4/Saved/Screenshots/LinuxNoEditor".
How to make a new map with RoadRunner? (特别繁琐。不方便!!)
Automatically generate a map from RoadRunner
--需要在code项目下面尝试,编译发行版本不行!
Importing and exporting maps for distribution builds
--linux环境下,
Where can I learn more about Unreal Engine? TBC!!
A basic introduction to C++ programming with UE4 can be found at Unreal's C++ Programming Tutorials. Then, if you want to dive into UE4 C++ development there are few paying options online. The Unreal C++ Course at Udemy it's pretty complete and there are usually offers that make it very affordable.
Are there any examples in CARLA to see how Unreal programming works?
You can find an example of how C++ classes work in UE4 in ASceneCaptureToDiskCamera (and its parent class ASceneCaptureCamera). This class creates an actor that can be dropped into the scene. In the editor, type "Scene Capture To Disk" in the Modes tab, and drag and drop the actor into the scene. Now searching for its detail tab you can find all the UPROPERTY members reflected. This shows the basic mechanism to use C++ classes in Unreal Editor.
For a more advanced example on how to extend C++ classes with blueprints, you can take a look at the "VehicleSpawner" blueprint. It derives from the C++ class AVehicleSpawnerBase. The C++ class decides where and when it spawns a vehicle, then calls the function SpawnVehicle(), which is implemented in the blueprint. The blueprint then decides model and color of the vehicle being spawned. Note that the blueprint can call back C++ functions, for instance for getting the random engine. This way there is a back-and-forth communication between C++ code and blueprints.
Carla 开源自动驾驶仿真软件使用指南 [AD simulator]相关推荐
- CARLA Simulator——开源自动驾驶模拟器
文章目录 安装教程 使用方法 ROS 车载传感器配置 相机 Lidar 参考文章 GitHub:CARLA Simulator 安装教程 CARLA--基于Ubuntu18.04安装CARLA Sim ...
- 自动驾驶仿真软件列表
自动驾驶仿真软件列表 目前做的比较好的自动驾驶仿真平台的列表和个人评价,仅供参考 点击名称进入官网/github主页 列表的分类基于仿真软件的基础构架 不另外说明的话,都是可在Windows上使用的 ...
- 最全国内外自动驾驶仿真软件总结
自动驾驶汽车在真正商业化应用前,需要经历大量的道路测试才能达到商用要求.采用路测来优化自动驾驶算法耗费的时间和成本太高,且开放道路测试仍受到法规限制,极端交通条件和场景复现困难,测试安全存在隐患.目前 ...
- 英伟达开源自动驾驶AI算法,升级芯片性能7倍于Xavier
2019-12-18 13:24:27 乾明 编辑整理 量子位 报道 | 公众号 QbitAI 一年一度,英伟达GTC China如期举办. 今年的英伟达创始人黄仁勋,对自动驾驶极为关注. 不仅发布 ...
- 300米远程深度估计:港科大重磅开源自动驾驶深度感知新技术,远超现有雷达|CVPR2020
原文链接:300 米远程深度估计:港科大重磅开源自动驾驶新技术,远超现有雷达|CVPR2020 本文原创首发自极市平台公众号,请授权后转载. 论文标题:Depth Sensing Beyond LiD ...
- 【自动驾驶摸爬滚打路】自动驾驶仿真软件SCANeR 001初相识
自动驾驶仿真软件SCANeR 001初相识 最近开始学习使用自动驾驶仿真软件SCANeR Studio 于是乎找了一圈,好像没有发现这个软件的pojie版 于是上官网申请试用版 AVSimulatio ...
- 国内自动驾驶仿真软件供应商为什么要自己做XIL?
年轻人最大的问题在于:会的太少,想的太多,参加公司XIL组发展方向的会议讨论,产生了下面一些个人想法. 关于XIL组的定位: XIL组是公司内部的产品(PanoSim软件)用户,通俗讲我们组做的事情, ...
- 那些年的自动驾驶仿真软件
1. CARLA 基于Unreal. Ref: https://carla.readthedocs.io/en/stable/ https://github.com/carla-simulator 2 ...
- 自动驾驶仿真软件简介----CARLAGazeboLGSVLOthers
CARLA CARLA 是一个开源模拟器,它使自主驾驶研究领域平民化.模拟器是开源的,是基于虚幻引擎开发的.它是一个模块化和灵活的工具,配备了强大的API来支持ADAS系统的培训和验证.因此,CARL ...
最新文章
- 部门换届推文文字_【校安协招新】这篇推文不要标题,只要你!
- 如何站在期刊角度上看论文写作
- vs2017 java sdk_系统无法找到Visual Studio 2017 ASP.NET核心项目
- 全志r11_全志R328 Demo开发板;全志R333开发板/核心板;全志R11开发板/核心板;全志R16开发板/方案设计...
- 廖雪峰Java1-2程序基础-7布尔运算符
- svn: Can't convert string from 'UTF-8' to native
- import win32com.client在python中报错及其解决办法
- python可变类型做默认参数
- ASP.NET验证码的实现
- 语音会议源代码_线上语音群聊神器!开会开黑都好用,免注册、免安装,还免费...
- 95-140-124-源码-transform-算子fold
- Android基于Socket无线遥控 - 模拟触摸按键篇framework jar
- python批量音频转格式_GitHub - shede333/SWConvertVideoToAudio: Python批量转换 视频 为 音频MP3(即提取音频文件)...
- 威联通如何备份文件服务器上,如何在 QNAP NAS 上使用 Commvault 软件来管理及备份数据?...
- 高等数学公式【上册+下册】
- ios python3.0编程软件_ios编程软件-7款学习Python编程的iPhone/iPad应用
- 编译原理 正则表达式_确定有穷自动机(DFA)_化简(最小化)
- VR分享会邀请函 | 如何利用VR影像创造商业应用新价值?
- 程序员常用英语积累---持续更新
- numpy.ndarray中对于字符串的处理