使用nginx+Apache负载均衡及动静分离
使用nginx+Apache负载均衡及动静分离
介绍
LB负载均衡集群分两类: LVS (四层)和 nginx或haproxy (七层)
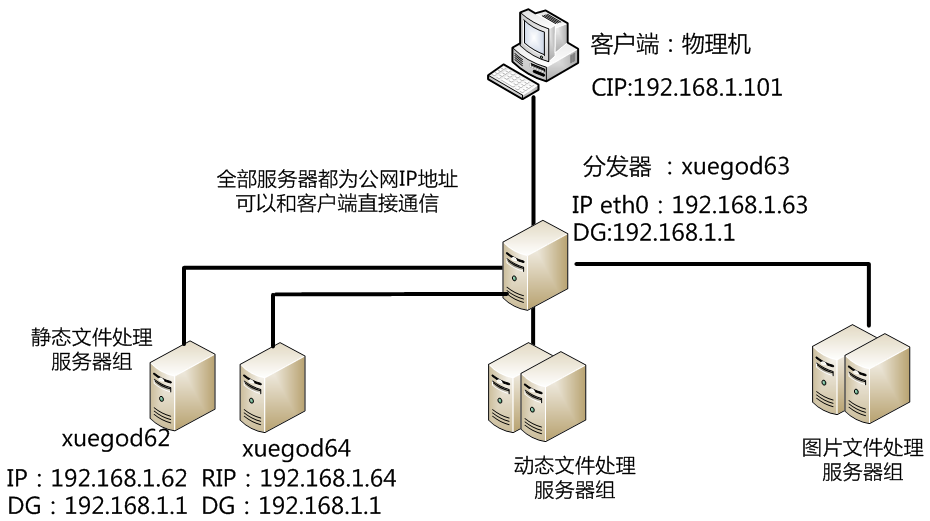
客户端都是通过访问分发器的VIP来访问网站 在七层中的网站页面有: .php .html .png .jpeg .jsp 等, 有动态页面有静态页面。 需要在应用层基于不同的应用进行分发。
一:实验拓扑图:
二:实验目标
实战:使用Apache+nginx实现动静分离的负载均衡集群
三:实验环境
|
主机作用分类 |
主机名 |
IP地址 |
安装软件 |
|
Nginx,代理服务器 |
xuegod63.cn |
192.168.1.63 |
nginx-1.8.0.tar.gz |
|
Apache,静态页面处理 |
xuegod62.cn |
192.168.1.62 |
http |
|
Apache,静态页面处理 |
xuegod64.cn |
192.168.1.64 |
http |
|
Apache,动态页面处理 |
xuegod62.cn |
192.168.1.62 |
http |
|
Apache,动态页面处理 |
xuegod64.cn |
192.168.1.64 |
http |
|
Apache,图片处理 |
xuegod62.cn |
192.168.1.62 |
http |
|
Apache,图片处理 |
xuegod64.cn |
192.168.1.64 |
http |
四:实验代码
1、配置分发器xuegod63(代理服务器)
1)安装nginx时必须先安装相应的编译工具
[root@xuegod63 ~]#yum -y install gcc gcc-c++ autoconf automake
[root@xuegod63 ~]#yum -y install zlib zlib-devel openssl openssl-devel pcre pcre-devel
zlib: nginx提供gzip模块,需要zlib库支持
openssl:nginx提供ssl功能
pcre:支持地址重写rewrite功能
2)安装nginx:
[root@xuegod63 ~]# tar -zxvf nginx-1.8.0.tar.gz -C /usr/local/src/
[root@xuegod63 ~]# cd /usr/local/src/nginx-1.8.0/
[root@xuegod63 nginx-1.8.0]# ./configure --prefix=/server/nginx-1.8.0 --with-http_dav_module --with-http_stub_status_module --with-http_addition_module --with-http_sub_module --with-http_flv_module --with-http_mp4_module
参数解释:
--with-http_dav_module 启用ngx_http_dav_module支持(增加PUT,DELETE,MKCOL:创建集合,COPY和MOVE方法)默认情冴下为关闭,需编译开启
--with-http_stub_status_module 启用ngx_http_stub_status_module支持(获取nginx自上次启动以来的工作状态)
--with-http_addition_module 启用ngx_http_addition_module支持(作为一个输出过滤器,支持不完全缓冲,分部分响应请求)
--with-http_sub_module 启用ngx_http_sub_module支持(允许用一些其他文本替换nginx响应中的一些文本)
--with-http_flv_module 启用ngx_http_flv_module支持(提供寻求内存使用基于时间的偏移量文件)
--with-http_mp4_module 启用对mp4文件支持(提供寻求内存使用基于时间的偏移量文件)
3)编译和安装:
[root@xuegod63 nginx-1.8.0]#make -j 4
[root@xuegod63 nginx-1.8.0]#make install
4)生成运行nginx的用户:
[root@xuegod63 nginx-1.8.0]# useradd -u 8000 -s /sbin/nologin nginx
5)启动nginx:
[root@xuegod63 /]# /server/nginx-1.8.0/sbin/nginx
[root@xuegod63 nginx-1.8.0]# echo '/server/nginx-1.8.0/sbin/nginx & ' >> /etc/rc.local
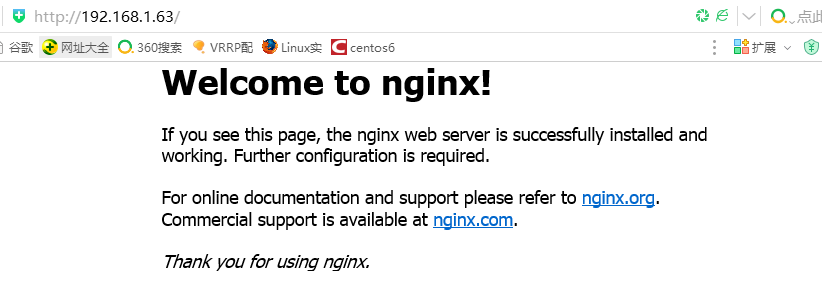
6)测试: http://192.168.1.63/
7)nginx服务日常操作: :
(1)测试配置文件是否正确语法:
[root@xuegod63 nginx-1.8.0]# /server/nginx-1.8.0/sbin/nginx -t
nginx: the configuration file /server/nginx-1.8.0/conf/nginx.conf syntax is ok
nginx: configuration file /server/nginx-1.8.0/conf/nginx.conf test is successful
(2)重新加载配置文件
[root@xuegod63 nginx-1.8.0]# /server/nginx-1.8.0/sbin/nginx -s reload
(3)关闭与开启nginx
[root@xuegod63 /]# /server/nginx-1.8.0/sbin/nginx -s stop
[root@xuegod63 /]# /server/nginx-1.8.0/sbin/nginx -s start #没有start参数
nginx: invalid option: "-s start"
7)配置nginx成为分发器,实现动静分离
[root@xuegod63 conf]# cd /server/nginx-1.8.0/conf #配置文件目录
[root@xuegod63 conf]# cp nginx.conf nginx.conf.back #备份一下配置文件
[root@xuegod63 conf]# vim nginx.conf
[root@xuegod63 nginx-1.8.0]# vim /server/nginx-1.8.0/conf/nginx.conf #指定启动nginx用户
改:# user nobody;
为:user nginx nginx;
改:
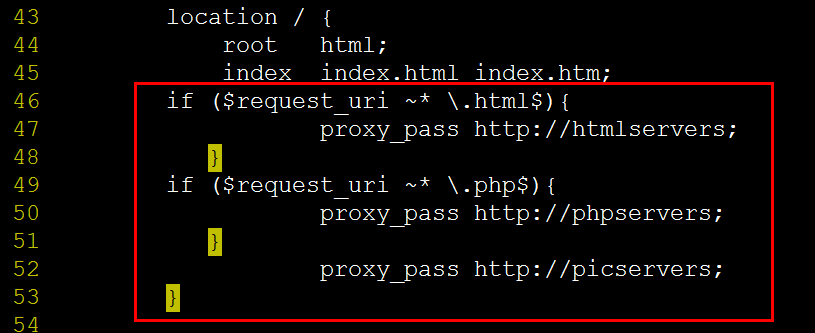
43 location / {
44 root html;
45 index index.html index.htm; #在location / { 。。。} 中添加以下内容 #定义分发策略
index index.html index.htm;
if ($request_uri ~* \.html$){
proxy_pass http://htmlservers; #匹配到htm静态类型访问的都会转到html服务池中
}
if ($request_uri ~* \.php$){
proxy_pass http://phpservers; #匹配到php动态类型文件直接在nginx服务器上解析了
}
}
如图:
把一下内容注释掉,匹配到php动态类型文件直接在nginx服务器上解析了,不再解析给后端服务器:
如图:

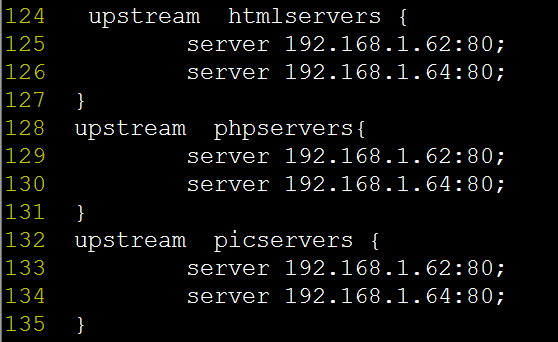
8)在配置文件nginx.conf的最后一行}前,添加以下内容:
upstream htmlservers { #定义静态文件负载均衡服务器组名称
server 192.168.1.62:80;
server 192.168.1.64:80;
}
upstream phpservers{ #定义动态文件负载均衡服务器组名称
server 192.168.1.62:80;
server 192.168.1.64:80;
}
upstream picservers { #定义图片文件负载均衡服务器组名称
server 192.168.1.62:80;
server 192.168.1.64:80;
}
#后期工作中,根据工作中的需要,配置成具体业务的IP地址
如图:
9)重新加载nginx服务器配置文件:
[root@xuegod63 conf]# /server/nginx-1.8.0/sbin/nginx -t
nginx: the configuration file /server/nginx-1.8.0/conf/nginx.conf syntax is ok
nginx: configuration file /server/nginx-1.8.0/conf/nginx.conf test is successful
[root@xuegod63 conf]# /server/nginx-1.8.0/sbin/nginx -s reload
2、配置后端服务器: xuegod62
(1)配置web服务器:
[root@xuegod62 html]# yum install httpd php -y
(2)生成静态测试文件:
root@xuegod62 html]#echo 192.168.1.62 > /var/www/html/index.html
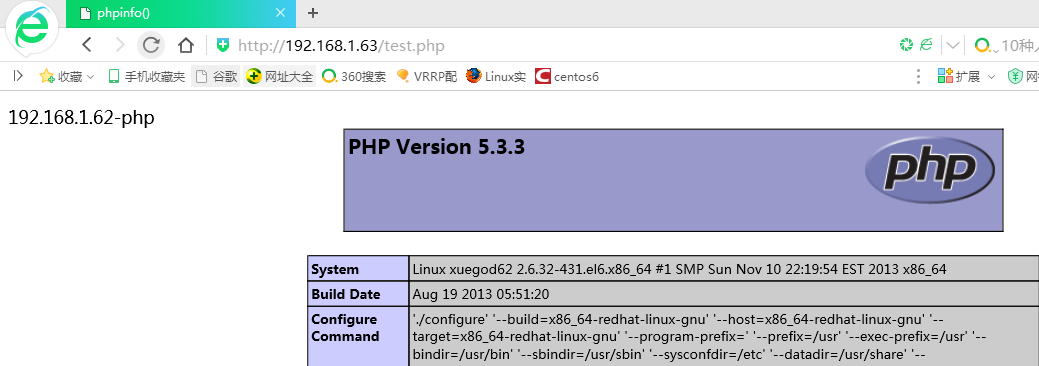
(3)生成动态测试文件:
[root@xuegod62 html]#vim /var/www/html/test.php #写如以下内容:
192.168.1.62-php
<?php
phpinfo();
?>
(4)生成图片文件: 上传如下图片,到“xuegod62网站/var/www/html/目录下:

(5)启动apache服务器:
[root@xuegod62 html]# service httpd restart
3、配置后端服务器:xuegod64
(1)配置web服务器:
[root@xuegod64 html]# yum install httpd php -y
(2)生成静态测试文件:
[root@xuegod64 html]#echo 192.168.1.64 > /var/www/html/index.html
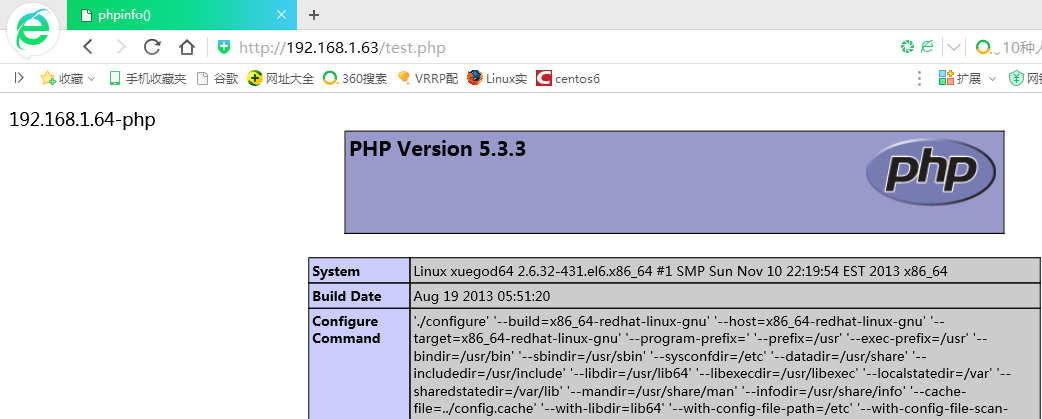
(3)生成动态测试文件:
[root@xuegod64 html]#vim /var/www/html/test.php #写如以下内容:
192.168.1.64-php
<?php
phpinfo();
?>
(4)生成图片文件: --上传如下图片,到“xuegod64网站/var/www/html/目录下:
![]()
(5)重启apache服务器
[root@xuegod64 html]# service httpd restart
4、测试
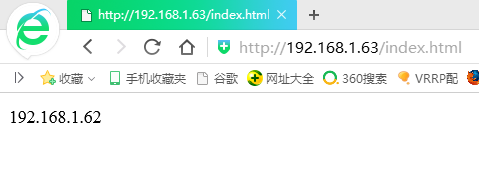
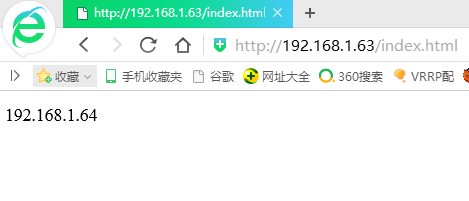
(1)测试负载均衡及动静分离---静态页面:
=
(2)测试动静分离及负载均衡---动态页面:
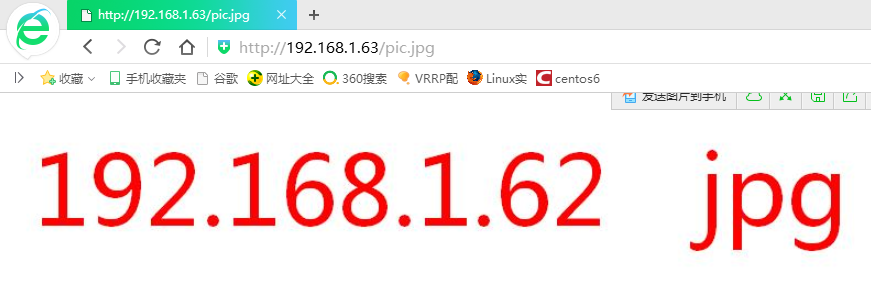
(3)测试图片负载均衡:
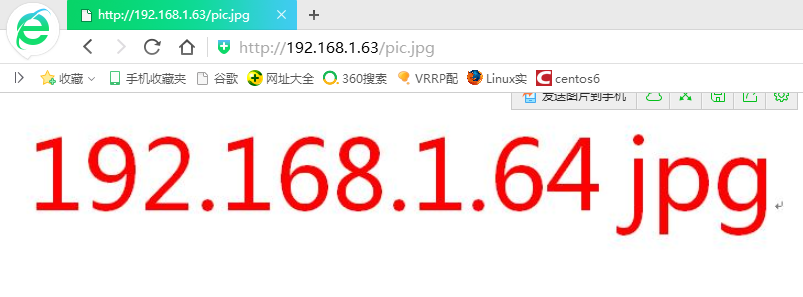
(4)测试自动剔除坏的节点:
[root@xuegod64 html]# service httpd stop
http://192.168.1.63/pic.jpg

5、测试性能:
扩展: 文件打开数过多
[root@xuegod63 html]# ab -n 1000 -c 1000 http://192.168.1.62/index.html #运行正常
[root@xuegod63 html]# ab -n 2000 -c 2000 http://192.168.1.62/index.html #报错
This is ApacheBench, Version 2.3 <$Revision: 655654 $>
Copyright 1996 Adam Twiss, Zeus Technology Ltd, http://www.zeustech.net/
Licensed to The Apache Software Foundation, http://www.apache.org/
Benchmarking 192.168.1.62 (be patient)
socket: Too many open files (24) # 测试时,一次打开的socket文件太多。
[root@xuegod63 ~]# ulimit -n
1024#系统默认一个进程最多同时允许打开1024的文件
[root@xuegod63 ~]# ulimit -n 10240 #修改默认允许同事打开10240个文件
[root@xuegod63 ~]# ab -n 2000 -c 2000 http://192.168.1.62/index.html
This is ApacheBench, Version 2.3 <$Revision: 655654 $>
Copyright 1996 Adam Twiss, Zeus Technology Ltd, http://www.zeustech.net/
Licensed to The Apache Software Foundation, http://www.apache.org/
Benchmarking 192.168.1.62 (be patient)
Completed 200 requests
Completed 400 requests
.......
Completed 1800 requests
Completed 2000 requests
Finished 2000 requests
Server Software: Apache/2.2.15
Server Hostname: 192.168.1.62
Server Port: 80
Document Path: /index.html
Document Length: 13 bytes
Concurrency Level: 2000
Time taken for tests: 1.119 seconds
Complete requests: 2000
Failed requests: 0
Write errors: 0
Total transferred: 560000 bytes
HTML transferred: 26000 bytes
Requests per second: 1787.69 [#/sec] (mean)
Time per request: 1118.765 [ms] (mean)
Time per request: 0.559 [ms] (mean, across all concurrent requests)
Transfer rate: 488.82 [Kbytes/sec] received
Connection Times (ms)
min mean[+/-sd] median max
Connect: 0 56 216.7 1 1062
Processing: 4 71 161.9 24 670
Waiting: 4 70 161.9 24 670
Total: 16 127 271.1 26 1087
Percentage of the requests served within a certain time (ms)
50% 26
66% 26
75% 27
80% 57
90% 717
95% 727
98% 1085
99% 1086
100% 1087 (longest request)
使用nginx+Apache负载均衡及动静分离相关推荐
- Nginx+Tomcat负载均衡、动静分离
目录 一:Nginx实现负载均衡原理 二:Nginx动静分离原理 三:Nginx+Tomcat负载均衡.动静分离实验 3.1部署Nginx负载均衡器 3.1.1关闭防火墙,将安装nginx所需的软件包 ...
- Nginx+Tomcat负载均衡和动静分离理论实操详解来袭!
文章目录 一:关于动静分离和负载均衡介绍 1.1:Nginx+Tomcat的动静分离 1.2:Nginx+Tomcat的负载均衡 1.3:Nginx配置反向代理的主要参数 二:Nginx+Tomcat ...
- Docker的安装和镜像管理并利用Docker容器实现nginx的负载均衡、动静分离
Docker的安装 一.Docker的概念 Docker 是一个开源的应用容器引擎,让开发者可以打包他们的应用以及依赖包到一个可移植的容器中,然后发布到任何流行的 Linux 机器上,也可以实现虚拟化 ...
- Nginx+Tomcat负载均衡、动静分离,4层代理,7层代理
一:7层反向代理 Nginx 服务器:192.168.52.200:80 Tomcat服务器1:192.168.52.201:80 Tomcat服务器2:192.168.52.108:8080 192 ...
- Nginx负载均衡与动静分离
文章目录 反向代理与负载均衡 nginx动静分离实验 在nginx主机上配置负载均衡 在nginx主机上配置动静分离 反向代理与负载均衡 nginx通常被用作后端服务器的反向代理,这样就可以很方便的实 ...
- Nginx之反向代理与负载均衡实现动静分离实战
Nginx之反向代理与负载均衡实现动静分离实战 什么是反向代理与负载均衡 Nginx仅仅作为Nginx proxy反向代理使用的,因为这个反向代理功能表现的效果是负载均衡集群的效果. 负载均衡指的是 ...
- Nginx入门教程-简介、安装、反向代理、负载均衡、动静分离使用实例
场景 Nginx入门简介和反向代理.负载均衡.动静分离理解 https://blog.csdn.net/BADAO_LIUMANG_QIZHI/article/details/102790862 Ub ...
- 使用Nginx负载均衡及动静分离
使用Nginx负载均衡及动静分离 目录 使用Nginx负载均衡及动静分离 一.系统拓扑图 二.环境准备 三.服务器安装 1.jdk,tomcat,mysql 2.Nginx的安装 2.1 gcc安装 ...
- Nginx+Tomcat实现负载均衡与动静分离
Nginx+Tomcat实现负载均衡与动静分离 一.Nginx负载均衡和动静分离 1.Nginx 实现负载均衡是通过反向代理实现 反向代理(Reverse Proxy) 是指以 代理服务器(例:Ngi ...
最新文章
- SpringBoot+Redis防止接口重复提交
- 忠告:创业公司与大公司正面竞争易死
- ConcurrentHashMap深度分析(JDK 1.8版本)
- 大数据学习笔记38:Hive - 内置函数(1)
- 基于Ogre的DeferredShading(延迟渲染)的实现以及应用
- 44.分治算法练习: 一元三次方程求解
- 百度下拉词推广是什么?
- springMVC浏览器接受json报406错误的解决方法
- MySQL中serial关键字的作用
- 监视Python程式自动退出,并重新启动程式
- 学习笔记:GAMES101图形学入门闫令琪(五)抗锯齿
- 鸿蒙电视如何播放手机上的歌,如何用鸿蒙OS在蜂鸣器播放音乐
- 医院计算机人员考试试题,医院信息科考试试题及答案-
- Three.js《踩坑日记1》
- c语言阿拉伯数字转大写,c++阿拉伯数字转化为中文大写
- HDU 3613 Best Reward 扩展kmp算法(将一个字符串分成两个回文串)
- html边框设置为背景同色,css边框与背景
- 图文演示电脑如何恢复系统还原到出厂状态
- 美洽客服系统怎么同步顾客身份
- 46家公司面试笔试题
热门文章
- 单细胞一站式分析网站CeDR Atlas使用指南
- php怎样解析数组,PHP 数组 Array 解析
- springboot项目文档源码_基于SpringBoot和Vue的企业级中后台项目(附源码)
- Matlab | Matlab从入门到放弃(5)——矩阵与format
- linux服务器网页出现错误,常见网页错误 | Linux 主机 (cPanel) - GoDaddy 帮助 SG
- 嵌入式系统的知识体系、学习误区及学习建议
- 15数码 java,15数码问题
- 吴恩达深度学习笔记2-Course1-Week2【神经网络基础:损失函数、梯度下降】
- 【NLP】打破BERT天花板:11种花式炼丹术刷爆NLP分类SOTA!
- 【论文解读】CVPR 2020:物体检测论文精选