LNMP之 nginx 启动脚本和配置文件
因为 nginx 启动不方便,所以我们需要自已手动来编译一个nginx 的启动脚本
[root@LNMP ~]# vim /etc/init.d/nginx #加入以下内容
#!/bin/bash# chkconfig: - 30 21# description: http service.# Source Function Library. /etc/init.d/functions# Nginx Settings

NGINX_SBIN="/usr/local/nginx/sbin/nginx"NGINX_CONF="/usr/local/nginx/conf/nginx.conf"NGINX_PID="/usr/local/nginx/logs/nginx.pid"RETVAL=0prog="Nginx"

start() {        echo -n $"Starting $prog: "        mkdir -p /dev/shm/nginx_temp        daemon $NGINX_SBIN -c $NGINX_CONF        RETVAL=$?        echo        return $RETVAL}

stop() {        echo -n $"Stopping $prog: "        killproc -p $NGINX_PID $NGINX_SBIN -TERM        rm -rf /dev/shm/nginx_temp        RETVAL=$?        echo        return $RETVAL}

reload(){        echo -n $"Reloading $prog: "        killproc -p $NGINX_PID $NGINX_SBIN -HUP        RETVAL=$?        echo        return $RETVAL}

restart(){        stop        start}

configtest(){    $NGINX_SBIN -c $NGINX_CONF -t    return 0}

case "$1" in  start)        start        ;;  stop)        stop        ;;  reload)        reload        ;;  restart)        restart        ;;  configtest)        configtest        ;;  *)        echo $"Usage: $0 {start|stop|reload|restart|configtest}"        RETVAL=1esac

exit $RETVAL
-----------------------------------------------------------------------
保存后,更改权限:
[root@LNMP ~]# chmod 755 /etc/init.d/nginx # 更改权限
[root@LNMP ~]# chkconfig --add nginx #加入到服务列表
[root@LNMP ~]# chkconfig nginx on #开机启动
[root@LNMP ~]# service nginx configtest #检查配置文件有没有问题
nginx: the configuration file /usr/local/nginx/conf/nginx.conf syntax is ok
nginx: configuration file /usr/local/nginx/conf/nginx.conf test is successful
---------------------------------------------------------------------------
更改 nginx 配置文件
[root@LNMP ~]# cp /usr/local/nginx/conf/nginx.conf /usr/local/nginx/conf/nginx.conf.bak
[root@LNMP ~]# >/usr/local/nginx/conf/nginx.conf #清空nginx.conf 里的配置文件
[root@LNMP ~]# vim /usr/local/nginx/conf/nginx.conf # 写入以下配置
user nobody nobody;worker_processes 2;error_log /usr/local/nginx/logs/nginx_error.log crit;pid /usr/local/nginx/logs/nginx.pid;worker_rlimit_nofile 51200;

events{    use epoll;    worker_connections 6000;}

http{    include mime.types;    default_type application/octet-stream;    server_names_hash_bucket_size 3526;    server_names_hash_max_size 4096;    log_format combined_realip '$remote_addr $http_x_forwarded_for [$time_local]'    '$host "$request_uri" $status'    '"$http_referer" "$http_user_agent"';    sendfile on;    tcp_nopush on;    keepalive_timeout 30;    client_header_timeout 3m;    client_body_timeout 3m;    send_timeout 3m;    connection_pool_size 256;    client_header_buffer_size 1k;    large_client_header_buffers 8 4k;    request_pool_size 4k;    output_buffers 4 32k;    postpone_output 1460;    client_max_body_size 10m;    client_body_buffer_size 256k;    client_body_temp_path /usr/local/nginx/client_body_temp;    proxy_temp_path /usr/local/nginx/proxy_temp;    fastcgi_temp_path /usr/local/nginx/fastcgi_temp;    fastcgi_intercept_errors on;    tcp_nodelay on;    gzip on;    gzip_min_length 1k;    gzip_buffers 4 8k;    gzip_comp_level 5;    gzip_http_version 1.1;    gzip_types text/plain application/x-javascript text/css text/htm application/xml;    include vhosts/*.conf; }  # 注意这个括号以及这一句 include vhosts/*.conf;
--------------------------------------------------------------------
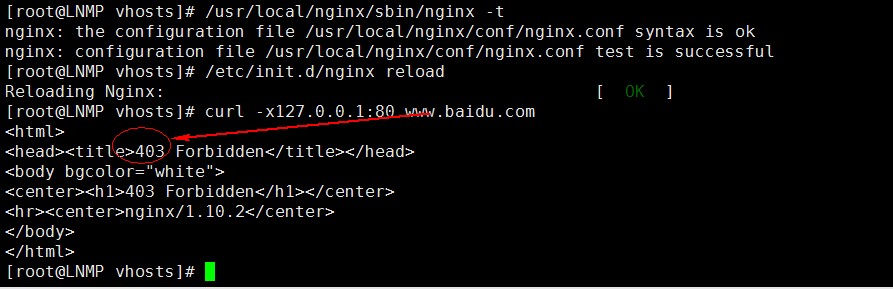
[root@LNMP ~]# /usr/local/nginx/sbin/nginx -t # 检查nginx 的编译
nginx: the configuration file /usr/local/nginx/conf/nginx.conf syntax is ok
nginx: configuration file /usr/local/nginx/conf/nginx.conf test is successful
[root@LNMP ~]# cd /usr/local/nginx/conf/
[root@LNMP conf]# mkdir vhosts #创建 vhosts 目录
[root@LNMP conf]# cd vhosts/
[root@LNMP vhosts]# vim default.conf # 编辑default.conf ,写入以下内容
server
{
listen 80 default_server;
server_name localhost;
index index.html index.htm index.php;
root /tmp/1233; #黙认的虚拟主机设置为 空,访问是会是 403 ,如下图
deny all;
以下不用的注释或册除
# root /usr/local/nginx/html;
# location ~ \.php$ {
# include fastcgi_params;
# fastcgi_pass unix:/tmp/php-fcgi.sock;
# fastcgi_index index.php;
# fastcgi_param SCRIPT_FILENAME /usr/local/nginx/html$fastcgi_script_name;
# }
}
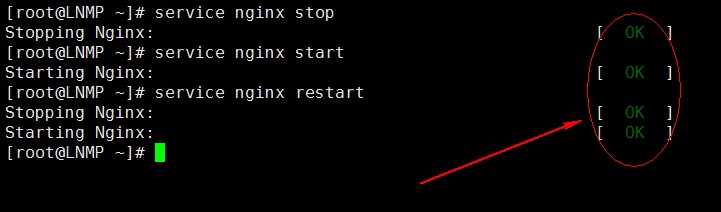
niginx 启动(一定要检查nginx 是否正常启动)

[root@LNMP vhosts]#mkdir /tmp/1223 #创建这个目录
[root@LNMP vhosts]# /usr/local/nginx/sbin/nginx -t #编译完检查
[root@LNMP vhosts]# /etc/init.d/nginx reload #重新加载配置文件
Reloading Nginx: [ OK ]
以下可以访问黙认主机的的情形反映
[root@LNMP vhosts]# curl localhost
<!DOCTYPE html>
<html>
<head>
<title>Welcome to nginx!</title>
<style>
body {
width: 35em;
margin: 0 auto;
font-family: Tahoma, Verdana, Arial, sans-serif;
}
</style>
</head>
<body>
<h1>Welcome to nginx!</h1>
<p>If you see this page, the nginx web server is successfully installed and
working. Further configuration is required.</p>
<p>For online documentation and support please refer to
<a href="http://nginx.org/">nginx.org</a>.<br/>
Commercial support is available at
<a href="http://nginx.com/">nginx.com</a>.</p>
<p><em>Thank you for using nginx.</em></p>
</body>
</html>
楼主在编写另一个主机的时候,没有实现 502 的状态,不知何故。
以下 test.com 示例文件
server
{
listen 80;
server_name test.com;
index index.html index.htm index.php;
root /data/www;
location ~ \.php$ {
include fastcgi_params;
#fastcgi_pass unix:/tmp/php-fcgi.sock;
fastcgi_pass 127.0.0.1:9000;
fastcgi_index index.php;
fastcgi_param SCRIPT_FILENAME /data/www$fastcgi_script_name;
}
}
[root@LNMP vhosts]# vim test.com
[root@LNMP vhosts]# curl -x127.0.0.1:80 test.com
<html>
<head><title>403 Forbidden</title></head>
<body bgcolor="white">
<center><h1>403 Forbidden</h1></center>
<hr><center>nginx/1.10.2</center>
</body>
</html>
转载于:https://blog.51cto.com/20151213start/1870855
LNMP之 nginx 启动脚本和配置文件相关推荐
- LNMP安装与启动脚本编写
1.安装mysql 1 cd /usr/local/src/ 下载mysql: 1 wget http://mirrors.sohu.com/mysql/MySQL-5.1/mysql-5.1.72- ...
- windows中wnmp设置nginx启动脚本
1.启动脚本 start-php-nginx.bat @ECHO OFF ECHO Starting PHP FastCGI... F:\web\Nginx\RunHiddenConsole.exe ...
- 自己写了个nginx启动脚本,shell
为什么80%的码农都做不了架构师?>>> 思路:nginx启动后会有nginx.pid文件在指定位置下,通过判断该文件是否存在.决定nginx是否已经启动. #!/bin/ba ...
- nginx 启动脚本
#vim /etc/rc.d/init.d/nginx #为nginx提供SysV init脚本 #!/bin/sh # # nginx - this script starts and sto ...
- linux添加nginx启动脚本_linux环境开机自启动nginx
一.编写脚本vi /etc/init.d/nginx 修改/etc/init.d/nginx代码如下:#!/bin/bash # nginx Startup script for the Nginx ...
- shell -nginx启动脚本
2019独角兽企业重金招聘Python工程师标准>>> ############################################################### ...
- Nginx服务安装与启动脚本配置
实验环境:RHEL7.2 x64-176,IP地址:192.168.1.176 实验工具: 实验步骤: 1.安装nginx服务器 2.配置nginx启动脚本 3.文件设置并验证结果 +++++++++ ...
- LNMP一键自动安装脚本
此脚本以在任何一台有网络的服务器上自动配置LNMP 使用方法:将inst_lnmp代码保存一个文件,例如inst_lnmp.sh 上传到服务器上执行. 此脚本在CentOS 6.0 X864环境下通 ...
- 通过Shell开发企业级专业服务启动脚本案例(MySQL)
老男孩教育Linux高端运维班Shell课后必会考试题: 企业Shell面试题10:开发企业级MySQL启动脚本 说明: MySQL启动命令为: /bin/sh mysqld_safe --pid-f ...
最新文章
- 网络编程中设计并发服务器,使用多进程 与 多线程 ,请问有什么区别?
- lede更改软件源_Linux的上传和下载——Ubuntu中软件的安装和ftp服务器的搭建
- [6]Windows内核情景分析 --APC
- .NET Core开发日志——从ASP.NET Core Module到KestrelServer
- 带有ActiveMQ和Maven的JMS Sender应用程序
- 自从阿里买了Flink母公司以后,你不懂Flink就out了!
- NLTK基础教程学习笔记(二)
- pl/sql配置连接远程数据库oracle,本地没有安装oracle数据库的情况下
- Matlab The Bisection Method
- Linux/UNIX系统编程手册(英文版)pdf
- 关于 Java 数组的 12 个最佳方法
- c语言函数调用求阶乘和
- python打开360浏览器_Selenium安装与360浏览器使用
- IDEA GitToolBox插件安装教程
- 北航计算机专业最低分,北京航空航天大学2020年本科录取线发布,最低分572
- 〖Python 数据库开发实战 - Python与Redis交互篇⑯〗- 综合案例 - 新闻管理系统第二阶段完结 - “app.py“ 模块收尾及案例演示
- 2022-2028年全球玻璃棉板收入年复合增长率CAGR为 5.0%
- 制造业ERP管理系统在企业管理中发挥什么作用?
- 【安装软件】 win10安装iTunes报错:“此Windows Installer软件包有一个问题。完成此安装需要......”的解决方式
- Android5.0 Settings各个子模块跳转和布局实现