python中outside loop_未知环境下的Lidar概率占位栅格图(Occupancy Grid Map) Python代码实现...
自动驾驶Mapping-占位栅格图(Occupancy Grid Map)中介绍了概率占位栅格地图(Probabilistic Occupancy Grid)的原理,并推导了如何利用贝叶斯理论(Bayes Theorem)更新生成概率占位栅格地图。下面看看如何用Python代码实现未知环境中的运动车辆上安装的激光雷达(lidar)生成概率占位栅格图。
1、构建环境地图和车辆运动模型
在生成栅格地图之前,首先需要构造一个用于车辆运动的环境地图(这个地图是用于仿真的真值,对于车辆来说是未知的环境)。我们用0和1值来构造M*N的环境地图,0表示可行驶区域,1表示占用区域。
M = 50
N = 60
true_map = np.zeros((M, N))
true_map[0:10, 0:10] = 1
true_map[30:35, 40:45] = 1
true_map[3:6,40:60] = 1;
true_map[20:30,25:29] = 1;
true_map[40:50,5:25] = 1;
然后构建车辆的运动模型。这里实现了一个简单的运动模型:车辆遇到障碍物或者到达地图边界之前,沿一个方向一直行驶;遇到障碍物或者到达地图边界之后,调整方向继续行驶。
# Initializing the robot's location.
x_0 = [30, 30, 0]
# The sequence of robot motions.
u = np.array([[3, 0, -3, 0], [0, 3, 0, -3]])
u_i = 1
# Initialize the vector of states for our simulation.
x = np.zeros((3, len(time_steps)))
x[:, 0] = x_0
while(Some Conditon...) :
# Perform robot motion.
move = np.add(x[0:2, t-1], u[:, u_i])
# If we hit the map boundaries, or a collision would occur, remain still.
if (move[0] >= M - 1) or (move[1] >= N - 1) or (move[0] <= 0) or (move[1] <= 0) or true_map[int(round(move[0])), int(round(move[1]))] == 1:
x[:, t] = x[:, t-1]
u_i = (u_i + 1) % 4
else:
x[0:2, t] = move
车辆的运动效果如下所示:
最后要构建激光雷达(Lidar)的旋转模型。这里假设在车辆运动过程中,激光雷达(lidar)以0.3/Step的速度持续旋转,对周围的环境进行扫描。
x[2, t] = (x[2, t-1] + w[t]) % (2 * math.pi)
2、生成激光雷达(Lidar)测量数据
有了地图和车辆运动模型,我们看看如何生成运动车辆上的激光雷达(lidar)扫描数据。
首先,我们需要搞清楚激光雷达的外参和内参,并以此推导出激光雷达(lidar)在Map坐标系下的姿态(x, y,
)和激光雷达(lidar)的激光束的水平和垂直角度分布(激光束的水平和垂直角度分布跟激光雷达自身的硬件属性相关,一般可以从Lidar产品说明书中获取)。
其次,我们需要知道激光雷达(Lidar)的最大扫描范围,超出该范围的区域不能被当前位置的Lidar扫描到,因而是定义为未知区域。最大扫描范围其实也是跟激光雷达自身属性相关的参数
# Parameters for the sensor model.
meas_phi = np.arange(-0.4, 0.4, 0.05)
rmax = 30 # Max beam range.
alpha = 1 # Width of an obstacle (distance about measurement to fill in).
beta = 0.05 # Angular width of a beam.
基于已知环境地图、车辆位置、Lidar激光束分布和Lidar最大扫描范围获取Lidar扫描数据的详细的代码如下:
def get_ranges(true_map, X, meas_phi, rmax):
(M, N) = np.shape(true_map)
x = X[0]
y = X[1]
theta = X[2]
meas_r = rmax * np.ones(meas_phi.shape)
# Iterate for each measurement bearing.
for i in range(len(meas_phi)):
# Iterate over each unit step up to and including rmax.
for r in range(1, rmax+1):
# Determine the coordinates of the cell.
xi = int(round(x + r * math.cos(theta + meas_phi[i])))
yi = int(round(y + r * math.sin(theta + meas_phi[i])))
# If not in the map, set measurement there and stop going further.
if (xi <= 0 or xi >= M-1 or yi <= 0 or yi >= N-1):
meas_r[i] = r
break
# If in the map, but hitting an obstacle, set the measurement range
# and stop ray tracing.
elif true_map[int(round(xi)), int(round(yi))] == 1:
meas_r[i] = r
break
return meas_r
3、计算Inverse Scanner Model
获取激光雷达(Lidar)的测量数据之后,下一步就是将其关联匹配到地图的Map Cell上。主要流程是:
1)将 Lidar bearing与Map Cell相对于传感器的方位进行最小误差匹配,得到影响当前Map Cell的激光束;
匹配的代码如下:
r = math.sqrt((i - x)**2 + (j - y)**2)
phi = (math.atan2(j - y, i - x) - theta + math.pi) % (2 * math.pi) - math.pi
# Find the range measurement associated with the relative bearing.
k = np.argmin(np.abs(np.subtract(phi, meas_phi)))
2) 计算每个Cell被占用的概率。计算完成之后,得到三种不同类型的区域:未探测区域、障碍物区域和非障碍物区域,并赋给它们不同的占用概率。这里将未探测区域的占用概率设为0.5,表示不确定是否占用;障碍物区域占用概率等于0.7,表示大概率被占用;可行驶区域占用概率0.3,表示小概率被占用。
完整的Inverse Scanner Model的实现代码如下:
def inverse_scanner(num_rows, num_cols, x, y, theta, meas_phi, meas_r, rmax, alpha, beta):
m = np.zeros((M, N))
for i in range(num_rows):
for j in range(num_cols):
# Find range and bearing relative to the input state (x, y, theta).
r = math.sqrt((i - x)**2 + (j - y)**2)
phi = (math.atan2(j - y, i - x) - theta + math.pi) % (2 * math.pi) - math.pi
# Find the range measurement associated with the relative bearing.
k = np.argmin(np.abs(np.subtract(phi, meas_phi)))
# If the range is greater than the maximum sensor range, or behind our range
# measurement, or is outside of the field of view of the sensor, then no
# new information is available.
if (r > min(rmax, meas_r[k] + alpha / 2.0)) or (abs(phi - meas_phi[k]) > beta / 2.0):
m[i, j] = 0.5
# If the range measurement lied within this cell, it is likely to be an object.
elif (meas_r[k] < rmax) and (abs(r - meas_r[k]) < alpha / 2.0):
m[i, j] = 0.7
# If the cell is in front of the range measurement, it is likely to be empty.
elif r < meas_r[k]:
m[i, j] = 0.3
return m
Inverse Scanner Model的测量结果如下图所示:
4、生成概率占位栅格地图(Probabilistic Occupancy Grid)
生成概率占位地图的过程就是循环对激光雷达(lidar)的测量结果应用Inverse Scanner Model,然后更新各个Map Cell的Log Odds的过程(详细推导过程参见:自动驾驶Mapping-占位栅格图(Occupancy Grid Map)):
其中:
是Inverse Measurement Model,
是网格i在t-1时刻的置信度(belif),
是Initial belief。
最后,将log odds还原为真实概率,得到每个网格的占位概率值。
生成概率占位地图的代码如下:
meas_rs = []
meas_r = get_ranges(true_map, x[:, 0], meas_phi, rmax)
meas_rs.append(meas_r)
invmods = []
invmod = inverse_scanner(M, N, x[0, 0], x[1, 0], x[2, 0], meas_phi, meas_r, rmax, alpha, beta)
invmods.append(invmod)
ms = []
ms.append(m)
# Main simulation loop.
for t in range(1, len(time_steps)):
# Perform robot motion.
move = np.add(x[0:2, t-1], u[:, u_i])
# If we hit the map boundaries, or a collision would occur, remain still.
if (move[0] >= M - 1) or (move[1] >= N - 1) or (move[0] <= 0) or (move[1] <= 0) or true_map[int(round(move[0])), int(round(move[1]))] == 1:
x[:, t] = x[:, t-1]
u_i = (u_i + 1) % 4
else:
x[0:2, t] = move
x[2, t] = (x[2, t-1] + w[t]) % (2 * math.pi)
# Gather the measurement range data, which we will convert to occupancy probabilities
meas_r = get_ranges(true_map, x[:, t], meas_phi, rmax)
meas_rs.append(meas_r)
# Given our range measurements and our robot location, apply inverse scanner model
invmod = inverse_scanner(M, N, x[0, t], x[1, t], x[2, t], meas_phi, meas_r, rmax, alpha, beta)
invmods.append(invmod)
# Calculate and update the log odds of our occupancy grid, given our measured occupancy probabilities from the inverse model.
L = np.log(np.divide(invmod, np.subtract(1, invmod))) + L - L0
# Calculate a grid of probabilities from the log odds.
m = np.divide(np.exp(L), np.add(1, np.exp(L)))
ms.append(m)
生成概率占用地图的过程如下:
最终生成的概率占用栅格地图如下图所示。可以看看它基本反应了真实的实际车辆运行环境。
注:本文首发于微信公众号,转载请注明出处,谢谢!公众号:半杯茶的小酒杯
个人博客地址:http://www.banbeichadexiaojiubei.comwww.banbeichadexiaojiubei.com
参考链接
1、Course自动驾驶课程:
相关文章半杯茶的小酒杯:自动驾驶Mapping-占位栅格图(Occupancy Grid Map)zhuanlan.zhihu.com 半杯茶的小酒杯:自动驾驶中的车辆运动学模型zhuanlan.zhihu.com
 半杯茶的小酒杯:自动驾驶定位算法(十五)基于多传感器融合的状态估计(muti-Sensors Fusion)zhuanlan.zhihu.com
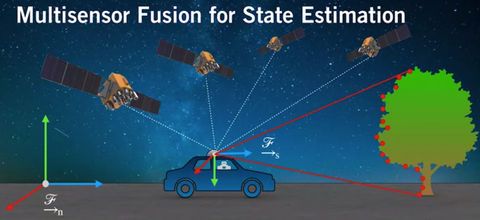 自动驾驶路径规划器-Lattice Planner详解www.banbeichadexiaojiubei.com半杯茶的小酒杯:自动驾驶定位算法(十四)-递归贝叶斯滤波(Bayes Filter)zhuanlan.zhihu.com
 半杯茶的小酒杯:自动驾驶定位算法(十三)-粒子滤波(Particle Filter)zhuanlan.zhihu.com
 半杯茶的小酒杯:自动驾驶硬件系统(十二)-激光雷达(Lidar)测量模型zhuanlan.zhihu.com
 半杯茶的小酒杯:自动驾驶硬件(十一)-Global Navigation Satellite System-GNSSzhuanlan.zhihu.com
 半杯茶的小酒杯:自动驾驶硬件系统(十)- Inertial Measurement Unit (IMU)zhuanlan.zhihu.com
 自动驾驶定位算法(九)-直方图滤波(Histogram Filter)定位www.banbeichadexiaojiubei.com
python中outside loop_未知环境下的Lidar概率占位栅格图(Occupancy Grid Map) Python代码实现...相关推荐
- get占位符传多个参数_未知环境下的Lidar概率占位栅格图(Occupancy Grid Map) Python代码实现...
自动驾驶Mapping-占位栅格图(Occupancy Grid Map)中介绍了概率占位栅格地图(Probabilistic Occupancy Grid)的原理,并推导了如何利用贝叶斯理论(Bay ...
- 自动驾驶之-MATLAB环境下利用单目摄像头和语义分割创建占位栅格(occupancy grid)
准备写一些关于自动驾驶方面的东西,以前研究过一些,也比较感兴趣. 本文简单讲解如何使用深度学习语义分割估计车辆可行驶区域(free space),并创建占位栅格(occupancy grid),然后使 ...
- 尚学python课程---11、linux环境下安装python注意
尚学python课程---11.linux环境下安装python注意 一.总结 一句话总结: 准备安装依赖包:zlib.openssl:yum install zlib* openssl*:pytho ...
- linux python复制安装,复制一个Python全部环境到另一个环境,python另一个,导出此环境下安装的包...
复制一个Python全部环境到另一个环境,python另一个,导出此环境下安装的包 导出此环境下安装的包的版本信息清单pipfreeze>requirements.txt联网,下载清单中的包到a ...
- Faster R-CNN python版在Ubuntu16.04环境下配置编译
Faster R-CNN python版在Ubuntu16.04环境下配置编译 1 电脑配置 2 安装显卡驱动 3 安装CUDA 3.1 安装CUDA 3.2 安装CUDNN 3.3 Samples测 ...
- python中pygame模块下载_基于python中pygame模块的Linux下安装过程(详解)
pyhthon中pygame模块怎么安装?pyhthon中pygame模块怎么安装?鄙人为初二一名学生,闲来无事 钻研起电这句话还是建议问一下你们代课老师吧,因为你们老师是这方面专家,诺儿那边的话肯定 ...
- Python中对象名称前单下划线和双下划线有啥区别
单下划线 在一个类中的方法或属性用单下划线开头就是告诉别的程序这个属性或方法是私有的.然而对于这个名字来说并没有什么特别的. 引自PEP-8: 单下划线:"内部使用"的弱指示器.比 ...
- python os模块安装方法_基于python中pygame模块的Linux下安装过程(详解)
一.使用pip安装Python包 大多数较新的Python版本都自带pip,因此首先可检查系统是否已经安装了pip.在Python3中,pip有时被称为pip3. 1.在Linux和OS X系统中检查 ...
- 图像处理/计算机视觉/python环境下/如何用四种不同滤波器处理噪声【附代码、亲测有效】
计算机视觉实操之图像处理 一.问题描述 二.效果图 三.代码附录 四.相关链接 一.问题描述 向图片中分别加入椒盐噪声.高斯噪声,使用四种不同的滤波器观察图片的处理效果(算术均值滤波.几何均值滤波 . ...
最新文章
- 名词用作动词举例_哪些词后面加动名词,哪些词加不定式,两者都可以加的又有那些?...
- 从换脸到换姿势,AI 在图像处理的道路上越走越魔幻
- c++ override final关键字
- [转]什么是CMMI?
- OpenSSL 再爆严重安全漏洞 —— CCS 注入
- 再有人问你synchronized是什么,就把这篇文章发给他。
- 区块链核心技术:委任权益证明算法DPoS
- jzoj3860-地壳运动(mst)【最小生成树,三分】
- http:(5):http状态码
- 数据科学 IPython 笔记本 7.4 Pandas 对象介绍
- SpringBoot第八篇:整合MyBatis-Generator
- 棋牌游戏服务器架构: 详细设计(3) 数据库设计
- weka分类器怎么设置类别_AI 迁移学习怎么玩?手把手教你实战迁移学习
- JavaScript创建对象的三种方式之利用构造函数创建对象及使用方法(3)
- 《信息与编码》考试复习笔记6----第六章连续信源熵和信道容量相关例题
- java实现ssdp协议_SSDP协议最简单的Reactor / Netty实现是什么?
- python对串口助手传入的16进制字符数据进行绘图
- DeepFool笔记:对原理的理解和公式推导(多分类)
- CSS minification error
- 未解Bug-邮箱字母莫名变成大写,导致修改密码时密码不一致