vue.js转换乘html_Vue.js的声明式共享元素转换
vue.js转换乘html
v共享元素 (v-shared-element)
Declarative shared-element transitions between pages for Vue.js. Uses illusory under the hood.
Vue.js页面之间的声明式共享元素过渡。 在引擎盖下使用虚幻的东西。

安装 (Install)
npm
npm
$ npm i v-shared-elementor
要么
CDN
CDN
<script src="https://unpkg.com/illusory"></script>
<script src="https://unpkg.com/v-shared-element"></script>
注册插件 (Register the plugin)
Vue.js + Vue路由器 (Vue.js + vue-router)
//main.jsimport Vue from 'vue'
import {SharedElementRouteGuard,SharedElementDirective
} from 'v-shared-element'Vue.use(SharedElementDirective)const router = new VueRouter({ ... })router.beforeEach(SharedElementRouteGuard)
or
要么
Nuxt.js (Nuxt.js)
Create a file in ~/plugins named v-shared-element.client.js
在~/plugins创建一个名为v-shared-element.client.js
// ~/plugins/v-shared-element.client.jsimport Vue from 'vue';
import { SharedElementDirective, NuxtSharedElementRouteGuard } from 'v-shared-element';Vue.use(SharedElementDirective);export default NuxtSharedElementRouteGuard;
Then add it in your nuxt.config.js
然后将其添加到您的nuxt.config.js
export default {plugins: ['~/plugins/v-shared-element.client.js'],
}
用法 (Usage)
Add v-shared-element:<namespace> to an element to transform it into a shared-element. On another page add the directive to an element and use the same namespace. That's it, you're done (there are more options below if you need them).
将v-shared-element:<namespace>到元素中,以将其转换为共享元素。 在另一页上,将指令添加到元素并使用相同的名称空间。 就是这样,您就完成了(如果需要,下面还有更多选择)。
Note: A given namespace should only be used once per-page. See below for usage with
v-for. Also,keep-aliveroutes need special treatment (see below).注意:给定的名称空间每页只能使用一次。 有关
v-for用法,请参见下文。 此外,keep-alive路线需要特殊对待(请参阅下文)。
<div v-shared-element:namespace></div>v-for用法 (Usage with v-for)
Suppose you have a list of contacts and you want all the profile pictures to be shared-elements. Use "dynamic directive arguments" to give a different namespace to each contact in the list (this is typically the same ID used for v-for's :key prop).
假设您有一个联系人列表,并且希望所有个人资料图片都是共享元素。 使用“动态指令参数”为列表中的每个联系人赋予不同的命名空间(这通常是用于v-for的:key prop的ID)。
<img:src="contact.profile"v-shared-element:[contact.id]
/>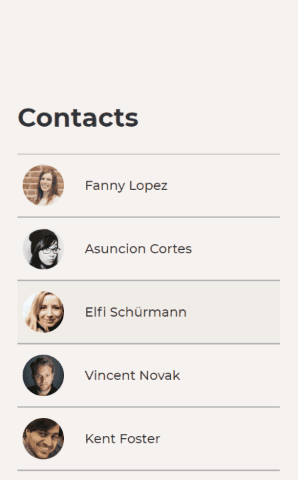
Detailed example
详细的例子
<template><div><h1>Contacts</h1><ul><liv-for="contact in contacts":key="contact.id"><img:src="contact.profile"v-shared-element:[contact.id]/><span>{{ contact.name }}</span></li></ul></div>
</template><script>
export default {data() {return {contacts: [{id: '11bf5b37-e0b8-42e0-8dcf-dc8c4aefc000',profile: './user/11bf5b37-e0b8-42e0-8dcf-dc8c4aefc000/profile',name: 'John Doe'},...]}}
}
</script>与keep-alive (Usage with keep-alive)
If you have routes that use <keep-alive>, you must add some additional code. Otherwise, the transition will only run once, and not run again while the component remains alive.
如果您的路由使用<keep-alive> ,则必须添加一些其他代码。 否则,过渡将只运行一次,而在组件保持活动状态时不会再次运行。
To fix this, use sharedElementMixin on routes that are "kept alive".
要解决此问题, sharedElementMixin在“保持有效”的路由上使用sharedElementMixin 。
使用sharedElementMixin (Using sharedElementMixin )
Import the mixin into to any components on your keep-alive routes that contain shared-elements. Then, in those components, pass $keepSharedElementAlive—a method provided by the mixin—as an option to every v-shared-element directive on that route. Everything should now work as you would expect.
将mixin导入到包含共享元素 keep-alive路线上的任何组件中。 然后,在这些组件中,将$keepSharedElementAlive一种由mixin提供的方法)作为该路由上每个v-shared-element指令的选项传递。 现在一切都应该按预期工作。
Note: This is only necessary for routes that are kept alive. For example, if
/homeis kept alive but/aboutis not, then only/homeneeds to import the mixin.注意:这仅对于保持活动状态的路由是必需的。 例如,如果
/home保持活动状态,而/about保持活动状态,则仅/home需要导入mixin。
keep-alive examplekeep-alive例子
<template><div><imgsrc="logo.png"v-shared-element:logo="{ $keepSharedElementAlive }"/></div>
</template><script>
import { sharedElementMixin } from 'v-shared-element'export default {mixins: [sharedElementMixin]
}
</script>
选件 (Options)
Options can be applied globally (when you register the plugin) and/or on each individual shared-element.
选项可以全局(在注册插件时)和/或每个单独的共享元素上应用。
关于选项层次结构的注释 (A note on option hierarchy )
Per-element options always override global options.
每个元素的选项始终会覆盖全局选项。
Per-element options on the page being navigated away from take precedence.
导航页面上的逐元素选项优先。
includeChildrensince it applies to each element individually.includeChildren因为它分别适用于每个元素。
If you're navigating from
/hometo/about, per-element options specified in/homewill override those specified in/about.如果您要从
/home导航到/about,则/home指定的逐元素选项将覆盖/about指定的选项。
设置全局选项 (Setting global options)
// In main.js or ~/plugins/v-shared-element.client.js...Vue.use(SharedElementDirective, {/* options */
});...
设置每个元素的选项 (Setting per-element options)
<imgsrc="logo.png"v-shared-element:logo="{/* options */}"
/>
摘要 (Summary)
| option | type | default |
|---|---|---|
| easing |
string
|
"ease"
|
| duration |
string
|
"300ms"
|
| endDuration |
string
|
"150ms"
|
| zIndex |
number
|
1
|
| compositeOnly |
boolean
|
false
|
| includeChildren |
boolean
|
false
|
| ignoreTransparency |
boolean \| string[]
|
["img"]
|
| restrictToViewport |
boolean
|
false
|
| 选项 | 类型 | 默认 |
|---|---|---|
| 缓和 |
string
|
"ease"
|
| 持续时间 |
string
|
"300ms"
|
| endDuration |
string
|
"150ms"
|
| 索引 |
number
|
1
|
| 仅复合材料 |
boolean
|
false
|
| includeChildren |
boolean
|
false
|
| ignoreTransparency |
boolean \| string[]
|
["img"]
|
| strictToViewport |
boolean
|
false
|
细节 (Details)
缓和 (easing)
type:
string类型:
stringdefault:
"ease"默认值:
"ease"A CSS easing-function defining the acceleration curve of the transition (e.g.
"ease-in","cubic-bezier(.29, 1.01, 1, -0.68)").定义过渡的加速曲线CSS 缓动函数 (例如
"ease-in","cubic-bezier(.29, 1.01, 1, -0.68)")。
持续时间 (duration)
type:
string类型:
stringdefault:
"300ms"默认值:
"300ms"A CSS time denoting the amount of time the transition should take (e.g.
"0.5s","250ms").表示过渡所需时间CSS 时间 (例如
"0.5s","250ms")。
endDuration (endDuration)
type:
string | false类型:
string | falsestring | falsedefault:
"100ms"默认值:
"100ms"A CSS time denoting the duration of the "fade out" stage of the animation to blend the duplicated element with the real one. Set to
falseor"0s"to disable the fade out effect.一个CSS 时间,表示动画“淡出”阶段将重复元素与真实元素混合的持续时间。 设置为
false或"0s"以禁用淡入效果。Note: This option only applies if
includeChildrenisfalse.注意:仅当
includeChildren为false此选项才适用。
索引 (zIndex)
type:
number类型:
numberdefault:
1默认值:
1The
z-indexto be used for the shared-element during the animation.动画期间用于共享元素的
z-index。
仅复合材料 (compositeOnly)
type:
boolean类型:
booleandefault:
false默认值:
falseSetting this to
truewill limit the transition totransformandopacityproperties only (improves performance).将此设置为
true将仅限制转换到transform和opacity属性的transform(提高性能)。compositeOnly: true(notice thatborder-radiusis not animated)compositeOnly: true(注意,border-radius未设置动画)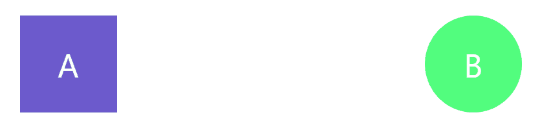
includeChildren (includeChildren)
type:
boolean类型:
booleandefault:
false默认值:
falsev-shared-elementworks by cloning each element (and its computed styles) then positioning the clones over the original element. By default, only the root node—the one that has the directive on it—will be cloned. SettingincludeChildrentotruewill also clone the root node's entire subtree (this is needed to clone text elements such ash1).v-shared-element工作原理是克隆每个元素(及其计算的样式 ),然后将克隆放置在原始元素上。 默认情况下,仅根节点(带有指令的根节点)将被克隆。 将includeChildren设置为true还将克隆根节点的整个子树(克隆文本元素(例如h1)需要此子树)。includeChildren: falseincludeChildren: false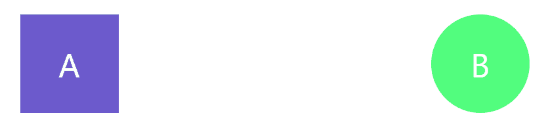
includeChildren: trueincludeChildren: true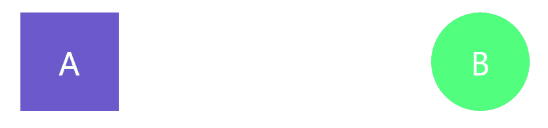
ignoreTransparency (ignoreTransparency)
type:
boolean | string[]类型:
boolean | string[]boolean | string[]default:
["img"]默认值:
["img"]Typically, if you're navigating from
/hometo/about, then the clone of the shared-element on/aboutwill fade in and the clone from/homewill remain atopacity: 1. However, if the shared-element on/homehas abackground-colorwith an alpha channel (e.g.rgba(0, 0, 0, 0.5)), or nobackground-colorat all, then the clone of the/homeelement will fade out while the clone of the element from/aboutfades in. This is usually what you want unless the element has a background thatv-shared-elementcan't detect. This could happen if the element is acting as a container for an<img>element but has no background of its own, or it has abackground-imagewithout abackground-colorspecified. In this case, settingignoreTransparencytotruewill override this behavior. You can also specify an array of HTML tag-names (e.g.["img", "div", "button"]) to automatically set this option totruefor those elements (astring[]like this is best used as a global option).通常情况下,如果你从导航
/home到/about,然后在共享元素的克隆/about将消失,并从克隆/home将保持在opacity: 1。 但是,如果/home上的共享元素具有带有alpha通道的background-color(例如rgba(0, 0, 0, 0.5)),或者根本没有background-color,则/home元素的克隆将淡出 而从元件的克隆/about在变淡。这通常是你想要的,除非该元素有一个背景下v-shared-element无法检测。 如果该元素充当<img>元素的容器但没有自己的background-image,或者它具有没有指定background-color的background-image,则可能发生这种情况。 在这种情况下,将ignoreTransparency设置为true将覆盖此行为。 您还可以指定HTML标记名的数组(例如["img", "div", "button"]),以将这些元素的此选项自动设置为true(像这样的string[]最好用作全局选项 )。Try setting this to
trueif you see a "flash" half-way through the transition.如果在过渡过程中看到“闪烁”,请尝试将其设置为
true。
strictToViewport (restrictToViewport)
type:
boolean类型:
booleandefault:
false默认值:
falseBy default, all shared-elements, with a matching element on the next page, will be activated when the route changes—regardless of their position in the document. With
restrictToViewportset totrue, only those elements which are in the viewport will be activated (those outside the viewport will behave as normal elements).默认情况下,更改路线时,无论其在文档中的位置如何,都会在下一页上激活所有具有匹配元素的共享元素。 将
restrictToViewport设置为true,只会激活视口中的那些元素(视口之外的那些元素将充当普通元素)。Recommended: Setting this to
truemakes navigation feel smoother. This setting is disabled by default to preserve backwards compatibility.推荐:将其设置为
true可使导航感觉更流畅。 默认情况下禁用此设置以保持向后兼容性。restrictToViewport: truerestrictToViewport: true
页面过渡的用法 (Usage with page transitions)
Thanks to @719media for figuring out how to make this work.
感谢@ 719media弄清楚如何进行这项工作。
This section assumes you have an understanding of Vue's transition component.
本部分假定您已了解Vue的过渡组件。
In your CSS
在您CSS中
.page-enter-active {transition: opacity 150ms ease 150ms;
}.page-leave-active {position: absolute;transition: opacity 150ms ease;
}.page-leave-to,
.page-enter {opacity: 0;
}
For Vue.js + vue-router
对于Vue.js + vue-router
// App.vue (or equivalent)<div id="app"><transitionname="page"@before-leave="beforeLeave"@after-leave="afterLeave"><router-view></router-view></transition>
</div><script>
export default {methods: {beforeLeave(el) {const {top} = el.getBoundingClientRect();el.style.position = "fixed";el.style.top = `${top}px`;el.style.left = 0;el.style.right = 0;el.style.zIndex = '-1';},afterLeave(el) {el.style.position = '';el.style.top = '';el.style.left = '';el.style.right = '';el.style.zIndex = '';}}
}
</script>
or
要么
For Nuxt.js
对于Nuxt.js
// nuxt.config.jsexport default {pageTransition: {name: 'page',mode: '',beforeLeave(el) {const {top} = el.getBoundingClientRect();el.style.position = "fixed";el.style.top = `${top}px`;el.style.left = 0;el.style.right = 0;el.style.zIndex = '-1';},afterLeave(el) {el.style.position = '';el.style.top = '';el.style.left = '';el.style.right = '';el.style.zIndex = '';}}
}
Important note about page transitions
有关页面过渡的重要说明
If the total duration of the page transition is longer than the duration of a shared-element on that page, things will get weird. You have been warned.
如果页面过渡的总持续时间长于该页面上共享元素的持续时间,那么事情将会变得很奇怪。 你被警告了。
虚幻 (illusory)
v-shared-element derives its element-morphing powers from its sister project illusory.
v-shared-element源自其姊妹项目幻觉的元素变形能力。
illusory comes bundled with v-shared-element as Vue instance methods. For more information on how to use it, see the illusory documentation or the illusory example page.
虚幻与v-shared-element捆绑在一起作为Vue实例方法。 有关如何使用它的更多信息,请参见虚幻的文档或虚幻的示例页面 。
illusory is exposed on the Vue instance as $illusory and $createIllusoryElement.
虚幻暴露在Vue的实例作为$illusory和$createIllusoryElement 。
For example:
例如:
<template><div><div ref="from"></div><div ref="to"></div><button @click="morph">Morph!</button></div>
</template><script>export default {methods: {morph() {this.$illusory(this.$refs.from, this.$refs.to)}}}
</script>
提出问题并报告错误 (Asking question and reporting bugs)
If you're experiencing any problems, or have general questions about the plugin, feel free open a new issue (but search through the existing ones first, as your question may have been answered already).
如果您遇到任何问题,或者对插件有一般性问题,请随时打开一个新问题(但请先搜索现有问题,因为您的问题可能已经回答了)。
Note that issues related to the
$illusoryand$createIllusoryElementshould be opened on the illusory repository instead.请注意,相关问题
$illusory和$createIllusoryElement应在打开虚幻库代替。
如何贡献 (How to contributing)
开发设置 (Development setup)
Fork and clone the repo.
分叉并克隆仓库。
$ git clone https://github.com/<your username>/v-shared-element.gitInstall the dependencies
安装依赖项
$ npm installCreate a new branch for your pull request
为您的拉取请求创建一个新分支
$ git checkout -b pr/your-branch-name
常见的NPM脚本 (Common NPM Scripts)
npm run build— Runs the build script.npm run build—运行构建脚本。npm run dev— Runs the build script in watch mode.npm run dev—在监视模式下运行构建脚本。npm run test— Runs the tests.npm run test—运行测试。npm run format— Fixes any code formatting issues.npm run format-修复任何代码格式化问题。npm run lint— Lints the code.npm run lint—减少代码。
开发网页 (Web page for development)
Run npm link so you can use it in other local projects.
运行npm link以便可以在其他本地项目中使用它。
Method one You can either create a new Vue.js or Nuxt.js project and use npm link v-shared-element to test your changes.
方法一您可以创建一个新的Vue.js或Nuxt.js项目,并使用npm link v-shared-element测试您的更改。
or
要么
Method two Clone the repo again, this time into a new directory. Then and run the following:
方法二再次克隆存储库,这次进入新目录。 然后运行以下命令:
$ git checkout example$ npm install$ npm link v-shared-element$ npm run devYou should now have the example page running on localhost. Hot reload will be triggered by changes made to v-shared-element.
现在,您应该在localhost上运行示例页面。 热重装将通过对v-shared-element进行更改来触发。
翻译自: https://vuejsexamples.com/declarative-shared-element-transitions-for-vue-js/
vue.js转换乘html
vue.js转换乘html_Vue.js的声明式共享元素转换相关推荐
- 函数式编程与声明式语言
原文链接:https://www.cnblogs.com/doit8791/p/8232821.html 编程语言可以分成两类: 命令式 声明式 事实上,凡是非命令式的编程都可归为声明式编程.因此,命 ...
- 【项目相关技术】前端由来、vscode安装使用、ECMAScript 6、Vue、element-ui、Node.js、npm、模块化、WebPack
前端开发的由来? vscode安装和使用 sda ①.下载地址:[https://code.visualstudio.com/](https://code.visualstudio.com/) sda ...
- vue前端表格插件_Grid.js - 跨框架的前端表格插件
只想简简单单画个表格,但 React,Vue,Angular,-,这么多前端框架,各自都有不同的表格渲染库.就没有表格库能"一次画表,到处运行"吗?来看看 Grid.js 这个跨框 ...
- js字符串替换_浅析Vue的生命周期以及JS异步
前言 Vue的生命周期和JS异步都是有很多文章的知识点,我之前也是一知半解,基本够用. 但是直到我在开发的时候真的遇到了问题,才发现如果不把这些知识点融汇到一起,很难解决实际问题. 我甚至觉得这是我离 ...
- Vue 脚手架中的.eslintrc.js代码规范 的解决
在我们使用Vue脚手架 创建项目时 尤其是团队共同开发项目时 会按照一个共同的代码规范来编程 创建Vue脚手架中有一个.eslintrc.js格式 但是在编程中我们通常会使用 shift+alt+f ...
- Vue中的Js动画与Velocity.js 的结合
<!DOCTYPE html> <html lang="en"> <head><meta charset="UTF-8" ...
- Ext JS 5的声明式事件监听
原文:Declarative Listeners in Ext JS 5 在前文<在Ext JS 5使用ViewControllers>中,简单的介绍了Ext JS 5的一项重要改进--声 ...
- 理解JS中的声明式与命令式
理解JS中的声明式与命令式? 声明式编程 :告诉机器你想要的是什么 让机器想出去做 优缺点 : 声明式减少了可变量(Immutable Variable)的声明,程序更为安全, 代码更加简洁 ...
- vue 引入qunee_Vue页面中js引入的问题
在项目中,我们需要引入qunee的编辑器graph.editor-master,在其中发现了一些引入js时需要注意的问题,在此书写,用来翻阅. 下载graph.editor的官方Demogit:htt ...
- Vue报错:sockjs.js?9be2:1627 GET http://192.168.43.88:8080/sockjs-node/info?t=1631603986586 net::ERR_CO
Vue报错:sockjs.js?9be2:1627 GET http://192.168.43.88:8080/sockjs-node/info?t=1631603986586 net::ERR_CO ...
最新文章
- Virtex-6中的SelectIO模块
- 使用ueditor实现多图片上传案例
- C/C++冷门知识点你知道多少呢?
- ASP.NET2.0 ObjectDataSource的使用详解
- 你要知道的MacOS哪些优缺点
- 实战经验:Oracle DG 的归档缺失修复
- (二)oracle的SGA
- 一周只指定一个主要目标,当主要目标完成时,就已经完成了任务的80%
- 测试开发字节跳动(二面),我被面试官按在地上摩擦!
- MySQL Workbench出现:Error Code: 2013. Lost connection to MySQL server during query的问题解决
- 经典算法:遗传算法(GA)
- Andorid 安卓接入支付宝支付(当面付)
- linux终端里面的光标很粗,怎么调细
- java对接支付宝当面付支付和查询
- 身份证号码组件:lt;idcardgt; —— 快应用组件库H-UI
- ETABS结构指标查看
- 基于数据挖掘的共享单车骑行数据分析与预测
- 编译原理实验一:词法分析程序设计与实现
- JSP——JSTL定制标签 - 递归标签显示属性结构
- ros与华为交换机 vlan配置思路及两种dhcp配置方法