vue 响应式布局组件_今天如何使用响应式Web组件
vue 响应式布局组件
A few years ago I started to hear a lot about Web Components. I got pretty excited and then totally forgot about them as the noise settled down. It turns out there has been some good movement and support is starting to increase. Responsive Web Components, in particular, are set to really simplify how we approach responsive design. As promising as this sounds, there are four questions many developers out there will want to know before they start using them today:
几年前,我开始听到很多有关Web组件的信息。 我非常兴奋,但随着噪音逐渐消失,他们完全忘记了它们。 事实证明,目前已有一些良好的运动,并且支持开始增加。 尤其是响应式Web组件旨在真正简化我们进行响应式设计的方式。 听起来如此有前途,但是许多开发人员在开始使用它们之前会想知道四个问题:
Will they…
他们会吗…
- Fit into the current state of the web?适合网络的当前状态?
- Work cross browser?使用跨浏览器?
- Adapt to fit the space they are dropped into?适应以适应他们掉进的空间?
- Promote modular code?推广模块化代码?
In this article, we will explore the answers to each of those questions!
在本文中,我们将探讨每个问题的答案!
什么是Web组件? (What Are Web Components?)
Essentially, they are a W3 specification that enables you to build your own HTML elements. If you literally don’t know anything about them it may be worth having a quick read up about them as some of the terms I use in the article require a basic understanding.
本质上,它们是W3规范,使您能够构建自己HTML元素。 如果您对它们一无所知,那么值得快速阅读一下,因为我在本文中使用的某些术语需要基本的理解。
我为什么要使用它们? (Why Would I Want To Use Them?)
A good example of when you might want to use Web Components would be when you are building UI that doesn’t exist natively in the browser — elements such as color pickers, carousels, accordions or typeaheads. Alternatively, you are likely to have some components that you use all the time across various sites that you are sick of rebuilding every time. These are things like social buttons, subscribe forms or notifications. With Web Components you can bundle up your markup, styles and scripts into encapsulated modules using HTML tags like <color-picker></color-picker> to reference them. This will seem familiar if you have used Angular directives or React components but the benefit here is that it is native to the browser and framework agnostic.
当您要构建浏览器本身不存在的UI时(例如颜色选择器,轮播,手风琴或预先键入),可以使用Web组件作为一个很好的例子。 另外,您很可能会在各个站点上经常使用某些组件,而您每次都想重建它们。 这些是社交按钮,订阅表单或通知之类的东西。 借助Web组件,您可以使用HTML标签(例如<color-picker></color-picker>将标记,样式和脚本捆绑到封装的模块中,以引用它们。 如果您使用过Angular指令或React组件,这似乎很熟悉,但是这样做的好处是,它对于浏览器和框架无关。
Web Components enable you to build pieces of UI once and use them everywhere. This is ideal for projects like a living styleguide where you want to build a library with a single source of truth for each of your components. This approach means repeating less code and having portable components that you or your team can simply drop references to into your interface.
Web组件使您可以一次构建UI并将其在任何地方使用。 对于像生活风格指南这样的项目,它是一个理想的项目,在该项目中,您想为每个组件的单个事实来源建立一个库。 这种方法意味着减少重复的代码,并拥有可移植的组件,您或您的团队可以简单地将引用插入到您的界面中。
Another big advantage of using Web Components is the ability to package these components up and share them with other developers or website owners. Essentially, the consumer can put an import statement in their web page such as:
使用Web组件的另一个主要优点是能够打包这些组件并将其与其他开发人员或网站所有者共享。 从本质上讲,消费者可以在其网页上放置一个导入语句,例如:
<link rel="import"
href="http://url.com/subscribe-form.html">
Then use the custom element tag you’ve defined in that component. With this imported into their webpage, they can have as many instances of the custom component on their page as they wish. In the subscribe form example, we could use the tag <subscribe-form></subscribe-form> in multiple locations on the page. Of course, if you are doing this, you need to ensure that the beautiful component you have crafted is extremely flexible and will work across a range of devices and screen sizes.
然后使用您在该组件中定义的自定义元素标签。 将其导入到他们的网页后,他们可以在其页面上根据需要拥有任意数量的自定义组件实例。 在订阅表单示例中,我们可以在页面上的多个位置使用标签<subscribe-form></subscribe-form> 。 当然,如果要这样做,则需要确保精心制作的精美组件非常灵活,并且可以在各种设备和屏幕尺寸上使用。
将这些坏男孩变成响应式Web组件 (Turning These Bad Boys Into Responsive Web Components)
I feel the best way to demonstrate is by example, so I’ll continue with the subscribe form which is a common piece of UI that doesn’t change much between different sites and implementations.
我觉得最好的演示方法是通过示例,所以我将继续使用订阅表单,这是一种常见的UI,在不同的站点和实现之间不会有太大变化。
Here’s one I made earlier:
这是我之前做的:
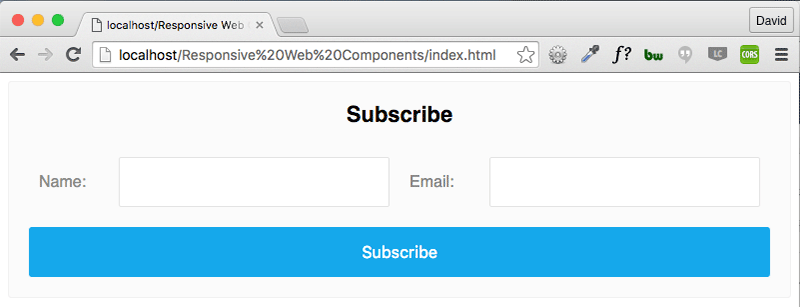
Inside my Web Component template I have some basic markup for the form.
在我的Web组件模板中,我有一些基本的表单标记。
<ul class="form">
<li class="form__item">
<label for="name">Name:</label>
<input id="name" name="name" type="text">
</li>
<li class="form__item">
<label for="name">Email:</label>
<input id="name" name="name" type="text">
</li>
</ul>
My markup and CSS are tucked away inside my component making use of the Shadow DOM part of the specification. This gives me encapsulation, allowing me to use label and input selectors freely in my code without worry of other styles bleeding in or mine bleeding out into the parent site.
利用规范的Shadow DOM部分,我的标记和CSS被隐藏在组件内部。 这给了我封装性,使我可以在代码中自由使用label和input选择器,而不必担心其他样式渗入或渗入父站点。
For clarity and brevity, I’m not going to write out the styles other than ones used for layout. I’ve used a combination of float: left and display: table to achieve this layout to prevent breaking in any widths.
为了清楚和简洁起见,我将不写除用于布局的样式以外的其他样式。 我使用了float: left和display: table来实现此布局,以防止以任何宽度折断。
.form__item {
display: table;
float: left;
width: 50%;
}
label {
display: table-cell;
width: auto;
}
input {
display: table-cell;
width: 100%;
}
I’ll be using HTML imports to pull it into the SitePoint site as a demonstration:
我将使用HTML导入将其拉入SitePoint网站作为演示:
Now we’re all set up, let’s look at some responsive techniques.
现在我们都完成了,让我们看一些响应技术。
媒体查询 (Media Queries)
The classic approach that we know and love is still alive and well inside Responsive Web Components. These can be applied inside your template when you code your component if you want to bake in some breakpoints, or you can apply a hook (for example, by using a class) to the container if you want to leave that decision to your consumer. In this case, all we need to do is strip the floats and adjust them to be full width.
在响应式Web组件中,我们知道和喜欢的经典方法仍然有效。 如果您要在某些断点处进行烘焙,则可以在对组件进行编码时将其应用于模板中,或者,如果您要将该决定留给使用者,则可以对容器应用一个钩子(例如,通过使用类)。 在这种情况下,我们要做的就是去除浮子并将其调整为全宽。
@media (max-width: 30em) {
.form__item {
float: none;
width: 100%;
}
}
However, media queries aren’t going to be enough to save us this time.
但是,媒体查询不足以挽救我们这次的时间。
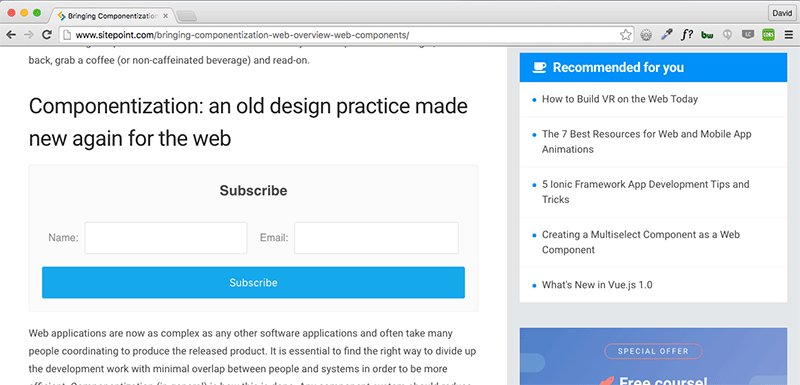
I’m happy with my sign up form styles and it works fine in the body, but what happens when the website author wants to chuck it into their sidebar? Suddenly my form looks squashed and isn’t really usable.
我对我的注册表单样式感到满意,并且可以很好地工作,但是当网站作者希望将其插入到侧边栏时会怎样? 突然,我的表单看起来很紧缩,并没有真正可用。
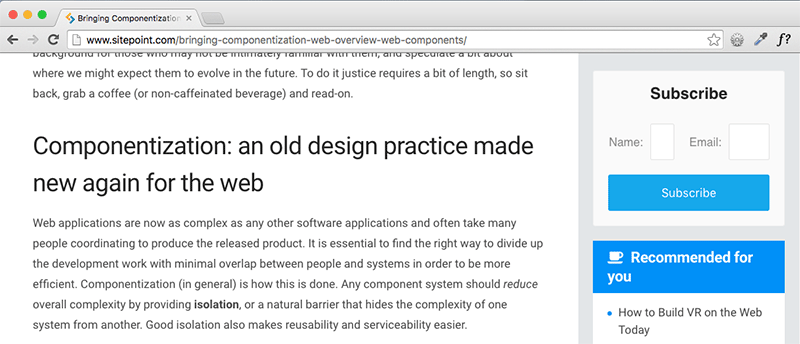
This is because the component is not aware of its boundaries – it has no context.
这是因为该组件不知道其边界-它没有上下文。
The whole point of Web Components is you can drop them anywhere and they’ll just work right? So obviously this won’t do, but there are a few techniques you can use to ensure your components are responsive and contextual.
Web组件的全部要点是您可以将它们放到任何地方,它们会正常工作吗? 因此显然这是行不通的,但是您可以使用一些技术来确保您的组件具有响应能力和上下文相关性。
Flexbox欺骗 (Flexbox Trickery)
If you’re looking at using Web Components, odds are you’re only supporting modern browsers and not worrying about IE9, in which case, a bit of Flexbox magic might be perfect for you to turn these into Responsive Web Components. This is my preferred approach as it doesn’t require any additional JavaScript.
如果您正在使用Web组件,很可能只支持现代浏览器,而不必担心IE9,在这种情况下,一些Flexbox魔术可能非常适合您将它们变成响应式Web组件。 这是我的首选方法,因为它不需要任何其他JavaScript。
Once again, the code sample here is purely showing the layout styles I’ve used:
再次,这里的代码示例纯粹显示了我使用的布局样式:
.form {
display: flex;
flex-wrap: wrap;
}
.form__item {
align-items: center;
display: flex;
flex: 1 0 320px;
flex-wrap: wrap;
max-width: 100%;
}
label {
flex: 1 0 90px;
}
input {
flex: 1 0 230px;
width: 100%;
}
By setting the container to display: flex; flex-wrap: wrap, the .form__item elements will appear side-by-side, but we still need to make a few adjustments so that when the container gets too small they will stack nicely.
通过将容器设置为display: flex; flex-wrap: wrap display: flex; flex-wrap: wrap , .form__item元素将并排显示,但是我们仍然需要进行一些调整,以便当容器变得太小时,它们可以很好地堆叠。
Inside the .form__item, I’ve used the flex shorthand of flex: 1 0 320px; which translates in flex terms to — grow of one, flex shrink of zero, and flex basis of 320 pixels. Having flex-wrap set to wrap means it won’t be any smaller than the basis we set (320px) but setting it to flex means it will take up the rest of the available space.
在.form__item内部,我使用了flex的flex缩写flex: 1 0 320px; 以flex的术语表示为-增长1,flex缩小为0,flex基础为320像素。 将flex-wrap设置为wrap意味着它不会小于我们设置的基础(320像素),但是将其设置为flex意味着它将占用剩余的可用空间。
I have given a similar treatment to the label and input elements. Their combined flex values total 320, which means they will behave as desired at smaller container sizes.
我对label和input元素进行了类似的处理。 它们的组合弯曲值总计为320,这意味着它们在较小的容器尺寸下将表现出所需的性能。
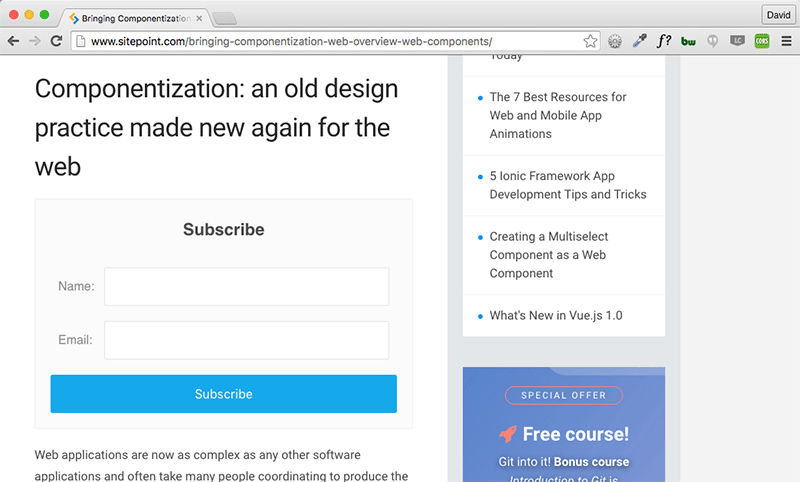
With these adjustments in place, let’s take a look at that same form in SitePoint’s sidebar:
完成这些调整后,让我们看一下SitePoint侧栏中的相同表格:
Much better! However, there is more than one way to skin a cat.
好多了! 但是,有多种方法可以给猫皮化。
元素查询 (Element Queries)
The idea of element queries is that you are able to emulate media query type functionality but at a component level — very handy for Responsive Web Components. Essentially, imagine being able to write something like this in your CSS:
元素查询的想法是,您可以在组件级别上模拟媒体查询类型的功能-对于响应式Web组件非常方便。 本质上,想象一下能够在CSS中编写如下代码:
.form__item[max-width~="30em"] {
/* Styles here */
}
With element queries that is exactly what we can do. Pretty powerful right?
使用元素查询正是我们可以做的。 很强大吧?
Unfortunately, this technique isn’t available natively due to browser vendors being concerned with the potential to cause infinite loops. However, some smart people have written plugins to enable this functionality.
不幸的是,由于浏览器供应商担心引起无限循环的可能性,因此无法自然使用该技术。 但是,一些聪明人编写了插件来启用此功能。
In my example, I have used CSS Element Queries by Marc J Schmidt which is a really nice implementation. There are also the following similar projects:
在我的示例中,我使用了Marc J Schmidt的 CSS元素查询 ,这是一个非常不错的实现。 也有以下类似的项目:
Elementary
初级
Element Query
元素查询
EQ.js
EQ.js
Essentially what they do is use JavaScript to detect the width of the component and modify an attribute so that you are able to style it in CSS. Some are event driven and some based on resize.
本质上,他们所做的是使用JavaScript检测组件的宽度并修改属性,以便您可以在CSS中对其进行样式设置。 有些是事件驱动的,有些则基于调整大小。
.form__item[max-width~="30em"] {
float: none;
width: 100%;
}
With the combination of one of these plugins and a small code snippet similar to the above we are able to get the exact same result as the flexbox implementation in the sidebar.
通过将这些插件之一和类似于上面的一小段代码相结合,我们可以在边栏中获得与flexbox实现完全相同的结果。
属性 (Attributes)
One of the cool things we can offer to consumers of our Responsive Web Components is an API via attributes. For example, you could set up a attribute called layout and have sizes of “small” and “large”. Our consumer of the component could then use it as follows:
我们可以为响应式Web组件的消费者提供的很酷的功能之一就是通过属性的API。 例如,您可以设置一个名为layout的属性,其大小分别为“小”和“大”。 然后,我们的组件使用者可以按以下方式使用它:
<subscribe-form layout="small"></subscribe-form>This would trigger the styles for the small implementation.
这将触发小型实现的样式。
In the Shadow DOM, the containing element is known as the :host. An example could look like so:
在Shadow DOM中,包含元素称为:host 。 一个示例如下所示:
:host {
display: block;
}
:host([layout = "small"]) .form__item {
float: none;
width: 100%;
}
:host([layout = "large"]) .form__item {
display: table;
float: left;
width: 50%;
}
This would then allow the component consumer to write some simple JavaScript to flip between the different sizes that you’ve provided them. This means instead of loading additional JavaScript inside of your module, you can leave it up to the consumer to decide how they want to hook into it. This allows your component to become more future proof.
然后,这将允许组件使用者编写一些简单JavaScript,以在您提供的不同大小之间切换。 这意味着您无需将其他JavaScript加载到模块中,而应由使用者自行决定如何挂钩。 这使您的组件变得更适合将来使用。
自己尝试! (Try It Yourself!)
If you’re interested in seeing the flexbox version I refer to in this demo in action on your own machine, you can do the following in Chrome:
如果您有兴趣在自己的计算机上查看本演示中提到的flexbox版本,可以在Chrome中执行以下操作:
Install the CORS Chrome extension and turn it on. This is to allow HTML Imports to work from external sites.
安装CORS Chrome扩展程序并将其打开。 这是为了允许HTML导入从外部站点进行。
- Either refresh this page or open any website in a new tab or window so the extension kicks in.刷新此页面或在新标签页或窗口中打开任何网站,以便扩展程序启动。
In Chrome developer tools, add this inside the
<head>tag:在Chrome开发人员工具中,将此添加到
<head>标记内:<link rel="import" href="http://wsh.webfactional.com/web_components/components/ cm-subscribe-form--flex.html">Finally, add:
最后,添加:
<cm-subscribe-form-flex></cm-subscribe-form-flex>somewhere inside the
<body>and you should see my subscribe form auto-magically pulled through. Enjoy!<body>内的某个位置,您应该会看到我的订阅表单自动神奇地通过。 请享用!
结论 (Conclusion)
The approaches above can actually be used for any UI development but they lend themselves particularly well to Responsive Web Components due to their reusable and shareable nature.
上面的方法实际上可以用于任何UI开发,但是由于它们具有可重用和可共享的特性,因此特别适合于响应式Web组件。
If you haven’t checked out Web Components yet I would strongly encourage you to do so. While the full spec is currently only available natively in Chrome and Opera, the other browser vendors aren’t far behind.
如果您尚未签出Web组件,我强烈建议您这样做。 虽然完整规范目前仅在Chrome和Opera中本地提供,但其他浏览器供应商也不甘落后 。
If you’re interesting in learning more about Responsive Web Design, check out our new book, Jump Start Responsive Web Design, written by Chris Ward.
如果您有兴趣学习有关响应式Web设计的更多信息,请查看克里斯·沃德(Chris Ward)撰写的新书《快速入门响应式Web设计》 。
翻译自: https://www.sitepoint.com/responsive-web-components/
vue 响应式布局组件
vue 响应式布局组件_今天如何使用响应式Web组件相关推荐
- 响应式轮播_角度2的响应式轮播组件
响应式轮播 Update (March 22, 2016): Provided a Demo Link which is available on PlunkerUpdate (March 21, 2 ...
- html 响应式布局 九宫格,两种方法实现响应式九宫格布局
html布局以及基础样式代码如下 响应式九宫格 html, body { color:#222; margin:0; padding: 0; text-decoration: none; } ul { ...
- html手机响应式布局,手机网页设计中的响应式布局
随着各种特性和智能手机浏览器的发展,网页能够根据设备显示变得很重要.我们不用再根据桌面浏览器窗口尺寸建立网站,然后让它们在更小的移动浏览器上渲染.现在,我们可以让元素大小和布局针对设备作出改变. 在C ...
- html页面的响应式布局,HTML+CSS十分钟实现响应式布局页面,响应式布局实战教程...
承蒙各位小伙伴的支持,鄙人有幸入围了<CSDN 2020博客之星>的前200名,现在进入投票环节,如果我平时写的文章和分享对你有用的话,请每天点击一下这个链接,投上你们宝贵的一票吧!谢谢! ...
- 在html中写响应式布局的代码,手机端自适应响应式框架,移动端响应式布局代码...
移动端自适应框架,响应式布局,如何实现移动端不同分辨率的手机?在本文能够详解,响应式布局是HTML5和css的结合是必然,但是很多朋友不知道怎么实现不同分辨率下的手机端,自适应框架在本站也有,但是具体 ...
- apollo配置中心的组件_如何使用Apollo的全新查询组件来管理本地状态
apollo配置中心的组件 Note: This article deals with utilizing Apollo's brand new Query and Mutation componen ...
- 编写react组件_如何编写第一个React.js组件
编写react组件 React的函数和类组件,道具,状态和事件处理程序 (React's function and class components, props, state, and event ...
- 添加组件_苹果ios14怎么添加删除小组件 小组件叠放添加设置教程
苹果ios14怎么添加删除小组件 小组件叠放添加设置教程 iOS14最吸引人的功能莫过于小组件,可以根据需求添加自己想要的功能,简单易用,系统功能得到改善和提升,让iOS使用更加便捷. iOS14小组 ...
- 响应已被截断_技术:RWD响应式网站网页设计基本原则
响应式网站网页设计 RWD响应式网站网页设计对于解决多尺寸屏幕问题是个很好的解决方案,从平面的角度切入需克服很多困难,没有固定的页面尺寸.没有毫米或英寸,没有任何限制会让人感到无从下手.随着建立网站的 ...
- java响应式网页设计_基于HTML5的响应式网站的设计与实现(论文).docx
毕业论文 基于HTML5的响应式网站的设计与实现 摘 要 随着网络的发展和普及,各类建站技术的更新与运用,现在搭建一个网站的时间和成本越来越低,使得企业官方网站得到了极大的发展.从早期简单的网页展示, ...
最新文章
- 发现服务内存中free部分很小,available部分很大,应该怎么办
- 360全景html插件,jquery实现360度全景展示特效插件
- Dom 学习总结及其实例
- 为什么不让安装卫xing×××啊
- C#自动弹出窗口并定时自动关闭
- 百度希壤元宇宙平台上线首个汽车数字展厅 领克探索汽车营销新方式
- sass 安装配置和使用
- python 港股交易数据_GitHub - 116pythonZS/futuquant: 富途量化平台 API
- 2005年度国产空间信息系统软件测评
- LeetCode 1219. 黄金矿工(回溯)
- ef mysql不显示所有表_mysql中显示当前数据库下的所有表,包括视图。
- 恐怖谷与深度爵士:计算机艺术能达到人类的高峰吗
- NutUI 2.1.0 发布,移动端轻量级 Vue 组件库
- android按钮点击后闪退_iphone闪退是什么原因?
- Mobilenet-ssd 目标检测
- md5加密算法~Java语言实现
- java生成word目录_Apache POI自动生成Word文档(带目录)
- {嵌入式}之TQ2440(天嵌)小记
- python的seaborn用于可视化分析_Python数据分析-可视化“大佬”之Seaborn
- 创业者必学的六种植物[转]