扩展CKEditor按钮
最近忙于开发工作流,想起之前开发的OA ,缺少一个重要的功能:表单设计器。因为我们的OA是基于Sharepoint开发的,如果没有表单设计器,定义一个列表的界面需要开发一个feature,或则需要VS开发一个aspx页面。这事一个很麻烦的事情。所以考虑实现一个表单设计器。
于是我到网上找HTML 编辑器,找到好几个,分别有CKEditor,TinyMCE,还有一个基于JQuery的一个编辑器XHEditor。这几个编辑器我就不做比较了。我这里选择使用CKEditor。既然要做表单设计器,我们的需要扩展这HTML编辑器,CKEditor提供了方便可扩展的插件体系,我们可以很方便的自定义一些自己的插件。这只介绍概述CKEditor插件开发。
首先我们到http://ckeditor.com/download下载CKEditor,这里我使用的是CKEditor 3.6。解压后目录如下:
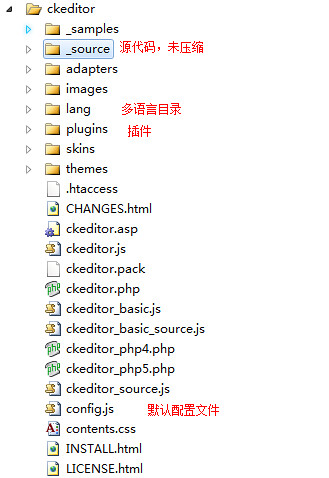
CKEditor的源码存放在_source目录下面,根目录下面的ckeditor.js是经过压缩的代码。Dom元素操作,事件处理,初始化脚本和其他一些环境设置都在ckeditor\_souce\core目录下面。其他功能,如格式化,复制粘贴,图片和链接都是以插件的形式实现的,存放在ckeditor\_source\plugins文件夹下面,每一个文件夹为一个插件。每个文件夹下面都有一个plugin.js的脚本文件。
为了减少HTML 请求数量,CKEditor压缩并打包成ckeditor.js 和ckeditor_basic.js。默认运行压缩后的ckeditor。在开发过程中,如果你想运行未压缩的源码,则把ckeditor.js替换成ckeditor_source.js就可以了。
我们以Hello World插件为例子。呵呵。在plugins目录下面新建一个HelloWorld文件夹,并在下面建立一个plugin.js文件。
插件配置
要CKEditor能够调用我们开发的插件,我们需要在CKEditor注册我们开发的插件。打开根目录下面的config.js。设置CKEDITOR.editorConfig属性
config.extraPlugins = 'HelloWorld';
完整的代码如下:
CKEDITOR.editorConfig = function( config )
{
// Define changes to default configuration here. For example:
// config.language = 'fr';
// config.uiColor = '#AADC6E';
config.extraPlugins = 'HelloWorld';
};
这样CKEditor会从Plugin文件夹找HelloWorld文件夹下面的plugin.js,并加载插件。
工具栏按钮
我们需要在CKEditor的工具栏上加入HelloWorld的按钮。单击按钮出发一个命令。命令可以触发一个事件,或调用方法。我们通过CKEDITOR.plugins.add方法来添加插件。
CKEDITOR.plugins.add('HelloWorld', {
init: function (editor) {
var pluginName = 'HelloWorld';
CKEDITOR.dialog.add(pluginName, this.path + 'dialogs/HelloWorld.js');
editor.addCommand(pluginName, new CKEDITOR.dialogCommand(pluginName));
editor.ui.addButton(pluginName,
{
label: 'Hello',
command: pluginName
});
}
});
上面代码中,我们添加了一个HelloWorld的按钮,和HelloWorld的命令。
通过方法editor.ui.addButton添加一个按钮,这个方法有两个参数。一个是按钮的名字,另外一个是按钮的定义。
定义有以下几个属性:
label:当鼠标移动到按钮上面是提示此文本信息。
className:样式名,默认是'cke_button_' + command
click:按钮的单击事件出发的方法。如果没有实现单击事件,则执行指定key的命令。
command:按钮单击默认执行的命令。
下面是按钮的部分源码。
CKEDITOR.ui.button = function( definition )
{
// Copy all definition properties to this object.
CKEDITOR.tools.extend( this, definition,
// Set defaults.
{
title : definition.label,
className : definition.className || ( definition.command && 'cke_button_' + definition.command ) || '',
click : definition.click || function( editor )
{
editor.execCommand( definition.command );
}
});
this._ = {};
};
editor表示一个编辑器的实例。通过调用其addCommand(commandName, commandDefinition) 方法,来添加命令。我们实例化了一个CKEDITOR.dialogCommand,此命令继承至CKEDITOR.commandDefinition,该命令执行时打开一个特定的对话框。我们现在把这个按钮加入到ToolBar里,修改Config.js。
CKEDITOR.editorConfig = function (config) {
// Define changes to default configuration here. For example:
// config.language = 'fr';
// config.uiColor = '#AADC6E';
config.toolbar =
[
{ name: 'document', items: ['Source', '-', 'Save', 'NewPage', 'DocProps', 'Preview', 'Print', '-', 'Templates'] },
{ name: 'clipboard', items: ['Cut', 'Copy', 'Paste', 'PasteText', 'PasteFromWord', '-', 'Undo', 'Redo'] },
{ name: 'editing', items: ['Find', 'Replace', '-', 'SelectAll', '-', 'SpellChecker', 'Scayt'] },
{ name: 'forms', items: ['Form', 'Checkbox', 'Radio', 'TextField', 'Textarea', 'Select', 'Button', 'ImageButton', 'HiddenField'] },
'/',
{ name: 'basicstyles', items: ['Bold', 'Italic', 'Underline', 'Strike', 'Subscript', 'Superscript', '-', 'RemoveFormat'] },
{ name: 'paragraph', items: ['NumberedList', 'BulletedList', '-', 'Outdent', 'Indent', '-', 'Blockquote', 'CreateDiv', '-', 'JustifyLeft', 'JustifyCenter', 'JustifyRight', 'JustifyBlock', '-', 'BidiLtr', 'BidiRtl'] },
{ name: 'links', items: ['Link', 'Unlink', 'Anchor'] },
{ name: 'insert', items: ['Image', 'Flash', 'Table', 'HorizontalRule', 'Smiley', 'SpecialChar', 'PageBreak', 'Iframe'] },
'/',
{ name: 'styles', items: ['Styles', 'Format', 'Font', 'FontSize'] },
{ name: 'colors', items: ['TextColor', 'BGColor'] },
{ name: 'tools', items: ['Maximize', 'ShowBlocks', '-', 'About'] },
'/',
{ name: 'extent', items: ['HelloWorld'] }
];
config.extraPlugins += (config.extraPlugins ? ',HelloWorld' : 'HelloWorld');
};
注释:’/’表示换行,’-‘标识分隔符 。
config.toolbar的默认值是Full。Full的菜单有哪些呢?打开ckeditor\_source\plugins\toolbar\plugin.js查看toolbar_Full的定义。
CKEDITOR.config.toolbar_Full =
[
{ name: 'document', items : [ 'Source','-','Save','NewPage','DocProps','Preview','Print','-','Templates' ] },
{ name: 'clipboard', items : [ 'Cut','Copy','Paste','PasteText','PasteFromWord','-','Undo','Redo' ] },
{ name: 'editing', items : [ 'Find','Replace','-','SelectAll','-','SpellChecker', 'Scayt' ] },
{ name: 'forms', items : [ 'Form', 'Checkbox', 'Radio', 'TextField', 'Textarea', 'Select', 'Button', 'ImageButton', 'HiddenField' ] },
'/',
{ name: 'basicstyles', items : [ 'Bold','Italic','Underline','Strike','Subscript','Superscript','-','RemoveFormat' ] },
{ name: 'paragraph', items : [ 'NumberedList','BulletedList','-','Outdent','Indent','-','Blockquote','CreateDiv','-','JustifyLeft','JustifyCenter','JustifyRight','JustifyBlock','-','BidiLtr','BidiRtl' ] },
{ name: 'links', items : [ 'Link','Unlink','Anchor' ] },
{ name: 'insert', items : [ 'Image','Flash','Table','HorizontalRule','Smiley','SpecialChar','PageBreak','Iframe' ] },
'/',
{ name: 'styles', items : [ 'Styles','Format','Font','FontSize' ] },
{ name: 'colors', items : [ 'TextColor','BGColor' ] },
{ name: 'tools', items : [ 'Maximize', 'ShowBlocks','-','About' ] }
];
那么我们可以模仿来定义Mine的ToolBar。再次编辑config.js。
CKEDITOR.editorConfig = function (config) {
// Define changes to default configuration here. For example:
// config.language = 'fr';
// config.uiColor = '#AADC6E';
config.toolbar_Mine =
[
{ name: 'document', items: ['Source', '-', 'Save', 'NewPage', 'DocProps', 'Preview', 'Print', '-', 'Templates'] },
{ name: 'clipboard', items: ['Cut', 'Copy', 'Paste', 'PasteText', 'PasteFromWord', '-', 'Undo', 'Redo'] },
{ name: 'editing', items: ['Find', 'Replace', '-', 'SelectAll', '-', 'SpellChecker', 'Scayt'] },
{ name: 'forms', items: ['Form', 'Checkbox', 'Radio', 'TextField', 'Textarea', 'Select', 'Button', 'ImageButton', 'HiddenField'] },
'/',
{ name: 'basicstyles', items: ['Bold', 'Italic', 'Underline', 'Strike', 'Subscript', 'Superscript', '-', 'RemoveFormat'] },
{ name: 'paragraph', items: ['NumberedList', 'BulletedList', '-', 'Outdent', 'Indent', '-', 'Blockquote', 'CreateDiv', '-', 'JustifyLeft', 'JustifyCenter', 'JustifyRight', 'JustifyBlock', '-', 'BidiLtr', 'BidiRtl'] },
{ name: 'links', items: ['Link', 'Unlink', 'Anchor'] },
{ name: 'insert', items: ['Image', 'Flash', 'Table', 'HorizontalRule', 'Smiley', 'SpecialChar', 'PageBreak', 'Iframe'] },
'/',
{ name: 'styles', items: ['Styles', 'Format', 'Font', 'FontSize'] },
{ name: 'colors', items: ['TextColor', 'BGColor'] },
{ name: 'tools', items: ['Maximize', 'ShowBlocks', '-', 'About'] },
'/',
{ name: 'extent', items: ['HelloWorld'] }
];
config.toolbar = 'Mine';
config.extraPlugins += (config.extraPlugins ? ',HelloWorld' : 'HelloWorld');
};
我们运行下,查看下效果 。

这个按钮已经出来了。可惜没有图片。在HelloWorld的插件目录下面新增一文件夹images,添加一个16*16的图标。
修改ckeditor\_source\plugins\HelloWorld\plugin.js。
CKEDITOR.plugins.add('HelloWorld', {
init: function (editor) {
var pluginName = 'HelloWorld';
CKEDITOR.dialog.add(pluginName, this.path + 'dialogs/HelloWorld.js');
editor.addCommand(pluginName, new CKEDITOR.dialogCommand(pluginName));
editor.ui.addButton(pluginName,
{
label: 'Hello',
command: pluginName,
icon: this.path + 'images/hello.png'
});
}
});
Dialogs:
Dialog是开发插件的关键,在前面我们使用CKEDITOR.dialog.add方法添加了一个对话框。 有两个参数。一个是对话框名,一个对话框定义。
然后我们还添加了一个dialog命令。这个命令会打开我们的dialog。
editor.addCommand(pluginName, new CKEDITOR.dialogCommand(pluginName));
我们的对话框定义放在ckeditor\_source\plugins\HelloWorld\dialogs\HelloWorld.js。
(function () {
function HelloWorldDialog(editor) {
return {
title: '对谁说Hello',
minWidth: 300,
minHeight: 80,
buttons: [{
type: 'button',
id: 'someButtonID',
label: 'Button',
onClick: function () {
alert('Custom Button');
}
},
CKEDITOR.dialog.okButton,
CKEDITOR.dialog.cancelButton],
contents:
[
{
id: 'info',
label: '名字',
title: '名字',
elements:
[
{
id: 'text',
type: 'text',
style: 'width: 50%;',
label: '名字',
'default': '',
required: true,
validate: CKEDITOR.dialog.validate.notEmpty('名字不能为空'),
commit: function () {
var text = ‘Hello ’+this.getValue();
alert(text);
}
}
]
}
],
onLoad: function () {
alert('onLoad');
},
onShow: function () {
alert('onShow');
},
onHide: function () {
alert('onHide');
},
onOk: function () {
this.commitContent();
},
onCancel: function () {
alert('onCancel');
},
resizable: CKEDITOR.DIALOG_RESIZE_HEIGHT
};
}
CKEDITOR.dialog.add('HelloWorld', function (editor) {
return HelloWorldDialog(editor);
});
})();
详细的Dialog定义,可以查看 http://docs.cksource.com/ckeditor_api/symbols/CKEDITOR.dialog.definition.html。这里介绍几个属性:
title:窗体的标题
minWidth:窗体最小的宽度
minHeight:窗体的最小高度
buttons:显示在窗体的按钮。默认CKEDITOR.dialog.okButton,CKEDITOR.dialog.cancelButton。也就是确定,和取消按钮。也可以自己定义一个Button。
{
type: 'button',
id: 'someButtonID',
label: 'Button',
onClick: function () {
alert('Custom Button');
}
}
这里创建了 CKEDITOR.dialog.definition.button对象。
contents:对话框里面的内容。是一个 CKEDITOR.dialog.definition.content数组。每一个CKEDITOR.dialog.definition.content显示为一个tab(选项卡)。这里有一个重要的属性是elements,是一个 CKEDITOR.dialog.definition.uiElement数组,是每一个选项卡里面的内容。uiElement中有commit方法,这个方法由对话框CKEDITOR.dialog.definition.commitContent方法调用执行。
commit: function () {
var text = ‘Hello ’+this.getValue();
alert(text);
}
这里我们调用CKEDITOR.ui.dialog.uiElement的getValue方法来获取到名字文本框的值。这里只是alert,稍后在改进怎么把值加入到设计器里面。
还有一个是setup方法,则由CKEDITOR.dialog.definition.setupContent方法调用执行。
type:有以下几个值。text, password, textarea, checkbox, button, select, file, fileButton, html
labelLayout:'horizontal' 或则'vertical'。
on*: 定义事件方法。事件可以是Dom事件,例如onChange,onClick,也可以是onShow,onHide,onLoad。
validate:验证用户的输入。例如:验证值不能为空。validate : CKEDITOR.dialog.validate.notEmpty(ErrorMessage)。当单击btnOk按钮,如果值为空,则会弹出ErrorMessage信息来提示。你还可以用其他的验证方法来验证输入:
- regex(regex, msg)
- notEmpty(msg)
- integer(msg) //regex: /^\d*$/
- number(msg) //regex: /^\d*(?:\.\d+)?$/
- equals(value, msg)
- notEqual(value, msg)
onLoad,onShow,onHide,onOk,onCancel这几个方法看字面意思就知道干嘛的了。就不多介绍了。我们这里当onOk,就是确定按钮单击的时候,执行了commitContent方法,从而执行了CKEDITOR.dialog.definition.uiElement.commit方法。
resizable:一个枚举。用于修改窗体的大小,是否可以修改高度,宽度,还是两者都可以。有以下几个定义。默认值是CKEDITOR.DIALOG_RESIZE_NONE。
CKEDITOR.DIALOG_RESIZE_NONE
CKEDITOR.DIALOG_RESIZE_WIDTH
CKEDITOR.DIALOG_RESIZE_HEIGHT
CKEDITOR.DIALOG_RESIZE_BOTH那现在在来运行看看效果:

单击确定按钮则弹出Hello 某某某。当然我们不想这样Alert。我们希望能够把Hello 某某某写到编辑器里面。
这里我们用到了CKEDITOR.dom.element对象。这对象里面包含了很多对编辑器DOM操作的方法。如我们要创建一个span元素。var element = new CKEDITOR.dom.element('span', editor.document);。我们需要设置值则调用setText方法等。
那我们修改刚刚做好的dialot。(function () {function HelloWorldDialog(editor) {return {title: '对谁说Hello',minWidth: 300,
minHeight: 80,
buttons: [
CKEDITOR.dialog.okButton,
CKEDITOR.dialog.cancelButton],
contents:
[
{id: 'info',label: '名字',title: '名字',elements:
[
{id: 'text',type: 'text',style: 'width: 50%;',label: '名字','default': '',required: true,validate: CKEDITOR.dialog.validate.notEmpty('名字不能为空'),commit: function (editor) {var text = 'Hello '+this.getValue();var element = new CKEDITOR.dom.element('span', editor.document);
element.setText(text);
editor.insertElement(element);
}
}
]
}
],
onOk: function () {this.commitContent(editor);},
resizable: CKEDITOR.DIALOG_RESIZE_HEIGHT
};
}
CKEDITOR.dialog.add('HelloWorld', function (editor) {return HelloWorldDialog(editor);});
})();
在单击OK按钮后,我们调用commit方法。我们传了一个当前编辑器的实例过去。
首先我们实例化了一个CKEDITOR.dom.elemtn。设置了它的Text,并通过insertElement方法把元素加入到编辑器。就这样。我们在看看效果。


源码:

就到这里。最近考虑实现编辑器。希望大家能够给点路子。不然我会误入歧途的。。。。谢谢了。
title="Preview" src="http://cid-68f492fd20ed58d7.office.live.com/embedicon.aspx/.Public/CKEditor/HelloWorld.rar" frameborder="0" marginwidth="0" marginheight="0" scrolling="no" style="padding: 0px; width: 98px; height: 115px; background-color: rgb(252, 252, 252);">参考资料:
http://docs.cksource.com/ckeditor_api/index.html
http://www.cnblogs.com/moozi/archive/2010/01/06/1640034.html
http://www.cnblogs.com/xiangyan168/archive/2011/05/19/2050991.html
http://ajithmanmadhan.wordpress.com/2009/12/16/customizing-ckeditor-and-adding-a-new-toolbar-button/
扩展CKEditor按钮相关推荐
- Windows 扩展 C 盘扩展卷按钮显示灰色怎么办
压缩 C 盘 先压缩 C 盘,输入一个很小的空间量,比如 8,然后点击压缩按钮 会看到在 C 盘旁边生成一个未分配的盘 此时再右键 C 盘,看到扩展卷按钮可点击 扩展 C 盘 选择磁盘,把未分配的盘放 ...
- UAP扩展开发 - 新增按钮
UAP新增按钮的实现 一.扩展说明 1.按钮扩展的实现有两种方法 - 按钮继承:NCAction,MenuAction - 拦截器实现:ActionInterceptor 此处是通过按钮继承实现的 2 ...
- Chrome资深粉热衷的10个必备扩展程序
如果你是Chrome用户,你应该很清楚扩展程序架构可以扩充功能,让Chrome不只是浏览器.事实上,有了合适的一组扩展程序,Chrome可以变成一种生产力很高的手段.不相信我?只要看看Chrome W ...
- 分享10个实用的超绚CSS3按钮设计
日期:2012-4-10 来源:GBin1.com CSS3在web开发技术中绝对是超棒的!随着梯度,阴影,文字阴影和边界半径属性的添加,我们现在还可以使用简单的HTML标记和CSS3代码来创建非 ...
- 360极速浏览器安装.crx扩展(postman)
用户在开发或者调试网络程序或者是网页B/S模式的程序的时候是需要一些方法来跟踪网页请求的,用户可以使用一些网络的监视工具比如著名的Firebug等网页调试工具.今天给大家介绍的这款网页调试工具不仅可以 ...
- 5分钟学会开发浏览器扩展
写在前面 做web开发的同学,经常会用到各种chrome浏览器插件,那么我们寄几怎么开发一个插件呢(其实是浏览器扩展)?其实很简单,你意想不到的简单.只要有web开发基础,会写基本的html,css和 ...
- 如何在Chrome工具栏中固定和取消固定扩展程序
Not all extensions are made equal. Some extensions, like Grammarly, work quietly in the background a ...
- 实战-Ueditor扩展二次开发
第一部分 开发前期准备 1.UEditor从1.4.1开始,添加对于二次开发的扩展支持. Jeewx扩展二次开发采用1.4.3.1 Jsp 版本 2.上传图片设置 简述: UE做的不够灵活,不如老版 ...
- gnome扩展_GNOME桌面的12个扩展
gnome扩展 GNOME桌面是大多数流行的Linux发行版以及某些BSD和Solaris操作系统的默认图形用户界面. GNOME当前为版本3,提供了流畅的用户体验,并且扩展提供了附加功能. 之前,我 ...
最新文章
- 基区宽度调制效应(厄尔利(Early)效应)
- ES索引模板——就是在新建索引时候指定的正则匹配来设置mapping而已,对于自动扩容有用...
- 从一个被Tomcat拒绝的漏洞到特殊内存马
- 复旦大学张奇组:对话摘要数据不足?对话数据、文档摘要数据,我全都要!...
- 【项目实战】mybatis +vue.js 前后端交互批量删除
- 二级导航 sql php,帝国cms栏目导航调用之SQL语句调用一级栏目和二级栏目的方法...
- 文档安全管理系统服务器地址是什么,一种文档安全管理系统登录方法及装置
- Docker的常规应用手册
- 我有几个粽子,和一个故事
- 写PHP还是Zend好用
- 基于matlab的暴雨强度公式参数推求,小样本流域降雨强度公式和设计降雨分布的推求方法...
- windows 下sftp ssh自动脚本
- Smarty下载和安装
- 106.比特率和波特率
- CAXA实体设计 2020 在草图中怎么快速选择与某一曲线相连的曲线?
- Linux(五、六)文本处理,文件内容显示和文件其他操作学习
- C++第一课(初识C++)
- 解决更换电池引发的乐视2手机(lex620)不进系统问题
- 使用rm删除一个目录下的除了ttt以外的所有文件
- 《转》创新团队中常见的几种“怪人”