guzzle 封装api_Wuzzlist API与Guzzle的速成课程
guzzle 封装api
Wunderlist is one of the most popular task management and list keeping applications out there. It allows you to create lists to which you can then add tasks that are easily checkable and have all sorts of functionality built into them. It has native apps for all the major OS’s and all your data syncs effectively over the cloud. It’s very nice to work with if you are trying to keep yourself organized and you can get a lot done even with the free version.
Wunderlist是最受欢迎的任务管理之一,它可以将应用程序保存在列表中。 它允许您创建列表,然后可以向其中添加易于检查的任务,并在其中内置各种功能。 它具有适用于所有主要操作系统的本机应用程序,并且您的所有数据都可以通过云有效地同步。 如果您想使自己保持井井有条,那么使用它非常好,即使使用免费版本也可以做很多事情。

Nowadays, most web apps out there provide APIs for developers to integrate with their own applications (even free ones like Trello). In 2015, it finally happened for Wunderlist as well: their API was made public and thoroughly documented.
如今,大多数Web应用程序都为开发人员提供了与自己的应用程序集成的API(甚至包括Trello之类的免费应用程序)。 在2015年,Wunderlist也终于发生了:他们的API公开并被详细记录 。
In this article, we will look at their API and see how we can interact with a Wunderlist application programatically. To this end, we will start a very small PHP app without any kind of framework behind it, just some raw PHP files brought together by Composer for testing purposes. And since there is no official PHP SDK, we’ll make use of Guzzle to perform HTTP requests to the various endpoints.
在本文中,我们将研究它们的API,并了解如何以编程方式与Wunderlist应用程序进行交互。 为此,我们将启动一个非常小PHP应用程序,其背后没有任何框架,只有Composer收集的一些原始PHP文件用于测试目的。 而且由于没有正式PHP SDK,我们将利用Guzzle对各个端点执行HTTP请求。
In addition, if you are curious, check out this demo repository which contains some basic code that allows you to load up all the tasks of a given list and then check them off one by one using Ajax. Similar to the core functionality of Wunderlist, but again without any kind of framework or styling.
另外,如果您感到好奇,请查看此演示存储库 ,其中包含一些基本代码,可让您加载给定列表的所有任务,然后使用Ajax逐项检查它们。 与Wunderlist的核心功能类似,但同样没有任何框架或样式。
操场 (The playground)
Inside the root folder of our project we can have a composer.json file like this:
在我们项目的根文件夹中,我们可以有一个composer.json文件,如下所示:
{
"require": {
"php": ">=5.5.0",
"guzzlehttp/guzzle": "~6.0"
},
"autoload": {
"psr-4": {
"Wunderlist\\": "src/"
}
},
"require-dev": {
"symfony/var-dumper": "~2.7"
}
}
As you can see, we will use Guzzle 6 which is PSR-7 compliant, and any classes that we want to create will go into the src/ folder which is namespaced as Wunderlist. We can also go ahead and create this folder. Lastly, we are using the Symfony VarDumper component to print out variables to the screen while developing.
如您所见,我们将使用符合PSR-7的Guzzle 6,并且要创建的任何类都将进入src/文件夹,该文件夹的名称空间为Wunderlist 。 我们也可以继续创建该文件夹。 最后,我们在开发时使用Symfony VarDumper组件将变量打印到屏幕上。
Still within the project’s root folder, let’s add three files: index.php, keys.php, .gitignore.
仍在项目的根文件夹中,让我们添加三个文件: index.php , keys.php和.gitignore 。
Inside index.php we will play with the API. We’ll use keys.php to store any access tokens and it will be referenced in the .gitignore file so that it doesn’t get committed to the repository.
在index.php内部,我们将使用API。 我们将使用keys.php来存储所有访问令牌,并且将在.gitignore文件中对其进行引用,以便不会将其提交到存储库中。
.gitignore should look like this as a starter:
.gitignore作为入门应该看起来像这样:
vendor/*
keys.php
Feel free to expand on it with rules from this one.
随意扩展此规则中的规则。
Wunderlist应用程序 (The Wunderlist application)
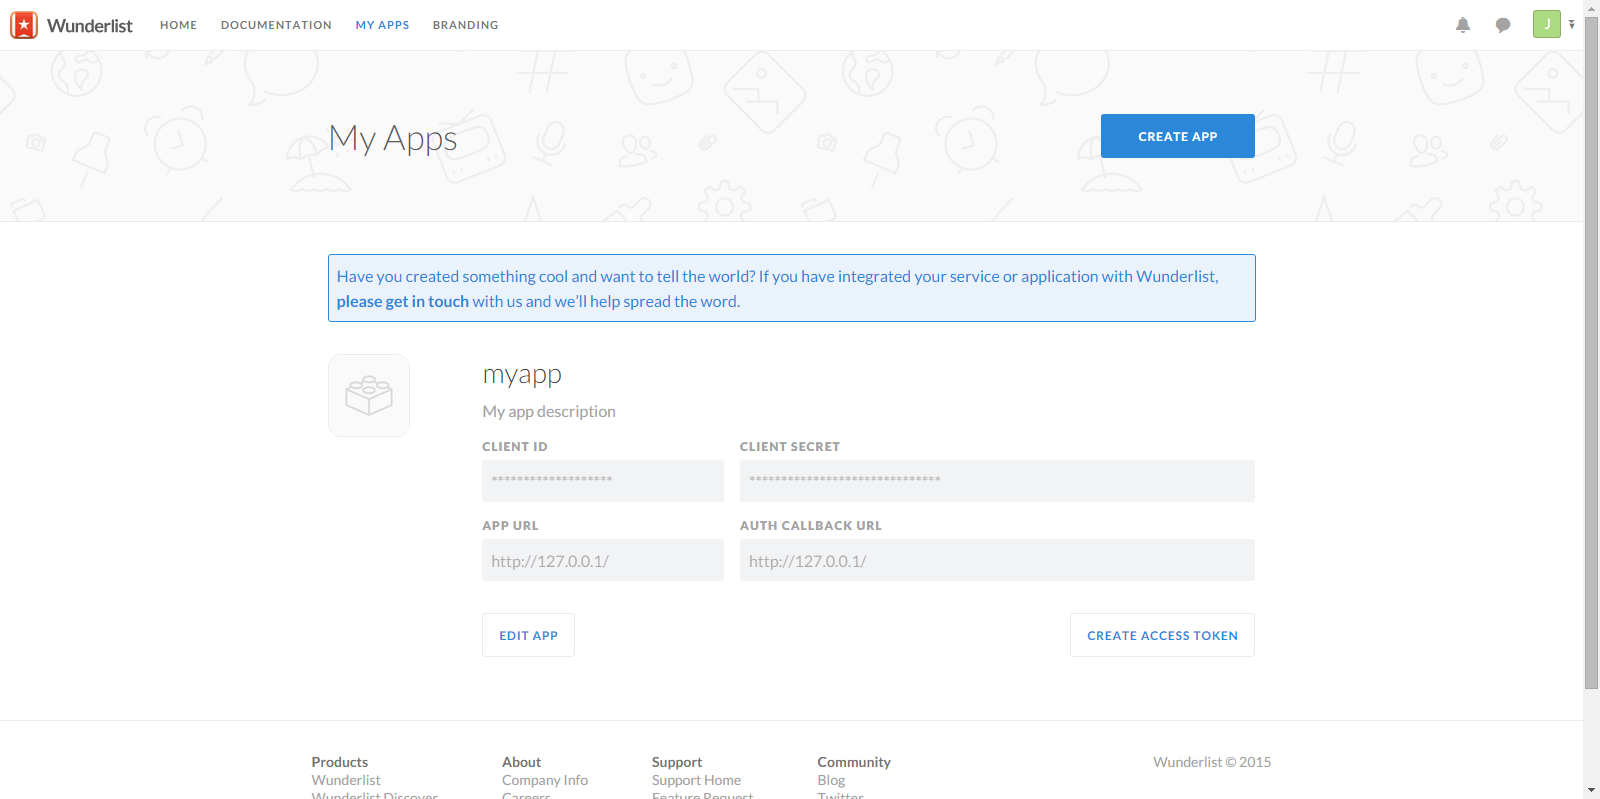
Before getting into working with the API, we’ll need to go to our Wunderlist account and create a new application. When doing so, we’ll need to specify an App URL and an App callback URL which will be used by the OAuth flow that lets users grant access to your application. We won’t be going into this here so we can just add some dummy URLs.
在使用API之前,我们需要进入Wunderlist帐户并创建一个新应用程序。 这样做时,我们需要指定一个App URL和一个App回调URL,OAuth流将使用这些URL,以便用户授予对您应用程序的访问权限。 我们将不在这里讨论,因此我们可以添加一些虚拟URL。
However, to authenticate with the application, we’ll need to click on the Create access token button which will generate an admin access token that can be used to authenticate with the API as our own user (in effect, we’re now building a Wunderlist app for ourselves).
但是,要通过应用程序进行身份验证,我们需要单击“ 创建访问令牌”按钮,该按钮将生成一个管理员访问令牌,可用于以我们自己的用户身份向API进行身份验证(实际上,我们正在构建一个自己的奇妙清单应用程序)。
奇妙类 (The Wunderlist class)
Once the application is saved, we can head back to our PHP app and paste the following into the keys.php file:
保存该应用程序后,我们可以回到我们PHP应用程序,并将以下内容粘贴到keys.php文件中:
<?php
$client_id = 'your-client-id';
$access_token = 'the-access-token-you-generated-earlier';
The information above can be retrieved from your Wunderlist account. We will then require this file inside index.php and use these variables globally. This is not a best practice but it will do for our little demonstration in order to keep things short and simple. For a better solution to the problem of loading credentials, you can check out this approach instead.
可以从您的Wunderlist帐户中检索以上信息。 然后,我们将在index.php需要此文件,并全局使用这些变量。 这不是最佳做法,但是对于我们的小示范,它可以使事情简短明了。 为了更好地解决加载凭据的问题,您可以改用这种方法 。
Next, let’s create a class called WunderlistClient inside the src/ folder of our app:
接下来,让我们在应用程序的src/文件夹中创建一个名为WunderlistClient的类:
<?php
namespace Wunderlist;
use GuzzleHttp\ClientInterface;
use Psr\Http\Message\ResponseInterface;
class WunderlistClient {
/**
* @var ClientInterface
*/
private $client;
/**
* Constructor
*
* @param ClientInterface $client
*/
public function __construct(ClientInterface $client) {
$this->client = $client;
}
All our class does for now is take the Guzzle client as a parameter and set it to a private variable. We will then use this class to make calls to the Wunderlist API by adding methods responsible for various endpoints and tasks.
我们的类现在所做的只是将Guzzle客户端作为参数并将其设置为私有变量。 然后,我们将使用此类通过添加负责各种终结点和任务的方法来调用Wunderlist API。
Back in our index.php file we can have this for now:
回到我们的index.php文件中,我们现在可以拥有它:
<?php
require 'vendor/autoload.php';
require_once 'keys.php';
use GuzzleHttp\Client;
use Wunderlist\WunderlistClient as Wunderlist;
$guzzle = new Client(
[
'base_uri' => 'https://a.wunderlist.com/api/v1/',
'headers' => [
'Content-Type' => 'application/json',
'X-Client-ID' => $client_id,
'X-Access-Token' => $access_token,
]
]
);
$wunderlist = new Wunderlist($guzzle);
We start by instantiating a new Guzzle client. We set the base_uri of the API and some necessary headers (most importantly for authentication). The JSON content type header is needed when sending data as JSON in the request body. Then, we create a new instance of our WunderlistClient class and pass the Guzzle client to it.
我们首先实例化一个新的Guzzle客户端。 我们设置API的base_uri和一些必要的标头(最重要的是用于身份验证)。 在请求正文中以JSON格式发送数据时,需要JSON内容类型标头。 然后,我们创建WunderlistClient类的新实例,并将Guzzle客户端传递给它。
Next, we will use the $wunderlist object to make the requests and return responses to be inspected.
接下来,我们将使用$wunderlist对象发出请求并返回要检查的响应。
使用Wunderlist API返回数据 (Returning data using the Wunderlist API)
First, let’s request all the lists on our account. Inside the WunderlistClient class we can add this public method:
首先,让我们请求帐户中的所有列表。 在WunderlistClient类中,我们可以添加以下公共方法:
/**
* Returns all the lists
*
* @return array
*/
public function getLists() {
$response = $this->client->get('lists');
$this->checkResponseStatusCode($response, 200);
return json_decode($response->getBody(), true);
}
We use Guzzle to make a request to the relevant endpoint and use a private method called checkResponseStatusCode() to verify that it has been successful. The latter will throw an exception if that’s not the case which can be caught by the caller (we’ll see in a moment).
我们使用Guzzle向相关端点发出请求,并使用称为checkResponseStatusCode()的私有方法来验证它是否成功。 如果不是这种情况,后者将引发异常(调用者可以捕获)(稍后我们将看到)。
Additionally, you’ll notice that with Guzzle 6 we no longer have a method for decoding the response from JSON but we are rather dealing with a Stream as the response body. And since the expected data is not so big, we can just dump it to a string with its own __toString() method and then decode it.
另外,您会注意到,在Guzzle 6中,我们不再有用于解码来自JSON的响应的方法,而是将Stream作为响应主体。 并且由于期望的数据不是很大,我们可以使用自己的__toString()方法将其转储到字符串中,然后对其进行解码。
Let’s also take a quick look at our checkResponseStatusCode() method:
让我们快速看一下我们的checkResponseStatusCode()方法:
/**
* Check the response status code.
*
* @param ResponseInterface $response
* @param int $expectedStatusCode
*
* @throws \RuntimeException on unexpected status code
*/
private function checkResponseStatusCode(ResponseInterface $response, $expectedStatusCode)
{
$statusCode = $response->getStatusCode();
if ($statusCode !== $expectedStatusCode) {
throw new \RuntimeException('Wunderlist API returned status code ' . $statusCode . ' expected ' . $expectedStatusCode);
}
}
Once all this is in place, we can call getLists() from index.php and dump out all the contents of the result:
完成所有这些操作后,我们可以从index.php调用getLists()并转储结果的所有内容:
try {
$lists = $wunderlist->getLists();
dump($lists);
}
catch(\Exception $exception) {
dump($exception);
}
Loading the file in the browser should allow us to inspect all the information returned about all the lists in our account. Neat.
在浏览器中加载文件应该可以让我们检查有关帐户中所有列表的所有返回信息。 整齐。
Once we have all of our lists and figure out the ID of one we want, we can return more information about it:
拥有所有列表并找出我们想要的列表的ID后,我们可以返回有关该列表的更多信息:
/**
* Returns a specific list
*
* @param int $id
*
* @return mixed
*/
public function getList($id) {
if (!is_numeric($id)) {
throw new \InvalidArgumentException('The list id must be numeric.');
}
$response = $this->client->get('lists/' . $id);
$this->checkResponseStatusCode($response, 200);
return json_decode($response->getBody(), true);
}
Here we do a basic check to see if the ID is numeric, make sure the request was successful and return the JSON decoded response from the Wunderlist API. Now, inside index.php:
在这里,我们进行了基本检查以查看ID是否为数字,确保请求成功,并从Wunderlist API返回JSON解码响应。 现在,在index.php :
try {
$list = $wunderlist->getList($id);
dump($list);
}
catch(\Exception $exception) {
dump($exception);
}
We should see some information about the list itself.
我们应该看到有关列表本身的一些信息。
But what if we want to load all the tasks in this list? We can implement something like this:
但是,如果我们要加载此列表中的所有任务怎么办? 我们可以实现这样的事情:
/**
* Return all the tasks of a given list
*
* @param int $list_id
*
* @return array()
*/
public function getListTasks($list_id) {
if (!is_numeric($list_id)) {
throw new \InvalidArgumentException('The list id must be numeric.');
}
$response = $this->client->get('tasks', ['query' => ['list_id' => $list_id]]);
$this->checkResponseStatusCode($response, 200);
return json_decode($response->getBody());
}
In order to specify for which list we’d like the tasks returned, we need to pass its ID as a query parameter to the GET request. The rest is about the same as before. Inside index.php we can debug all the data related to the (uncompleted) tasks from this list:
为了指定我们要返回哪个列表的任务,我们需要将其ID作为查询参数传递给GET请求。 其余部分与以前大致相同。 在index.php我们可以从以下列表中调试与(未完成)任务相关的所有数据:
try {
$tasks = $wunderlist->getListTasks($id);
dump($tasks);
}
catch(\Exception $exception) {
dump($exception);
}
使用Wunderlist API创建和更新数据 (Creating and updating data with the Wunderlist API)
All the requests we’ve made so far have been GET calls to load information. Let’s try making a few by which we create and update resources using the API. To start, we can create a task like this:
到目前为止,我们提出的所有请求都是GET调用,以加载信息。 让我们尝试一些使用API创建和更新资源的方法。 首先,我们可以创建一个像这样的任务:
/**
* Creates a new task
*
* @param string $name
* @param int $list_id
* @param array $task
*
* @return mixed
*/
public function createTask($name, $list_id, $task = []) {
if (!is_numeric($list_id)) {
throw new \InvalidArgumentException('The list id must be numeric.');
}
$task['name'] = $name;
$task['list_id'] = $list_id;
$response = $this->client->post('tasks', ['body' => json_encode($task)]);
$this->checkResponseStatusCode($response, 201);
return json_decode($response->getBody());
}
The data of the new task needs to be sent in the POST request body as JSON. To use this method inside index.php, we can do something like this:
新任务的数据需要作为JSON在POST请求主体中发送。 要在index.php使用此方法,我们可以执行以下操作:
try {
$created = $wunderlist->createTask('My new task', 'the-list-id');
dump($created);
}
catch(\Exception $exception) {
dump($exception);
}
These are the only two mandatory parameters that need to exist in the task we send to Wunderlist but we can of course add more inside an array passed as the third parameter to our method. Feel free to check out the relevant documentation page for more information.
这是我们发送给Wunderlist的任务中仅需要存在的两个必需参数,但是我们当然可以在作为第三个参数传递给方法的数组中添加更多参数。 随时查看相关文档页面以获取更多信息。
If all goes well, Wunderlist sends back a status of 201 (Created). And what we are returning here is an array of information related to the task we just created. This is what we can inspect in the browser if we load up index.php.
如果一切顺利,Wunderlist将发回状态201(已创建 )。 我们在这里返回的是与我们刚创建的任务相关的一系列信息。 如果我们加载index.php这就是我们可以在浏览器中检查的内容。
In order to now update the task we created, we need to send a PATCH request to its endpoint with only the data that we want changed and the current revision (which is to ensure different apps don’t overwrite each other’s data). So by sending the boolean TRUE for the completed property of the task, we are essentially marking it as checked. We can create this method dedicated to completing tasks:
为了现在更新我们创建的任务,我们需要仅将要更改的数据和当前修订版本发送到其端点的PATCH请求(以确保不同的应用程序不会覆盖彼此的数据)。 因此,通过为任务的completed属性发送布尔值TRUE,我们实际上将其标记为已选中。 我们可以创建专门用于完成任务的方法:
/**
* Completes a task
*
* @param int $task_id
* @param int $revision
* @return mixed
*/
public function completeTask($task_id, $revision) {
if (!is_numeric($task_id)) {
throw new \InvalidArgumentException('The list id must be numeric.');
} elseif (!is_numeric($revision)) {
throw new \InvalidArgumentException('The revision must be numeric.');
}
$response = $this->client->patch('tasks/' . $task_id, ['body' => json_encode(['revision' => (int) $revision, 'completed' => true])]);
$this->checkResponseStatusCode($response, 200);
return json_decode($response->getBody());
}
The endpoint we are PATCHING contains the ID of the task and we send as the request body the JSON representation of the values we want changed on the task. As mentioned earlier, this needs to contain the last revision of the resource which we can learn from the getListTasks() method we wrote earlier.
我们正在PATCHING的端点包含任务的ID,我们将要在任务上更改的值的JSON表示形式发送为请求主体。 如前所述,它需要包含资源的最新版本,我们可以从我们先前编写的getListTasks()方法中学到该资源。
Assuming that we know the last revision and ID of the task in index.php, we can complete a task like so:
假设我们知道index.php任务的最新版本和ID,我们可以像这样完成任务:
try {
$response = $wunderlist->completeTask($task_id, $revision);
dump($response)
}
catch(\Exception $exception) {
dump($exception);
}
If all goes well, the response we get in the body is the JSON representation of our task that we can decode into an array.
如果一切顺利,我们在正文中获得的响应就是我们可以解码为数组的任务的JSON表示形式。
结论 (Conclusion)
There are, of course, many more endpoints and much more you can do with each endpoint. Go ahead and check out the documentation pages to get an overview of all you can do.
当然,还有更多的端点,每个端点可以做更多的事情。 继续查看文档页面,以获取所有可用功能的概述。
A very important aspect of integrating with Wunderlist is also to allow users to grant access to their own Wunderlist account. You can do this using the OAuth flow we mentioned earlier – here are some tutorials on how to accomplish that.
与Wunderlist集成的一个非常重要的方面也是允许用户授予对自己的Wunderlist帐户的访问权限。 您可以使用我们前面提到的OAuth流程来执行此操作-这是一些有关如何完成此操作的教程 。
Finally, if you are curious, take a look at the repository where you can find a super tiny extension of what we discussed in this article with which you can supply a list ID, have its tasks printed on the screen and then check them off one by one via Ajax. Looks ugly, but you should be able to get the point.
最后,如果您感到好奇,请查看存储库 ,您可以在其中找到我们在本文中讨论的内容的超小扩展,您可以使用该扩展提供列表ID,将其任务打印在屏幕上,然后将其选中一个通过Ajax。 看起来很丑,但是您应该能够明白这一点。
Did you write a Wunderlist app yet? Show us!
您是否编写了Wunderlist应用程序? 给我们看一看!
翻译自: https://www.sitepoint.com/crash-course-of-wunderlists-api-with-guzzle/
guzzle 封装api
guzzle 封装api_Wuzzlist API与Guzzle的速成课程相关推荐
- axios get 某个参数是数组怎么传_Vue 中 Axios 的封装和 API 接口的管理
我们所要的说的axios的封装和api接口的统一管理,其实主要目的就是在帮助我们简化代码和利于后期的更新维护. 一.axios的封装 在vue项目中,和后台交互获取数据这块,我们通常使用的是axios ...
- $.post请求的参数在后台代码中得到为null_vue中Axios的封装和API接口的管理
来源:愣锤 https://juejin.im/post/684490365288107214 如图,面对一团糟代码的你~~~真的想说,What F~U~C~K!!! 回归正题,我们所要的说的axio ...
- jq封装接口ajax,jquery ajax方法封装及api文件设计的代码示例
本篇文章给大家带来的内容是关于jquery ajax方法封装及api文件设计的代码示例,有一定的参考价值,有需要的朋友可以参考一下,希望对你有所帮助. 封装 jquery ajax 文件/** * 封 ...
- router中获取vuex_Vue 中 Axios 的封装和 API 接口的管理
(给JavaScript加星标,提升前端技能) 作者:愣锤 https://juejin.im/post/684490365288107214 如图,面对一团糟代码的你~~~真的想说,What F~U ...
- 极光推送之java后台封装REST API
1 什么是推送? 这个看图效果最好请直接看下图: 我们手机经常会收到如上图弹框消息,我们今天说的就是上面的弹窗信息如何推送的.一般情况我们可以通过第三的服务来给自己的app发送推送消息例如:极光推送. ...
- 使用封装的API接口,在控制台输出undefined
今天我调用一个在小程序中封装的API接口,一直出现输出res为undefined. 后来我才发现是在封装的时候,resolve(rea.data.data),造成的报错,因为接口中只能在二级,没有三级 ...
- axios封装,api接口封装统一管理
axios封装,api接口封装统一管理 一. axios说明 Axios 是一个基于 promise 的 HTTP 库,可以用在浏览器和 node.js 中. axios的封装和api接口的统一管理, ...
- SWIG学习记录(三)SWIG封装C#API实例
目录 1 一个构建接口的策略 1.1 为SWIG编写C语言程序 1.2 SWIG接口文件 1.3 为什么使用单独的接口文件? 1.4 获取正确的头文件 1.5 如何处理main()函数 2 SWIG封 ...
- 【Vuejs】1028- 中 Axios 的封装和 API 接口的管理
如图,面对一团糟代码的你~~~真的想说,What F~U~C~K!!! 回归正题,我们所要的说的axios的封装和api接口的统一管理,其实主要目的就是在帮助我们简化代码和利于后期的更新维护. 一.a ...
- 机器学习速成课程 | 练习 | Google Development——编程练习:使用 TensorFlow 的起始步骤
使用 TensorFlow 的基本步骤 学习目标: 学习基本的 TensorFlow 概念 在 TensorFlow 中使用 LinearRegressor 类并基于单个输入特征预测各城市街区的房屋价 ...
最新文章
- decimal(C# 参考)
- 外国人居留证办理手续
- python3精要(5)-最长公共前缀Trie树
- 2013计算机大纲,2013计算机应用基础考试大纲
- oracle set markup,oracle sql*plus set spool介绍(二)
- 这个拖后腿的“in”
- java字符串底层实现_「JAVA」细述合理创建字符串,分析字符串的底层存储,你不该错过...
- SVN系列操作(一)
- DLA SQL技巧:行、列转换和JSON数据列展开
- 能量采集(HYSBZ-2005)
- 开源串口调试助手java_(串口通信编程) 开源串口调试助手Common (Com Monitor)
- C++基础:如何去使用extern?
- Android Revolution
- JavaSE基础———Set接口中的常用类HashSet、LinkedHashSet和TreeSet
- java的八大基本类型
- 高通揭秘“地表最强”骁龙855,专为AI新增张量加速器,每秒7万亿次运算
- P4086 [USACO17DEC]My Cow Ate My Homework S(静态数据预处理:后缀和、后缀最小值)
- 吉首 - 夫子云游(DFS)
- nginx静态资源缓存与压缩
- 《工程电磁场》学习笔记1-静电场