linux 中软件安装的三种方法
2019独角兽企业重金招聘Python工程师标准>>> 
linux 中软件安装的三种方法
1.rpm包安装
2.yum安装
3.源码包安装
1.rpm包安装
· RPM包的命名规则
1.RPM包的来源
- RPM包在系统光盘中
在虚拟机中点击选择虚拟机设置,选中CD/DVD,选择ISO镜像,设备状态选择已连接, 然后点击确定。
[root@xuexi--01 ~]# mkdir /mnt/cdrom
[root@xuexi--01 ~]# mount /dev/sr0 /mnt/cdrom
[root@xuexi--01 ~]# cd /mnt/cdrom/
[root@xuexi--01 cdrom]# ls  ````所有的RPM包都在Packages这个目录当中
CentOS_BuildTag  GPL       LiveOS    RPM-GPG-KEY-CentOS-7
EFI              images    Packages  RPM-GPG-KEY-CentOS-Testing-7
EULA             isolinux  repodata  TRANS.TBL
[root@xuexi--01 cdrom]# cd Packages/
[root@xuexi--01 Packages]# ls
······
postgresql-libs-9.2.21-1.el7.x86_64.rpm
postgresql-odbc-09.03.0100-2.el7.x86_64.rpm
postgresql-plperl-9.2.21-1.el7.x86_64.rpm
postgresql-plpython-9.2.21-1.el7.x86_64.rpm
postgresql-pltcl-9.2.21-1.el7.x86_64.rpm
postgresql-server-9.2.21-1.el7.x86_64.rpm
postgresql-test-9.2.21-1.el7.x86_64.rpm
pothana2000-fonts-1.3.3-6.el7.noarch.rpm
powertop-2.3-12.el7.x86_64.rpm
ppp-2.4.5-33.el7.x86_64.rpm
pptp-1.7.2-22.el7.x86_64.rpm
prelink-0.5.0-9.el7.x86_64.rpm
procmail-3.22-36.el7.x86_64.rpm
procps-ng-3.3.10-16.el7.x86_64.rpm
psacct-6.6.1-13.el7.x86_64.rpm
ps_mem-3.1-7.el7.noarch.rpm
psmisc-22.20-15.el7.x86_64.rpm
pth-2.0.7-23.el7.x86_64.rpm
ptlib-2.10.10-6.el7.x86_64.rpm
pulseaudio-10.0-3.el7.x86_64.rpm
pulseaudio-gdm-hooks-10.0-3.el7.x86_64.rpm
pulseaudio-libs-10.0-3.el7.x86_64.rpm
pulseaudio-libs-devel-10.0-3.el7.x86_64.rpm
pulseaudio-libs-glib2-10.0-3.el7.x86_64.rpm
pulseaudio-module-bluetooth-10.0-3.el7.x86_64.rpm
······
2.RPM包的命名规则 例如:httpd-2.4.6-67.el7.centos.x86_64.rpm
- httpd软件包名
- 2.4.6 软件版本
- 67 发布的次数
- el7.centos 适合的linux平台
- x86_64/i686 适合的硬件平台
- rpm rpm包扩展名
3.RPM包依赖性
- 树形依赖:a→b→c
- 环形依赖:a→b→c→a
- 模块依赖:查询网站:www.rpmfind.net
· 安装命令
1.包全名与包名
- 包全名:操作的包是没有安装的软件包时,使用包全名。而且要注意路径
- 包名:操作已经安装的软件包时,使用包名,是搜索/var/lib/rpm/中的数据库
2.RPM安装
- rpm -ivh 包全名
选项:
- -i 安装
- -v 显示详细信息
- -h 显示进度
- --nodeps 不检测依赖性
[root@xuexi--01 Packages]# rpm -ivh zsh-5.0.2-28.el7.x86_64.rpm
准备中...                          ################################# [100%]
正在升级/安装...1:zsh-5.0.2-28.el7                 ################################# [100%]
· 升级与卸载
RPM升级
- rpm -Uvh 包全名
选项:
- -U 升级
RPM卸载
- rpm -e 包名
选项:
- -e 卸载
[root@xuexi--01 Packages]# rpm -e zsh
· RPM包查询
1.查询是否安装
- rpm -q 包名
#查询包是否安装
[root@xuexi--01 Packages]# rpm -q httpd
未安装软件包 httpd
- rpm -qa
#查询所有已经安装的RPM包
2.查询软件包的详细信息
- rpm -qi 包名
选项:
- -i 查询软件信息
- -p 查询未安装包信息
[root@xuexi--01 Packages]# rpm -ivh zsh-5.0.2-28.el7.x86_64.rpm
准备中...                          ################################# [100%]
正在升级/安装...1:zsh-5.0.2-28.el7                 ################################# [100%]
[root@xuexi--01 Packages]# rpm -qi zsh
Name        : zsh
Version     : 5.0.2
Release     : 28.el7
Architecture: x86_64
Install Date: 2018年05月26日 星期六 21时45分48秒
Group       : System Environment/Shells
Size        : 5855982
License     : MIT
Signature   : RSA/SHA256, 2017年08月11日 星期五 04时28分17秒, Key ID 24c6a8a7f4a80eb5
Source RPM  : zsh-5.0.2-28.el7.src.rpm
Build Date  : 2017年08月02日 星期三 18时52分37秒
Build Host  : c1bm.rdu2.centos.org
Relocations : (not relocatable)
Packager    : CentOS BuildSystem <http://bugs.centos.org>
Vendor      : CentOS
URL         : http://zsh.sourceforge.net/
Summary     : Powerful interactive shell
Description :
The zsh shell is a command interpreter usable as an interactive login
shell and as a shell script command processor.  Zsh resembles the ksh
shell (the Korn shell), but includes many enhancements.  Zsh supports
command line editing, built-in spelling correction, programmable
command completion, shell functions (with autoloading), a history
mechanism, and more.
3.查询包中文件安装位置
- rpm -ql 包名
选项:
- -l 列表
- -p 查询未安装包信息
RPM包默认安装位置
| 安装位置 | 说明 |
|---|---|
| /etc/ | 配置文件安装目录 |
| /usr/bin/ | 可执行的命令安装目录 |
| /usr/lib/ | 程序所使用的函数库保存位置 |
| /usr/share/doc/ | 基本的软件使用手册保存位置 |
| /usr/share/man/ | 帮助文件保存位置 |
4.查询系统文件属于哪个RPM包
- rpm -qf 系统文件名
/usr/share/zsh/site-functions
[root@xuexi--01 Packages]# rpm -qf /usr/share/zsh/site-functions
systemd-219-42.el7.x86_64
zsh-5.0.2-28.el7.x86_64
· RPM包校验
1.RPM校验
- rpm -V 已安装的包名
选项:
- -V校验指定RPM包中的文件
2.yum安装
查询
- yum list
#查询所有可用软件包列表
[root@localhost ~]# yum list
···
yum-utils.noarch                     1.1.31-45.el7           base
zenity.x86_64                        3.22.0-1.el7            base
zip.x86_64                           3.0-11.el7              base
zlib.i686                            1.2.7-17.el7            base
zlib-devel.i686                      1.2.7-17.el7            base
zlib-devel.x86_64                    1.2.7-17.el7            base
zlib-static.i686                     1.2.7-17.el7            base
zlib-static.x86_64                   1.2.7-17.el7            base
zsh.x86_64                           5.0.2-28.el7            base
zsh-html.x86_64                      5.0.2-28.el7            base
zziplib.i686                         0.13.62-5.el7           base
zziplib.x86_64                       0.13.62-5.el7           base
zziplib-devel.i686                   0.13.62-5.el7           base
zziplib-devel.x86_64                 0.13.62-5.el7           base
zziplib-utils.x86_64                 0.13.62-5.el7           base
- yum search 关键字
# 搜索服务器上所有和关键字相关的包
[root@localhost ~]# yum search vim
已加载插件:fastestmirror
Loading mirror speeds from cached hostfile* base: mirrors.aliyun.com* extras: mirrors.aliyun.com* updates: ftp.sjtu.edu.cn
========================= N/S matched: vim =========================
protobuf-vim.x86_64 : Vim syntax highlighting for Google Protocol: Buffers descriptions
vim-X11.x86_64 : The VIM version of the vi editor for the X Window: System
vim-common.x86_64 : The common files needed by any version of the: VIM editor
vim-enhanced.x86_64 : A version of the VIM editor which includes: recent enhancements
vim-filesystem.x86_64 : VIM filesystem layout
vim-minimal.x86_64 : A minimal version of the VIM editor名称和简介匹配 only,使用“search all”试试。
还有一种搜索的rpm包的方法,使用grep。 yum list |grep '关键字'
[root@localhost ~]# yum list |grep 'vim'
vim-minimal.x86_64                          2:7.4.160-2.el7            @anaconda
protobuf-vim.x86_64                         2.5.0-8.el7                base
vim-X11.x86_64                              2:7.4.160-4.el7            base
vim-common.x86_64                           2:7.4.160-4.el7            base
vim-enhanced.x86_64                         2:7.4.160-4.el7            base
vim-filesystem.x86_64                       2:7.4.160-4.el7            base
vim-minimal.x86_64                          2:7.4.160-4.el7            base
安装
- yum install -y 包名
选项:
- -y 自动回答yes
- install 安装
[root@localhost ~]# yum install -y zsh.x86_64
已加载插件:fastestmirror
base                                         | 3.6 kB     00:00
extras                                       | 3.4 kB     00:00
updates                                      | 3.4 kB     00:00
Loading mirror speeds from cached hostfile* base: mirrors.aliyun.com* extras: mirrors.aliyun.com* updates: ftp.sjtu.edu.cn
正在解决依赖关系
--> 正在检查事务
---> 软件包 zsh.x86_64.0.5.0.2-28.el7 将被 安装
--> 解决依赖关系完成依赖关系解决====================================================================Package     架构           版本                 源            大小
====================================================================
正在安装:zsh         x86_64         5.0.2-28.el7         base         2.4 M事务概要
====================================================================
安装  1 软件包总下载量:2.4 M
安装大小:5.6 M
Downloading packages:
zsh-5.0.2-28.el7.x86_64.rpm                    | 2.4 MB   00:00
Running transaction check
Running transaction test
Transaction test succeeded
Running transaction正在安装    : zsh-5.0.2-28.el7.x86_64                         1/1 验证中      : zsh-5.0.2-28.el7.x86_64                         1/1 已安装:zsh.x86_64 0:5.0.2-28.el7                                         完毕!
升级
- yum -y update 包名
卸载
- yum -y remove 包名
选项:
- remove 卸载
- -y yes
#服务器使用最小化安装,用什么软件装什么软件,尽量不卸载
[root@localhost ~]# yum remove -y zsh
Failed to set locale, defaulting to C
Loaded plugins: fastestmirror
Resolving Dependencies
--> Running transaction check
---> Package zsh.x86_64 0:5.0.2-28.el7 will be erased
--> Finished Dependency ResolutionDependencies Resolved====================================================================Package    Arch          Version                Repository    Size
====================================================================
Removing:zsh        x86_64        5.0.2-28.el7           @base        5.6 MTransaction Summary
====================================================================
Remove  1 PackageInstalled size: 5.6 M
Downloading packages:
Running transaction check
Running transaction test
Transaction test succeeded
Running transactionErasing    : zsh-5.0.2-28.el7.x86_64                          1/1 Verifying  : zsh-5.0.2-28.el7.x86_64                          1/1 Removed:zsh.x86_64 0:5.0.2-28.el7                                         Complete!
YUM 软件组管理命令
- yum grouplist 列出所有可用的软件组列表
[root@localhost ~]# yum grouplist
已加载插件:fastestmirror
没有安装组信息文件
Maybe run: yum groups mark convert (see man yum)
Loading mirror speeds from cached hostfile* base: mirrors.aliyun.com* extras: mirrors.aliyun.com* updates: ftp.sjtu.edu.cn
可用的环境分组:最小安装基础设施服务器计算节点文件及打印服务器基本网页服务器虚拟化主机带 GUI 的服务器GNOME 桌面KDE Plasma Workspaces开发及生成工作站
可用组:传统 UNIX 兼容性兼容性程序库图形管理工具安全性工具开发工具控制台互联网工具智能卡支持科学记数法支持系统管理系统管理工具
完成
使用 英文显示,只需要将语言改为英文就可以了LANG=en
[root@localhost ~]# yum grouplist
Failed to set locale, defaulting to C
Loaded plugins: fastestmirror
There is no installed groups file.
Maybe run: yum groups mark convert (see man yum)
Loading mirror speeds from cached hostfile* base: mirrors.aliyun.com* extras: mirrors.aliyun.com* updates: ftp.sjtu.edu.cn
Available Environment Groups:Minimal InstallCompute NodeInfrastructure ServerFile and Print ServerBasic Web ServerVirtualization HostServer with GUIGNOME DesktopKDE Plasma WorkspacesDevelopment and Creative Workstation
Available Groups:Compatibility LibrariesConsole Internet ToolsDevelopment ToolsGraphical Administration ToolsLegacy UNIX CompatibilityScientific SupportSecurity ToolsSmart Card SupportSystem Administration ToolsSystem Management
Done
- yum groupinstall 软件组名 安装指定软件组,组名可以由grouplist查询出来
- yum groupremove 软件组名 卸载指定软件组
- yum provides "/*/vim"搜索包含关键字vim的软件包
[root@localhost ~]# yum provides /*/"vim"
已加载插件:fastestmirror
Loading mirror speeds from cached hostfile* base: mirrors.aliyun.com* extras: mirrors.aliyun.com* updates: ftp.sjtu.edu.cn
base/7/x86_64/filelists_db                   | 6.9 MB     00:00
extras/7/x86_64/filelists_db                 | 519 kB     00:00
updates/7/x86_64/filelists_db                | 1.3 MB     00:00
cmake-2.8.12.2-2.el7.x86_64 : Cross-platform make system
源    :base
匹配来源:
文件名    :/usr/share/cmake/editors/vim2:docker-unit-test-1.13.1-53.git774336d.el7.centos.x86_64 :...: Automates deployment of containerized applications - for...: running unit tests
源    :extras
匹配来源:
文件名    :/var/lib/docker-unit-test/v1.10-migrator-c417a6a022c5023c111662e8280f885f6ac259be/Godeps/_workspace/src/github.com/docker/docker/contrib/syntax/vim
文件名    :/var/lib/docker-unit-test/contrib/syntax/vim
文件名    :/var/lib/docker-unit-test/runc-e9c345b3f906d5dc5e8100b05ce37073a811c74a/Godeps/_workspace/src/github.com/docker/docker/contrib/syntax/vim
文件名    :/var/lib/docker-unit-test/docker-novolume-plugin-385ec70baac3ef356f868f391c8d7818140fbd44/Godeps/_workspace/src/github.com/docker/docker/contrib/syntax/vim
文件名    :/var/lib/docker-unit-test/containerd-296f1f80d6c6a83cc625163f863e53d3287328ee/vendor/src/github.com/docker/docker/contrib/syntax/vim2:docker-unit-test-1.13.1-58.git87f2fab.el7.centos.x86_64 :...: Automates deployment of containerized applications - for...: running unit tests
源    :extras
匹配来源:
文件名    :/var/lib/docker-unit-test/v1.10-migrator-c417a6a022c5023c111662e8280f885f6ac259be/Godeps/_workspace/src/github.com/docker/docker/contrib/syntax/vim
文件名    :/var/lib/docker-unit-test/contrib/syntax/vim
文件名    :/var/lib/docker-unit-test/runc-e9c345b3f906d5dc5e8100b05ce37073a811c74a/Godeps/_workspace/src/github.com/docker/docker/contrib/syntax/vim
文件名    :/var/lib/docker-unit-test/docker-novolume-plugin-385ec70baac3ef356f868f391c8d7818140fbd44/Godeps/_workspace/src/github.com/docker/docker/contrib/syntax/vim
文件名    :/var/lib/docker-unit-test/containerd-296f1f80d6c6a83cc625163f863e53d3287328ee/vendor/src/github.com/docker/docker/contrib/syntax/vim2:docker-unit-test-1.13.1-63.git94f4240.el7.centos.x86_64 :...: Automates deployment of containerized applications - for...: running unit tests
源    :extras
匹配来源:
文件名    :/var/lib/docker-unit-test/v1.10-migrator-c417a6a022c5023c111662e8280f885f6ac259be/Godeps/_workspace/src/github.com/docker/docker/contrib/syntax/vim
文件名    :/var/lib/docker-unit-test/contrib/syntax/vim
文件名    :/var/lib/docker-unit-test/runc-e9c345b3f906d5dc5e8100b05ce37073a811c74a/Godeps/_workspace/src/github.com/docker/docker/contrib/syntax/vim
文件名    :/var/lib/docker-unit-test/docker-novolume-plugin-385ec70baac3ef356f868f391c8d7818140fbd44/Godeps/_workspace/src/github.com/docker/docker/contrib/syntax/vim
文件名    :/var/lib/docker-unit-test/containerd-296f1f80d6c6a83cc625163f863e53d3287328ee/vendor/src/github.com/docker/docker/contrib/syntax/vimgit-1.8.3.1-13.el7.x86_64 : Fast Version Control System
源    :base
匹配来源:
文件名    :/usr/share/doc/git-1.8.3.1/contrib/vim2:vim-common-7.4.160-4.el7.x86_64 : The common files needed by any: version of the VIM editor
源    :base
匹配来源:
文件名    :/usr/share/vim2:vim-enhanced-7.4.160-4.el7.x86_64 : A version of the VIM editor...: which includes recent enhancements
源    :base
匹配来源:
文件名    :/usr/bin/vim
使用yum搭建本地yum源 方法一
思路
- 挂载镜像到/mnt 目录
- cp -r /etc/yum.repos.d /etc/yum.repos.d.bak
#将 yum.repos.d 这个文件备份一份出来
- rm -rf /etc/yum.repos.d/*
- vim /etc/yum.repos.d/dvd.repo
#内容如下
[dvd] name=install dvd baseurl=file:///mnt enable=1 gpcheck=0
[root@localhost ~]# mount /dev/sr0 /mnt/cdrom/
[root@localhost ~]# cp -r /etc/yum.repos.d/ /etc/yum.repos.d.bak
[root@localhost ~]# ls /etc/ | grep yum*
yum
yum.conf
yum.repos.d
yum.repos.d.bak
vim /etc/yum.repos.d/dvd.repo
[dvd]
name=install dvd
baseurl=file:///mnt/cdrom  ····地址为自己光盘目录挂载点
enable=1  ···· enabled=1 让这个yum源失效
gpgcheck=0
[root@localhost ~]# yum clean all
[root@localhost ~]# yum list
······
pygobject3-devel.x86_64            3.22.0-1.el7            dvd
pygtk2.x86_64                      2.24.0-9.el7            dvd
pygtk2-libglade.x86_64             2.24.0-9.el7            dvd
pykde4.x86_64                      4.10.5-4.el7            dvd
pykickstart.noarch                 1.99.66.12-1.el7        dvd
pyldb.x86_64                       1.1.29-1.el7            dvd
pyorbit.x86_64                     2.24.0-15.el7           dvd
pyparsing.noarch                   1.5.6-9.el7             dvd
pyparted.x86_64                    1:3.9-13.el7            dvd
pytalloc.x86_64                    2.1.9-1.el7             dvd
python-IPy.noarch                  0.75-6.el7              dvd
python-augeas.noarch               0.5.0-2.el7             dvd
python-babel.noarch                0.9.6-8.el7             dvd
python-backports.x86_64            1.0-8.el7               dvd
python-backports-ssl_match_hostname.noarch
······
搭建本地yum 源方法二
思路
1、挂载光盘 [root@localhost ~]# mount /dev/sr0 /mnt/cdrom/ 2.使网络yum 源失效
[root@localhost ~]# cd /etc/yum.repos.d/
# 进入yum源
[root@localhost yum.repos.d]# ls
CentOS-Base.repo       CentOS-fasttrack.repo  CentOS-Vault.repo
CentOS-CR.repo         CentOS-Media.repo
CentOS-Debuginfo.repo  CentOS-Sources.repo
# 网络yum源生效的文件为CentOS-Base.repo,未防止以后需要使用,不要将其删除,可以更改后缀名使其失效。
[root@localhost yum.repos.d]# mv CentOS-Base.repo CentOS-Base.repo.bak
[root@localhost yum.repos.d]# ls
CentOS-Base.repo.bak   CentOS-fasttrack.repo  CentOS-Vault.repo
CentOS-CR.repo         CentOS-Media.repo
CentOS-Debuginfo.repo  CentOS-Sources.repo
# 更改名称后,网络yum源就已经失效了
本地yum源起作用的是CentOS-Media.repo,需要修改这个文件里面的内容
3.使光盘yum源生效
[root@localhost yum.repos.d]# vi CentOS-Media.repo
# CentOS-Media.repo
#
#  This repo can be used with mounted DVD media, verify the mount point for
#  CentOS-7.  You can use this repo and yum to install items directly off the
#  DVD ISO that we release.
#
# To use this repo, put in your DVD and use it with the other repos too:
#  yum --enablerepo=c7-media [command]
#
# or for ONLY the media repo, do this:
#
#  yum --disablerepo=\* --enablerepo=c7-media [command][c7-media]
name=CentOS-$releasever - Media
baseurl=file:///mnt/cdrom/
#        file:///media/cdrom/
#        file:///media/cdrecorder/
gpgcheck=1
enabled=1
gpgkey=file:///etc/pki/rpm-gpg/RPM-GPG-KEY-CentOS-7
[root@localhost yum.repos.d]# yum list
······
pygobject3-devel.x86_64            3.22.0-1.el7            c7-media
pygtk2.x86_64                      2.24.0-9.el7            c7-media
pygtk2-libglade.x86_64             2.24.0-9.el7            c7-media
pykde4.x86_64                      4.10.5-4.el7            c7-media
pykickstart.noarch                 1.99.66.12-1.el7        c7-media
pyldb.x86_64                       1.1.29-1.el7            c7-media
pyorbit.x86_64                     2.24.0-15.el7           c7-media
pyparsing.noarch                   1.5.6-9.el7             c7-media
pyparted.x86_64                    1:3.9-13.el7            c7-media
pytalloc.x86_64                    2.1.9-1.el7             c7-media
python-IPy.noarch                  0.75-6.el7              c7-media
python-augeas.noarch               0.5.0-2.el7             c7-media
python-babel.noarch                0.9.6-8.el7             c7-media
python-backports.x86_64            1.0-8.el7               c7-media
python-backports-ssl_match_hostname.noarch
······
更换国内yum源
思路
- cd /etc/yum.repos.d/
- rm -f
[root@localhost yum.repos.d]# wget http://mirrors.163.com/.help/CentOS7-Base-163.repo如果删除了CentOS-Base.repo  没有办法使用yum 安装wget 软件包 可以使用curl -O 进行下载
curl -O http://mirrors.163.com/.help/CentOS7-Base-163.repoyum-plugin-versionlock.noarch        1.1.31-45.el7           base
yum-rhn-plugin.noarch                2.0.1-10.el7            base
yum-updateonboot.noarch              1.1.31-45.el7           base
yum-utils.noarch                     1.1.31-45.el7           base
zenity.x86_64                        3.22.0-1.el7            base
zip.x86_64                           3.0-11.el7              base
zlib.i686                            1.2.7-17.el7            base
zlib-devel.i686                      1.2.7-17.el7            base
zlib-devel.x86_64                    1.2.7-17.el7            base
zlib-static.i686                     1.2.7-17.el7            base
zlib-static.x86_64                   1.2.7-17.el7            base
zsh.x86_64                           5.0.2-28.el7            base
zsh-html.x86_64                      5.0.2-28.el7            base
zziplib.i686                         0.13.62-5.el7           base
zziplib.x86_64                       0.13.62-5.el7           base
zziplib-devel.i686                   0.13.62-5.el7           base
zziplib-devel.x86_64                 0.13.62-5.el7           base
zziplib-utils.x86_64                 0.13.62-5.el7           base
[root@localhost yum.repos.d]# yum install -y zsh
已加载插件:fastestmirror
Loading mirror speeds from cached hostfile
正在解决依赖关系
--> 正在检查事务
---> 软件包 zsh.x86_64.0.5.0.2-28.el7 将被 安装
--> 解决依赖关系完成依赖关系解决====================================================================Package     架构           版本                 源            大小
====================================================================
正在安装:zsh         x86_64         5.0.2-28.el7         base         2.4 M事务概要
====================================================================
安装  1 软件包总下载量:2.4 M
安装大小:5.6 M
Downloading packages:
zsh-5.0.2-28.el7.x86_64.rpm                    | 2.4 MB   00:02
Running transaction check
Running transaction test
Transaction test succeeded
Running transaction正在安装    : zsh-5.0.2-28.el7.x86_64                         1/1 验证中      : zsh-5.0.2-28.el7.x86_64                         1/1 已安装:zsh.x86_64 0:5.0.2-28.el7                                         完毕!
安装扩展源
- yum install -y epel-release
[root@localhost yum.repos.d]# yum install -y epel-release
已加载插件:fastestmirror
Loading mirror speeds from cached hostfile
正在解决依赖关系
--> 正在检查事务
---> 软件包 epel-release.noarch.0.7-11 将被 安装
--> 解决依赖关系完成依赖关系解决====================================================================Package             架构          版本         源             大小
====================================================================
正在安装:epel-release        noarch        7-11         extras         15 k事务概要
====================================================================
安装  1 软件包总下载量:15 k
安装大小:24 k
Downloading packages:
epel-release-7-11.noarch.rpm                   |  15 kB   00:00
Running transaction check
Running transaction test
Transaction test succeeded
Running transaction正在安装    : epel-release-7-11.noarch                        1/1 验证中      : epel-release-7-11.noarch                        1/1 已安装:epel-release.noarch 0:7-11                                        完毕!
- yum list |grep epel
[root@localhost yum.repos.d]# yum list | grep epel
······
znc-modtcl.x86_64                         1.6.6-1.el7                  epel
zopfli.x86_64                             1.0.1-1.el7                  epel
zsh-lovers.noarch                         0.9.0-1.el7                  epel
zstd.x86_64                               1.3.4-1.el7                  epel
zulucrypt.x86_64                          5.0.1-1.el7                  epel
zulucrypt-console.x86_64                  5.0.1-1.el7                  epel
zulucrypt-devel.x86_64                    5.0.1-1.el7                  epel
zulucrypt-doc.noarch                      5.0.1-1.el7                  epel
zulucrypt-libs.x86_64                     5.0.1-1.el7                  epel
zvbi.x86_64                               0.2.35-1.el7                 epel
zvbi-devel.x86_64                         0.2.35-1.el7                 epel
zvbi-fonts.noarch                         0.2.35-1.el7                 epel
······
yum下载rpm包
- yum install -y 包名 --downloadonly
- ls /var/cache/yum/x86_64/7/
- yum install -y 包名 -- downloadonly --downloaddir=路径
- yum reinstall -y 包名 -- downloadonly --downloaddir=路径 重新安装
[root@localhost yum.repos.d]# yum install  zsh --downloadonly
已加载插件:fastestmirror
Loading mirror speeds from cached hostfile* epel: mirrors.ustc.edu.cn
正在解决依赖关系
--> 正在检查事务
---> 软件包 zsh.x86_64.0.5.0.2-28.el7 将被 安装
--> 解决依赖关系完成依赖关系解决====================================================================Package     架构           版本                 源            大小
====================================================================
正在安装:zsh         x86_64         5.0.2-28.el7         base         2.4 M事务概要
====================================================================
安装  1 软件包总下载量:2.4 M
安装大小:5.6 M
Background downloading packages, then exiting:
zsh-5.0.2-28.el7.x86_64.rpm                    | 2.4 MB   00:02
exiting because "Download Only" specified
#默认的下载目录
[root@localhost yum.repos.d]# ls /var/cache/yum/x86_64/7/base/packages/
glibc-2.17-222.el7.x86_64.rpm
glibc-common-2.17-222.el7.x86_64.rpm
glibc-devel-2.17-222.el7.x86_64.rpm
glibc-headers-2.17-222.el7.x86_64.rpm
libmpc-1.0.1-3.el7.x86_64.rpm
mpfr-3.1.1-4.el7.x86_64.rpm
zsh-5.0.2-28.el7.x86_64.rpm
#指定下载的目录
[root@localhost yum.repos.d]# yum install zsh --downloadonly --downloaddir=/tmp/
已加载插件:fastestmirror
Loading mirror speeds from cached hostfile* epel: mirrors.ustc.edu.cn
正在解决依赖关系
--> 正在检查事务
---> 软件包 zsh.x86_64.0.5.0.2-28.el7 将被 安装
--> 解决依赖关系完成依赖关系解决====================================================================Package     架构           版本                 源            大小
====================================================================
正在安装:zsh         x86_64         5.0.2-28.el7         base         2.4 M事务概要
====================================================================
安装  1 软件包总下载量:2.4 M
安装大小:5.6 M
Background downloading packages, then exiting:
exiting because "Download Only" specified
[root@localhost yum.repos.d]# ls /tmp/
zsh-5.0.2-28.el7.x86_64.rpm
使yum保留下载的rpm包
可以设置使yum保留已经下载的rpm包,供以后升级或重新安装时使用。
修改/etc/yum.conf即可:
- [main]
- cachedir=/tmp/
- keepcache=1
- debuglevel=2
[root@localhost ~]# ls /tmp/base/packages/
zsh-5.0.2-28.el7.x86_64.rpm
搭建一个局域网http的yum源
- 先创建一个目录,作为存在rpm包的目录
[root@localhost ~]# mkdir -p /root/data/yumdata
2.拷贝ISO镜像文件中的rpm包到/data/yumdata/
[root@localhost ~]# cp /mnt/cdrom/Packages/*.rpm /data/yumdata/
3.创建repository 创建repo 的库
- [root@localhost ~]# createrepo /data/yumdata/
#如果rpm包有增加,需要执行
createrepo --update /data/yumdata/
[root@localhost ~]# createrepo /data/yumdata/
Spawning worker 0 with 7308 pkgs
Workers Finished
Saving Primary metadata
Saving file lists metadata
Saving other metadata
Generating sqlite DBs
Sqlite DBs complete
- 安装nginx,提供http服务
- 安装nginx 需要先安装epel
- yum install epel-release
- yum install nginx
[root@localhost ~]# yum install -y nginx
已加载插件:fastestmirror
base                                         | 3.6 kB     00:00
c7-media                                     | 3.6 kB     00:00
epel/x86_64/metalink                         | 7.0 kB     00:00
extras                                       | 3.4 kB     00:00
updates                                      | 3.4 kB     00:00
Loading mirror speeds from cached hostfile* epel: mirrors.tuna.tsinghua.edu.cn
软件包 1:nginx-1.12.2-2.el7.x86_64 已安装并且是最新版本
无须任何处理
nginx软件包之前安装过提示已经是最新版本
安装完成后需要更改一下配置文件
[root@localhost ~]# vim /etc/nginx/nginx.conf
server {listen       80 default_server;listen       [::]:80 default_server;server_name  _;root         /data/yumdata; IP 可以访问到rpm包# Load configuration files for the default server block.include /etc/nginx/default.d/*.conf;location / {autoindex on; 在这个地方添加  autoindex on;未来提供目录浏览}error_page 404 /404.html;location = /40x.html {}error_page 500 502 503 504 /50x.html;
[root@localhost ~]# nginx -t 检测nginx 配置语法有没有错误
nginx: the configuration file /etc/nginx/nginx.conf syntax is ok
nginx: configuration file /etc/nginx/nginx.conf test is successful
[root@localhost ~]# systemctl start nginx 启动nginx
- 客户端上配置repo文件
[root@localhost ~]# cd /etc/yum.repos.d/
[root@localhost yum.repos.d]# mkdir bak
[root@localhost yum.repos.d]# mv *.repo  bak/
[root@localhost yum.repos.d]# ls
bak  CentOS-Base.repo.bak
使用ip 访问 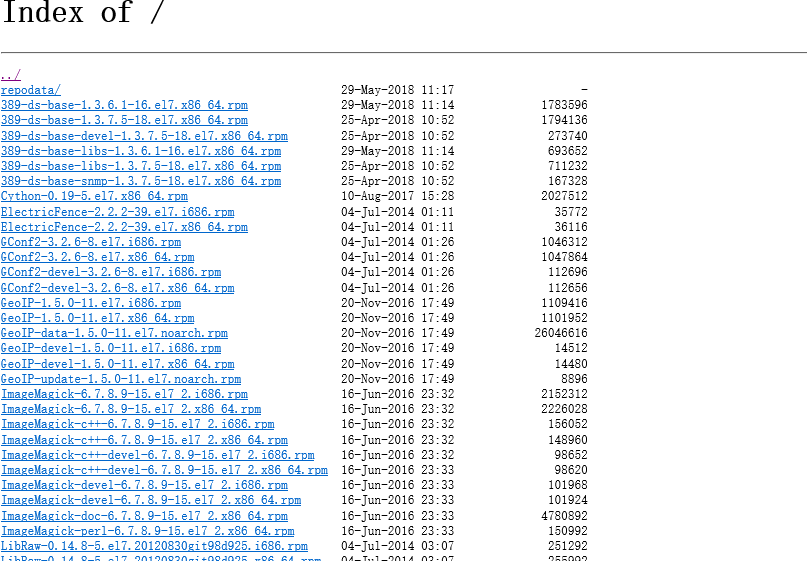
源码包安装
# 源码包存放位置 /usr/local/src
[root@localhost ~]# cd /usr/local/src
[root@localhost src]# wget  http://mirrors.cnnic.cn/apache/httpd/httpd-2.4.33.tar.gz
--2018-05-29 20:58:29--  http://mirrors.cnnic.cn/apache/httpd/httpd-2.4.33.tar.gz
正在解析主机 mirrors.cnnic.cn (mirrors.cnnic.cn)... 101.6.8.193, 2402:f000:1:408:8100::1
正在连接 mirrors.cnnic.cn (mirrors.cnnic.cn)|101.6.8.193|:80... 已连接。
已发出 HTTP 请求,正在等待回应... 302 Found
位置:http://219.238.7.69/files/200300000B7F2CD1/mirrors.hust.edu.cn/apache//httpd/httpd-2.4.33.tar.gz [跟随至新的 URL]
--2018-05-29 20:58:29--  http://219.238.7.69/files/200300000B7F2CD1/mirrors.hust.edu.cn/apache//httpd/httpd-2.4.33.tar.gz
正在连接 219.238.7.69:80... 已连接。
已发出 HTTP 请求,正在等待回应... 200 OK
长度:9076901 (8.7M) [application/octet-stream]
正在保存至: “httpd-2.4.33.tar.gz”100%[==========================>] 9,076,901   46.6KB/s 用时 4m 0s  2018-05-29 21:02:31 (36.9 KB/s) - 已保存 “httpd-2.4.33.tar.gz” [9076901/9076901])
[root@localhost src]# ls
httpd-2.4.33.tar.gz
[root@localhost src]# tar -zxvf httpd-2.4.33.tar.gz
[root@localhost src]# ls
httpd-2.4.33  httpd-2.4.33.tar.gz
[root@localhost src]# cd httpd-2.4.33
[root@localhost httpd-2.4.33]# ls
ABOUT_APACHE     CMakeLists.txt  INSTALL         NWGNUmakefile
acinclude.m4     config.layout   InstallBin.dsp  os
Apache-apr2.dsw  configure       LAYOUT          README
Apache.dsw       configure.in    libhttpd.dep    README.cmake
apache_probes.d  docs            libhttpd.dsp    README.platforms
ap.d             emacs-style     libhttpd.mak    ROADMAP
build            httpd.dep       LICENSE         server
BuildAll.dsp     httpd.dsp       Makefile.in     srclib
BuildBin.dsp     httpd.mak       Makefile.win    support
buildconf        httpd.spec      modules         test
CHANGES          include         NOTICE          VERSIONING这个里面有README 和 INSTALL 这两个文件,可以查看这些帮助文档来进行安装[root@localhost httpd-2.4.33]# cat INSTALL APACHE INSTALLATION OVERVIEWQuick Start - Unix------------------For complete installation documentation, see [ht]docs/manual/install.html orhttp://httpd.apache.org/docs/2.4/install.html$ ./configure --prefix=PREFIX  安装步骤$ make$ make install$ PREFIX/bin/apachectl start
[root@localhost httpd-2.4.33]# ./configure --prefix=/usr/local/apache2
checking for chosen layout... Apache
checking for working mkdir -p... yes
checking for grep that handles long lines and -e... /usr/bin/grep
checking for egrep... /usr/bin/grep -E
checking build system type... x86_64-pc-linux-gnu
checking host system type... x86_64-pc-linux-gnu
checking target system type... x86_64-pc-linux-gnu
configure:
configure: Configuring Apache Portable Runtime library...
configure:
checking for APR... no
configure: error: APR not found.  Please read the documentation.
运行安装命令的时候报错,可以使用echo $? 如果执行的结果非0 说明上一条命令是错误的
[root@localhost httpd-2.4.33]# echo $?
1
checking for APR... no
configure: error: APR not found. Please read the documentation.
- 下载apr 源码包对apr 进行安装
[root@localhost src]# wget http://mirrors.cnnic.cn/apache/apr/apr-1.6.3.tar.gz
--2018-05-29 21:20:57--  http://mirrors.cnnic.cn/apache/apr/apr-1.6.3.tar.gz
正在解析主机 mirrors.cnnic.cn (mirrors.cnnic.cn)... 101.6.8.193, 2402:f000:1:408:8100::1
正在连接 mirrors.cnnic.cn (mirrors.cnnic.cn)|101.6.8.193|:80... 已连接。
已发出 HTTP 请求,正在等待回应... 302 Found
位置:http://219.239.26.11/files/224600000AE1B9A7/mirror.bit.edu.cn/apache//apr/apr-1.6.3.tar.gz [跟随至新的 URL]
--2018-05-29 21:20:58--  http://219.239.26.11/files/224600000AE1B9A7/mirror.bit.edu.cn/apache//apr/apr-1.6.3.tar.gz
正在连接 219.239.26.11:80... 已连接。
已发出 HTTP 请求,正在等待回应... 200 OK
长度:1072661 (1.0M) [application/octet-stream]
正在保存至: “apr-1.6.3.tar.gz”100%[==========================>] 1,072,661   6.62MB/s 用时 0.2s   2018-05-29 21:20:58 (6.62 MB/s) - 已保存 “apr-1.6.3.tar.gz” [1072661/1072661])[root@localhost src]# ls
apr-1.6.3.tar.gz  httpd-2.4.33  httpd-2.4.33.tar.gz
[root@localhost src]# tar -zxvf apr-1.6.3.tar.gz
[root@localhost src]# ls
apr-1.6.3  apr-1.6.3.tar.gz  httpd-2.4.33  httpd-2.4.33.tar.gz
[root@localhost src]# cd  apr-1.6.3
[root@localhost apr-1.6.3]# ls
apr-config.in     CMakeLists.txt  libapr.mak     poll
apr.dep           config.layout   libapr.rc      random
apr.dsp           configure       LICENSE        README
apr.dsw           configure.in    locks          README.cmake
apr.mak           docs            Makefile.in    shmem
apr.pc.in         dso             Makefile.win   strings
apr.spec          emacs-mode      memory         support
atomic            encoding        misc           tables
build             file_io         mmap           test
buildconf         helpers         network_io     threadproc
build.conf        include         NOTICE         time
build-outputs.mk  libapr.dep      NWGNUmakefile  tools
CHANGES           libapr.dsp      passwd         user
还是使用
- ./configure --prefix=/usr/local/src
- make
- make test
- make install
[root@localhost apr-1.6.3]# ./configure --prefix=/usr/desired/path/of/apr2
[root@localhost apr-1.6.3]# echo $?
0
[root@localhost apr-1.6.3]# make
[root@localhost apr-1.6.3]# make test
[root@localhost apr-1.6.3]# echo $?
0
[root@localhost apr-1.6.3]# make install
安装完apr 然后再回去继续安装apache还是报错没有APR 这时候需要关联一下路径
#./configure --prefix=/usr/local/src/apache2 --with-apr=/usr/local/src/apr
然后报错 没有安装checking for APR-util... no configure: error: APR-util not found. Please read the documentation. 继续安装apr-util
# ./configure --prefix=/usr/local/src/apr-util2 --with-apr=/usr/local/src/apr
[root@localhost ~]# ls /usr/local/src/apache2/
bin    cgi-bin  error   icons    logs  manual
build  conf     htdocs  include  man   modules
使用源码包安装apache时出现的问题以及解决方法
提示没有安装apr 下载源码包安装 也可以使用yum安装,本章节讲的使用源码包所以使用源码包安装的方法,
提示没有安装apr-util 同上下载安装,./configure时需要关联apr ./configure --prefix=/usr/local/src/apr-util2 --with-apr=/usr/local/src/apr
apr-util make报错 yum install expat-devel
安装apache时需要关联apr和apr-util2 ./configure --prefix=/usr/local/src/apache2 --with-apr=/usr/local/src/apr --with-apr-util=/usr/local/src/aprutil2
pcre-config... false: yum -y install pcre-devel
转载于:https://my.oschina.net/u/3850965/blog/1820839
linux 中软件安装的三种方法相关推荐
- linux ubuntu 软件安装的三种方式
apt-get 自动安装软件,解决依赖关系 sudo apt-get update 更新源 源在 /etc/apt/sources.list 文件中sudo apt-get install softw ...
- 【Linux入门到精通系列讲解】Centos 7软件安装的三种方式
centos 软件安装的三种方式 Linux下面安装软件的常见方法: 一.yum 替你下载软件 替你安装 替你解决依赖关系 点外卖 缺少的东西 外卖解决 1.方便 简单 2.没有办法深入修改 yum ...
- 【转】Linux下软件安装的几种方式
转自Linux下软件安装的几种方式 Linux 系统的/usr目录 Linux 软件安装到哪里合适,目录详解 Linux 的软件安装目录是也是有讲究的,理解这一点,在对系统管理是有益的 /usr:系统 ...
- qt打包rpm时候先安装其他软件_云计算学习路线图素材课件,Linux中软件安装的方式...
很多初学者感觉云计算就是一个听起来比较高大上的名词,每次想要了解它的时候都像是雾里看花,迷迷糊糊看不真切,至于它是干什么的就更不了解了,其实云计算学起来在IT行业中还是比较容易上手的,接下来我给大家分 ...
- _云计算学习路线图素材课件,Linux中软件安装的方式
很多初学者感觉云计算就是一个听起来比较高大上的名词,每次想要了解它的时候都像是雾里看花,迷迷糊糊看不真切,至于它是干什么的就更不了解了,其实云计算学起来在IT行业中还是比较容易上手的,接下来我给大家分 ...
- 什么是android应用程序未安装,Android 解决应用程序未安装的三种方法
<Android 解决应用程序未安装的三种方法>由会员分享,可在线阅读,更多相关<Android 解决应用程序未安装的三种方法(3页珍藏版)>请在人人文库网上搜索. 1.解决安 ...
- 禁止开机时软件自启动的三种方法
禁止开机时软件自启动的三种方法 目前常用的方法一般有三种:用软件禁止:用Windows命令禁止:直接修改注册表.那么就让我们分别来看一下. 一.使用软件禁止软件的自动启动 现在有很多的软件可以禁止开机 ...
- 【查看linux中所有用户的三种方式】
查看linux中所有用户的三种方式学习目标: 提示:通过使用 /etc/passwd 文件,getent 命令,compgen 命令这三种方法查看系统中用户的信息 用户信息存放位置: 提示:Linux ...
- Altium Designer16.0中查找元器件的三种方法
Altium Designer16.0中查找元器件的三种方法 方法一:在已知库中查找 1 这个方法仅适用于已知元器件所在的库的情况.如果已知某个元器件在某个库中,那么只需在那个库中进行查找即可.下面以 ...
- LaTeX中处理参考文献的三种方法总结
LaTeX 中处理参考文献的三种方法总结 1.摘要 2.关键词 3.处理参考文献常用的三种方法 3.1 方法一:用BibLaTeX处理 3.2 方法二:用BibTeX处理 3.3 方法三:用thebi ...
最新文章
- 大数据学习,涉及的知识点
- C语言主应用程序在哪设置,哪位师傅知道51单片机怎样编写子程序?C语言的。在主程序里调...
- java 获取微信公众号code为空
- git中的删除命令操作
- C++ 11 创建和使用共享 weak_ptr
- close wait 过多原因_time_wait 详解和解决方案
- 51 -算法 -斐波拉奇数列 -LeetCode 70 -递推
- 华硕微型计算机配置数据,“智能”显卡 华硕ROG Matrix显卡赏析
- DX中关于error C2664: “ID3DXEffect::SetMatrix”: 不能将参数 1 从“const char [17]”转换为“D3DXHANDLE”
- java刷票小程序,小程序投票系统刷票
- 不容错过!Greenplum的又一本好书
- 水经注地图发布服务中间件服务配置功能说明
- 一个节拍都不错过——dfuse 2019年第三季度回顾
- JAXWS CXF HelloWorld + MyEclipse + Maven + Jetty Byron自學視頻01
- 限流的两种算法以及相关的实现方法
- 使用electron-builder --win --x64 命令 app-builder-bin\win\x64\app-builder.exe 报错
- Css 弹性布局(Flex)详细介绍(Flex 属性详解、场景分析)
- 实战三十九:鲍鱼年龄预测热力图相关性分析
- 公众号怎么赚钱新思路,这么运营你也可以轻松获得睡后收入!
- Mac appStore下载软件报500错误的解决方法