php在windows编译_在Windows上编译PHP
php在windows编译
Compiling PHP from source code is more commonly done on Unix-type systems. Those working in a Windows environment are more likely to download and install PHP from precompiled packages. And while I don’t disagree it’s easier to use a precompiled solution, even on Unix systems, there are some advantages that can come with compiling a binary from source. In general:
从源代码编译PHP通常是在Unix类型的系统上完成的。 在Windows环境中工作的人更有可能从预编译的软件包中下载并安装PHP。 尽管我不同意,但即使在Unix系统上,使用预编译的解决方案也更容易,但是从源代码编译二进制文件可能会有一些优势。 一般来说:
- You have the ability to fine tune the final product when you compile. Maybe you want to have a particular extension compiled directly into the binary instead of loading it as an external library. Or, perhaps you want to turn off a particular feature which would normally be available by default.您可以在编译时对最终产品进行微调。 也许您想将特定的扩展名直接编译到二进制文件中,而不是将其作为外部库加载。 或者,也许您想关闭通常默认情况下可用的特定功能。
- You can make tweaks to the compilation process if you’re so inclined which may enhance performance for your particular environment (of course this assumes you already know what you’re doing in which case you wouldn’t be reading this article).如果您愿意,可以对编译过程进行调整,以提高特定环境的性能(当然,这是假定您已经知道自己在做什么,在这种情况下,您将不会阅读本文)。
- Compiling might be the only way to get things to work if the precompiled binaries were built against older versions of supporting software and libraries than you are running on your system.如果预编译的二进制文件是针对比系统上正在运行的支持软件和库更旧的版本构建的,则编译可能是使事情工作的唯一方法。
But be forewarned: compiling can be a frustrating task, especially on Windows! You must ensure your build environment is set up correctly, learn how to use the compiler and other build tools properly, and satisfy any library dependencies. Hopefully this article is your first step in overcoming many of these obstacles.
但请注意:编译可能是一项令人沮丧的任务,尤其是在Windows上! 您必须确保正确设置了构建环境,学习如何正确使用编译器和其他构建工具,并满足任何库依赖性。 希望本文是您克服这些障碍的第一步。
设置构建环境 (Setting Up the Build Environment)
PHP is written in C and so a C compiler is necessary if you’re going to build PHP from source. C++ is a super set of C, so a good C++ compiler should be able to compile C code as well, though sometimes this isn’t always the case. For Windows, Microsoft’s Visual C++ Express (to which I’ll refer to as VC++ from here after) should suffice and is freely available from Microsoft’s website. I’m using the 2010 edition for this write up.
PHP用C编写,因此如果要从源代码构建PHP,则必须使用C编译器。 C ++是C的超集,因此一个好的C ++编译器也应该能够编译C代码,尽管有时并非总是如此。 对于Windows,Microsoft的Visual C ++ Express(在下文中将其称为VC ++)就足够了,并且可以从Microsoft的网站免费获得 。 我使用的是2010年版。
When choosing your compiler version, you should keep in mind how you will be running PHP. If you’ll be running mod_php with an officially precompiled Apache binary then you’ll want to compile PHP using Visual Studio 6 since that’s the version used to compile Apache. The module needs to target the same runtime library as Apache, in this case msvcrt.dll. If you’re building Apache from source as well, or if you’re going to run PHP as CLI or FastCGI, then this isn’t an issue and 2010 will work just fine.
选择编译器版本时,应记住如何运行PHP。 如果要使用正式预编译的Apache二进制文件运行mod_php,则需要使用Visual Studio 6编译PHP,因为那是用于编译Apache的版本。 该模块需要与Apache定位相同的运行时库,在本例中为msvcrt.dll 。 如果您还从源代码构建Apache,或者要以CLI或FastCGI的形式运行PHP,那么这不是问题,2010年就可以正常工作。
You’ll also need to install the Windows Software Development Kit (here after SDK) as well. The SDK supplies us with important header files for the Windows platform which we’ll need for a successful compile. It too is available for free; I’m using version 7.1.
您还需要安装Windows软件开发工具包(在SDK之后)。 SDK为我们提供了Windows平台的重要头文件,而成功编译则需要这些头文件。 它也是免费提供的 ; 我正在使用7.1版。
Install the compiler first and then the SDK. I won’t discuss the installation since both have a graphical installation wizard to guide you through the process.
首先安装编译器,然后安装SDK。 我不会讨论安装,因为两者都有一个图形化安装向导来指导您完成安装过程。
Once you have a working compiler set up, download the binary tools and deps packages from windows.php.net/downloads/php-sdk. The binary tools package (I’m using the 20110915 archive) contains development tools like re2c, bison, and some additional commands you’ll need to build PHP. The deps package (I’m using the 5.4 archive since that matches the version of PHP I’ll be compiling) contains the minimum header and library dependencies needed, such as zlib.h.
设置好工作的编译器后,从Windows.php.net/downloads/php-sdk下载二进制工具和deps软件包。 二进制工具包(我正在使用20110915归档文件)包含诸如re2c,bison之类的开发工具,以及一些构建PHP所需的其他命令。 deps包(我使用的是5.4归档文件,因为它与将要编译PHP版本匹配)包含所需的最小标头和库依赖关系,例如zlib.h
It probably goes without saying that you’ll want to download the PHP source as well from windows.php.net/download. At the time of this writing, the current version of PHP is 5.4.6 so that’s the version number you’ll see in my examples.
不用说,您也想从windows.php.net/download下载PHP源代码。 在撰写本文时,PHP的当前版本是5.4.6,因此这是您在示例中看到的版本号。
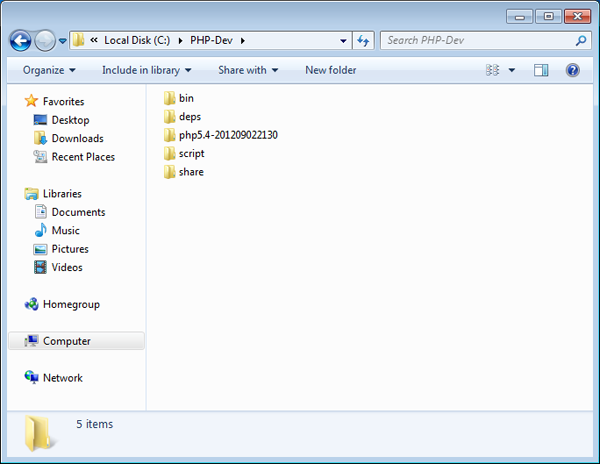
It’s a good idea to create a workspace to which you can unpack the source code to and compile in without mucking up the rest of your system. Create the folder C:PHP-Dev which will serve as the working directory, and then unpack the binary tools archive into it.
创建一个工作区是一个好主意,您可以将源代码解压缩到该工作区并进行编译,而不会破坏系统的其余部分。 创建将用作工作目录的文件夹C:PHP-Dev ,然后将二进制工具存档解压缩到其中。
Next, extract the contents of the PHP source archive to C:PHP-Dev so you have the php5.4 source folder there, and then extract the deps archive into a sibling deps folder. Your directory structure should look similar to this:
接下来,将PHP源归档文件的内容提取到C:PHP-Dev以便在那里有php5.4源文件夹,然后将deps归档文件提取到同级deps文件夹中。 您的目录结构应类似于以下内容:
Open the Windows SDK Command Prompt that was installed with the SDK (Start > Microsoft Windows SDK > Windows SDK Command Prompt) and execute these commands:
打开随SDK一起安装的Windows SDK命令提示符(“开始”>“ Microsoft Windows SDK”>“ Windows SDK命令提示符”),然后执行以下命令:
setenv /release /xp /x86
cd C:PHP-Dev
binphpsdk_setvars.bat
Using the SDK Command Prompt console is desirable over the ordinary cmd.exe console as it sets many environment variables specific for compiling source code. The compile commands later should also be executed in this console.
与普通的cmd.exe控制台相比,使用SDK命令提示符控制台cmd.exe可取,因为它会设置许多特定于编译源代码的环境变量。 以后的编译命令也应在此控制台中执行。
The flags to setenv set some build properties for the environment; In this case I’ve set the environment to target a Windows XP 32-bit release build. You can try and build with /x64 if you’re feeling adventurous, but there are still some issues with it. Specifying different versions of Windows such as /vista will most likely yield problems because of some odd defines in the build scripts (PHP still aims to be XP-compatible). Unless you really know what you are doing, it’s probably safest to stick with the recommended values that I used above.
setenv的标志为环境设置了一些构建属性。 在这种情况下,我已将环境设置为以Windows XP 32位发行版为目标。 如果您喜欢冒险,可以尝试使用/x64构建,但是仍然存在一些问题。 由于构建脚本中的某些奇怪定义,因此指定Windows的不同版本(例如/vista很可能会产生问题(PHP仍旨在与XP兼容)。 除非您真的知道自己在做什么,否则坚持我上面使用的建议值可能是最安全的。
phpsdk_setvars.bat script then goes on to set some additional environment variables so the build process can find the binary tools.
然后phpsdk_setvars.bat脚本继续设置一些其他环境变量,以便构建过程可以找到二进制工具。
Keep in mind that all this variable setting is only temporarily for your console’s session. If you close out of the prompt and go back to compile later, you’ll need to run the commands again. If you don’t, you’ll receive errors like the following when you run configure later in the process and be unable to proceed:
请记住,所有此变量设置仅在控制台会话中是临时的。 如果关闭提示并稍后返回以进行编译,则需要再次运行命令。 如果不这样做,则在此过程中稍后运行configure时将收到类似以下的错误,并且无法继续:
Checking for bison.exe ...  <not found>
ERROR: bison is required
Making sure you have the correct build environment, the required sources, and any dependencies is the hardest part of the process. So now that your environment is set up and the source code and dependencies are in their proper place, it’s time to compile!
确保您拥有正确的构建环境,所需的源以及所有依赖关系是该过程中最难的部分。 因此,既然您的环境已经设置好,并且源代码和依赖项已经放置在正确的位置,那么该编译了!
编译PHP (Compiling PHP)
In the SDK Command Prompt, navigate to the PHP source folder and run buildconf. The command is responsible for generating a configuration file which will create a Makefile to drive the compilation process.
在SDK命令提示符中,导航到PHP源文件夹并运行buildconf 。 该命令负责生成配置文件,该文件将创建一个Makefile来驱动编译过程。
After buildconf completes (it should only take a second), run configure --help and examine what functionality you wish to enable/disable, and then re-run configure with any desired options. It’s a good idea to inspect the output before moving on since it will warn you if any of the necessary dependencies are not available. If that happens, you can either install the dependencies and re-run configure again or adjust the invocation to disable the extensions that require them.
在buildconf完成之后(只需一秒钟),运行configure --help并检查您希望启用/禁用的功能,然后使用任何所需的选项重新运行configure 。 在继续之前检查输出是个好主意,因为它会在没有必要的依赖项时警告您。 如果发生这种情况,您可以安装依赖项并重新运行configure ,或者调整调用以禁用需要它们的扩展。
Finally, run nmake to kick off the compile.
最后,运行nmake开始编译。
cd C:PHP-Devphp5.4
buildconf
configure
nmake
nmake test
If either configure or nmake fails, there’s a good chance the problem is one of two things: 1) your environment is not set up correctly, or 2) you’ve enabled a feature which depends on an external library and the library is not installed on your system. Double check that you’ve set up the environment according to the instructions above and that any extra libraries which may be necessary based on your configure options have been installed.
如果configure或nmake失败,则很有可能是以下两个问题之一:1)您的环境未正确设置,或2)您启用了依赖于外部库的功能并且未安装该库在您的系统上。 仔细检查您是否已按照上述说明设置了环境,并已安装了根据您的配置选项可能需要的任何其他库。
When the first nmake compile process has completed you’ll find your shiny new PHP binaries in the Release_TS folder. nmake test runs the new binaries through a battery of bug tests to make sure things are working as they should be. The results of nmake test are forwarded to the QA team which depends on them to improve PHP, so even though it may take a few minutes to run, it’s the responsible thing to do.
当第一个nmake编译过程完成时,您将在Release_TS文件夹中找到闪亮的新PHP二进制文件。 nmake test通过一系列错误测试来运行新的二进制文件,以确保一切正常。 nmake test的结果已转发给质量保证团队,该团队依靠他们来改进PHP,因此即使运行可能需要几分钟,这也是负责任的事情。
At this point you can also take the extra step of running nmake snap which will create ZIP archives with the binaries which you can copy around.
在这一点上,您还可以采取额外的步骤来运行nmake snap ,这将创建具有二进制文件的ZIP存档,您可以在其中进行复制。
编译扩展 (Compiling Extensions)
There are two ways to compile PHP extensions: statically and dynamically. A statically-compiled extension is compiled into the PHP binary itself, while a dynamically-compiled one is a separate DLL which can be loaded later through the php.ini file. Extensions are typically compiled as DLLs, although there are some advantages to static compilation as well; it ultimately it depends on your needs.
有两种编译PHP扩展的方法:静态和动态。 静态编译的扩展本身被编译到PHP二进制文件中,而动态编译的扩展是一个单独的DLL,可以稍后通过php.ini文件加载。 扩展通常以DLL的形式进行编译,尽管静态编译也有一些优点。 最终取决于您的需求。
To compile PHP extensions on Windows, extract the extension’s source code folder into the ext folder of your PHP source directory. Then, rebuild the configure script by running buildconf --force and re-compile PHP using the appropriate flags to enable the extension.
要在Windows上编译PHP扩展,请将扩展的源代码文件夹提取到PHP源目录的ext文件夹中。 然后,通过运行buildconf --force重建配置脚本,并使用适当的标志重新编译PHP以启用扩展。
As an example, let’s compile the AOP extension statically. Download the source code from PECL, and extract it’s folder into ext. Then execute the following:
例如,让我们静态地编译AOP扩展。 从PECL下载源代码 ,并将其文件夹提取到ext 。 然后执行以下命令:
cd C:PHP-Devphp5.4
buildconf --force
configure --enable-aop
nmake
The --force option to buildconf forces it to rebuild the configuration scripts. Afterwards, run configure --help and you should see the option to include the new extension in the output. In this case, it’s --enable-aop.
buildconf的--force选项强制其重新生成配置脚本。 然后,运行configure --help ,您应该看到在输出中包括新扩展名的选项。 在这种情况下,它是--enable-aop 。
When nmake finishes, you’ll have a newly built PHP binary with the AOP extension baked right in.
nmake finishes ,您将拥有一个新生成PHP二进制文件,其中包含AOP扩展。
If you want an extension to be available as a DLL and not baked into PHP, you can follow the same steps as above but specify “shared” as a value to configure’s enable option.
如果您希望扩展以DLL的形式提供而不是不包含在PHP中,则可以按照上述相同的步骤进行操作,但是将“ shared”指定为用于配置enable选项的值。
buildconf --force
configure --enable-aop=shared
The resulting DLL will be in the Release_TS folder alongside the PHP binary once compilation has finished, in this case named php_aop.dll.
编译完成后,生成的DLL将与PHP二进制文件一起位于Release_TS文件夹中,在本例中为php_aop.dll 。
Compiling on Windows is still a bit tricky, especially when it comes to extensions. The windows version of phpize seems to be broken and I have yet been able to compile a DLL after-the-fact, much like how PECL does. There have been tremendous strides made by the PHP team in the past five years or so towards making PHP just as awesome on Windows as it is on Unix, so hopefully the snags and wrinkles will be ironed out in time. In the meantime, I recommend compiling PHP and your shared DLLs at the same time.
在Windows上编译仍然有些棘手,尤其是在扩展方面。 Windows版本的phpize似乎已损坏, phpize我仍然能够编译DLL,就像PECL那样。 在过去的五年左右的时间里,PHP团队在使PHP在Windows上与在Unix上一样出色方面取得了长足的进步,因此希望能及时消除这些障碍。 同时,我建议同时编译PHP和共享的DLL。
摘要 (Summary)
The ability to compile source code is a good skill to have, especially if you later want modify PHP. Perhaps you want to add new functionality, link against a new library, or just be the next great PHP core developer (they can always use the help!). And now that you know how, feel free to hack and build away!
具备编译源代码的能力是一项很好的技能,尤其是如果您以后想要修改PHP时。 也许您想添加新功能,链接到新库,或者只是成为下一个伟大PHP核心开发人员(他们可以随时使用帮助!)。 现在,您知道了如何,随时可以破解和扩展!
Image via Fotolia
图片来自Fotolia
翻译自: https://www.sitepoint.com/compiling-php-from-source-on-windows/
php在windows编译
php在windows编译_在Windows上编译PHP相关推荐
- 树莓派指定python2编译_在树莓派上编译安装ROS2
最新编译方式已经修改,请参考官网最新文档: ------------------------------------下文已经过时 仅供参考------------------------------- ...
- 其他笔记 - Mono for Windows 跨平台 Runtime 在Win10上编译和安装
目录 在Windows上编译Mono 安装环境 下载Mono源码 预配置编译安装说明 详细的编译说明 启用BTLS作为Windows构建的加密后端 为Windows版本启用LLVM 使用monolit ...
- centos llvm安装_在CentOS上编译安装llvm-3.8.1详细教程
在CentOS上编译安装llvm-3.8.1详细教程 2020/1/11 18:12 1682次 注:CentOS版本是6.8,6.x版本的操作类似 安装需求: [list] [*]Cmake: 3 ...
- 依赖编译_开源项目的编译优化实践
Zilliz 公司以 "重新定义数据科学" (Reinvent Data Science)为愿景,专注于研发利用新一代异构计算的开源数据科学软件.随着各项目的蓬勃发展,我们对于持续 ...
- moses 编译_手把手教你编译MOSES机器翻译系统 | 学步园
摩西是一个由英国爱丁堡大学的SMT先锋团队[科恩等人,2007 ]开发的翻译系统.摩西的最新版本支持许多特征和功能.例如,它支持基于短语和基于语法基础的模型(从短语/规则提取解码).同时,它提供的因素 ...
- linux编译aborted,Ubuntu Linux上编译kernel出错__stack_chk_fail
Ubuntu Linux上编译kernel出错__stack_chk_fail 发布时间:2008-02-06 00:02:18来源:红联作者:SMuonon init/built-in.o: In ...
- java多态编译_关于java:编译时多态是否是这样的运行时多态?
通过研究,我了解到: 重载,运算符重载和重载是我们所说的多态. 多态性意味着同一实体有时表现不同 例如: 参数 add(12, 13); add(12.2, 13.3); 相同实体(add())有时会 ...
- windows命令_用Windows恢复环境(WinRE)排除电脑故障,只需一条命令
在Windows10上,Windows Recovery Environment(Windows恢复环境,WinRE)是一项功能,它将自动修复.重置为出厂默认设置.系统映像恢复和其他故障排除工具捆绑在 ...
- java输出windows系统日志_闲聊Windows系统日志
title: "闲聊Windows系统日志" date: 2021-02-22T18:59:49+08:00 draft: true tags: ['windows'] autho ...
最新文章
- common pool2 mysql_连接池Commons Pool2的使用
- mapreduce运行模式
- c语言结构体易错点,C语言结构体注意点
- kubernetes-Pod定义
- 设置新生代与老年代比例关系
- [C++][线程安全]单例模式下双检查锁和线程
- 关于memcpy和memmove两函数的区别
- md5加密解密代码_Python内置方法实现基于秘钥的信息加解密
- “XEIM”国内开源即时通讯XEIM
- esp8266 wifi 中继整理
- python requests接收chunked编码问题
- 侦探小明:如何判断电脑里突然出现的流氓广告来自哪个软件?
- 如何开发自己的VUE组件库并打包复用
- 直播六脉神剑,练好这几招才能行走江湖
- linux查看web密码,fuel7.0 openstack webui 默认密码查看
- 基于springboot vue uniapp点餐外码系统源码(毕设)
- 阿里前端工程师面试题+解题思路
- 【d3.js实践教程01】d3基本操作
- 配置ubuntu20.04 LTS深度学习工作站教程
- 对于新手来说怎么动漫人物手伸出去的动作?该怎么画?