react入门代码_如何在React中构建温度控制应用程序-包括提示和入门代码
react入门代码
我们正在建立的 (What we're building)
In this beginner React project, we're going to learn how to use state hooks, handle events, apply CSS based on state, and more! Check it out:
在这个初学者的React项目中,我们将学习如何使用状态挂钩,处理事件,基于状态应用CSS等等! 看看这个:
喜欢视频教程吗? (Prefer Video Tutorials?)
Check out the YouTube tutorial here.
在此处查看YouTube教程。
自己尝试 (Try it yourself)
If you want to have a go yourself first, here are the scenarios (you can also grab the CSS/starter code below):
如果您想先自己动手,请参考以下场景(您也可以在下面获取CSS /入门代码):
- When the user clicks the "increase button", the temperature should increase当用户单击“增加按钮”时,温度应增加
- The temperature cannot go above 30温度不能超过30
- When the user clicks the "decrease button", the temperature should decrease当用户单击“降低按钮”时,温度应降低
- The temperature cannot go below 0温度不能低于0
- When the temperature is 15 or above, the background color should change to red (HINT: I've included a style called "hot" you can use)当温度为15或更高时,背景色应变为红色(提示:我提供了一种可以使用的名为“热”的样式)
- When the temperature is below 15, the background color should be blue (HINT: I've included a style called "cold" you can use)当温度低于15时,背景色应为蓝色(提示:我提供了一种称为“冷”的样式,可以使用)
设置/入门代码 (Setup/Starter code)
NOTE: I'm assuming you have a React development environment setup. If not, check out this video to help you get started.
注意:我假设你有一个React开发环境设置。 如果没有, 请观看此视频以帮助您入门。
All we need to get started is to use create-react-app. Fire up a terminal and run:
我们需要开始的只是使用create-react-app 。 启动终端并运行:
npx create-react-app temperature-controlLet the terminal do its thing and open up the project in VS Code (or whatever you use).
让终端执行其操作,并以VS Code(或您使用的任何方式)打开项目。
Next, go into index.js, delete everything, and paste in the following:
接下来,进入index.js ,删除所有内容,然后粘贴以下内容:
import React from 'react';
import ReactDOM from 'react-dom';
import './index.css';
import App from './App';ReactDOM.render(<React.StrictMode><App /></React.StrictMode>,document.getElementById('root')
);
Go into index.css, delete everything, and paste in the following:
进入index.css ,删除所有内容,然后粘贴以下内容:
body {font-family: sans-serif;text-align: center;display: flex;flex-direction: column;justify-content: center;align-items: center;text-align: center;min-height: 100vh;
}.app-container {height: 400px;width: 300px;background: #2b5870;border-radius: 20px;box-shadow: 10px 10px 38px 0px rgba(0, 0, 0, 0.75);
}.temperature-display-container {display: flex;justify-content: center;align-items: center;height: 70%;
}.temperature-display {display: flex;border-radius: 50%;color: #ffffff;height: 220px;width: 220px;text-align: center;justify-content: center;align-items: center;font-size: 48px;border: 3px #ffffff solid;transition: background 0.5s;
}button {border-radius: 100px;height: 80px;width: 80px;font-size: 32px;color: #ffffff;background: rgb(105, 104, 104);border: 2px #ffffff solid;
}button:hover {background: rgb(184, 184, 184);cursor: pointer;
}button:focus {outline: 0;
}.button-container {display: flex;justify-content: space-evenly;align-items: center;
}.neutral {background: rgb(184, 184, 184);
}.cold {background: #035aa6;
}.hot {background: #ff5200;
}
Lastly, go into App.js, delete everything, and paste in the following:
最后,进入App.js ,删除所有内容,然后粘贴以下内容:
import React from 'react';const App = () => {return (<div className='app-container'><div className='temperature-display-container'><div className='temperature-display'>10°C</div></div><div className='button-container'><button>+</button><button>-</button></div></div>);
};export default App;
Now we can open a terminal in VS Code and run the following:
现在,我们可以在VS Code中打开一个终端并运行以下命令:
npm startIf all went as planned, you should see the following:
如果一切按计划进行,您应该看到以下内容:
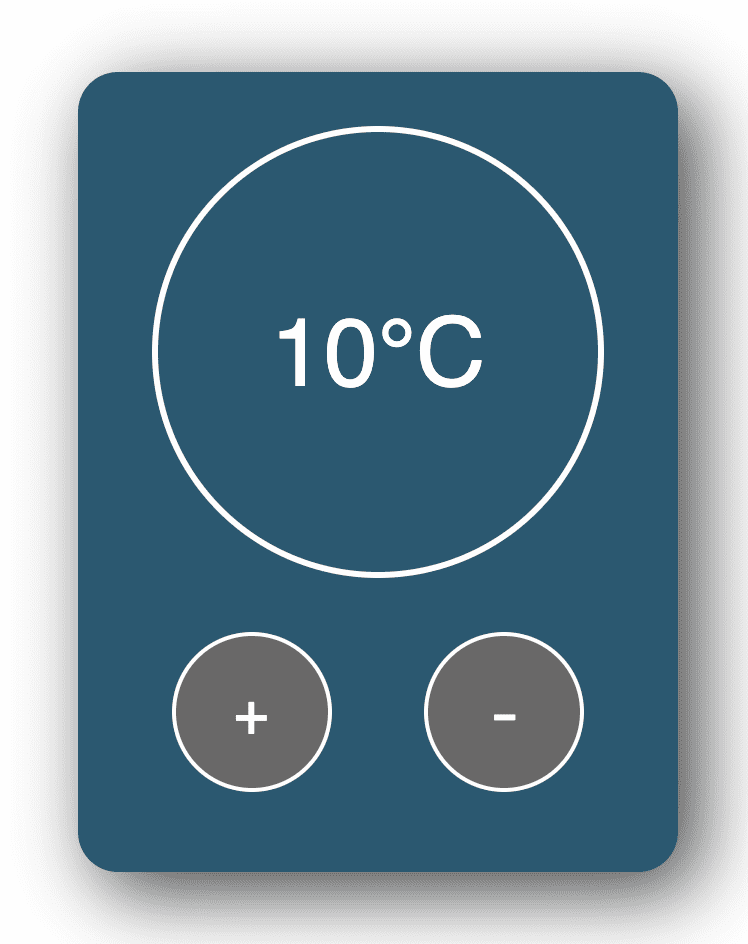
Hurray! This gives us a nice template to play with, without having to worry about any CSS.
欢呼! 这为我们提供了一个不错的模板,而无需担心任何CSS。
使温度值动态化-使用状态 (Make the temperature value dynamic - using State)
The first thing we'll do is make the temperature value dynamic. To do this, we'll store the temperature value in state. This makes it easier for us to get at the value later, and perform logic using it.
我们要做的第一件事是使温度值动态变化。 为此,我们将温度值存储在state中 。 这使我们以后更容易获得该值并使用该值执行逻辑。
If something changes on your UI, it's a good idea to put it in state.
如果您的UI发生了变化,则最好将其置于状态。
In App.js import the useState hook at the top of the file like so:
在App.js中,将useState挂钩导入文件顶部,如下所示:
import React, { useState } from 'react';Then, add the following within the App function:
然后,在App函数中添加以下内容:
const [temperatureValue, setTemperatureValue] = useState(10);A quick refresher on useState - it allows us to hold data in component state. The useState hook gives us 2 things:
useState的快速更新-它使我们可以将数据保持在组件状态。 useState挂钩为我们提供了两件事:
- a variable that holds the current state value保持当前状态值的变量
- a function to change the state value.更改状态值的功能。
In this case, we've called our state variable temperatureValue and called our function setTemperatureValue. We've initialized our temperatureValue to have a value of 10, by passing the value 10 to the useState hook.
在这种情况下,我们称为状态变量temperatureValue,并称为函数setTemperatureValue 。 我们初始化我们temperatureValue有值10,由值10传递给useState钩。
Now that we have a state value, it's time to use it in our code. Remember, the stuff we get from useState can use used just like any old JavaScript variable and function (since that's what they are).
现在我们有了状态值,是时候在代码中使用它了。 请记住,我们从useState那里获得的东西可以像任何旧JavaScript变量和函数一样使用(因为它们就是它们)。
Within our JSX, we want to replace the hardcoded temperature value using our fancy new state variable. Change this line:
在我们的JSX中,我们想使用新的状态变量替换硬编码的温度值。 更改此行:
<div className='temperature-display'>10°C</div>So that it becomes this:
这样就变成了:
<div className='temperature-display'>{temperatureValue}°C</div>Notice how we've used {} to render our temperatureValue variable. Now, when our temperature value changes, the component will rerender and display the new temperature value.
注意我们如何使用{}来呈现我们的temperatureValue变量。 现在,当我们的温度值改变时,组件将重新渲染并显示新的温度值。
Our App.js file so far looks like this:
到目前为止,我们的App.js文件如下所示:
import React, { useState } from 'react';const App = () => {const [temperatureValue, setTemperatureValue] = useState(10);return (<div className='app-container'><div className='temperature-display-container'><div className='temperature-display'>{temperatureValue}°C</div></div><div className='button-container'><button>+</button><button>-</button></div></div>);
};export default App;
Now if you run the app, and look at the browser, you'll see that things look the same as before.
现在,如果您运行该应用程序,并查看浏览器,您将看到与以前相同的外观。
But if you change the initial value we pass to the useState hook from 10 to something else (e.g 15), you'll see that the app updates. This means our state hook is working!
但是,如果您将初始值从10 传递给useState挂钩 ,则将其更改为其他值(例如15),您将看到该应用程序进行了更新。 这意味着我们的状态挂钩正在工作!
单击按钮更改状态 (Changing state on button click)
Let's work on making the temperature value increase/decrease when the buttons are clicked.
单击按钮时,让我们进行温度值的增减。
As we know, the useState hook gives us a setTemperatureValue function that we can use to change the temperatureValue. So, it makes sense for us to wire this up to the button's onClick event.
众所周知,useState挂钩为我们提供了setTemperatureValue函数,可用于更改temperatureValue 。 因此,对于我们来说,将其连接到按钮的onClick事件是很有意义的。
We'll do the increase button first. Replace the increase button with the following:
我们将首先执行增加按钮。 将增加按钮替换为以下内容:
<button onClick={() => setTemperatureValue(temperatureValue + 1)}>+</button>Notice how this calls the setTemperatureValue function. We take the current temperatureValue, add 1 to it, and pass this as an argument.
注意这是如何调用setTemperatureValue函数的。 我们采用当前的temperatureValue ,将其加1并将其作为参数传递。
So since temperatureValue starts at 10, adding 1 will set the state value to be 11. When the button is clicked again, the state is set to 12, and so on.
因此,由于temperatureValue从10开始,所以加1会将状态值设置为11。再次单击该按钮时,状态将设置为12,依此类推。
Next, we'll do the same with the decrease button. Replace the current decrease button with the following:
接下来,我们将使用减少按钮进行相同操作。 将当前的减少按钮替换为以下内容:
<button onClick={() => setTemperatureValue(temperatureValue - 1)}>-</button>This is doing the same thing, except we're decreasing the temperatureValue this time.
这是在做相同的事情,除了这次我们要降低temperatureValue 。
Our code now looks like this:
现在,我们的代码如下所示:
import React, { useState } from 'react';const App = () => {const [temperatureValue, setTemperatureValue] = useState(10);return (<div className='app-container'><div className='temperature-display-container'><div className='temperature-display'>{temperatureValue}°C</div></div><div className='button-container'><button onClick={() => setTemperatureValue(temperatureValue + 1)}>+</button><button onClick={() => setTemperatureValue(temperatureValue - 1)}>-</button></div></div>);
};export default App;
Try running this in the browser and clicking the buttons. The values will increase/decrease.
尝试在浏览器中运行它,然后单击按钮。 值将增加/减少。
根据状态更改颜色 (Changing color based on state)
Now let's do some fancy stuff. We want the background color of the display to change depending on how high (or low) the temperature is.
现在,让我们做一些花哨的事情。 我们希望显示器的背景颜色根据温度的高低而变化。
If the temperature is 15 degrees or over, we want to change the background color to red. If it's under 15, we want to change the background color to blue.
如果温度为15度或以上,我们想将背景色更改为红色。 如果小于15,则要将背景颜色更改为蓝色。
If you have a look at the CSS, I've provided 2 classes:
如果您看一下CSS,我提供了2个类:
.coldwhich sets the background to blue.cold将背景设置为蓝色.hotwhich sets the background to red.hot将背景设置为红色
If we add either of these classes to the temperature display div, it changes the color. For example:
如果我们将这些类别之一添加到温度显示 div中,它将更改颜色。 例如:
<div className='temperature-display cold'>{temperatureValue}°C</div>will give the temperature display a blue background, while:
将使温度显示为蓝色背景,同时:
<div className='temperature-display hot'>{temperatureValue}°C</div>will give the temperature display a red background.
将使温度显示红色背景。
Ok, so that's nice and all, but how do we dynamically add these classes based on state?
好的,这很好,但是如何基于状态动态添加这些类?
Remember, it's generally a good idea to put the things that can change on your UI into state. So state is a perfect place to hold the current CSS class we want to use.
记住,将可更改的UI状态放入状态通常是一个好主意。 因此,state是存放我们要使用的当前CSS类的理想场所。
Let's go ahead and create another state hook to hold the temperatureColor like so:
让我们继续创建另一个状态挂钩,以保存temperatureColor,如下所示:
const [temperatureColor, setTemperatureColor] = useState('cold');Notice that we initialize our temperatureColor state object with a value of "cold" (since our temperature value is initially 10 degrees, we want the background color to be blue).
请注意,我们使用“ cold”值初始化了temperatureColor状态对象(由于我们的温度值最初为10度,因此我们希望背景颜色为蓝色)。
We can then use template literals to dynamically add the classes we want using this state variable. Go ahead and update the code with the following:
然后,我们可以使用模板文字来使用此状态变量动态添加所需的类。 继续并使用以下内容更新代码:
<div className={`temperature-display ${temperatureColor}`}>{temperatureValue}°C</div>This is a tricky syntax to understand, so don't worry if you don't understand straight away.
这是一个难以理解的语法,因此如果您不立即理解,请不要担心。
All this is doing is creating a string and dynamically applying the temperatureColor variable. Whenever the temperatureColor changes to "hot", the component will rerender and the CSS class "hot" will be added to the className string instead.
这一切都是创建一个字符串并动态应用temperatureColor变量。 每当temperatureColor更改为“ hot”时,该组件将重新呈现,并将CSS类“ hot”添加到className字符串中。
Our code so far looks like this:
到目前为止,我们的代码如下所示:
import React, { useState } from 'react';const App = () => {const [temperatureValue, setTemperatureValue] = useState(10);const [temperatureColor, setTemperatureColor] = useState('cold');return (<div className='app-container'><div className='temperature-display-container'><div className={`temperature-display ${temperatureColor}`}>{temperatureValue}°C</div></div><div className='button-container'><button onClick={() => setTemperatureValue(temperatureValue + 1)}>+</button><button onClick={() => setTemperatureValue(temperatureValue - 1)}>-</button></div></div>);
};export default App;
Change the initial temperatureColor state variable to "hot" / "cold" and the background of the temperature display should change.
将初始colorColor状态变量更改为“ hot” /“ cold”,并且温度显示的背景应更改。
Now that we know this is working, all we have to do is change the state variable. But where do we do this?
现在我们知道这是可行的,我们要做的就是更改状态变量。 但是我们在哪里做呢?
Well, we already have an onClick handler that changes the temperatureValue, so it makes sense to add our new logic to this handler.
好了,我们已经有了一个可以更改temperatureValue的onClick处理程序 ,因此将新逻辑添加到该处理程序是有意义的。
Up until now, we've been using an inline function for our click event handlers. And using inline functions is good when we have a one-line function.
到目前为止,我们一直在为点击事件处理程序使用内联函数 。 当我们具有单行函数时,使用内联函数会很好。
But when we have a multi-line function with a bunch of logic, it's best to move the function outside the JSX. This makes our code a bit cleaner.
但是,当我们具有包含逻辑的多行函数时,最好将函数移到JSX之外。 这使我们的代码更加简洁。
Go ahead and paste the following just below all the state stuff:
继续,将以下内容粘贴在所有州以下:
const increaseTemperature = () => {setTemperatureValue(temperatureValue + 1);
};const decreaseTemperature = () => {setTemperatureValue(temperatureValue - 1);
};
Here we're defining 2 functions - one that increases the temperature and another that decreases the temperature.
在这里,我们定义了2个功能-一个增加温度,另一个降低温度。
Next, we want to change our button's onClick properties to call these functions instead of the inline functions we had previously:
接下来,我们要更改按钮的onClick属性以调用这些函数,而不是以前的内联函数:
<button onClick={increaseTemperature}>+</button><button onClick={decreaseTemperature}>-</button>Now, instead of using an inline function, we are passing a reference to our increaseTemperature and decreaseTemperature functions. Our code so far looks like this:
现在,我们不再使用内联函数,而是将引用传递给我们的gainTemperature和reduceTemperature函数。 到目前为止,我们的代码如下所示:
import React, { useState } from 'react';const App = () => {const [temperatureValue, setTemperatureValue] = useState(10);const [temperatureColor, setTemperatureColor] = useState('cold');const increaseTemperature = () => {setTemperatureValue(temperatureValue + 1);};const decreaseTemperature = () => {setTemperatureValue(temperatureValue - 1);};return (<div className='app-container'><div className='temperature-display-container'><div className={`temperature-display ${temperatureColor}`}>{temperatureValue}°C</div></div><div className='button-container'><button onClick={increaseTemperature}>+</button><button onClick={decreaseTemperature}>-</button></div></div>);
};export default App;
Notice how nothing has changed just yet – we are just refactoring our code and getting ready for upcoming changes.
请注意,到目前为止还没有什么变化–我们只是重构代码 ,为即将发生的变化做好准备。
Now it is much easier to add code logic for either of the button click events - we just write our logic in the appropriate function and life is good.
现在,为两个按钮单击事件中的任何一个添加代码逻辑都变得更加容易-我们只需在适当的函数中编写逻辑即可,使用寿命长。
OK! With refactoring fun out of the way, let's get back to business. So we've said that When the temperature is 15 degrees or over, we want to change the temperatureColor state value.
好! 借助重构乐趣,让我们重新开始业务。 因此,我们说过, 当温度为15度或更高时,我们想更改temperatureColor状态值 。
We can add this logic to our increaseTemperature function like so:
我们可以像这样将逻辑添加到我们的gainTemperature函数中:
const increaseTemperature = () => {const newTemperature = temperatureValue + 1;setTemperatureValue(newTemperature);if (newTemperature >= 15) {setTemperatureColor('hot');}
};
What have we done?
我们做了什么?
We've created a variable to hold the newTemperature value (we did this since we'll be using this variable in a few places)
我们创建了一个变量来保存newTemperature值(我们这样做是因为我们将在几个地方使用此变量)
We set the temperatureValue, as we did before
我们像以前一样设置temperatureValue
We wrote an if statement to check if the newTemperature value is more than or equal to, 15
我们编写了一个if语句来检查newTemperature值是否大于或等于15
If yes, then we use the setTemperatureColor function to set to the temperatureColor state value to be "hot"
如果是的话,那么我们使用setTemperatureColor功能集于temperatureColor状态值是“热”
So whenever we click the button enough times that the temperatureValue is more than or equal to above 15, the temperatureColor variable changes, the component rerenders, and the "hot" class gets added to the temperature display like witchcraft.
因此,只要我们单击按钮足够多的时间,使temperatureValue大于或等于15, 温度 color变量就会更改,组件会重新渲染,并且“热”类会像巫术一样添加到温度显示中。
But wait! We haven't handled the decrease yet. Which is basically similar to the increase function:
可是等等! 我们尚未处理下降的情况。 基本上类似于增加功能:
const decreaseTemperature = () => {const newTemperature = temperatureValue - 1;setTemperatureValue(newTemperature);if (newTemperature < 15) {setTemperatureColor('cold');}
};
This time we subtract one and check if the new value is below 15 before changing the temperature color
这次我们减去一并在更改温度颜色之前检查新值是否低于15
Our final app code looks like this:
我们最终的应用程序代码如下所示:
import React, { useState } from 'react';const App = () => {const [temperatureValue, setTemperatureValue] = useState(10);const [temperatureColor, setTemperatureColor] = useState('cold');const increaseTemperature = () => {const newTemperature = temperatureValue + 1;setTemperatureValue(newTemperature);if (newTemperature >= 15) {setTemperatureColor('hot');}};const decreaseTemperature = () => {const newTemperature = temperatureValue - 1;setTemperatureValue(newTemperature);if (newTemperature < 15) {setTemperatureColor('cold');}};return (<div className='app-container'><div className='temperature-display-container'><div className={`temperature-display ${temperatureColor}`}>{temperatureValue}°C</div></div><div className='button-container'><button onClick={increaseTemperature}>+</button><button onClick={decreaseTemperature}>-</button></div></div>);
};export default App;
Run the app and everything should work - hurray!
运行该应用程序,一切正常-欢呼!
尝试的挑战 (A challenge to try)
You may have noticed that our temperature control isn't very safe - the user can increase the temperature until they reach 100°C, boiling themselves into oblivion, or decrease the temperature until they reach -100°C, turning themselves into a massive ice cube.
您可能已经注意到我们的温度控制不是很安全-用户可以升高温度直至达到100°C,使其沸腾,或者降低温度直至达到-100°C,从而使自身变成巨大的冰块立方体。
The challenge, should you choose to accept it, is to prevent the temperature value from going over 30°C, and prevent it from going under 30°C.
您应该选择接受的挑战是防止温度值超过30°C ,并防止温度低于30°C 。
HINT: The increaseTemperature and decreaseTemperature functions are perfect places to add this logic!
提示: 增加温度和减少温度功能是添加此逻辑的理想之地!
翻译自: https://www.freecodecamp.org/news/react-beginner-project-tutorial-temperature-control-app/
react入门代码
react入门代码_如何在React中构建温度控制应用程序-包括提示和入门代码相关推荐
- figma设计_如何在Figma中构建设计入门套件(第1部分)
figma设计 Figma教程 (Figma Tutorial) Do you like staring at a blank canvas every time you start a new pr ...
- react本地储存_如何在React项目中利用本地存储
react本地储存 以及为什么要这么做. 本地存储是现代Web浏览器固有的Web API. 它允许网站/应用程序在浏览器中存储数据(简单和有限),从而使数据在以后的浏览器会话中可用. 在开始学习本教程 ...
- figma设计_如何在Figma中构建设计入门套件(第二部分)
figma设计 Figma教程 (Figma Tutorial) With this short, but informative Tutorial Series I aim to show you ...
- html中看到php代码_如何在HTML中嵌入PHP代码
如何在HTML中嵌入PHP代码 对于一个有经验的 PHP Web 开发者,在HTML中嵌入PHP代码是一件非常容易的事情.但是对于刚开始接触 PHP 编程语言的新手这就是一个问题.下面是小编为大家带来 ...
- python二进制转八进制代码_如何在python中输入二进制、八进制、十进制、十六进制数据并转换...
最近在学习python,不过跟着课本的作业题目: 分别就计算二进制110110011.八进制256和十六进制的数字a4b5,并转化为十进制求和. 不过写过程中遇到了个问题: 如何在python中输入二 ...
- react 错误边界_如何在React 16中使用错误边界
react 错误边界 Have you seen these in your console? 您是否在控制台中看到了这些? Cannot read property 'getHostNode'of ...
- react页面保留_如何在React中保留已登录的用户
react页面保留 If you run a quick Google search for persisting a logged-in user in React (or keeping a us ...
- java类添加单元测试代码_如何在java中单元测试时跳过一段代码
如果问题确实是: 如何在Java 然后我给出的答案同意单元测试时,我跳过一段代码.依赖注入,嘲讽框架绝对是真正的单元测试的正确途径. 但是,如果问题是: 使用JUnit(或其他单元测试框架) 然后我想 ...
- 去停用词 java代码_如何在java中去除中文文本的停用词
1. 整体思路 第一步:先将中文文本进行分词,这里使用的HanLP-汉语言处理包进行中文文本分词. 第二步:使用停用词表,去除分好的词中的停用词. 2. 中文文本分词环境配置 使用的HanLP-汉 ...
最新文章
- 人工智能浪潮下,什么内容值得看?
- 【转】C#格式化字符串
- 针对监控摄像机(海康、大华等)进行手动录像的录像文件播放器功能设计
- 云服务器磁盘挂载_云小课 | 磁盘容量不够用?小课教你来扩容!
- linux内核研究(一)
- 在PyCharm下使用Jupyter Notebook
- nodejs 获取内存,网络 ,连接 ,磁盘等等
- 系统架构师成长之路(一)
- matlab如何保存子图,MATLAB:在子图中绘制/保存网格函数的X-Y视图
- 对象的当前状态使该操作无效
- 新浪推荐 二面 移动零
- multisim中pwl_(Multisim电子电路仿真教程)第3章Multisim仿真元件库与虚拟仪器.ppt
- 【JAVA程序设计】(C00048)基于springboot酒店宾馆管理系统
- 城市大脑总体框架和主要平台
- 短视频SEO优化教程 自媒体SEO优化技巧方法
- 2021年,我已经说服 27 个人不上培训机构了
- i2c我们用得很多,i3c又是什么?
- 三菱q系列plc 和电脑socket_三菱Q系列Socket通讯(套接字通讯)讲解
- python构建聊天机器人之录制声音保存为音频文件(利用pyaudio进行录音)
- ECharts数据可视化项目