仿牛客论坛项目(下)
代码仓库:https://gitee.com/qiuyusy/community
仿牛客论坛项目(上)
仿牛客论坛项目
- 15.kafka
- 1.阻塞队列
- 2.Kafka入门
- 简介
- 术语解释
- 下载
- 配置
- 命令
- 3.Spring整合Kafka
- 引入依赖
- 配置
- 代码
- 16.系统通知(Kafka)
- 发送系统通知功能(点赞关注评论)
- 1.编写Kafka消息队列事件Event实体类
- 2.编写Kafka生产者
- 3.编写Kafka消费者
- 4.在CommunityConstant添加Kafka主题静态常量
- 5.处理触发评论事件CommentController
- 6.处理触发点赞时间LikeController
- 7.处理触发关注事件FollowController
- 显示系统通知
- DAO层
- Service层
- Controller
- 1.查询系统通知接口(评论类通知、点赞类通知、关注类通知三种类似)
- 2.详情页
- 通过拦截器实现查询未读消息总数(私信消息+系统消息
- 17.Elasticsearch
- 1.术语解释
- 2.下载/配置
- 下载本体
- 下载中文分词插件
- 3.常用命令
- 4.分词搜索测试
- 全部搜索
- 条件搜索
- 5.Spring整合ES
- 1.导入包
- 2.配置
- 18.搜索功能(Elasticsearch + Kafka)
- 1.编写实体类映射到ES服务器
- 2.编写xxxRepository接口继承ElasticsearchRepository
- 3.操作Demo
- 4.Service层
- 4.修改发布帖子和增加评论Controller
- 5.在Kafka消费者中增加方法(消费帖子发布事件)
- 6.编写SearchController类
- 19.权限控制
- 1.Spring Security
- 依赖
- 2. 权限控制实现
- 2.1去掉之前的登录拦截器
- 2.2 配置类
- 2.3 编写UserService增加自定义登录认证方法绕过security自带认证流程
- 2.4 编写登录凭证拦截器LoginTicketInterceptor
- 2.5 退出登录时释放SecurityContext资源
- 2.6 注意:防止CSRF攻击
- 3.置顶、加精、删除
- 1.导包
- 2.Service层
- 3.DiscussPostController层
- 4.编写Kafka消费者中删除(TOPIC_DELETE)的主题事件
- 5.在SecurityConfig中给予(置顶、加精、删除)权限
- 6.前端(重点)
- 20.网站数据统计(HyperLogLog BitMap)
- 1.编写RedisUtil规范Key值
- 2.编写DataService业务层
- 3.在DataInterceptor拦截器中调用Service(每次请求最开始调用)
- 4.编写DataController用以渲染模板
- 5.编写SecurityConfig进行权限控制
- 6.编写前端管理员专用页面(核心部分)
- 21.线程池(Quartz)
- JDK线程池
- Spring线程池
- 1.配置
- 2.使用方式
- 3.Spring线程池使用注解
- @Async
- @Scheduled
- Quartz线程池
- 0.导包
- 1.定义任务
- 2.配置类
- 22.热帖排行(Quartz + Redis)
- 1.编写RedisUtil规范Key值
- 2.处理发布、点赞、加精、评论时计算分数,将帖子id存入Key
- 2.1发布帖子时初始化分数
- 2.2点赞时计算帖子分数
- 2.3评论时计算帖子分数
- 2.4加精时计算帖子分数
- 3.定义Quartz热帖排行Job
- 4.配置Quartz的PostScoreRefreshJob
- 5.修改主页帖子显示(Service、Controller)
- Service
- Controller
- 6.前端
- 23.文件上传至云服务器(阿里云OSS)
- 1.在阿里云中创建一个用户,勾选OpenAPI模式
- 2.创建Bucket
- 3.给用户添加权限
- 4.SpringBoot引入阿里云OSS依赖
- 5.配置
- 6.写个配置类
- 7.Controller调用
- 24.优化网站的性能(Caffeine)
- 多级缓存查询过程
- 对热门帖子进行本地缓存
- 1.导入包
- 2.配置
- 3.修改DiscussPostService业务层分页查询方法
- 4.压力测试(Jmeter)
- 1.下载Jmeter
- 2.设置线程组,设置线程数
- 3.添加事件HTTP请求访问首页热门
- 4.设置定时器
- 5.添加监听器(聚合报告)
- 6.测试使用Caffeine
- 25.其他
- 1.单元测试
- 2.项目监控
- 自定义端点
- 参考
15.kafka
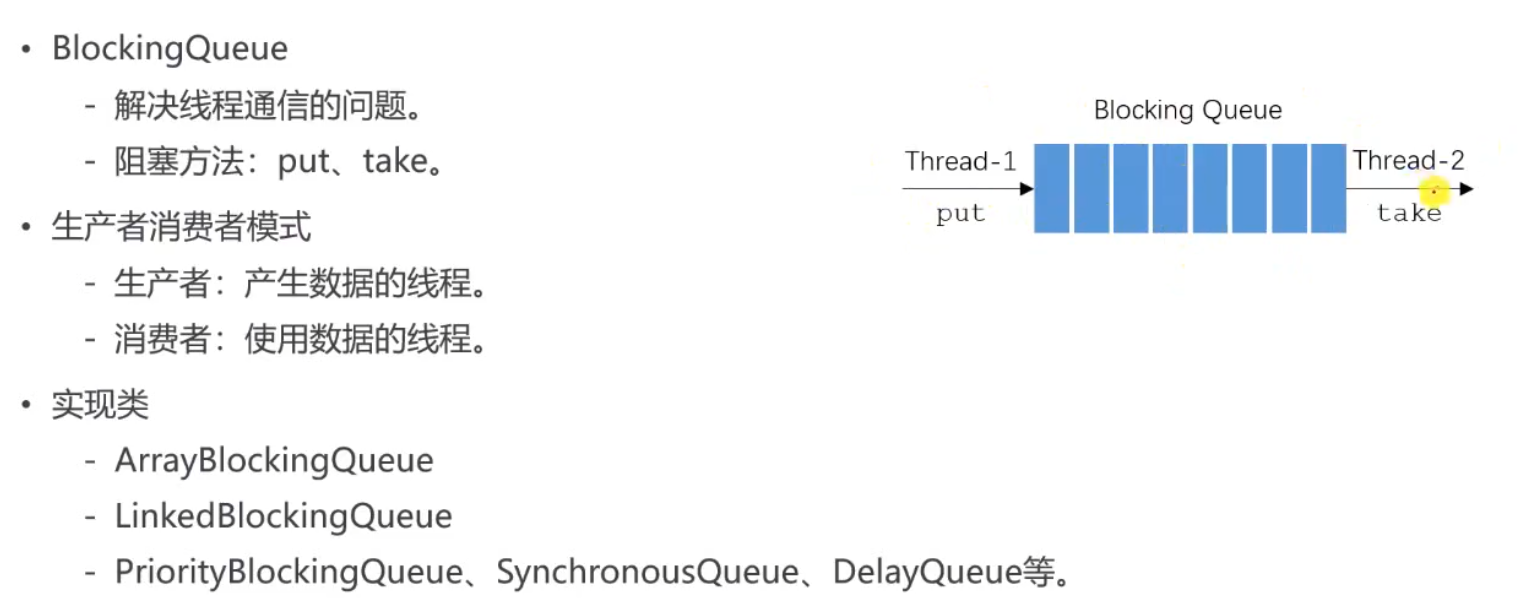
1.阻塞队列
使用原生的jdk方法来实现消息队列
2.Kafka入门
简介
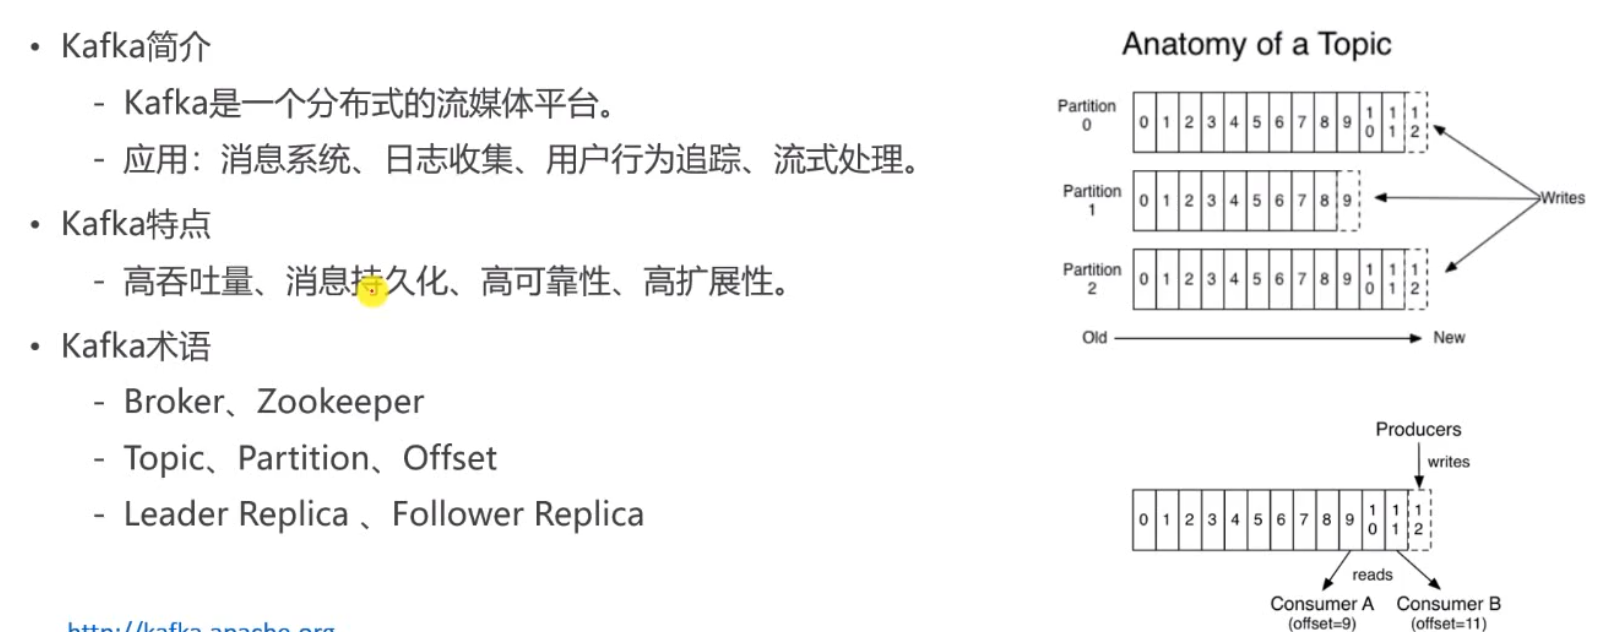
- Kafka为什么能存储这么多的数据?
- 因为数据存入了硬盘中
- Kafka是消息持久化的,也就是说将数据存入了硬盘之中,那为什么速度还快呢?
- 硬盘的顺序读取速度其实很快,甚至可能比内存的随机读取速度还快
- Kafka如何保证高可靠的?
- 分布式存储,对数据做备份
术语解释
- Broker 服务器(译:中间人)
- Zookeeper 用于管理集群
- Topic 消息存放的位置
- Partition 对Topic进行了分区,提高并发能力
- Offset 消息在Partition分区内的索引
- Leader Replica 主副本
- Follower Replica 从副本,如果主副本挂了,选用一个从副本使用
下载
https://kafka.apache.org/downloads
配置
- zookeeper.properties
- 设置数据路径 dataDir=D:/MyCodeEnv/kafka/data/zookeeper
- server.properties
- log.dirs=D:/MyCodeEnv/kafka/data/kafka-logs
命令
#启动zookeeper
zookeeper-server-start.bat ../../config/zookeeper.properties
#启动kafka
kafka-server-start.bat ../../config/server.properties#创建一个主题topic 名为test
kafka-topics.bat --create --bootstrap-server localhost:9092 --replication-factor 1 --partitions 1 --topic test#查看创建的主题
kafka-topics.bat --list --bootstrap-server localhost:9092
test
#创建生产者,发送消息
kafka-console-producer.bat --broker-list localhost:9092 --topic test
>hello
>world#创建消费者,接受消息
kafka-console-consumer.bat --bootstrap-server localhost:9092 --topic test --from-beginning
hello
world
3.Spring整合Kafka
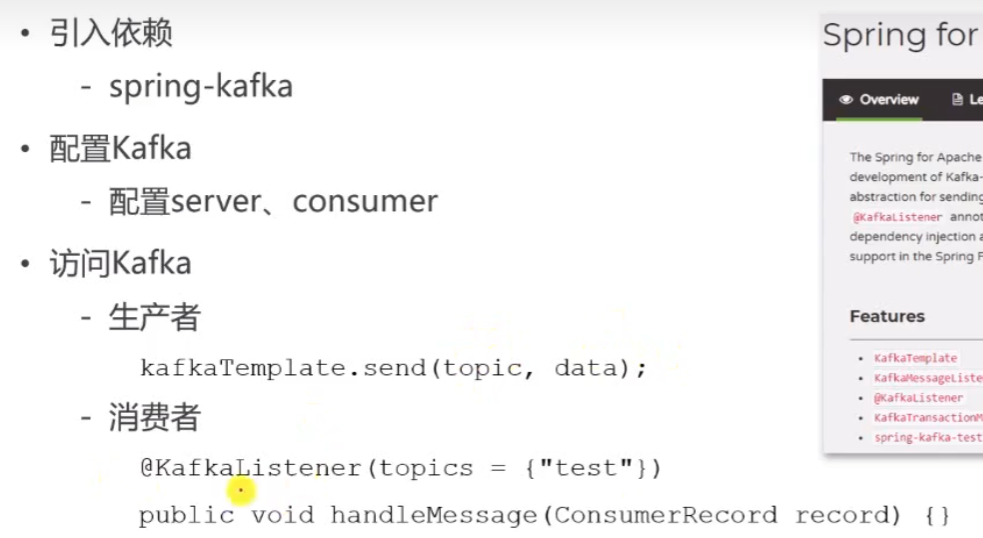
引入依赖
<dependency><groupId>org.springframework.kafka</groupId><artifactId>spring-kafka</artifactId>
</dependency>
配置
spring:#kafkakafka:bootstrap-servers: localhost:9092producer:key-serializer: org.apache.kafka.common.serialization.StringSerializervalue-serializer: org.apache.kafka.common.serialization.StringSerializerconsumer:group-id: test-consumer-group #根据comsumer.properties配置文件中填写enable-auto-commit: true #是否自动提交消费者的偏移量auto-commit-interval: 3000 #3秒提交一次key-deserializer: org.apache.kafka.common.serialization.StringDeserializervalue-deserializer: org.apache.kafka.common.serialization.StringDeserializer
代码
@SpringBootTest
@RunWith(SpringRunner.class)
@ContextConfiguration(classes = CommunityApplication.class)
public class KafkaTest {@Autowiredprivate KafkaProducer kafkaProducer;@Testpublic void testKafka() throws InterruptedException {kafkaProducer.sendMessage("test1","hello1");kafkaProducer.sendMessage("test1","world1");Thread.sleep(5000);}
}@Component
class KafkaProducer{@Autowiredprivate KafkaTemplate kafkaTemplate;public void sendMessage(String topic, String content){kafkaTemplate.send(topic,content);}
}@Component
class KafkaComsumer{@KafkaListener(topics = {"test1"})public void handleMessage(ConsumerRecord record){System.out.println(record.value());}
}
16.系统通知(Kafka)
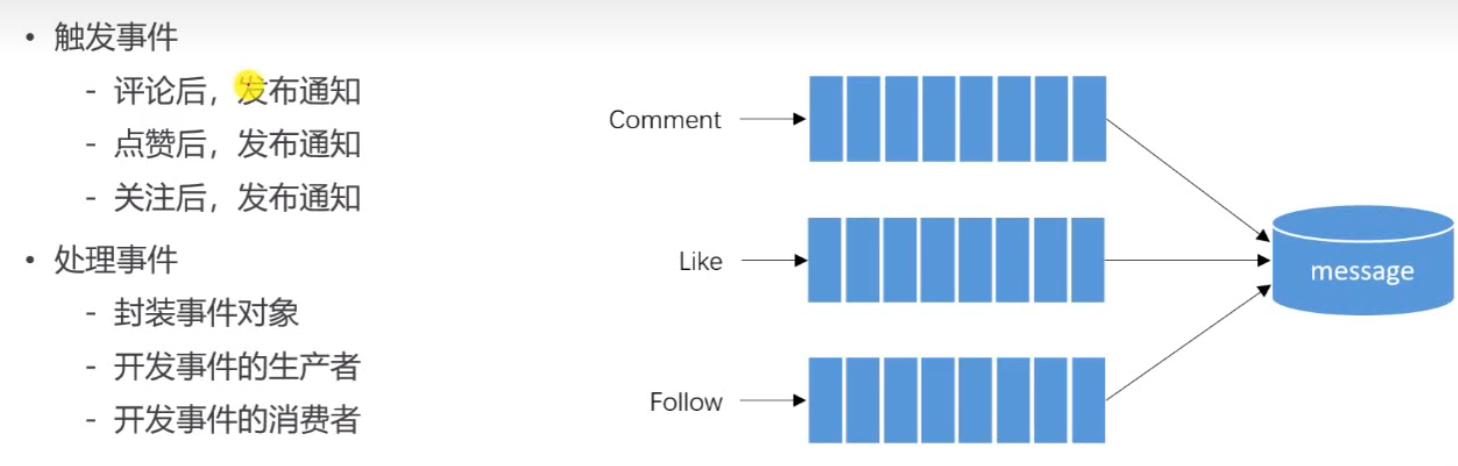
发送系统通知功能(点赞关注评论)
1.编写Kafka消息队列事件Event实体类
注意这里set放回Event是为了使用了链式编程
加入一个Map是为了可以扩展数据
package com.qiuyu.bean;/*** Kafka消息队列事件(评论、点赞、关注事件*/
@Getter
public class Event {// Kafka必要的主题变量private String topic;private int userId;// 用户发起事件的实体类型(评论、点赞、关注类型)private int entityType;// 用户发起事件的实体(帖子、评论、用户)idprivate int entityId;// 被发起事件的用户id(被评论、被点赞、被关注用户)private int entityUserId;// 其他可扩充内容对应Comment中的content->显示用户xxx评论、点赞、关注了xxxprivate Map<String,Object> data = new HashMap<>();//返回Event方便链式调用public Event setTopic(String topic) {this.topic = topic;return this;}public Event setUserId(int userId) {this.userId = userId;return this;}public Event setEntityType(int entityType) {this.entityType = entityType;return this;}public Event setEntityId(int entityId) {this.entityId = entityId;return this;}public Event setEntityUserId(int entityUserId) {this.entityUserId = entityUserId;return this;}// 方便外界直接调用key-value,而不用再封装一下传整个Map集合public Event setData(String key,Object value) {this.data.put(key, value);return this;}@Overridepublic String toString() {return "Event{" +"topic='" + topic + '\'' +", userId=" + userId +", entityType=" + entityType +", entityId=" + entityId +", entityUserId=" + entityUserId +", data=" + data +'}';}
}
2.编写Kafka生产者
package com.qiuyu.event;@Component
public class EventProducer {@Autowiredprivate KafkaTemplate kafkaTemplate;public void fireEvent(Event event){// 将事件发布到指定的主题,内容为event对象转化的json格式字符串kafkaTemplate.send(event.getTopic(), JSONObject.toJSONString(event));}
}
3.编写Kafka消费者
消费者调用了一些Service,之前使用AOP实现了调用Service时获取request的功能
因为是消费者调用的,所以会空指针异常,需要去处理一下
package com.qiuyu.event;@Component
public class EventConsumer implements CommunityConstant {public static final Logger logger = LoggerFactory.getLogger(EventConsumer.class);@Autowiredprivate MessageService messageService;@KafkaListener(topics = {TOPIC_COMMENT, TOPIC_LIKE, TOPIC_FOLLOW})public void handleCommentMessage(ConsumerRecord record) {if (record == null || record.value() == null) {logger.error("消息的内容为空!");return;}// 将record.value字符串格式转化为Event对象Event event = JSONObject.parseObject(record.value().toString(), Event.class);if (event == null) {logger.error("消息格式错误!");return;}Message message = new Message();message.setFromId(SYSTEM_USER_ID);// Message表中ToId设置为被发起事件的用户idmessage.setToId(event.getEntityUserId());// ConversationId设置为事件的主题(点赞、评论、关注)message.setConversationId(event.getTopic());message.setStatus(0);message.setCreateTime(new Date());// 设置content为可扩展内容,封装在Map集合中,用于显示xxx评论..了你的帖子HashMap<String, Object> content = new HashMap<>();content.put("userId", event.getUserId());content.put("entityId", event.getEntityId());content.put("entityType", event.getEntityType());// 将event.getData里的k-v存到context这个Map中,再封装进message// Map.Entry是为了更方便的输出map键值对,Entry可以一次性获得key和value者两个值// 其实就是把俩map合并if (!event.getData().isEmpty()) {for (Map.Entry<String, Object> entry : event.getData().entrySet()) {content.put(entry.getKey(), entry.getValue());}}// 将content(map类型)转化成字符串类型封装进messagemessage.setContent(JSONObject.toJSONString(content));messageService.addMessage(message);}
}
4.在CommunityConstant添加Kafka主题静态常量
public interface CommunityConstant {/*** Kafka主题: 评论*/String TOPIC_COMMENT = "comment";/*** Kafka主题: 点赞*/String TOPIC_LIKE = "like";/*** Kafka主题: 关注*/String TOPIC_FOLLOW = "follow";/*** 系统用户ID*/int SYSTEM_USER_ID = 1;
}
5.处理触发评论事件CommentController
 /*** 添加回复* @param discussPostId* @param comment* @return*/
@PostMapping("/add/{discussPostId}")
public String addComment(@PathVariable("discussPostId") int discussPostId, Comment comment){comment.setUserId(hostHolder.getUser().getId());comment.setStatus(0);comment.setCreateTime(new Date());commentService.addComment(comment);//触发评论事件Event event = new Event().setTopic(TOPIC_COMMENT).setUserId(hostHolder.getUser().getId()).setEntityType(comment.getEntityType()).setEntityId(comment.getEntityId()).setData("postId",discussPostId); //方便之后跳到帖子上/*** event.setEntityUserId要分情况设置被发起事件的用户id* 1.评论的是帖子,被发起事件(评论)的用户->该帖子发布人id* 2.评论的是用户的评论,被发起事件(评论)的用户->该评论发布人id*/if (comment.getEntityType() == ENTITY_TYPE_POST) {// 先找评论表对应的帖子id,在根据帖子表id找到发帖人idDiscussPost target = discussPostService.findDiscussPostById(comment.getEntityId());event.setEntityUserId(Integer.valueOf(target.getUserId()));} else if (comment.getEntityType() == ENTITY_TYPE_COMMENT) {Comment target = commentService.findCommentById(comment.getEntityId());event.setEntityUserId(target.getUserId());}eventProducer.fireEvent(event);return "redirect:/discuss/detail/"+discussPostId;
}
6.处理触发点赞时间LikeController
注意添加了一个postId,方便之后再通知页写跳转到具体帖子页的链接
@PostMapping("/like")
@ResponseBody
// 加了一个postId变量,对应的前端和js需要修改
public String like(int entityType, int entityId,int entityUserId, int postId){User user = hostHolder.getUser();// 点赞likeService.like(user.getId(), entityType,entityId,entityUserId);// 获取对应帖子、留言的点赞数量long entityLikeCount = likeService.findEntityLikeCount(entityType, entityId);// 获取当前登录用户点赞状态(1:已点赞 0:赞)int entityLikeStatus = likeService.findEntityLikeStatus(user.getId(), entityType, entityId);Map<String,Object> map = new HashMap<>();map.put("likeCount",entityLikeCount);map.put("likeStatus",entityLikeStatus);/*** 触发点赞事件* 只有点赞完后,才会调用Kafka生产者,发送系统通知,取消点赞不会调用事件*/if (entityLikeStatus == 1) {Event event = new Event().setTopic(TOPIC_LIKE).setEntityId(entityId).setEntityType(entityType).setUserId(user.getId()).setEntityUserId(entityUserId).setData("postId", postId);// 注意:data里面存postId是因为点击查看后链接到具体帖子的页面eventProducer.fireEvent(event);}return CommunityUtil.getJSONString(0,null,map);
}
HTML 和 JS 也要修改
<!--对应的前端postId变量以及js的修改-->
<a href="javascript:;" th:onclick="like(this,2,[[${replyvo.reply.id}]],[[${replyvo.reply.userId}]],[[${post.id}]])" class="text-primary">
</a>
function like(btn, entityType, entityId, entityUserId, postId) {$.post(CONTEXT_PATH + "/like",{"entityType": entityType, "entityId": entityId, "entityUserId": entityUserId, "postId":postId},function(data) {.....});}
7.处理触发关注事件FollowController
/*** 关注* @param entityType* @param entityId* @return*/
@PostMapping("/follow")
@ResponseBody
public String follow(int entityType, int entityId) {followService.follow(hostHolder.getUser().getId(), entityType, entityId);/*** 触发关注事件* 关注完后,调用Kafka生产者,发送系统通知*/Event event = new Event().setTopic(TOPIC_FOLLOW).setUserId(hostHolder.getUser().getId()).setEntityType(entityType).setEntityId(entityId).setEntityUserId(entityId);// 用户关注实体的id就是被关注的用户id->EntityId=EntityUserIdeventProducer.fireEvent(event);return CommunityUtil.getJSONString(0,"已关注");
}
显示系统通知
DAO层
/*** 查询某个主题最新通知*/
Message selectLatestNotice(@Param("userId")int userId, @Param("topic")String topic);
/*** 查询某个主题通知个数*/
int selectNoticeCount(@Param("userId")int userId, @Param("topic")String topic);
/*** 查询某个主题未读个数(topic可为null,若为null:查询所有类系统未读通知个数)*/
int selectNoticeUnreadCount(@Param("userId")int userId, @Param("topic")String topic);
/*** 分页查询某个主题的详情*/
IPage<Message> selectNotices(@Param("userId")int userId, @Param("topic")String topic,IPage<Message> page);
<select id="selectLatestNotice" resultType="Message">select <include refid="selectFields"></include>from community.messagewhere id in (select max(id) from messagewhere status != 2and from_id = 1and to_id = #{userId}and conversation_id = #{topic})
</select><select id="selectNoticeCount" resultType="int">select count(id)from community.messagewhere status != 2and from_id = 1and to_id = #{userId}and conversation_id = #{topic}
</select><select id="selectNoticeUnreadCount" resultType="int">select count(id)from community.messagewhere status = 0and from_id = 1and to_id = #{userId}<if test="topic!=null">and conversation_id = #{topic}</if>
</select><select id="selectNotices" resultType="Message">select <include refid="selectFields"></include>from community.messagewhere status != 2and from_id = 1and to_id = #{userId}and conversation_id = #{topic}order by create_time desc
</select>
Service层
/*** 查询某个主题最新通知* @param userId* @param topic* @return*/
public Message findLatestNotice(int userId, String topic) {return messageMapper.selectLatestNotice(userId, topic);
}/*** 查询某个主题通知个数* @param userId* @param topic* @return*/
public int findNoticeCount(int userId, String topic) {return messageMapper.selectNoticeCount(userId, topic);
}/*** 查询某个主题未读个数(topic可为null,若为null:查询所有类系统未读通知个数)* @param userId* @param topic* @return*/
public int findNoticeUnreadCount(int userId, String topic) {return messageMapper.selectNoticeUnreadCount(userId, topic);
}/*** 分页查询某个主题的详情* @param userId* @param topic* @return*/
public IPage<Message> findNotices(int userId, String topic,IPage<Message> page) {return messageMapper.selectNotices(userId, topic, page);
}
Controller
1.查询系统通知接口(评论类通知、点赞类通知、关注类通知三种类似)
/*** 查询系统通知* @param model* @return*/
@GetMapping( "/notice/list")
public String getNoticeList(Model model) {User user = hostHolder.getUser();/**查询评论类通知**/Message message = messageService.findLatestNotice(user.getId(), TOPIC_COMMENT);if (message != null) {HashMap<String, Object> messageVO = new HashMap<>();messageVO.put("message", message);// 转化message表中content为HashMap<k,v>类型String content = HtmlUtils.htmlUnescape(message.getContent());Map<String, Object> data = JSONObject.parseObject(content, HashMap.class);// 将content数据中的每一个字段都存入map// 用于显示->用户[user] (评论、点赞、关注[entityType])...了你的(帖子、回复、用户[entityId]) 查看详情连接[postId]messageVO.put("user", userService.findUserById( data.get("userId").toString()));messageVO.put("entityType", data.get("entityType"));messageVO.put("entityId", data.get("entityId"));messageVO.put("postId", data.get("postId"));// 共几条会话int count = messageService.findNoticeCount(user.getId(), TOPIC_COMMENT);messageVO.put("count", count);// 评论类未读数int unreadCount = messageService.findNoticeUnreadCount(user.getId(), TOPIC_COMMENT);messageVO.put("unreadCount", unreadCount);model.addAttribute("commentNotice", messageVO);}/**查询点赞类通知**/message = messageService.findLatestNotice(user.getId(), TOPIC_LIKE);if (message != null) {HashMap<String, Object> messageVO = new HashMap<>();messageVO.put("message", message);// 转化message表中content为HashMap<k,v>类型String content = HtmlUtils.htmlUnescape(message.getContent());Map<String, Object> data = JSONObject.parseObject(content, HashMap.class);// 将content数据中的每一个字段都存入map// 用于显示->用户[user] (评论、点赞、关注[entityType])...了你的(帖子、回复、用户[entityId]) 查看详情连接[postId]messageVO.put("user", userService.findUserById(data.get("userId").toString()));messageVO.put("entityType", data.get("entityType"));messageVO.put("entityId", data.get("entityId"));messageVO.put("postId", data.get("postId"));// 共几条会话int count = messageService.findNoticeCount(user.getId(), TOPIC_LIKE);messageVO.put("count", count);// 点赞类未读数int unreadCount = messageService.findNoticeUnreadCount(user.getId(), TOPIC_LIKE);messageVO.put("unreadCount", unreadCount);model.addAttribute("likeNotice", messageVO);}/**查询关注类通知**/message = messageService.findLatestNotice(user.getId(), TOPIC_FOLLOW);if (message != null) {HashMap<String, Object> messageVO = new HashMap<>();messageVO.put("message", message);// 转化message表中content为HashMap<k,v>类型String content = HtmlUtils.htmlUnescape(message.getContent());Map<String, Object> data = JSONObject.parseObject(content, HashMap.class);// 将content数据中的每一个字段都存入map// 用于显示->用户[user] (评论、点赞、关注)...了你的(帖子、回复、用户[entityType]) 查看详情连接[postId]messageVO.put("user", userService.findUserById( data.get("userId").toString()));messageVO.put("entityType", data.get("entityType"));messageVO.put("entityId", data.get("entityId"));messageVO.put("postId", data.get("postId"));// 共几条会话int count = messageService.findNoticeCount(user.getId(), TOPIC_FOLLOW);messageVO.put("count", count);// 关注类未读数int unreadCount = messageService.findNoticeUnreadCount(user.getId(), TOPIC_FOLLOW);messageVO.put("unreadCount", unreadCount);model.addAttribute("followNotice", messageVO);}// 查询未读私信数量int letterUnreadCount = messageService.findLetterUnreadCount(user.getId(), null);model.addAttribute("letterUnreadCount", letterUnreadCount);// 查询所有未读系统通知数量int noticeUnreadCount = messageService.findNoticeUnreadCount(user.getId(), null);model.addAttribute("noticeUnreadCount", noticeUnreadCount);return "/site/notice";
}
2.详情页
/*** 查询系统通知详情页(分页)* @param topic* @param page* @param model* @return*/
@GetMapping( "/notice/detail/{topic}")
public String getNoticeDetail(@PathVariable("topic")String topic, MyPage page, Model model) {User user = hostHolder.getUser();page.setSize(5);page.setPath("/notice/detail/" + topic);page = (MyPage) messageService.findNotices(user.getId(), topic, page);List<Message> noticeList = page.getRecords();// 聚合拼接UserList<Map<String, Object>> noticeVoList = new ArrayList<>();if (noticeList != null) {for (Message notice : noticeList) {HashMap<String, Object> map = new HashMap<>();// 将查询出来的每一个通知封装Mapmap.put("notice", notice);// 把message中的content内容转化ObjectString content = HtmlUtils.htmlUnescape(notice.getContent());Map<String, Object> data = JSONObject.parseObject(content, HashMap.class);// 发起事件的usermap.put("user", userService.findUserById( data.get("userId").toString()));map.put("entityType", data.get("entityType"));map.put("entityId", data.get("entityId"));map.put("postId", data.get("postId"));// 系统通知->id=1的系统用户map.put("fromUser", userService.findUserById(notice.getFromId().toString()));noticeVoList.add(map);}}model.addAttribute("notices", noticeVoList);model.addAttribute("page",page);//设置已读(当打开这个页面是就更改status =1)List<Integer> ids = getLetterIds(noticeList);if (!ids.isEmpty()) {messageService.readMessage(ids);}return "/site/notice-detail";
}
通过拦截器实现查询未读消息总数(私信消息+系统消息
package com.qiuyu.controller.interceptor;@Component
public class MessageInterceptor implements HandlerInterceptor {@Autowiredprivate HostHolder hostHolder;@Autowiredprivate MessageService messageService;// 查询未读消息总数(AOP),controller之后,渲染模板之前@Overridepublic void postHandle(HttpServletRequest request, HttpServletResponse response, Object handler, ModelAndView modelAndView) throws Exception {User user = hostHolder.getUser();if (user != null && modelAndView != null) {int letterUnreadCount = messageService.findLetterUnreadCount(user.getId(), null);int noticeUnreadCount = messageService.findNoticeUnreadCount(user.getId(), null);modelAndView.addObject("allUnreadCount", letterUnreadCount + noticeUnreadCount);}}
}
然后再配置类中进行注册,然后改html
// index页前端对应代码
<li th:if="${loginUser!=null}"><a th:href="@{/letter/list}">消息<span th:text="${allUnreadCount!=0?allUnreadCount:''}">消息未读总数</span></a>
</li>
17.Elasticsearch
1.术语解释
索引: 对应mysql中的数据库
类型: 对应mysql中的表,在7.0版本后被弃用
文档: 对应一行(一条数据)
字段: 对应字段
分片: 把一个索引分为多个来存,提高并发能力
副本: 对分片的备份
2.下载/配置
下载本体
https://www.elastic.co/cn/downloads
elasticsearch.yml
cluster.name: elastic  #集群名字
path.data: D:\MyCodeEnv\elasticsearch\elasticsearch-7.17.7\data
path.logs: D:\MyCodeEnv\elasticsearch\elasticsearch-7.17.7\logs
下载中文分词插件
https://github.com/medcl/elasticsearch-analysis-ik
没看到7.17.7的版本插件,查看issus,有人说用7.17.6也行
unzip elasticsearch-analysis-ik-7.17.6.zip
vi plugin-descriptor.properties
modify elasticsearch.version=7.17.6 to elasticsearch.version=7.17.7
restart es
ok,ik is working
解压到\plugins\ik下(必须)
3.常用命令
elasticsearch.bat #打开es
curl -X GET "localhost:9200/_cat/health?v" #显示健康状态
curl -X GET "localhost:9200/_cat/nodes?v" #查看节点
curl -X GET "localhost:9200/_cat/indices?v" #查看索引curl -X PUT "localhost:9200/test" #加入索引test(健康为yellow)
curl -X DELETE "localhost:9200/test" #删除索引
或者直接使用postman发送
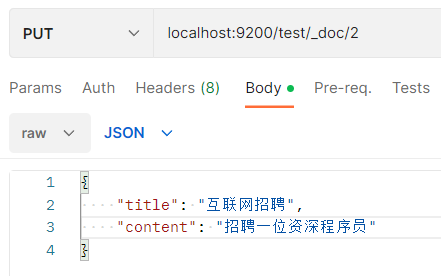
- 添加数据 POST(规范)/PUT
![]()
查询数据 GET
localhost:9200/test/_doc/1{"_index": "test","_type": "_doc","_id": "1","_version": 1,"_seq_no": 0,"_primary_term": 1,"found": true,"_source": {"title": "Hello","content": "How are you"}
}
修改数据 POST
localhost:9200/test/_doc/2删除数据 DELETE
localhost:9200/test/_doc/2
4.分词搜索测试
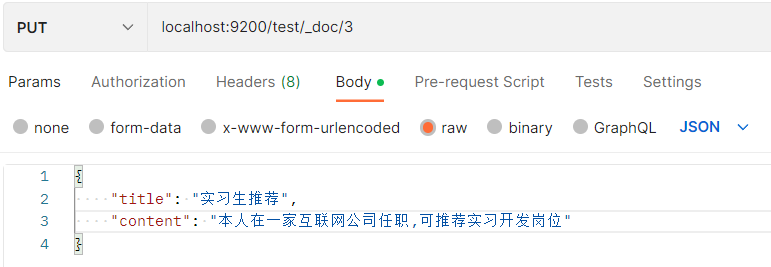
- 建3条数据

全部搜索
localhost:9200/test/_search
{"took": 919,"timed_out": false,"_shards": {"total": 1,"successful": 1,"skipped": 0,"failed": 0},"hits": {"total": {"value": 3,"relation": "eq"},"max_score": 1.0,"hits": [{"_index": "test","_type": "_doc","_id": "1","_score": 1.0,"_source": {"title": "互联网求职","content": "寻求一份运营的工作"}},{"_index": "test","_type": "_doc","_id": "2","_score": 1.0,"_source": {"title": "互联网招聘","content": "招聘一位资深程序员"}},{"_index": "test","_type": "_doc","_id": "3","_score": 1.0,"_source": {"title": "实习生推荐","content": "本人在一家互联网公司任职,可推荐实习开发岗位"}}]}
}
条件搜索
localhost:9200/test/_search?q=title:互联网
{"took": 20,"timed_out": false,"_shards": {"total": 1,"successful": 1,"skipped": 0,"failed": 0},"hits": {"total": {"value": 2,"relation": "eq"},"max_score": 2.4269605,"hits": [{"_index": "test","_type": "_doc","_id": "1","_score": 2.4269605,"_source": {"title": "互联网求职","content": "寻求一份运营的工作"}},{"_index": "test","_type": "_doc","_id": "2","_score": 2.4269605,"_source": {"title": "互联网招聘","content": "招聘一位资深程序员"}}]}
}
localhost:9200/test/_search?q=content:运营实习
这里进行了分词,运营和实习
{"took": 2,"timed_out": false,"_shards": {"total": 1,"successful": 1,"skipped": 0,"failed": 0},"hits": {"total": {"value": 2,"relation": "eq"},"max_score": 2.7725885,"hits": [{"_index": "test","_type": "_doc","_id": "1","_score": 2.7725885,"_source": {"title": "互联网求职","content": "寻求一份运营的工作"}},{"_index": "test","_type": "_doc","_id": "3","_score": 1.7940278,"_source": {"title": "实习生推荐","content": "本人在一家互联网公司任职,可推荐实习开发岗位"}}]}
}
多条件查询
localhost:9200/test/_search
条件写在body中
{"query":{"multi_match":{"query":"互联网","fields":["title","content"]}}
}
结果
{"took": 6,"timed_out": false,"_shards": {"total": 1,"successful": 1,"skipped": 0,"failed": 0},"hits": {"total": {"value": 3,"relation": "eq"},"max_score": 2.6910417,"hits": [{"_index": "test","_type": "_doc","_id": "3","_score": 2.6910417,"_source": {"title": "实习生推荐","content": "本人在一家互联网公司任职,可推荐实习开发岗位"}},{"_index": "test","_type": "_doc","_id": "1","_score": 2.2024121,"_source": {"title": "互联网求职","content": "寻求一份运营的工作"}},{"_index": "test","_type": "_doc","_id": "2","_score": 2.2024121,"_source": {"title": "互联网招聘","content": "招聘一位资深程序员"}}]}
}
5.Spring整合ES
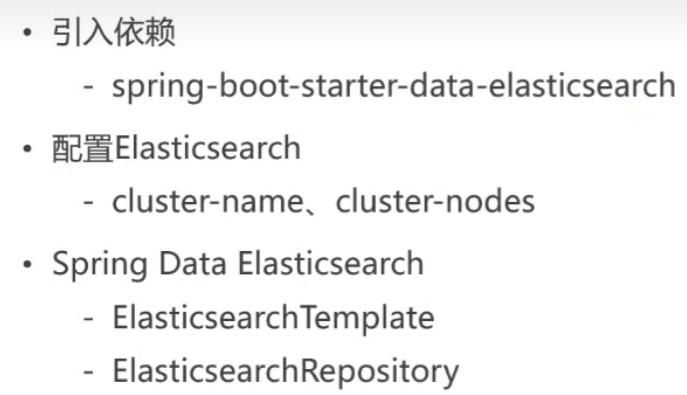
1.导入包
 <dependency><groupId>org.springframework.boot</groupId><artifactId>spring-boot-starter-data-elasticsearch</artifactId>
</dependency>
2.配置
spring: #ElasticSearchdata:elasticsearch:cluster-name: elasticcluster-nodes: localhost:9300
ES和Rediss底层都使用了netty,会导致冲突,需要在启动类中设置一下
package com.qiuyu;@SpringBootApplication
public class CommunityApplication {@PostConstructpublic void init(){//解决Netty启动冲突的问题System.setProperty("es.set.netty.running.available.processors","false");}public static void main(String[] args) {SpringApplication.run(CommunityApplication.class, args);}}
18.搜索功能(Elasticsearch + Kafka)
1.编写实体类映射到ES服务器
@Document注意不是元注解@DocumentedindexName = “discusspost” 索引名
shards = 6 分片
replicas = 3 备份
@Id主键@Field普通字段type = FieldType.Integer/Date/Text/...analyzer = "ik_max_word"分析的时候尽量拆分出多的词searchAnalyzer = "ik_smart"查找的时候智能拆分出少点的词比如互联网校招分词
ik_max_word时 互联 互联网 联网 网校 校招…ik_smart时 互联网 校招
package com.qiuyu.bean;@Data
@NoArgsConstructor
@AllArgsConstructor
@Document(indexName = "discusspost", shards = 6, replicas = 3)
public class DiscussPost {@Idprivate Integer id;@Field(type = FieldType.Integer)private String userId;@Field(type = FieldType.Text, analyzer = "ik_max_word",searchAnalyzer = "ik_smart")private String title;@Field(type = FieldType.Text, analyzer = "ik_max_word",searchAnalyzer = "ik_smart")private String content;@Field(type = FieldType.Integer)private Integer type;@Field(type = FieldType.Integer)private Integer status;@Field(type = FieldType.Date)private Date createTime;@Field(type = FieldType.Integer)private Integer commentCount;@Field(type = FieldType.Double)private Double score;
}
2.编写xxxRepository接口继承ElasticsearchRepository
package com.qiuyu.dao.elasticsearch;/*** ElasticsearchRepository<DiscussPost, Integer>* DiscussPost:接口要处理的实体类* Integer:实体类中的主键是什么类型* ElasticsearchRepository:父接口,其中已经事先定义好了对es服务器访问的增删改查各种方法。Spring会给它自动做一个实现,我们直接去调就可以了。*/
@Repository
public interface DiscussPostRepository extends ElasticsearchRepository<DiscussPost, Integer> {}
3.操作Demo
package com.qiuyu;import com.baomidou.mybatisplus.core.conditions.query.QueryWrapper;
import com.baomidou.mybatisplus.core.metadata.IPage;
import com.qiuyu.bean.DiscussPost;
import com.qiuyu.bean.MyPage;
import com.qiuyu.dao.DiscussPostMapper;
import com.qiuyu.dao.elasticsearch.DiscussPostRepository;
import org.elasticsearch.index.query.QueryBuilders;
import org.elasticsearch.search.fetch.subphase.highlight.HighlightBuilder;
import org.elasticsearch.search.sort.SortBuilders;
import org.elasticsearch.search.sort.SortOrder;
import org.junit.Test;
import org.junit.runner.RunWith;
import org.springframework.beans.factory.annotation.Autowired;
import org.springframework.boot.test.context.SpringBootTest;
import org.springframework.data.domain.PageRequest;
import org.springframework.data.domain.Sort;
import org.springframework.data.elasticsearch.core.*;
import org.springframework.data.elasticsearch.core.query.NativeSearchQuery;
import org.springframework.data.elasticsearch.core.query.NativeSearchQueryBuilder;
import org.springframework.test.context.ContextConfiguration;
import org.springframework.test.context.junit4.SpringRunner;import java.util.ArrayList;
import java.util.List;
import java.util.Optional;@SpringBootTest
@RunWith(SpringRunner.class)
@ContextConfiguration(classes = CommunityApplication.class)
public class ElasticSearchTest {@Autowiredprivate DiscussPostMapper discussPostMapper;@Autowiredprivate DiscussPostRepository discussPostRepository;@Autowiredprivate ElasticsearchRestTemplate elasticsearchRestTemplate;/*** 插入数据*/@Testpublic void testInsert(){discussPostRepository.save(discussPostMapper.selectById(241));discussPostRepository.save(discussPostMapper.selectById(242));discussPostRepository.save(discussPostMapper.selectById(243));}/*** 批量插入数据*/@Testpublic void testInsertList(){List<DiscussPost> list = discussPostMapper.selectList(new QueryWrapper<DiscussPost>().lambda().ge(DiscussPost::getId, 195));discussPostRepository.saveAll(list);}/*** 修改*/@Testpublic void testUpdate(){DiscussPost discussPost = discussPostMapper.selectById(231);discussPost.setContent("秋雨灌水");discussPostRepository.save(discussPost);}/*** 删除*/@Testpublic void testDelete(){//        discussPostRepository.deleteById(231);//删除所有discussPostRepository.deleteAll();}/*** 根据id查找*/@Testpublic void findById(){DiscussPost discussPost = discussPostRepository.findById(230).get();System.out.println(discussPost);}@Testpublic void testSearch(){NativeSearchQuery searchQuery = new NativeSearchQueryBuilder().withQuery(QueryBuilders.multiMatchQuery("互联网寒冬","title","content")).withSort(SortBuilders.fieldSort("type").order(SortOrder.DESC)).withSort(SortBuilders.fieldSort("score").order(SortOrder.DESC)).withSort(SortBuilders.fieldSort("createTime").order(SortOrder.DESC)).withPageable(PageRequest.of(0,10)).withHighlightFields(new HighlightBuilder.Field("title").preTags("<em>").postTags("</em>"),new HighlightBuilder.Field("content").preTags("<em>").postTags("</em>")).build();SearchHits<DiscussPost> searchHits = elasticsearchRestTemplate.search(searchQuery, DiscussPost.class);SearchPage<DiscussPost> searchPage = SearchHitSupport.searchPageFor(searchHits, searchQuery.getPageable());
//        System.out.println(searchPage.getTotalElements());
//        System.out.println(searchPage.getTotalPages());
//        System.out.println(searchPage.getNumber());
//        System.out.println(searchPage.getSize());
//        for (SearchHit<DiscussPost> discussPostSearchHit : page) {//            System.out.println(discussPostSearchHit.getHighlightFields()); //高亮内容
//            System.out.println(discussPostSearchHit.getContent()); //原始内容
//        }//封装到MyPageList<DiscussPost> list = new ArrayList<>();IPage<DiscussPost> page = new MyPage<>();for (SearchHit<DiscussPost> discussPostSearchHit : searchPage) {DiscussPost discussPost = discussPostSearchHit.getContent();//discussPostSearchHit.getHighlightFields() //高亮if (discussPostSearchHit.getHighlightFields().get("title") != null) {discussPost.setTitle(discussPostSearchHit.getHighlightFields().get("title").get(0));}if (discussPostSearchHit.getHighlightFields().get("content") != null) {discussPost.setContent(discussPostSearchHit.getHighlightFields().get("content").get(0));}//System.out.println(discussPostSearchHit.getContent());list.add(discussPost);}page.setRecords(list);page.setSize(searchPage.getSize());page.setTotal(searchPage.getTotalElements());page.setPages(searchPage.getTotalPages());page.setCurrent(searchPage.getNumber()+1);for (DiscussPost record : page.getRecords()) {System.out.println(record);}}
}
4.Service层
package com.qiuyu.service;@Service
public class ElasticsearchService {@Autowiredprivate DiscussPostRepository discussRepository;@Autowiredprivate ElasticsearchRestTemplate elasticsearchRestTemplate;public void saveDiscussPost(DiscussPost post) {discussRepository.save(post);}public void deleteDiscussPost(int id) {discussRepository.deleteById(id);}/*** Elasticsearch高亮搜索* @param keyword* @param page* @return*/public IPage<DiscussPost> searchDiscussPost(String keyword, IPage<DiscussPost> page) {page.setCurrent(page.getCurrent() < 1 ? 1 : page.getCurrent());NativeSearchQuery searchQuery = new NativeSearchQueryBuilder().withQuery(QueryBuilders.multiMatchQuery(keyword,"title","content")).withSort(SortBuilders.fieldSort("type").order(SortOrder.DESC)).withSort(SortBuilders.fieldSort("score").order(SortOrder.DESC)).withSort(SortBuilders.fieldSort("createTime").order(SortOrder.DESC)).withPageable(PageRequest.of((int) (page.getCurrent()-1), (int) page.getSize())).withHighlightFields(new HighlightBuilder.Field("title").preTags("<em>").postTags("</em>"),new HighlightBuilder.Field("content").preTags("<em>").postTags("</em>")).build();SearchHits<DiscussPost> searchHits = elasticsearchRestTemplate.search(searchQuery, DiscussPost.class);SearchPage<DiscussPost> searchPage = SearchHitSupport.searchPageFor(searchHits, searchQuery.getPageable());//封装到MyPageList<DiscussPost> list = new ArrayList<>();for (SearchHit<DiscussPost> discussPostSearchHit : searchPage) {DiscussPost discussPost = discussPostSearchHit.getContent();//discussPostSearchHit.getHighlightFields() //高亮if (discussPostSearchHit.getHighlightFields().get("title") != null) {discussPost.setTitle(discussPostSearchHit.getHighlightFields().get("title").get(0));}if (discussPostSearchHit.getHighlightFields().get("content") != null) {discussPost.setContent(discussPostSearchHit.getHighlightFields().get("content").get(0));}//System.out.println(discussPostSearchHit.getContent());list.add(discussPost);}page.setRecords(list);page.setSize(searchPage.getSize());page.setTotal(searchPage.getTotalElements());page.setPages(searchPage.getTotalPages());page.setCurrent(searchPage.getNumber()+1);return page;}
}
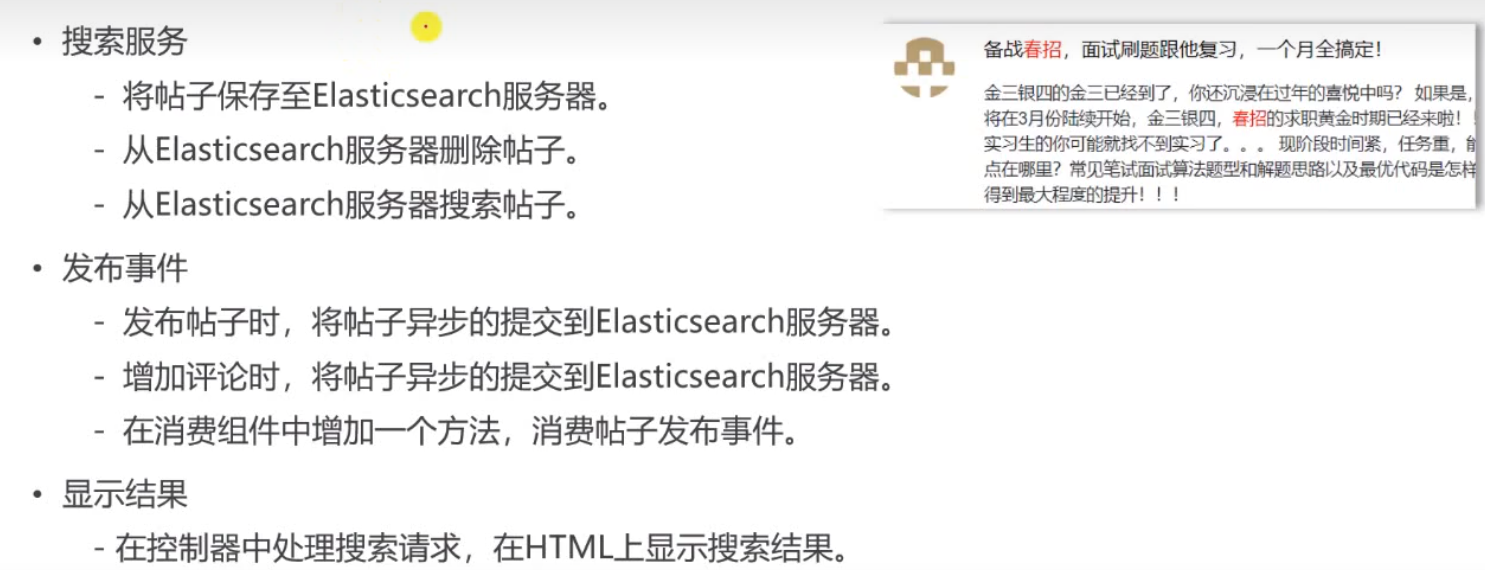
4.修改发布帖子和增加评论Controller
发布帖子时,将帖子异步提交到Elasticsearch服务器
增加评论时,将帖子异步提交到Elasticsearch服务器(因为帖子的评论数量变了)
/**
* Kafka主题: 发布帖子(常量接口)
*/
String TOPIC_PUBILISH = "publish";
package com.qiuyu.controller;/*** 添加帖子*/@PostMapping("/add")@ResponseBody
//    @LoginRequiredpublic String addDiscussPost(String title, String content) {.....//触发发帖事件,让消费者将帖子存入ElasticSearchEvent event = new Event().setTopic(TOPIC_PUBLISH).setUserId(user.getId()).setEntityType(ENTITY_TYPE_POST).setEntityId(post.getId());eventProducer.fireEvent(event);//返回Json格式字符串给前端JS,报错的情况将来统一处理return CommunityUtil.getJSONString(0, "发布成功!");}}
/**
* 添加回复
*/@PostMapping("/add/{discussPostId}")public String addComment(@PathVariable("discussPostId") int discussPostId, Comment comment){.......//评论帖子时if (comment.getEntityType() == ENTITY_TYPE_POST) {//触发发帖事件,让消费者将帖子存入ElasticSearchevent = new Event().setTopic(TOPIC_PUBLISH).setUserId(hostHolder.getUser().getId()).setEntityType(ENTITY_TYPE_POST).setEntityId(discussPostId);eventProducer.fireEvent(event);}return "redirect:/discuss/detail/"+discussPostId;}5.在Kafka消费者中增加方法(消费帖子发布事件)
   /*** 消费发帖事件* @param record*/
@KafkaListener(topics = {TOPIC_PUBLISH})
public void handlePublishMessage(ConsumerRecord record){if (record == null || record.value() == null) {logger.error("消息的内容为空!");return;}// 将record.value字符串格式转化为Event对象Event event = JSONObject.parseObject(record.value().toString(), Event.class);if (event == null) {logger.error("消息格式错误!");return;}//根据帖子id查询到帖子,然后放到ES中DiscussPost discussPost = discussPostService.findDiscussPostById(event.getEntityId());elasticsearchService.saveDiscussPost(discussPost);}
6.编写SearchController类
package com.qiuyu.controller;@Controller
public class SearchController implements CommunityConstant {@Autowiredprivate UserService userService;@Autowiredprivate LikeService likeService;@Autowiredprivate ElasticsearchService elasticsearchService;// search?keyword=xxx@GetMapping("/search")public String search(String keyword, MyPage<DiscussPost> page, Model model) {// 搜索帖子page.setSize(10);page = (MyPage<DiscussPost>) elasticsearchService.searchDiscussPost(keyword, page);List<DiscussPost> searchResult = page.getRecords();// 聚合数据List<Map<String, Object>> discussPostVo = new ArrayList<>();if (searchResult != null) {for (DiscussPost post : searchResult) {Map<String, Object> map = new HashMap<>();// 帖子map.put("post", post);// 作者map.put("user", userService.findUserById(post.getUserId()));// 点赞数量map.put("likeCount", likeService.findEntityLikeCount(ENTITY_TYPE_POST, post.getId()));discussPostVo.add(map);}}model.addAttribute("discussPostVo", discussPostVo);// 为了页面上取的默认值方便model.addAttribute("keyword", keyword);model.addAttribute("page", page);page.setPath("/search?keyword=" + keyword);return "/site/search";}
}
19.权限控制
1.Spring Security
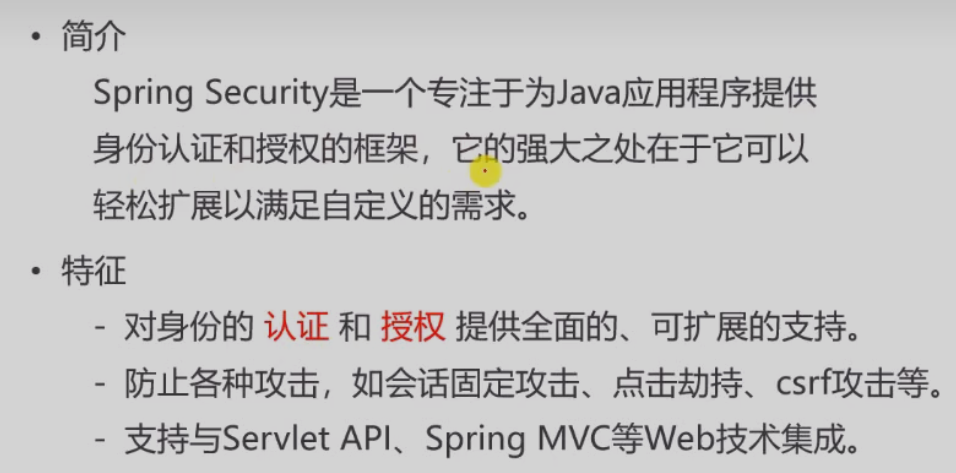
- 认证:判断用户是否登录
- 授权:认证后判断用户是否有某一部分的权限,比如加精置顶
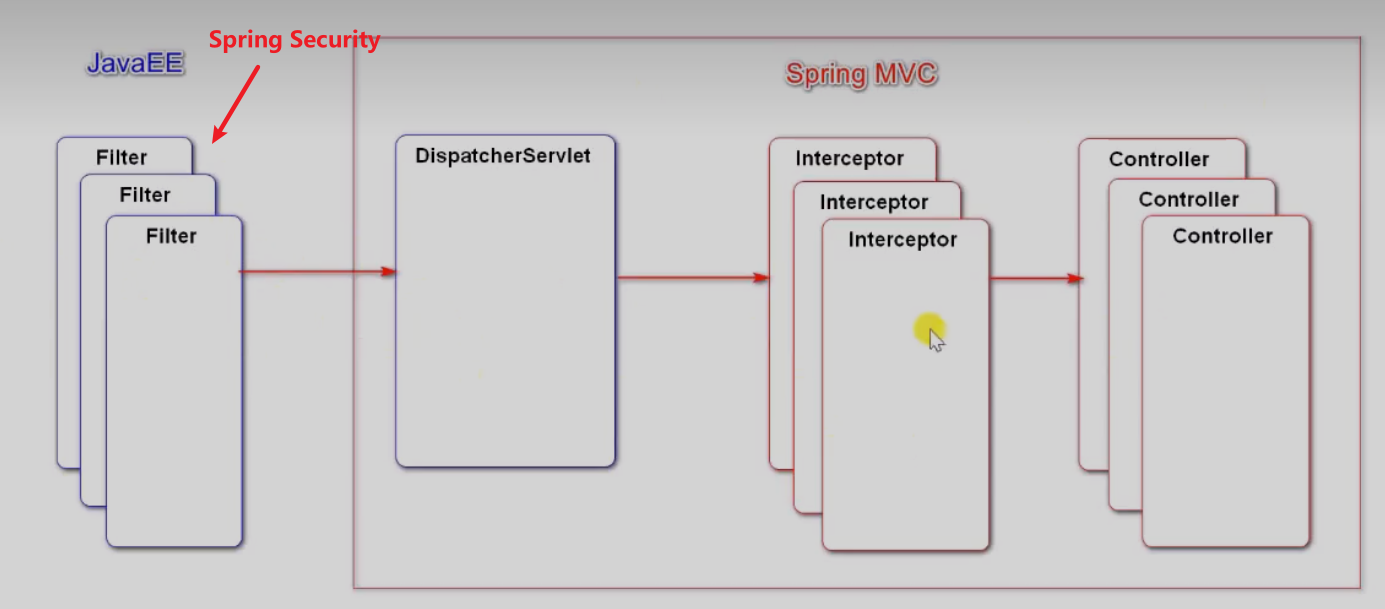
底层基于过滤器Filter
依赖
<dependency><groupId>org.springframework.boot</groupId><artifactId>spring-boot-starter-security</artifactId>
</dependency>
导入直接就生效了,会生成一个默认账号密码
Using generated security password: c903823d-de73-44e9-a06d-7444d82f1c3d
2. 权限控制实现

2.1去掉之前的登录拦截器
//    @Autowired
//    private LoginRequiredInterceptor loginRequiredInterceptor;
2.2 配置类
走自己的认证
package com.qiuyu.config;/*** springsecurity配置* 之所以没有configure(AuthenticationManagerBuilder auth),是因为要绕过security自带的方案*/
@Configuration
public class SecurityConfig extends WebSecurityConfigurerAdapter implements CommunityConstant {@Autowiredprivate UserService userService;@Overridepublic void configure(WebSecurity web) throws Exception {//静态资源,不拦截,随便访问web.ignoring().antMatchers("/resources/**");}@Overrideprotected void configure(HttpSecurity http) throws Exception {// 授权http.authorizeRequests()// 需要授权的请求.antMatchers("/user/setting","/user/upload","/discuss/add","/comment/add/* *","/letter/* *","/notice/* *","/like","/follow","/unfollow")// 这3中权限可以访问以上请求.hasAnyAuthority(AUTHORITY_USER,AUTHORITY_ADMIN,AUTHORITY_MODERATOR)// 除了上面请求外,其他请求所有人都允许访问.anyRequest().permitAll();// 禁用 检查csrf攻击功能//.and().csrf().disable();// 权限不够时的处理http.exceptionHandling()// 没有登录时的处理.authenticationEntryPoint(new AuthenticationEntryPoint() {@Overridepublic void commence(HttpServletRequest request, HttpServletResponse response, AuthenticationException e) throws IOException, ServletException {// 同步请求重定向返回HTML,异步请求返回jsonString xRequestedWith = request.getHeader("x-requested-with");if ("XMLHttpRequest".equals(xRequestedWith)) {// 处理异步请求response.setContentType("application/plain;charset=utf-8");PrintWriter writer = response.getWriter();writer.write(CommunityUtil.getJSONString(403, "你还没有登录哦!"));} else {response.sendRedirect(request.getContextPath() + "/login");}}})// 权限不足时的处理.accessDeniedHandler(new AccessDeniedHandler() {@Overridepublic void handle(HttpServletRequest request, HttpServletResponse response, AccessDeniedException e) throws IOException, ServletException {String xRequestedWith = request.getHeader("x-requested-with");if ("XMLHttpRequest".equals(xRequestedWith)) {response.setContentType("application/plain;charset=utf-8");PrintWriter writer = response.getWriter();writer.write(CommunityUtil.getJSONString(403, "你没有访问此功能的权限!"));} else {response.sendRedirect(request.getContextPath() + "/denied");}}});// Security底层默认会拦截/logout请求,进行退出处理.// 覆盖它默认的逻辑,让他别处理我们自己写的/logout,才能执行我们自己的退出代码.//底层:private String logoutUrl = "/logout";http.logout().logoutUrl("/securitylogout");}
}
2.3 编写UserService增加自定义登录认证方法绕过security自带认证流程
/*** 绕过Security认证流程,采用原来的认证方案,封装认证结果* @param userId* @return*/
public Collection<? extends GrantedAuthority> getAuthorities(int userId) {User user = this.findUserById(String.valueOf(userId));List<GrantedAuthority> list = new ArrayList<>();list.add(new GrantedAuthority() {@Overridepublic String getAuthority() {switch (user.getType()) {case 1:return AUTHORITY_ADMIN;case 2:return AUTHORITY_MODERATOR;default:return AUTHORITY_USER;}}});return list;
}
2.4 编写登录凭证拦截器LoginTicketInterceptor
构建用户认证结果,并存入SecurityContext,以便于Security进行授权
@Override
/**在Controller访问所有路径之前获取凭证**/
public boolean preHandle(HttpServletRequest request, HttpServletResponse response, Object handler) throws Exception {//...................................if (loginTicket != null && loginTicket.getStatus() == 0 && loginTicket.getExpired().after(new Date())) {// .............................../*** 构建用户认证结果,并存入SecurityContext,以便于Security进行授权*/Authentication authentication = new UsernamePasswordAuthenticationToken(user, user.getPassword(), userService.getAuthorities(user.getId()));SecurityContextHolder.setContext(new SecurityContextImpl(authentication));}
}
@Override
public void afterCompletion(HttpServletRequest request, HttpServletResponse response, Object handler, Exception ex) throws Exception {// 释放线程资源hostHolder.clear();// 释放SecurityContext资源 这里删除的话.一个页面就无法进行多次异步请求了//SecurityContextHolder.clearContext();
}
2.5 退出登录时释放SecurityContext资源
/*** 退出登录功能* @CookieValue()注解:将浏览器中的Cookie值传给参数*/
@GetMapping("/logout")
public String logout(@CookieValue("ticket") String ticket){userService.logout(ticket);// 释放SecurityContext资源SecurityContextHolder.clearContext();return "redirect:/login";//重定向
}
2.6 注意:防止CSRF攻击
CSRF攻击原理
- 第三方网站拿到了你的ticket,然后发送给了服务器
- 解决:服务器给浏览器的表单中有一个随机的token,这个无法被第三方拿走
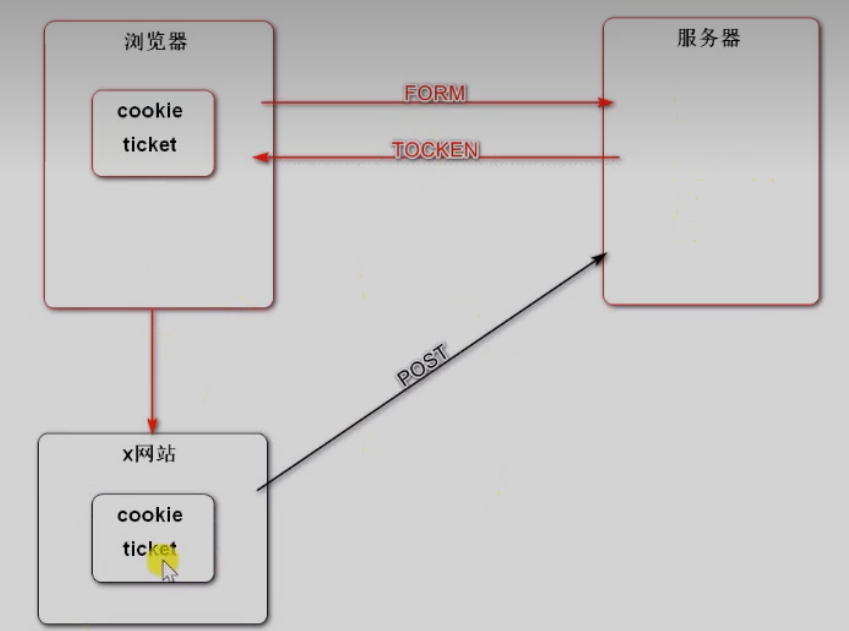
由于服务端SpringSecurity自带防止CSRF攻击,因此只要编写前端页面防止CSRF攻击即可 \ (常发生在提交表单时)
<!--访问该页面时,在此处生成CSRF令牌.-->
<meta name="_csrf" th:content="${_csrf.token}">
<meta name="_csrf_header" th:content="${_csrf.headerName}">
Ajax异步请求时携带该参数
function publish() {$("#publishModal").modal("hide");// 发送AJAX请求之前,将CSRF令牌设置到请求的消息头中.var token = $("meta[name='_csrf']").attr("content");var header = $("meta[name='_csrf_header']").attr("content");$(document).ajaxSend(function(e, xhr, options){xhr.setRequestHeader(header, token);});// ...............................
}
3.置顶、加精、删除

1.导包
<dependency><groupId>org.thymeleaf.extras</groupId><artifactId>thymeleaf-extras-springsecurity5</artifactId>
</dependency>
2.Service层
思路:改变帖子状态
置顶:type = (0-正常,1-置顶) 加精:status = (0-正常,1-加精,2-删除)
/*** 修改帖子类型* @param id* @param type* @return*/
public int updateType(int id, int type) {DiscussPost discussPost = new DiscussPost();discussPost.setId(id);discussPost.setType(type);return discussPostMapper.updateById(discussPost);
}/*** 修改帖子状态* @param id* @param status* @return*/
public int updateStatus(int id, int status) {DiscussPost discussPost = new DiscussPost();discussPost.setId(id);discussPost.setStatus(status);return discussPostMapper.updateById(discussPost);
}
3.DiscussPostController层
/*** 置顶、取消置顶(与以下类似)* @param id* @return*/
@PostMapping( "/top")
@ResponseBody
public String setTop(int id) {DiscussPost post = discussPostService.findDiscussPostById(id);// 获取置顶状态,1为置顶,0为正常状态,1^1=0 0^1=1 异或int type = post.getType() ^ 1;discussPostService.updateType(id, type);// 返回结果给JS异步请求HashMap<String, Object> map = new HashMap<>();map.put("type", type);// 触发事件,修改Elasticsearch中的帖子typeEvent event = new Event().setTopic(TOPIC_PUBLISH).setUserId(hostHolder.getUser().getId()).setEntityType(ENTITY_TYPE_POST).setEntityId(id);eventProducer.fireEvent(event);return CommunityUtil.getJSONString(0, null, map);
}/*** 加精、取消加精* @param id* @return*/
@PostMapping( "/wonderful")
@ResponseBody
public String setWonderful(int id) {DiscussPost post = discussPostService.findDiscussPostById(id);int status = post.getStatus() ^ 1;discussPostService.updateStatus(id, status);// 返回结果给JS异步请求HashMap<String, Object> map = new HashMap<>();map.put("status", status);// 触发事件,修改Elasticsearch中的帖子statusEvent event = new Event().setTopic(TOPIC_PUBLISH).setUserId(hostHolder.getUser().getId()).setEntityType(ENTITY_TYPE_POST).setEntityId(id);eventProducer.fireEvent(event);return CommunityUtil.getJSONString(0, null, map);
}// 删除
@RequestMapping(value = "/delete", method = RequestMethod.POST)
@ResponseBody
public String setDelete(int id) {discussPostService.updateStatus(id, 2);// 触发删帖事件,将帖子从Elasticsearch中删除Event event = new Event().setTopic(TOPIC_DELETE).setUserId(hostHolder.getUser().getId()).setEntityType(ENTITY_TYPE_POST).setEntityId(id);eventProducer.fireEvent(event);return CommunityUtil.getJSONString(0);
}
4.编写Kafka消费者中删除(TOPIC_DELETE)的主题事件
/*** 消费删帖事件* @param record*/
@KafkaListener(topics = {TOPIC_DELETE})
public void handleDeleteMessage(ConsumerRecord record) {if (record == null || record.value() == null) {logger.error("消息的内容为空!");return;}// 将record.value字符串格式转化为Event对象Event event = JSONObject.parseObject(record.value().toString(), Event.class);// 注意:event若data=null,是fastjson依赖版本的问题if (event == null) {logger.error("消息格式错误!");return;}elasticsearchService.deleteDiscussPost(event.getEntityId());
}
5.在SecurityConfig中给予(置顶、加精、删除)权限
@Overrideprotected void configure(HttpSecurity http) throws Exception {// 授权http.authorizeRequests()// 需要授权的请求.antMatchers("/user/setting","/user/upload","/discuss/add","/comment/add/* *","/letter/* *","/notice/* *","/like","/follow","/unfollow")// 这3中权限可以访问以上请求.hasAnyAuthority(AUTHORITY_USER,AUTHORITY_ADMIN,AUTHORITY_MODERATOR)// 授予版主加精、置顶权限.antMatchers("/discuss/top","/discuss/wonderful").hasAnyAuthority(AUTHORITY_ADMIN,AUTHORITY_MODERATOR)// 授予管理员删除帖子权限.antMatchers("/discuss/delete").hasAnyAuthority(AUTHORITY_ADMIN)// 除了上面请求外,其他请求所有人都允许访问.anyRequest().permitAll()// 禁用 防止csrf攻击功能.and().csrf().disable();6.前端(重点)
<html lang="en" xmlns:th="http://www.thymeleaf.org" xmlns:sec="http://www.thymeleaf.org/extras/spring-security">
<button type="button" class="btn btn-danger btn-sm" th:text="${post.type==0?'置顶':'取消置顶'}"sec:authorize="hasAnyAuthority('moderator','admin')" id="topBtn">置顶</button>
<button type="button" class="btn btn-danger btn-sm" th:text="${post.status==0?'加精':'取消加精'}"sec:authorize="hasAnyAuthority('moderator','admin')" id="wonderfulBtn">加精</button>
<button type="button" class="btn btn-danger btn-sm" id="deleteBtn"th:disabled="${post.status==2}" sec:authorize="hasAnyAuthority('admin')">删除</button>
JS
// 页面加载完以后调用
$(function(){$("#topBtn").click(setTop);$("#wonderfulBtn").click(setWonderful);$("#deleteBtn").click(setDelete);
});// 置顶、取消置顶
function setTop() {$.post(CONTEXT_PATH + "/discuss/top",{"id":$("#postId").val()},function(data) {data = $.parseJSON(data);if(data.code == 0) {$("#topBtn").text(data.type == 1 ? '取消置顶':'置顶');} else {alert(data.msg);}});
}// 加精、取消加精
function setWonderful() {$.post(CONTEXT_PATH + "/discuss/wonderful",{"id":$("#postId").val()},function(data) {data = $.parseJSON(data);if(data.code == 0) {$("#wonderfulBtn").text(data.status == 1 ? '取消加精':'加精');} else {alert(data.msg);}});
}// 删除
function setDelete() {$.post(CONTEXT_PATH + "/discuss/delete",{"id":$("#postId").val()},function(data) {data = $.parseJSON(data);if(data.code == 0) {//跳转首页location.href = CONTEXT_PATH + "/index";} else {alert(data.msg);}});
}
20.网站数据统计(HyperLogLog BitMap)
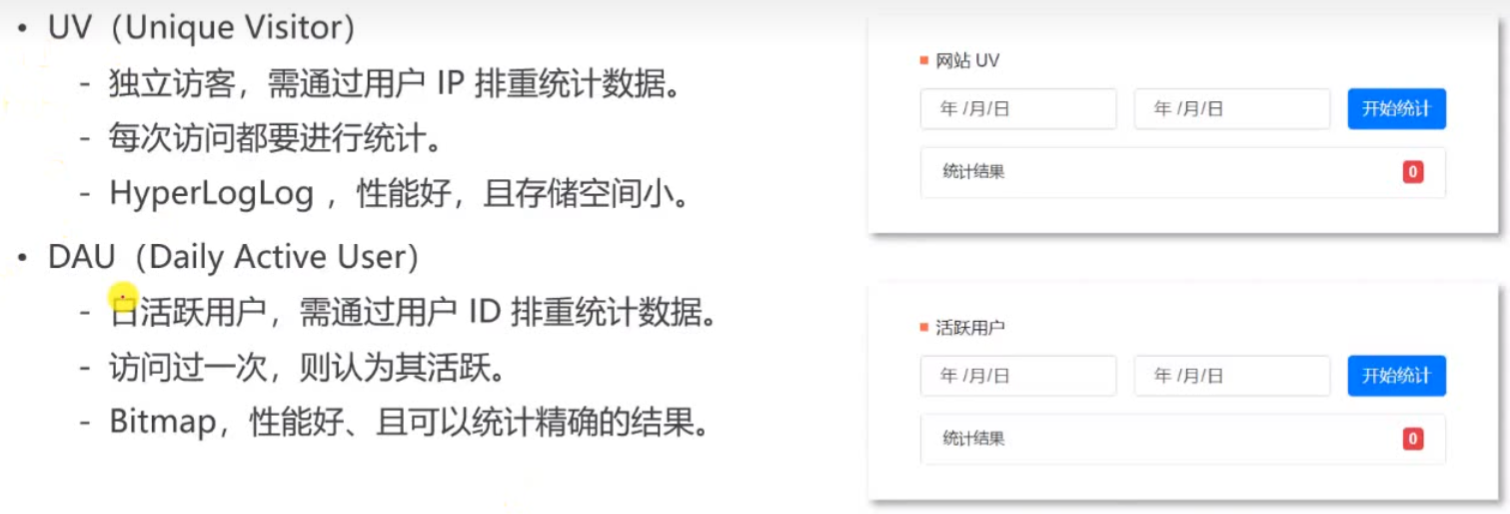
- DAU 要求统计登录后的用户,要求精确统计,不能有误差
1.编写RedisUtil规范Key值
// UV (网站访问用户数量---根据Ip地址统计(包括没有登录的用户))private static final String PREFIX_UV = "uv";// DAU (活跃用户数量---根据userId)private static final String PREFIX_DAU = "dau";/*** 存储单日ip访问数量(uv)--HyperLogLog ---k:时间 v:ip (HyperLogLog)* 示例:uv:20220526 = ip1,ip2,ip3,...*/public static String getUVKey(String date) {return PREFIX_UV + SPLIT + date;}/*** 获取区间ip访问数量(uv)* 示例:uv:20220525:20220526 = ip1,ip2,ip3,...*/public static String getUVKey(String startDate, String endDate) {return PREFIX_UV + SPLIT + startDate + SPLIT + endDate;}/*** 存储单日活跃用户(dau)--BitMap ---k:date v:userId索引下为true (BitMap)* 示例:dau:20220526 = userId1索引--(true),userId2索引--(true),....*/public static String getDAUKey(String date) {return PREFIX_DAU + SPLIT + date;}/*** 获取区间活跃用户* 示例:dau:20220526:20220526*/public static String getDAUKey(String startDate, String endDate) {return PREFIX_DAU + SPLIT + startDate + SPLIT + endDate;}
2.编写DataService业务层
@Autowired
private RedisTemplate redisTemplate;// 将Date类型转化为String类型
private SimpleDateFormat df = new SimpleDateFormat("yyyyMMdd");/*********************** HypeLogLog*************************/
// 将指定ip计入UV---k:当前时间 v:ip
public void recordUV(String ip) {String redisKey = RedisKeyUtil.getUVKey(df.format(new Date()));redisTemplate.opsForHyperLogLog().add(redisKey, ip);
}// 统计指定日期范围内的ip访问数UV
public long calculateUV(Date start, Date end) {if (start == null || end == null) {throw new IllegalArgumentException("参数不能为空!");}if (start.after(end)) {throw new IllegalArgumentException("请输入正确的时间段!");}// 整理该日期范围内的KeyList<String> keyList = new ArrayList<>();Calendar calendar = Calendar.getInstance();calendar.setTime(start);while (!calendar.getTime().after(end)) {// 获取该日期范围内的每一天的Key存入集合String key = RedisKeyUtil.getUVKey(df.format(calendar.getTime()));keyList.add(key);// 日期+1(按照日历格式)calendar.add(Calendar.DATE, 1);}// 合并日期范围内相同的ipString redisKey = RedisKeyUtil.getUVKey(df.format(start), df.format(end));// 获取keyList中的每一列key进行合并redisTemplate.opsForHyperLogLog().union(redisKey, keyList.toArray());// 返回统计结果return redisTemplate.opsForHyperLogLog().size(redisKey);
}/*********************** BitMap *****************************/
// 将指定用户计入DAU --k:当前时间 v:userId
public void recordDAU(int userId) {String redisKey = RedisKeyUtil.getDAUKey(df.format(new Date()));redisTemplate.opsForValue().setBit(redisKey, userId, true);
}// 统计指定日期范围内的DAU日活跃用户
public long calculateDAU(Date start, Date end) {if (start == null || end == null) {throw new IllegalArgumentException("参数不能为空!");}if (start.after(end)) {throw new IllegalArgumentException("请输入正确的时间段!");}// 整理该日期范围内的KeyList<byte[]> keyList = new ArrayList<>();Calendar calendar = Calendar.getInstance();calendar.setTime(start);while (!calendar.getTime().after(end)) {String key = RedisKeyUtil.getDAUKey(df.format(calendar.getTime()));keyList.add(key.getBytes());// 日期+1(按照日历格式)calendar.add(Calendar.DATE, 1);}// 进行OR运算return (long) redisTemplate.execute(new RedisCallback() {@Overridepublic Object doInRedis(RedisConnection connection) throws DataAccessException {String redisKey = RedisKeyUtil.getDAUKey(df.format(start), df.format(end));connection.bitOp(RedisStringCommands.BitOperation.OR, redisKey.getBytes(), keyList.toArray(new byte[0][0]));return connection.bitCount(redisKey.getBytes());}});}
3.在DataInterceptor拦截器中调用Service(每次请求最开始调用)
package com.qiuyu.controller.interceptor;@Component
public class DataInterceptor implements HandlerInterceptor {@Autowiredprivate DataService dataService;@Autowiredprivate HostHolder hostHolder;@Overridepublic boolean preHandle(HttpServletRequest request, HttpServletResponse response, Object handler) throws Exception {// 获取请求用户的ip地址,统计UVString Ip = request.getRemoteHost();dataService.recordUV(Ip);// 统计DAUser user = hostHolder.getUser();if (user != null) {dataService.recordDAU(user.getId());}return true;}}
/***********注册拦截器*********/
@Configuration
public class WebMvcConfig implements WebMvcConfigurer {@Autowiredprivate DataInterceptor dataInterceptor;registry.addInterceptor(dataInterceptor).excludePathPatterns("/**/*.css","/**/*.js","/**/*.png","/**/*.jpg","/**/*.jpeg");}
4.编写DataController用以渲染模板
@DateTimeFormat告诉服务器日期的格式
package com.qiuyu.controller;@Controller
public class DataController {@Autowiredprivate DataService dataService;/*** 统计页面*/@RequestMapping(value = "/data", method = {RequestMethod.GET, RequestMethod.POST})public String getDataPage() {return "/site/admin/data";}/*** 统计网站UV(ip访问数量)* @DateTimeFormat将时间参数转化为字符串*/@PostMapping( "/data/uv")public String getUV(@DateTimeFormat(pattern = "yyyy-MM-dd") Date start, @DateTimeFormat(pattern = "yyyy-MM-dd") Date end, Model model) {long uv = dataService.calculateUV(start, end);model.addAttribute("uvResult", uv);model.addAttribute("uvStartDate", start);model.addAttribute("uvEndDate", end);// 转发到 /data请求return "forward:/data";}/*** 统计网站DAU(登录用户访问数量)*/@PostMapping("/data/dau")public String getDAU(@DateTimeFormat(pattern = "yyyy-MM-dd") Date start, @DateTimeFormat(pattern = "yyyy-MM-dd") Date end, Model model) {long dau = dataService.calculateDAU(start, end);model.addAttribute("dauResult", dau);model.addAttribute("dauStartDate", start);model.addAttribute("dauEndDate", end);return "forward:/data";}
}
5.编写SecurityConfig进行权限控制
.antMatchers("/discuss/delete","/data/* *"
).hasAnyAuthority(AUTHORITY_ADMIN
)
6.编写前端管理员专用页面(核心部分)
<!-- 网站UV (活跃用户类似)--> <div><h6> 网站 访问人数</h6><form method="post" th:action="@{/data/uv}"><input name="start" th:value="${#dates.format(uvStartDate,'yyyy-MM-dd')}" type="date"/><input name="end" th:value="${#dates.format(uvEndDate,'yyyy-MM-dd')}" type="date"/><button type="submit">开始统计</button></form><li>统计结果<span th:text="${uvResult}">访问人数</span></li> </div>
21.线程池(Quartz)
一些任务不是由浏览器发给服务器,服务器才去做的,比如 服务器半小时统计下数据、一小时清理下临时文件等等,这些就需要任务调度

为什么分布式情况下,需要使用Quartz?
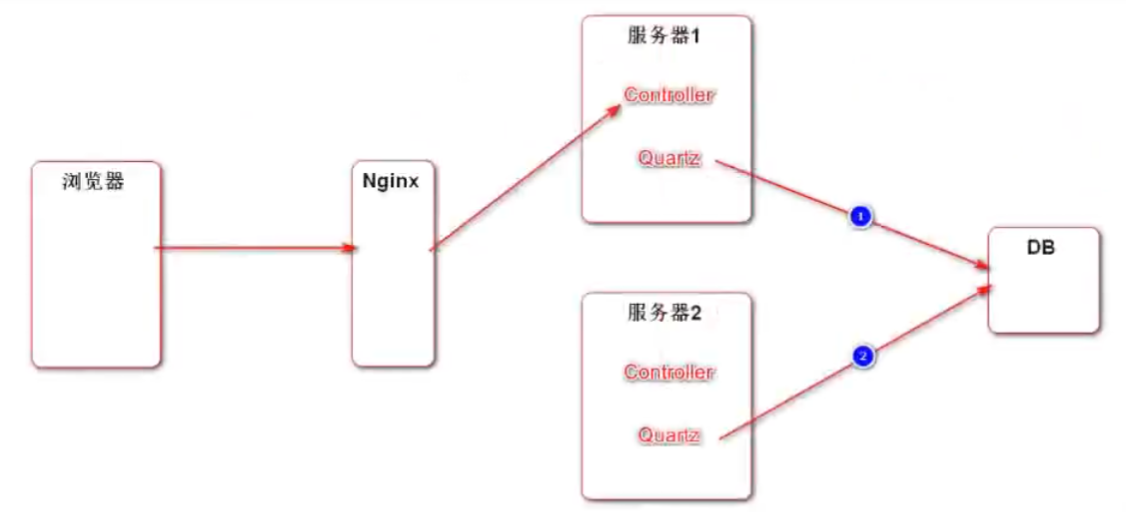
- jdk和spring的线程池,在各个服务器中都有一份,如果有定时任务,每隔一段时间,每个服务器都会进行一次任务处理
- Quartz将数据存储在数据库中,进行加锁来处理分布式定时任务的问题
JDK线程池
package com.qiuyu;@SpringBootTest
@RunWith(SpringRunner.class)
public class ThreadPoolTest {private static final Logger logger = LoggerFactory.getLogger(ThreadPoolTest.class);//JDK普通线程池ThreadPoolExecutor threadPoolExecutor = new ThreadPoolExecutor(2,5,60,TimeUnit.SECONDS,new LinkedBlockingQueue<>(),Executors.defaultThreadFactory(),new ThreadPoolExecutor.AbortPolicy());//JDK定时线程池private ScheduledExecutorService scheduledExecutorService = Executors.newScheduledThreadPool(5);private void sleep(int t) {try {Thread.sleep(t);} catch (InterruptedException e) {throw new RuntimeException(e);}}/*** JDK普通线程池测试*/@Testpublic void testJDK1(){for (int i = 0; i < 10; i++) {threadPoolExecutor.submit(()->{logger.debug("Hello!");});}}/*** JDK定时线程池测试*/@Testpublic void testJDK2(){// 任务 多久后开始(延迟) 间隔 时间单位scheduledExecutorService.scheduleAtFixedRate(()->{logger.debug("Hello!");}, 10, 1,TimeUnit.SECONDS);sleep(30000);}}
Spring线程池
1.配置
spring:task:execution: #TaskExecutionProperties Spring普通线程池pool:core-size: 5 #核心线程数max-size: 15 #最大线程数queue-capacity: 100 #队列容量scheduling: #TaskSchedulingProperties Spring定时线程池pool:size: 5 #线程数量
定时线程池还需要写个配置类
@Configuration
@EnableScheduling
@EnableAsync
public class ThreadPoolConfig {}
@EnableScheduling表示启用定时任务
2.使用方式
//Spring普通线程池@Autowiredprivate ThreadPoolTaskExecutor threadPoolTaskExecutor;//Spring定时线程池@Autowiredprivate ThreadPoolTaskScheduler threadPoolTaskScheduler;/*** Spring普通线程池*/@Testpublic void testSpringExecutors(){for (int i = 0; i < 10; i++) {threadPoolTaskExecutor.submit(()->{logger.debug("hello!");});}}/*** Spring定时线程池*/@Testpublic void testSpringExecutors2(){//开始进行任务的时间Date startTime = new Date(System.currentTimeMillis() + 5000);threadPoolTaskScheduler.scheduleAtFixedRate(() -> logger.debug("Hello!"), startTime, 1000);sleep(30000);}
3.Spring线程池使用注解
@Configuration
@EnableScheduling
@EnableAsync
public class ThreadPoolConfig {}
@EnableAsync配置类中加入,代表开启异步
@Async
@Service
public class TestService {public static final Logger logger = LoggerFactory.getLogger(TestService.class);@Asyncpublic void task(){logger.debug("hello  " + Thread.currentThread().getName());}
}
 @Test
public void testSpringExecutors3(){for (int i = 0; i < 10; i++) {testService.task();}
}
@Async表示该方法异步进行,会使用Spring的普通线程池取调用
@Scheduled
不需要调用,自动就会执行
@Scheduled(initialDelay = 5000, fixedDelay = 1000)
public void task2(){logger.debug("hello2  " + Thread.currentThread().getName());
}
@Scheduled表示该方法为定时任务initialDelay延迟多久后开始(ms)fixedDelay多久执行一次(ms)
@Test
public void testSpringExecutors4(){for (int i = 0; i < 10; i++) {testService.task2();}sleep(10000);
}
Quartz线程池
0.导包
<dependency><groupId>org.springframework.boot</groupId><artifactId>spring-boot-starter-quartz</artifactId>
</dependency>
1.定义任务
package com.qiuyu.quartz;public class DemoJob implements Job {@Overridepublic void execute(JobExecutionContext jobExecutionContext) throws JobExecutionException {System.out.println(Thread.currentThread().getName());}
}
2.配置类
BeanFactory 和 FactoryBean的区别
- BeanFactory是容器的顶层接口
- FactoryBean用来简化Bean的实例化过程
- 通过FactoryBean封装Bean的实例化过程
- 将FactoryBean装配到Spring容器里
- 将FactoryBean注入到其他的Bean
- 该Bean得到的是FactoryBean所管理的对象实例
这里使用FactoryBean来实例化Bean
package com.qiuyu.config;@Configuration
public class QuartzConfig {//配置JobDetail@Beanpublic JobDetailFactoryBean demoJobDetail(){JobDetailFactoryBean factoryBean = new JobDetailFactoryBean();factoryBean.setJobClass(DemoJob.class);factoryBean.setName("demoJob");factoryBean.setGroup("demoJobGroup");factoryBean.setDurability(true); //持久化保存factoryBean.setRequestsRecovery(true); //是否可以恢复return factoryBean;}//配置Trigger(SimpleTriggerFactoryBean, CronTriggerFactoryBean)//CronTriggerFactoryBean用于比如每月底执行一次这种@Beanpublic SimpleTriggerFactoryBean demoTrigger(JobDetail demoJobDetail){SimpleTriggerFactoryBean factoryBean = new SimpleTriggerFactoryBean();factoryBean.setJobDetail(demoJobDetail);factoryBean.setName("demoTrigger");factoryBean.setGroup("demoTriggerGroup");factoryBean.setRepeatInterval(3000); //多久执行一次factoryBean.setJobDataMap(new JobDataMap()); //存储数据的类型return factoryBean;}
}
小坑:
因为我的版本比较高,所以
org.quartz.jobStore.class=org.quartz.impl.jdbcjobstore.JobStoreTX需要改成
org.springframework.scheduling.quartz.LocalDataSourceJobStore否则报DataSource 的 name 为 null
配置后,运行Quartz,会把配置保存到数据库中,才能实现分布式部署
#QuartzProperties
quartz:job-store-type: jdbcscheduler-name: communitySchedulerproperties:org:quartz:scheduler:instanceId: AUTOjobStore:class: org.springframework.scheduling.quartz.LocalDataSourceJobStoredriverDelegateClass: org.quartz.impl.jdbcjobstore.StdJDBCDelegateisClustered: truethreadPool:class: org.quartz.simpl.SimpleThreadPoolthreadCount: 5
22.热帖排行(Quartz + Redis)

实际上线的时候可以几个小时算一次分数
Q:我们每次算分的时候需要把所有的帖子都算一遍吗?
A:太多了,太耗费时间,因为只有加精 评论 点赞会改变帖子的分数,所以我们只需要在这三个操作的时候
把当前的帖子的Id放入到Redis中,等时间一到,把这些Redis中的帖子进行计算就行了
1.编写RedisUtil规范Key值
// 热帖分数 (把需要更新的帖子id存入Redis当作缓存)
private static final String PREFIX_POST = "post";/***  帖子分数 (发布、点赞、加精、评论时放入)*/
public static String getPostScore() {return PREFIX_POST + SPLIT + "score";
}
2.处理发布、点赞、加精、评论时计算分数,将帖子id存入Key
2.1发布帖子时初始化分数
/*** 计算帖子分数* 将新发布的帖子id存入set去重的redis集合------addDiscussPost()*/
String redisKey = RedisKeyUtil.getPostScore();
redisTemplate.opsForSet().add(redisKey, post.getId());
2.2点赞时计算帖子分数
/*** 计算帖子分数* 将点赞过的帖子id存入set去重的redis集合------like()*/
if (entityType == ENTITY_TYPE_POST) {String redisKey = RedisKeyUtil.getPostScore();redisTemplate.opsForSet().add(redisKey, postId);
}
2.3评论时计算帖子分数
if (comment.getEntityType() == ENTITY_TYPE_POST) {/*** 计算帖子分数* 将评论过的帖子id存入set去重的redis集合------addComment()*/String redisKey = RedisKeyUtil.getPostScore();redisTemplate.opsForSet().add(redisKey, discussPostId);
}
2.4加精时计算帖子分数
/*** 计算帖子分数* 将加精的帖子id存入set去重的redis集合-------setWonderful()*/
String redisKey = RedisKeyUtil.getPostScore();
redisTemplate.opsForSet().add(redisKey, id);
3.定义Quartz热帖排行Job
package com.qiuyu.quartz;/*** 计算帖子的分数*/
@Component
public class PostScoreRefreshJob implements Job, CommunityConstant {private static final Logger logger = LoggerFactory.getLogger(PostScoreRefreshJob.class);@Autowiredprivate RedisTemplate redisTemplate;@Autowiredprivate DiscussPostService discussPostService;@Autowiredprivate LikeService likeService;@Autowiredprivate ElasticsearchService elasticsearchService;// 网站创建时间private static final Date epoch;//初始化日期static {try {epoch = new SimpleDateFormat("yyyy-MM-dd HH:mm:ss").parse("2014-10-22 00:00:00");} catch (ParseException e) {throw new RuntimeException("初始化时间失败!", e);}}@Overridepublic void execute(JobExecutionContext jobExecutionContext) throws JobExecutionException {String redisKey = RedisKeyUtil.getPostScore();// 处理每一个keyBoundSetOperations operations = redisTemplate.boundSetOps(redisKey);if (operations.size() == 0) {logger.info("[任务取消] 没有需要刷新的帖子");return;}logger.info("[任务开始] 正在刷新帖子分数" + operations.size());while (operations.size() > 0) {// 刷新每一个从set集合里弹出的postIdthis.refresh((Integer) operations.pop());}logger.info("[任务结束] 帖子分数刷新完毕!");}// 从redis中取出每一个value:postIdprivate void refresh(int postId) {DiscussPost post = discussPostService.findDiscussPostById(postId);if (post == null) {logger.error("该帖子不存在:id = " + postId);return;}if (post.getStatus() == 2) {logger.error("帖子已被删除");return;}/*** 帖子分数计算公式:[加精(75)+ 评论数*  10 + 点赞数*  2] + 距离天数*/// 是否加精帖子boolean wonderful = post.getStatus() == 1;// 点赞数量long liketCount = likeService.findEntityLikeCount(ENTITY_TYPE_POST, postId);// 评论数量int commentCount = post.getCommentCount();// 计算权重double weight = (wonderful ? 75 : 0) + commentCount * 10 + liketCount * 2;// 分数 = 取对数,max防止负数(帖子权重) + 距离天数double score = Math.log10(Math.max(weight, 1)) +(post.getCreateTime().getTime() - epoch.getTime()) / (1000 * 3600 * 24);// 更新帖子分数discussPostService.updateScore(postId, score);// 同步搜索数据post.setScore(score);elasticsearchService.saveDiscussPost(post);}
}
4.配置Quartz的PostScoreRefreshJob
3秒刷一次
package com.qiuyu.config;@Configuration
public class QuartzConfig {//配置JobDetail@Beanpublic JobDetailFactoryBean postScoreRefreshJobDetail(){JobDetailFactoryBean factoryBean = new JobDetailFactoryBean();factoryBean.setJobClass(PostScoreRefreshJob.class);factoryBean.setName("postScoreRefreshJob");factoryBean.setGroup("communityGroup");factoryBean.setDurability(true); //持久化保存factoryBean.setRequestsRecovery(true); //是否可以恢复return factoryBean;}//配置Trigger(SimpleTriggerFactoryBean, CronTriggerFactoryBean)@Beanpublic SimpleTriggerFactoryBean PostScoreRefreshTrigger(JobDetail postScoreRefreshJobDetail){SimpleTriggerFactoryBean factoryBean = new SimpleTriggerFactoryBean();factoryBean.setJobDetail(postScoreRefreshJobDetail);factoryBean.setName("postScoreRefreshTrigger");factoryBean.setGroup("postScoreRefreshTrigger");factoryBean.setRepeatInterval(3000); //多久执行一次factoryBean.setJobDataMap(new JobDataMap()); //存储数据的类型return factoryBean;}
}
5.修改主页帖子显示(Service、Controller)
从之前的按照时间排序,增加一个参数orderMode
Service
/*** 查询没被拉黑的帖子,并且userId不为0按照type排序* @param userId* @param orderMode 0-最新 1-最热* @param page* @return*/
public IPage<DiscussPost> findDiscussPosts(int userId, int orderMode, IPage<DiscussPost> page) {LambdaQueryWrapper<DiscussPost> queryWrapper = new LambdaQueryWrapper<>();queryWrapper.ne(DiscussPost::getStatus, 2).eq(userId != 0, DiscussPost::getUserId, userId).orderBy(orderMode == 0, false, DiscussPost::getType, DiscussPost::getCreateTime).orderBy(orderMode == 1, false, DiscussPost::getType, DiscussPost::getScore, DiscussPost::getCreateTime);discussPostMapper.selectPage(page, queryWrapper);return page;
}
Controller
/*** 分页获取所有帖子* @param orderMode* @param page* @param model* @return*/
@GetMapping("/index")
public String getIndexPage(@RequestParam(name = "orderMode", defaultValue = "0") int orderMode,MyPage<DiscussPost> page, Model model) {page.setSize(10);page.setPath("/index?orderMode="+orderMode);//查询到分页的结果page = (MyPage<DiscussPost>) discussPostService.findDiscussPosts(0, orderMode, page);List<DiscussPost> list = page.getRecords();//因为这里查出来的是userid,而不是user对象,所以需要重新查出userList<Map<String, Object>> discussPorts = new ArrayList<>();if (list != null) {for (DiscussPost post : list) {Map<String, Object> map = new HashMap<>(15);map.put("post", post);User user = userService.findUserById(post.getUserId());map.put("user", user);discussPorts.add(map);//点赞数long entityLikeCount = likeService.findEntityLikeCount(ENTITY_TYPE_POST, post.getId());map.put("likeCount", entityLikeCount);}}model.addAttribute("discussPorts", discussPorts);model.addAttribute("orderMode",orderMode);model.addAttribute("page", page);return "/index";
}
6.前端
<li class="nav-item"><a th:class="|nav-link ${orderMode==0?'active':''}|" th:href="@{/index(orderMode=0)}">最新</a>
</li>
<li class="nav-item"><a th:class="|nav-link ${orderMode==1?'active':''}|" th:href="@{/index(orderMode=1)}">最热</a>
</li>
23.文件上传至云服务器(阿里云OSS)

1.在阿里云中创建一个用户,勾选OpenAPI模式
![]()
2.创建Bucket
![]()
3.给用户添加权限
![]()
![]()
4.SpringBoot引入阿里云OSS依赖
<dependency><groupId>com.aliyun.oss</groupId><artifactId>aliyun-sdk-oss</artifactId><version>3.13.0</version>
</dependency>
5.配置
aliyun:oss:file:end-point: "https://oss-cn-hangzhou.aliyuncs.com"access-key-id: "***"access-key-secret: "***"bucket-name: "***" #bucket名字dir-name: "community" #文件夹名字
6.写个配置类
本来是用静态方法和变量写的,但@Value无法注入静态变量
试了几种办法,只有@Configuration + set方法 + @Value 可以成功注入,但是会有点问题,看着也不爽
还是直接放到容器里算了
- 阿里云的文件目录为 bucketName.endPoint+ /文件夹/文件
package com.qiuyu.utils;/*** 上传到OSS*/
@Component
public class OSSUtil {@Value("${aliyun.oss.file.end-point}")private String endPoint;@Value("${aliyun.oss.file.access-key-id}")private String accessKeyId;@Value("${aliyun.oss.file.access-key-secret}")private String accessKeySecret;@Value("${aliyun.oss.file.bucket-name}")private String bucketName;@Value("${aliyun.oss.file.dir-name}")private String dirName;/*** 上传文件* @param objectName 文件名(带后缀)* @param file 文件* @return*/public String uploadFile(String objectName ,File file){objectName = dirName + "/" + objectName;// 创建OSSClient实例。OSS ossClient = new OSSClientBuilder().build(endPoint, accessKeyId, accessKeySecret);try {ossClient.putObject(bucketName, objectName, file);} catch (OSSException oe) {System.out.println("Caught an OSSException, which means your request made it to OSS, "+ "but was rejected with an error response for some reason.");System.out.println("Error Message:" + oe.getErrorMessage());System.out.println("Error Code:" + oe.getErrorCode());System.out.println("Request ID:" + oe.getRequestId());System.out.println("Host ID:" + oe.getHostId());return null;} catch (ClientException ce) {System.out.println("Caught an ClientException, which means the client encountered "+ "a serious internal problem while trying to communicate with OSS, "+ "such as not being able to access the network.");System.out.println("Error Message:" + ce.getMessage());return null;} finally {if (ossClient != null) {ossClient.shutdown();}}String filePath = "https://"+ bucketName + "."+ endPoint.substring(endPoint.lastIndexOf("/")+1)+ "/" + objectName;return filePath;}}
7.Controller调用
得到头像的地址后,存入数据库
//确定文件存放路径
File dest = new File(uploadPath + "/" + filename);
//存入本地
try {//将文件存入指定位置headerImage.transferTo(dest);
} catch (IOException e) {logger.error("上传文件失败: " + e.getMessage());throw new RuntimeException("上传文件失败,服务器发生异常!", e);
}//上传到阿里云OSS
String headerUrl = ossUtil.uploadFile(filename, dest);
System.out.println(headerUrl);
if(headerUrl == null){logger.error("文件上传至云服务器失败! ");throw new RuntimeException("文件上传至云服务器失败!");
}//更新当前用户的头像的路径(web访问路径)
//http://localhost:8080/community/user/header/xxx.png
User user = hostHolder.getUser();
//String headerUrl = domain + contextPath + "/user/header/" + filename;
userService.updateHeaderUrl(user.getId(), headerUrl);
24.优化网站的性能(Caffeine)
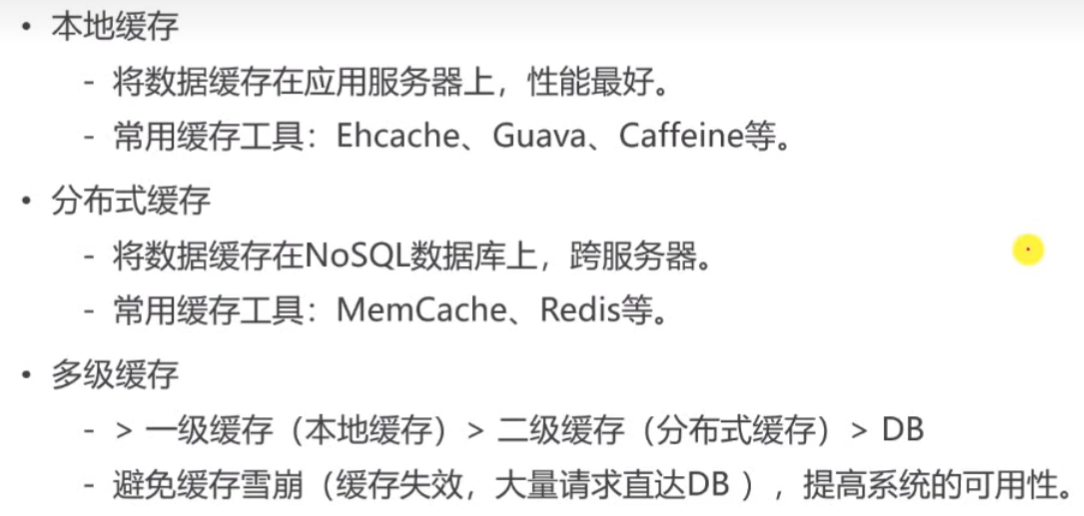
本地缓存的效率会比分布式缓存要快,因为没有网络开销
Q:为什么登录凭证不存在本地缓存上?
A:分布式情况下用户第一次访问A服务器,登陆凭证会存在A服务器的内存中,但是下一次有可能访问的是B服务器,所以还是得用分布式服务器。也可以使用多级缓存(本地缓存+分布式缓存)
多级缓存查询过程

第一次查询的情况(服务器1):
- 先到服务器1的本地缓存中查询数据,没查到
- 到Redis中查询数据,没查到
- 到DB中查询,查到了,返回给App,然后App把结果存到本地缓存和Redis中,方便下次查找
第二次查询的情况(服务器1):
- 到服务器1的本地缓存中查询数据,直接命中,返回结果
第二次查询的情况(服务器2):
- 先到服务器2的本地缓存中查询数据,没查到
- 到Redis中查询数据,命中,返回数据给App
- App把结果存到本地缓存中
对热门帖子进行本地缓存
Q:为什么不对默认最新的帖子进行缓存?
A:缓存一般存储变化不太大的数据
不使用Spring来整合Caffeine,因为Spring使用一个缓存管理器来对多个缓存进行配置,但是我们不同的缓存的配置是不同的,所以我们直接使用Caffeine
1.导入包
<dependency><groupId>com.github.ben-manes.caffeine</groupId><artifactId>caffeine</artifactId>
</dependency>
2.配置
# caffeine 本地缓存优化热门帖子
caffeine:post:max-size: 15 #最大页数expire-seconds: 180 #过期时间(s)
3.修改DiscussPostService业务层分页查询方法
Caffeine的核心接口Cache
Cache下有两个子接口,同步子接口LoadingCache 异步子接口AsyncLoadingCache
项目开始的时候,再构造之前初始化Caffeine缓存(用处是,如果再缓存中找不到目标数据的话,会执行这个初始化函数)
在查询热门帖子时直接调用caffeine的get方法,如果缓存中有这个key会直接返回,没有的话会执行初始化函数
package com.qiuyu.service;@Slf4j
@Service
public class DiscussPostService {@Autowiredprivate DiscussPostMapper discussPostMapper;@Autowiredprivate SensitiveFilter sensitiveFilter;@Value("${caffeine.post.max-size}")private int maxSize;@Value("${caffeine.post.expire-seconds}")private int expireSeconds;// 帖子列表缓存private LoadingCache<String, MyPage<DiscussPost>> postPageCache;// 项目启动时初始化缓存@PostConstructpublic void init() {// 初始化帖子列表缓存postPageCache = Caffeine.newBuilder().maximumSize(maxSize).expireAfterWrite(expireSeconds,TimeUnit.SECONDS).build(new CacheLoader<String, MyPage<DiscussPost>>(){@Overridepublic @Nullable MyPage<DiscussPost> load(@NonNull String key) throws Exception {if (key == null || key.length() == 0) {throw new IllegalArgumentException("参数错误!");}String[] params = key.split(":");if (params == null || params.length != 3) {throw new IllegalArgumentException("参数错误!");}//拆分keyint current = Integer.valueOf(params[0]);int size = Integer.valueOf(params[1]);String path = params[2];// 这里可用二级缓存:Redis -> mysql//本地缓存中查不到,从数据库中查询,查到后会自动存入本地缓存log.debug("正在从数据库加载热门帖子总数!");MyPage<DiscussPost> page = new MyPage<>();page.setCurrent(current);page.setSize(size);page.setPath(path);LambdaQueryWrapper<DiscussPost> queryWrapper = new LambdaQueryWrapper<>();queryWrapper.ne(DiscussPost::getStatus, 2).orderByDesc( DiscussPost::getType, DiscussPost::getScore, DiscussPost::getCreateTime);discussPostMapper.selectPage(page, queryWrapper);return page;}});}/*** 查询没被拉黑的帖子,并且userId不为0按照type排序** @param userId* @param orderMode 0-最新 1-最热* @param page* @return*/public MyPage<DiscussPost> findDiscussPosts(int userId, int orderMode, MyPage<DiscussPost> page) {//全部查询并且查的是热门帖子的话先去缓存查询if (userId == 0 && orderMode == 1) {//按照当前页和页面最大值作为Key查询log.debug("正在从Caffeine缓存中加载热门帖子!");return postPageCache.get(page.getCurrent()+":"+ page.getSize()+":"+ page.getPath());}log.debug("正在从数据库加载热门帖子总数!");//从数据库中查LambdaQueryWrapper<DiscussPost> queryWrapper = new LambdaQueryWrapper<>();queryWrapper.ne(DiscussPost::getStatus, 2).eq(userId != 0, DiscussPost::getUserId, userId).orderBy(orderMode == 0, false, DiscussPost::getType, DiscussPost::getCreateTime).orderBy(orderMode == 1, false, DiscussPost::getType, DiscussPost::getScore, DiscussPost::getCreateTime);discussPostMapper.selectPage(page, queryWrapper);return page;}
4.压力测试(Jmeter)
先将缓存给注释掉,并且去掉访问Service层打印信息的那个切面
1.下载Jmeter
https://jmeter.apache.org/
2.设置线程组,设置线程数

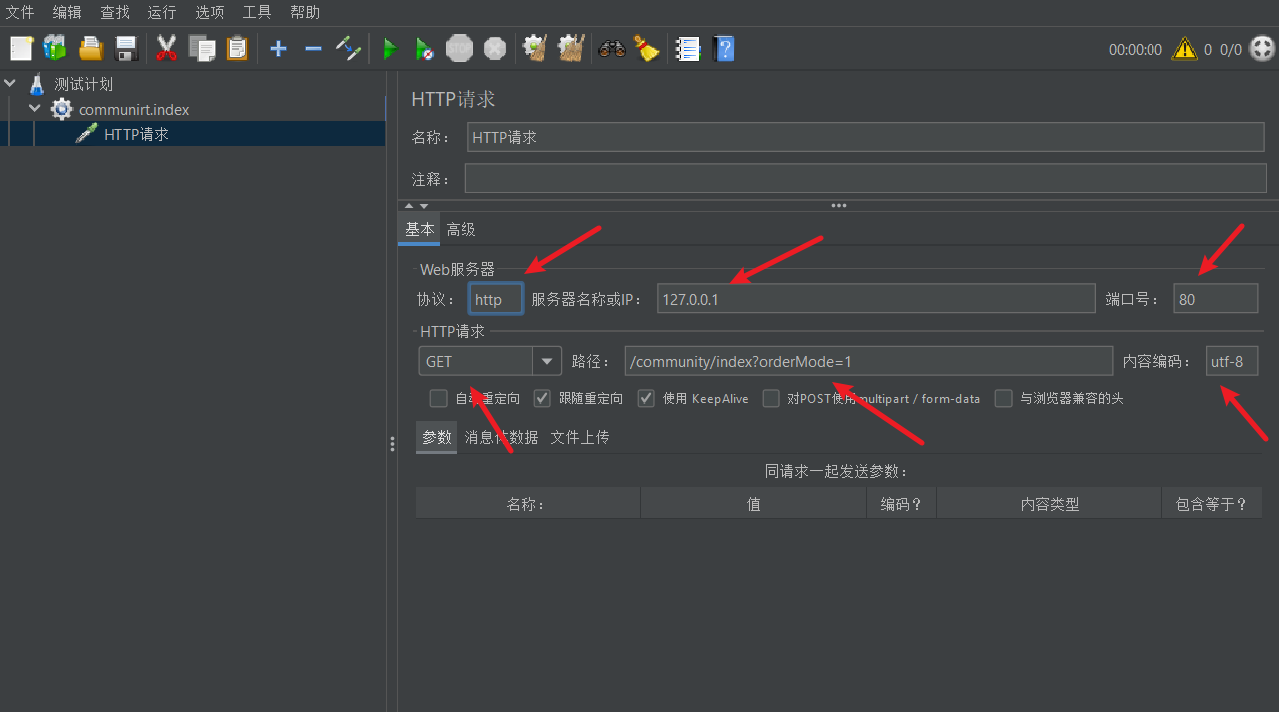
3.添加事件HTTP请求访问首页热门
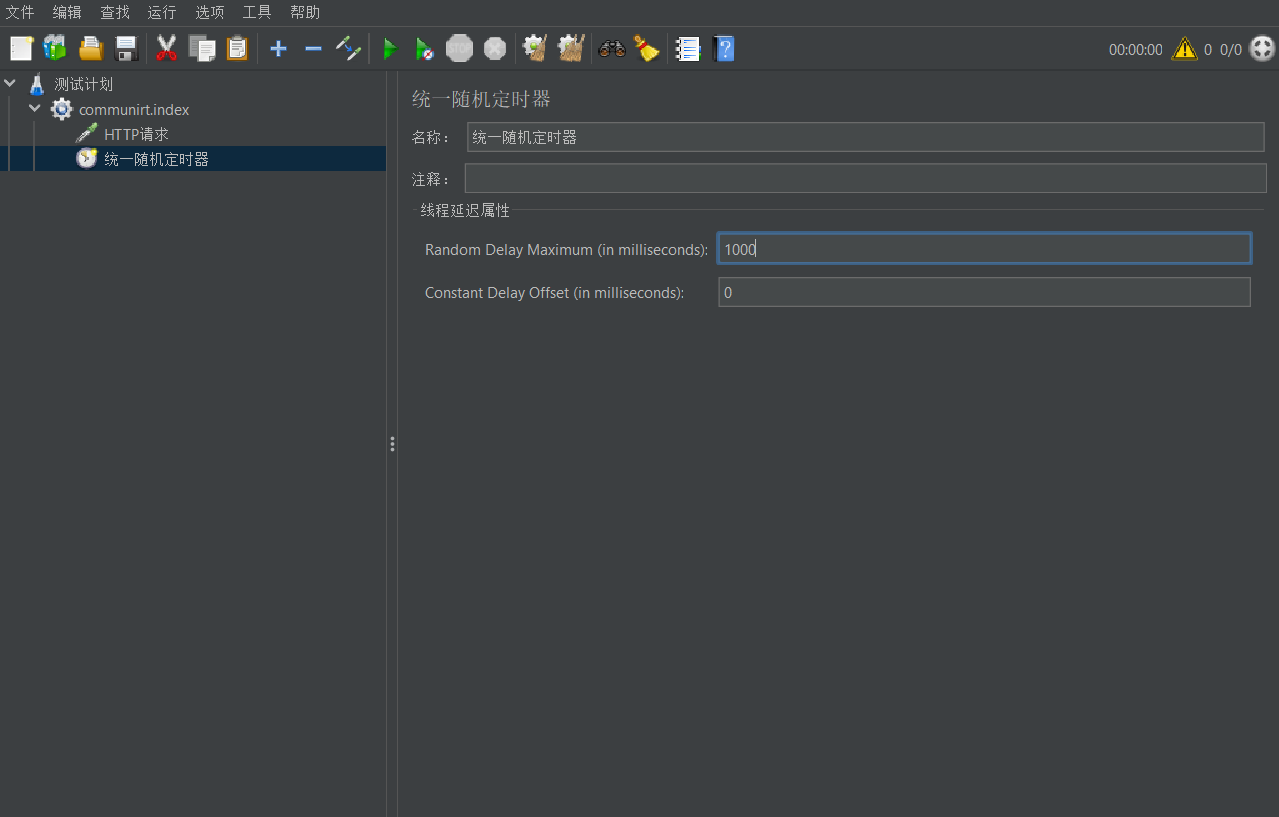
4.设置定时器
0-1000ms
5.添加监听器(聚合报告)
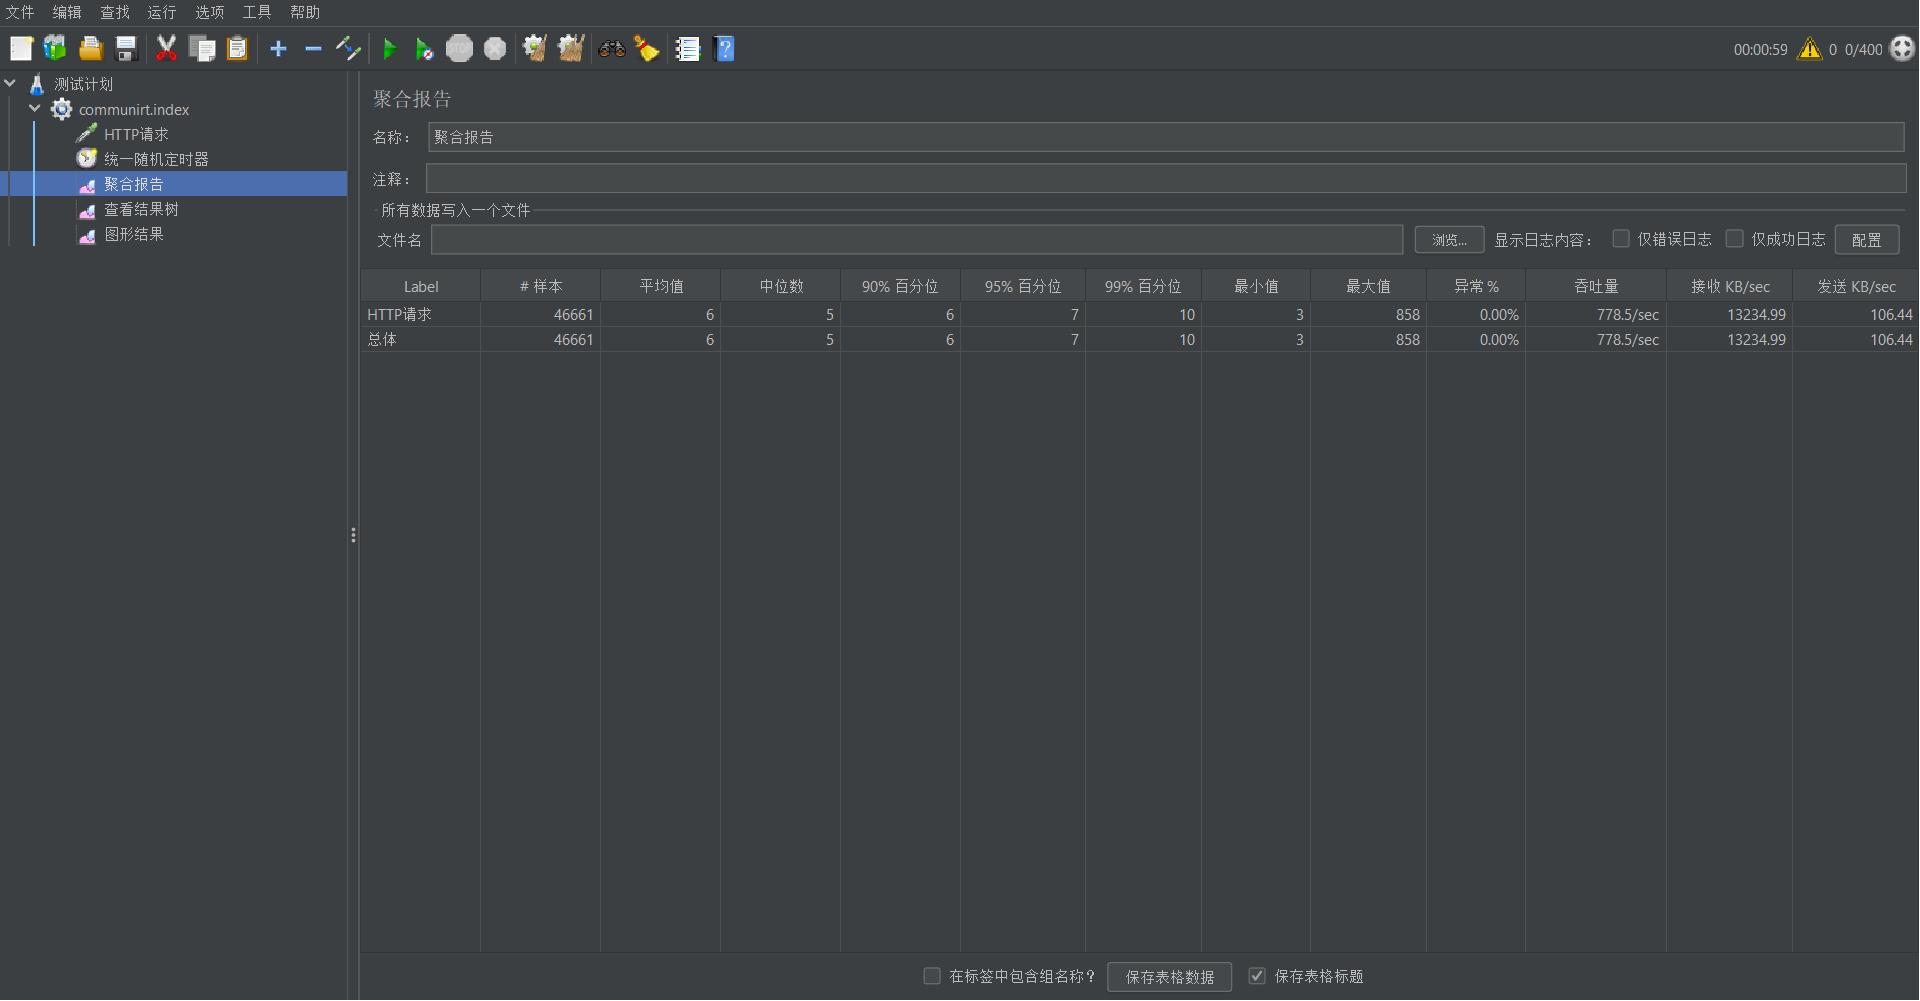
进行测试,不断加大线程数最终为400,到达吞吐的最大值大概在每秒60个请求
![]()
Label:每个 JMeter 的 element(例如 HTTP Request)都有一个 Name 属性,这里显示的就是 Name 属性的值
样本:表示你这次测试中一共发出了多少个请求,如果模拟10个用户,每个用户迭代10次,那么这里显示100
平均值:平均响应时间——默认情况下是单个 Request 的平均响应时间,当使用了 Transaction Controller 时,也可以以Transaction 为单位显示平均响应时间
中位数:中位数,也就是 50% 用户的响应时间
90% 百分位:90% 用户的响应时间(单位毫秒)
最小值:最小响应时间
最大值:最大响应时间
异常%:本次测试中出现错误的请求的数量/请求的总数
吞吐量:吞吐量——默认情况下表示每秒完成的请求数(Request per Second),当使用了 Transaction Controller 时,也可以表示类似 LoadRunner 的 Transaction per Second 数
接收KB/Sec:每秒从服务器端接收到的数据量,相当于LoadRunner中的Throughput/Sec
6.测试使用Caffeine
解开注释
吞吐量到了778,是之前60的12倍左右!
25.其他
1.单元测试
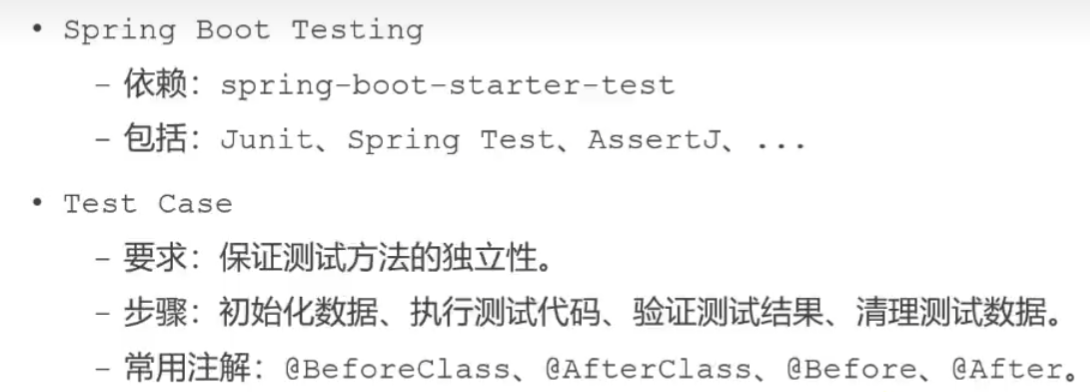
- @BeforeClass 在类初始化之前执行,必须是静态方法
- @Before 在方法测试类中所有方法执行前执行
Before可以用来创建这个测试类自己用的数据,在After中删掉
这样就不会在测试完后数据库中一堆测试数据,而且不依赖别人的数据
断言
Assert.assertEquals();
Assert.assertNull();
Assert.assertFalse();
2.项目监控
<dependency><groupId>org.springframework.boot</groupId><artifactId>spring-boot-starter-actuator</artifactId>
</dependency>
默认打开的端口
http://localhost/community/actuator/healthhttp://localhost/community/actuator/info
![]()
配置打开和关闭的端口
#actuator
management:endpoints:web:exposure:include: "*"exclude: "info,caches"
- beans可以查看容器中的所有Bean
- loggers可用查看日志

自定义端点
这里测试数据库连接是否成功
package com.qiuyu.actuator;import javax.sql.DataSource;@Component
@Endpoint(id = "database") //这里是url中访问的名称
public class DatabaseEndpoint {private static final Logger logger = LoggerFactory.getLogger(DatabaseEndpoint.class);@Autowiredprivate DataSource dataSource;// 相当于GET请求@ReadOperationpublic String checkConnection() {try (Connection conn = dataSource.getConnection();) {return CommunityUtil.getJSONString(0, "获取连接成功!");} catch (SQLException e) {logger.error("获取连接失败:" + e.getMessage());return CommunityUtil.getJSONString(1, "获取连接失败!");}}
}
Spring Security设置权限
.antMatchers("/discuss/delete","/data/**","/actuator/**").hasAnyAuthority(AUTHORITY_ADMIN)![]()
参考
https://xumingyu2018.github.io/docsify-blog/#/?id=docsify-blog
https://blog.csdn.net/lijiaming_99/article/details/124931663
仿牛客论坛项目(下)相关推荐
- 仿牛客论坛项目(上)
代码仓库:https://gitee.com/qiuyusy/community 仿牛客论坛项目(下) 仿牛客论坛项目上 1. Spring 在测试类中使用Spring环境 @Primary的作用 @ ...
- 仿牛客论坛项目(3)
仿牛客论坛项目 一.阻塞队列 1.1 测试 二.kafka入门 2.1 kafka下载 2.2 测试 三.Spring整合kafka 3.1 引入依赖 3.2 修改配置文件 3.3 测试 四.发布系统 ...
- 仿牛客论坛项目(5)
仿牛客论坛项目 一.SpringSecurity入门案例 1.1 添加依赖 1.2 配置文件 1.3 工具类 CommunityUtil 1.4 配置类 SecurityConfig 1.5 实体类 ...
- 仿牛客论坛项目(4)
仿牛客论坛项目 一.Elasticsearch入门 1.1 elasticsearch安装 1.2 修改config目录下的elasticsearch.yml配置文件 1.3 配置环境变量 1.4 下 ...
- 仿牛客论坛项目全面大总结
1.核心功能: - 发帖.评论.私信.转发: - 点赞.关注.通知.搜索: - 权限.统计.调度.监控: 2.核心技术: - Spring Boot.SSM - Redis.Kafka.Elastic ...
- SpringBoot仿牛客论坛项目实战
Community 论坛项目 转载请附带原文链接: 1. 环境搭建与技术栈说明 1.0 项目架构图 1.1 技术要求 熟悉快速开发框架:SpringBoot2.3.x 整合 SpringMVC + M ...
- 仿牛客论坛项目之修改用户头像
前言: 在项目最开始的时候,我们默认从牛客网的静态资源库中选择一张照片作为用户的头像,但在实际开发中,我们还要考虑用户可以自己设置头像. 思路: 上传文件(上传到硬盘服务器上 或者 上传到云服务器上, ...
- (仿牛客论坛项目)01 - 开发社区首页
文章目录 前言 1.做项目的步骤 2.开发社区首页功能分步 2.1 User 类 2.2 UserMapper 接口 2.3 UserMapper 映射文件 2.4 编写测试类 3.开发社区首页,显示 ...
- 仿牛客论坛项目部署总结
最新文章
- vb.net中类型转换
- 校内训练赛题解第三篇
- python学习 day1 (3月1日)
- mysql基础操作(二)
- java中String类的用法
- NHibernate Antlr.Runtime.NoViableAltException报错
- GPS :NEMA数据解析
- JDK GUI对应的c文件
- 三种GDB类型的转换后字段类型的变化
- 服务器集群虚拟化区别,服务器集群与虚拟化
- POJ 1625 Censored! (AC自动机 + 高精度 + DP)
- 使用Scrapy框架爬取58同城的出租房信息
- 盘古石考核取证复现检材1(??)
- CSS颜色代码大全及a标签超链接颜色改变
- 汤小丹计算机操作系统慕课版课后题答案第五章:储存器管理
- filter 过滤器
- rtmp协议规范详解
- 目前最流畅的android手机,盘点国内最流畅的4款安卓手机,堪称用500天不卡顿
- fedora26安装flash插件、搜狗拼音、Mysql
- 记录M1Mac基础的Command快捷键