TestNG配合ant脚本进行单元测试
![]()
![]()
![]()
上面就是一个简单的SSM框架的整合,数据库来自宜立方商城的e3-mall采用一个简单的spring-mvc和spring以及mybatis的整合
单元测试代码为
TestUserByTestNG.java
package com.e3mall.dao.test;
import java.util.Date;
import java.util.List;
import org.springframework.beans.factory.BeanFactory;
import org.springframework.context.support.ClassPathXmlApplicationContext;
import org.testng.annotations.BeforeClass;
import org.testng.annotations.Test;
import org.testng.annotations.*;
import org.testng.Assert;
import com.e3mall.mapper.TbUserMapper;
import com.e3mall.pojo.TbUser;
import com.e3mall.pojo.TbUserExample;
import org.testng.annotations.Test;
import static org.testng.AssertJUnit.*;
public class TestUserByTestNG {
private TbUserMapper userDao;
private static BeanFactory factory = new ClassPathXmlApplicationContext("classpath:applicationContext-dao.xml");
private static long id = 100;
@BeforeClass
public void setUp() {
userDao = factory.getBean(TbUserMapper.class);
}
@Test
public void testAddUser() {
userDao.deleteByPrimaryKey(id);
TbUser tbUser = new TbUser();
tbUser.setId(id);
tbUser.setPassword("lsdl");
tbUser.setUsername("kdkjsdjk");
tbUser.setPhone("12222");
tbUser.setCreated(new Date());
tbUser.setEmail("1223@qq.com");
tbUser.setUpdated(new Date());
int insert = userDao.insert(tbUser);
assertTrue("添加用户失败",id>0);
}
@Test
public void testAddExistUser() {
try {
TbUser tbUser = new TbUser();
tbUser.setId(id);
tbUser.setPassword("lsdl");
tbUser.setUsername("kdkjsdjk");
tbUser.setPhone("12222");
tbUser.setCreated(new Date());
tbUser.setEmail("1223@qq.com");
tbUser.setUpdated(new Date());
int insert = userDao.insert(tbUser);
fail("添加用户名相同的用户有问题");
} catch (Exception e) {
System.out.println("testAddExistUser:"+e.toString());
}
}
@Test
public void testLoadUser() {
TbUser user = userDao.selectByPrimaryKey(id);
assertNotNull("加载存在的用户失败",user);
}
@Test
public void testLoadNotExistUser() {
TbUser user = userDao.selectByPrimaryKey((long) Integer.MAX_VALUE);
assertNull("加载不存在用户失败", user);
}
@Test
public void testUpdateUser() {
TbUser user = userDao.selectByPrimaryKey(id);
System.out.println(user.toString());
String name = "超级管理员1";
user.setUsername(name);
userDao.updateByPrimaryKeySelective(user);
TbUser user2 = userDao.selectByPrimaryKey(id);
assertEquals("更新用户失败", user2.getUsername(), name);
}
@Test
public void testListUser() {
TbUserExample example = new TbUserExample();
List<TbUser> list = userDao.selectByExample(example );
assertNotNull("列表用户为空",list);
assertTrue("列表用户失败",list.size()>0);
}
@Test
public void testDeleteUser() {
userDao.deleteByPrimaryKey(id);
TbUser tbUser = userDao.selectByPrimaryKey(id);
assertNull("删除用户失败",tbUser);
}
@Test
public void testDeleteNotExist() {
try {
userDao.deleteByPrimaryKey((long) Integer.MAX_VALUE);
} catch (Exception e) {
}
}
}
testNG.xml制定单元测试执行的顺序
<?xml version="1.0" encoding="UTF-8"?>
<suite name="Suite" parallel="false"><test name="Demo" ><classes><class name="com.e3mall.dao.test.TestUserByTestNG"><methods preserve-order="true"><include name="testAddUser" /><include name="testAddExistUser" /><include name="testLoadUser" /><include name="testLoadNotExistUser" /><include name="testUpdateUser" /><include name="testListALLUser" /><include name="testDeleteUser" /><include name="testDeleteNotExist" /></methods></class></classes></test>
</suite>
运行的话:鼠标选中testNG.xml,点击右键属性选择
![]()
就可以运行TestNG了
现在我们要让TestNG和Ant一起配合使用如何实现了,首先需要编写ant脚本
ant脚本的编写请查看孔浩老师ant视频教程
我们编写一个build-testNG.xml ant脚本,这个脚本和src在同一目录下面
脚本的内容如下所示
<?xml version="1.0" encoding="UTF-8"?>
<project default="run-test"><property name="src.dir" location="src"></property><property name="test.src.dir" location="test"></property><property name="web.dir" location="WebRoot"></property><property name="conf.dir" location="conf"></property><property name="web.web-info.dir" location="${web.dir}/WEB-INF"></property><property name="lib.dir" location="${web.web-info.dir}/lib"></property><property name="build.dir" location="build"></property><property name="build.classes" location="${build.dir}/classes"></property><property name="test.dir" location="${build.dir}/test/"></property><property name="test.classes.dir" location="${test.dir}/classes"></property><property name="test.report.dir" location="${test.dir}/report"></property><property name="build.jar.dir" location="${build.dir}/dist"></property><property name="build.zip.dir" location="${build.dir}/zip"></property><property name="build.doc.dir" location="${build.dir}/doc"></property><property name="build.src" location="${build.dir}/src"></property><path id="complie-path"><fileset dir="${lib.dir}" includes="**/*.jar"></fileset></path><path id="complie-test-path"><path refid="complie-path"></path><pathelement location="${build.classes}"/></path><path id="run-test-path"><path refid="complie-test-path"></path><pathelement location="${test.classes.dir}"/></path><taskdef name="testng" classname="org.testng.TestNGAntTask" classpathref="complie-path" /><target name="clean"><delete dir="${build.dir}"></delete></target><target name="init" depends="clean" ><mkdir dir="${build.dir}"/><mkdir dir="${build.classes}"/><mkdir dir="${test.dir}"/><mkdir dir="${test.classes.dir}"/><mkdir dir="${test.report.dir}"/><mkdir dir="${build.jar.dir}"/><mkdir dir="${build.zip.dir}"/><mkdir dir="${build.doc.dir}"/><mkdir dir="${build.src}"/></target><target name="compile" depends="init"><javac destdir="${build.classes}" srcdir="${src.dir}" includeantruntime="true"classpathref="complie-path"></javac><copy todir="${build.classes}" ><fileset dir="${src.dir}" excludes="**/*.java"></fileset></copy></target><target name="compile-test" depends="compile"><javac destdir="${test.classes.dir}" srcdir="${test.src.dir}" includeantruntime="true"classpathref="complie-test-path"></javac><copy todir="${test.classes.dir}" ><fileset dir="${test.src.dir}" excludes="**/*.java"></fileset></copy></target><target name="run-test" depends="compile-test"><testng  classpathref="run-test-path"  outputDir="${test.report.dir}" haltonfailure="true"useDefaultListeners="false"   listeners="org.uncommons.reportng.HTMLReporter,org.testng.reporters.FailedReporter" >  <xmlfileset dir="${src.dir}" includes="testNG.xml"/><jvmarg value="-Dfile.encoding=UTF-8" /><sysproperty key="org.uncommons.reportng.title" value="AutoMation TestReport" /> </testng></target></project>
这里我们使用到了reportNG来输出TestNG的单元测试结果
使用TestNG有下面的几点需要注意的:
“1.1.4版本的ReportNG是最后一个版本,之后不再做维护。作为一个简单的测试报告插件,它是创造来替代TestNG原有的HTML报告。ReportNG提供了一个简易的、色彩分明的测试结果报告”,这段话是reportng官网上的介绍。
这里我们不选择1.1.4版本,我们要选择1.1.5版本,1.1.4对中文支持不好
https://testerhome.com/topics/2180
https://blog.csdn.net/miss_hua/article/details/78741142
以上这两篇文章比较经典,可以好好的详细的阅读和分析下
环境准备:
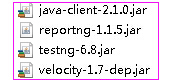
1,你需要这些架包
解释:有人会问现在ReportNG版本不是1.1.4吗?为什么我这里是1.1.5呢,这里是因为我改过这里面的源码,(为什么要改源码?后面告诉你)
修复ReportNG中文乱码问题包下载地址:地址
第二:在编写ant脚本的时候有下面的几个地方需要注意的
第一默认的listen要禁止使用
useDefaultListeners="false" 配置下面的listen
listeners="org.uncommons.reportng.HTMLReporter,org.testng.reporters.FailedReporter" > 然配置testNG.xml所在的位置
<xmlfileset dir="${src.dir}" includes="testNG.xml"/>然后设置中文支持以及
reportng的标题
<jvmarg value="-Dfile.encoding=UTF-8" /> <sysproperty key="org.uncommons.reportng.title" value="AutoMation TestReport" />
我们来看使用自带的testNg和使用reportNG的ant脚本的区别
7、通过Apache ANT构建测试,生成reportng html report
修改配置文件build.xml,ant运行即可
![]()
生成好之后的效果图如下所示:
![]()
整个项目的下载地位为:
整个ant脚本的步骤大概如下:
前提是ant脚本和src在同一个目录
1、首先编写src目录下的源文件,编译好的class文件放在build.class文件夹下面,在编译的时候,需要将src目录下的所有的xml等配置文件拷贝到build.class文件中
编译源文件的时候需要依赖lib目录下的jar包
2、第二编译test目录下的测试文件,原理同上,编译测试文件${test.classes.dir}目录下,在编译的时候,需要将src目录下的所有的xml等配置文件拷贝到${test.classes.dir}下,
编译的时候需要依赖lib目录下的jar包和编译好的对应的build.class文件夹下的源文件的class文件
3、测试文件编译好之后,就可以运行测试文件了,运行测试文件的时候,需要下面的几个文件,第一测试文件编译生成的class文件,第二在测试文件中使用到了源文件
因此需要源文件编译好之后生成的class文件,第三依赖第三方的jar包
上面的ant脚本大概就是上面的三个步骤。
整个工程的代码下载地址如下:
链接:https://pan.baidu.com/s/1_6bhiJQ2W6osCQ4j2qkfow 密码:kif6
![]()
现在我们要统计单元测试的代码覆盖率,我们可以使用下面的工具
Cobertura原理
Cobertura 是一种开源工具,它通过检测基本的代码,并观察在测试包运行时执行了哪些代码和没有执行哪些代码,来测量测试覆盖率。
Cobertura原理及过程
cobertura执行过程大致如下:
1,使用instrument修改我们编译后的class文件。
2,执行测试,测试数据输出到xxx.ser中。
3,使用report生成覆盖率报告。
官网教程为:https://www.ibm.com/developerworks/cn/java/j-lo-cobertura/ 讲解的是在maven中使用cobertura插件来实现代码的覆盖率
Cobertura 是一种开源工具,它通过检测基本的代码,并观察在测试包运行时执行了哪些代码和没有执行哪些代码,来测量测试覆盖率。Cobertura提供了Ant和Maven的执行方式,并且Cobertura要比JaCoCo配置和使用起来更方便。
使用之前首先在工程的lib目录下添加所需的jar包
cobertura.jar
接下来我们来编写对于的脚本
注意事项点2:我们在跑junit的时候测试类中不要有TestNg编写的单元测试类,同理在跑TestNg编写的单元测试类的时候,也不要存在junit4编写的单元测试;类
否则在ant脚本运行的时候会出现很多莫名其妙的问题
首先我们来看基于junit4编写的ant脚本,在上面的框架中如何使用了的
build-junit.xml
<?xml version="1.0" encoding="UTF-8"?>
<project default="coverage-report"><property name="src.dir" location="src"></property><property name="test.src.dir" location="test"></property><property name="web.dir" location="WebRoot"></property><property name="conf.dir" location="conf"></property><property name="web.web-info.dir" location="${web.dir}/WEB-INF"></property><property name="lib.dir" location="${web.web-info.dir}/lib"></property><property name="build.dir" location="build"></property><property name="build.classes" location="${build.dir}/classes"></property><property name="test.dir" location="${build.dir}/test/"></property><property name="test.classes.dir" location="${test.dir}/classes"></property><property name="test.report.dir" location="${test.dir}/report"></property><property name="build.jar.dir" location="${build.dir}/dist"></property><property name="build.zip.dir" location="${build.dir}/zip"></property><property name="build.doc.dir" location="${build.dir}/doc"></property><property name="build.src" location="${build.dir}/src"></property><property name="instrumented_classes" value="${test.dir}/instrumented-classes" /><property name="cobertura_report" value="${test.dir}/cobertura-report" /><path id="complie-path"><fileset dir="${lib.dir}" includes="**/*.jar"></fileset></path><path id="complie-test-path"><path refid="complie-path"></path><pathelement location="${build.classes}"/></path><path id="run-test-path"><path refid="complie-test-path"></path><pathelement location="${test.classes.dir}"/></path><path id="cobertura-run-path"><path refid="complie-path"></path><pathelement location="${test.classes.dir}"/><pathelement location="${instrumented_classes}"/></path><target name="clean"><delete dir="${build.dir}"></delete></target><target name="init" depends="clean" ><mkdir dir="${build.dir}"/><mkdir dir="${build.classes}"/><mkdir dir="${test.dir}"/><mkdir dir="${test.classes.dir}"/><mkdir dir="${test.report.dir}"/><mkdir dir="${build.jar.dir}"/><mkdir dir="${build.zip.dir}"/><mkdir dir="${build.doc.dir}"/><mkdir dir="${build.src}"/><mkdir dir="${instrumented_classes}"/><mkdir dir="${cobertura_report}"/></target><target name="compile" depends="init"><javac debug="true" destdir="${build.classes}" srcdir="${src.dir}" includeantruntime="true"classpathref="complie-path"></javac><copy todir="${build.classes}" ><fileset dir="${src.dir}" excludes="**/*.java"></fileset></copy><copy todir="${instrumented_classes}" ><fileset dir="${src.dir}" excludes="**/*.java"></fileset></copy></target><!-- 定义 cobertura 的ant task   --><taskdef classpath="cobertura.jar" resource="tasks.properties" classpathref="complie-path" /><!-- 为源码添加日志代码,放到 instrumented-classes 目录 --><target name="instrument" depends="compile"><cobertura-instrument todir="${instrumented_classes}"><fileset dir="${build.classes}"><include name="**/*.class" /></fileset></cobertura-instrument></target><target name="compile-test" depends="instrument"><javac debug="yes" destdir="${test.classes.dir}" srcdir="${test.src.dir}" includeantruntime="true"classpathref="cobertura-run-path"></javac><copy todir="${test.classes.dir}" ><fileset dir="${test.src.dir}" excludes="**/*.java"></fileset></copy></target><target name="run-test" depends="compile-test"> <junit printsummary="true" haltonfailure="no" showoutput="true" failureproperty="junit.fail"> <classpath refid="run-test-path"> </classpath> <formatter type="xml" usefile="true"/> <batchtest fork="yes" todir="${test.report.dir}"> <fileset dir="${test.classes.dir}"> <include name="**/Test*.class"/> </fileset> </batchtest> </junit> <junitreport todir="${test.report.dir}">  <fileset dir="${test.report.dir}">  <include name="TEST-*.xml"/>  </fileset>  <report format="frames" todir="${test.report.dir}/html"/>  </junitreport>  <fail if="${junit.fail}" message="单元测试运行失败,请查看:${test.report.dir}/html"/></target> <!-- 执行单元测试 coverage-report--><target name="cover-test" depends="run-test"><junit printsummary="yes" fork="yes" haltonfailure="no" ><classpath refid="cobertura-run-path"></classpath><formatter type="xml" usefile="true"/> <batchtest fork="yes" todir="${test.report.dir}"> <fileset dir="${test.classes.dir}"> <include name="**/Test*.class"/> </fileset> </batchtest> </junit></target><!-- 输出报告 --><target  name="coverage-report" depends="cover-test"><cobertura-report srcdir="${src.dir}" destdir="${cobertura_report}"/></target></project>
我们来分析下原理和步骤:
第一:编译src目录下的源代码,并且将src目录下的除了java文件以外的xml等配置文件拷贝到build.class目录下,这里特别关键的也要拷贝到instrumented_classes目录下cobertura,我们在运行单元测试文件的时候依赖的编译好的源文件是加入了代码统计信息的class文件,该文件位于instrumented_classes目录下,所以也需要将运行源文件依赖的xml文件拷贝到该目录下,因为引入了编译src源文件需要依赖第三方的jar文件中的class文件。jar包中的文件都是class文件
<target name="compile" depends="init">
<javac debug="true" destdir="${build.classes}" srcdir="${src.dir}" includeantruntime="true"
classpathref="complie-path">
</javac>
<copy todir="${build.classes}" >
<fileset dir="${src.dir}" excludes="**/*.java"></fileset>
</copy>
<copy todir="${instrumented_classes}" >
<fileset dir="${src.dir}" excludes="**/*.java"></fileset>
</copy>
</target>
第二步:编译好源文件生成的class文件之后,我们需要引入cobertura.jar,我们使用cobertura.jar利用反射功能对生成好的class文件加入代码覆盖率的统计信息
,我们将加入统计信息之后的class文件,拷贝到instrumented_classes目录下
<!-- 定义 cobertura 的ant task -->
<taskdef classpath="cobertura.jar" resource="tasks.properties" classpathref="complie-path" />
<!-- 为源码添加日志代码,放到 instrumented-classes 目录 -->
<target name="instrument" depends="compile">
<cobertura-instrument todir="${instrumented_classes}">
<fileset dir="${build.classes}">
<include name="**/*.class" />
</fileset>
</cobertura-instrument>
</target>
第三步:记下了编译单元测试文件生成对于的class,编译单元测试文件需要下面的三个依赖:
a、加入统计信息之后的源class文件
b、源文件或者单位测试文件依赖的第三方class文件,因此需要引入对应的jar包
c、单元测试文件所在的目录
<path id="cobertura-run-path">
<path refid="complie-path"></path>
<pathelement location="${test.classes.dir}"/>
<pathelement location="${instrumented_classes}"/>
</path>
这就是对于的三个依赖
在编译单元测试文件的时候,同理需要将对于的xml等配置文件拷贝到test.classes.dir目录下
<target name="compile-test" depends="instrument">
<javac debug="yes" destdir="${test.classes.dir}" srcdir="${test.src.dir}" includeantruntime="true"
classpathref="cobertura-run-path">
</javac>
<copy todir="${test.classes.dir}" >
<fileset dir="${test.src.dir}" excludes="**/*.java"></fileset>
</copy>
</target>
第四步:接下来就运行单元测试文件,生成对于的单元测试报告
<target name="run-test" depends="compile-test">
<junit printsummary="true" haltonfailure="no" showoutput="true" failureproperty="junit.fail">
<classpath refid="run-test-path">
</classpath>
<formatter type="xml" usefile="true"/>
<batchtest fork="yes" todir="${test.report.dir}">
<fileset dir="${test.classes.dir}">
<include name="**/Test*.class"/>
</fileset>
</batchtest>
</junit>
<junitreport todir="${test.report.dir}">
<fileset dir="${test.report.dir}">
<include name="TEST-*.xml"/>
</fileset>
<report format="frames" todir="${test.report.dir}/html"/>
</junitreport>
<fail if="${junit.fail}" message="单元测试运行失败,请查看:${test.report.dir}/html"/>
</target>
运行单元测试的时候,依赖的路径就是
<classpath refid="run-test-path">
第五步:生成代码覆盖率的统计报告
<!-- 执行单元测试 coverage-report-->
<target name="cover-test" depends="run-test">
<junit printsummary="yes" fork="yes" haltonfailure="no" >
<classpath refid="cobertura-run-path"></classpath>
<formatter type="xml" usefile="true"/>
<batchtest fork="yes" todir="${test.report.dir}">
<fileset dir="${test.classes.dir}">
<include name="**/Test*.class"/>
</fileset>
</batchtest>
</junit>
</target>
<!-- 输出报告 -->
<target name="coverage-report" depends="cover-test">
<cobertura-report srcdir="${src.dir}" destdir="${cobertura_report}"/>
</target>
这里要特别注意的是运行test需要依赖的路径是<classpath refid="cobertura-run-path"></classpath>,这里不要写成 <classpath refid="run-test-path"> ,否则会出现问题
这样就可以了,相当的经典,千万不要弄错了
下面还有几个地方需要注意的
使用Cobertura中,编写build.xml时,请注意如下两个细节:
1.
<javac debug="yes" srcdir="${source.dir}" destdir="${classes.dir}" classpathref="build.classpath" />
如上代码所示,请增加 debug="yes"
如果无此属性,则在生成的覆盖报告中,所有类的 Line Coverage是N/A。同时注意观察Ant的构建输出,提示"[cobertura-instrument] WARN visitEnd, No line number information found for class cn.com.sungole.medapp.Web.App. Perhaps you need to compile with debug=true?">。
对于TestNg,原理同上,编写ant脚本的时候需要注意下面的情景
参考博客:http://www.asjava.com/testng/testng-with-cobertura-generate-code-coverage-report/
![]()
![]()
上面这篇文章重点介绍了TestNg如何与cobertura.jar进行整合,需要注意的是如果是运行TestNg编写的单元测试案例,在单元测试案例中就不要存在junit编写的单元测试案例
我们来看看TestNg+ant+cobertura一起使用编写的ant脚本,原理同上面的junit一样
<?xml version="1.0" encoding="UTF-8"?>
<project default="coverage-report"><property name="src.dir" location="src"></property><property name="test.src.dir" location="test"></property><property name="web.dir" location="WebRoot"></property><property name="conf.dir" location="conf"></property><property name="web.web-info.dir" location="${web.dir}/WEB-INF"></property><property name="lib.dir" location="${web.web-info.dir}/lib"></property><property name="build.dir" location="build"></property><property name="build.classes" location="${build.dir}/classes"></property><property name="test.dir" location="${build.dir}/test/"></property><property name="test.classes.dir" location="${test.dir}/classes"></property><property name="test.report.dir" location="${test.dir}/report"></property><property name="build.jar.dir" location="${build.dir}/dist"></property><property name="build.zip.dir" location="${build.dir}/zip"></property><property name="build.doc.dir" location="${build.dir}/doc"></property><property name="build.src" location="${build.dir}/src"></property><property name="instrumented_classes" value="${test.dir}/instrumented-classes" /><property name="cobertura_report" value="${test.dir}/cobertura-report" /><path id="complie-path"><fileset dir="${lib.dir}" includes="**/*.jar"></fileset></path><path id="complie-test-path"><path refid="complie-path"></path><pathelement location="${build.classes}"/></path><path id="run-test-path"><path refid="complie-test-path"></path><pathelement location="${test.classes.dir}"/></path><path id="cobertura-run-path"><path refid="complie-path"></path><pathelement location="${test.classes.dir}"/><pathelement location="${instrumented_classes}"/></path><target name="clean"><delete dir="${build.dir}"></delete></target><target name="init" depends="clean" ><mkdir dir="${build.dir}"/><mkdir dir="${build.classes}"/><mkdir dir="${test.dir}"/><mkdir dir="${test.classes.dir}"/><mkdir dir="${test.report.dir}"/><mkdir dir="${build.jar.dir}"/><mkdir dir="${build.zip.dir}"/><mkdir dir="${build.doc.dir}"/><mkdir dir="${build.src}"/><mkdir dir="${instrumented_classes}"/><mkdir dir="${cobertura_report}"/></target><taskdef name="testng" classname="org.testng.TestNGAntTask" classpathref="complie-path" /><target name="compile" depends="init"><javac debug="true" destdir="${build.classes}" srcdir="${src.dir}" includeantruntime="true"classpathref="complie-path"></javac><copy todir="${build.classes}" ><fileset dir="${src.dir}" excludes="**/*.java"></fileset></copy><copy todir="${instrumented_classes}" ><fileset dir="${src.dir}" excludes="**/*.java"></fileset></copy></target><!-- 定义 cobertura 的ant task   --><taskdef classpath="cobertura.jar" resource="tasks.properties" classpathref="complie-path" /><!-- 为源码添加日志代码,放到 instrumented-classes 目录 --><target name="instrument" depends="compile"><cobertura-instrument todir="${instrumented_classes}"><fileset dir="${build.classes}"><include name="**/*.class" /></fileset></cobertura-instrument></target><target name="compile-test" depends="instrument"><javac debug="yes" destdir="${test.classes.dir}" srcdir="${test.src.dir}" includeantruntime="true"classpathref="cobertura-run-path"></javac><copy todir="${test.classes.dir}" ><fileset dir="${test.src.dir}" excludes="**/*.java"></fileset></copy></target><target name="run-test" depends="compile-test"><testng  classpathref="run-test-path"  outputDir="${test.report.dir}" haltonfailure="true"useDefaultListeners="false"   listeners="org.uncommons.reportng.HTMLReporter,org.testng.reporters.FailedReporter" >  <xmlfileset dir="${src.dir}" includes="testNG.xml"/><jvmarg value="-Dfile.encoding=UTF-8" /><sysproperty key="org.uncommons.reportng.title" value="AutoMation TestReport" /> </testng></target><!-- 执行单元测试 coverage-report--><target name="coverage-test" depends="run-test"><testng classpathref="cobertura-run-path"><classfileset dir="${test.classes.dir}" includes="**/Test*.class"/></testng></target><!-- 输出报告 --><target  name="coverage-report" depends="coverage-test"><cobertura-report srcdir="${src.dir}" destdir="${cobertura_report}"/></target></project>
有下面几个地方不一样的:
上面是使用reportNG输出TestNg的单元测试报告,这里需要指定TestNg.xml所在的目录位置
<xmlfileset dir="${src.dir}" includes="testNG.xml"/>

第二就是:
<target name="coverage-test" depends="run-test"><testng classpathref="cobertura-run-path"><classfileset dir="${test.classes.dir}" includes="**/Test*.class"/></testng></target>这里是上面的junit是不一样的,需要特别的注意。
转载于:https://www.cnblogs.com/kebibuluan/p/9223042.html
TestNG配合ant脚本进行单元测试相关推荐
- Ant 脚本打印系统属性变量、ant内置属性
Ant 脚本打印系统属性变量.ant内置属性 作用 编写ant脚本的时候,经常会引用到系统属性,本脚本用于打印系统常用属性(System.getProperties)与环境变量(Environment ...
- (转)[Android] 利用 ant 脚本修改项目包名
[Android] 利用 ant 脚本修改项目包名在开发android应用项目的时候,经常会有这样的需求,一个应用项目,要求 房价上半年下行 下半年或回暖 在不同的OEM下有不同的包名,不同的资源,不 ...
- 运行ant脚本(转载)
http://blog.csdn.net/linwei_1029/article/details/5809801 运行ANT脚本的步骤 1.右击我的电脑-->属性-->高级-->环境 ...
- java ant war包_java利用Ant脚本生成war包全过程
使用ant脚本前的准备 1.下载一个ant安装包.如:apache-ant-1.8.4-bin.zip.解压到E盘. 2.配置环境变量.新增ANT_HOME:E:\apache-ant-1.8.4:P ...
- mybaitis快速生成_Mybatis中使用mybatis-generator结合Ant脚本快速自动生成Model、Mapper等文件...
使用过Mybatis的同学都知道,针对每一个项目中使用到的数据库表都需要建立其对应的数据库增删改查xxxMapper.xml文件.实体类xxx.java文件以及其他类用来调用进行数据库操作的xxxMa ...
- 如何在ant脚本中获得svn版本号
关于这个问题现在已经有几种解决办法了.SvnAnt: http://subclipse.tigris.org/svnant.html,我在日常的build中用的便是这种方法,但我并不喜欢这种方法,因为 ...
- iQQ 学习笔记3 :编写代码打包Ant脚本
iQQ 学习笔记声明 本文仅供学习研究使用,不得用于任何非法及侵权用途. 转贴请注明原发位置: http://xuekaiyuan.com/forum.php?mod=viewthread&t ...
- linux spec 脚本,关于linux:shell脚本的单元测试
多年来,我从事的几乎所有产品都涉及到一定程度的Shell脚本(或Windows上的批处理文件,PowerShell等). 即使我们使用Java或C ++编写了大量代码,但似乎总是存在一些集成或安装任务 ...
- linux ant脚本,linux下ant jmeter自动化测试
1.借助badboy工具进行Jmeter的脚本录制; 2.在Jmeter的图形界面下进行脚本调整和增加理想的监听器; 3.linux下正确安装ant和Jmeter 4.书写ant的执行脚本build. ...
最新文章
- 图灵奖获得者Yann LeCun:未来几十年AI研究的最大挑战是「预测世界模型」
- 【Paper】2010_Distributed optimal control of multiple systems
- OpenStack安装过程备忘
- 记录webpack的source map使用详细说明
- RocketMQ中的Topic和JMS的queue有什么区别?
- 17 初探Context的使用场景
- node.js——麻将算法(四)胡牌算法的一些优化处理方案(无赖子版)
- 周立功的linux开发板例程,USB NXP LPC1766 开发配套例程(周立功开发板自带例程) - 下载 - 搜珍网...
- 图像重建计算机冷却风扇故障,维修别克英朗XT冷却风扇故障
- YOLO系列专题——YOLOv2理论篇
- pandas将数组写入csv新增一列
- 面试必考:秒杀系统的9个核心知识点,一次性打包给你
- win10系统office2010每次打开总是出现配置进度
- 如何同时使用双网卡进行两个网络上网
- linux下使用 sb接口扫描仪,怎样在Linux下设置和使用扫描仪.doc
- AI智能语音机器人安装 --小白如何安装智能电话机器人
- 深度学习基础实例与总结
- 雷迪9000使用说明_雷迪RD8100PXL操作说明
- 人工神经网络分析方法,人工神经网络算法步骤
- C语言:va_list
热门文章
- 下载eclipse出现a java_java - 运行eclipse出现问题?
- Tomcat 通用组件
- WebFlux响应式编程基础之 5 webflux服务端开发讲解
- 微信小程序字符长度超出变成神略号显示
- linux curl
- qtcpsocket断开_2020-05-06 QT子线程使用QTcpSocket连接服务器
- no segments* file found in org.apache.lucene.store.SimpleFSDirectory
- 《Go 语言程序设计》读书笔记 (七) Goroutine 与系统线程的区别
- 【1】Docker概述
- Rabbitmq消息中间件整合Springboot