初始化一个vue项目的流程
为什么80%的码农都做不了架构师?>>> 
一、安装 nodejs
建议安装 v 7.9.0 本人使用的此版本比较好
二、安装 安装vue、创建vue项目
# 全局安装 vue-cli
$ npm install --global vue-cli
# 创建一个基于 webpack 模板的新项目
$ vue init webpack my-project
# 安装依赖,走你
$ cd my-project
$ npm install
$ npm run dev
三、安装 iView
前端组件,用于快速开发
# npm 安装
$ npm install iview --save
引入 iView
一般在 webpack 入口页面 main.js 中如下配置:
import Vue from 'vue';
import VueRouter from 'vue-router';
import App from 'components/app.vue';    // 路由挂载
import Routers from './router.js';       // 路由列表
import iView from 'iview';
import 'iview/dist/styles/iview.css';    // 使用 CSSVue.use(VueRouter);
Vue.use(iView);// 路由配置
const RouterConfig = {routes: Routers
};
const router = new VueRouter(RouterConfig);new Vue({el: '#app',router: router,render: h => h(App)
});
四、安装vue-router 2
路由处理机制
- vue-router2 开发手册
NPM
npm install vue-router
如果在一个模块化工程中使用它,必须要通过 Vue.use() 明确地安装路由功能:
import Vue from 'vue'
import VueRouter from 'vue-router'Vue.use(VueRouter)
使用
在scr/router/index.js
import Vue from 'vue'
import Router from 'vue-router'Vue.use(Router)const HelloWorld = r => require.ensure([], () => r(require('@/components/HelloWorld')), 'HelloWorld');export default new Router({routes: [{path: '/',name: 'Hello',component: HelloWorld}]
})
五、安装vuex
NPM
npm install vuex --save
创建目录结构
- src-- store--- index.js--- Public---- action.js---- getters.js---- index.js---- mutations.js---- state.jsstore - index.js
import Vue from 'vue'
import vuex from 'vuex'
import Public from './Public'Vue.use(vuex);let Store = new vuex.Store({modules: {Public}
})export default Store
store - Public - action.js
export default {}
store - Public - getters.js
export default {}
store - Public - index.js
import actions from './action.js'
import getters from './getters.js'
import mutations from './mutations.js'
import state from './state.js'export default {actions,getters,mutations,state
}
store - Public - mutations.js
export default {}
store - Public - state.js
export default {test: '测试数据,调用缓存里静态变量',
}
调用
main.js 导入 store
// The Vue build version to load with the `import` command
// (runtime-only or standalone) has been set in webpack.base.conf with an alias.
import Vue from 'vue'
import App from './App'
import router from './router'
import iView from 'iview'
import 'iview/dist/styles/iview.css';
import store from './store'Vue.config.productionTip = falseVue.use(iView)/* eslint-disable no-new */
new Vue({el: '#app',router,store,template: '<App/>',components: { App }
})
组件里
<template><div class="hello">{{test}}</div>
</template><script scoped>
import { mapState } from 'vuex'
export default {data () {return {}},computed:{...mapState({test:store => store.Public.test})}
}
</script>
六、安装axios
Axios 是一个基于 promise 的 HTTP 库,可以用在浏览器和 node.js 中。
npm
npm install axios --save
src 文件夹下添加 api/index.js
import axios from 'axios'
import qs from 'qs'let toLogin = () => {MessageBox('提示', '您还没有登录,请先登录');router.push({ name: 'Hello' })
}
axios.defaults.baseURL = '/api';
axios.defaults.timeout = 10000;axios.interceptors.request.use(function (config) {return config;},function (error) {return Promise.reject(error);}
);axios.interceptors.response.use(function (res) {if (res.data && res.data.status == "401") {toLogin();}if (res && res.data && res.data.status != "200") {res.data.data = {};}return res;},function (error) {return Promise.reject(error);}
);export default {get: (urlName = '', params = {}) => {return axios.get(urlName,{params: params}).then((res) => {return res.data;})},post: (urlName = '', params = {}) => {return axios.get(urlName,qs.stringify(params)).then((res) => {return res.data;})}
}
main.js 中导入 api/index.js
// The Vue build version to load with the `import` command
// (runtime-only or standalone) has been set in webpack.base.conf with an alias.
import Vue from 'vue'
import App from './App'
import router from './router'
import iView from 'iview'
import 'iview/dist/styles/iview.css';
import store from './store'
import Api from './api'Vue.config.productionTip = falseVue.use(iView)
Vue.prototype.$ajax = Api;/* eslint-disable no-new */
new Vue({el: '#app',router,store,template: '<App/>',components: { App }
})
在config 文件夹下 的 index.js文件中添加 端口转发 proxyTable
dev: {env: require('./dev.env'),port: process.env.PORT || 8080,autoOpenBrowser: true,assetsSubDirectory: 'static',assetsPublicPath: '/',proxyTable: {'/api': {target: 'http://rapapi.org/mockjsdata/20113/',changeOrigin: true,pathRewrite: {'^/api': ''}}},cssSourceMap: false}
程序中调用
<template><div class="hello">测试MadDragon</div>
</template><script scoped>
import { mapState } from 'vuex'
export default {data() {return {}},mounted() {this.getData();},methods: {getData() {this.$ajax.get('custom/operateproblem/getOperateProblemList').then((e) => {console.log(e)})}}
}
七、安装moment.js
JavaScript 日期处理类库
npm
npm install moment --save # npm
单个组件内使用
<template><div class="hello">测试MadDragon</div>
</template><script scoped>
import moment from 'moment'export default {data() {return {}},mounted() {console.log(moment().format('YYYY-MM-DD'))console.log(moment().format('x'))},
}
</script>
全局导入使用
在main.js 中
// The Vue build version to load with the `import` command
// (runtime-only or standalone) has been set in webpack.base.conf with an alias.
import Vue from 'vue'
import App from './App'
import router from './router'
import iView from 'iview'
import 'iview/dist/styles/iview.css';
import store from './store'
import Api from './api'
import moment from 'moment'Vue.config.productionTip = falseVue.use(iView)Vue.prototype.$ajax = Api;
Vue.prototype.$moment = moment;/* eslint-disable no-new */
new Vue({el: '#app',router,store,template: '<App/>',components: { App }
})
组件中使用
<template><div class="hello">测试MadDragon</div>
</template><script scoped>export default {data() {return {}},mounted() {console.log(this.$moment().format('YYYY-MM-DD'))console.log(this.$moment().format('x'))},
}
</script>
八、使用sessionStorage
浏览器缓存
src 下创建 sessionStorage/index.js 文件
const setItem = (key, data) => {if (!data || !key) return;sessionStorage.setItem(key, JSON.stringify(data));
}const getItem = (key) => {if (!key) return;let data = sessionStorage.getItem(key);if (!data) return;return JSON.parse(data);
}const removeItem = (key) => {if (!key) return;sessionStorage.removeItem(key);
}const OPL = 'operateProblemList';
export const opl = {set: (data) => { setItem(OPL, data) },get: () => { return getItem(OPL) },remove: () => { removeItem(OPL) }
}
使用
移除、设置
import { opl } from '@/sessionStorage/index'
export default {setOperateProblemList(state, data) {opl.remove()opl.set(data)}
}
获取
import { opl } from '@/sessionStorage/index'
export default {test: '测试数据,调用缓存里静态变量',operateProblemList:opl.get(),
}
九、配置UEditor富文本编辑器
1、下载 jsp 或 php
下载UEditor官网最新的jsp版本的包,下载完成解压之后得到一个ueditor1_4_3_3-utf8-jsp的文件夹,里面包含的内容如下:
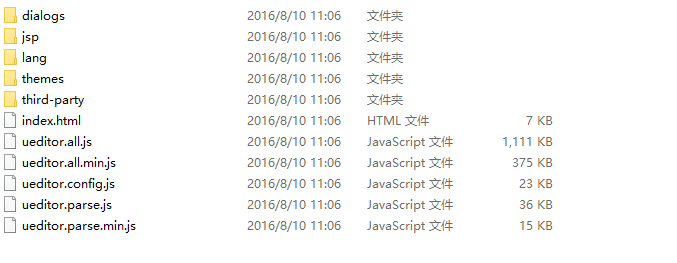
除了jsp的文件夹之外,其余的文件和文件夹复制到前端项目中的static用于存放静态文件的目录下,结构如下:
![]()
这里特别说明jsp目录下的资源为何不放进来,因为我们是vue搭建的项目,jsp页面肯定是不会放在前端的项目中的,包括config.json也放在后端用于解析,这里后面会解释这样做的原因。
2、修改配置
uedior 配置文件相关根目录: src/assets/utf8-php/ueditor.config.js 中将 window.UEDITOR_HOME_URL = "/static/utf8-php/";
3、在 main.js 中引入
import '../static/utf8-php/ueditor.config'
import '../static/utf8-php/ueditor.all.min'
import '../static/utf8-php/lang/zh-cn/zh-cn'
import '../static/utf8-php/ueditor.parse.min'
4、创建公共组件
\src\components\ue\index.vue
<template><div><script :id=id type="text/plain"></script></div>
</template>
<script>export default {name: 'UE',data () {return {editor: null}},props: {defaultMsg: {type: String},config: {type: Object},id: {type: String},},mounted() {const _this = this;this.editor = UE.getEditor(this.id, this.config); // 初始化UEthis.editor.addListener("ready", function () {_this.editor.setContent(_this.defaultMsg); // 确保UE加载完成后,放入内容。});},methods: {getUEContent() { // 获取内容方法return this.editor.getContent()}},destroyed() {this.editor.destroy();}}
</script>
5、调用
\src\views\editor\editor.vue
<template><div class="components-container"><button @click="getUEContent()">获取内容</button><div class="editor-container"><UE :defaultMsg=defaultMsg :config=config :id=ue1 ref="ue"></UE></div></div>
</template>
<style>.info{border-radius: 10px;line-height: 20px;padding: 10px;margin: 10px;background-color: #ffffff;}
</style>
<script>// import UE from '@/components/ue/ue.vue';import UE from '../../components/ue'export default {components: {UE},data() {return {defaultMsg: 'editor.vue?5c45:42 <p style="text-align: left; margin-bottom: 5px;">这里是U</p><p style="text-align: center; margin-bottom: 5px;"><img src="/ueditor/php/upload/image/20171015/1508063519822204.jpg" title="1508063519822204.jpg"/></p><ol class=" list-paddingleft-2" style="list-style-type: decimal;"><li><p style="line-height: normal; margin-bottom: 10px;"><img src="/ueditor/php/upload/image/20171015/1508063519100952.jpg" title="1508063519100952.jpg"/><img src="http://img.baidu.com/hi/jx2/j_0047.gif"/><img src="http://img.baidu.com/hi/jx2/j_0029.gif"/>szdfs18:44:04</p></li><li><p style="margin-bottom: 5px;">sdfsd</p></li><li><p style="margin-bottom: 5px;">sdf</p></li></ol><p style="margin-bottom: 5px;">sdf<br/></p><pre class="brush:php;toolbar:false;">h</pre><p style="margin-bottom: 5px;"><br/></p><p style="margin-bottom: 5px;"><br/></p><pre class="brush:diff;toolbar:false">sssfsdsdfsdfsdfsdf</pre><p><br/></p><p><br/></p><p style="margin-bottom: 5px;">E测试<br/></p>',config: {initialFrameWidth: null,initialFrameHeight: 350},ue1: "ue1", // 不同编辑器必须不同的id}},methods: {getUEContent() {let content = this.$refs.ue.getUEContent(); // 调用子组件方法// this.$notify({//   title: '获取成功,可在控制台查看!',//   message: content,//   type: 'success'// });console.log(content)}}};
</script>
6、配置路由
\src\router\index.vue
import Vue from 'vue'
import Router from 'vue-router'Vue.use(Router)const Hello = r => require.ensure([], () => r(require('@/components/HelloWorld')), 'Hello');
const editor = r => require.ensure([], () => r(require('@/views/editor/editor')), 'editor');const courses = r => require.ensure([], () => r(require('@/views/selective/courses')),'courses')export default new Router({mode: 'history',routes: [{path: '/',name: 'Hello',component: Hello},{path: '/ue',name: 'ue',component: editor},{path: '/courses',name: 'courses',component: courses}]
})
7、配置 图片上传服务
将UEditor项目中地 jsp / php 单独搭建服务跑起来 我用地php 所以这里将展示php相关操作
nginx 配置(已有完成php运行环境,没有请先搭建)
# E:\web\ueditor\php# 图片上传PHP程序server {listen 6004;server_name 127.0.0.1;location / {root E:/web/ueditor/php;index index.html index.htm index.php;#访问路径的文件不存在则重写URL转交给ThinkPHP处理 if (!-e $request_filename) { rewrite ^/(.*)$ /index.php/$1 last; break; } }error_page 500 502 503 504 /50x.html;location = /50x.html {root E:/web/ueditor/php;}location ~ \.php {root E:/web/ueditor/php;fastcgi_pass 127.0.0.1:9000;fastcgi_index index.php;#加载Nginx默认"服务器环境变量"配置 include fastcgi.conf; #设置PATH_INFO并改写SCRIPT_FILENAME,SCRIPT_NAME服务器环境变量 set $fastcgi_script_name2 $fastcgi_script_name; if ($fastcgi_script_name ~ "^(.+\.php)(/.+)$") { set $fastcgi_script_name2 $1; set $path_info $2; } fastcgi_param PATH_INFO $path_info; fastcgi_param SCRIPT_FILENAME $document_root$fastcgi_script_name2; fastcgi_param SCRIPT_NAME $fastcgi_script_name2; }}#selective-courses-systeserver {listen 6005;server_name 192.168.2.213;#selective-courses-systelocation / {proxy_pass http://192.168.2.213:8080;}#图片上传location /static/utf8-php/php/ {proxy_pass http://192.168.2.213:6004/;}#图片查看location /ueditor/ {proxy_pass http://192.168.2.213:6004/ueditor/;}}8、重启nginx 完成
十、安装Element UI
npm 安装
npm i element-ui -S
导入 在main.js 中
// The Vue build version to load with the `import` command
// (runtime-only or standalone) has been set in webpack.base.conf with an alias.
import Vue from 'vue'
import App from './App'
import router from './router'
import iView from 'iview'
import 'iview/dist/styles/iview.css';
import store from './store'
import Api from './api'
import moment from 'moment'
import ElementUI from 'element-ui'
import 'element-ui/lib/theme-chalk/index.css'import '../static/utf8-php/ueditor.config'
import '../static/utf8-php/ueditor.all.min'
import '../static/utf8-php/lang/zh-cn/zh-cn'
import '../static/utf8-php/ueditor.parse.min'Vue.use(iView)
Vue.use(ElementUI)Vue.config.productionTip = falseVue.prototype.$ajax = Api;
Vue.prototype.$moment = moment;/* eslint-disable no-new */
new Vue({el: '#app',router,store,template: '<App/>',components: { App }
})
使用
<template><div><div><el-table :data="tableData" style="width: 100%"><el-table-column prop="id" label="id" width="180"></el-table-column><el-table-column prop="kcName" label="课程" width="180"></el-table-column><el-table-column prop="xuefen" label="学分"></el-table-column><el-table-column prop="leibie" label="类别"></el-table-column><el-table-column prop="teacher" label="任教老师"></el-table-column><el-table-column prop="xianxuan" label="限选"></el-table-column><el-table-column prop="yixuan" label="已选"></el-table-column><el-table-column prop="kexuan" label="可选"></el-table-column><el-table-column label="操作"><template scope="scope"><el-button size="small" @click="handleEdit(scope.$index, scope.row)">编辑</el-button><el-button size="small" type="danger" @click="handleDelete(scope.$index, scope.row)">删除</el-button></template></el-table-column></el-table></div></div>
</template><script>
export default {data() {return {tableData: [{ "id": 1, "kcName": "体育课", "xuefen": 2, "leibie": "公共课", "teacher": "王红", "xianxuan": "240", "yixuan": "200", "kexuan": "40" }, { "id": 2, "kcName": "语文课", "xuefen": 2, "leibie": "公共课", "teacher": "王红", "xianxuan": "260", "yixuan": "200", "kexuan": "60" }, { "id": 3, "kcName": "体育课", "xuefen": 2, "leibie": "公共课", "teacher": "王红", "xianxuan": "240", "yixuan": "200", "kexuan": "40" }, { "id": 4, "kcName": "体育课", "xuefen": 2, "leibie": "公共课", "teacher": "王红", "xianxuan": "240", "yixuan": "200", "kexuan": "40" }, { "id": 5, "kcName": "体育课", "xuefen": 2, "leibie": "公共课", "teacher": "王红", "xianxuan": "240", "yixuan": "200", "kexuan": "40" }, { "id": 6, "kcName": "体育课", "xuefen": 2, "leibie": "公共课", "teacher": "王红", "xianxuan": "240", "yixuan": "200", "kexuan": "40" }, { "id": 7, "kcName": "测试课", "xuefen": 2, "leibie": "公共课", "teacher": "王红", "xianxuan": "240", "yixuan": "200", "kexuan": "40" }, { "id": 8, "kcName": "体育课", "xuefen": 2, "leibie": "公共课", "teacher": "王红", "xianxuan": "240", "yixuan": "200", "kexuan": "40" }, { "id": 9, "kcName": "体育课", "xuefen": 2, "leibie": "公共课", "teacher": "王红", "xianxuan": "240", "yixuan": "200", "kexuan": "40" }, { "id": 10, "kcName": "体育课", "xuefen": 2, "leibie": "公共课", "teacher": "王红", "xianxuan": "240", "yixuan": "200", "kexuan": "40" }, { "id": 11, "kcName": "体育课", "xuefen": 2, "leibie": "公共课", "teacher": "王红", "xianxuan": "240", "yixuan": "200", "kexuan": "40" }, { "id": 12, "kcName": "体育课", "xuefen": 2, "leibie": "公共课", "teacher": "王红", "xianxuan": "240", "yixuan": "200", "kexuan": "40" }, { "id": 13, "kcName": "体育课", "xuefen": 2, "leibie": "公共课", "teacher": "王红", "xianxuan": "240", "yixuan": "200", "kexuan": "40" }, { "id": 14, "kcName": "体育课", "xuefen": 2, "leibie": "公共课", "teacher": "王红", "xianxuan": "240", "yixuan": "200", "kexuan": "40" }, { "id": 15, "kcName": "体育课", "xuefen": 2, "leibie": "公共课", "teacher": "王红", "xianxuan": "240", "yixuan": "200", "kexuan": "40" }, { "id": 16, "kcName": "体育课", "xuefen": 2, "leibie": "公共课", "teacher": "王红", "xianxuan": "240", "yixuan": "200", "kexuan": "40" }, { "id": 17, "kcName": "数学课", "xuefen": 2, "leibie": "公共课", "teacher": "王红", "xianxuan": "240", "yixuan": "200", "kexuan": "40" }, { "id": 18, "kcName": "体育课", "xuefen": 2, "leibie": "公共课", "teacher": "王红", "xianxuan": "240", "yixuan": "200", "kexuan": "40" }],//接口获取数据};},methods: {handleEdit(index, row) {console.log(index, row);},handleDelete(index, row) {console.log(index, row);}}
}
</script><style scoped></style>
转载于:https://my.oschina.net/520wsl/blog/1549948
初始化一个vue项目的流程相关推荐
- Vue之初始化一个vue项目
Vue之初始化一个vue项目 以防忘记需要重新查资料创建,在这里简略的记一记 1.node.js官网下载安装node.js https://nodejs.org/zh-cn/ 下载好之后cmd运行一下 ...
- 如何初始化一个vue项目
1.先安装node(略) 2.npm 设置成淘宝源: npm config set registry https://registry.npm.taobao.org 都安装完成后,可以命令行工具中输入 ...
- Vue 项目 build 流程解析(webpack工具解析)
Vue 项目 build 流程解析(webpack工具解析) 注:本篇文章解析框架为 vue2.0 本篇文章通过解析简单的项目打包步骤试着去了解我们的 Vue 项目是怎么打包的. build.js 干 ...
- 从零开始搭建一个vue项目 -- vue-cli/cooking-cli(一)
从零开始搭建一个vue项目 -- vue-cli/cooking-cli(一) 1.vue-cli搭建一个可靠成熟的项目 1.介绍 vue-cli 我是去年六月份接触的vue1.0,当时还是个菜逼,当 ...
- vue请求在退出页面还执行吗_如何用 Cloudbase Framework 部署一个 Vue 项目
无需修改业务代码,就能将 Vue 应用前后端一键托管部署在云开发平台~ Cloudbase Framework 是云开发官方出品的前后端一体化部署工具.目前已经 开源 . 关于 Cloudbase F ...
- [vue] 从0到1自己构架一个vue项目,说说有哪些步骤、哪些重要插件、目录结构你会怎么组织
[vue] 从0到1自己构架一个vue项目,说说有哪些步骤.哪些重要插件.目录结构你会怎么组织 1 项目类型 前端的项目目前来看主要分为小程序开发,H5页面开发.PC官网.后台管理系统开发.Nativ ...
- VsCode创建第一个vue项目
转载自:https://www.cnblogs.com/z45281625/p/9015380.html VsCode创建第一个vue项目 使用vue-cli快速构建项目 ( vue-cli 是vu ...
- 使用VSCode创建一个Vue项目
使用VSCode创建一个Vue项目 vue-cli 是vue.js的脚手架,用于自动生成vue.js模板工程的. 安装vue-cli之前,需要先安装了vue和webpack · node -v //( ...
- 使用webpack脚手架创建一个vue项目
使用webpack脚手架创建一个vue项目 前言介绍 前期环境准备 开始创建项目 实例 交流 前言介绍 创建vue的项目方式有很多种,这里仅介绍使用webpack脚手架来创建一个vue项目,下面将创建 ...
最新文章
- vSphere企业运维:从入门到提高【学习路线图】
- pytorch 实现openpose
- [恢]hdu 2098
- 买房贷款时为什么银行让客户选等额本息,这是不是个坑?
- Java编程作业体会_Java作业的几点总结感想
- 作者:叶郁文,男,中兴通讯股份有限公司产品规划部长。
- python sphinx_Python Sphinx使用实例及问题解决
- 我的Android进阶之旅------Android图片处理(Matrix,ColorMatrix)
- A5如何备份oracle数据库,oracle的数据库的导入导出
- c# session总结
- 第三章、Zigbee模块参数(DRF2658C、DRF2659C、DRF2670C)
- We Will Rock You
- 使用phpword替换模板内容 在模板追加内容
- 总结jQuery中的DOM节点属性
- 工具的服务端口已关闭。要使用命令行调用工具,请打开工具 - 设置 - 安全设置,将服务端口开启。
- java 距离转坐标_Java经纬读坐标的距离计算
- Desperate Housewife 1-1
- vue简单实现无缝滚动
- 有向图中欧拉回路存在的充分条件及证明
- 怎么给苹果手机设备画面投屏到电脑上面?