mac ruby 环境变量_Ruby环境设置| 在Mac和Windows操作系统上安装Ruby
mac ruby 环境变量
Ruby环境设置 (Ruby Environment Setup)
1)在Mac操作系统上安装Ruby (1) Installation of Ruby on Mac Operating System)
Ruby is already included in default macOS installation but it won't be the latest version. In the following steps, we are setting up Ruby Programming Environment using Homebrew. You will have to use the Terminal Application provided macOS.
Ruby已包含在默认的macOS安装中,但它不是最新版本。 在以下步骤中,我们将使用Homebrew设置Ruby编程环境 。 您将必须使用终端应用程序提供的macOS。
Step 1:
第1步:
Install Xcode(An IDE) Command line tool. Though it is not required for writing Ruby programs, Ruby and some of its components will depend upon Xcode's Command Line Tools package. Execute the command given below in the Terminal and these components will be downloaded and installed,
安装Xcode(IDE)命令行工具。 尽管不需要编写Ruby程序,但Ruby及其某些组件将取决于Xcode的Command Line Tools软件包。 在终端中执行下面给出的命令,这些组件将被下载并安装,
$ xcode-select –install
A prompt will appear to start the installation. Accept the software license and then tools will be downloaded and installed automatically.
出现提示,开始安装。 接受软件许可证,然后将自动下载并安装工具。
Step 2:
第2步:
Install and Set up Homebrew. After installing Xcode, you are ready to install Homebrew (It is a package manager). We will use Homebrew to install the latest version of Ruby and configure our system to use this latest version. Type the following command in the Terminal to install Homebrew.
安装和设置Homebrew。 安装Xcode之后,您就可以安装Homebrew(它是一个程序包管理器)。 我们将使用Homebrew安装最新版本的Ruby,并将我们的系统配置为使用该最新版本。 在终端中键入以下命令以安装Homebrew。
/usr/bin/ruby -e
$(curl-fsSLhttps://raw.githubusercontent.com/Homebrew/install/master/install)
$(curl-fsSLhttps://raw.githubusercontent.com/Homebrew/install/master/install)
The script which is downloaded by curl will be executed by default Ruby interpreter. The homebrew installation process will be started. The password prompt will appear. Return to the Terminal by pressing 'Return' key once you've entered your password.
curl下载的脚本将在默认的Ruby解释器中执行。 自制程序安装过程将开始。 出现密码提示。 输入密码后,按“返回”键返回终端。
Press y for Yes, whenever you are required to confirm the installation process. After the installation of Homebrew, we will put the directory Homebrew uses to store its executable files at the front of the PATH environment variables.
在需要确认安装过程时,请按y表示是 。 安装Homebrew之后,我们将把Homebrew用于存储其可执行文件的目录放在PATH环境变量的前面。
Use the nano text editor to create the bash_profile file by typing the following command:
使用nano文本编辑器通过键入以下命令来创建bash_profile文件:
$ nano ~/.bash_profile
Now add Homebrew's executable directory in front of the PATH
现在在PATH的前面添加Homebrew的可执行目录
export PATH=/usr/local/bin:$PATH
To save the changes, use ctrl+O. A prompt will appear, press the Return key then press ctrl+X to exit the editor.
要保存更改,请使用ctrl + O。 出现提示,按Return键,然后按ctrl + X退出编辑器。
Now activate these changes by typing,
现在,通过键入来激活这些更改,
$ source ~/.bash_profile
To verify the brew set up, execute the command,
要验证冲煮设置,请执行以下命令,
$ brew doctor
You will see this in your terminal,
"Your system is ready to use brew."
您会在终端中看到这一点,
“您的系统已准备就绪,可以使用Brew。”
Step 3:
第三步:
Installing Ruby. In Homebrew, find packages related to Ruby by executing the following command,
安装Ruby。 在Homebrew中,通过执行以下命令查找与Ruby相关的软件包,
$ brew search ruby
You will find a variety of options but don't get confused, just ask brew to install ruby by typing.
您会找到多种选择,但不要感到困惑,只需要求brew通过键入来安装ruby。
$ brew install ruby
Homebrew will install many dependencies and ultimately install and download Ruby.
Homebrew将安装许多依赖项,并最终安装和下载Ruby。
To check the version installed, type:
要检查安装的版本,请键入:
$ ruby -v
2)在Windows上安装Ruby (2) Installation of Ruby on Windows)
Follow the steps mentioned below for setting up Ruby Environment on your Windows PC,
请按照下面提到的步骤在Windows PC上设置Ruby Environment ,
Step 1: Download the zipped installer for Ruby Version 2.5.1 from the link provided https://rubyinstaller.org/downloads/.
第1步:从https://rubyinstaller.org/downloads/提供的链接下载Ruby版本2.5.1的压缩安装程序。
Step 2: You will get a zipped file, unpack it into a new directory or folder.
步骤2:您将获得一个压缩文件,将其解压缩到新目录或文件夹中。
Step 3: Now, Double Click on Ruby2.5.1.exe file. The installer window will appear.
步骤3:现在,双击Ruby2.5.1.exe文件。 将出现安装程序窗口。
Step 4: Click on the 'Next' and go through the documentation listed.
步骤4:点击“下一步”,然后浏览列出的文档。
Step 4: Keep Clicking on 'Next' until the installation process is not completed.
步骤4:继续单击“下一步”,直到安装过程完成。
Step 5: If you want to make sure that Ruby is working fine, then proceed with checking the version by typing '-v' in the Command Prompt with Ruby.
步骤5:如果要确保Ruby正常运行,请在Ruby的命令提示符中键入“ -v”以继续检查版本。
Now open Notepad, write a ruby code and save it with ".rb" extension
现在打开记事本,编写一个ruby代码,并以“ .rb”扩展名保存
x = 190
if x > 2
puts "x is greater than 2"
else
puts "I can't guess the number"
end
Run the code through Ruby Command Prompt by writing "Ruby <program_name>.rb" in the following way, you will get the output in the Command Prompt.
通过以以下方式编写“ Ruby <program_name> .rb” ,通过Ruby Command Prompt运行代码,您将在Command Prompt中获得输出。
x is greater than 2
交互式Ruby(IRB) (Interactive Ruby (IRB))
As the word Interactive suggests, Interactive Ruby is inclined towards creating a more user-friendly environment through an Interactive Command line argument. Interactive Ruby was designed by Keiju Ishitsuka.
就像Interactive这个词所暗示的那样,Interactive Ruby倾向于通过Interactive Command Line参数创建一个更加用户友好的环境。 Interactive Ruby由Keiju Ishitsuka设计。
It is a type of tool which is used to implement the Ruby expressions read from the conventional input. Ruby is an Object-Oriented Scripting language and Read-Eval-Print-Loop(REPL) programming in ruby is carried out through Interactive Ruby.
它是一种工具,用于实现从常规输入中读取的Ruby表达式。 Ruby是一种面向对象的脚本语言,Ruby中的Read-Eval-Print-Loop(REPL)编程是通过Interactive Ruby进行的。
The commands are executed with an immediate response. Job control, line editing capabilities and command history are supported by IRB.
这些命令将立即响应执行。 IRB支持作业控制,行编辑功能和命令历史记录。
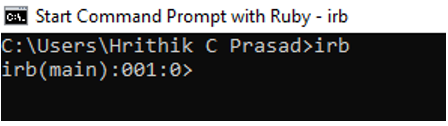
IRB can be invoked through typing irb on the shell or on the command prompt in the following way:
可以通过以下方法在外壳或命令提示符上键入irb来调用IRB:
You can quit Interactive Ruby anytime by typing "exit" or "quit" on the command prompt as shown below:
您可以随时通过在命令提示符下键入“退出”或“退出”来退出Interactive Ruby,如下所示:
    irb(main):001:0> exit
or
irb(main):001:0> quit
Syntax:
句法:
irb.rb [options] [programfile] [arguments]
Here is the list of Command-line options which you may need while working on Interactive Ruby Shell.
这是在Interactive Ruby Shell上工作时可能需要的命令行选项列表 。
| Serial Number | Option | Description |
|---|---|---|
| 1 | v, --version | Used for printing the version of irb. |
| 2 | -f | Used for Supressing read of ~/.irbrc |
| 3 | -m | Bash Calculator(bc) mode. It loads math, fraction or matrix are available. |
| 4 | -d | Used for setting $DEBUG to true(same as 'ruby -d') |
| 5 | -l path | Used for Specifying $LOAD_PATH directory |
| 6 | -r load-module | Functioning is same as 'ruby -r' |
| 7 | -U | Functioning is same as 'ruby -U' |
| 8 | -E enc | Functioning is same as 'ruby -E' |
| 9 | -w | Functioning is same as 'ruby -w' |
| 10 | -W[level=2] | Functioning is same as 'ruby -W' |
| 11 | --inspect | Use this option for output(default expect for bc mode) |
| 12 | --noninspect | Don't use this option for output. |
| 13 | --readline | Use readline extension module. |
| 14 |
--prompt prompt-mode --prompt-mode prompt-mode |
Used for switching prompt mode. Pre-defined prompt modes are 'default', 'simple', 'xmp' and 'inf-ruby' |
| 15 | --inf-ruby-mode | Use prompt appropriate for inf-ruby-mode on emacs. Suppresses--readline. |
| 16 | --simple-prompt | It is a simple prompt mode |
| 17 | --noprompt | No prompt mode. |
| 18 | --tracer | It is used for displaying each execution of commands. |
| 19 | --back-trace-limit n | Its default value is 16 and used for displaying back trace top n and tail n. |
| 20 | --irb_debug n | It sets internal debug level to n(not for wide use) |
| 序列号 | 选项 | 描述 |
|---|---|---|
| 1个 | v --version | 用于打印irb版本。 |
| 2 | -F | 用于禁止读取〜/ .irbrc |
| 3 | -米 | Bash Calculator(bc)模式。 它可以加载数学,分数或矩阵。 |
| 4 | -d | 用于将$ DEBUG设置为true(与'ruby -d'相同) |
| 5 | -l路径 | 用于指定$ LOAD_PATH目录 |
| 6 | -r加载模块 | 功能与“ ruby -r”相同 |
| 7 | -U | 功能与“ ruby -U”相同 |
| 8 | -E enc | 功能与“ ruby -E”相同 |
| 9 | -w | 功能与“ ruby -w”相同 |
| 10 | -W [level = 2] | 功能与“ ruby -W”相同 |
| 11 | - 检查 | 使用此选项进行输出(默认为bc模式) |
| 12 | -非检查 | 不要将此选项用于输出。 |
| 13 | --readline | 使用readline扩展模块。 |
| 14 |
-提示提示模式 -提示模式提示模式 |
用于切换提示模式。 预定义的提示模式为“默认”,“简单”,“ xmp”和“ inf-ruby” |
| 15 | --inf-ruby-mode | 在emacs上使用适合于inf-ruby-mode的提示。 禁止-阅读线。 |
| 16 | -简单提示 | 这是一个简单的提示模式 |
| 17 | -无提示 | 没有提示模式。 |
| 18 | -示踪剂 | 它用于显示命令的每次执行。 |
| 19 | --back-trace-limit n | 它的默认值是16,用于显示后跟踪top n和tail n。 |
| 20 | --irb_debug n | 它将内部调试级别设置为n(不广泛使用) |
IRB can be used for evaluating a variety of expressions. You can go through the example given below for a better understanding of how Interactive Ruby evaluates expressions.
IRB可用于评估各种表达式。 您可以阅读下面给出的示例,以更好地了解Interactive Ruby如何评估表达式。
    irb(main):001:0> 120*78
=>9360
irb(main):002:0> 5-4
=>1
irb(main):003:0> 70/10
=>7
There may be chances when you need the following lifesaving ruby terminal commands to pop out from the problem in which you are stuck:
当您需要以下救生Ruby终端命令来摆脱卡住的问题时,可能会有机会:
CTRL+c: It is used for interrupting the current process. If you are stuck in an endless or infinite loop then use this command in the terminal.
CTRL + c :用于中断当前进程。 如果您陷入无限循环或无限循环中,请在终端中使用此命令。
CTRL+d: It is used for ending the IRB session and it takes you back into your terminal shell at the same time.
CTRL + d :用于结束IRB会话,同时将您带回到终端Shell。
翻译自: https://www.includehelp.com/ruby/ruby-environment-setup-installation-of-ruby-on-mac-and-windows-operating-system.aspx
mac ruby 环境变量
mac ruby 环境变量_Ruby环境设置| 在Mac和Windows操作系统上安装Ruby相关推荐
- C语言getenv()函数的用法?(获取系统某个环境变量字符串名的值)(windows VS上用_dupenv_s()函数)
描述 C 库函数 char *getenv(const char *name) 搜索 name 所指向的环境字符串,并返回相关的值给字符串. 声明 下面是 getenv() 函数的声明. char * ...
- 在Windows系统上安装Ruby On Rails
2019独角兽企业重金招聘Python工程师标准>>> 在网上下载安装程序 railsinstaller-3.1.0 自动安装后 出现如下错误 C:\Users\Admin> ...
- oracle sid环境变量,ORACLE_SID环境变量设置的问题
明明在注册表里存在环境变量ORACLE_SID的设置,可执行emctl时却提示: C:>emctl Environment variable ORACLE_SID not defined. Pl ...
- ASP.NET Core配置环境变量和启动设置
在这一部分内容中,我们来讨论ASP.NET Core中的一个新功能:环境变量和启动设置,它将开发过程中的调试和测试变的更加简单.我们只需要简单的修改配置文件,就可以实现开发.预演.生产环境的切换. A ...
- 【linux】查看环境变量|getenv setenv设置获取环境变量
目录 环境变量类型 查看环境变量 系统的环境变量 进程的环境变量 初始化时载入的环境变量 执行过程中设置的环境变量 环境变量原理 通过函数存取环境变量 getenv & setenv 获取&a ...
- linux怎么查看系统环境变量路径,Linux系统中的环境变量该如何设置与查看
今天小编要跟大家分享的文章是关于Linux系统中的环境变量该如何设置与查看.大家都知道,在 Linux 系统中,有环境变量和 Shell 变量这两种变量. 环境变量是在程序及其子程序中全局可用的,常常 ...
- win10环境变量在哪设置?教你设置win10环境变量的方法
win10电脑使用环境变量可以使电脑快速地启动或运行某些应用或程序.特殊情况下,为了方便执行命令,需要添加或者编辑环境变量,那么win10环境变量在哪里设置?新手用户不太懂怎么操作?针对此疑问,这里笔 ...
- ubuntu20输入密码后,一直黑屏解决(针对环境变量未正确设置)
问题描述 Vm打开ubuntu20开机正常进入登录界面,输入密码后,一直黑屏 鼠标键盘均可用. 问题起因分析 环境变量的设置问题 我出问题的地方在etc/profile和~/.bashrc设置环境变量 ...
- linux如何保存环境变量,linux环境变量设置及保存地点
1. 显示环境变量HOME $ echo $HOME /home/redbooks 2. 设置一个新的环境变量hello $ export HELLO="Hello!" $ ech ...
- python要配置几个环境变量_Python环境变量配置
第一步:下载Python安装包 在Python的官网 www.python.org 中找到最新版本的Python安装包,点击进行下载,请注意,当你的电脑是32位的机器,请选择32位的安装包,如果是64 ...
最新文章
- 新建html带参数,本地html加载时带参数的问题
- 反欺诈之地址的处理和使用
- wps右键新建里面没有word和excel_wps常用的基本操作方法
- 10个非常有用的CSS hack和技术
- 使用Blazor开发内部后台(一):认识Blazor
- 前端使用正则表达式从接口地址栏取值并将对应的值展示在页面上
- WordPress忘记密码的5种解决方法
- 动态规划——How to Type(hdu2577)
- 代码居中对齐_HTML span标签如何居中和右对齐?这里有HTML span标签的样式解析
- 在LoadRunner里何时该用 .NET Vuser协议?
- linux把profile文件删了怎么办,误删Profile后的处理
- cognos数据源的配置
- 淘淘商城19_在taotoa-portal工程中调用taotao-rest工程
- HTML 多选框
- Ubuntu系统通用快捷键
- 简化企业组网 H3C S1224F以太网交换机评测
- 在线学习编程网站收集
- 如何使用SQL对数据进行分析和可视化
- 用Altium designer画PCB的一般心得
- Debian11.5和Ubuntu22.04安装fcitx5中文输入法(五笔拼音)