使用Microsoft数据迁移助手将Oracle数据库迁移到SQL Server –安装过程和简短概述
目标听众 (Intended audience)
This document is intended for application developers and database administrators who plan to migrate an Oracle Database to Microsoft SQL Server.
本文档适用于计划将Oracle数据库迁移到Microsoft SQL Server的应用程序开发人员和数据库管理员。
语境 (Context)
Nowadays, most IT professionals are aware that Oracle Database is a very good database solution, but it’s not inexpensive, to say the least. If you want to partition a table in Oracle, it’s an option that you must pay for, which is the same for advanced security options like Database Encryption or Dynamic Data Masking. In contrast, SQL Server comes with these options out of the box when you use the Enterprise Edition.
如今,大多数IT专业人员都意识到Oracle数据库是一个非常好的数据库解决方案,但至少可以说它并不便宜。 如果要在Oracle中对表进行分区,则必须为此选项付费,这与高级安全选项(如数据库加密或动态数据屏蔽)相同。 相反,当您使用企业版时,SQL Server附带了这些选项。
Hence, we can observe that a significant number of applications are moving from Oracle Database to Microsoft SQL Server and that’s probably the reason why Microsoft helps its customers by providing tools to assist them in their migration process. This tool is called SQL Server Migration Assistant a.k.a. SSMA and is available in different versions in order to migrate from:
因此,我们可以观察到大量的应用程序正在从Oracle数据库迁移到Microsoft SQL Server,这可能就是Microsoft通过提供工具来协助其客户迁移过程中帮助其客户的原因。 此工具称为SQL Server迁移助手(又名SSMA) ,并且有不同版本可用,以便从以下位置迁移:
- Oracle MySQL OracleMySQL
- Oracle Database Oracle数据库
- Microsoft Access Microsoft Access
- as well as others … 以及其他...
At the moment of writing this article, the SSMA for Oracle solution is in version 7.7 and we can migrate an Oracle Database 9i (or higher) to an on-premises SQL Server 2008+ or in the Azure cloud.
在撰写本文时,SSMA for Oracle解决方案的版本为7.7,我们可以将Oracle Database 9i(或更高版本)迁移到本地SQL Server 2008+或Azure云中。
In this article, we will review the installation of the tool in order to prepare a migration.
在本文中,我们将检查该工具的安装以准备迁移。
SSMA概念概述 (Conceptual overview of SSMA)
The tool is divided into two parts:
该工具分为两部分:
- A client application that will actually perform the migration 实际执行迁移的客户端应用程序
- An extension pack that will allow you to migrate data from your Oracle instance. 扩展包,使您可以从Oracle实例迁移数据。
The former is installed on a client computer, not necessarily the source or destination for migration and will assist you in migration steps which are the following ones:
前者安装在客户端计算机上,不一定是迁移的源或目的地,并且将帮助您执行以下迁移步骤:
The latter must be installed on the destination server and enables data migration options for SSMA client. The installation of this extension pack will add two databases on destination instance, which are:
后者必须安装在目标服务器上,并为SSMA客户端启用数据迁移选项。 此扩展包的安装将在目标实例上添加两个数据库,它们是:
- [sysdb] – contains not only the database objects (tables, procedures) needed to migrate data but also functions that emulate the Oracle system functions. [sysdb] –不仅包含迁移数据所需的数据库对象(表,过程),而且还包含模拟Oracle系统功能的功能。
- [ssmatesterdb] – contains database objects used by a validation component (called “Tester component”). [ssmatesterdb] –包含验证组件(称为“测试器组件”)使用的数据库对象。
As you will see in following, this client actually uses CLR capabilities of SQL Server.
正如您将在后面看到的,该客户端实际上使用SQL Server的CLR功能。
下载并安装SSMA for Oracle (Downloading and installing SSMA for Oracle)
Go to Microsoft’s download page and download the tool (client and extension pack).
转到Microsoft的下载页面,然后下载该工具(客户端和扩展包)。
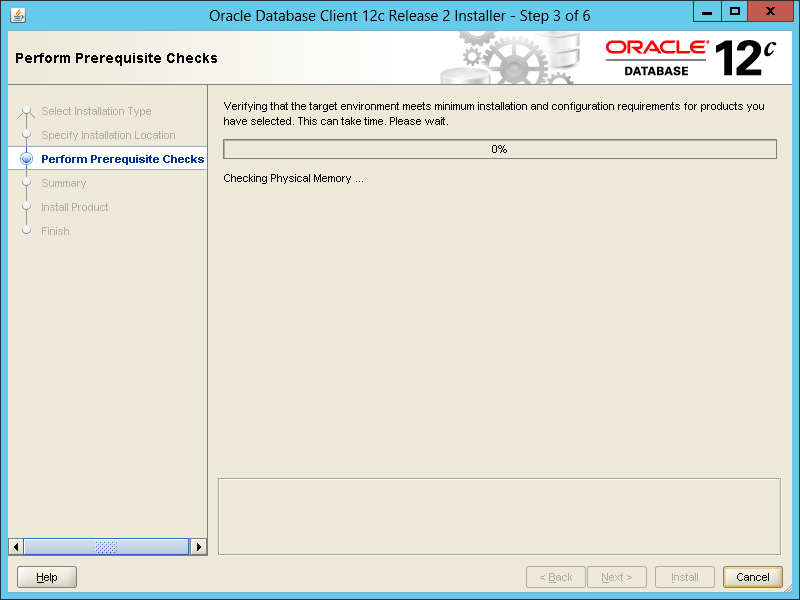
Analyzing prerequisites
分析先决条件
Once it’s done and you know which computer will be the client, we will first have to compare the specifications of this computer with SSMA prerequisites, which are:
完成后,您知道哪台计算机将是客户端,我们首先必须将这台计算机的规格与SSMA先决条件进行比较,这些先决条件是:
- A least Windows 7 or Windows Server 2008 至少Windows 7或Windows Server 2008
- At least Windows Installer 3.1 and .NET Framework 4.0 are installed 至少安装了Windows Installer 3.1和.NET Framework 4.0
- An Oracle Database Client must be installed, at least in the same version as a source or higher. 必须安装Oracle数据库客户端,至少要与源相同或更高版本。
- Conversion from Oracle objects to T-SQL statements: CONNECT to SQL Server 从Oracle对象到T-SQL语句的转换:CONNECT到SQL Server
- Load database objects into SQL Server: mandatory sysadmin membership 将数据库对象加载到SQL Server:强制sysadmin成员身份
- Migrate data to SQL Server: same as above 将数据迁移到SQL Server:与上述相同
- Running of code generated by SSMA granted EXECUTE permission on all user-defined functions in ssma_oracle schema of target database 由SSMA生成的代码的运行在目标数据库的ssma_oracle模式中授予了所有用户定义函数的EXECUTE权限
- The computer must have at least 4 Gb RAM installed 计算机必须至少安装4 Gb RAM
Installing and configuration an Oracle Client for SSMA Client application
安装和配置Oracle Client for SSMA Client应用程序
Let’s consider the client computer does not have an Oracle client and first install it in its latest available version (12.2.0.1).
让我们考虑一下客户端计算机没有Oracle客户端,然后首先以其最新的可用版本(12.2.0.1)安装它。
Here is the content of the folder for that version. Run “setup.exe”.
这是该版本文件夹的内容。 运行“ setup.exe”。
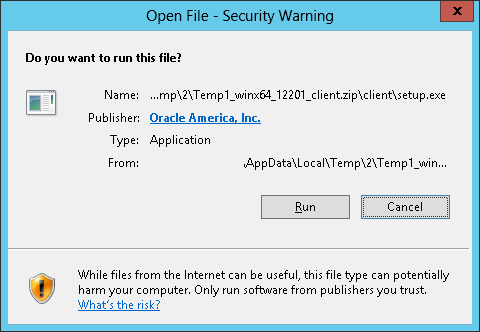
We could get the following message:
我们可以获得以下消息:
If so, click on “Run”.
如果是这样,请单击“运行”。
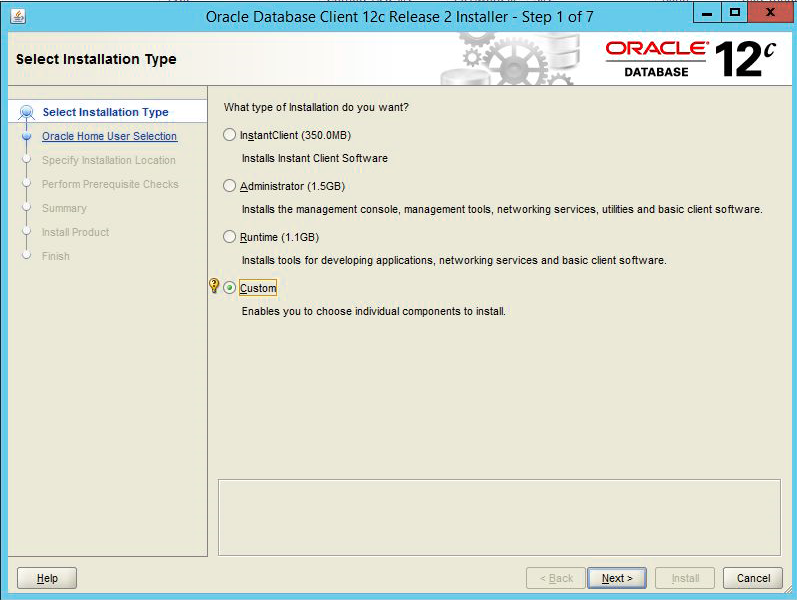
Now, you will get in touch with the “OUI”, Oracle Universal Installer. Here is the first view we’ll get.
现在,您将与Oracle Universal Installer“ OUI”取得联系。 这是我们得到的第一个视图。
Select “Instant Client” installation type.
选择“ Instant Client ”安装类型。
Specify the location where you will install the Oracle Client software. It’s referred to as the Oracle Home.
指定您将安装Oracle Client软件的位置。 它被称为Oracle Home。
Then, click on “Next”.
然后,单击“下一步”。
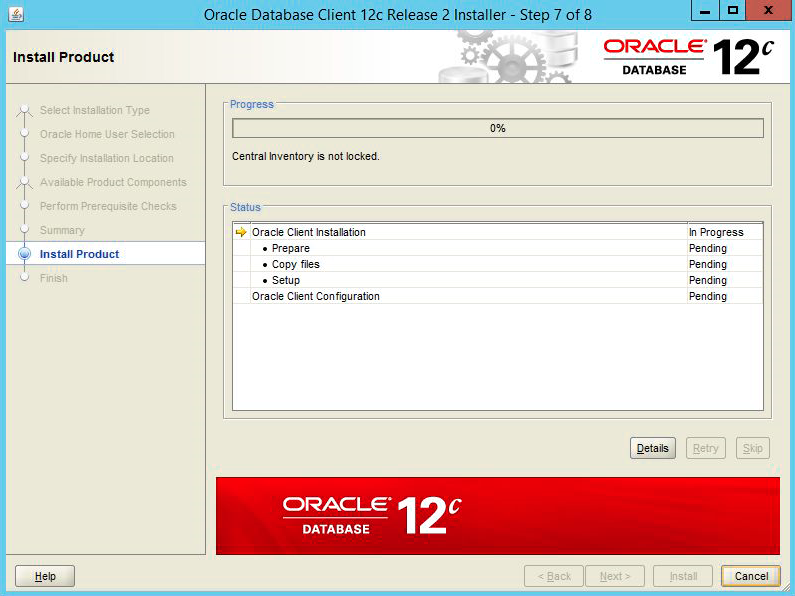
You get a summary of what it will do. Click on “Install” to start the installation.
您将获得其摘要。 点击“安装”开始安装。
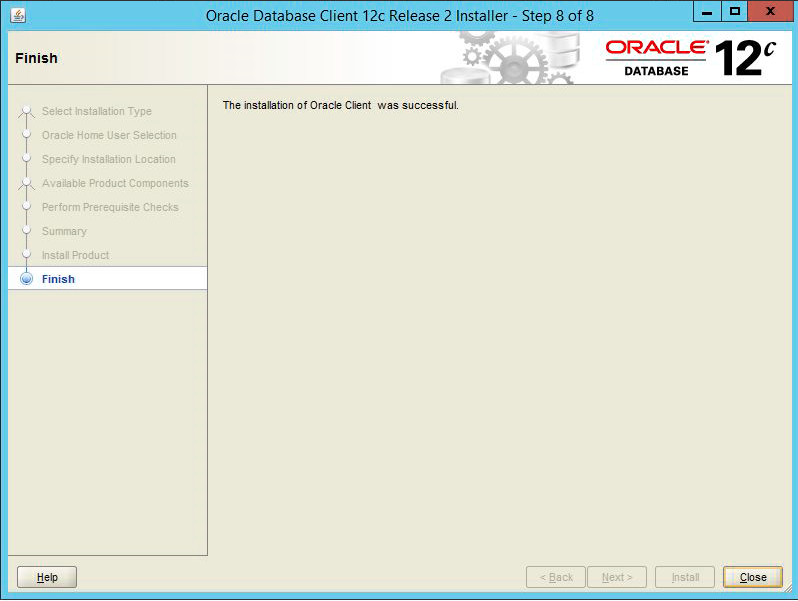
Once the installation is done, you will get a pane with a “Done” button on which you can click to close the Oracle Universal Installer (OUI).
安装完成后,您将获得一个带有“完成”按钮的窗格,您可以单击该窗格以关闭Oracle Universal Installer(OUI)。
Installing SSMA Client
安装SSMA客户端
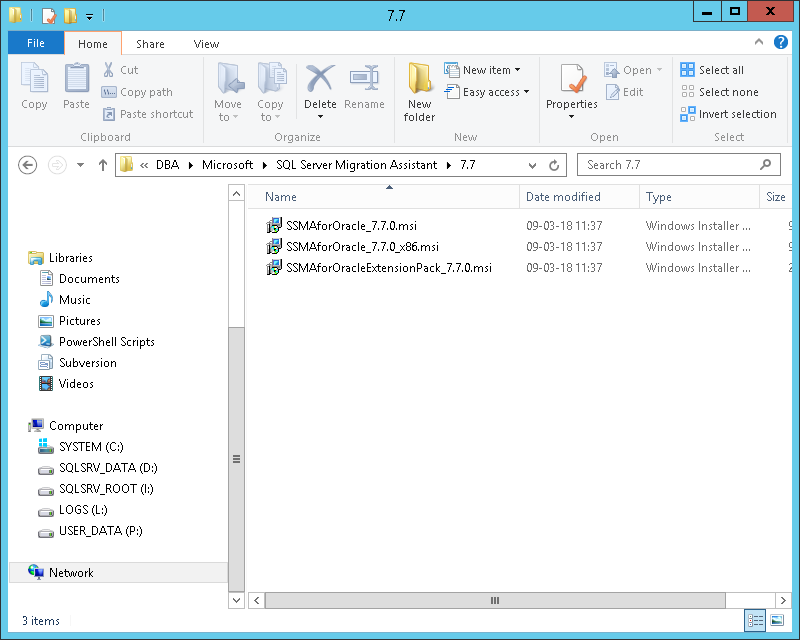
Go to the folder in which you downloaded the SSMA tool installers and open the msi file corresponding to your environment (x86 or 64 bits).
转到下载SSMA工具安装程序的文件夹,然后打开与您的环境相对应的msi文件(x86或64位)。
You could eventually get following warning message. Click on “Run”.
您最终可能会收到以下警告消息。 点击“运行”。
And the installer is ready for us to play with it.
安装程序已准备就绪,可供我们使用。
Click on “Next” button.
点击“下一步”按钮。
Accept the agreement and click on “Next” button.
接受协议,然后单击“下一步”按钮。
Choose the setup type you want. I personally prefer getting the whole program.
选择所需的设置类型。 我个人更喜欢整个程序。
Here is what I think as unfortunate: you can’t disable telemetry and error reporting… Click on “Install”.
这是我认为很不幸的事情:您无法禁用遥测和错误报告……单击“安装”。
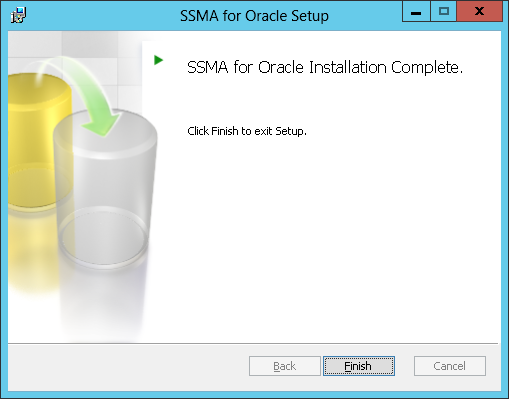
Once SSMA is installed, you’ll get the following pane:
一旦安装了SSMA,您将获得以下窗格:
If you go back to your desktop, you’ll see a new icon appeared:
如果返回桌面,则会看到一个新图标:
Installing and configuration an Oracle Client for SSMA Client application
安装和配置Oracle Client for SSMA Client应用程序
Let’s still install Oracle client in its latest available version (12.2.0.1).
让我们仍然以最新的可用版本(12.2.0.1)安装Oracle客户端。
Here is the content of the folder for that version. Run “setup.exe”.
这是该版本文件夹的内容。 运行“ setup.exe”。
We could get the following message:
我们可以获得以下消息:
If so, click on “Run”.
如果是这样,请单击“运行”。
“OUI”, Oracle Universal Installer will fire up and you’ll get following selection dialog:
“ OUI”,Oracle Universal Installer将启动,您将看到以下选择对话框:
Select “Custom” installation type and click on “Next” button.
选择“ 自定义 ”安装类型,然后单击“下一步”按钮。
Some of the components of the Oracle Client can run as a Windows Service. You are asked to provide the name and password for this account or choose a Windows Built-in account, which is the option we will take.
Oracle客户端的某些组件可以作为Windows服务运行。 要求您提供此帐户的名称和密码,或选择Windows内置帐户,这是我们要采取的选项。
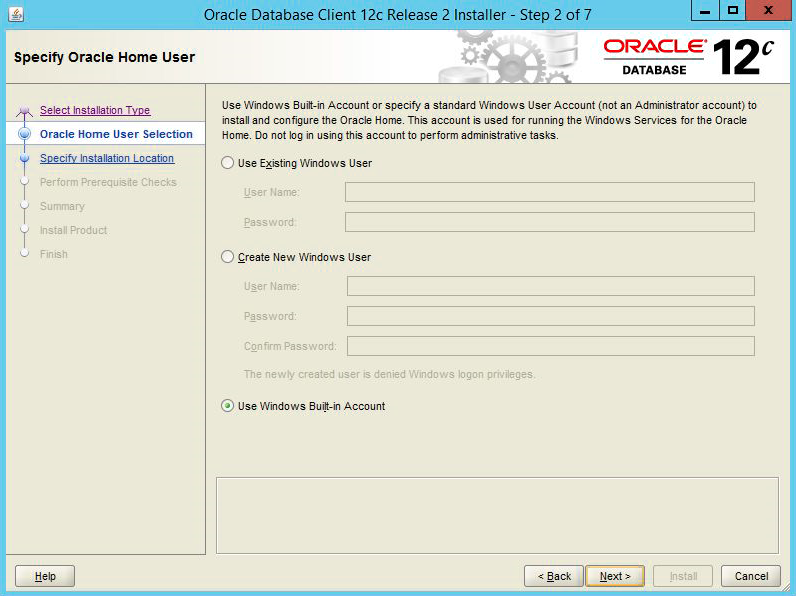
Then click on “Next” button.
然后点击“下一步”按钮。
Now, it’s time to specify the location of the installation, the famous ORACLE_HOME. Here is a suggested configuration.
现在,是时候指定安装的位置了,著名的ORACLE_HOME。 这是建议的配置。
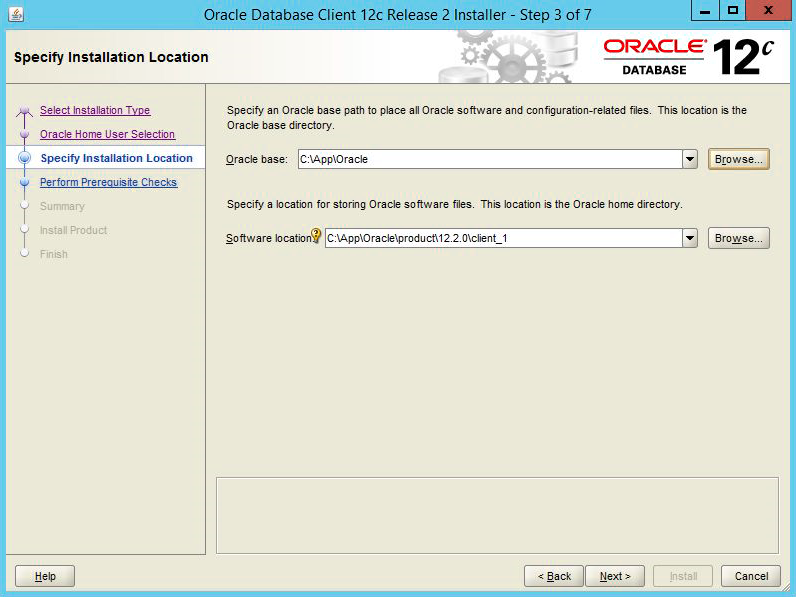
Once you are ready, click on “Next” button.
准备就绪后,单击“下一步”按钮。
You arrive to the components selection list. Make sure to select the OLEDB provider as it’s mandatory for SSMA Extension Pack. You can also add other components like SQL*Plus and Oracle Net (the network layer of Oracle Database product) for convenience.
您到达组件选择列表。 确保选择OLEDB提供程序,因为它是SSMA Extension Pack的必需项。 为了方便起见,您还可以添加其他组件,例如SQL * Plus和Oracle Net(Oracle数据库产品的网络层)。
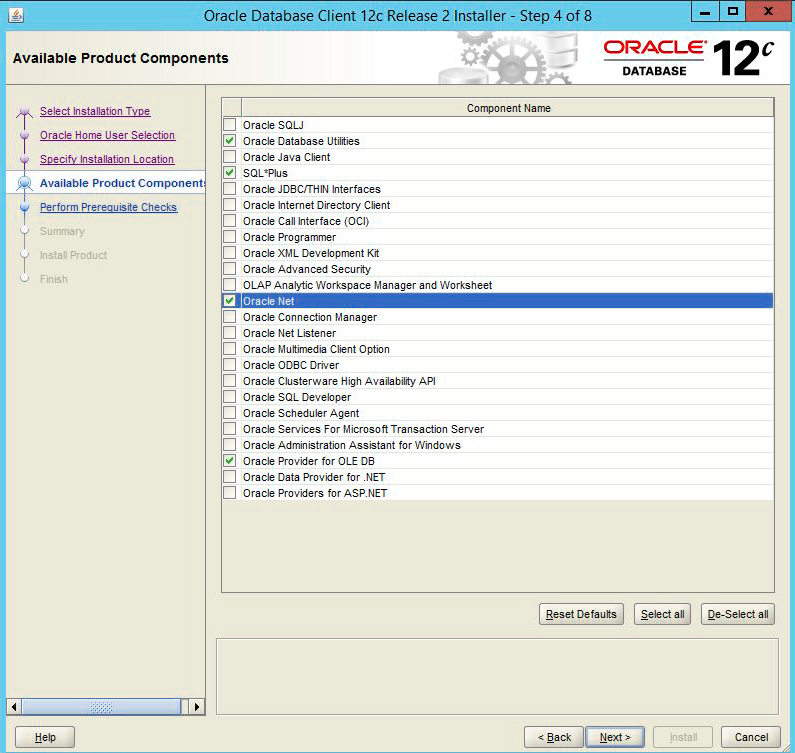
As soon as you selected all the features you want, click on “Next” to go to the summary view.
一旦选择了所需的所有功能,请单击“下一步”转到摘要视图。

Before hitting the “Install” button, just take the time to close the SQL Server instance located on the destination host. It won’t break the installation if it’s still up and running but to be able to use the OLEDB provider, the destination instance will have to be restarted.
在点击“安装”按钮之前,只需花一些时间关闭位于目标主机上SQL Server实例。 如果安装仍然可以运行,它不会中断安装,但是要能够使用OLEDB提供程序,必须重新启动目标实例。
Once it’s done, click on the “Install” button and wait for the installer to complete its job.
完成后,单击“安装”按钮,然后等待安装程序完成其工作。
Once the installation is done, you will get a pane with a “Close” button on which you can click to close the Oracle Universal Installer (OUI).
安装完成后,您将获得一个带有“关闭”按钮的窗格,您可以单击该窗格以关闭Oracle Universal Installer(OUI)。
We can restart SQL Server services, open SQL Server Management Studio (SSMS) and connect to the destination host.
我们可以重新启动SQL Server服务,打开SQL Server Management Studio(SSMS)并连接到目标主机。
If we go down to Server Objects/Linked Servers/Providers, we should be able to see a provider called “OraOLEDB.Oracle” as follows:
如果转到“服务器对象/链接的服务器/提供程序”,则应该能够看到名为“ OraOLEDB.Oracle”的提供程序,如下所示:
Installing SSMA Extension Pack on destination instance
在目标实例上安装SSMA Extension Pack
You will find below the process for installing the Extension Pack on a Windows Server 2012R2. But, before that, let’s review its prerequisites.
您将在下面找到在Windows Server 2012R2上安装扩展包的过程。 但是,在此之前,让我们回顾一下它的先决条件。
Prerequisites
先决条件
The prerequisites are almost the same as for the client application. You will find them listed out below:
前提条件几乎与客户端应用程序相同。 您会在下面找到它们:
- Windows Installer 3.1 or higher Windows Installer 3.1或更高版本
- The Oracle Client Provider or the OLEDB provider for Oracle (See procedure in the previous section) Oracle的Oracle客户端提供程序或OLEDB提供程序(请参阅上一节中的过程)
- Connectivity from destination server to source server 从目标服务器到源服务器的连接
- SQL Server Browser Service must be running during installation. SQL Server浏览器服务必须在安装过程中运行。
Note
注意
- SQL Server 2008 Express Edition is not supported 不支持SQL Server 2008 Express Edition
- A temporary rule in your local firewall that allows traffic to UDP port 1434 could be necessary if a problem occurs while SQL Server Browser Service is running. 如果在运行SQL Server浏览器服务时出现问题,则可能需要使用本地防火墙中的临时规则,该规则允许到UDP端口1434的通信。
Installation process
安装过程
First, open Services and start “SQL Server Service Browser” service.
首先,打开“服务”并启动“ SQL Server服务浏览器”服务。
Then, go to the folder where the Extension Pack installer is located and run this installer.
然后,转到Extension Pack安装程序所在的文件夹并运行该安装程序。
The following dialog will open.
将打开以下对话框。
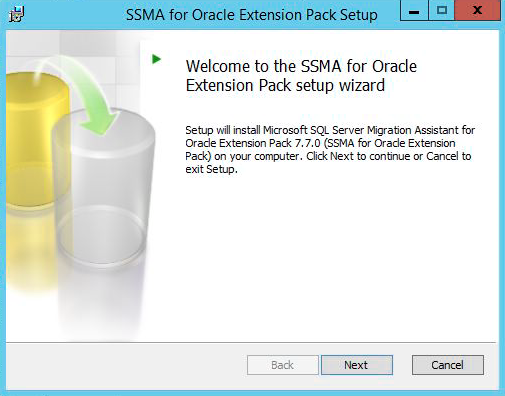
Click on “Next” button.
点击“下一步”按钮。
Note
注意
If you skipped the prerequisites part of this section, you could get the following message:
如果跳过本节的前提条件部分,则可能会收到以下消息:
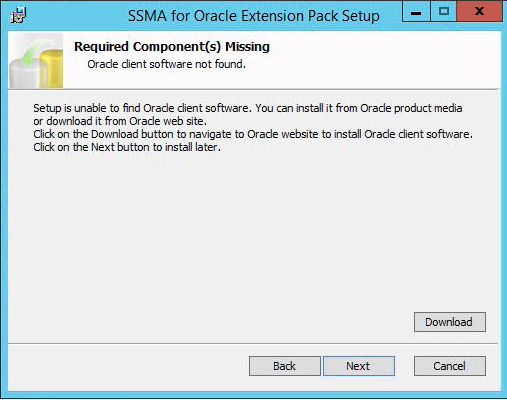
If so, go back to prerequisites sub-section and make sure to do the appropriate action to meet them.
如果是这样,请返回前提条件小节,并确保执行适当的操作来满足这些要求。
You will then be proposed to accept or reject license agreement.
然后,将建议您接受或拒绝许可协议。
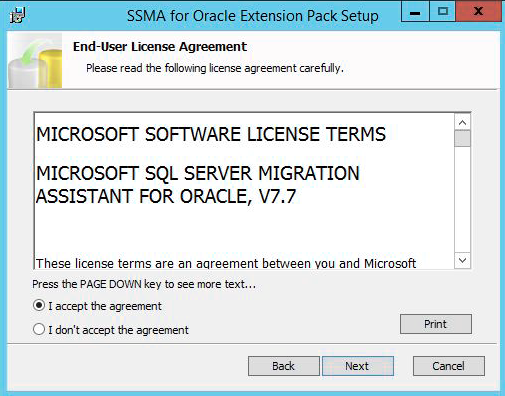
If you accept, check the option and click on “Next” button.
如果您接受,请选中该选项,然后单击“下一步”按钮。
Like the client application, you will be asked to choose the installation type.
像客户端应用程序一样,将要求您选择安装类型。
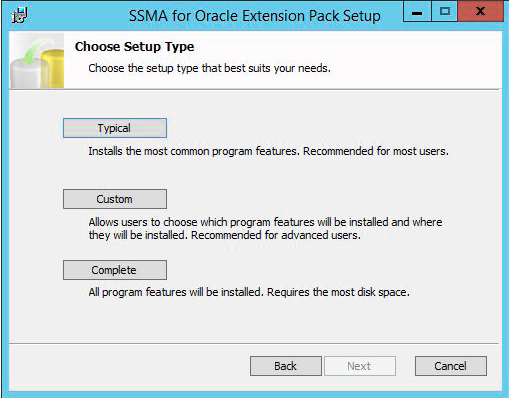
We will choose the “Complete” to be sure we can take the most out of this tool.
我们将选择“完成”以确保我们可以充分利用该工具。
This will lead us to a panel where, unfortunately, no user interaction is allowed except hitting the “Install” button (if you really want to install the tool):
不幸的是,这将导致我们进入一个面板,除非单击“安装”按钮(如果您确实要安装该工具),否则不允许用户交互:
Surprisingly, the installation is not complete at the end of the process:
令人惊讶的是,该过程结束时安装未完成:
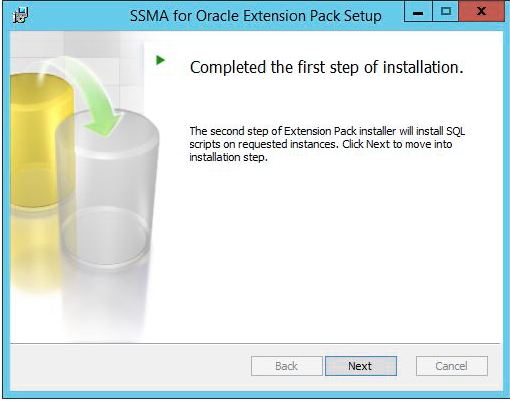
So, let’s click on the “Next button”.
因此,让我们单击“下一步”按钮。
A new dialog will pop up to provide information on the destination platform.
将弹出一个新对话框,以提供有关目标平台的信息。
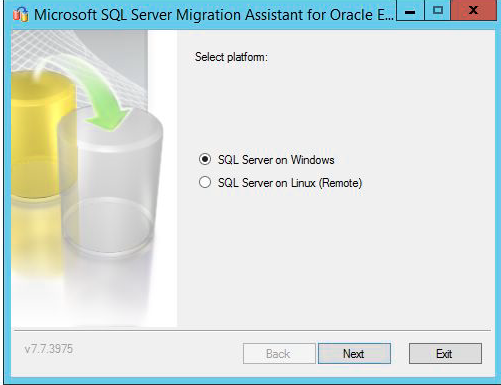
Here, as we are on Windows, we can just click on “Next” button. It will display a selection list with SQL Server instances available on the current computer.
在这里,就像在Windows上一样,我们只需单击“下一步”按钮。 它将显示一个选择列表,其中包含当前计算机上可用SQL Server实例。
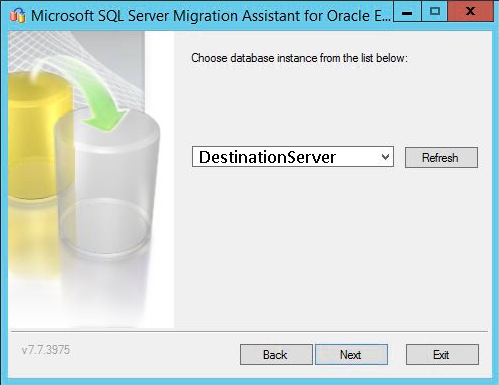
Select the appropriate one and click on “Next” button.
选择适当的一个,然后单击“下一步”按钮。
You are asked to provide credentials (if Windows Authentication is not used).
要求您提供凭据(如果未使用Windows身份验证)。
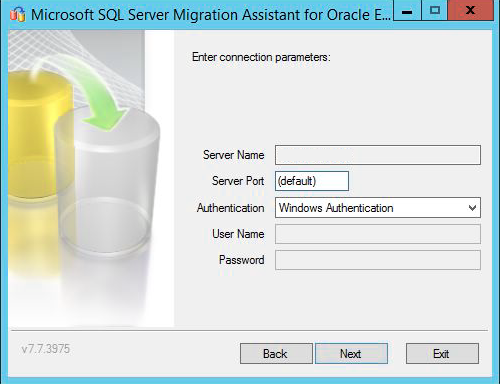
Once done, click “Next”.
完成后,单击“下一步”。
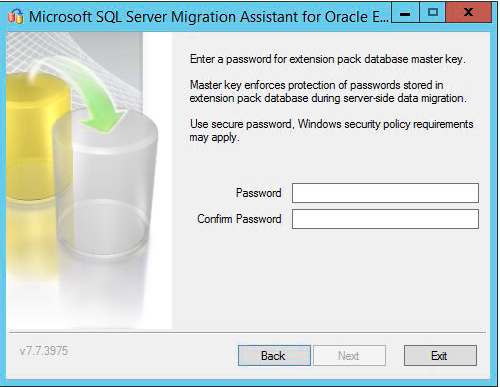
Next step consists in providing a password that will be used as database master key for the databases the installer will create. Once it’s done, click on “Next”.
下一步包括提供一个密码,该密码将用作安装程序将创建的数据库的数据库主密钥。 完成后,单击“下一步”。
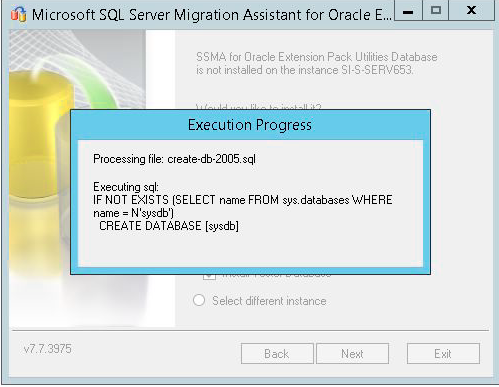
For next step, just hit next, it will tell the installer to create two databases: sysdb and ssmatesterdb. As you can see the second database is optional, but it’s worth spending additional time testing than being confronted to a problem after the migration.
对于下一步,只需单击下一步,它将告诉安装程序创建两个数据库:sysdb和ssmatesterdb。 如您所见,第二个数据库是可选的,但是值得花额外的时间测试,而不是在迁移后遇到问题。
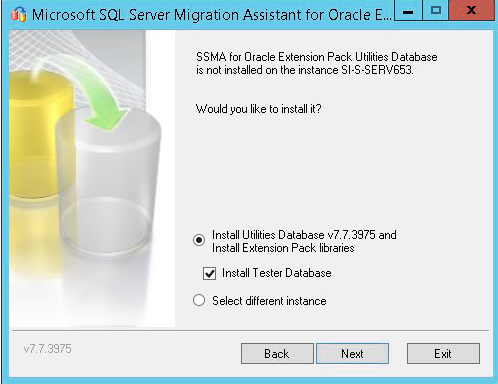
Hit “Next” button and the installation process will start.
点击“下一步”按钮,安装过程将开始。
Once the process ends, it will ask you whether to run against another instance or not (on the same server or on Linux).
该过程结束后,它将询问您是否要针对另一个实例(在同一服务器或Linux上)运行。
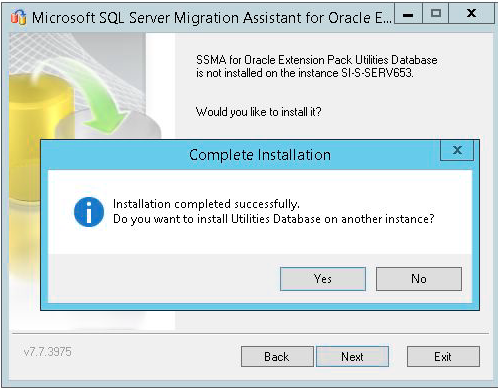
If you installed the Extension Pack on all the instances you had to, just click on “No” then “Exit” buttons.
如果您在所有实例上都安装了扩展包,则只需单击“否”,然后单击“退出”按钮。
Last but not least, open a new connection on SSMS and run following T-SQL code that will enable CLR.
最后但并非最不重要的一点是,在SSMS上打开一个新连接,然后按照将启用CLR的T-SQL代码运行。
sp_configure 'clr enabled', 1  ;
GO
RECONFIGURE  ;
GO
Post-installation checks
安装后检查
The SSMA Extension Pack is now installed. Let’s now check what has changed on the destination server.
现在已安装SSMA扩展包。 现在,让我们检查目标服务器上的更改。
First, the two databases sysdb and ssmatesterdb have been created.
首先,已创建两个数据库sysdb和ssmatesterdb。
Then, we can notice that, in sysdb, there are following objects that could be interesting:
然后,我们可以注意到,在sysdb中,以下对象可能很有趣:
- ssma_oracle.bcp_migration_packages table, ssma_oracle.bcp_migration_packages表,
- Procedures and functions defined in ssma_oracle schema. ssma_oracle模式中定义的过程和函数。
Preparing SSMA execution
准备执行SSMA
We now have everything for the tool to run, except that we should create a user/login on both source and destination that meets prerequisites. It’s what we will do in following part.
现在,我们已经具备运行该工具所需的一切,除了我们应该在满足先决条件的源和目标上都创建用户/登录名。 这就是我们在接下来的部分中要做的。
Source configuration
源配置
TNS Configuration
TNS配置
The Oracle TNS is the network layer of the Oracle Client. We can create kind of a directory file in which we will map a network name to a network descriptor.
Oracle TNS是Oracle客户端的网络层。 我们可以创建一种目录文件,在其中将网络名称映射到网络描述符。
To do so, we’ll go to the Oracle Home directory, which is the folder in which we installed the Oracle Client software and:
为此,我们将转到Oracle Home目录,该目录是我们安装Oracle Client软件的文件夹,并且:
- Create a folder network (if not exists) 创建文件夹网络(如果不存在)
- Go into that folder 进入那个文件夹
- Create a folder admin (if not exists) 创建一个文件夹管理员(如果不存在)
- Create a file called “tnsnames.ora” 创建一个名为“ tnsnames.ora”的文件
- Edit the file and add following descriptor, replacing values in red by the one corresponding to yours. 编辑文件并添加以下描述符,用红色替换对应的描述符。
MIGSOURCE = (DESCRIPTION = (ADDRESS_LIST = (ADDRESS = (PROTOCOL = TCP)(HOST = myoraclehost)(PORT = 1521)))(CONNECT_DATA = (SERVICE_NAME = ORCL) ) )
NB: some of you may be using SID instead of SERVICE_NAME.
注意:有些人可能正在使用SID而不是SERVICE_NAME。
Connection user account
连接用户帐户
According to documentation, the account to be used for migration has to be granted following permissions:
根据文档,用于迁移的帐户必须具有以下权限:
- CONNECT 连接
- CREATE ANY PROCEDURE 创建任何程序
- EXECUTE ANY PROCEDURE 执行任何程序
- SELECT ANY TABLE 选择任何表格
- SELECT ANY SEQUENCE 选择任何顺序
- CREATE ANY TYPE 创建任何类型
- CREATE ANY TRIGGER 创建任何触发器
- (query any table or view in any schema) (查询任何模式中的任何表或视图)
The easy way to do it is to use the SYSTEM account on the source server, but it’s not the most secure way… Let’s create an account with those permissions.
最简单的方法是在源服务器上使用SYSTEM帐户,但这不是最安全的方法……让我们创建一个具有这些权限的帐户。
-- user creation
CREATE USER SSMAUsr IDENTIFIED BY "123456a."
DEFAULT TABLESPACE USERS
TEMPORARY TABLESPACE TEMP
ACCOUNT UNLOCK;
-- permissions
GRANT CONNECT to SSMAUsr ;
GRANT CREATE ANY PROCEDURE to SSMAUsr ;
GRANT EXECUTE ANY PROCEDURE to SSMAUsr ;
GRANT SELECT ANY TABLE to SSMAUsr ;
GRANT SELECT ANY SEQUENCE to SSMAUsr ;
GRANT CREATE ANY TYPE to SSMAUsr ;
GRANT CREATE ANY TRIGGER to SSMAUsr ;
GRANT SELECT ANY DICTIONARY to SSMAUsr ;
Let’s open up a command prompt and check the results of the following command:
让我们打开一个命令提示符,并检查以下命令的结果:
Sqlplus SSMAUsr/'123456a.'@MIGSOURCE
SQL>Select sysdate from dual;
SQL>Exit
Destination Configuration
目标配置
SSMA prerequisites are pretty clear about what has to be done here: you must define a sysadmin account that will be used for actual migration.
SSMA前提条件非常清楚此处必须执行的操作:您必须定义一个将用于实际迁移的sysadmin帐户。
Running SSMA for the first time
首次运行SSMA
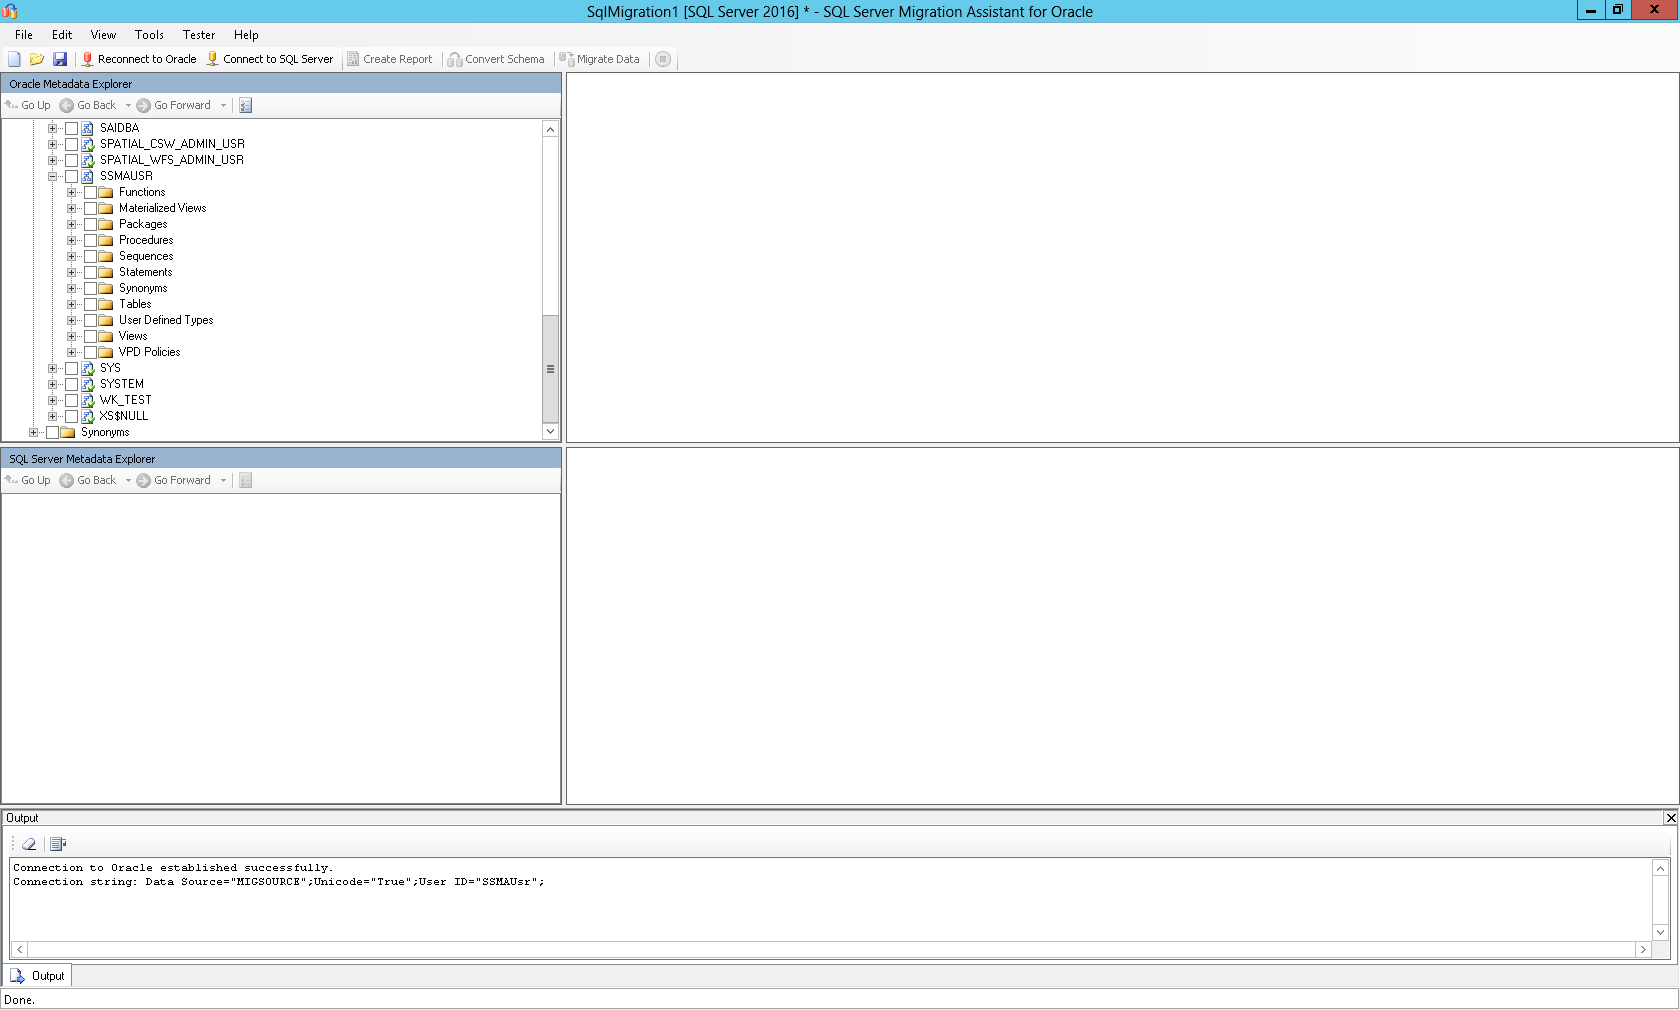
The interface is pretty simple to understand. It’s divided into mainly four parts:
界面非常简单易懂。 它主要分为四个部分:
- The action zone (above) comprising menu and tool bars 包括菜单和工具栏的操作区(上方)
- The source examination zone 源检查区
- The destination examination zone 目的地检查区
- A detailed view zone 详细的视区
To be able to run a migration test, we will first need to create a new project. It’s done by either clicking on the new project icon or clicking on “File” menu then “New Project”.
为了能够进行迁移测试,我们首先需要创建一个新项目。 通过单击新项目图标或单击“文件”菜单,然后单击“新建项目”来完成。
|
|
|
|
No matter the way to do it, you’ll be asked to enter a name to the project and a path where details about the project will be kept and target SQL Server version:
无论采用哪种方式,都将要求您输入项目的名称以及将保留有关该项目的详细信息以及目标SQL Server版本的路径:
As soon as you clicked the “Ok” button, some actions become active and we’ll first connect to the source server by hitting the “Connect to Oracle button”.
单击“确定”按钮后,一些操作将变为活动状态,我们将首先通过单击“连接到Oracle按钮”来连接到源服务器。
A dialog will show up and you’ll need to enter details about the connection.
将出现一个对话框,您需要输入有关连接的详细信息。
You will have to wait some time before getting a view like this:
您将需要等待一段时间才能获得如下视图:
If we go deeper in the “schema” hierarchy, all the schemas existing in source database instance will be listed out. For each schema, we will have the following list of objects that we can check:
如果我们更深入“架构”层次结构,则将列出源数据库实例中存在的所有架构。 对于每个模式,我们都有以下可以检查的对象列表:
更进一步 (Going further)
In this article, we’ve seen how to install SQL Server Migration Assistant for Oracle. We also ran it to check that it can connect to an Oracle database based on the steps we followed.
在本文中,我们已经了解了如何为Oracle安装SQL Server Migration Assistant。 我们还运行了它以根据我们遵循的步骤检查它是否可以连接到Oracle数据库。
In the next article, in this series, we will discuss how to use SSMA by migrating an example schema from an open source application designed to connect to both SQL Server and Oracle. Stay tuned!
在本系列的下一篇文章中,我们将讨论如何通过从旨在连接到SQL Server和Oracle的开源应用程序中迁移示例架构来使用SSMA。 敬请关注!
Previous article in this series:
本系列的上一篇文章:
- An overview of SQL Server database migration tools provided by MicrosoftMicrosoft提供SQL Server数据库迁移工具概述
Next article in this series:
本系列的下一篇文章:
- A concrete example of migration between an Oracle Database and SQL Server using Microsoft Data Migration Assistant使用Microsoft数据迁移助手在Oracle数据库和SQL Server之间迁移的具体示例
翻译自: https://www.sqlshack.com/migrating-an-oracle-database-to-sql-server-with-microsoft-data-migration-assistant-installation-process-and-short-overview/
使用Microsoft数据迁移助手将Oracle数据库迁移到SQL Server –安装过程和简短概述相关推荐
- 使用Microsoft数据迁移助手在Oracle数据库和SQL Server之间迁移的具体示例
介绍 (Introduction) Intended audience 目标听众 This document is intended for application developers and da ...
- oracle数据库索引介绍,SQL Server和Oracle数据库索引介绍
SQL Server和Oracle数据库索引介绍 SQL Server 和 Oracle 数据库索引介绍1 SQL Server 中的索引 索引是与表或视图关联的磁盘上结构,可以加快从表或视图中检索行 ...
- oracle数据库迁移 增大空间,Oracle数据库迁移、创建表空间、创建数据表实例讲解-Oracle...
数据库迁移 对于数据库迁移来说,如果源数据库与目标数据库版本一致,推荐使用Oracle导入或者pl/sql导入:如果版本不一致,则可以使用sql导入的方式. 创建表空间 create tablespa ...
- SQL数据库引擎服务SQL Server启动参数概述
In the SQL world, it is an important activity to perform SQL Server installation for a database admi ...
- ORACLE使用copy方式存储迁移,详细讲解Oracle数据库的数据迁移方法
添加所需的表空间和用户到目标数据库中:安装所需的SQL*Net2或者Net8软件,并配置用于连接数据库的别名. 在DOS命令提示符下设置oracle_sid=Oracle7_sid. 以Interna ...
- 利用迁移助手从Oracle迁移到SQL Server
在实际的项目中,我们常常需要在不同的数据库之前进行迁移,在以前,这可能是和麻烦的事情,但是现在有很多的好的工具可以快速的帮助我们忙成这个目标. 下面我们从来看看如何从Oracle迁移到SQL Serv ...
- Oracle数据库迁移-基础
Oracle数据库迁移-基础 作为一个开发人员,数据库知识肯定是需要我们掌握的.但是目前公司的数据库都是有专门的DBA维护的,一般都是给我们一个环境地址,然后我们书写CRUD SQL.而且公司产品要求 ...
- oracle mysql增量迁移_深入浅出XTTS:Oracle数据库迁移升级利器
内容来源:2017年3月11日,新炬网络高级工程师杨光在"DBAplus北京数据库技术沙龙"进行<深入浅出XTTS:Oracle数据库迁移升级利器>演讲分享.IT 大咖 ...
- Oracle数据库迁移到AWS云的方案
转载:http://www.cnblogs.com/allcloud/p/6148513.html 当前云已经成为常态,越来越多的企业希望使用云来增加基础设施的弹性.减轻基础设施的维护压力,运维的成本 ...
最新文章
- 【青少年编程】【答疑】控制Scratch异步代码的执行顺序
- R语言ggplot2可视化:在选定数据点周围添加三角形(Add Triangles Around Select Data Points)
- mysql dml ddldcl权限_MySQL中的DML、DDL、DCL到底是什么呢?
- python要不要装pycharm-subli(python要不要装pycharm)
- [转]论SOA架构的几种主要开发方式
- [Java基础] Java中List.remove报错UnsupportedOperationException
- 三维旋转四元数系列(2.三维旋转之轴角与罗德里格斯公式推导)
- vmware linux ssh密码,从 CLI 重置 Linux VM 密码和 SSH 密钥 - Azure Virtual Machines | Microsoft Docs...
- 学习c3p0连接池的原理与使用总结
- android mmkv使用_[Android]高性能MMKV数据交互分析-MMKV初始化
- GitHub 标星 6W:口吐芬芳终端助手
- 第二章 Python数据类型和运算符
- Android Camera HAL3 - MultiCamera-HALBufferManager
- Uav开发杂记-4-无人机开发的C-C++
- 用python画一些有趣的图案(001)
- post请求或get请求通过url传递参数
- 常见邮件服务器 接收服务器和发送邮件服务器 地址
- springboot实验课程辅助管理系统 毕业设计-附源码191113
- 近乎不朽:Ed Yourdon
- 【数据结构】最小生成树的概念