Zookeeper序列化组件Jute分析
2019独角兽企业重金招聘Python工程师标准>>> 
简介
Jute是Zookeeper中的序列化组件,最初也是Hadoop中的默认序列化组件,前身就是Hadoop Record IO,后来由于Apache Avro具有更好的跨语言性,丰富的数据结构和对MapReduce的支持,并且能够方便的用于RPC调用;因此Hadoop废弃了Record IO,开始使用Avro,并且将Record IO剥离出来,成为了一个独立的序列化组件,重新命名为Jute。
Zookeeper从最早的版本开始就一直使用Jute作为序列化工具,直到现在最新的版本zookeeper-3.4.9依然使用Jute;至于为什么没有换成性能更好,通用性更强的如:Apache Avro,Thrift,Protobuf等序列化组件,主要还是由于考虑到新老版本序列化组件的兼容性,另一方面Jute并没有成为Zookeeper的瓶颈所在;下面针对Jute使用和部分源码的分析。
简单使用
首先对Jute简单使用,对Jute有一个初步的了解:
1.提供一个实现接口Record的bean
public class TestBean implements Record {private int intV;private String stringV;public TestBean() {}public TestBean(int intV, String stringV) {this.intV = intV;this.stringV = stringV;}//get/set方法@Overridepublic void deserialize(InputArchive archive, String tag)throws IOException {archive.startRecord(tag);this.intV = archive.readInt("intV");this.stringV = archive.readString("stringV");archive.endRecord(tag);}@Overridepublic void serialize(OutputArchive archive, String tag) throws IOException {archive.startRecord(this, tag);archive.writeInt(intV, "intV");archive.writeString(stringV, "stringV");archive.endRecord(this, tag);}}实现的Record接口,主要实现了2个方法deserialize和serialize。
2.序列化和反序列
public class BinaryTest1 {public static void main(String[] args) throws IOException {ByteArrayOutputStream baos = new ByteArrayOutputStream();BinaryOutputArchive boa = BinaryOutputArchive.getArchive(baos);new TestBean(1, "testbean1").serialize(boa, "tag1");byte array[] = baos.toByteArray();ByteArrayInputStream bais = new ByteArrayInputStream(array);BinaryInputArchive bia = BinaryInputArchive.getArchive(bais);TestBean newBean1 = new TestBean();newBean1.deserialize(bia, "tag1");System.out.println("intV = " + newBean1.getIntV() + ",stringV = "+ newBean1.getStringV());bais.close();baos.close();}
}
分别提供了序列化器BinaryOutputArchive和反序列化器ByteArrayInputStream,然后将TestBean指定tag1标记进行序列化和反序列化,最终对比序列化前的数据和序列化后的数据。
使用分析
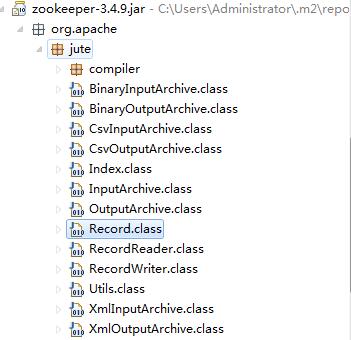
以上实例中对jute进行了简单的使用,当然也可以在使用的过程中,进入到源码中进行代码分析,可以先看一下Jute的代码结构:
首先从Bean继承的Record接口入手,源码如下:
public interface Record {public void serialize(OutputArchive archive, String tag)throws IOException;public void deserialize(InputArchive archive, String tag)throws IOException;
}
很简单,就提供了2个方法分别是serialize和deserialize,各自都有2个参数,OutputArchive表示序列化器,InputArchive表示反序列器,tag用于标识对象,主要是因为同一个序列化器可以序列化多个对象,所以需要给每个对象一个标识。
同样OutputArchive序列化器也是一个接口,源码如下:
public interface OutputArchive {public void writeByte(byte b, String tag) throws IOException;public void writeBool(boolean b, String tag) throws IOException;public void writeInt(int i, String tag) throws IOException;public void writeLong(long l, String tag) throws IOException;public void writeFloat(float f, String tag) throws IOException;public void writeDouble(double d, String tag) throws IOException;public void writeString(String s, String tag) throws IOException;public void writeBuffer(byte buf[], String tag)throws IOException;public void writeRecord(Record r, String tag) throws IOException;public void startRecord(Record r, String tag) throws IOException;public void endRecord(Record r, String tag) throws IOException;public void startVector(List v, String tag) throws IOException;public void endVector(List v, String tag) throws IOException;public void startMap(TreeMap v, String tag) throws IOException;public void endMap(TreeMap v, String tag) throws IOException;}接口中定义了支持序列化的类型:
基本类型:byte,boolean,int,long,float,double
非基本类型:string,byte[],嵌套类型,vector,treeMap
对应的InputArchive反序列器支持同样的类型,此处不再累赘。
OutputArchive和InputArchive的实现类,可以从代码结构中看到,主要有如下几个:
OutputArchive实现类:BinaryOutputArchive,CsvOutputArchive和XmlOutputArchive
InputArchive实现类:BinaryInputArchive,CsvInputArchive和XmlInputArchive
用途:
BinaryOutputArchive:用于网络传输和本地磁盘的存储
CsvOutputArchive:更多的是方便数据对象的可视化展现
XmlInputArchive:将数据以xml保存和还原
在Zookeeper中更多的地方用于网络传输和本地磁盘的存储,所以BinaryOutputArchive使用最为广泛,上面的实例也是以BinaryOutputArchive作为序列化类。
下面可以简单看一下BinaryOutputArchive的实现代码:
private ByteBuffer bb = ByteBuffer.allocate(1024);private DataOutput out;public static BinaryOutputArchive getArchive(OutputStream strm) {return new BinaryOutputArchive(new DataOutputStream(strm));}/** Creates a new instance of BinaryOutputArchive */public BinaryOutputArchive(DataOutput out) {this.out = out;}public void writeByte(byte b, String tag) throws IOException {out.writeByte(b);}//其他类型的序列化省略,可以自行去看源码以上代码中BinaryOutputArchive提供了2个构造BinaryOutputArchive的方法,一个是静态方法getArchive(OutputStream strm),另一个是DataOutput参数的构造器;
不管使用哪种构造方法,都要提供一个DataOutput参数,而最终的序列化所有类型都是基于jdk的DataOutput进行操作的,并没有自己去实现一套方式,也就有了一定的局限性,不能在空间上进行优化。
至此jute序列化中的几个重要的类都进行了简单的分析,下面根据以上分析的所有支持的数据类型提供一个更加复杂的bean。
一个更全的实例
public class TestBeanAll implements Record {private byte byteV;private boolean booleanV;private int intV;private long longV;private float floatV;private double doubleV;private String stringV;private byte[] bytesV;private Record recodeV;private List<Integer> listV;private TreeMap<Integer, String> mapV;@Overridepublic void deserialize(InputArchive archive, String tag)throws IOException {archive.startRecord(tag);this.byteV = archive.readByte("byteV");this.booleanV = archive.readBool("booleanV");this.intV = archive.readInt("intV");this.longV = archive.readLong("longV");this.floatV = archive.readFloat("floatV");this.doubleV = archive.readDouble("doubleV");this.stringV = archive.readString("stringV");this.bytesV = archive.readBuffer("bytes");archive.readRecord(recodeV, "recodeV");// listIndex vidx1 = archive.startVector("listV");if (vidx1 != null) {listV = new ArrayList<>();for (; !vidx1.done(); vidx1.incr()) {listV.add(archive.readInt("listInt"));}}archive.endVector("listV");// mapIndex midx1 = archive.startMap("mapV");mapV = new TreeMap<>();for (; !midx1.done(); midx1.incr()) {Integer k1 = new Integer(archive.readInt("k1"));String v1 = archive.readString("v1");mapV.put(k1, v1);}archive.endMap("mapV");archive.endRecord(tag);}@Overridepublic void serialize(OutputArchive archive, String tag) throws IOException {archive.startRecord(this, tag);archive.writeByte(byteV, "byteV");archive.writeBool(booleanV, "booleanV");archive.writeInt(intV, "intV");archive.writeLong(longV, "longV");archive.writeFloat(floatV, "floatV");archive.writeDouble(doubleV, "doubleV");archive.writeString(stringV, "stringV");archive.writeBuffer(bytesV, "bytes");archive.writeRecord(recodeV, "recodeV");// listarchive.startVector(listV, "listV");if (listV != null) {int len1 = listV.size();for (int vidx1 = 0; vidx1 < len1; vidx1++) {archive.writeInt(listV.get(vidx1), "listInt");}}archive.endVector(listV, "listV");// maparchive.startMap(mapV, "mapV");Set<Entry<Integer, String>> es1 = mapV.entrySet();for (Iterator<Entry<Integer, String>> midx1 = es1.iterator(); midx1.hasNext();) {Entry<Integer, String> me1 = (Entry<Integer, String>) midx1.next();Integer k1 = (Integer) me1.getKey();String v1 = (String) me1.getValue();archive.writeInt(k1, "k1");archive.writeString(v1, "v1");}archive.endMap(mapV, "mapV");archive.endRecord(this, tag);}
}
以上实例把jute支持的所有类型都涉及了,有了一个更加直观的了解,如果每次写一个Bean,都要写这么一段代码,那真要疯掉,好在现在大多数序列化工具都支持数据描述语言,DDL(Data Description Language),当然jute也不例外,其实如果看过Zookeeper的源码,会发现很多类的开头都有这么一段描述:// File generated by hadoop record compiler. Do not edit.
有相关描述的类,都是通过jute的数据描述语言生成的。
数据描述语言
Zookeeper中的很多类都是通过描述语言生成的,对应的描述文件在Zookeeper的包中也能找到:zookeeper-3.4.9/src文件下的zookeeper.jute文件,里面包含了Zookeeper中所有需要生成的bean文件,可以自行打开去查看,这里我提供一个更全的描述文件实例:
module test {class TestBean {int intV;ustring stringV;}class TestBeanAll {byte byteV;boolean booleanV;int intV;long longV;float floatV;double doubleV;ustring stringV;buffer bytes;test.TestBean record;vector<int>listV;map<int,ustring>mapV;}
}
module指定了包名,class指定类名,然后就是类里面的字段类型,支持的类型在上面已经列出来了;
以上描述文件,包括了所有的类型,最终生成的类文件和上面的类TestBeanAll类似;
有了描述文件,具体怎么生成类文件,相关的代码实现都在compiler包下面,上面的类结构图片中没有展开compiler包,这里可以展开一下:
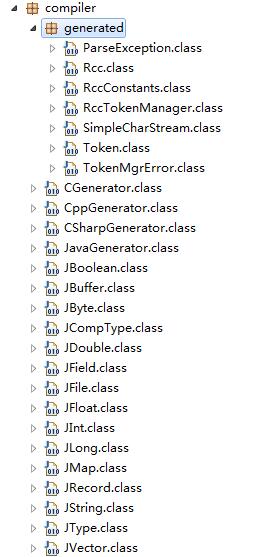
从类结构中可以看到4个类:JavaGenerator,CSharpGenerator,CppGenerator,CGenerator;分别对应生成java,c#,c++,c语言的类文件;
通过一层层的往上找,最终可以找到Rcc类为主类,可以看一下部分代码:
public static void main(String args[]) {String language = "java";ArrayList recFiles = new ArrayList();JFile curFile=null;for (int i=0; i<args.length; i++) {if ("-l".equalsIgnoreCase(args[i]) ||"--language".equalsIgnoreCase(args[i])) {language = args[i+1].toLowerCase();i++;} else {recFiles.add(args[i]);}}if (!"c++".equals(language) && !"java".equals(language) && !"c".equals(language)) {System.out.println("Cannot recognize language:" + language);System.exit(1);}//以下省略...
}
默认的语言是java,通过-l或者–language来指定语言;代码中已经支持c#了,但是这里却没有写上,不知道为什么,难道是c#还有bug。
所以可以写一个简单的测试用例:
public class ParseTest {public static void main(String[] args) {String params[] = new String[3];params[0] = "-l";params[1] = "java";params[2] = "test.jute";Rcc.main(params);}
}
指定了3个参数,当然这里可以添加多个jute描述文件,运行就可以生成相应的类文件。
与Protobuf简单对比
与protobuf3序列化和反序列化时间,以及序列化之后的字节数进行比较,对应版本分别是:
Protobuf:protobuf-3.0.0
jute:zookeeper-3.4.9
分别提供各自的描述文件,并且指定相同类型的字段和字段名,如下所示:
protobuf描述文件:
syntax = "proto3";
option java_package = "protobuf.clazz";
option java_outer_classname = "GoodsPicInfo";message PicInfo { int32 ID = 1; int64 GoodID = 2;        string Url = 3; string Guid = 4; string Type = 5; int32 Order = 6;
}
jute描述文件:
module test {class PicInfo {int ID;long GoodID;ustring Url;ustring Guid;ustring Type;int Order;}
}
然后通过各自的生成工具,生成对应的类文件,以下是测试代码
protobuf测试代码:
public class Protobuf_Test {public static void main(String[] args)throws InvalidProtocolBufferException {long startTime = System.currentTimeMillis();byte[] result = null;for (int i = 0; i < 50000; i++) {GoodsPicInfo.PicInfo.Builder builder = GoodsPicInfo.PicInfo.newBuilder();builder.setGoodID(100);builder.setGuid("11111-22222-3333-444");builder.setOrder(0);builder.setType("ITEM");builder.setID(10);builder.setUrl("http://xxx.jpg");GoodsPicInfo.PicInfo info = builder.build();result = info.toByteArray();}long endTime = System.currentTimeMillis();System.out.println("字节数大小:" + result.length + ",序列化花费时间:"+ (endTime - startTime) + "ms");for (int i = 0; i < 50000; i++) {GoodsPicInfo.PicInfo newBean = GoodsPicInfo.PicInfo.getDefaultInstance();MessageLite prototype = newBean.getDefaultInstanceForType();newBean = (PicInfo) prototype.newBuilderForType().mergeFrom(result).build();}long endTime2 = System.currentTimeMillis();System.out.println("反序列化花费时间:" + (endTime2 - endTime) + "ms");}
}
jute测试代码:
public class Jute_test {public static void main(String[] args) throws IOException {long startTime = System.currentTimeMillis();byte array[] = null;for (int i = 0; i < 50000; i++) {ByteArrayOutputStream baos = new ByteArrayOutputStream();BinaryOutputArchive boa = BinaryOutputArchive.getArchive(baos);new PicInfo(10, 100, "http://xxx.jpg", "11111-22222-3333-444","ITEM", 0).serialize(boa, "tag" + i);array = baos.toByteArray();}long endTime = System.currentTimeMillis();System.out.println("字节数大小:" + array.length + ",序列化花费时间:"+ (endTime - startTime) + "ms");for (int i = 0; i < 50000; i++) {ByteArrayInputStream bais = new ByteArrayInputStream(array);BinaryInputArchive bia = BinaryInputArchive.getArchive(bais);PicInfo newBean = new PicInfo();newBean.deserialize(bia, "tag1");}long endTime2 = System.currentTimeMillis();System.out.println("反序列化花费时间:" + (endTime2 - endTime) + "ms");}
}
分别进行50000次的序列化操作和反序列化操作,结果如下:
protobuf:字节数大小:48,序列化花费时间:141ms,反序列化花费时间:62ms
jute:字节数大小:66,序列化花费时间:94ms,反序列化花费时间:62ms
jute在序列化的花费的时间上占有一定的优势,但是字节数大小不太理想。
总结
本文从一个简单的实例入手,然后分析了几个核心类,了解到jute支持的数据类型,支持的语言,以及它的序列化和反序列化都是基于jdk的DataOutput和DataInput来实现的;然后了解了jute的数据描述语言;最后和protobuf就行对比,发现jute还是有自己的优势,我想这也是Zookeeper一直把jute当做自己的序列化工具的部分原因吧。
转载于:https://my.oschina.net/OutOfMemory/blog/819471
Zookeeper序列化组件Jute分析相关推荐
- 【Zookeeper读书笔记-2】序列化框架Jute
1 Jute概念 ZK客户端与服务端的网络通信和数据传输,需要首先解决的事数据序列化与反序列化问题. Jute前身是Hadoop Record IO,后来Hadoop框架采用Avro(跨语言特性好,数 ...
- Zookeeper 序列化
读完这篇文章你将会收获到 在 Zookeeper 源码项目中新建模块,使用 Jute 进行序列化和反序列化 修改 Jute 中的 buffer size 来序列化/反序列化大对象 序言 从 前面的文章 ...
- Zookeeper——序列化与反序列化原理
摘要 我们大概清楚了使用 ZooKeeper 实现一些功能的主要方式,也就是通过客户端与服务端之间的相互通信.那么首先要解决的问题就是通过网络传输数据,而要想通过网络传输我们定义好的 Java 对象数 ...
- Zookeeper序列化及通信协议
一.Jute Jute是Zookeeper底层序列化组件,其用于Zookeeper进行网络数据传输和本地磁盘数据存储的序列化和反序列化工作. 2.1 Jute序列化 MockReHeader实体类 p ...
- Rest Framework:序列化组件
Django内置的serializers(把对象序列化成json字符串 from django.core import serializersdef test(request):book_list = ...
- 8,协议序列化组件NewLife.Serialization
<?xml:namespace prefix = o /> 在开发某些需要跟第三方平台交互的项目时,往往需要解析或者构造符合对方协议要求的数据格式,该操作在.Net中有个很漂亮的名字--序 ...
- APIView与序列化组件使用
APIView基本使用 1.什么是APIView Django中视图views.py有两种一种是基于类的实现另一种是函数的实现,而APIView就是REST framework提供的所有视图的基类,继 ...
- Rest Framework第二天-序列化组件(下)、解析器
序列化组件(下) 一.rest-framework序列化之ModelSerializer class BookSerializers(serializers.ModelSerializer):clas ...
- 1. DRF 序列化组件
0. 环境创建 * 1. 新建一个项目 * 2. 修改 tempaltes路径问题 # 修改模板文件路径拼接问题 'DIRS': [BASE_DIR, 'templates'] * 3. 在app01 ...
最新文章
- 过拟合的原因以及解决办法(深度学习)
- go 1.4支持Android的说明(译文)
- 机器学习中的DCGAN-Tensorflow:用于更稳定的训练
- 光源时间_天哪!你们居然都错了!D65光源,指的是上午还是下午的太阳光?
- mysql+monitor+下载_详解MySQL监控工具 mysql-monitor
- 2020-WEB开发路线图,和即将到来的 2021-WEB技术清单
- boost::graph模块实现读写graphml的测试程序
- 【渝粤教育】国家开放大学2018年春季 0599-22T工程造价管理基础理论与相关法规 参考试题
- 苹果支付:如何解决沙盒环境下获取可恢复购买项为空
- 关于通过dll导出类模板和函数模板
- CVE-2015-1642 POC
- MATLAB图形插入标题
- linux mysql 查询慢_linux – MySQL非常简单的SELECT查询速度极慢
- redis 内存管理分析
- UVA10375 POJ2613 ZOJ1863 Choose and divide【组合计算+迭代】
- python笔记(1)安装调试
- 从办公桌可以看透一个人
- OpenCV绘制朱利亚(Julia)集合图形
- 【从零开始玩量化7】easyTrader: 自动化(程序化)交易利器
- iOS XCode 解决 error: Unable to load contents of file list
热门文章
- 仅用一台电脑如何同时打开多个平台、登录多个账号?
- 转 jmeter 等待时间 pacing think time
- 注释部分为spring循环依赖的解释,由于方便调阅源码使用了很对{@link},所以讲这文件放在spring源码中阅读会比较方便
- Android开发板串口(SerialPort)通信
- 软件测试兼容性常用手机,手机app兼容性测试,主要是针对哪些方面测试?
- 不宁腿的巨大危害你可能不知道!
- 限制 video 播放 快进 (vue)
- AWS EC2手动/自动切换Elastic IP
- uniapp引入uview 后sass-loader报错解决
- 微信小程序案例 | 微信用户授权登录,无需cookie