Android 基站定位源代码
1 相关技术内容
Google Android Api里面的TelephonyManager的管理。
联通、移动、电信不同制式在获取基站位置的代码区别。
通过基站的基本信息,通过Google Gears获取对应的GPS经纬度。
通过Google Map API根据GPS经纬度获取当前位置。
2 目前存在的几个问题
由于得到的GPS经纬度在Google Map上面显示需要偏移,这块暂时没有进行处理。
没有使用PhoneStateListener来对状态实时进行更新。
没有使用线程异步获取数据
没有使用服务的方式来实时获取数据
所以如果是商业使用的话,还需进一步修改。
3 当然本部分代码已经移植到我们的家庭卫士的项目中了,2提到的问题全部解决了。
下面我针对第一部分的四大内容进行代码注解。
1 Google Android Api里面的TelephonyManager的管理。
TelephonyManager tm = (TelephonyManager) getSystemService(Context.TELEPHONY_SERVICE);
这个接口的源代码可以通过设置在项目里面查看,这里不具体附上了。
得到TelephonyManager后,由于针对不同的运营商,代码有所不同,所以需要判断getNetworkType()
在源代码里面有如下的类型定义
01
|
/** Network type is unknown */
|
02
|
public static final int NETWORK_TYPE_UNKNOWN = 0;
|
03
|
/** Current network is GPRS */
|
04
|
public static final int NETWORK_TYPE_GPRS = 1;
|
05
|
/** Current network is EDGE */
|
06
|
public static final int NETWORK_TYPE_EDGE = 2;
|
07
|
/** Current network is UMTS */
|
08
|
public static final int NETWORK_TYPE_UMTS = 3;
|
09
|
/** Current network is CDMA: Either IS95A or IS95B*/
|
10
|
public static final int NETWORK_TYPE_CDMA = 4;
|
11
|
/** Current network is EVDO revision 0*/
|
12
|
public static final int NETWORK_TYPE_EVDO_0 = 5;
|
13
|
/** Current network is EVDO revision A*/
|
14
|
public static final int NETWORK_TYPE_EVDO_A = 6;
|
15
|
/** Current network is 1xRTT*/
|
16
|
public static final int NETWORK_TYPE_1xRTT = 7;
|
17
|
/** Current network is HSDPA */
|
18
|
public static final int NETWORK_TYPE_HSDPA = 8;
|
19
|
/** Current network is HSUPA */
|
20
|
public static final int NETWORK_TYPE_HSUPA = 9;
|
21
|
/** Current network is HSPA */
|
22
|
public static final int NETWORK_TYPE_HSPA = 10;
|
2 联通、移动、电信不同制式在获取基站位置的代码区别。
这部分是我实际测试出来的,经过无数次的拆机,放卡,才实现了不同制式的完美实现。
代码如下:
01
|
TelephonyManager tm = (TelephonyManager) getSystemService(Context.TELEPHONY_SERVICE);
|
02
|
int type = tm.getNetworkType();
|
03
|
//中国电信为CTC
|
04
|
//NETWORK_TYPE_EVDO_A是中国电信3G的getNetworkType
|
05
|
//NETWORK_TYPE_CDMA电信2G是CDMA
|
06
|
if (type == TelephonyManager.NETWORK_TYPE_EVDO_A || type == TelephonyManager.NETWORK_TYPE_CDMA || type ==TelephonyManager.NETWORK_TYPE_1xRTT)
|
07
|
{
|
08
|
}
|
09
|
//移动2G卡 + CMCC + 2
|
10
|
//type = NETWORK_TYPE_EDGE
|
11
|
else if(type == TelephonyManager.NETWORK_TYPE_EDGE)
|
12
|
{
|
13
|
}
|
14
|
//联通的2G经过测试 China Unicom 1 NETWORK_TYPE_GPRS
|
15
|
else if(type == TelephonyManager.NETWORK_TYPE_GPRS)
|
16
|
{
|
17
|
|
18
|
}
|
19
|
else
|
20
|
{
|
21
|
tv.setText("Current Not Support This Type.");
|
22
|
}
|
3 通过基站的基本信息,通过Google Gears获取对应的GPS经纬度。
这部分前面的两篇文章都有提到,代码参考了网友们的代码,感谢感谢。
01
|
private Location callGear(ArrayList cellID) {
|
02
|
if (cellID == null) return null;
|
03
|
DefaultHttpClient client = new DefaultHttpClient();
|
04
|
HttpPost post = new HttpPost(
|
05
|
"http://www.google.com/loc/json");
|
06
|
JSONObject holder = new JSONObject();
|
07
|
try {
|
08
|
holder.put("version", "1.1.0");
|
09
|
holder.put("host", "maps.google.com");
|
10
|
holder.put("home_mobile_country_code", cellID.get(0).mobileCountryCode);
|
11
|
holder.put("home_mobile_network_code", cellID.get(0).mobileNetworkCode);
|
12
|
holder.put("radio_type", cellID.get(0).radioType);
|
13
|
holder.put("request_address", true);
|
14
|
if ("460".equals(cellID.get(0).mobileCountryCode))
|
15
|
holder.put("address_language", "zh_CN");
|
16
|
else
|
17
|
holder.put("address_language", "en_US");
|
18
|
JSONObject data,current_data;
|
19
|
JSONArray array = new JSONArray();
|
20
|
current_data = new JSONObject();
|
21
|
current_data.put("cell_id", cellID.get(0).cellId);
|
22
|
current_data.put("location_area_code", cellID.get(0).locationAreaCode);
|
23
|
current_data.put("mobile_country_code", cellID.get(0).mobileCountryCode);
|
24
|
current_data.put("mobile_network_code", cellID.get(0).mobileNetworkCode);
|
25
|
current_data.put("age", 0);
|
26
|
array.put(current_data);
|
27
|
if (cellID.size() > 2) {
|
28
|
for (int i = 1; i < cellID.size(); i++) {
|
29
|
data = new JSONObject();
|
30
|
data.put("cell_id", cellID.get(i).cellId);
|
31
|
data.put("location_area_code", cellID.get(i).locationAreaCode);
|
32
|
data.put("mobile_country_code", cellID.get(i).mobileCountryCode);
|
33
|
data.put("mobile_network_code", cellID.get(i).mobileNetworkCode);
|
34
|
data.put("age", 0);
|
35
|
array.put(data);
|
36
|
}
|
37
|
}
|
38
|
holder.put("cell_towers", array);
|
39
|
StringEntity se = new StringEntity(holder.toString());
|
40
|
Log.e("Location send", holder.toString());
|
41
|
post.setEntity(se);
|
42
|
HttpResponse resp = client.execute(post);
|
43
|
HttpEntity entity = resp.getEntity();
|
44
|
|
45
|
BufferedReader br = new BufferedReader(
|
46
|
new InputStreamReader(entity.getContent()));
|
47
|
StringBuffer sb = new StringBuffer();
|
48
|
String result = br.readLine();
|
49
|
while (result != null) {
|
50
|
Log.e("Locaiton receive", result);
|
51
|
sb.append(result);
|
52
|
result = br.readLine();
|
53
|
}
|
54
|
if(sb.length() return null;
|
55
|
data = new JSONObject(sb.toString());
|
56
|
data = (JSONObject) data.get("location");
|
57
|
|
58
|
Location loc = new Location(LocationManager.NETWORK_PROVIDER);
|
59
|
loc.setLatitude((Double) data.get("latitude"));
|
60
|
loc.setLongitude((Double) data.get("longitude"));
|
61
|
loc.setAccuracy(Float.parseFloat(data.get("accuracy").toString()));
|
62
|
loc.setTime(GetUTCTime());
|
63
|
return loc;
|
64
|
} catch (JSONException e) {
|
65
|
return null;
|
66
|
} catch (UnsupportedEncodingException e) {
|
67
|
e.printStackTrace();
|
68
|
} catch (ClientProtocolException e) {
|
69
|
e.printStackTrace();
|
70
|
} catch (IOException e) {
|
71
|
e.printStackTrace();
|
72
|
}
|
73
|
return null;
|
74
|
}
|
4 通过Google Map API根据GPS经纬度获取当前位置。
本部分代码参考了 简单基站定位程序 ,感谢雷一兄这么好的文章。同时雷一兄的排版真的非常好看,清晰明了。
01
|
private String getLocation(Location itude) throws Exception {
|
02
|
String resultString = "";
|
03
|
|
04
|
/** 这里采用get方法,直接将参数加到URL上 */
|
05
|
String urlString = String.format("http://maps.google.cn/maps/geo?key=abcdefg&q=%s,%s", itude.getLatitude(), itude.getLongitude());
|
06
|
Log.i("URL", urlString);
|
07
|
|
08
|
/** 新建HttpClient */
|
09
|
HttpClient client = new DefaultHttpClient();
|
10
|
/** 采用GET方法 */
|
11
|
HttpGet get = new HttpGet(urlString);
|
12
|
try {
|
13
|
/** 发起GET请求并获得返回数据 */
|
14
|
HttpResponse response = client.execute(get);
|
15
|
HttpEntity entity = response.getEntity();
|
16
|
BufferedReader buffReader = new BufferedReader(newInputStreamReader(entity.getContent()));
|
17
|
StringBuffer strBuff = new StringBuffer();
|
18
|
String result = null;
|
19
|
while ((result = buffReader.readLine()) != null) {
|
20
|
strBuff.append(result);
|
21
|
}
|
22
|
resultString = strBuff.toString();
|
23
|
|
24
|
/** 解析JSON数据,获得物理地址 */
|
25
|
if (resultString != null && resultString.length() > 0) {
|
26
|
JSONObject jsonobject = new JSONObject(resultString);
|
27
|
JSONArray jsonArray = new JSONArray(jsonobject.get("Placemark").toString());
|
28
|
resultString = "";
|
29
|
for (int i = 0; i < jsonArray.length(); i++) {
|
30
|
resultString = jsonArray.getJSONObject(i).getString("address");
|
31
|
}
|
32
|
}
|
33
|
} catch (Exception e) {
|
34
|
throw new Exception("获取物理位置出现错误:" + e.getMessage());
|
35
|
} finally {
|
36
|
get.abort();
|
37
|
client = null;
|
38
|
}
|
39
|
|
40
|
return resultString;
|
41
|
}
|
5 最关键的出来了,附上代码吧。
下载地址:http://download.csdn.net/detail/t80t90s/4558226
补充一下:
在AndroidMenifest.xml里面需要加上
android.permission.INTERNET、android.permission.ACCESS_COARSE_LOCATION、android.permission.READ_PHONE_STATE权限,否则会出错。
放在Application包前面。
6 图片看一下效果吧。
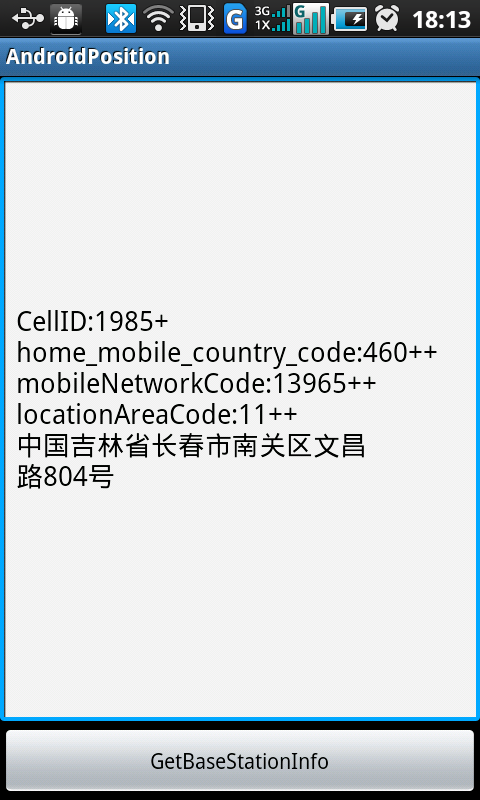
7 另外在提交数据到Google Gears的时候,格式如下
发送到Google的数据格式:
02-24 18:08:20.550: E/Location send(12892): {“address_language”:”zh_CN”,”host”:”maps.google.com”,”radio_type”:”cdma”,”home_mobile_country_code”:”460″,”home_mobile_network_code”:”13965″,”cell_towers”:[{"mobile_network_code":"13965","location_area_code":11,"cell_id":1985,"age":0,"mobile_country_code":"460"}],”request_address”:true,”version”:”1.1.0″}
接收到Google的数据格式:
02-24 18:08:22.975: E/Locaiton receive(12892): {“location”:{“latitude”:43.8595097,”longitude”:125.3355736,”address”: {“country”:”中国”,”country_code”:”CN”,”region”:”吉林省”,”city”:”长春市”,”street”:”文昌路”,”street_number”:”"},”accuracy”:1815.0},”access_token”:”2:_Kpk9mOFMgyWgLai:8iWlDpBYZsp4_VxO”}
-End-
Android 基站定位源代码相关推荐
- Android基站定位
Android基站定位 一.通过手机信号获取基站信息 通过TelephonyManager 获取lac:mcc:mnc:cell-id(基站信息)的解释: MCC,Mobile Country C ...
- Android基站定位——单基站定位(二)
转载请标明出处:http://blog.csdn.net/android_ls/article/details/8672856 基站定位原理:通过手机信号获取基站信息,然后调用第三方公开的根据基站信息 ...
- Android基站定位——通过手机信号获取基站信息(一)
转载请标明出处:http://blog.csdn.net/android_ls/article/details/8672442 基站定位原理:通过手机信号获取基站信息,然后调用第三方公开的根据基站信息 ...
- Android基站定位——三基站(多基站)定位(三)
转载请标明出处:http://blog.csdn.net/android_ls/article/details/8673532 这一篇基于:Android基站定位--单基站定位(二) 阐述几个概念: ...
- 无线基站定位服务器,android 基站定位api
android 基站定位api 内容精选 换一换 网络告警需要有确切的发生时间.所在网元.告警名称等信息,且告警能挂载于拓扑数据的网元之上.具体告警数据格式参见API文档.设备之间需要有确定的拓扑关系 ...
- Android基站定位——通过手机信号获取基站信息
基站定位原理:通过手机信号获取基站信息,然后调用第三方公开的根据基站信息查找基站的经纬度值,想要具体地址信息的再根据经纬度值获取具体的地址信息. 一.通过手机信号获取基站信息 通过TelephonyM ...
- android 基站定位
这里给大家分享下基站定位的实现,基站定位首先要通过TelephonyManager得到手机的信号信息,比如基站的国家编码,小区id等......得到这些后需要向google提供的接口提交这些参数,然后 ...
- 真实可行的android 基站定位代码
来自:http://blog.csdn.net/swqqcs/article/details/7064532 大部分国产的Android定制机里不支持最简单实用的基站和WIFI定位,只能使用速度慢而耗 ...
- android 基站定位 api,基站定位查询接口 - whoisliang的个人空间 - OSCHINA - 中文开源技术交流社区...
本站查询接口免费开放 所有免费接口禁止从移动设备端直接访问,请使用固定IP的服务器转发请求. 每5分钟限制查询300次,基站/WIFI/经纬度查询接口每日限制查询1000次,反向基站查询接口每日限制查 ...
最新文章
- 边缘检测robert原理_机器视觉边缘模式检测应用
- pytorh 激活函数,循环神经网络层,损失函数和优化器
- Spark Streaming实现实时WordCount,DStream的使用,updateStateByKey(func)实现累计计算单词出现频率
- 基于verilog的洗衣机设计
- ( )不是html的布局标签,不要使用的HTML标签(WEB标准网页布局)
- css知识笔记(一)——基础知识、选择器、元素分类
- Java案例:Karel学习Java
- 淘宝的开源分布式文件系统TFS
- spring boot--拦截器实现
- python创意小作品代码-超全代码详解 Python 制作精美炫酷图表教程
- 训练集,验证集与测试集
- 华为路由器DDNS设置and NAT内网映射 and SSH
- github上比较好用的第三方库
- MongoDB ODM
- 组件化-创建私有组件库库
- 《PYTHON编程初学者指南》pdf
- 如何扩展Orchard
- 仿苹果手机闹钟_高仿iOS系统闹钟 UserNotifications
- 每日一练 JS30天挑战 数组操作实例
- U9服务器显示不全,U9常见技术问题分析与解决.docx