python保存图片到指定路径_python 抓取页面数据,并保存图片文本到指定目录文件夹...
这个爬虫主要利用scrapy+beautifulsoup完成,其中图片保存碰到了一个大坑,花了一天的时间才解决。
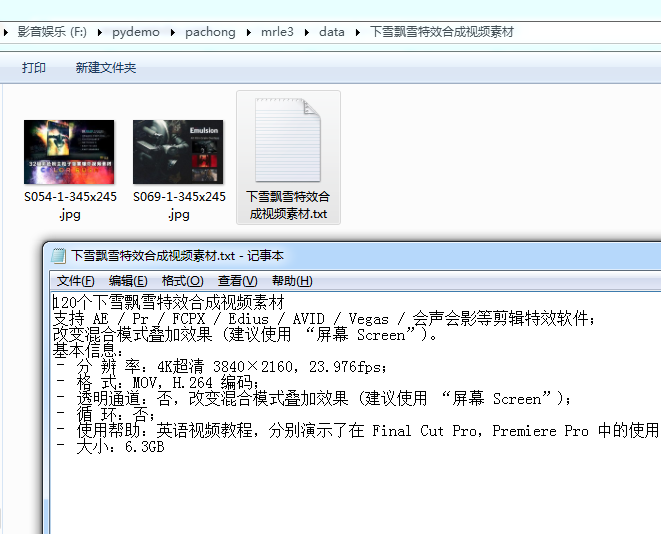
大坑就是:在抓取文章页指定区域所有图片的时候,刚好那块区域的图片所有页面都一样,导致图片下载完第一个页面的时候,其他页面就不会再去下载了。所以其他文件夹里没有图片数据。一开始以为代码写错了,最后换了个地址才找到原因,ImagesPipeline实现图片下载中 同样的图是不会重复下载的!
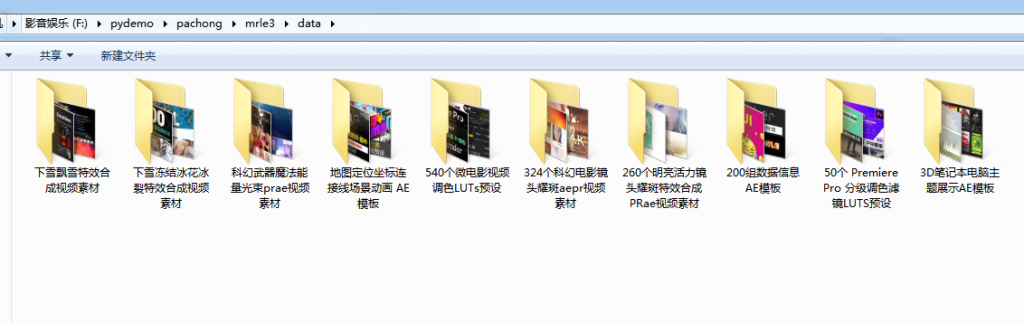
成功后的效果图如下:
items.py文件代码编写
# -*- coding: utf-8 -*-
# Define here the models for your scraped items
#
# See documentation in:
# https://docs.scrapy.org/en/latest/topics/items.html
import scrapy
class mrle3Item(scrapy.Item):
#定义一个类mrleItem,它继承自scrapy.Item
picurl = scrapy.Field()
title = scrapy.Field()
wenzi = scrapy.Field()
link = scrapy.Field()
video = scrapy.Field()
urls = scrapy.Field()
setting.py 代码编写
# -*- coding: utf-8 -*-
# Scrapy settings for mrle project
#
# For simplicity, this file contains only settings considered important or
# commonly used. You can find more settings consulting the documentation:
#
# https://docs.scrapy.org/en/latest/topics/settings.html
# https://docs.scrapy.org/en/latest/topics/downloader-middleware.html
# https://docs.scrapy.org/en/latest/topics/spider-middleware.html
BOT_NAME = 'mrle3'
SPIDER_MODULES = ['mrle3.spiders']
NEWSPIDER_MODULE = 'mrle3.spiders'
#存储路径 决定文件存储在哪个文件夹下面
IMAGES_STORE = 'data'
# 定义接受图片的变量
IMAGES_URLS_FIELD = 'urls'
# Crawl responsibly by identifying yourself (and your website) on the user-agent
DEFAULT_REQUEST_HEADERS = {
# 'Accept': 'text/html,application/xhtml+xml,application/xml;q=0.9,*/*;q=0.8',
# 'Accept-Language': 'en',
'User-agent': 'Mozilla/5.0 (Linux; U; Android 2.3.7; en-us; Nexus One Build/FRF91) AppleWebKit/533.1 (KHTML, like Gecko) Version/4.0 Mobile Safari/533.1',
}
# Obey robots.txt rules
ROBOTSTXT_OBEY = False
# Configure maximum concurrent requests performed by Scrapy (default: 16)
#CONCURRENT_REQUESTS = 32
# Configure a delay for requests for the same website (default: 0)
# See https://docs.scrapy.org/en/latest/topics/settings.html#download-delay
# See also autothrottle settings and docs
DOWNLOAD_DELAY = 0.5
# The download delay setting will honor only one of:
#CONCURRENT_REQUESTS_PER_DOMAIN = 16
#CONCURRENT_REQUESTS_PER_IP = 16
# Disable cookies (enabled by default)
#COOKIES_ENABLED = False
# Disable Telnet Console (enabled by default)
#TELNETCONSOLE_ENABLED = False
# Override the default request headers:
#DEFAULT_REQUEST_HEADERS = {
# 'Accept': 'text/html,application/xhtml+xml,application/xml;q=0.9,*/*;q=0.8',
# 'Accept-Language': 'en',
#}
# Enable or disable spider middlewares
# See https://docs.scrapy.org/en/latest/topics/spider-middleware.html
#SPIDER_MIDDLEWARES = {
# 'mrle.middlewares.MrleSpiderMiddleware': 543,
#}
# Enable or disable downloader middlewares
# See https://docs.scrapy.org/en/latest/topics/downloader-middleware.html
#DOWNLOADER_MIDDLEWARES = {
# 'mrle.middlewares.MrleDownloaderMiddleware': 543,
#}
# Enable or disable extensions
# See https://docs.scrapy.org/en/latest/topics/extensions.html
#EXTENSIONS = {
# 'scrapy.extensions.telnet.TelnetConsole': None,
#}
# Configure item pipelines
# See https://docs.scrapy.org/en/latest/topics/item-pipeline.html
ITEM_PIPELINES = {
'mrle3.pipelines.Mrle3Pipeline': 300,
'mrle3.pipelines.ImagesspiderPipeline': 400,
}
# Enable and configure the AutoThrottle extension (disabled by default)
# See https://docs.scrapy.org/en/latest/topics/autothrottle.html
#AUTOTHROTTLE_ENABLED = True
# The initial download delay
#AUTOTHROTTLE_START_DELAY = 5
# The maximum download delay to be set in case of high latencies
#AUTOTHROTTLE_MAX_DELAY = 60
# The average number of requests Scrapy should be sending in parallel to
# each remote server
#AUTOTHROTTLE_TARGET_CONCURRENCY = 1.0
# Enable showing throttling stats for every response received:
#AUTOTHROTTLE_DEBUG = False
# Enable and configure HTTP caching (disabled by default)
# See https://docs.scrapy.org/en/latest/topics/downloader-middleware.html#httpcache-middleware-settings
#HTTPCACHE_ENABLED = True
#HTTPCACHE_EXPIRATION_SECS = 0
#HTTPCACHE_DIR = 'httpcache'
#HTTPCACHE_IGNORE_HTTP_CODES = []
#HTTPCACHE_STORAGE = 'scrapy.extensions.httpcache.FilesystemCacheStorage'
爬虫处理文件编写
import scrapy
import bs4
import csv
from ..items import mrle3Item
# 需要引用mrleItem,它在items里面。因为是items在deal.py的上一级目录,所以要用..items,这是一个固定用法。
class mrle3Spider(scrapy.Spider):
#定义一个爬虫类mrle3Spider。
name = 'mrle3'
#定义爬虫的名字。
allowed_domains = ['www.lovelifemrle.com']
#定义爬虫爬取网址的域名。
start_urls = []
#定义起始网址。
for x in range(1):
url = 'http://www.lovelifemrle.com/page/' + str(x+1)
start_urls.append(url)
def parse(self, response):
#parse是默认处理response的方法。
bs = bs4.BeautifulSoup(response.text,'html.parser')
#用BeautifulSoup解析response。
datas = bs.find_all('div',class_="post-inner post-hover")
for data in datas:
#遍历data。
#获取文章页地址
url = data.find('a')['href']
yield scrapy.Request(url, callback=self.parse_job)
#用yield语句把构造好的request对象传递给引擎。用scrapy.Request构造request对象。callback参数设置调用parsejob方法。
def parse_job(self, response):
#定义新的处理response的方法parse_job(方法的名字可以自己起)
bs = bs4.BeautifulSoup(response.text, 'html.parser')
item = mrle3Item()
item['title'] = bs.find(class_="post-title entry-title").text
try:
item['video'] = bs.find('source')['src']
except:
item['video'] = '默认值'
item['link'] = bs.find('link', rel="canonical")['href']
item['wenzi'] = bs.find('div', class_="entry-inner").find('p',style='font-size: 20px; line-height: 30px;').text
# 抓取文章内容部分第一张图片地址
item['picurl'] = bs.find('div', class_="post-inner group").find('img')['src']
#获取底部相关推荐图片
item['urls'] = bs.find('ul', class_="related-posts group").find_all('img')
yield item
pipelines文件代码编写
# -*- coding: utf-8 -*-
# Define your item pipelines here
#
# Don't forget to add your pipeline to the ITEM_PIPELINES setting
# See: https://docs.scrapy.org/en/latest/topics/item-pipeline.html
import scrapy
from scrapy.spiders import Request
from scrapy.pipelines.images import ImagesPipeline # 下载图片的管道
import os
import openpyxl
class Mrle3Pipeline(object):
#定义一个JobuiPipeline类,负责处理item
def __init__(self):
#初始化函数 当类实例化时这个方法会自启动
self.wb =openpyxl.Workbook()
#创建工作薄
self.ws = self.wb.active
#定位活动表
self.ws.append(['标题', '地址', '视频', '图片地址', '文章内容'])
#用append函数往表格添加表头
def create_dir(self, path):
# 去除首位空格
path = path.strip()
# 去除尾部 \ 符号
path = path.rstrip("\\")
# 判断路径是否存在
isExists = os.path.exists(path)
# 判断结果
if not isExists:
# 如果不存在则创建目录
# 创建目录操作函数
os.makedirs(path)
print(path + ' 创建成功')
return True
else:
# 如果目录存在则不创建,并提示目录已存在
print(path + ' 目录已存在')
return False
def process_item(self, item, spider):
#process_item是默认的处理item的方法,就像parse是默认处理response的方法
plist=[]
for url in item['urls']:
plist.append(url.get('src'))
stra=','
line = [item['title'], item['link'], item['video'], stra.join(plist), item['wenzi']] #join() 方法用于将序列中的元素以指定的字符连接生成一个新的字符串
#把名称、链接、视频地址都写成列表的形式,赋值给line
self.ws.append(line)
#用append函数把数据都添加进表格
#新建以标题命名的文件夹
path = "data/" + item["title"].replace('/','')
self.create_dir(path)
with open(path + '/'+ item["title"].replace('/','') +'.txt', 'w') as file:
file.write(item['wenzi'])
return item
#将item丢回给引擎,如果后面还有这个item需要经过的itempipeline,引擎会自己调度
def close_spider(self, spider):
#close_spider是当爬虫结束运行时,这个方法就会执行
self.wb.save('./mrle3.xlsx')
#保存文件
self.wb.close()
# 关闭文件
class ImagesspiderPipeline(ImagesPipeline):
#scrapy自带的处理函数
def get_media_requests(self, item, info):
# '''获取图片的url,通过Request方法,保存图片'''
for imgurl in item['urls']:
downurl = imgurl.get('src')
yield Request(downurl, meta={'item': item}) # # # # 这里meta={'item': item},目的事件item传递到file_path中
def file_path(self, request, response=None, info=None):
# '''图片保存的路径'''
item = request.meta['item']
#replace('/','')把地址中的/去掉 避免文件夹层级出错
path = item["title"].replace('/','')
# print('得到的地址'+request.url)
img_name = request.url.split('/')[-1] #获取xxxx.jpg
#img_name= item["title"].replace('/','')
# 图片路径将是data/文章标题/xxx.jpg data在setting里设置 文件夹没有会自动创建
# path = path + '/' + img_name + '.jpg'
path = path + '/' + img_name
print("图片路径+++++++++++++", path)
return path
python保存图片到指定路径_python 抓取页面数据,并保存图片文本到指定目录文件夹...相关推荐
- Python语言程序设计之urllib.request抓取页面,网易公开课之《麻省理工学院公开课:算法导论》
Python语言用urllib.request模块抓取页面非常简单,再将抓取的页面内容用re模块解析,找出自己想要的东西.下面就就此方法来抓取网易公开课之<麻省理工学院公开课:算法导论>, ...
- 爬虫抓取页面数据原理(php爬虫框架有很多 )
爬虫抓取页面数据原理(php爬虫框架有很多 ) 一.总结 1.php爬虫框架有很多,包括很多傻瓜式的软件 2.照以前写过java爬虫的例子来看,真的非常简单,就是一个获取网页数据的类或者方法(这里的话 ...
- 知乎爬虫之4:抓取页面数据
git爬虫项目地址( 终于上传代码了~~~~关注和star在哪里):https://github.com/MatrixSeven/ZhihuSpider(已完结) 附赠之前爬取的数据一份(mysql) ...
- java 爬数据工具 知乎_知乎爬虫之4:抓取页面数据
本文由博主原创,转载请注明出处:知乎爬虫之4:抓取页面数据 咱们上一篇分析了知乎的登陆请求和如何拿到粉丝/关注的请求,那么咱们这篇就来研究下如何拿利用Jsoup到咱们想要的数据. 那么咱们说下,首先请 ...
- PHP利用正则表达式抓取页面数据
PHP利用正则表达式抓取页面数据 (记录一下,00后程序员第一天写博客,2021/4/1) (抓取招头标网站中的数据) <?php header('Content-Type:text/html; ...
- python爬关键词百度指数_Python 抓取指定关键词的百度指数
百度指数很多时候在我们做项目的时候会很有帮助,从搜索引擎的流量端给到我们一些帮助,比如:家具行业的销量跟"装修","新房","二手房"等关键 ...
- python抓取页面数据实例
抓取文章数据保存在本地 #coding=utf-8 import urllib import redef getHtml(url):page = urllib.urlopen(url)html = p ...
- python下载图片怎么保存_Python抓取站酷作品图片并保存至本地
思路 1.通过 requests 模块请求网页,获取到网页的源码,其中包含了作品集的 URL 2.通过 BeautifulSoup 提取到作品集的 URL ,返回为列表,使用 for 循环遍历作品集 ...
- python大众点评霸王餐_python抓取大众点评商户信息
数据说明: 本次爬取大众点评共8个字段信息,包括: 商户名字, 口味评分, 环境评分,服务评分,人均价格,评论数量,地址,商户星级 然后把数据存入excel表格 一 .首页部分 我们可以看到有很多分类 ...
最新文章
- python数据结构与算法(二)
- Android面试题目之五: 算法题--嵌套的信封
- redis 五大数据结构__常用命令
- STM32中stm32f0xx_flash.icf文件的作用详解!
- WPF 3D和光照学习1
- 运维分级发布_华为杨超斌发布面向“1+N”目标网的5G全系列解决方案
- mysql延迟注入br_(原创)安全狗SQL注入绕过思路[sql注入waf绕过][sql注入bypass]
- 教你读懂Ajax的工作原理
- Pandas Timedelta对象
- CCF 2014-3-2 窗口
- 数据类型oracle,oracle的数据类型
- c++用数组初始化向量_用C ++初始化向量
- html项目组成员分工情况,分工.html · zhongjingxin/APP_I组_期末项目PRD文档 - Gitee.com...
- 聚类算法之密度聚类方法
- lenovo G50-80bios设置U盘启动选项及win10永久激活及win10下载
- 全球领导人齐聚一堂,出席10月14日召开的2021年全球包容性增长峰会
- 访问服务器硬盘速度慢,硬盘读取速度变慢 当前传输模式pio的解决方法
- TIA博途_数据的保持型与初始化的具体方法和相关问题汇总
- Android静态壁纸和动态壁纸的使用和理解
- 常用的加密方式有哪些?
热门文章
- 无意看到的一篇文章,有我的影子
- 一位资深开发的个人经历(走心好文)
- 2021年跨境电商行业相关数据
- 输入年份和月份,求该月有多少天
- 西交《物理化学》在线作业
- 堆排序基础讲解(代码+注释)
- SwapMix: Diagnosing and Regularizing the Over-Reliance on Visual Context in ... ——2022 CVPR 论文笔记
- 5、Dubbo-监控中心
- vue 中provide的用法_vue 中的 provide 和 inject 用法
- 【python办公自动化(8)】批量处理调整Excel内容字体、对齐方式、边框、填充、合并与取消合并、行高及列宽(目标数据的筛选与标记)