找不到.jack_您不了解Jack关于Firefox的知识!
找不到.jack
If you feel that the Web has lost its sparkle, that’s probably because you’re slogging across it in an old browser. I’m over here on the other side, and the grass is not only greener: there are none of those microscopic grass bugs that cause nasty rashes!
如果您觉得Web失去了光芒,那可能是因为您正在旧的浏览器中浏览它。 我在另一边,这里的草不仅绿了,而且没有引起微小皮疹的细小的草虫!
Firefox的秘密 (Firefox Secrets)
This excerpt is taken from Firefox Secrets, SitePoint’s new release, by Cheah Chu Yeow. Firefox is revolutionizing the way people browse the Web. Don’t get left behind: grab yourself a copy of Firefox Secrets and be part of the revolution!
此摘录摘自Cheah Chu Yeow的SitePoint的新版本Firefox Secrets 。 Firefox正在革新人们浏览Web的方式。 不要落伍:获取Firefox Secrets副本,并成为革命的一部分!
The title contains over 290 pages of Firefox tips, tricks and hacks, providing invaluable pointers to help you customize the browser to your specfic preferences.
标题包含290页以上的Firefox技巧,窍门和hack,提供了宝贵的指针,可帮助您根据特定的喜好自定义浏览器。
It starts with some of the better-known tweaks, such as search customizations and favourites, password, and history management. But later chapters challenge even the most hardened Firefox devotee, revealing the inner workings of Web developer extensions, RSS feed subscripton, and the little-known about:config interface.
它从一些众所周知的调整开始,例如搜索自定义和收藏夹,密码和历史记录管理。 但是后面的章节甚至挑战最坚强的Firefox爱好者,揭示Web开发人员扩展的内部工作原理,RSS feed下标以及鲜为人知的about:config接口。
This sample should give you a taste of the action. It begins at Chapter 2, Essential Browsing Features, which outlines the must-have functionality that any Firefox user should use to their advantage. We then skip to samples from Chapter 6, Tips, Tricks, and Hacks, and Chapter 7, Web Development Nirvana, through which you can roll up your sleeves and get your hands dirty tweaking the behind-the-scenes capabilities of this powerful browser. To find out more about Firefox Secrets, visit the book’s information page, or review the contents of the entire publication. As always, you can download this excerpt as a PDF if you prefer. And now, to Chapter 2.
该样本应使您尝尝一下动作。 它从第2章“基本浏览功能”开始,概述了任何Firefox用户都应利用的必备功能。 然后,我们跳到第6章,技巧,窍门和Hacks,以及第7章Web开发必杀技中的示例,通过这些示例,您可以袖手旁观,让您的手变得肮脏,从而可以调整此功能强大的浏览器的幕后功能。 要查找有关Firefox Secrets的更多信息, 请访问本书的信息页面 ,或查看整个出版物的内容 。 与往常一样,如果愿意,您可以将本摘录下载为PDF 。 现在,转到第2章。
第2章基本浏览功能 (Chapter 2. Essential Browsing Features)
This chapter is all about moving forward to browse the Web with a new sense of style. We’ll investigate the major features of Firefox and I’ll show you how to use them. You’ll learn how to explore the Web more efficiently, and with fewer interruptions. You’ll also see how you might (if you so choose) let go of a few old Web surfing habits that may be holding you back; window management habits and Web search habits are two very important examples. There may even be pictures of attractive models, both male and female. Okay, there are no models. Let’s explore Firefox!
本章都是关于以一种新的风格继续浏览Web。 我们将研究Firefox的主要功能,并向您展示如何使用它们。 您将学习如何更有效地浏览网络并减少中断。 您还将看到如何(如果您愿意的话)放弃一些可能使您退缩的旧网络冲浪习惯。 窗口管理习惯和Web搜索习惯是两个非常重要的例子。 甚至可能有吸引人的模特的照片,包括男性和女性。 好的,没有模型。 让我们探索Firefox!
标签式浏览 (Tabbed Browsing)
Tabbed browsing has been called "the best thing since sliced bread and the biggest fundamental improvement in Web browsing in years," by Walter S. Mossberg, Staff Reporter of The Wall Street Journal. It has also been criticized, rejected and labeled a useless non-innovation. You must be wondering what the big deal is with tabbed browsing and which point of view is right. You might also be curious about which side of the argument I, your intrepid author who pretends to know what’s best for you, am on. You’ll find out soon enough!
《 华尔街日报》记者沃尔特·莫斯伯格 ( Walter S. Mossberg)称,标签式浏览被称为“自切成薄片以来最好的东西,也是多年来网络浏览的最大根本改进” 。 它也受到批评,拒绝,并被标记为无用的非创新。 您一定想知道选项卡式浏览有什么大不了的,以及哪种观点是正确的。 您可能也对论据的哪一边感到好奇,我是您的勇敢作者,假装知道对您最有利。 您很快就会发现!
If you’re a stranger to tabbed browsing, you’re probably trapped in a somewhat old-fashioned Web surfing pattern. Perhaps you click on an interesting link, wait for that link to load, then press the Back button when you’ve finished reading that new page. Alternatively, perhaps you right-click (or context-click on Mac OS X) on a hyperlink and select Open in New Window on those occasions when you don’t have time to wait for the new page to load.
如果您不熟悉选项卡式浏览,那么您可能会陷入某种老式的Web冲浪模式。 也许您单击了一个有趣的链接,等待该链接加载,然后在阅读完新页面后按“返回”按钮。 或者,也许在没有时间等待新页面加载的情况下,右键单击(或在Mac OS X上上下文单击)超链接,然后选择“在新窗口中打开”。
Either way, prepare to be blown away when you see how effectively tabbed browsing eliminates waiting and unnecessary backwards and forwards tracking. You’ll be wondering how you could ever have been satisfied browsing one Web page at a time in a single window. Those who have already made the leap may still need some convincing as to why tabbed browsing is better than browsing with multiple windows. I’m here to encourage you to consider the benefits.
无论哪种方式,当您看到标签式浏览如何有效地消除等待和不必要的后退和前进跟踪时,都准备好被震撼。 您会想知道如何才能在一个窗口中一次浏览一个网页。 那些已经取得飞跃的人可能仍需要一些令人信服的信息,以了解为什么选项卡式浏览比使用多个窗口浏览更好。 我在这里鼓励您考虑这些好处。
Let’s learn everything about use of tabbed browsing in Firefox. But remember: you are not forced to use it. If you’re more comfortable with a single window per Web page, then that’s your choice. Don’t deny yourself the possibility of a better alternative, though.
让我们学习有关在Firefox中使用选项卡式浏览的所有信息。 但是请记住:您不会被迫使用它。 如果您对每个网页只有一个窗口比较满意,那么这就是您的选择。 但是,不要否认自己有更好的选择的可能性。
A Short History and a Warning
简短的历史和警告
Tabbed browsing is not that new an idea; in fact, it wasn’t invented by Firefox. It’s probable that NetCaptor, a third-party program that provides an alternative tabbed browsing interface for Internet Explorer, pioneered this approach. The Mozilla Application Suite followed hot on the heels of that tool, and more recently, Opera has, too. Opera developed a Multiple Document Interface (MDI), which is not the same as the Tabbed Document Interface (TDI) of tabbed browsing; Opera has added a faux-tabbed browsing interface in Opera 7.60 preview 3 (and later). Firefox, being a derivative of the Mozilla Application Suite, naturally inherited its tabbed browsing capability. Of course, spreadsheet tools like Microsoft Excel have used tabs in the worksheet display area for a long time.
选项卡式浏览并不是一个新想法。 实际上,它不是Firefox发明的。 第三方程序NetCaptor很可能率先采用了这种方法,该程序为Internet Explorer提供了另一种选项卡式的浏览界面。 Mozilla应用程序套件紧随其后紧随其后,最近,Opera也随之推出。 Opera开发了一个多文档界面(MDI),它与选项卡式浏览的选项卡式文档界面(TDI)不同; Opera在Opera 7.60预览版3(及更高版本)中添加了一个带有人造标签的浏览界面。 Firefox是Mozilla Application Suite的派生产品,自然地继承了其选项卡式浏览功能。 当然,像Microsoft Excel这样的电子表格工具已经在工作表显示区域中使用了很长时间的标签。
Currently, most graphical browsers support tabbed browsing. A quick (and incomplete) list of tab-enabled browsers reads: Firefox, Opera, Mozilla, Safari, Konqueror, Netscape, OmniWeb, and Camino. This list doesn’t include programs like NetCaptor, Maxthon, Avant Browser, and Crazy Browser, which add tabbed browsing functionality to Internet Explorer. The only notable exception is Internet Explorer itself, which may possibly be feature-enhanced with tabs in version 7.0.
当前,大多数图形浏览器都支持选项卡式浏览。 启用标签页的浏览器的快速(且不完整)列表显示为:Firefox,Opera,Mozilla,Safari,Konqueror,Netscape,OmniWeb和Camino。 该列表不包括NetCaptor,Maxthon,Avant Browser和Crazy Browser之类的程序,这些程序向Internet Explorer添加了选项卡式浏览功能。 唯一值得注意的例外是Internet Explorer本身,它可能通过7.0版中的选项卡进行了功能增强。
It’s important to realize that the add-ons that provide tabbed browsing functionality in Internet Explorer (such as the aforementioned NetCaptor, Maxthon, and kin) carry the same faults as the Internet Explorer engine, since they are no more than superficial "skins" over this product. This means that, when you use one of these variant browsers, you remain open to the set of security risks implied by Internet Explorer.
重要的是要意识到,在Internet Explorer中提供选项卡式浏览功能的加载项(例如上述的NetCaptor,Maxthon和kin)与Internet Explorer引擎存在相同的错误,因为它们仅不过是表面上的“外观”而已。这个产品。 这意味着,当您使用这些变体浏览器中的一个时,您仍然会面临Internet Explorer隐含的一系列安全风险。
Tabs vs. Multiple Windows
标签页与多个Windows
Here I am, stepping onto my soapbox and making the case for tabbed browsing against the alternative: multiple browser windows. Naturally, I’ll use Internet Explorer as the prime example for the case of multiple browser windows, since it’s the most popular tab-free browser. I’ll make objective arguments (I hope!) for both tabbed browsing and multiple windows, and leave it to you to make the decision as to which option suits you best.
在这里,我走到我的肥皂盒上,并针对以下选项卡进行选项卡式浏览:多个浏览器窗口。 自然,我将使用Internet Explorer作为多个浏览器窗口的主要示例,因为它是最流行的无标签浏览器。 我将为选项卡式浏览和多个窗口提供客观的参数(我希望!),然后由您自己决定哪个选项最适合您。
Organizational Differences
组织差异
Tabbed browsing doesn’t prevent the use of multiple windows; in fact, you can opt to use a browser that supports tabbed browsing in the same way as you use Internet Explorer (i.e. displaying a single window per Web page). You can use this compatibility to your advantage, mixing and matching both styles to suit your needs. Tabbed browsing groups related tabs in a single window, so you can have one window of tabs for work, another window for email and personal stuff, and so on. Tabbed browsing also lets you keep related tabs in a logical group. Multiple windows, on the other hand, are just that: a single window displays a single Web page.
标签式浏览不会阻止使用多个窗口; 实际上,您可以选择使用支持选项卡式浏览的浏览器,就像使用Internet Explorer一样(即,每个网页显示一个窗口)。 您可以利用这种兼容性来发挥自己的优势,可以混合和匹配两种样式以适合您的需求。 选项卡式浏览将与选项卡相关的选项卡组合在一个窗口中,因此您可以有一个窗口用于工作,另一个窗口用于电子邮件和个人资料,依此类推。 选项卡式浏览还使您可以将相关选项卡保留在逻辑组中。 另一方面,多个窗口就是这样:一个窗口显示单个Web页面。
There’s not much I can say to help the old-style multiple window case, even though I want to be objective. One small advantage is that closing a non-tabbed window dismisses only the single page it displays. Closing a tabbed window can dismiss a whole set of pages, some of which you may have meant to keep.
尽管我想保持客观,但我可以说的对老式多窗口案例的帮助并不多。 一个小的优点是,关闭非选项卡式窗口只会关闭它显示的单个页面。 关闭选项卡式窗口可以关闭整个页面集,您可能想保留其中的一部分。
Managing Multiple Web Pages
管理多个网页
It’s second nature for most of us to work with multiple windows simultaneously. Naturally, we expect that those windows can be operated in a manageable way, but the crunch really comes when we have a large number of Web pages open. Does Figure 2.1 below, which shows the Windows taskbar, look manageable to you? There are 14 browser windows open!
对我们大多数人来说,同时使用多个窗口是第二天性。 自然,我们希望这些窗口可以以一种可管理的方式进行操作,但是当我们打开大量网页时,真正的困难就来了。 下面显示Windows任务栏的图2.1对您来说是否易于管理? 打开14个浏览器窗口!

Figure 2.1. Using multiple browser windows in IE.
图2.1。 在IE中使用多个浏览器窗口。
I know I’d have a hard time finding the Web page I wanted here, particularly as each taskbar button shows the same unhelpful Internet Explorer icon. One solution, of course, is to use the "Group similar taskbar buttons" option that’s available on Windows XP; Linux KDE and Gnome users have an equivalent feature. Grouping helps – at least you can see the page titles, as shown in Figure 2.2. Personally, though, I dislike this feature because it requires me to click twice to reach the particular window I want.
我知道我很难在这里找到想要的网页,尤其是每个任务栏按钮都显示相同的无用Internet Explorer图标时。 当然,一种解决方案是使用Windows XP上的“分组相似任务栏按钮”选项。 Linux KDE和Gnome用户具有等效的功能。 分组帮助–至少您可以看到页面标题,如图2.2所示。 不过,就我个人而言,我不喜欢此功能,因为它要求我单击两次才能进入所需的特定窗口。
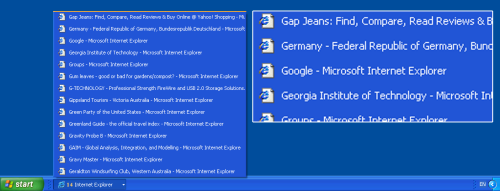
Figure 2.2. Grouping IE windows makes browsing slightly easier.
图2.2。 对IE窗口进行分组可以使浏览更加轻松。
In my view, tabs are a better solution. Figure 2.3 shows the same Web pages opened in tabs in Firefox.
我认为,制表符是更好的解决方案。 图2.3显示了在Firefox中的选项卡中打开的相同网页。
Tabbed browsing suffers the same page title truncation problem as the taskbar, although a few more letters show in the given tab space. But, with the same number of windows open, it’s still hard to work out which page is the one I want. At least the tabs display helpful icons (called favicons) for Websites that provide them. You can see that about half of the tabs displayed in Figure 2.3 have favicons.
选项卡式浏览遭受与任务栏相同的页面标题截断问题,尽管在给定的选项卡空间中显示了更多字母。 但是,在打开相同数量的窗口的情况下,仍然很难确定哪一页是我想要的。 至少这些标签为提供它们的网站显示有用的图标(称为网站图标)。 您可以看到图2.3中显示的选项卡中大约有一半带有图标。
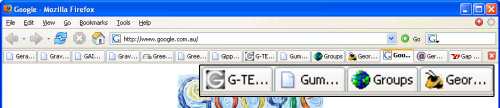
Figure 2.3. Multiple tabs displaying in Firefox.
图2.3。 在Firefox中显示多个标签。
Another redeeming feature of tabbed browsing is that this system allows you to juggle more Web pages than would be possible using multiple separate windows. You can handle more Web pages because there’s no competition for space on the tab bar (the section of the display that holds the tab names and icons). Multiple window browsing requires each IE window to compete with other open programs for space on the taskbar. That includes non-IE windows, the system notification area at the bottom right, the Start bar, the Quick Launch bar, and any other bars you may happen to have configured.
选项卡式浏览的另一个兑换功能是,与使用多个单独的窗口相比,该系统可以处理更多的网页。 您可以处理更多的网页,因为选项卡栏(包含选项卡名称和图标的显示部分)上的空间没有竞争。 多个窗口浏览要求每个IE窗口与其他打开的程序争夺任务栏上的空间。 其中包括非IE窗口,右下角的系统通知区域,“开始”栏,“快速启动”栏以及您可能刚配置的任何其他栏。
Which solution stands out? Well, both have merits. Firefox helpfully displays an indicative icon (a favicon) for different Websites, which, to my mind, is much more helpful than the showing the same "e" icon for every page. These displays vary a little between the Macintosh and Linux desktop environments, but I’m sure you get the picture.
哪种解决方案比较突出? 好吧,两者都有优点。 Firefox可以帮助显示不同网站的指示图标(收藏夹图标),在我看来,这比在每个页面上显示相同的“ e”图标更有帮助。 这些显示在Macintosh和Linux桌面环境之间略有不同,但是我确定您能理解。
Avoiding Context Pollution
避免环境污染
There is a little issue I like to call "context-switching pollution." Application context-switching occurs when you switch from one window to another on the desktop. My apologies to techies for this simplification and my abuse of the term "context-switching." In Windows, you do that by clicking on a taskbar item, or by pressing Alt-Tab to bring up another window. Mac OS X users are probably big fans of Exposé. In Linux, depending on your Desktop Environment, you may have Windows-like Alt-Tab context-switching, or even an Exposé-like feature. When you context-switch, Windows displays an icon (a context object) for each available window; you then pick the one you want.
我喜欢将其称为“上下文切换污染”。 当您从桌面上的一个窗口切换到另一个窗口时,就会发生应用程序上下文切换。 对于这种简化,我向技术人员表示歉意,并且滥用“上下文切换”一词。 在Windows中,您可以通过单击任务栏项或按Alt-Tab调出另一个窗口来执行此操作。 Mac OS X用户可能是Exposé的忠实拥护者。 在Linux中,根据您的桌面环境,您可能具有类似于Windows的Alt-Tab上下文切换,甚至具有类似Exposé的功能。 进行上下文切换时,Windows为每个可用窗口显示一个图标(上下文对象)。 然后选择您想要的那个。
Now, if you have tabbed browsing in place, you’ll probably have a few windows open at most. In fact, most of the Firefox users I know have no need for more than a single window to hold all their tabs. I usually stick to a single window, myself. You can open as many tabs as you want within a window, and the bonus you receive is this: you have just one context object for that set of tabs. One window: one context object. By comparison, imagine that you have multiple IE windows open: one for each Web page. Each of these windows counts as a context object. And you have a bad case of context-switching pollution, my friend! Figure 2.4 shows what context-switching pollution looks like.
现在,如果您已使用标签浏览,则最多可能会打开几个窗口。 实际上,据我所知,大多数Firefox用户只需要一个窗口即可容纳所有选项卡。 我通常会坚持一个单一的窗口。 您可以在一个窗口中打开任意多个选项卡,而您获得的好处是:对于这组选项卡,您只有一个上下文对象。 一个窗口:一个上下文对象。 相比之下,假设您打开了多个IE窗口:每个网页一个。 这些窗口中的每一个都算作上下文对象。 我的朋友,您遇到了上下文切换污染的糟糕情况! 图2.4显示了上下文切换污染的外观。
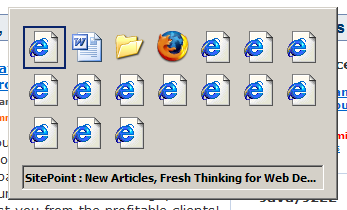
Figure 2.4. Context-switching pollution in Windows XP.
图2.4。 Windows XP中的上下文切换污染。
How are we ever going to quickly find the window we want without some furious Windows-style Alt-Tabbing? Figure 2.5 shows a similarly cluttered summary delivered by Exposé on Mac OS X.
我们如何才能快速找到我们想要的窗口而又不使用某些Windows风格的Alt-Tab bing? 图2.5显示了由Exposé在Mac OS X上提供的类似混乱的摘要。
Although Exposé fares better than the Windows context-switcher, you’re still left to perform laborious squint-and-click selection.
尽管Exposé的性能要比Windows上下文切换器好,但您仍然可以执行费力的斜视和单击选择。
Tabbed browsing reduces those nasty multiple windows into individual tabs in a single window – two or three windows at most. Bye-bye, context-switching clutter!
选项卡式浏览将这些讨厌的多个窗口缩小为单个窗口中的单个选项卡-最多两个或三个窗口。 再见,上下文切换混乱!
Productivity Differences
生产力差异
When you read a Web page in a tabbed browser, you can open interesting links in "background" tabs, which will load those pages as you continue to read the original. You can access those new pages in your own time, once you’ve finished with the current page. By then, they will likely have finished loading, and will be ready to view.
在选项卡式浏览器中阅读网页时,可以在“背景”选项卡中打开有趣的链接,当您继续阅读原始页面时,这些链接将加载这些页面。 完成当前页面的操作后,您可以在自己的时间内访问这些新页面。 届时,它们可能已完成加载,并准备查看。
When you use a single window per Web page, you have to open interesting links in new windows to achieve the same effect. In Internet Explorer, this will open a new window, which then has the "focus:" it’s brought to the front of all other windows. This stealing of focus may or may not be what you want. If it isn’t, too bad, you just have to navigate back to the original window again. You can’t change this behavior in IE; in Opera, at least, there is an ‘Open behind’ option that keeps the focus on the current page. In a tabbed system, you’re able to tell the browser whether or not to open new tabs in the background, and when you want them to steal the focus. We’ll see how to do both later.
当每个网页使用单个窗口时,必须在新窗口中打开有趣的链接才能获得相同的效果。 在Internet Explorer中,这将打开一个新窗口,然后将其置于“焦点:”,并将其置于所有其他窗口的前面。 这种窃取焦点可能不是您想要的。 如果不是很糟糕,则只需再次导航回原始窗口即可。 您无法在IE中更改此行为; 至少在Opera中,有一个“向后打开”选项可以将焦点集中在当前页面上。 在选项卡式系统中,您可以告诉浏览器是否在后台打开新选项卡,以及何时让它们夺取焦点。 稍后我们将介绍如何做。
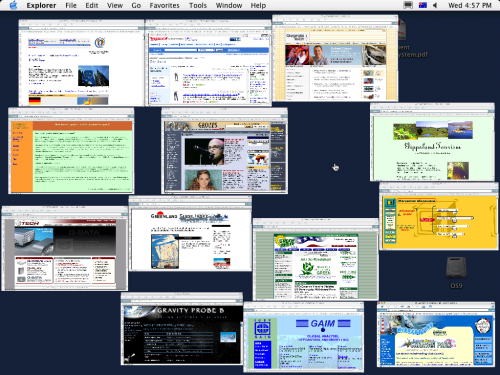
Figure 2.5. Exposé pollution on Mac OS X.
图2.5。 Mac OS X上的Exposé污染。
I’ve found opening links in background tabs to be the most productive and efficient method of Web browsing. There is a near-perfect match between the basic concepts of Web browsing, and of opening interesting links in background tabs. Think about it: Web pages are built on hypertext, which means that there are always hyperlinks to other Web pages. Some links may interest you; most probably won’t. You’ll want to visit those links you do care about, so you click on them. But, wait! We’re talking about "links," not "a link." Usually, more than a single link will catch your attention (especially when using Google or one of the other search engines). You’ll want to visit all those interesting links, and it’s a natural process to open those links as you read the current page, so that you aren’t distracted from the current task, and visit them when you’re done. Tabbed browsing allows you to do that. IE doesn’t, because it steals focus when you open links in a new window.
我发现在后台选项卡中打开链接是最高效,最有效的Web浏览方法。 Web浏览的基本概念与在背景选项卡中打开有趣的链接之间几乎完美匹配。 想想看:网页是建立在超文本基础上的,这意味着总有指向其他网页的超链接。 一些链接可能会让您感兴趣; 可能不会。 您将要访问您确实关心的那些链接,因此单击它们。 可是等等! 我们所说的是“链接”,而不是“链接”。 通常,不止一个链接会引起您的注意(尤其是在使用Google或其他搜索引擎之一时)。 您将要访问所有这些有趣的链接,并且在阅读当前页面时打开这些链接是一个自然的过程,这样您就不会分散当前任务的注意力,并在完成后访问它们。 标签式浏览允许您执行此操作。 IE不会,因为当您在新窗口中打开链接时,IE会失去焦点。
The Verdict
判决
Needless to say, tabbed browsing makes a very strong case for itself. I loved tabbed browsing the first time I tried it (in the Mozilla Application Suite). To me, it feels like the way the Web was meant to be browsed!
不用说,选项卡式浏览本身就是一个很好的例子。 我喜欢第一次尝试选项卡式浏览(在Mozilla Application Suite中)。 对我来说,感觉就像是浏览网络的方式!
There is more to tabbed browsing than tabs alone, as we’ll see as we review the other features of Firefox. Firefox is built around the tabbed browsing paradigm, and, throughout this discussion, we’ll explore instances of how this integration can be used to further improve your browsing experience.
选项卡式浏览比仅选项卡式功能更多,正如我们在回顾Firefox的其他功能时所看到的。 Firefox是围绕选项卡式浏览范例构建的,在整个讨论中,我们将探索如何使用此集成进一步改善浏览体验的实例。
Using Tabs
使用标签
By now, you’re probably convinced of the superiority of tabbed browsing – or are, at least, willing to give it a try! In this section, we’ll see how to use tabbed browsing in Firefox.
到目前为止,您可能已经相信标签式浏览的优越性,或者至少愿意尝试一下! 在本节中,我们将看到如何在Firefox中使用选项卡式浏览。
Opening, Closing and Changing Tabs
打开,关闭和更改选项卡
Opening a new tab is easy; it can be done in many ways.
打开一个新标签很容易。 它可以通过多种方式完成。
The simplest way to open a new tab is the middle-click. Middle-clicking (or scroll wheel-clicking) on a link creates a new tab and loads the linked page into it. This is also the most efficient way to open links, so it’s worthwhile to learn to middle-click if you aren’t used to doing so. Most people aren’t even aware that scroll wheels are clickable, but you can simply click the wheel as if it were a button, as the wheel has both button and scrolling functions. If you have a three-button mouse, just click away. If you have a two-button mouse with a scroll wheel, middle-clicking can be a bit disconcerting at first. On Mac OS X, use command-left-click instead. If you like middle-clicking, you can make this a standard on the Macintosh by reassigning command-click to the mouse wheel (middle button) via the Mac OS X mouse driver.
打开新标签的最简单方法是单击鼠标中键。 在链接上单击鼠标中键(或在滚轮上单击)会创建一个新选项卡,并将链接的页面加载到其中。 这也是打开链接的最有效方法,因此如果您不习惯单击中间键,则值得学习。 大多数人甚至都不知道滚动轮是可单击的,但是您可以简单地单击滚轮,就好像它是一个按钮一样,因为滚轮同时具有按钮和滚动功能。 如果您有三键鼠标,只需单击即可。 如果您有一个带有滚轮的两键鼠标,那么首先单击鼠标中键可能会有点令人不安。 在Mac OS X上,请使用Command-left-click代替。 如果您喜欢单击鼠标中键,则可以通过Mac OS X鼠标驱动程序将命令单击重新分配到鼠标滚轮(中间按钮)来使其成为Macintosh上的标准设置。
Note that if you miss the link with the mouse pointer when middle-clicking, Firefox goes into "free scroll" mode, which is probably not what you’re after. If that happens, click again while the mouse pointer is still away from any links, and you’ll be back to normal.
请注意,如果您在单击鼠标中键时错过了鼠标指针的链接,则Firefox会进入“自由滚动”模式,这可能不是您想要的。 如果发生这种情况,请在鼠标指针仍远离任何链接的情况下再次单击,您将恢复正常。
Here are a few other ways to open tabs:
以下是打开标签页的其他几种方法:
Ctrl-T opens a new, empty tab.
Ctrl-T打开一个新的空白标签。
- Right-click (or context click on the Mac) a link, and select Open Link in a New Tab from the resulting context menu.
右键单击(或在Mac上上下文单击)链接,然后从出现的上下文菜单中的“新建”选项卡中选择“打开链接”。 Hold Ctrl down while clicking a link.
单击链接时按住Ctrl键。
Type a URL into the location bar, then hit Alt-Enter. This loads the URL in a new foreground tab.
在位置栏中输入 URL,然后按Alt-Enter 。 这会将URL加载到新的前景选项卡中。
Press trl-Enter when a link is selected (for example, after you’ve run a page search for it and the link is highlighted).
选择链接后按trl-Enter (例如,在页面上对其进行搜索并突出显示该链接后)。
- Drag a URL (from a Web page or an external application) and drop it onto the tab bar.
拖动URL(从网页或外部应用程序)并将其拖放到选项卡栏上。
Closing tabs is also easy and flexible: simply middle-click on a tab’s description (the bit that sticks up above the tab content). You can also use Ctrl-W to close the current tab, or you can right-click on the tab and select Close Tab. Choose whichever groove suits you. Finally, you can click on the Close Tab icon, which appears as an "X" on the right-hand end of the tab bar, and "Poof!" – no more tab. Figure 2.6 shows the Close Tab icon as it appears on the tab bar.
关闭选项卡也很容易且灵活:只需在选项卡的描述上单击鼠标中键即可(该内容位于选项卡内容上方)。 您也可以使用Ctrl-W关闭当前选项卡,或者右键单击该选项卡并选择“关闭选项卡”。 选择适合您的凹槽。 最后,您可以单击“关闭选项卡”图标,该图标在选项卡栏的右端显示为“ X”,并显示“ Po!”。 –没有更多标签。 图2.6显示了在选项卡栏上显示的“关闭选项卡”图标。
Figure 2.6. The Close Tab icon adjacent to the tab bar.
图2.6。 选项卡栏旁边的“关闭选项卡”图标。
Once you’ve got your tabs set up, switching focus between them is easily done: just click on the required tab. Less obvious ways to switch tabs are to use Ctrl-Tab to switch focus to the next tab (to the right of the current tab), and Ctrl-Shift-Tab to access the previous tab (to the left of the current tab). This is very useful if you’ve got your hands on the keyboard most of the time.
设置完标签后,就可以轻松地在它们之间切换焦点:只需单击所需的标签即可。 切换选项卡的不太明显的方法是使用Ctrl-Tab将焦点切换到下一个选项卡(在当前选项卡的右侧),而使用Ctrl-Shift-Tab来访问上一个选项卡(在当前选项卡的左侧)。 如果您大部分时间都在键盘上,这将非常有用。
Tab-Related Preferences
标签相关的首选项
Let’s take a look at the available user preferences that are related to tabs and tabbed browsing. Start Firefox and choose Tools > Options (Windows), Firefox > Options (Macintosh) or Edit > Preferences (Linux) from the menu bar, then select the Advanced panel. You should see a dialog box that’s something like the one shown in Figure 2.7.
让我们看一下与选项卡和选项卡式浏览相关的可用用户首选项。 启动Firefox,然后从菜单栏中选择“工具”>“选项”(Windows),“ Firefox”>“ Options”(Macintosh)或“编辑”>“首选项”(Linux),然后选择“高级”面板。 您应该看到一个对话框,如图2.7所示。
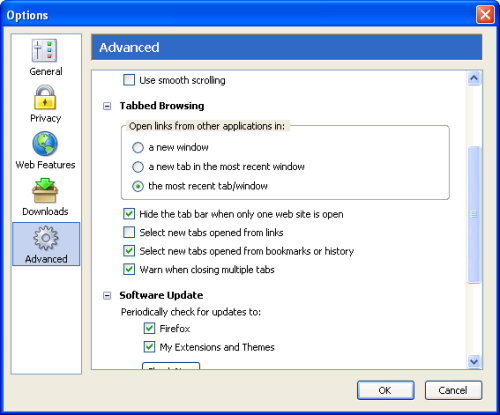
Figure 2.7. Tabbed browsing preferences in Firefox 1.0.
图2.7。 Firefox 1.0中的选项卡式浏览首选项。
Note that the options panel has been redesigned slightly for Firefox 1.1 and beyond: there, you must click a tab rather than an icon to see this information. Figure 2.8 shows the shape of things to come.
请注意,对于Firefox 1.1及更高版本,选项面板已经过重新设计:在此处,必须单击选项卡而不是图标才能查看此信息。 图2.8显示了即将发生的事情的形状。
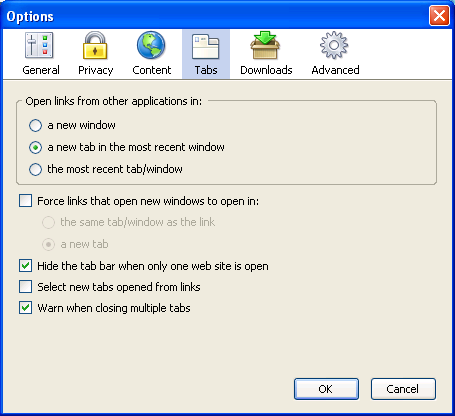
Figure 2.8. Tabbed browsing preferences in Firefox 1.1 and beyond.
图2.8。 Firefox 1.1及更高版本中的选项卡式浏览首选项。
You can see that, although there’s a little reorganization, the options are much the same in both versions. Here’s what each preference does:
您会看到,尽管进行了一些重组,但是两个版本中的选项都差不多。 这是每个首选项的作用:
Open links from other applications in:
在以下位置打开来自其他应用程序的链接:
If you click on a link displayed in an another program, such as Microsoft Word or Adobe Acrobat Reader, this preference dictates how that link will be displayed by Firefox. I prefer to have links from other applications open in a new tab in the most recent window, because I usually use a single window, and I don’t want to lose the Web page on my most recent tab. Of course, links will only load in Firefox if Firefox is set as your default browser.
如果单击其他程序(例如Microsoft Word或Adobe Acrobat Reader)中显示的链接,则此首选项将指示Firefox如何显示该链接。 我更喜欢在最近的窗口的新选项卡中打开来自其他应用程序的链接,因为我通常使用单个窗口,并且我不想丢失最近选项卡上的网页。 当然,只有将Firefox设置为默认浏览器,链接才会在Firefox中加载。
Force links that open new windows to open in:
强制打开新窗口的链接在以下位置打开:
This is a newish feature that can be used to tame popup windows: check the box to turn it on. Instead of popups launching in a separate, new window, or being blocked by the popup blocker (discussed later), this option lets that new content be created inside an existing tab or an existing window. This option is available only in Firefox versions 1.1 and later.
这是一项新功能,可用于控制弹出窗口:选中复选框将其打开。 该选项可以使新内容在现有选项卡或现有窗口中创建,而不是在单独的新窗口中启动弹出窗口或被弹出窗口阻止程序阻止(稍后讨论)。 此选项仅在Firefox 1.1及更高版本中可用。
Hide the tab bar when only one Website is open
仅打开一个网站时隐藏标签栏
If checked, this hides the tab bar when only one Web page is open. Personally, I have this unchecked (it’s checked by default), because it’s disconcerting to have the tab bar disappear and re-appear. This option was made the default as a deliberate design decision to enable users who don’t use tabbed browsing to enjoy more screen real estate. Users of tabbed browsing, however, will probably prefer to have this option unchecked.
如果选中,则仅打开一个网页时将隐藏选项卡栏。 就我个人而言,我没有选中它(默认情况下是选中的),因为令人不安的是选项卡栏消失并重新出现。 默认情况下,此选项是默认设计,可以使不使用选项卡式浏览的用户享受更多的屏幕空间。 但是,使用选项卡式浏览的用户可能更希望取消选中此选项。
Select new tabs opened from links
选择从链接中打开的新标签页
This is the preference I was talking about earlier, which allows you to choose whether new tabs open in the background, or steal focus from the current page. Checking this option will cause links opened in new tabs to steal focus. I recommend that you leave this unchecked to gain the productivity benefits I mentioned earlier.
这是我之前提到的首选项,它使您可以选择是在后台打开新选项卡,还是从当前页面中窃取焦点。 选中此选项将导致在新选项卡中打开的链接失去焦点。 我建议您不要勾选此选项,以获得前面提到的生产率收益。
Note: Those who have the Select new tabs opened from links preference set one way or the other can reverse their setting temporarily with the Shift key modifier. For example, if you’ve set Firefox up so that new tabs opened from links load in the background, but you want a particular link to open in the foreground, just hold on to the Shift key when clicking the link (i.e. Shift-middle-click, or Ctrl-Shift-left-click).
注意:那些具有“从链接中打开选择新选项卡”首选项的人可以用Shift键修改器暂时设置其另一种设置,或用Shift键修改器暂时撤消其设置。 例如,如果您已设置Firefox,以便从链接中打开的新标签页在后台加载,但是您希望在前台打开特定链接,则只需在单击链接时按住Shift键即可(即Shift-middle单击或Ctrl-Shift-左键单击)。
Warn when closing multiple tabs
关闭多个标签时发出警告
This option will display a warning dialog if you take an action to close more than one tab simultaneously, as will occur if you try to close a window in which multiple tabs are open. This is a useful warning that can prevent you from accidentally closing a window full of tabs, but it could be annoying if you mean to close that window. Figure 2.9 shows this warning.
如果您采取措施同时关闭多个标签页,则此选项将显示警告对话框,如果您尝试关闭其中打开多个标签页的窗口,则会发生此对话框。 这是一个有用的警告,可以防止您意外关闭充满选项卡的窗口,但是如果您要关闭该窗口,可能会很烦人。 图2.9显示了此警告。
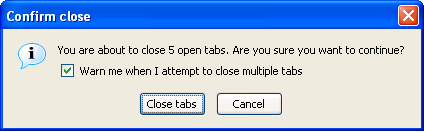
Figure 2.9. Warning dialog shown when closing multiple tabs simultaneously.
图2.9。 同时关闭多个选项卡时显示警告对话框。
As you can see, you don’t have to change any of the options if you are a "normal" user: Firefox is built so that sensible configuration choices are available from the start.
如您所见,如果您是“普通”用户,则无需更改任何选项:Firefox是内置的,因此从一开始就可以提供明智的配置选择。
A Single Homepage: So 1999!
一个单一的网页:1999年!
Another good thing about tabbed browsing is that tabbed browsers are no longer stuck with a single homepage. If you’re like most other Web surfers, you probably have more than one favorite Web page: pages that you absolutely must visit the first time you launch your Web browser. I, for example, have a total of eight URLs that I want to check at the start of every Web surfing session.
选项卡式浏览的另一个好处是,选项卡式浏览器不再局限于单个主页。 如果您像大多数其他Web冲浪者一样,则可能拥有多个喜爱的Web页面:首次启动Web浏览器时绝对必须访问的页面。 例如,在每个Web冲浪会话开始时,我总共要检查八个URL。
What’s a user of a Single Document Interface (SDI)Web browser – Internet Explorer, for example – to do? A Single Document Interface (SDI) is, simply put, a way to organize applications into individual windows, one for each application (or each instance of an application). If you’ve used Internet Explorer, you already know what an SDI is. Well, they’d better start looking through their bookmarks! Those lucky users of tabbed browsers, on the other hand, can set multiple homepages and load all of their favorite pages at once. Figure 2.10 illustrates the format required for setting multiple homepages via the Options dialog box.
单一文档界面(SDI)Web浏览器(例如Internet Explorer)的用户要做什么? 简而言之,单一文档界面(SDI)是一种将应用程序组织到各个窗口中的方法,每个应用程序(或应用程序的每个实例)都可以使用一个窗口。 如果您使用过Internet Explorer,那么您已经知道什么是SDI。 好了,他们最好开始浏览书签! 另一方面,那些使用标签式浏览器的幸运用户可以设置多个主页,并一次加载所有喜欢的页面。 图2.10说明了通过“选项”对话框设置多个主页所需的格式。
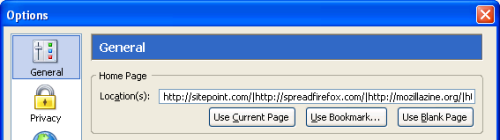
Figure 2.10. Specifying a tabbed set of homepages.
图2.10。 指定选项卡式主页集。
Note the vertical bar (|) that separates each URL: one URL is shown per tab. You simply load the preferred Web pages into tabs, and mark the set as your homepage. For example, if you want https://www.sitepoint.com/ and http://www.spreadfirefox.com/ to be your homepages, load them up in Firefox, go to Tools > Options > General (or Firefox > Preferences > General on Mac OS X, or Edit > Preferences > General on Linux), then click the Use Current Pages button.
请注意,分隔每个URL的竖线(|):每个选项卡显示一个URL。 您只需将首选网页加载到选项卡中,然后将其标记为主页即可。 例如,如果您希望将https://www.sitepoint.com/和http://www.spreadfirefox.com/设为主页,请在Firefox中加载它们,然后转到工具>选项>常规(或Firefox>首选项) > Mac OS X上的常规,或Linux上的“编辑”>“首选项”>“常规”),然后单击“使用当前页面”按钮。
Alternatively, you can hand-enter the URLs you want to set as your homepages in the Location(s) text box, separating each using the pipe character (|) as shown above. For example, if you want sitepoint.com and Spreadfirefox.com to be your homepages, enter https://www.sitepoint.com/|http://spreadfirefox.com/ into the Location(s) textbox. The pipe character key is located near the Backspace key on most PC keyboards, and is represented by two vertical dashes placed on atop the other.
或者,您可以在“位置”文本框中手动输入要设置为主页的URL,并使用竖线字符(|)分隔每个URL,如上所示。 例如,如果您希望sitepoint.com和Spreadfirefox.com成为主页, https://www.sitepoint.com/|http://spreadfirefox.com/在“位置”文本框中输入https://www.sitepoint.com/|http://spreadfirefox.com/ 。 竖线字符键位于大多数PC键盘上的Backspace键附近,并由位于另一个上方的两个竖线表示。
A third approach is to click on the Use Bookmark… button, and then select the bookmark folder that contains the bookmarks you want to use as your homepages. We’ll cover bookmarks in more detail later.
第三种方法是单击“使用书签...”按钮,然后选择包含要用作主页的书签的书签文件夹。 稍后我们将详细介绍书签。
Setting more than a single homepage does have a disadvantage, though. If all you want to do is a quick Web search, Firefox startup is too clever (or perhaps too dumb), and insists upon loading your entire set of homepages instead. This does slow things down a bit, especially on a dial-up connection, because loading eight Web pages is almost certainly slower than loading just one. You can always press Ctrl-T to get a new tab and turn eight into nine, if you’re feeling impatient. You can then type your desired URL into the ninth tab and have it load at (hopefully) more than one-ninth of its normal rate.
但是,设置多个主页确实有一个缺点。 如果您只想进行快速的Web搜索,则Firefox启动会很聪明(或者可能太笨了),而是坚持加载整个主页。 这确实会使速度变慢,尤其是在使用拨号连接时,因为加载八个Web页面几乎肯定比加载一个慢。 如果您不耐烦,可以随时按Ctrl-T获得新标签,然后将8变成9。 然后,您可以在第九个选项卡中键入所需的URL,并使其(希望)以正常速率的十分之一以上的速度加载。
Despite the performance implications, it’s hard to deny the convenience of loading up multiple Web pages at once, and it’s even harder not to feel sorry for those poor Internet Explorer users still facing dilemmas like, "Do I want Yahoo! email as my homepage, or should I set it to sitepoint.com instead?" With Firefox, you can avoid such decisions. Just set all your favorite Web pages as your homepage and be done with it!
尽管会影响性能,但很难否认一次加载多个Web页面的便利性,对于那些仍然面临两难境地的贫困Internet Explorer用户,例如“我是否希望Yahoo!电子邮件作为我的主页,还是应该将其设置为sitepoint.com?” 使用Firefox,您可以避免这样的决定。 只需将所有您喜欢的网页设置为主页即可完成操作!
Back, Forward and Home Buttons
后退,前进和主页按钮
Now, Firefox is a tabbed browsing Web browser, right? Of course it is. So it would make sense if Firefox could open the previous page in a new tab if you middle-click on the Back button, right? In fact, this is exactly how Firefox behaves.
现在,Firefox是一个选项卡式浏览Web浏览器,对吗? 当然是的。 因此,如果您在“后退”按钮上单击鼠标中键,那么Firefox是否可以在新选项卡中打开上一页是有意义的? 实际上,这正是Firefox的行为方式。
You can middle-click (command-left-click on Mac OS X) on all of the Back, Forward, and Home buttons in the toolbar to open the corresponding link(s) in a new tab (or tabs). If your homepage is a set of four pages in separate tabs, middle-clicking on the Home button will add four tabs to your current tab set. Figure 2.11 reminds us of what these major buttons look like. There’s no special tab action for the Reload or Stop buttons.
您可以在工具栏中的所有“后退”,“前进”和“主页”按钮上单击鼠标中键(在Mac OS X上为命令左键单击),以在一个或多个新选项卡中打开相应的链接。 如果您的主页是由四个页面组成的一组页面,分别位于不同的标签中,则在“主页”按钮上单击鼠标中键会将四个标签添加到当前的标签集中。 图2.11让我们想起了这些主要按钮的外观。 重新加载或停止按钮没有特殊的选项卡操作。
Figure 2.11. Firefox’s toolbar icons.
图2.11。 Firefox的工具栏图标。
The provision of tab support within the main browser buttons clearly demonstrates that tabbed browsing is part and parcel of Firefox’s design. It’s neither an afterthought nor a bolted-on feature.
浏览器主按钮中提供的选项卡支持清楚地表明,选项卡式浏览是Firefox设计的一部分。 这既不是事后的想法,也不是固定的功能。
搜索和搜索工具 (Search and Search Tools)
Search: you can’t escape it as a fundamental Web surfing activity. Well, perhaps you can if you have the uncanny ability to guess URLs that give you the exact Web page you wanted. A good dab of clairvoyance is probably necessary as well! "Hmm… Let’s see. Are there any good Firefox ebooks online? I shall use my Powers of Uncanny Deduction to find out…" (Supernatural pause.) "Ah, I’ll go to http://firefox-book.com/."
搜索:作为基本的Web冲浪活动,您无法逃脱它。 好吧,如果您具有不可思议的能力来猜测可以为您提供所需的确切网页的URL,也许可以。 也许还需要一个很好的千里眼! “嗯……让我们看看。在线上有什么好的Firefox电子书吗?我会用我的神奇演绎力找出来……”(超自然的停顿。)“啊,我去http://firefox-book.com/ 。”
Does that even sound remotely possible? Well, if there was a Website at http://firefox-book.com/ (there isn’t), it would probably have something to do with a book on Firefox. Relying on your powers of deduction is, in the end, unlikely to produce results, and besides, Uncanny Deduction is tremendously exhausting!
这听起来是否遥不可及? 好吧,如果有一个http://firefox-book.com/上的网站(没有),则可能与Firefox上的书有关。 最终,依靠您的演绎能力不太可能产生结果,此外,“疯狂演绎”令人筋疲力尽!
This rigmarole underscores the reality that Search is an integral part of using the World Wide Web. You can’t find the information you want using hit-and-miss techniques. Instead, we use search tools that offer systematic solutions: search engines, directories, and similar online services.
这种繁琐的动作突显了以下事实:搜索是使用万维网不可或缺的一部分。 使用“命中与失败”技术找不到所需的信息。 相反,我们使用提供系统解决方案的搜索工具:搜索引擎,目录和类似的在线服务。
Examples of search are everywhere. Are you looking for the scoop on your favorite band? Perhaps you’re trying to learn Java programming? Google is your best bet. Are you reading up on the latest in flux capacitors and time travel for your thesis? Run a search over at ScienceDirect or arXiv.org. Looking for a good computer book, self-improvement manual, or Dragonlance novel? I’m a Dragonlance fan, in case you’re wondering. I’m not into self-improvement books, though. (It’s more fun to write your own D&D campaign settings – Ed.). Amazon.com has a nice search feature that yields customer reviews and recommendations.
搜索的例子无处不在。 您是否正在寻找自己喜欢的乐队的独家新闻? 也许您正在尝试学习Java编程? Google是您最好的选择。 您是否正在阅读有关通量电容器的最新文章以及论文的时间旅行? 在ScienceDirect或arXiv.org上进行搜索。 您是否正在寻找一本好的计算机书籍,自我完善的手册或Dragonlance小说? 如果您想知道的话,我是龙枪迷。 不过,我不喜欢自我完善的书籍。 (编写自己的D&D广告系列设置会更加有趣-编辑)。 Amazon.com具有出色的搜索功能,可产生客户评论和建议。
If search is an integral part of the Web, it follows that it should also be an integral part of your Web browser. Firefox promises unobtrusive and integrated search functionality. The Firefox developers know what you want, and they give it to you. I wish all software projects did that!
如果搜索是Web的组成部分,那么它也应该成为Web浏览器的组成部分。 Firefox承诺不引人注目的集成搜索功能。 Firefox开发人员知道您想要什么,然后将其交给您。 我希望所有软件项目都能做到这一点!
Here, we take a detailed look at Firefox’s search-related features and see how you can best employ them to make things easy for yourself.
在这里,我们详细研究了Firefox与搜索相关的功能,并了解如何最好地利用它们使事情变得容易。
There’s More than One Way to Find it!
找到不止一种方法!
That’s right: There Is More Than One Way To Find It (TIMTOWTFI). Search is an integrated feature in Firefox, but it’s integrated in several ways. There are many separate search features and several different starting points from which you can perform a search. Each method of searching is convenient for its particular situation.
没错:找到它的方式不止一种(TIMTOWTFI)。 搜索是Firefox中的一项集成功能,但通过多种方式进行了集成。 有许多单独的搜索功能以及可以从中进行搜索的几个不同的起点。 每种搜索方法都适合其特定情况。
For example, you can search for the meaning of a word or phrase (say, "blogosphere") on a Web page by highlighting it, then context-clicking and selecting the context menu entry Search Web for "blogosphere." Figure 2.12 shows this technique at work.
例如,您可以通过突出显示某个单词或短语(例如,“ blogosphere”)来搜索网页上某个单词或短语的含义,然后单击上下文并选择上下文菜单项“ Blogosphere”的“搜索Web”。 图2.12显示了该技术的工作原理。
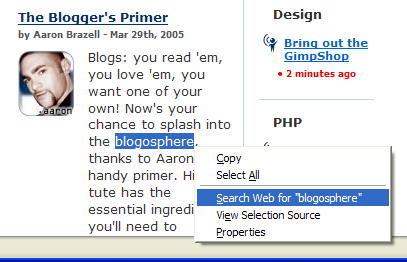
Figure 2.12. Context Web searching for highlighted text.
图2.12。 上下文Web搜索突出显示的文本。
Alternately, you can surf to the search engine’s homepage and type your search terms into the form (not that this is a Firefox feature, but it is a way to perform a search). Or you can… but let’s put an end to these trivial examples and dive straight into discussing the more effective and efficient ways that you can search using Firefox.
或者,您可以浏览搜索引擎的主页,然后在表格中键入搜索词(不是说这是Firefox的功能,而是一种执行搜索的方法)。 或者,您也可以……但是,让我们结束这些琐碎的示例,直接讨论如何使用Firefox搜索更有效的方法。
The Search Bar: Drunk on Search!
搜索栏:搜索时喝醉!
When you first launched Firefox, you probably noticed that there were two textboxes into which you could type text. One of these is the location bar, into which you can type URLs; the other has a funny looking "G" next to it. Figure 2.13 shows this corner of the browser.
首次启动Firefox时,您可能会注意到有两个文本框可在其中输入文本。 其中之一是位置栏,您可以在其中键入URL。 另一个旁边有一个有趣的外观“ G”。 图2.13显示了浏览器的这一角。
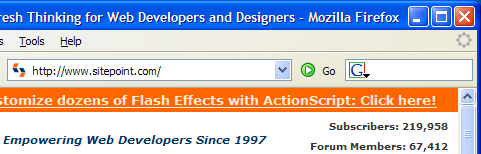
Figure 2.13. Search bar on the right, location bar on the left.
图2.13。 搜索栏在右侧,位置栏在左侧。
The "G" is actually an icon for the Google search engine, and this textbox is called the "search bar." If you type in a search phrase, and hit Enter, Firefox will take you to the Google search results page for that phrase. Go ahead and try it out for yourself: it’s a very convenient arrangement. No longer do you have to type in http://www.google.com/, wait for it to load, and then search using the standard form. The search bar saves a good three seconds each time you do a search – possibly more if you’re on dial-up. Since the average Web surfer performs 12 searches per hour, that’s a good 36 seconds saved for every hour spent online, or 14.4 minutes per day, or 3.65 days per year! This figure was derived through a complex process called guessing! Try doing a search on Google for "36 seconds per hour in days per year." Google’s calculator kicks in and does the conversion for you! I knew Google’s calculator function was really smart, but this smart?! Imagine what you could do with those 3.65 days. You could take a three-day vacation and still have 0.65 days left in which to do nothing. When the Firefox folks say that Firefox helps make your online experience more productive, they aren’t just boosting the marketing hype: the productivity increases are real.
“ G”实际上是Google搜索引擎的图标,此文本框称为“搜索栏”。 如果您输入搜索词组,然后按Enter键,Firefox将带您进入该词组的Google搜索结果页面。 继续尝试一下:这是一个非常方便的安排。 您不再需要键入http://www.google.com/ ,等待其加载,然后使用标准表单进行搜索。 每次进行搜索时,搜索栏都可以节省三秒钟,如果您正在拨号,则可以节省更多时间。 由于一般的网上冲浪者每小时执行12次搜索,因此,每在线花费一个小时,即每天14.4分钟,或每年3.65天,可以节省36秒! 这个数字是通过称为猜测的复杂过程得出的! 尝试在Google上进行“每年几天,每小时每小时36秒”的搜索。 Google的计算器将启动并为您进行转换! 我知道Google的计算器功能确实很聪明,但是这个聪明吗? 想象一下,在这3.65天里您能做什么。 您可以休三天假,而您还有0.65天的空闲时间。 当Firefox人士说Firefox可以帮助您提高在线体验的效率时,他们不仅在推动营销炒作:生产率的提高是真实的。
Using the Search Bar like a Pro
像专业人士一样使用搜索栏
The search bar is easy to use, but you can do a lot more with it than merely search Google. Learn these other tricks before you embarrass yourself in front of your Firefox evangelist friends!
搜索栏易于使用,但是您可以用它做更多的事情,而不仅仅是搜索Google。 在让您的Firefox传播者朋友面前感到尴尬之前,请学习其他技巧。
To start with, hitting Enter loads the search results page in the current tab. At times, it may be more convenient to load in a new tab. For cases like this, hit Alt-Enter instead of just Enter.
首先, 按Enter键将在当前选项卡中加载搜索结果页面。 有时,加载新标签可能更方便。 对于这种情况,请按Alt-Enter而不是Enter 。
The shortcut keys that place the input cursor in the search bar are Ctrl-K and Ctrl-E – you can use either. If, like me, you don’t like to take your hands off the keyboard, those shortcuts are very useful. The way I search is to hit Ctrl-E, type in my query, and then hit Alt-Enter to specify a new tab.
将输入光标置于搜索栏中的快捷键是Ctrl-K和Ctrl-E –您可以使用其中任何一个。 如果像我一样,您不想放开键盘,那么这些快捷键将非常有用。 我搜索的方式是按Ctrl-E ,键入查询,然后按Alt-Enter指定一个新选项卡。
You can also search using drag and drop. Simply select a piece of text (from any drag and drop-capable program, not just Firefox), and drag it into the Firefox search bar. And, if you’re thinking of dragging and dropping text from a Firefox Web page specifically, there is an Even Better Way! Let me keep you in suspense for now: we’ll come back to this shortly.
您也可以使用拖放进行搜索。 只需选择一条文本(从任何具有拖放功能的程序中,而不仅仅是Firefox),然后将其拖动到Firefox搜索栏中。 而且,如果您正在考虑专门从Firefox网页拖放文本,那么还有更好的方法! 让我暂时让您保持悬念:我们很快会再谈这个。
Adding More Search Engines
添加更多搜索引擎
You aren’t restricted to searching on Google, even if it is the best search engine around and complemented by totally cool software. You can easily add other search engines, like AltaVista, AllTheWeb, and even the new kid on the block, Clusty. To do so, click on the G icon. You should see a drop-down like the one shown in Figure 2.14, which lists the search plugins installed by default in the Firefox product.
即使它是周围最好的搜索引擎,并且由功能非常酷的软件所补充,您也不受限于在Google上进行搜索。 You can easily add other search engines, like AltaVista, AllTheWeb, and even the new kid on the block, Clusty. To do so, click on the G icon. You should see a drop-down like the one shown in Figure 2.14, which lists the search plugins installed by default in the Firefox product.
To search with a different search engine – say, Amazon.com – simply select that item from the drop-down. The icon to the left of the search box will change from the G icon to its Amazon equivalent. Now, any searches you perform through the search bar will be run on Amazon.com (try searching for "Firefox").
To search with a different search engine – say, Amazon.com – simply select that item from the drop-down. The icon to the left of the search box will change from the G icon to its Amazon equivalent. Now, any searches you perform through the search bar will be run on Amazon.com (try searching for "Firefox").
Naturally, everyone has his or her own specific needs and favorite search engines. You’ll probably be wondering how to add a new option to the search bar, and you might have guessed that you simply click the Add Engines item in the drop-down to do so. Choosing that item takes you to Firefox Central, where you can add other search plugins. Figure 2.15 shows a slice of that page.
Naturally, everyone has his or her own specific needs and favorite search engines. You'll probably be wondering how to add a new option to the search bar, and you might have guessed that you simply click the Add Engines item in the drop-down to do so. Choosing that item takes you to Firefox Central, where you can add other search plugins. Figure 2.15 shows a slice of that page.
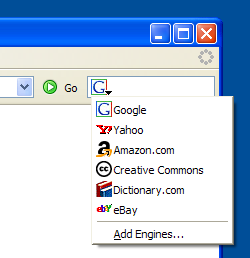
Figure 2.14. Adding and changing search engines.
Figure 2.14. Adding and changing search engines.
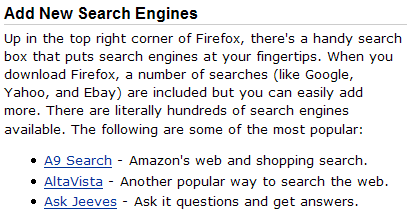
Figure 2.15. Adding new search engines at Firefox Central.
Figure 2.15. Adding new search engines at Firefox Central.
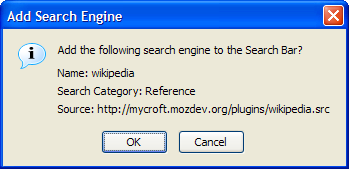
Figure 2.16. Adding the Wikipedia search plugin.
Figure 2.16. Adding the Wikipedia search plugin.
To add a particular search engine, just click on the appropriate link. Let’s add the search plugin for Wikipedia (a very useful and comprehensive online encyclopedia). You should see the confirmation dialog shown in Figure 2.16 after you click on the Wikipedia search plugin link.
To add a particular search engine, just click on the appropriate link. Let's add the search plugin for Wikipedia (a very useful and comprehensive online encyclopedia). You should see the confirmation dialog shown in Figure 2.16 after you click on the Wikipedia search plugin link.
Click OK, and you’re done! You can now see Wikipedia in the search bar drop-down. Simply select it to search Wikipedia, as shown in Figure 2.17.
Click OK, and you're done! You can now see Wikipedia in the search bar drop-down. Simply select it to search Wikipedia, as shown in Figure 2.17.
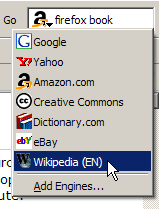
Figure 2.17. Successful installation of the Wikipedia search option.
Figure 2.17. Successful installation of the Wikipedia search option.
If you want to add a search engine that isn’t on the provided list, go to the Mycroft project Website, which offers a collection of search plugins for many sites. Search for the plugin you want, or browse the search plugins categories. Over a thousand search plugins are listed here, so there’s definitely something for everyone.
If you want to add a search engine that isn't on the provided list, go to the Mycroft project Website , which offers a collection of search plugins for many sites. Search for the plugin you want, or browse the search plugins categories. Over a thousand search plugins are listed here, so there's definitely something for everyone.
Removing a search engine from the search bar is a little bit of a hassle. First, use the desktop file manager (Explorer or Finder) to locate the searchplugins directory inside the Firefox installation directory. It’s at C:Program FilesMozilla Firefoxsearchplugins on Windows systems. There, two files are stored for each search plugin. One is a .src file, the other is a graphic, usually either a .png or .gif file. Delete the pair of files whose names match the search option that you no longer want. For example, if I wanted to remove the Yahoo! search plugin, I would simply delete yahoo.src and yahoo.gif, then restart Firefox. An interface for removing unwanted search engines is planned for inclusion in a future release of Firefox. The related bug note is available online.
Removing a search engine from the search bar is a little bit of a hassle. First, use the desktop file manager (Explorer or Finder) to locate the searchplugins directory inside the Firefox installation directory. It's at C:Program FilesMozilla Firefoxsearchplugins on Windows systems. There, two files are stored for each search plugin. One is a .src file, the other is a graphic, usually either a .png or .gif file. Delete the pair of files whose names match the search option that you no longer want. For example, if I wanted to remove the Yahoo! search plugin, I would simply delete yahoo.src and yahoo.gif , then restart Firefox. An interface for removing unwanted search engines is planned for inclusion in a future release of Firefox. The related bug note is available online .
Next, we’ll take a look at a clever and convenient way of searching.
Next, we'll take a look at a clever and convenient way of searching.
Smart Keywords
Smart Keywords
Smart Keywords are a great way to perform search queries from the location bar. With smart keywords, you can type dict extemporaneous into the location bar, hit Enter, and be taken to the Dictionary.com definition of "extemporaneous." The hard way to do this is to go to Dictionary.com, wait for it to load, click on its search box and enter extemporaneous. Bah! That takes too many steps.
Smart Keywords are a great way to perform search queries from the location bar. With smart keywords, you can type dict extemporaneous into the location bar, hit Enter , and be taken to the Dictionary.com definition of "extemporaneous." The hard way to do this is to go to Dictionary.com, wait for it to load, click on its search box and enter extemporaneous . 呸! That takes too many steps.
Firefox comes with several Smart Keywords automatically installed. You can find them in the Quick Searches folder in your bookmarks, as illustrated in Figure 2.18. You don’t have to use this menu at all – it’s just an easy way to see which Smart Keywords are installed.
Firefox comes with several Smart Keywords automatically installed. You can find them in the Quick Searches folder in your bookmarks, as illustrated in Figure 2.18. You don't have to use this menu at all – it's just an easy way to see which Smart Keywords are installed.
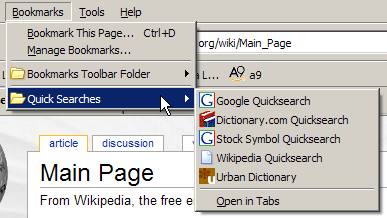
Figure 2.18. Firefox’s pre-defined Smart Keywords offering.
Figure 2.18. Firefox's pre-defined Smart Keywords offering.
The predefined Smart Keywords are:
The predefined Smart Keywords are:
Dictionary.com
Dictionary.com
Type
类型
dict wordto lookup the definition of a word.dict wordto lookup the definition of a word.Google
Google
Type
类型
google search keyword(s)to perform a normal Google search.google search keyword(s)to perform a normal Google search.Stock Symbol
Stock Symbol
Type
类型
quote symbolto look up stock quotes for a stock symbol. This content is sourced from Yahoo! Finance by Google.quote symbolto look up stock quotes for a stock symbol. This content is sourced from Yahoo! Finance by Google.Wikipedia
Wikipedia
Type
类型
wp anythingto access the Wikipedia entry on just about anything (Wikipedia is a free online encyclopedia).wp anythingto access the Wikipedia entry on just about anything (Wikipedia is a free online encyclopedia).Urban Dictionary
Urban Dictionary
Type
类型
slang slang wordto look up the meaning of urban slang words, and keep up with the times!slang slang wordto look up the meaning of urban slang words, and keep up with the times!
I’m sure you’re wondering how Smart Keywords are created. After all, it would be nice to construct additional keywords for searches that Firefox has not already provided for you. There are two ways to create a Smart Keyword: the easy way, and the hard way. The easy way is preferred, but when it occasionally fails, you’ll have to fall back on the hard way. Let’s look at both, starting with the easy way.
I'm sure you're wondering how Smart Keywords are created. After all, it would be nice to construct additional keywords for searches that Firefox has not already provided for you. There are two ways to create a Smart Keyword: the easy way, and the hard way. The easy way is preferred, but when it occasionally fails, you'll have to fall back on the hard way. Let's look at both, starting with the easy way.
Let’s add a Smart Keyword for A9, Amazon’s relatively new search engine. First display A9’s homepage. Right-click in the search box, and you should see the context menu item Add a Keyword for this Search…, as shown in Figure 2.19.
Let's add a Smart Keyword for A9, Amazon's relatively new search engine. First display A9's homepage . Right-click in the search box, and you should see the context menu item Add a Keyword for this Search…, as shown in Figure 2.19.
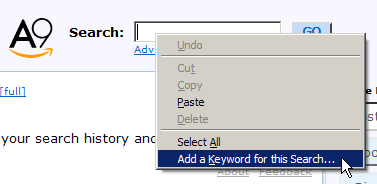
Figure 2.19. Adding a Smart Keyword from a search field.
Figure 2.19. Adding a Smart Keyword from a search field.
The last item on the menu looks like the one we’re after, and indeed it is. When you pick that item, an Add Bookmark dialog will appear, prompting you to fill in the name of the bookmark as well as the keyword. Let’s name it A9 keyword and use a9 for the special keyword. Save the result in a bookmark folder of your choice – I recommend you save it in the Quick Searches folder with all the other predefined Smart Keywords.
The last item on the menu looks like the one we're after, and indeed it is. When you pick that item, an Add Bookmark dialog will appear, prompting you to fill in the name of the bookmark as well as the keyword. Let's name it A9 keyword and use a9 for the special keyword. Save the result in a bookmark folder of your choice – I recommend you save it in the Quick Searches folder with all the other predefined Smart Keywords.
When you’re done, you can try it out straight away. Enter a9 firefox, and you’ll be taken to the A9 search results for the "firefox" search term that you entered. Great! We’re making progress.
When you're done, you can try it out straight away. Enter a9 firefox , and you'll be taken to the A9 search results for the "firefox" search term that you entered. 大! 我们正在进步。
Now, let’s try doing this same task the hard way. We’re not doing this just so we can say we’ve done it to impress fellow guests at dinner parties. We’re doing it because the easy way doesn’t work.
Now, let's try doing this same task the hard way. We're not doing this just so we can say we've done it to impress fellow guests at dinner parties. We're doing it because the easy way doesn't work.
For example, go to the Yahoo! search engine, and try to add a Smart Keyword the easy way. Nothing happens: no Add Bookmark dialog appears – at least, not as this book goes to print. (Technically, this is because the Yahoo! Search text field is not specified with id="search").
For example, go to the Yahoo! search engine , and try to add a Smart Keyword the easy way. Nothing happens: no Add Bookmark dialog appears – at least, not as this book goes to print. (Technically, this is because the Yahoo! Search text field is not specified with id="search").
Perhaps Yahoo! will fix this someday. Perhaps it will already have been fixed by the time this book lands in your hands: such is the nature of the Internet. Fixed or not, it’s clear that many Websites do not support the easy addition of Smart Keywords.
Perhaps Yahoo! will fix this someday. Perhaps it will already have been fixed by the time this book lands in your hands: such is the nature of the Internet. Fixed or not, it's clear that many Websites do not support the easy addition of Smart Keywords.
To add a Smart Keyword the hard way, you must first study Web addresses a little. Type a query into the search box, hit Enter, and look at the URL that’s generated. We need to pull that URL apart for our own purposes. If we use the Yahoo! Search search engine to search for "firefox," the resulting search URL looks like this: http://search.yahoo.com/search?ei=UTF-8&fr=sfp&p=firefox. Those who are familiar with URL query strings, and understand how certain search engines work, will recognize that only http://search.yahoo.com/search?p=firefox is necessary to perform the search. The rest is extra information for Yahoo!, like the character encoding for your search query and where you conducted the search.
To add a Smart Keyword the hard way, you must first study Web addresses a little. Type a query into the search box, hit Enter , and look at the URL that's generated. We need to pull that URL apart for our own purposes. If we use the Yahoo! Search search engine to search for "firefox," the resulting search URL looks like this: http://search.yahoo.com/search?ei=UTF-8&fr=sfp&p=firefox. Those who are familiar with URL query strings, and understand how certain search engines work, will recognize that only http://search.yahoo.com/search?p=firefox is necessary to perform the search. The rest is extra information for Yahoo!, like the character encoding for your search query and where you conducted the search.
Replace the search query ("firefox") in that URL with %s to create a URL that’s suitable for a Smart Bookmark. A Smart Bookmark is a special bookmark that is used to define a Smart Keyword. Firefox recognizes "%s" as a placeholder for your keyword, and replaces it with your typed information whenever you perform a Smart Keyword search. If you enter two or more words, possibly separated by spaces, Firefox treats them all as a single keyword string. So you can only use "%s" once.
Replace the search query ("firefox") in that URL with % s to create a URL that's suitable for a Smart Bookmark. A Smart Bookmark is a special bookmark that is used to define a Smart Keyword. Firefox recognizes "%s" as a placeholder for your keyword, and replaces it with your typed information whenever you perform a Smart Keyword search. If you enter two or more words, possibly separated by spaces, Firefox treats them all as a single keyword string. So you can only use "%s" once.
To create the Smart Bookmark, we bookmark the search page (the ordinary search page for the search engine in question), then modify the new bookmark. We change the bookmark’s name to something better, like "Yahoo! QuickSearch," and tweak the bookmark so that it acts in a Smart Keyword-like manner. We then save the bookmark in the QuickSearch bookmark folder.
To create the Smart Bookmark, we bookmark the search page (the ordinary search page for the search engine in question), then modify the new bookmark. We change the bookmark's name to something better, like "Yahoo! QuickSearch," and tweak the bookmark so that it acts in a Smart Keyword-like manner. We then save the bookmark in the QuickSearch bookmark folder.
To do all this, find the new bookmark in the Bookmarks menu, select it, right-click, and select Properties. Figure 2.20 shows the menu that holds the Properties item.
To do all this, find the new bookmark in the Bookmarks menu, select it, right-click, and select Properties. Figure 2.20 shows the menu that holds the Properties item.
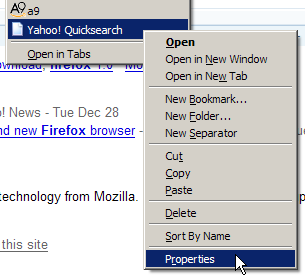
Figure 2.20. Displaying a plain bookmark’s properties.
Figure 2.20. Displaying a plain bookmark's properties.
Choosing Properties should bring up the bookmark properties dialog, in which we can make all the required edits. Update the name, replacing "firefox" with the special %s placeholder, and provide a keyword (I chose "y" for "yahoo"). You can also add a description if you wish. Figure 2.21 shows these changes.
Choosing Properties should bring up the bookmark properties dialog, in which we can make all the required edits. Update the name, replacing "firefox" with the special % s placeholder, and provide a keyword (I chose "y" for "yahoo"). You can also add a description if you wish. Figure 2.21 shows these changes.
Finally, click OK, and there you have it: a Smart Keyword for Yahoo! Search. Try it out for kicks.
Finally, click OK, and there you have it: a Smart Keyword for Yahoo! 搜索。 Try it out for kicks.
Now that you’re armed with enough knowledge to create Smart Keywords the hard way, you can use it to do some innovative and interesting stuff. Let’s create a currency conversion Smart Keyword that converts from European Euros to US Dollars. Using the service at XE.com, let’s try to do this the hard way.
Now that you're armed with enough knowledge to create Smart Keywords the hard way, you can use it to do some innovative and interesting stuff. Let's create a currency conversion Smart Keyword that converts from European Euros to US Dollars. Using the service at XE.com , let's try to do this the hard way.
It turns out that this task is even more challenging than usual. Web developers will understand me when I say that the xe.com currency converter normally uses HTTP POST for form submission, instead of HTTP GET, so there isn’t a URL that we can exploit: one into which we can insert the "%s" placeholder we used before. POST (or rather, HTTP POST) is a method of passing data to a Web page (or rather, a Web server). The Smart Keyword system can only use URLs based on GET requests. Non-developers probably won’t understand this technicality, nor should they have to. The upshot is that we need to find a GET request that we can use as the basis of our Smart Keyword.
It turns out that this task is even more challenging than usual. Web developers will understand me when I say that the xe.com currency converter normally uses HTTP POST for form submission, instead of HTTP GET, so there isn't a URL that we can exploit: one into which we can insert the "%s" placeholder we used before. POST (or rather, HTTP POST) is a method of passing data to a Web page (or rather, a Web server). The Smart Keyword system can only use URLs based on GET requests. Non-developers probably won't understand this technicality, nor should they have to. The upshot is that we need to find a GET request that we can use as the basis of our Smart Keyword.
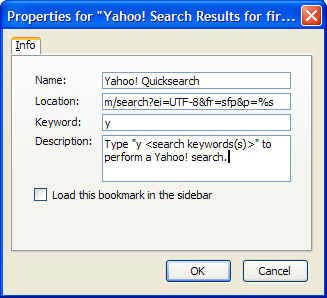
Figure 2.21. Specifying the Yahoo! Quicksearch Smart Bookmark properties.
Figure 2.21. Specifying the Yahoo! Quicksearch Smart Bookmark properties.
To do so, we have to dig into the HTML source of the Web page that performs the search (from the menu, choose View > Page Source, then start tearing your hair out!). With a little digging into the HTML source of the http://www.xe.com Web page, we can deduce that a useful Smart Keyword URL would be: http://www.xe.com/ucc/convert.cgi?Amount=%s&From=EUR&To=USD
To do so, we have to dig into the HTML source of the Web page that performs the search (from the menu, choose View > Page Source, then start tearing your hair out!). With a little digging into the HTML source of the http://www.xe.com Web page, we can deduce that a useful Smart Keyword URL would be: http://www.xe.com/ucc/convert.cgi?Amount=%s&From=EUR&To=USD
We bookmark that URL, and edit the bookmark properties, remembering to give it a keyword: "e2u" is a good choice. To test out the new keyword – for example, to find out how much one million Euros is worth in USD – type e2u 1000000 in the location bar.
We bookmark that URL, and edit the bookmark properties, remembering to give it a keyword: "e2u" is a good choice. To test out the new keyword – for example, to find out how much one million Euros is worth in USD – type e2u 1000000 in the location bar.
If you know how to sift through HTML source, life is great; if you don’t, life isn’t so terrible. A little help from someone else is all you need. Here are some other Smart Keywords that you might consider.
If you know how to sift through HTML source, life is great; if you don't, life isn't so terrible. A little help from someone else is all you need. Here are some other Smart Keywords that you might consider.
Google I’m Feeling Lucky
Google I'm Feeling Lucky
Altavista
Altavista
Amazon
亚马孙
Google News
谷歌新闻
Google Groups
Google Groups
eBay
易趣
Feedster recent blog posts
Feedster recent blog posts
The Internet Movie Database
The Internet Movie Database
Thesaurus.com
Thesaurus.com
CiteSeer (Computer and information science publications database)
CiteSeer (Computer and information science publications database)
The basic premise behind the Smart Keyword feature is very simple: it simply replaces the "%s" placeholder with the keyword that you type in. Armed with this knowledge, you can make a Smart Keyword for just about any Web service that has a variable component in its URL.
The basic premise behind the Smart Keyword feature is very simple: it simply replaces the "%s" placeholder with the keyword that you type in. Armed with this knowledge, you can make a Smart Keyword for just about any Web service that has a variable component in its URL.
Right-Click Text Searching
Right-Click Text Searching
I started this section by saying that TIMTOWTFI (There Is More Than One Way To Find It). Then, we searched for the text "blogosphere." That technique is called "text search," and it’s something that bears a little further exploration.
I started this section by saying that TIMTOWTFI (There Is More Than One Way To Find It). Then, we searched for the text "blogosphere." That technique is called "text search," and it's something that bears a little further exploration.
To perform a text search, you must master two mouse gestures: highlight, and context select. Highlighting text is easy – for simple operations, at least. To do so, click before the required piece of text, then, holding the left mouse button down, drag the mouse over the text to create the highlight. Release the mouse button to finish the highlight. When you do the context-selection (right-clicking on the highlighted content), you’ll see a Search Web for "whatever you selected" item appear in the context menu, as shown in Figure 2.22.
To perform a text search, you must master two mouse gestures: highlight, and context select. Highlighting text is easy – for simple operations, at least. To do so, click before the required piece of text, then, holding the left mouse button down, drag the mouse over the text to create the highlight. Release the mouse button to finish the highlight. When you do the context-selection (right-clicking on the highlighted content), you'll see a Search Web for " whatever you selected " item appear in the context menu, as shown in Figure 2.22.
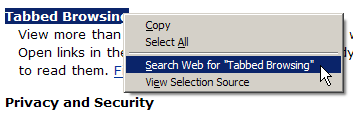
Figure 2.22. Convenient search from the context menu.
Figure 2.22. Convenient search from the context menu.
If you left-click on this menu item (I dare you to!), Firefox will perform a search for the selected text on Google in a new background tab. Yes: on Google, again!
If you left-click on this menu item (I dare you to!), Firefox will perform a search for the selected text on Google in a new background tab. Yes: on Google, again!
Text search isn’t restricted to text, either. If you highlight an image on the page (by clicking just outside the left edge of the image, then dragging across it), the context menu will provide a search based on any alt (descriptive) text that’s specified with the image. Alas, if the image is provided as part of a style, you can’t do this yet; the image must be a proper part of the page.
Text search isn't restricted to text, either. If you highlight an image on the page (by clicking just outside the left edge of the image , then dragging across it), the context menu will provide a search based on any alt (descriptive) text that's specified with the image. Alas, if the image is provided as part of a style, you can't do this yet; the image must be a proper part of the page.
You can also perform a highlighted search for text that appears in a link. Highlighting text in a link is quite tricky, though: you might accidentally start a download or open a tab if you try to drag-highlight across such text. Instead, start by highlighting the text with the Find Links As You Type feature (discussed next as part of the section called "FastFind: Find As You Type"). Once the text is highlighted, bring up the context menu by right-clicking on it as you would for any highlighted text.
You can also perform a highlighted search for text that appears in a link. Highlighting text in a link is quite tricky, though: you might accidentally start a download or open a tab if you try to drag-highlight across such text. Instead, start by highlighting the text with the Find Links As You Type feature (discussed next as part of the section called "FastFind: Find As You Type" ). Once the text is highlighted, bring up the context menu by right-clicking on it as you would for any highlighted text.
As yet, you can’t perform a text search on text inside a textbox or a text input field, but that feature may come in future.
As yet, you can't perform a text search on text inside a textbox or a text input field, but that feature may come in future.
What if you don’t want to use Google as the default search engine? A bit of geek-speak is required to change that. You might like to read Chapter 6, Tips, Tricks, and Hacks before experimenting, though.
What if you don't want to use Google as the default search engine? A bit of geek-speak is required to change that. You might like to read Chapter 6, Tips, Tricks, and Hacks before experimenting, though.
Type about:config into your Firefox address bar, hit Enter and look for the browser.search.defaulturl preference in the displayed set of preferences. Its value should be set to: http://www.google.com/search?lr=&ie=UTF-8&oe=UTF-8&q=. Replace this string by right-clicking on the preference. Use http://search.yahoo.com/search?p= for a Yahoo! search, or the equivalent string for another engine. Note that "%s" is not required in this case.
Type about:config into your Firefox address bar, hit Enter and look for the browser.search.defaulturl preference in the displayed set of preferences. Its value should be set to: http://www.google.com/search?lr=&ie=UTF-8&oe=UTF-8&q=. Replace this string by right-clicking on the preference. Use http://search.yahoo.com/search?p= for a Yahoo! search, or the equivalent string for another engine. Note that "%s" is not required in this case.
FastFind: Find As You Type
FastFind: Find As You Type
Other than searching for a Web page, you will often find yourself searching within a Web page. This is especially so for Web pages that contain lots of (largely irrelevant) content, for long listings, and when you’re looking for a specific piece of information.
Other than searching for a Web page, you will often find yourself searching within a Web page. This is especially so for Web pages that contain lots of (largely irrelevant) content, for long listings, and when you're looking for a specific piece of information.
Firefox has an easy to use über-feature called FastFind. This is the official marketing buzzword; it’s also known among veteran Firefox users as Find As You Type (FAYT), or Type-Ahead Find. Find As You Type does exactly what it says: it finds text as you type. How does it work? Just hit / (forward-slash) or Ctrl-F, then start typing the word (or words) you’re looking for. Firefox will find and highlight the first instance of the word(s) that matches what you’ve typed, from the second you start typing. The easiest way to see what I mean is to try this out for yourself. Go to the Mozilla site and type /firefox as soon as the page has finished loading.
Firefox has an easy to use über-feature called FastFind . This is the official marketing buzzword; it's also known among veteran Firefox users as Find As You Type (FAYT), or Type-Ahead Find . Find As You Type does exactly what it says: it finds text as you type . 它是如何工作的? Just hit / (forward-slash) or Ctrl-F , then start typing the word (or words) you're looking for. Firefox will find and highlight the first instance of the word(s) that matches what you've typed, from the second you start typing. The easiest way to see what I mean is to try this out for yourself. Go to the Mozilla site and type /firefox as soon as the page has finished loading.
You can also use F3 or Ctrl-G to find the next match on the page, and Ctrl-Shift-G to find the previous match. So there’s no need to take your hands off the keyboard, and no need to deal with a pesky Find dialog window that gets in the way! Instead, you get an unobtrusive Find toolbar at the bottom of the page, as shown in Figure 2.23.
You can also use F3 or Ctrl-G to find the next match on the page, and Ctrl-Shift-G to find the previous match. So there's no need to take your hands off the keyboard, and no need to deal with a pesky Find dialog window that gets in the way! Instead, you get an unobtrusive Find toolbar at the bottom of the page, as shown in Figure 2.23.

Figure 2.23. The Find toolbar.
Figure 2.23. The Find toolbar.
This is one of my favorite Firefox features. When I occasionally use Internet Explorer, I often lapse into hitting / and typing text in an attempt to search for stuff. Alas, this feature doesn’t work in IE…
This is one of my favorite Firefox features. When I occasionally use Internet Explorer, I often lapse into hitting / and typing text in an attempt to search for stuff. Alas, this feature doesn't work in IE…
If you’re daunted by having to remember keyboard shortcuts, have no fear: the Find toolbar is here (so much for poetry). Whenever you start a find, the toolbar springs into existence at the bottom of the page. You can use the buttons on the Find toolbar to find the next or previous matches. I recommend you get used to the keyboard shortcuts though, because they really speed up the searching process.
If you're daunted by having to remember keyboard shortcuts, have no fear: the Find toolbar is here (so much for poetry). Whenever you start a find, the toolbar springs into existence at the bottom of the page. You can use the buttons on the Find toolbar to find the next or previous matches. I recommend you get used to the keyboard shortcuts though, because they really speed up the searching process.
Perhaps you noticed the Highlight button in the Find toolbar. You can use this to highlight all text that matches your search word(s). The keyboard shortcut for this is Ctrl-Enter. Figure 2.24 shows what this looks like.
Perhaps you noticed the Highlight button in the Find toolbar. You can use this to highlight all text that matches your search word(s). The keyboard shortcut for this is Ctrl-Enter . Figure 2.24 shows what this looks like.
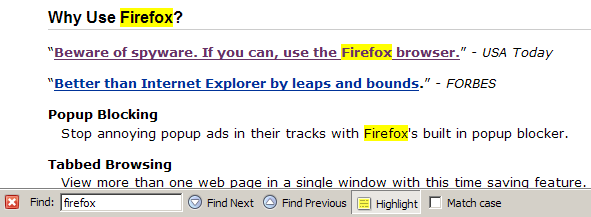
Figure 2.24. Highlighting "Firefox" through the Find toolbar.
Figure 2.24. Highlighting "Firefox" through the Find toolbar.
This kind of highlighting uses yellow to mimic the action of a felt pen highlighter, and doesn’t change your current selection. There’s also a checkbox that you can check should you want to match case (i.e. typing FiReFoX will match "FiReFoX" but not "Firefox" or "firefox").
This kind of highlighting uses yellow to mimic the action of a felt pen highlighter, and doesn't change your current selection. There's also a checkbox that you can check should you want to match case (ie typing FiReFoX will match "FiReFoX" but not "Firefox" or "firefox").
Tip There are probably times when you want to search only within the text of links, ignoring all the other text on the page. A good example is my endless scanning for the "download" link on a Web page. To start searching only within links, hit ‘ (single apostrophe), instead of the usual / (forward-slash) or Ctrl-F, then start typing as you normally would. Only link text that matches your search term is highlighted. When you come to a link that you want, you can use Enter to load it in the current tab, or CtrlEnter to load it into a new tab.
Tip There are probably times when you want to search only within the text of links, ignoring all the other text on the page. A good example is my endless scanning for the "download" link on a Web page. To start searching only within links, hit ' (single apostrophe), instead of the usual / (forward-slash) or Ctrl-F , then start typing as you normally would. Only link text that matches your search term is highlighted. When you come to a link that you want, you can use Enter to load it in the current tab, or CtrlEnter to load it into a new tab.
A final variation that improves the efficiency of your searching is to enable the preference Begin finding when you begin typing, which can be found under Tools > Options > Advanced >Accessibility (Firefox >Preferences on Mac OS X, Edit >Preferences on Linux). That option’s shown in Figure 2.25.
A final variation that improves the efficiency of your searching is to enable the preference Begin finding when you begin typing, which can be found under Tools > Options > Advanced >Accessibility (Firefox >Preferences on Mac OS X, Edit >Preferences on Linux). That option's shown in Figure 2.25.
When this preference is enabled, you no longer have to hit / or Ctrl-F to start a search: just start typing your search phrase! This used to be the default behavior prior to Firefox 1.0, and is a well-loved feature among power users, yours truly included.
When this preference is enabled, you no longer have to hit / or Ctrl-F to start a search: just start typing your search phrase! This used to be the default behavior prior to Firefox 1.0, and is a well-loved feature among power users, yours truly included.
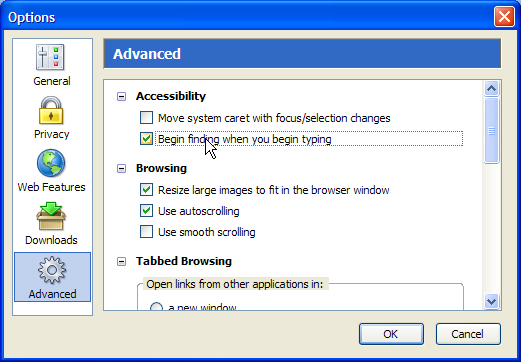
Figure 2.25. Begin finding when you begin typing.
Figure 2.25. Begin finding when you begin typing.
Search is what you do with a browser when you want to find something. But, what do you do when you’re presented with information that you’d rather not know? We take a look at this issue next.
Search is what you do with a browser when you want to find something. But, what do you do when you're presented with information that you'd rather not know? We take a look at this issue next.
Non-invasive Browsing (Non-invasive Browsing)
Firefox has built-in features that make your online browsing experience as smooth and uninterrupted as possible. Lots of features exist to remove the annoyances we tend to suffer when using IE. Popup and pop-under ads, spoofed status bar text that hides URLs, animated status bar text, flashing "Click me!" banner advertisements, windows that resize themselves to be either incredibly small or incredibly large: all these are annoyances. I have not seen any of them since I started using Firefox.
Firefox has built-in features that make your online browsing experience as smooth and uninterrupted as possible. Lots of features exist to remove the annoyances we tend to suffer when using IE. Popup and pop-under ads, spoofed status bar text that hides URLs, animated status bar text, flashing "Click me!" banner advertisements, windows that resize themselves to be either incredibly small or incredibly large: all these are annoyances. I have not seen any of them since I started using Firefox.
Annoyance elimination is the process of silently removing all these irritants. Annoyance elimination is one thing at which Firefox excels, so let’s see how you can configure Firefox to create the uninterrupted browsing experience that you deserve.
Annoyance elimination is the process of silently removing all these irritants. Annoyance elimination is one thing at which Firefox excels, so let's see how you can configure Firefox to create the uninterrupted browsing experience that you deserve.
Popup Blocking
Popup Blocking
In the past, we lived with popup and pop-under windows that contained advertisements as if they were an unavoidable part of life. Fortunately, someone conceived of popup blocking software, which provided some relief. Eventually, software developers started building popup-blocking capabilities into their browsers; Firefox is one such browser. Popup blocking has become such an important feature of Web browsers that you’d now be hard-pressed to find one without it. Firefox, Safari, the Mozilla Application Suite, and even Internet Explorer on Windows XP (provided Service Pack 2 is installed) offer integrated popup-blocking features.
In the past, we lived with popup and pop-under windows that contained advertisements as if they were an unavoidable part of life. Fortunately, someone conceived of popup blocking software, which provided some relief. Eventually, software developers started building popup-blocking capabilities into their browsers; Firefox is one such browser. Popup blocking has become such an important feature of Web browsers that you'd now be hard-pressed to find one without it. Firefox, Safari, the Mozilla Application Suite, and even Internet Explorer on Windows XP (provided Service Pack 2 is installed) offer integrated popup-blocking features.
If you visit sites that use popups as a necessary element of the site’s functionality (a banking site, for example), or you simply have some strange popup ad fetish, you can turn off Firefox’s popup blocker, either globally, or on an individual site basis. We’ll see how to tune the Firefox popup blocker to suit your requirements as we move through this discussion.
If you visit sites that use popups as a necessary element of the site's functionality (a banking site, for example), or you simply have some strange popup ad fetish, you can turn off Firefox's popup blocker, either globally, or on an individual site basis. We'll see how to tune the Firefox popup blocker to suit your requirements as we move through this discussion.
Note This is not the place to discuss the "ethics" of popup blocking and online advertising, so throughout this discussion I’ll assume you’ll want to block popups. What has popup blocking got to do with ethics? Well, people argue that since online advertising is what funds many free (and non-free) Websites, popup blocking is like stealing from these sites, since they don’t get revenue from your viewing of their content. To debate these issues is beyond the scope of this book.
Note This is not the place to discuss the "ethics" of popup blocking and online advertising, so throughout this discussion I'll assume you'll want to block popups. What has popup blocking got to do with ethics? Well, people argue that since online advertising is what funds many free (and non-free) Websites, popup blocking is like stealing from these sites, since they don't get revenue from your viewing of their content. To debate these issues is beyond the scope of this book.
Avoiding Popups
Avoiding Popups
Firefox is configured out-of-the-box to block popup windows, so you don’t need to do anything to get this working. You can test out the popup blocker by going to a Website that uses popups. I suggest searching for "popup test" and visiting one of the popular testing sites. Whenever Firefox encounters a Website-initiated popup, as opposed to a user-initiated popup (more on that shortly), it will block that popup and display a notice that it has done so. You can see an example of the notice in Figure 2.26: the strip across the top appears by default; the displayed menu appears if you click on that strip.
Firefox is configured out-of-the-box to block popup windows, so you don't need to do anything to get this working. You can test out the popup blocker by going to a Website that uses popups. I suggest searching for "popup test" and visiting one of the popular testing sites. Whenever Firefox encounters a Website-initiated popup, as opposed to a user-initiated popup (more on that shortly), it will block that popup and display a notice that it has done so. You can see an example of the notice in Figure 2.26: the strip across the top appears by default; the displayed menu appears if you click on that strip.
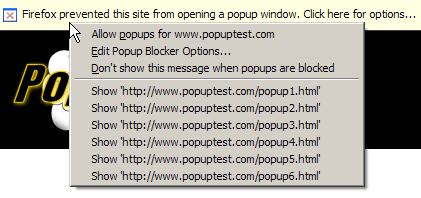
Figure 2.26. Firefox’s popup blocker generating a notice and blocked popup menu.
Figure 2.26. Firefox's popup blocker generating a notice and blocked popup menu.
In this example, Firefox has dutifully blocked a popup from PopupTest.com. If you want, you can choose from the context menu the option to permanently allow popups from that site; additionally, you may (just once) choose to load the blocked popups.
In this example, Firefox has dutifully blocked a popup from PopupTest.com . If you want, you can choose from the context menu the option to permanently allow popups from that site; additionally, you may (just once) choose to load the blocked popups.
When popups are blocked, you will also see an icon at the bottom right corner of your Firefox window: this will always be visible, even after you select Don’t show this message when popups are blocked. In Figure 2.27 the icon appears to the left of the window resize grip (the small triangle of dots in the bottom-right corner).
When popups are blocked, you will also see an icon at the bottom right corner of your Firefox window: this will always be visible, even after you select Don't show this message when popups are blocked. In Figure 2.27 the icon appears to the left of the window resize grip (the small triangle of dots in the bottom-right corner).
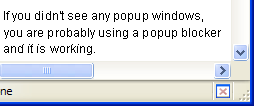
Figure 2.27. The blocked popup icon.
Figure 2.27. The blocked popup icon.
To view any blocked popup, click on the information bar and select the appropriate Show ‘http://www.example.com/popup.html‘ option. The blocked popup will burst into existence for one time only. This is useful if you want to be sure you aren’t missing anything (like a good deal on Viagra).
To view any blocked popup, click on the information bar and select the appropriate Show ' http://www.example.com/popup.html ' option. The blocked popup will burst into existence for one time only. This is useful if you want to be sure you aren't missing anything (like a good deal on Viagra).
You can also tell Firefox to allow the Website to open popups from this point forward for a particular site. This is best used when you trust the Website and don’t mind seeing its popup windows – perhaps it’s a work-related Website whose popups you should see. Whatever the reason, you can view popups for a given site by selecting Allow popups for www.example.com from the information bar.
You can also tell Firefox to allow the Website to open popups from this point forward for a particular site. This is best used when you trust the Website and don't mind seeing its popup windows – perhaps it's a work-related Website whose popups you should see. Whatever the reason, you can view popups for a given site by selecting Allow popups for www.example.com from the information bar.
Don’t be afraid to allow popups: you can just as easily disable popups again. To do so, access the Popup Blocker Options. Under Tools > Options > Web Features, you will see a Block Popup Windows checkbox, with an Allowed Sites button beside it. Figure 2.28 shows this feature.
Don't be afraid to allow popups: you can just as easily disable popups again. To do so, access the Popup Blocker Options. Under Tools > Options > Web Features, you will see a Block Popup Windows checkbox, with an Allowed Sites button beside it. Figure 2.28 shows this feature.
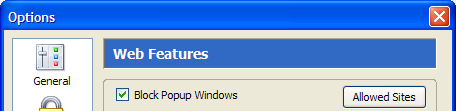
Figure 2.28. Popup blocker options.
Figure 2.28. Popup blocker options.
Click on the Allowed Sites button to bring up the list of sites that are allowed to open popup windows in your browser. An example setup is shown in Figure 2.29.
Click on the Allowed Sites button to bring up the list of sites that are allowed to open popup windows in your browser. An example setup is shown in Figure 2.29.
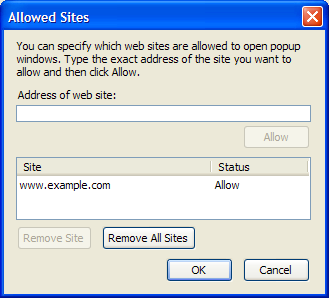
Figure 2.29. The Allowed Sites dialog.
Figure 2.29. The Allowed Sites dialog.
This dialog holds a simple whitelist of sites whose popups are allowed to appear in your browser. You can add Websites to the list by typing their URLs into the Address of web site field in the dialog, but that’s the hard way to do it. It’s much easier to allow popups from the information bar, as we did before. Removing a site is as simple as selecting it in the list (left-click), then clicking the Remove Site button.
This dialog holds a simple whitelist of sites whose popups are allowed to appear in your browser. You can add Websites to the list by typing their URLs into the Address of web site field in the dialog, but that's the hard way to do it. It's much easier to allow popups from the information bar, as we did before. Removing a site is as simple as selecting it in the list (left-click), then clicking the Remove Site button.
User-Initiated Popups
User-Initiated Popups
A small note about popup blocking: Firefox doesn’t block user-initiated popups. Such popups occur if you click on a link that spawns a popup. If you do this, the popup isn’t blocked, because you asked for it. This is logical behavior: if I click on the link, I probably want it to do what it’s supposed to do. See the Tabbed Browsing discussion in Chapter 3, Revisiting Web Pages for a way to trap even these popups inside an existing window or a tab.
A small note about popup blocking: Firefox doesn't block user-initiated popups. Such popups occur if you click on a link that spawns a popup. If you do this, the popup isn't blocked, because you asked for it. This is logical behavior: if I click on the link, I probably want it to do what it's supposed to do. See the Tabbed Browsing discussion in Chapter 3, Revisiting Web Pages for a way to trap even these popups inside an existing window or a tab.
User-initiated popups are often implemented using JavaScript. Next, we’ll see how to control what JavaScript can and can’t do.
User-initiated popups are often implemented using JavaScript. Next, we'll see how to control what JavaScript can and can't do.
Disabling Annoying JavaScript
Disabling Annoying JavaScript
I don’t know about you, but all those pesky things that Websites do with JavaScript really annoy me. My pet-hates are popup windows that spawn more popup windows, animated status bar tickers that obscure the normal status bar text, and spoofed status bar text that tries to mislead.
I don't know about you, but all those pesky things that Websites do with JavaScript really annoy me. My pet-hates are popup windows that spawn more popup windows, animated status bar tickers that obscure the normal status bar text, and spoofed status bar text that tries to mislead.
I’d always wished there was a way to turn off those particular JavaScript effec ts in my browser without losing the rest of the dynamic JavaScript functionality offered by the Websites in question. Preventing a Website from spoofing the status bar text is good. Preventing a dynamic form from using its JavaScript scripts to calculate whether I am "the life of the party" or the "uninvited nerd" is not so helpful.
I'd always wished there was a way to turn off those particular JavaScript effec ts in my browser without losing the rest of the dynamic JavaScript functionality offered by the Websites in question. Preventing a Website from spoofing the status bar text is good. Preventing a dynamic form from using its JavaScript scripts to calculate whether I am "the life of the party" or the "uninvited nerd" is not so helpful.
Firefox supports this distinction nicely by blocking certain JavaScript calls while allowing the rest. Exactly which JavaScript calls are blocked can be configured in the Web Features preferences pane.
Firefox supports this distinction nicely by blocking certain JavaScript calls while allowing the rest. Exactly which JavaScript calls are blocked can be configured in the Web Features preferences pane.
JavaScript Web Features
JavaScript Web Features
To find these JavaScript settings, look in the Web Features pane of the Options or Preferences dialog box. There is an Enable JavaScript checkbox alongside an Advanced… button on which you can click. Figure 2.30 shows this arrangement and the resulting secondary dialog box:
To find these JavaScript settings, look in the Web Features pane of the Options or Preferences dialog box. There is an Enable JavaScript checkbox alongside an Advanced… button on which you can click. Figure 2.30 shows this arrangement and the resulting secondary dialog box:
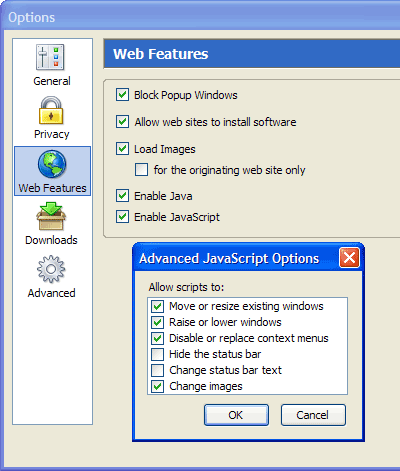
Figure 2.30. Advanced JavaScript options.
Figure 2.30. Advanced JavaScript options.
Don’t be afraid to play with the options here just because they’re described as "Advanced." These are actually fairly obscure options, rather than particularly advanced options. Here’s a run-down of what each does.
Don't be afraid to play with the options here just because they're described as "Advanced." These are actually fairly obscure options, rather than particularly advanced options. Here's a run-down of what each does.
Move or resize existing windows
Move or resize existing windows
Uncheck this to disable JavaScript that tries to resize a browser window that’s already open. Sites that do this usually want to make the window smaller. They’re often Web design sites, but can simply be sites that were created to annoy the heck out of you. This option will not prevent a popup window from choosing its own size, however. Popup windows can choose their own size provided that you’ve allowed popup windows, or the window is a user-initiated popup.
Uncheck this to disable JavaScript that tries to resize a browser window that's already open. Sites that do this usually want to make the window smaller. They're often Web design sites, but can simply be sites that were created to annoy the heck out of you. This option will not prevent a popup window from choosing its own size, however. Popup windows can choose their own size provided that you've allowed popup windows, or the window is a user-initiated popup.
Raise or lower windows
Raise or lower windows
This option is a little ambiguous at first inspection and, initially, I had some trouble figuring out what "raise" and "lower" actually meant! These options control whether JavaScript can be used to bring a window to the front (that’s "raise") and, therefore to the top of the windows displayed on the desktop, or, conversely, to hide a window under others (that’s "lower"). A common example of the "lower" case, typically used for devious purposes, is the pop-under window, where a Website tries to open a secret window that you won’t notice. Sometimes this feature is needed, though, especially when Web-based applications need to maintain several open windows at once, or windows need to display warning messages.
This option is a little ambiguous at first inspection and, initially, I had some trouble figuring out what "raise" and "lower" actually meant! These options control whether JavaScript can be used to bring a window to the front (that's "raise") and, therefore to the top of the windows displayed on the desktop, or, conversely, to hide a window under others (that's "lower"). A common example of the "lower" case, typically used for devious purposes, is the pop-under window, where a Website tries to open a secret window that you won't notice. Sometimes this feature is needed, though, especially when Web-based applications need to maintain several open windows at once, or windows need to display warning messages.
Disable or replace context menus
Disable or replace context menus
Have you ever come across Websites that prevent you from right-clicking? No? Perhaps you remember trying to save an image that caught your fancy, only to find that you couldn’t right-click; instead, you’re told sternly that the image is copyrighted and not for download. When the Disable or replace context menus option is checked, that kind of thing may happen. Unchecking this option disables any JavaScript that tries to hide the context menu, so that the context menu is always free for you to use.
Have you ever come across Websites that prevent you from right-clicking? 没有? Perhaps you remember trying to save an image that caught your fancy, only to find that you couldn't right-click; instead, you're told sternly that the image is copyrighted and not for download. When the Disable or replace context menus option is checked, that kind of thing may happen. Unchecking this option disables any JavaScript that tries to hide the context menu, so that the context menu is always free for you to use.
Hide the status bar
Hide the status bar
Uncheck this option to prevent Web pages from hiding the status bar at the bottom of the Firefox window. This is a highly recommended option since an absent status bar creates a security risk (see the next point).
Uncheck this option to prevent Web pages from hiding the status bar at the bottom of the Firefox window. This is a highly recommended option since an absent status bar creates a security risk (see the next point).
Change status bar text
Change status bar text
Some Websites spoof the status bar text, replacing the actual URLs of links with other URLs, or other text. Some sites have annoying animated stock ticker-like text that screams "WeLcOmE tO mY hOmEpAgE!" This is not only annoying but a security risk, because you can be fooled into clicking a link that goes to a URL that you weren’t expecting to visit. A carefully crafted piece of status bar text can also mislead you rather than annoy you. This is a so-called "phishing" scam that attempts to mimic normal browser functionality. I highly recommend you leave this option unchecked.
Some Websites spoof the status bar text, replacing the actual URLs of links with other URLs, or other text. Some sites have annoying animated stock ticker-like text that screams "WeLcOmE tO mY hOmEpAgE!" This is not only annoying but a security risk, because you can be fooled into clicking a link that goes to a URL that you weren't expecting to visit. A carefully crafted piece of status bar text can also mislead you rather than annoy you. This is a so-called "phishing" scam that attempts to mimic normal browser functionality. I highly recommend you leave this option unchecked.
Change images
Change images
Unchecking this option disables features like JavaScript rollovers and dynamic menus that rely on images. It also disables some obscure form submission techniques based on image replacement.
Unchecking this option disables features like JavaScript rollovers and dynamic menus that rely on images. It also disables some obscure form submission techniques based on image replacement.
Downloading for Dummies (Downloading for Dummies)
Using Firefox to download files from the Internet is a pretty common activity. It helps if the browser makes this mundane stuff hassle-free. Firefox has several standard features that make downloading easier; we’ll step through these now. Later in the book we’ll see how to enhance that download support with extra features.
Using Firefox to download files from the Internet is a pretty common activity. It helps if the browser makes this mundane stuff hassle-free. Firefox has several standard features that make downloading easier; we'll step through these now. Later in the book we'll see how to enhance that download support with extra features.
Downloading Files
Downloading Files
When you first download a file, Firefox displays a dialog window that asks you what it should do with that file. Choosing to open the file instructs Firefox to download the file to a temporary directory and then open it with the application you selected in the drop-down. As you’d expect, saving to disk simply saves the file to your hard disk. Figure 2.31 shows this initial dialog box:
When you first download a file, Firefox displays a dialog window that asks you what it should do with that file. Choosing to open the file instructs Firefox to download the file to a temporary directory and then open it with the application you selected in the drop-down. As you'd expect, saving to disk simply saves the file to your hard disk. Figure 2.31 shows this initial dialog box:
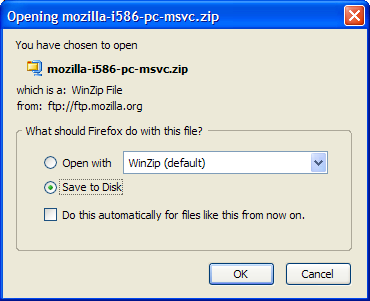
Figure 2.31. The file download dialog.
Figure 2.31. The file download dialog.
Downloads that are risky, such as executable files, cannot be opened by Firefox automatically: you can only save such files direct to disk. In such cases, the Open with option is disabled, as you can see in Figure 2.31. This restriction prevents you from accidentally running an application that you did not intend to run.
Downloads that are risky, such as executable files, cannot be opened by Firefox automatically: you can only save such files direct to disk. In such cases, the Open with option is disabled, as you can see in Figure 2.31. This restriction prevents you from accidentally running an application that you did not intend to run.
Notice also the dialog checkbox labeled Do this automatically for files like this from now on. This option instructs Firefox to remember your preference and to pre-select it the next time you download a file of the same type. You can change this behavior in the Downloads section of the Options dialog box (Tools > Options, Firefox > Preferences or Edit > Preferences, depending on your platform). Figure 2.32 shows this dialog box after a few common file types have been configured.
Notice also the dialog checkbox labeled Do this automatically for files like this from now on. This option instructs Firefox to remember your preference and to pre-select it the next time you download a file of the same type. You can change this behavior in the Downloads section of the Options dialog box (Tools > Options, Firefox > Preferences or Edit > Preferences, depending on your platform). Figure 2.32 shows this dialog box after a few common file types have been configured.
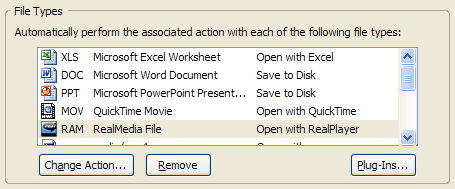
Figure 2.32. Configuring file type associations.
Figure 2.32. Configuring file type associations.
Once Firefox has recorded your initial preference, you can change the default action taken for a remembered file type. Clicking the Change Action… button will allow you to change the application with which Firefox opens files of this type, or lets you tell the browser to revert to saving them directly to disk.
Once Firefox has recorded your initial preference, you can change the default action taken for a remembered file type. Clicking the Change Action… button will allow you to change the application with which Firefox opens files of this type, or lets you tell the browser to revert to saving them directly to disk.
The Download Manager
The Download Manager
Firefox comes with a Download Manager that displays all of your downloads in one place. Instead of displaying a download dialog for every single download, as Internet Explorer does, Firefox gathers your downloads together in a single location where you can track their progress without having to contend with multiple windows. Figure 2.33 shows the Download Manager.
Firefox comes with a Download Manager that displays all of your downloads in one place. Instead of displaying a download dialog for every single download, as Internet Explorer does, Firefox gathers your downloads together in a single location where you can track their progress without having to contend with multiple windows. Figure 2.33 shows the Download Manager.
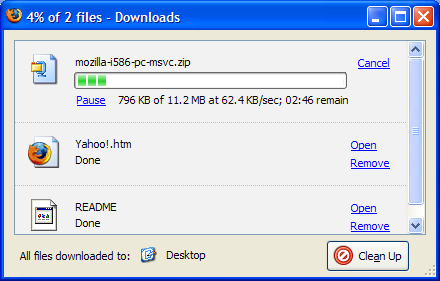
Figure 2.33. The Download Manager in action.
Figure 2.33. The Download Manager in action.
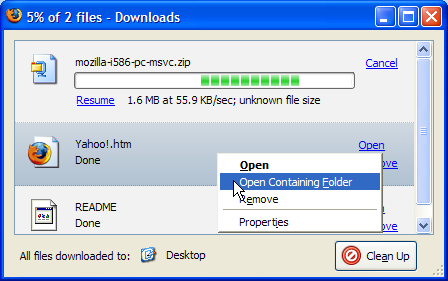
Figure 2.34. Opening a folder containing a downloaded file.
Figure 2.34. Opening a folder containing a downloaded file.
Let’s quickly discuss exactly what you can do in the Download Manager. Firstly, you’ll notice that downloads in progress can be paused or cancelled. Resuming paused downloads only works if the server supplying the file is configured that way, so don’t pause if you’re unsure of the server. Completed downloads can be opened by clicking the Open link, or double-clicking the row in which the file is listed. Completed downloads can also be removed from the Download Manager. Note that Remove doesn’t delete any files from disk: it simply removes them from the Download Manager. Another commonly needed action is to open the folder containing the downloaded file. This can be done by right-clicking the row on which the file is listed in the Download Manager, and selecting Open Containing Folder. Figure 2.34 shows that detail.
Let's quickly discuss exactly what you can do in the Download Manager. Firstly, you'll notice that downloads in progress can be paused or cancelled. Resuming paused downloads only works if the server supplying the file is configured that way, so don't pause if you're unsure of the server. Completed downloads can be opened by clicking the Open link, or double-clicking the row in which the file is listed. Completed downloads can also be removed from the Download Manager. Note that Remove doesn't delete any files from disk: it simply removes them from the Download Manager. Another commonly needed action is to open the folder containing the downloaded file. This can be done by right-clicking the row on which the file is listed in the Download Manager, and selecting Open Containing Folder. Figure 2.34 shows that detail.
Notice that, at the base of the window, there’s also an indication of the standard download directory. This is correct provided that you haven’t configured Firefox to ask you where to save each downloaded file. In the screenshot above, the Download Manager helpfully reminds us that files are downloaded to the desktop, which is a folder or directory associated with the current operating system user account.
Notice that, at the base of the window, there's also an indication of the standard download directory. This is correct provided that you haven't configured Firefox to ask you where to save each downloaded file. In the screenshot above, the Download Manager helpfully reminds us that files are downloaded to the desktop, which is a folder or directory associated with the current operating system user account.
Finally, the Clean Up button is used to remove completed and cancelled entries from the Download Manager, which helps to keep the list of entries in the Download Manager to a sane limit. When all downloads are complete, Firefox pops up a small notification window in the bottom-right corner of the desktop, as shown in Figure 2.35.
Finally, the Clean Up button is used to remove completed and cancelled entries from the Download Manager, which helps to keep the list of entries in the Download Manager to a sane limit. When all downloads are complete, Firefox pops up a small notification window in the bottom-right corner of the desktop, as shown in Figure 2.35.

Figure 2.35. The Downloads Complete notification.
Figure 2.35. The Downloads Complete notification.
Firefox saves all downloads to the desktop by default, and does so without prompting. If you prefer to save to another location, or to have Firefox prompt you for a save location for every new download, go to Tools > Options > Downloads (on Windows) and change the settings in the Download Folder section shown in Figure 2.36.
Firefox saves all downloads to the desktop by default, and does so without prompting. If you prefer to save to another location, or to have Firefox prompt you for a save location for every new download, go to Tools > Options > Downloads (on Windows) and change the settings in the Download Folder section shown in Figure 2.36.
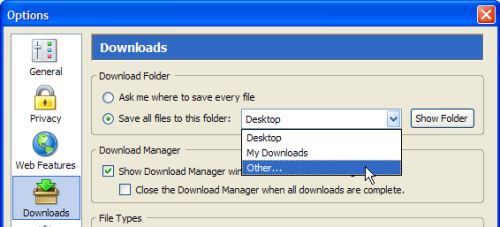
Figure 2.36. Configuring Download Folder options.
Figure 2.36. Configuring Download Folder options.
To be prompted for a save location each time you download, make sure the Ask me where to save every file option is selected. Otherwise, if you’d like to change the automatically selected default download location, simply select Other… from the drop-down, and choose the folder you want.
To be prompted for a save location each time you download, make sure the Ask me where to save every file option is selected. Otherwise, if you'd like to change the automatically selected default download location, simply select Other… from the drop-down, and choose the folder you want.
If you find the Download Manager a little annoying (in which case, you’re not alone) you can disable it through the Downloads preferences (Tools > Options > Downloads on Windows) by unchecking Show Download Manager window when a download begins. If you do so, you can still call up the Download Manager from Tools > Downloads or via the Ctrl-J shortcut key. You will always be notified when all downloads are complete.
If you find the Download Manager a little annoying (in which case, you're not alone) you can disable it through the Downloads preferences (Tools > Options > Downloads on Windows) by unchecking Show Download Manager window when a download begins. If you do so, you can still call up the Download Manager from Tools > Downloads or via the Ctrl-J shortcut key. You will always be notified when all downloads are complete.
If you press Pause in the Download Manager while downloading a file, you can resume that download anytime as long as Firefox is still running. The Download Manager doesn’t support the cross-session resumption of downloads as yet. Cross-session resuming is a rather useful feature that allows you to close Firefox, or even shutdown your computer, while downloading a file. When you start up again, the download picks up where it left off. This feature is targeted to appear in Firefox 2.0: see this functionality outline for more. While we (especially those of us on dial-up) wait patiently for this killer feature, you may be comforted to know that at least Firefox protects your in-progress download with a warning if you try to exit the browser prematurely. The dialog in Figure 2.37 shows that warning, which provides you with an opportunity to reverse your hasty exit decision. If you keep going, your partially downloaded files will have to be re-downloaded from scratch.
If you press Pause in the Download Manager while downloading a file, you can resume that download anytime as long as Firefox is still running. The Download Manager doesn't support the cross-session resumption of downloads as yet. Cross-session resuming is a rather useful feature that allows you to close Firefox, or even shutdown your computer, while downloading a file. When you start up again, the download picks up where it left off. This feature is targeted to appear in Firefox 2.0: see this functionality outline for more. While we (especially those of us on dial-up) wait patiently for this killer feature, you may be comforted to know that at least Firefox protects your in-progress download with a warning if you try to exit the browser prematurely. The dialog in Figure 2.37 shows that warning, which provides you with an opportunity to reverse your hasty exit decision. If you keep going, your partially downloaded files will have to be re-downloaded from scratch.

Figure 2.37. The partial downloads cancellation warning shown on exit.
Figure 2.37. The partial downloads cancellation warning shown on exit.
Installing Plugins (Installing Plugins)
Plugins are add-on programs that allow you to view non-HTML content such as PDF files, Flash content, Java applets, and video within Firefox browser windows, or in separate windows created from Firefox windows.
Plugins are add-on programs that allow you to view non-HTML content such as PDF files, Flash content, Java applets, and video within Firefox browser windows, or in separate windows created from Firefox windows.
If a plugin is missing when you view a page that carries plugin content, then you’ll see a jigsaw piece in place of the content; a yellow plugin information bar will also appear at the top of the page. Figure 2.38 shows this arrangement when the Macromedia Flash plugin is missing.
If a plugin is missing when you view a page that carries plugin content, then you'll see a jigsaw piece in place of the content; a yellow plugin information bar will also appear at the top of the page. Figure 2.38 shows this arrangement when the Macromedia Flash plugin is missing.
To install the required plugin automatically, just click the Install Missing Plugins… button and let Firefox find the plugin for you. Follow the resulting install prompts as you normally would. At the end of that process, the current page is redisplayed with the plugin content presented by the new plugin.
To install the required plugin automatically, just click the Install Missing Plugins… button and let Firefox find the plugin for you. Follow the resulting install prompts as you normally would. At the end of that process, the current page is redisplayed with the plugin content presented by the new plugin.
Major plugins are available for Adobe Acrobat, Macromedia Flash, Java, Apple Quicktime, Realplayer, and Windows Media Player. Firefox knows how to get all of these plugins. However, if, by some chance, the plugin isn’t found by Firefox, or you want a particular version of the plugin or some other special arrangement, you can install plugins yourself. You can obtain most plugins at https://addons.update.mozilla.org/plugins/.
Major plugins are available for Adobe Acrobat, Macromedia Flash, Java, Apple Quicktime, Realplayer, and Windows Media Player. Firefox knows how to get all of these plugins. However, if, by some chance, the plugin isn't found by Firefox, or you want a particular version of the plugin or some other special arrangement, you can install plugins yourself. You can obtain most plugins at https://addons.update.mozilla.org/plugins/ .
To install plugin software from that page, look for the link that suits your operating system, click it, and follow the instructions on the resulting page. Supporting documentation is also found at the PluginDoc project. You can refer to that more extensive site should you have any problems.
To install plugin software from that page, look for the link that suits your operating system, click it, and follow the instructions on the resulting page. Supporting documentation is also found at the PluginDoc project . You can refer to that more extensive site should you have any problems.

Figure 2.38. The plugin content placeholder and information bar.
Figure 2.38. The plugin content placeholder and information bar.
Getting to your Email (Getting to your Email)
Firefox has an email integration user interface (UI) feature that lets you create and read emails from your browser. It’s available on Microsoft Windows only. You can access this extra feature from the Tools menu: it even indicates to you how many unread emails you have, provided that Windows has registered a default email application. Of the two menu options supplied, choosing Read Mail will launch your default email application (probably Outlook, Outlook Express, or Thunderbird); choosing New Message… creates a new email message for you. Figure 2.39 shows these menu items.
Firefox has an email integration user interface (UI) feature that lets you create and read emails from your browser. It's available on Microsoft Windows only. You can access this extra feature from the Tools menu: it even indicates to you how many unread emails you have, provided that Windows has registered a default email application. Of the two menu options supplied, choosing Read Mail will launch your default email application (probably Outlook, Outlook Express, or Thunderbird); choosing New Message… creates a new email message for you. Figure 2.39 shows these menu items.
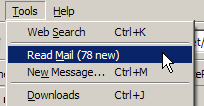
Figure 2.39. Windows email options on the Tools menu.
Figure 2.39. Windows email options on the Tools menu.
If you choose to customize your toolbars (use View > Toolbars > Customize…), you can add an email button to the navigation bar. It contains a drop-down list that provides the same options for reading and creating emails. Figure 2.40 shows this button after it’s been left-clicked.
If you choose to customize your toolbars (use View > Toolbars > Customize…), you can add an email button to the navigation bar. It contains a drop-down list that provides the same options for reading and creating emails. Figure 2.40 shows this button after it's been left-clicked.
Figure 2.40. Toolbar-based email button.
Figure 2.40. Toolbar-based email button.
摘要 (Summary)
In this chapter, we’ve covered the core functionality of Firefox: the basic things you need to know to work efficiently with Firefox on the Web.
In this chapter, we've covered the core functionality of Firefox: the basic things you need to know to work efficiently with Firefox on the Web.
We took a good look at tabbed browsing and how it compares against the old-school non-tabbed browser interface. This author’s conclusion is that tabs are a superior way to browse. Annoyance elimination is another task at which Firefox excels, and in addition to the standard features, you can also change popup blocking and disable bothersome JavaScript.
We took a good look at tabbed browsing and how it compares against the old-school non-tabbed browser interface. This author's conclusion is that tabs are a superior way to browse. Annoyance elimination is another task at which Firefox excels, and in addition to the standard features, you can also change popup blocking and disable bothersome JavaScript.
There Is More Than One Way To Find It (TIMTOWTFI) in Firefox, and by now you should be a master of search using Firefox. Smart Keywords are particularly clever, and so are you, now that you know how to create and use them! We also covered what I think is another killer feature of Firefox: FastFind, which allows you to search text within a page quickly.
There Is More Than One Way To Find It (TIMTOWTFI) in Firefox, and by now you should be a master of search using Firefox. Smart Keywords are particularly clever, and so are you, now that you know how to create and use them! We also covered what I think is another killer feature of Firefox: FastFind, which allows you to search text within a page quickly.
On top of tabs, popups and search, we briefly covered working with non-Web content: downloading files, installing plugins, and accessing email. Firefox integrates quite well with all of those not-strictly-Web-browsing activities.
On top of tabs, popups and search, we briefly covered working with non-Web content: downloading files, installing plugins, and accessing email. Firefox integrates quite well with all of those not-strictly-Web-browsing activities.
In the next chapter, we’ll continue our exploration of Firefox’s standard browsing features. We’ve already learned that Firefox is an efficient system for carrying you from the current page to the next page. In Chapter 3, Revisiting Web Pages, we’ll see that Firefox has many helpful features when the time comes to revisit a page that you’ve already visited.
In the next chapter, we'll continue our exploration of Firefox's standard browsing features. We've already learned that Firefox is an efficient system for carrying you from the current page to the next page. In Chapter 3, Revisiting Web Pages , we'll see that Firefox has many helpful features when the time comes to revisit a page that you've already visited.
Sample Secrets (Sample Secrets)
Chapter 6, Tips, Tricks and Hacks (Chapter 6, Tips, Tricks and Hacks)
There are many subtle features hidden beneath the Firefox hood, many of which aren’t accessible from the menu system: some even require that you learn hidden keyboard incantations! In this chapter, we dive into the deep end of the pool, where such wonders lie. We’ll take a look at Firefox’s hidden preferences, and uncover the hidden mysteries of your Firefox profiles. We’ll also explore some useful tricks that do everything from speeding up the browser, to changing the way it looks and responds.
There are many subtle features hidden beneath the Firefox hood, many of which aren't accessible from the menu system: some even require that you learn hidden keyboard incantations! In this chapter, we dive into the deep end of the pool, where such wonders lie. We'll take a look at Firefox's hidden preferences, and uncover the hidden mysteries of your Firefox profiles. We'll also explore some useful tricks that do everything from speeding up the browser, to changing the way it looks and responds.
The Secret Named about:config (The Secret Named about:config)
Firefox is designed to be immediately usable, without any configuration effort. There’s no confusing glut of preferences and options in the user interface – a problem that plagues a number of other applications and Web browsers. By design, Firefox has fewer configuration interface intricacies than do comparable tools.
Firefox is designed to be immediately usable, without any configuration effort. There's no confusing glut of preferences and options in the user interface – a problem that plagues a number of other applications and Web browsers. By design, Firefox has fewer configuration interface intricacies than do comparable tools.
While this approach is vital for everyday use and for the "everyman" user, "power" users need something more flexible. Those special users are not left in the lurch, though, because Firefox has numerous extra preferences that one can set, albeit via a somewhat unofficial method. Such hidden preferences are managed through the about:config configuration page. This is a special interface to the Firefox preference system.
While this approach is vital for everyday use and for the "everyman" user, "power" users need something more flexible. Those special users are not left in the lurch, though, because Firefox has numerous extra preferences that one can set, albeit via a somewhat unofficial method. Such hidden preferences are managed through the about:config configuration page. This is a special interface to the Firefox preference system.
To call this interface up, type the special URL or Web address, about:config (yes, that’s correctly stated) into the location bar, and hit Enter. You should see something like Figure 6.1.
To call this interface up, type the special URL or Web address, about:config (yes, that's correctly stated) into the location bar, and hit Enter. You should see something like Figure 6.1.
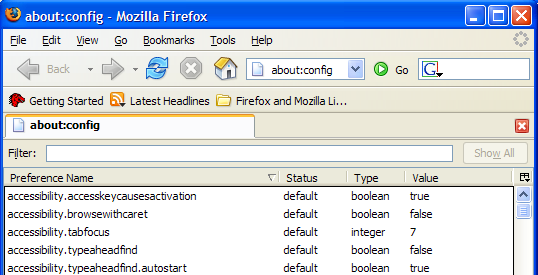
Figure 6.1. Introducing the about:config interface.
Figure 6.1. Introducing the about:config interface.
Instead of an HTML Web page, the special preference system is displayed, using Firefox’s own XUL page display language. The about:config page is a bit like a dialog box, except that it sits inside the existing window, rather than a window of its own. In Figure 6.1, the page is displayed inside a single tab.
Instead of an HTML Web page, the special preference system is displayed, using Firefox's own XUL page display language. The about:config page is a bit like a dialog box, except that it sits inside the existing window, rather than a window of its own. In Figure 6.1, the page is displayed inside a single tab.
Some explanation of this interface is in order. Each line in the list reflects a single preference. You can see five such lines in Figure 6.1. Each preference has a name and a value. The Status column of a preference indicates whether it is set to the Firefox default value (default), or has been changed by the user to something else (user set). The Type column of a preference identifies the kind of data that preference holds.
Some explanation of this interface is in order. Each line in the list reflects a single preference. You can see five such lines in Figure 6.1. Each preference has a name and a value. The Status column of a preference indicates whether it is set to the Firefox default value (default), or has been changed by the user to something else (user set). The Type column of a preference identifies the kind of data that preference holds.
Note Preferences can be one of three types: string, boolean, or integer. String preferences are simply text strings (like "hello"), which include URLs (https://update.mozilla.org/extensions/?application=%APPID%). Boolean preferences are yes/no options; they hold either true or false. George Boole, a famous scientist, was the first to explain how to work with true/false values, so they’re also called "Booleans." Integer preferences take on any integer value (such as 1, 2, 23, 1099), but can’t accept decimal numbers like 5.4.
Note Preferences can be one of three types: string, boolean, or integer. String preferences are simply text strings (like "hello"), which include URLs (https://update.mozilla.org/extensions/?application=%APPID%). Boolean preferences are yes/no options; they hold either true or false. George Boole, a famous scientist, was the first to explain how to work with true/false values, so they're also called "Booleans." Integer preferences take on any integer value (such as 1, 2, 23, 1099), but can't accept decimal numbers like 5.4.
At the top of the page you’ll see a Filter text field into which you can enter some text to filter out preferences. This is very handy, since the full list of preferences spans a good number of pages.
At the top of the page you'll see a Filter text field into which you can enter some text to filter out preferences. This is very handy, since the full list of preferences spans a good number of pages.
Modifying Preferences (Modifying Preferences)
Changing an existing preference is very simple. Just double-click on that preference’s line, or right-click on it and select Modify. The values of Boolean preferences will be automatically toggled (swapped from "true" to "false" or vice versa). Modifying string and integer preferences causes a dialog box to appear, prompting you for the new value for the preference.
Changing an existing preference is very simple. Just double-click on that preference's line, or right-click on it and select Modify. The values of Boolean preferences will be automatically toggled (swapped from "true" to "false" or vice versa). Modifying string and integer preferences causes a dialog box to appear, prompting you for the new value for the preference.
As you make your changes, you’ll notice the status of the preference changing from default to user set, and that the preference text is displayed in bold type. This provides a clear indication of preferences that have been changed from the built-in browser defaults.
As you make your changes, you'll notice the status of the preference changing from default to user set, and that the preference text is displayed in bold type. This provides a clear indication of preferences that have been changed from the built-in browser defaults.
Among the hundreds of Firefox preferences there are some particularly handy ones that help to make Firefox even better than it already is. Let’s discover a few of these hidden gems.
Among the hundreds of Firefox preferences there are some particularly handy ones that help to make Firefox even better than it already is. Let's discover a few of these hidden gems.
Speeding up Firefox (Speeding up Firefox)
Here’s a configuration tip that enables Firefox to download Web pages faster: enable HTTP pipelining. HTTP pipelining allows Firefox to send multiple requests at the same time, resulting in faster loading times for Web content. Note that more technical details on HTTP pipelining are available.
Here's a configuration tip that enables Firefox to download Web pages faster: enable HTTP pipelining. HTTP pipelining allows Firefox to send multiple requests at the same time, resulting in faster loading times for Web content. Note that more technical details on HTTP pipelining are available.
Warning HTTP pipelining is an experimental feature and can cause some Web pages to display incorrectly if they’re not properly supported by the Web servers. While the speed improvements may be worthwhile, if your favorite Web pages start to look weird, try turning pipelining off again.
Warning HTTP pipelining is an experimental feature and can cause some Web pages to display incorrectly if they're not properly supported by the Web servers. While the speed improvements may be worthwhile, if your favorite Web pages start to look weird, try turning pipelining off again.
To enable pipelining, open the about:config interface and:
To enable pipelining, open the about:config interface and:
- Set the network.http.pipelining preference to "true" to enable HTTP pipelining for Web access that’s "direct connect."
Set the network.http.pipelining preference to "true" to enable HTTP pipelining for Web access that's "direct connect." - Set the network.http.proxy.pipelining preference to "true" to enable HTTP pipelining when the Web is accessed via a proxy server. You only need to do this if you’re using a proxy server; your ISP or network administrator can tell you if that’s the case or not.
Set the network.http.proxy.pipelining preference to "true" to enable HTTP pipelining when the Web is accessed via a proxy server. You only need to do this if you're using a proxy server; your ISP or network administrator can tell you if that's the case or not. - Set the network.http.pipelining.maxrequests preference to a number between 1 and 8. This number is the maximum number of requests that Firefox may send out at any one time in a pipeline. I recommend it be set to the maximum of 8 initially, then test working backwards from there. (The maximum is 8 as specified by the HTTP 1.1 specification; don’t try to set it any higher, as this will have no effect.) Step the value down by one (first to 7, then to 6, and so on) each time you notice the page display having problems.
Set the network.http.pipelining.maxrequests preference to a number between 1 and 8. This number is the maximum number of requests that Firefox may send out at any one time in a pipeline. I recommend it be set to the maximum of 8 initially, then test working backwards from there. (The maximum is 8 as specified by the HTTP 1.1 specification; don't try to set it any higher, as this will have no effect.) Step the value down by one (first to 7, then to 6, and so on) each time you notice the page display having problems.
With this hidden preference, you have to restart Firefox entirely before you can determine if a speed boost has been gained.
With this hidden preference, you have to restart Firefox entirely before you can determine if a speed boost has been gained.
Inline URL Auto-completion (Inline URL Auto-completion)
Here’s a useful hack to enable inline auto-complete for URLs. When this feature is working, whatever you type into the location bar is automatically completed by Firefox with the closest possible match that can be determined from the browser’s history. You can hit Enter when you get a match, or keep typing. This is much like the Inline AutoComplete feature in Internet Explorer. Figure 6.6 shows it at work.
Here's a useful hack to enable inline auto-complete for URLs. When this feature is working, whatever you type into the location bar is automatically completed by Firefox with the closest possible match that can be determined from the browser's history. You can hit Enter when you get a match, or keep typing. This is much like the Inline AutoComplete feature in Internet Explorer. Figure 6.6 shows it at work.
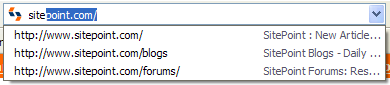
Figure 6.6. Inline auto-completion in the location bar.
Figure 6.6. Inline auto-completion in the location bar.
To enable this effect, you must add a preference that doesn’t yet appear in the about:config list. Go to about:config, right-click anywhere on the page, and select New > Boolean from the context menu, as shown in Figure 6.7.
To enable this effect, you must add a preference that doesn't yet appear in the about:config list. Go to about:config, right-click anywhere on the page, and select New > Boolean from the context menu, as shown in Figure 6.7.
This menu choice yields a couple of dialog boxes. Enter browser.urlbar.autoFill when prompted by the first dialog box, as depicted in Figure 6.8.
This menu choice yields a couple of dialog boxes. Enter browser.urlbar.autoFill when prompted by the first dialog box, as depicted in Figure 6.8.
Select true when you’re prompted to select a value, and that’s it: inline auto-complete for URLs is activated! There’s no need to restart Firefox in this case; it works straight away.
Select true when you're prompted to select a value, and that's it: inline auto-complete for URLs is activated! There's no need to restart Firefox in this case; it works straight away.
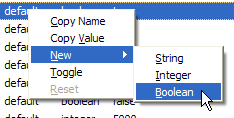
Figure 6.7. Creating a Boolean preference in about:config.
Figure 6.7. Creating a Boolean preference in about:config.
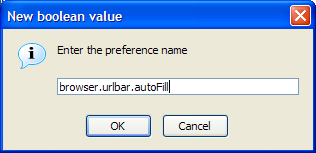
Figure 6.8. Naming the new preference.
Figure 6.8. Naming the new preference.
Chapter 7 – Web Development Nirvana (Chapter 7 – Web Development Nirvana)
Warning This chapter is geared towards Web developers and designers, and assumes some knowledge of Website creation.
Warning This chapter is geared towards Web developers and designers, and assumes some knowledge of Website creation.
From its penchant for Web standards compliance, to its built-in Web developer-friendly features, and onwards across the amazingly useful plethora of Web development-oriented extensions, Firefox is, without doubt, a far more useful Web development tool than any other Web browser! Such hyperbole, is, in this case, entirely accurate.
From its penchant for Web standards compliance, to its built-in Web developer-friendly features, and onwards across the amazingly useful plethora of Web development-oriented extensions, Firefox is, without doubt, a far more useful Web development tool than any other Web browser! Such hyperbole, is, in this case, entirely accurate.
Firefox’s checklist of useful tools is extensive. Friendly and actually useful JavaScript debugging tools – check. Provision of detailed Web page information – check. Real-time DOM inspector and editor – check. Ability to view HTTP headers as they are returned from a Web server – check. Validation of HTML, CSS, and accessibility conformance with minimal clicks – check.
Firefox's checklist of useful tools is extensive. Friendly and actually useful JavaScript debugging tools – check. Provision of detailed Web page information – check. Real-time DOM inspector and editor – check. Ability to view HTTP headers as they are returned from a Web server – check. Validation of HTML, CSS, and accessibility conformance with minimal clicks – check.
Using extensions, you can even edit the CSS of a living, breathing Web page and observe the results immediately. It doesn’t even matter which Website the Web page comes from!
Using extensions, you can even edit the CSS of a living, breathing Web page and observe the results immediately. It doesn't even matter which Website the Web page comes from!
In this chapter, we’ll explore Firefox’s Web developer-friendly features. We’ll also delve into the extensions that make indispensable tools for so many Web developers (including myself: I’ve been a freelance Web developer since 2001 and I’m currently employed as a Java Web developer). Read on if you want your development work to proceed as smoothly and professionally as possible.
In this chapter, we'll explore Firefox's Web developer-friendly features. We'll also delve into the extensions that make indispensable tools for so many Web developers (including myself: I've been a freelance Web developer since 2001 and I'm currently employed as a Java Web developer). Read on if you want your development work to proceed as smoothly and professionally as possible.
Firefox's Standard Tools (Firefox’s Standard Tools)
You don’t need to buy or download anything to get started. Many useful tools lurk inside the standard Firefox install.
You don't need to buy or download anything to get started. Many useful tools lurk inside the standard Firefox install.
Viewing Source Fundamentals
Viewing Source Fundamentals
One of the first tasks with which many Web developers find themselves involved is examining the source of other people’s Web pages, whether for debugging purposes, as a learning aid, or simply to satisfy their own irrepressible curiosity. Firefox comes with a nifty page source viewer that offers built-in syntax highlighting. Highlighting makes it easier to read the HTML source, and simpler to grasp the implied structure of the page.
One of the first tasks with which many Web developers find themselves involved is examining the source of other people's Web pages, whether for debugging purposes, as a learning aid, or simply to satisfy their own irrepressible curiosity. Firefox comes with a nifty page source viewer that offers built-in syntax highlighting. Highlighting makes it easier to read the HTML source, and simpler to grasp the implied structure of the page.
You can view the source of a page using the menu system: choose View > Page Source. Alternatively, right-click and choose View Page Source from the context menu, or hit Ctrl-U. Figure 7.1 shows the scrutiny of a typical page’s source; in this case, it’s the Firefox homepage on the Mozilla Website.
You can view the source of a page using the menu system: choose View > Page Source. Alternatively, right-click and choose View Page Source from the context menu, or hit Ctrl-U. Figure 7.1 shows the scrutiny of a typical page's source; in this case, it's the Firefox homepage on the Mozilla Website .
If you read and write HTML for a living, you probably already use an HTML editor that offers syntax highlighting. Modern browsers should perform to the same level. Yet Firefox’s support is far superior to simply opening a black-and-white Notepad session – the default action for Internet Explorer 6.0.
If you read and write HTML for a living, you probably already use an HTML editor that offers syntax highlighting. Modern browsers should perform to the same level. Yet Firefox's support is far superior to simply opening a black-and-white Notepad session – the default action for Internet Explorer 6.0.
Viewing Selection Source
Viewing Selection Source
Sometimes, viewing a whole Web page is just too much. Have you ever wished that you could check the HTML source of specific page elements on their own? (Generating dynamic content is a common Web development task that’s always prone to careless mistakes, or so I’ve found.) Perhaps you saw a well-designed element on someone else’s Web page, and wanted to know how it was done. Using Internet Explorer, you would probably view the HTML source of the entire page, then use the find/search function to locate the matching piece of HTML. This can be an unreliable process that depends on your recollection of contextual clues from the page, or other obscure hints.
Sometimes, viewing a whole Web page is just too much. Have you ever wished that you could check the HTML source of specific page elements on their own? (Generating dynamic content is a common Web development task that's always prone to careless mistakes, or so I've found.) Perhaps you saw a well-designed element on someone else's Web page, and wanted to know how it was done. Using Internet Explorer, you would probably view the HTML source of the entire page, then use the find/search function to locate the matching piece of HTML. This can be an unreliable process that depends on your recollection of contextual clues from the page, or other obscure hints.
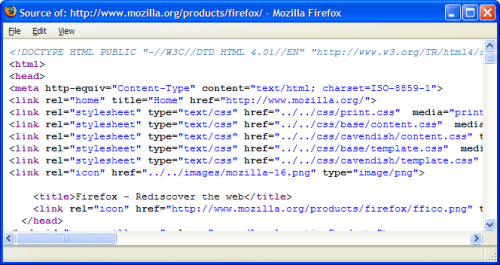
Figure 7.1. Viewing the source of the Firefox homepage.
Figure 7.1. Viewing the source of the Firefox homepage.
In Firefox, this process is hassle-free. Just use your mouse to highlight the interesting elements of the page, right-click, and then select View Selection Source. For example, if you want to find out how an input form’s checkbox is coded, just use your mouse to select the whole checkbox; then, click the right mouse button and choose View Selection Source. That’s shown in Figure 7.2, where the "Remember Me?" checkbox is highlighted.
In Firefox, this process is hassle-free. Just use your mouse to highlight the interesting elements of the page, right-click, and then select View Selection Source. For example, if you want to find out how an input form's checkbox is coded, just use your mouse to select the whole checkbox; then, click the right mouse button and choose View Selection Source. That's shown in Figure 7.2, where the "Remember Me?" checkbox is highlighted.
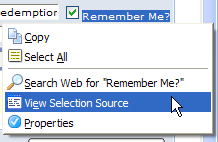
Figure 7.2. Choosing View Selection Source from the context menu.
Figure 7.2. Choosing View Selection Source from the context menu.
In return, Firefox will show you the HTML of your selection, and its surrounding code, as shown in Figure 7.3.
In return, Firefox will show you the HTML of your selection, and its surrounding code, as shown in Figure 7.3.
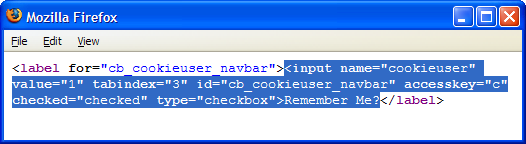
Figure 7.3. Displaying source code for the selected source.
Figure 7.3. Displaying source code for the selected source.
View Selection Source has saved me countless times as I’ve coded HTML forms, in which it’s easy to make trivial syntax mistakes. View Selection Source lets me quickly check any form elements that don’t seem to be working properly. (Often, the cause of the error is an incorrectly named form field, or the omission of a closing quotation mark.)
View Selection Source has saved me countless times as I've coded HTML forms, in which it's easy to make trivial syntax mistakes. View Selection Source lets me quickly check any form elements that don't seem to be working properly. (Often, the cause of the error is an incorrectly named form field, or the omission of a closing quotation mark.)
View Selection Source is also a great tool for helping developers learn from the best. Often, I find myself looking at the source code of Websites created by the best Web developers and designers. To learn something new, I just view the source of the interesting part of the page in question. By narrowing down the HTML source to a specific area, View Selection Source saves time and keeps me focused.
View Selection Source is also a great tool for helping developers learn from the best. Often, I find myself looking at the source code of Websites created by the best Web developers and designers. To learn something new, I just view the source of the interesting part of the page in question. By narrowing down the HTML source to a specific area, View Selection Source saves time and keeps me focused.
Page Info Document Reports
Page Info Document Reports
Firefox provides very detailed information about Web pages via the View Page Info feature, which you can access from Tools > Page Info, or by right-clicking on the page and selecting View Page Info from the context menu. Either method pops up the Page Info window, shown in Figure 7.4, which tells you everything you’d ever want to know about the page.
Firefox provides very detailed information about Web pages via the View Page Info feature, which you can access from Tools > Page Info, or by right-clicking on the page and selecting View Page Info from the context menu. Either method pops up the Page Info window, shown in Figure 7.4, which tells you everything you'd ever want to know about the page.
Figure 7.4. Displaying Page Info for sitepoint.com.
Figure 7.4. Displaying Page Info for sitepoint.com.
Each of the tabs at the top of the window represents a logical area of information about the Web page. Let’s go through each tab and identify which bits are useful to Web developers.
Each of the tabs at the top of the window represents a logical area of information about the Web page. Let's go through each tab and identify which bits are useful to Web developers.
The General Tab
The General Tab
As its name suggests, the General tab shown in Figure 7.4 displays general information about the Web page, including its MIME type, character encoding, and the size of the page. The character encoding information is particularly useful for those working on internationalized Web pages. If you’ve had any experience developing Web pages in multiple languages (and, therefore, using multiple character encodings), you’ll know that if you’re not careful, you’ll create incorrectly encoded pages that display as gibberish. Ensuring that you’re using correct character encoding can save a lot of debugging time down the track. For instance, just because you set the meta content-type to "iso-8859-1" doesn’t necessarily mean the Web page is using that encoding!
As its name suggests, the General tab shown in Figure 7.4 displays general information about the Web page, including its MIME type, character encoding, and the size of the page. The character encoding information is particularly useful for those working on internationalized Web pages. If you've had any experience developing Web pages in multiple languages (and, therefore, using multiple character encodings), you'll know that if you're not careful, you'll create incorrectly encoded pages that display as gibberish. Ensuring that you're using correct character encoding can save a lot of debugging time down the track. For instance, just because you set the meta content-type to "iso-8859-1" doesn't necessarily mean the Web page is using that encoding!
Notice also the Render Mode field. This indicates how the Firefox layout engine (called Gecko) renders the Web page. In Standards compliance mode, Firefox renders the content exactly in the manner described in the HTML and CSS specifications. Quirks mode, on the other hand, accommodates existing and poorly made Web pages that are coded to older standards, or are not coded to standards. Pages displayed in Quirks Mode still look reasonable because their content is laid out and rendered in a way that aims to represent a "best effort," rather than being "pedantically correct." Firefox determines which mode to use by checking first the HTTP Content-Type, then the DOCTYPE of the page. Pages with Content-Type application/xhtml+xml or text/xml are rendered in standards compliance mode. Unlike Internet Explorer, Firefox always follows the HTTP Content-Type’s instructions.
Notice also the Render Mode field. This indicates how the Firefox layout engine (called Gecko) renders the Web page. In Standards compliance mode , Firefox renders the content exactly in the manner described in the HTML and CSS specifications. Quirks mode , on the other hand, accommodates existing and poorly made Web pages that are coded to older standards, or are not coded to standards. Pages displayed in Quirks Mode still look reasonable because their content is laid out and rendered in a way that aims to represent a "best effort," rather than being "pedantically correct." Firefox determines which mode to use by checking first the HTTP Content-Type, then the DOCTYPE of the page. Pages with Content-Type application/xhtml+xml or text/xml are rendered in standards compliance mode. Unlike Internet Explorer, Firefox always follows the HTTP Content-Type's instructions.
Finally, the General tab provides a list of the <meta> content tags used in the Web page, presenting this information in a more readable format than is available through the HTML source.
Finally, the General tab provides a list of the <meta> content tags used in the Web page, presenting this information in a more readable format than is available through the HTML source.
The Forms Tab
The Forms Tab
The Forms tab is an interesting case: it shows the details of forms and form fields in the Web page. Figure 7.5 shows the Forms information displayed for Google’s home page.
The Forms tab is an interesting case: it shows the details of forms and form fields in the Web page. Figure 7.5 shows the Forms information displayed for Google's home page.
Figure 7.5. Displaying the Forms tab for Google.com.
Figure 7.5. Displaying the Forms tab for Google.com.
The top listbox identifies the forms in the page; the bottom listbox shows the form fields contained in the form selected in the top listbox.
The top listbox identifies the forms in the page; the bottom listbox shows the form fields contained in the form selected in the top listbox.
Note If the page doesn’t contain any forms, this tab will be empty.
Note If the page doesn't contain any forms, this tab will be empty.
This display is extremely convenient in instances in which you need to verify the field names contained in a form, and the values of hidden form fields. It provides the information in a format that’s much more digestible than the alternative: HTML "tag soup."
This display is extremely convenient in instances in which you need to verify the field names contained in a form, and the values of hidden form fields. It provides the information in a format that's much more digestible than the alternative: HTML "tag soup."
The Links Tab
The Links Tab
The Links tab lists all the links contained in the Web page. The list includes the usual hyperlinks as well as links to style sheets, and any links that specify related meta information (These are tags of the form: <link rel="linkName"/>). Figure 7.6 shows a sample report.
The Links tab lists all the links contained in the Web page. The list includes the usual hyperlinks as well as links to style sheets, and any links that specify related meta information (These are tags of the form: <link rel="linkName"/> ). Figure 7.6 shows a sample report.
Figure 7.6. Displaying information about links on sitepoint.com.
Figure 7.6. Displaying information about links on sitepoint.com.
This display also lets you view each link’s target, which identifies whether or not the link will open in a new page, and each link’s access key, which is the keystroke that causes navigation for that link. You can display the Access Key column by clicking the small button in the Page Info window’s top-right corner, and checking the Access Key item in the dialog box that results. A list of access keys is very useful to those developing accessible Web pages, as it allows us to see, at a glance, if any links lack access keys, and if any access key is assigned to more than one link.
This display also lets you view each link's target, which identifies whether or not the link will open in a new page, and each link's access key, which is the keystroke that causes navigation for that link. You can display the Access Key column by clicking the small button in the Page Info window's top-right corner, and checking the Access Key item in the dialog box that results. A list of access keys is very useful to those developing accessible Web pages, as it allows us to see, at a glance, if any links lack access keys, and if any access key is assigned to more than one link.
The Media Tab
The Media Tab
The Media tab holds detailed information about all the media files (not just image files) embedded in a given Web page – even background images and favicons. You can view each media file’s title attribute, as well as its alternate text. To enable the Alternate Text column, click the button in the window’s top-right corner, and check Alternate Text, as shown in Figure 7.7.
The Media tab holds detailed information about all the media files (not just image files) embedded in a given Web page – even background images and favicons. You can view each media file's title attribute, as well as its alternate text. To enable the Alternate Text column, click the button in the window's top-right corner, and check Alternate Text, as shown in Figure 7.7.
Figure 7.7. Reviewing information about media files on sitepoint.com.
Figure 7.7. Reviewing information about media files on sitepoint.com.
Displaying the alternate text for media files makes it easy to identify images for which the alt attribute is not specified, and remedy the situation. This is especially handy if, for some reason, you can’t use online validators such as Bobby. It’s also a good way to check that a page of good quality hasn’t been damaged by small changes you’ve just made.
Displaying the alternate text for media files makes it easy to identify images for which the alt attribute is not specified, and remedy the situation. This is especially handy if, for some reason, you can't use online validators such as Bobby . It's also a good way to check that a page of good quality hasn't been damaged by small changes you've just made.
Another useful feature of the Media tab is that it gives you the ability to view and save media files. Simply select a given media file from the list, and a nice little preview of it appears, along with a Save As… button that lets you save the file. Sometimes, this is the only way to access an embedded media file, such as a Flash applet, that you want to save.
Another useful feature of the Media tab is that it gives you the ability to view and save media files. Simply select a given media file from the list, and a nice little preview of it appears, along with a Save As… button that lets you save the file. Sometimes, this is the only way to access an embedded media file, such as a Flash applet, that you want to save.
The Security Tab
The Security Tab
The Security tab provides security-related information about a Web page. On a normally delivered Web page – one that’s not sent via HTTPS (secure HTTP) – the Security tab will tell you that the identity of the Web site cannot be verified, and that it does not support encryption. On securely delivered pages, however, the Security tab shows you whether the Website is verified (by its certificate), and identifies the type of encryption the page uses to protect any transferred data. Figure 7.8 shows that information for Google.com.
The Security tab provides security-related information about a Web page. On a normally delivered Web page – one that's not sent via HTTPS (secure HTTP) – the Security tab will tell you that the identity of the Web site cannot be verified, and that it does not support encryption. On securely delivered pages, however, the Security tab shows you whether the Website is verified (by its certificate), and identifies the type of encryption the page uses to protect any transferred data. Figure 7.8 shows that information for Google.com.
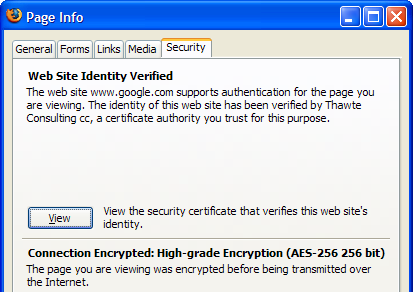
Figure 7.8. Accessing encryption details via the Security tab.
Figure 7.8. Accessing encryption details via the Security tab.
This is the only way to access the encryption details for secure HTTP. For peace of mind, it’s worth checking these details if your page – or your site – needs to integrate with some other site, such as a payment processing facility.
This is the only way to access the encryption details for secure HTTP. For peace of mind, it's worth checking these details if your page – or your site – needs to integrate with some other site, such as a payment processing facility.
Popup Cookie Tracking
Popup Cookie Tracking
You may find it necessary to set a cookie in the user’s browser. Naturally, you test the cookie by surfing through the matching Web pages and verifying that they’re working as intended. Perhaps you print debug messages when cookies are set, so that you can see what’s going on. Wouldn’t it be nice if you could confirm whether cookies are set without having to add temporary diagnostic code? Firefox allows you to do just that.
You may find it necessary to set a cookie in the user's browser. Naturally, you test the cookie by surfing through the matching Web pages and verifying that they're working as intended. Perhaps you print debug messages when cookies are set, so that you can see what's going on. Wouldn't it be nice if you could confirm whether cookies are set without having to add temporary diagnostic code? Firefox allows you to do just that.
To get this functionality working, go to Tools > Options > Privacy, and expand the resulting tab’s Cookies section (if it isn’t already expanded). Select Ask me every time from the Keep Cookies: dropdown, and click OK.
To get this functionality working, go to Tools > Options > Privacy, and expand the resulting tab's Cookies section (if it isn't already expanded). Select Ask me every time from the Keep Cookies: dropdown, and click OK.
Now, surf to a Web page that sets a cookie: any Web-based email service should do the trick, as will the Internet Movie Database. Firefox will inform you that a cookie is being set, and if you click Show Details, you’ll be able to access specific information about the cookie, from its name and value, to its expiry date. This information is absolutely invaluable for those debugging cookie- and session-based Websites. Figure 7.9 shows the details that Firefox reports for Google.com.
Now, surf to a Web page that sets a cookie: any Web-based email service should do the trick, as will the Internet Movie Database . Firefox will inform you that a cookie is being set, and if you click Show Details, you'll be able to access specific information about the cookie, from its name and value, to its expiry date. This information is absolutely invaluable for those debugging cookie- and session-based Websites. Figure 7.9 shows the details that Firefox reports for Google.com.
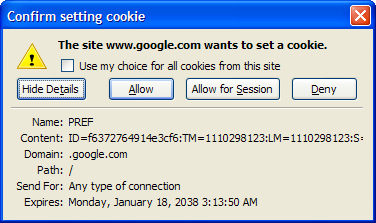
Figure 7.9. Firefox reporting that Google.com wants to set a cookie.
Figure 7.9. Firefox reporting that Google.com wants to set a cookie.
Stretch the window to see the whole cookie value, if it’s too long to fit in the default display.
Stretch the window to see the whole cookie value, if it's too long to fit in the default display.
Once the cookie is accepted – click Allow to make that happen – you can easily recall it later. To view the set of currently held cookies, use the options buried behind Firefox’s menus, as discussed in Chapter 3, Revisiting Web Pages. For cookies, access Tools > Options > Privacy > Cookies > View Cookies. On Linux, start with Edit > Preferences; on Mac OS X, start with Firefox > Preferences.
Once the cookie is accepted – click Allow to make that happen – you can easily recall it later. To view the set of currently held cookies, use the options buried behind Firefox's menus, as discussed in Chapter 3, Revisiting Web Pages. For cookies, access Tools > Options > Privacy > Cookies > View Cookies. On Linux, start with Edit > Preferences; on Mac OS X, start with Firefox > Preferences.
Viewing cookie details as they’re set is something of a "divide and conquer" strategy for debugging Web pages. It allows you to handle problems one at a time, rather than have your cookie problems mixed up with the other issues on the page. You can worry about scripts that manipulate page content in response to cookie values after you’ve confirmed that the cookies themselves are in good order.
Viewing cookie details as they're set is something of a "divide and conquer" strategy for debugging Web pages. It allows you to handle problems one at a time, rather than have your cookie problems mixed up with the other issues on the page. You can worry about scripts that manipulate page content in response to cookie values after you've confirmed that the cookies themselves are in good order.
JavaScript Console Techniques
JavaScript Console Techniques
In Chapter 6, Tips, Tricks, and Hacks, we briefly touched on the JavaScript Console. Let’s now have a closer look at that tool. It’s called a "console" because it’s in this tool that any internally-generated messages from scripts will appear.
In Chapter 6, Tips, Tricks, and Hacks, we briefly touched on the JavaScript Console. Let's now have a closer look at that tool. It's called a "console" because it's in this tool that any internally-generated messages from scripts will appear.
The console is a real gem – a lifesaver for those debugging JavaScript scripts. One brief attempt by the Firefox team to remove it from the browser for the sake of a smaller download met with such an outcry of protest that the plan was dropped immediately. The JavaScript Console is here to stay.
The console is a real gem – a lifesaver for those debugging JavaScript scripts. One brief attempt by the Firefox team to remove it from the browser for the sake of a smaller download met with such an outcry of protest that the plan was dropped immediately. The JavaScript Console is here to stay.
In helping debug your JavaScript, the console provides an error message, a direct link to the line of the JavaScript file on which the problem occurs, and, if applicable, the context of the error. Figure 7.10 shows the error generated when a string lacks its closing quotation mark.
In helping debug your JavaScript, the console provides an error message, a direct link to the line of the JavaScript file on which the problem occurs, and, if applicable, the context of the error. Figure 7.10 shows the error generated when a string lacks its closing quotation mark.
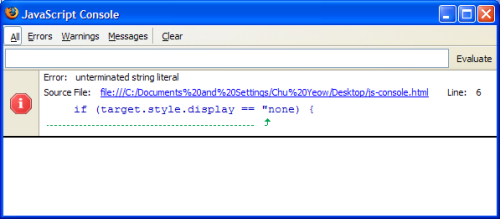
Figure 7.10. Displaying an error in the JavaScript Console.
Figure 7.10. Displaying an error in the JavaScript Console.
The link that’s displayed in the error message is an incredibly useful debugging aid. Clicking that link opens the View Source window, complete with a display of the problem page. Better still, the offending line is always centered – and highlighted – for your immediate consumption, as shown in Figure 7.11.
The link that's displayed in the error message is an incredibly useful debugging aid. Clicking that link opens the View Source window, complete with a display of the problem page. Better still, the offending line is always centered – and highlighted – for your immediate consumption, as shown in Figure 7.11.
You can filter the entries shown in the JavaScript Console to show only errors, warnings, and messages. Click the text items that look like menu names to see how.
You can filter the entries shown in the JavaScript Console to show only errors, warnings, and messages. Click the text items that look like menu names to see how.
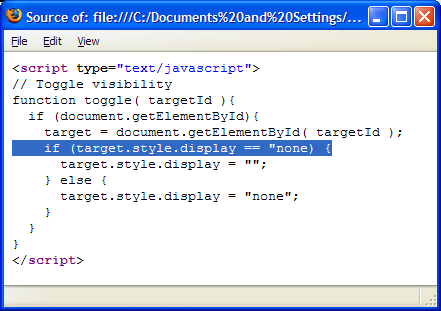
Figure 7.11. Highlighting a syntax error in View Source.
Figure 7.11. Highlighting a syntax error in View Source.
Two hidden preferences affect the JavaScript Console’s operation. The first is javascript.options.strict, which is unset by default. Set it to true, and Firefox will sometimes report additional grumpy messages – usually around scripts that were written using poor coding practices. The second preference is javascript.options.showInConsole, which is set to false by default. Don’t touch this unless you plan on becoming a Firefox extension hacker.
Two hidden preferences affect the JavaScript Console's operation. The first is javascript.options.strict, which is unset by default. Set it to true, and Firefox will sometimes report additional grumpy messages – usually around scripts that were written using poor coding practices. The second preference is javascript.options.showInConsole, which is set to false by default. Don't touch this unless you plan on becoming a Firefox extension hacker.
The JavaScript Console never pops up when an error occurs: you must always start it yourself, by hand. Press the Clear button before each page load to keep the list of messages to a bare minimum. If you do see the console pop up, this indicates that the current page is unwisely using the javascript: URL as a link target. That URL has no purpose other than to reveal the JavaScript Console. The problem page should use href="#" instead.
The JavaScript Console never pops up when an error occurs: you must always start it yourself, by hand. Press the Clear button before each page load to keep the list of messages to a bare minimum. If you do see the console pop up, this indicates that the current page is unwisely using the javascript: URL as a link target. That URL has no purpose other than to reveal the JavaScript Console. The problem page should use href="#" instead.
In Chapter 6, Tips, Tricks, and Hacks, we touched briefly on the use of the JavaScript Console as a calculator. You can perform fancier scripting operations in the console if you work at it a bit. Try typing in the following simple script, then hit Enter or click the Evaluate button: var a=5; var b=6; if (a > b) alert("Impossible"); else a*b;.
In Chapter 6, Tips, Tricks, and Hacks, we touched briefly on the use of the JavaScript Console as a calculator. You can perform fancier scripting operations in the console if you work at it a bit. Try typing in the following simple script, then hit Enter or click the Evaluate button: var a=5; var b=6; if (a > b) alert("Impossible"); else a*b;.
The number 30 should appear. If you reverse the sense of this comparison, you should get an alert instead.
The number 30 should appear. If you reverse the sense of this comparison, you should get an alert instead.
Finally, you can use this kind of "on the fly" JavaScript to probe the contents of a displayed Web page, even without the JavaScript Console. Let’s return briefly to the javascript: URL. Visit the Google homepage (or any form-based Web page), and type something into the search field (e.g. Foo), but don’t start the search. Instead, move to the location bar and type something along these lines: javascript:alert(document.forms[0].elements[1].value).
Finally, you can use this kind of "on the fly" JavaScript to probe the contents of a displayed Web page, even without the JavaScript Console. Let's return briefly to the javascript: URL. Visit the Google homepage (or any form-based Web page), and type something into the search field (eg Foo), but don't start the search. Instead, move to the location bar and type something along these lines: javascript:alert(document.forms[0].elements[1].value) .
In the case of Google’s home page, this input displays the search text that you just entered. You can look at any part of a displayed Web page in this way. For a more complete approach, try the JavaScript Debugger extension, which we’ll touch upon at the end of this chapter.
In the case of Google's home page, this input displays the search text that you just entered. You can look at any part of a displayed Web page in this way. For a more complete approach, try the JavaScript Debugger extension, which we'll touch upon at the end of this chapter.
DOM Inspector Content Analysis
DOM Inspector Content Analysis
The DOM Inspector, or DOMi for short, is a tool that allows you to view and dynamically edit the Document Object Model (DOM) of XML documents such as Web documents or XUL pages. It’s an excellent tool for debugging and learning during Web development, and is almost essential for Mozilla application development (the process of writing Firefox extensions and themes).
The DOM Inspector, or DOMi for short, is a tool that allows you to view and dynamically edit the Document Object Model (DOM) of XML documents such as Web documents or XUL pages. It's an excellent tool for debugging and learning during Web development, and is almost essential for Mozilla application development (the process of writing Firefox extensions and themes).
With the DOM Inspector installed, you can examine the DOM structure of an HTML document – the set of nested tags that make up the page. That structure is presented in a sideways-displayed, hierarchical tree format. You can zoom in on a particular element within that document, and study a broad range of information about it, including DOM Node object properties, the application of CSS style rules, Box Model properties, and even JavaScript methods and properties.
With the DOM Inspector installed, you can examine the DOM structure of an HTML document – the set of nested tags that make up the page. That structure is presented in a sideways-displayed, hierarchical tree format. You can zoom in on a particular element within that document, and study a broad range of information about it, including DOM Node object properties, the application of CSS style rules, Box Model properties, and even JavaScript methods and properties.
The DOM Inspector is not installed by default in the Windows version; to obtain it, you must select Custom Installation when installing Firefox. This provides the option to add the DOM Inspector, as shown in Figure 7.12.
The DOM Inspector is not installed by default in the Windows version; to obtain it, you must select Custom Installation when installing Firefox. This provides the option to add the DOM Inspector, as shown in Figure 7.12.
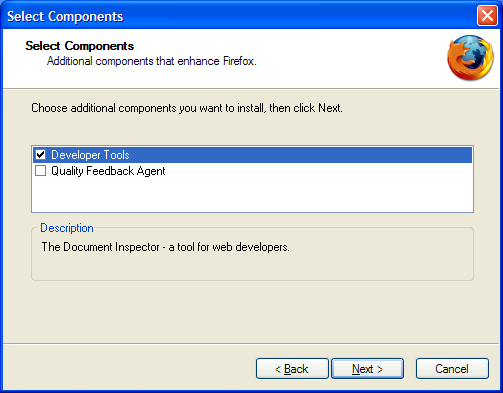
Figure 7.12. Choosing to install the DOM Inspector.
Figure 7.12. Choosing to install the DOM Inspector.
If you forget to grab the DOM Inspector at install time, it’s not the end of the world. A simple but somewhat disruptive solution is to uninstall Firefox, then re-install it, choosing Custom Install when prompted. A better solution is to download the Inspector as a separate extension. Make sure that you read the release notes carefully before you jump on the download link: at this time, Firefox version 0.9.85 is the absolute minimum version required.
If you forget to grab the DOM Inspector at install time, it's not the end of the world. A simple but somewhat disruptive solution is to uninstall Firefox, then re-install it, choosing Custom Install when prompted. A better solution is to download the Inspector as a separate extension . Make sure that you read the release notes carefully before you jump on the download link: at this time, Firefox version 0.9.85 is the absolute minimum version required.
Once you’ve installed the DOM Inspector, you can call it up via the Tools > DOM Inspector menu options, or via Ctrl-Shift-I.
Once you've installed the DOM Inspector, you can call it up via the Tools > DOM Inspector menu options, or via Ctrl-Shift-I .
Let’s walk through the use of the DOM Inspector on the SitePoint homepage.
Let's walk through the use of the DOM Inspector on the SitePoint homepage.
Opening a Document for Inspection
Opening a Document for Inspection
To begin inspecting a Web page, browse to that document in Firefox, then run the DOM Inspector (Tools > DOM Inspector or Ctrl-Shift-I). This will select the currently loaded document for inspection, and display the DOM of that document in the DOM Inspector. You can also select a document from the DOM Inspector’s File menu by choosing a window (File > Inspect a Window), or by entering the document’s URL into the DOM Inspector’s text field and pressing Inspect, as shown in Figure 7.13.
To begin inspecting a Web page, browse to that document in Firefox, then run the DOM Inspector (Tools > DOM Inspector or Ctrl-Shift-I ). This will select the currently loaded document for inspection, and display the DOM of that document in the DOM Inspector. You can also select a document from the DOM Inspector's File menu by choosing a window (File > Inspect a Window), or by entering the document's URL into the DOM Inspector's text field and pressing Inspect, as shown in Figure 7.13.
Figure 7.13. Entering URLs for DOM inspection.
Figure 7.13. Entering URLs for DOM inspection.
Let’s load the SitePoint homepage. The DOM Inspector will obediently populate the left-hand Document pane with a hierarchical tree view of the DOM of the page https://www.sitepoint.com/index.html. The right-hand Object pane displays information about the node selected in the left pane. The display is shown in Figure 7.14, after the left pane’s content has been expanded a little by the user.
Let's load the SitePoint homepage. The DOM Inspector will obediently populate the left-hand Document pane with a hierarchical tree view of the DOM of the page https://www.sitepoint.com/index.html. The right-hand Object pane displays information about the node selected in the left pane. The display is shown in Figure 7.14, after the left pane's content has been expanded a little by the user.
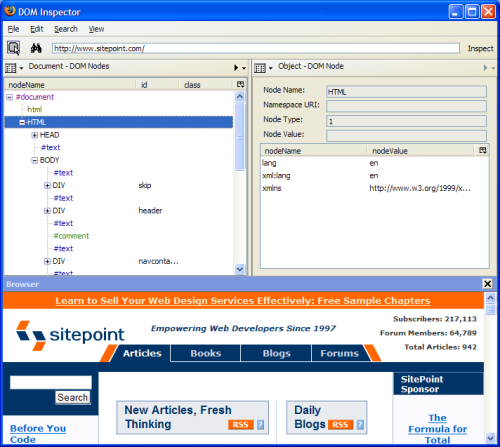
Figure 7.14. Inspecting the DOM of sitepoint.com.
Figure 7.14. Inspecting the DOM of sitepoint.com.
If the SitePoint page doesn’t show at the bottom of your DOM Inspector window, add it via View > Browser. I find this a convenient way to match the node being inspected with its appearance in the document. If you prefer the DOM Inspector window to be less cluttered, you can leave the inspected page in a Firefox browser window. To do so, display the page in the normal browser window before opening the DOM Inspector.
If the SitePoint page doesn't show at the bottom of your DOM Inspector window, add it via View > Browser. I find this a convenient way to match the node being inspected with its appearance in the document. If you prefer the DOM Inspector window to be less cluttered, you can leave the inspected page in a Firefox browser window. To do so, display the page in the normal browser window before opening the DOM Inspector.
Note There’s only one version of the inspected page inside Firefox! The browser window and the DOM Inspector window display that single document in two different ways. This is called "multi-view display."
Note There's only one version of the inspected page inside Firefox! The browser window and the DOM Inspector window display that single document in two different ways. This is called "multi-view display."
Selecting Nodes and Page Elements
Selecting Nodes and Page Elements
Once the DOM Inspector is up and running, feel free to play with the page hierarchy shown in the top-left panel. Click on the little plus icons to expand and collapse any part of the hierarchy that seems interesting. This simple action reveals the structure of the page in a way that’s separate, and different, from its visual layout.
Once the DOM Inspector is up and running, feel free to play with the page hierarchy shown in the top-left panel. Click on the little plus icons to expand and collapse any part of the hierarchy that seems interesting. This simple action reveals the structure of the page in a way that's separate, and different, from its visual layout.
Note If you aren’t using the default Firefox theme, the plus icons might be replaced with some other icon. Regardless of what the icons look like, they operate consistently.
Note If you aren't using the default Firefox theme, the plus icons might be replaced with some other icon. Regardless of what the icons look like, they operate consistently.
Another way to access that same level of detail is to select a node for inspection using the Inspect node icon in the upper-left corner in the DOM Inspector toolbar. Selecting Search > Select Element By Click from the menu does the same thing. Figure 7.15 identifies that Inspect node icon.
Another way to access that same level of detail is to select a node for inspection using the Inspect node icon in the upper-left corner in the DOM Inspector toolbar. Selecting Search > Select Element By Click from the menu does the same thing. Figure 7.15 identifies that Inspect node icon.
Figure 7.15. The DOM Inspector’s Inspect node icon.
Figure 7.15. The DOM Inspector's Inspect node icon.
Click the icon to activate the Inspect function, then bring to the front the browser window that holds the page. Click on the page element in which you’re interested, and a flashing red rectangle should border the corresponding element (or its parent) within the page display. Return to the DOM Inspector window, where the page hierarchy will be expanded to reveal the matching node, which should be both selected and highlighted. This technique is particularly useful when you’re trying to determine the properties of a given element of the document. The DOM Inspector lets you see everything without requiring you to add diagnostic styles or scripts to the page.
Click the icon to activate the Inspect function, then bring to the front the browser window that holds the page. Click on the page element in which you're interested, and a flashing red rectangle should border the corresponding element (or its parent) within the page display. Return to the DOM Inspector window, where the page hierarchy will be expanded to reveal the matching node, which should be both selected and highlighted. This technique is particularly useful when you're trying to determine the properties of a given element of the document. The DOM Inspector lets you see everything without requiring you to add diagnostic styles or scripts to the page.
This element selection process also works in reverse. Selecting (by left-clicking) a node in the left pane of DOM Inspector will highlight the matching page node with the same blinking red border. That pairing effect is shown in Figure 7.16.
This element selection process also works in reverse. Selecting (by left-clicking) a node in the left pane of DOM Inspector will highlight the matching page node with the same blinking red border. That pairing effect is shown in Figure 7.16.
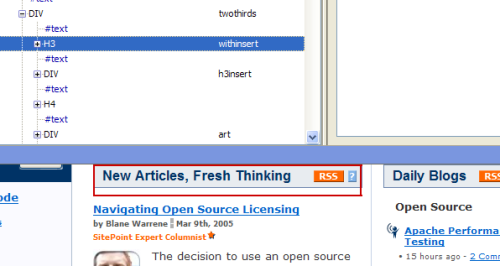
Figure 7.16. Highlighting a DOM Inspector element within the page.
Figure 7.16. Highlighting a DOM Inspector element within the page.
Finally, you can find specific elements by their ID, class, or tag. For example, you can search for <a> tags or <img> tags, or even for the value of a specific attribute, like href="http://www.example.com/", using the binoculars icon, Search > Find Nodes…, or Ctrl-F. Hitting F3 will begin a search for the next matching element in the document.
Finally, you can find specific elements by their ID, class, or tag. For example, you can search for <a> tags or <img> tags, or even for the value of a specific attribute, like href="http://www.example.com/" , using the binoculars icon, Search > Find Nodes…, or Ctrl-F . Hitting F3 will begin a search for the next matching element in the document.
Information Views
Information Views
The DOM Inspector can display several types of information about a particular document element. These displays are available from the drop-down menu in the top-left corner of the right-hand panel. Figure 7.17 shows the items in that list.
The DOM Inspector can display several types of information about a particular document element. These displays are available from the drop-down menu in the top-left corner of the right-hand panel. Figure 7.17 shows the items in that list.
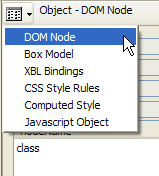
Figure 7.17. Information types in the Object panel.
Figure 7.17. Information types in the Object panel.
We’ll take a look at each of these options in turn, and see how they can assist your Web or application development work.
We'll take a look at each of these options in turn, and see how they can assist your Web or application development work.
The DOM Node View
The DOM Node View
The DOM Node view shows the DOM representation of the selected node. The view for the document container – the <html> tag – is shown in Figure 7.18.
The DOM Node view shows the DOM representation of the selected node. The view for the document container – the <html> tag – is shown in Figure 7.18.
Figure 7.18. Displaying the document container in DOM Node view.
Figure 7.18. Displaying the document container in DOM Node view.
We’ll see later that this view is most useful when you’re dynamically editing the DOM of the current document.
We'll see later that this view is most useful when you're dynamically editing the DOM of the current document.
The Box Model View
The Box Model View
The Box Model view shows positioning and layout-related attributes of the selected node. Values like the node’s dimensions, padding, and margins are all shown. The small menu inside this view lets you pick which vital statistics are of most interest to you. Figure 7.19 shows the possibilities.
The Box Model view shows positioning and layout-related attributes of the selected node. Values like the node's dimensions, padding, and margins are all shown. The small menu inside this view lets you pick which vital statistics are of most interest to you. Figure 7.19 shows the possibilities.
Figure 7.19. Inspecting positioning and layout attributes using the Box Model view.
Figure 7.19. Inspecting positioning and layout attributes using the Box Model view.
This view is useful when you need to work out where any extra space comes from in a set of nested page elements.
This view is useful when you need to work out where any extra space comes from in a set of nested page elements.
The XBL Bindings View
The XBL Bindings View
XBL, or eXtensible Binding Language, is an XML markup language that attaches JavaScript objects and other content to HTML or XML elements in order to make those elements smarter and more functional. The code that’s added is called a binding, and it describes the behavior of the bound element. XBL is slightly too advanced for this book, and is not yet a widespread technique within Web development circles. Mozilla application developers – those that build extensions and tools that sit on top of Firefox – are the folks who are most interested in it. Note that more information on XBL can be found at http://www.mozilla.org/projects/xbl/xbl.html and http://xulplanet.com/tutorials/xultu/introxbl.html, should you be interested in application development on the Mozilla platform.
XBL, or eXtensible Binding Language, is an XML markup language that attaches JavaScript objects and other content to HTML or XML elements in order to make those elements smarter and more functional. The code that's added is called a binding, and it describes the behavior of the bound element. XBL is slightly too advanced for this book, and is not yet a widespread technique within Web development circles. Mozilla application developers – those that build extensions and tools that sit on top of Firefox – are the folks who are most interested in it. Note that more information on XBL can be found at http://www.mozilla.org/projects/xbl/xbl.html and http://xulplanet.com/tutorials/xultu/introxbl.html , should you be interested in application development on the Mozilla platform.
The XBL Bindings view shows the XBL bindings loaded into the inspected document by means of CSS rules. Use it when you’re not sure what processing occurs when particular HTML events are targeted on the displayed page element, and you really want to know all the gory details.
The XBL Bindings view shows the XBL bindings loaded into the inspected document by means of CSS rules. Use it when you're not sure what processing occurs when particular HTML events are targeted on the displayed page element, and you really want to know all the gory details.
The CSS Style Rules View
The CSS Style Rules View
The CSS Style Rules view identifies the CSS rules that are applied to the selected node. It even shows you which fields the rules are defined in, and the exact line numbers at which they’re located. This view lists the original rules – not the rules after they’ve been cascaded or computed. It’s like View Source, but for CSS stylesheets rather than HTML.
The CSS Style Rules view identifies the CSS rules that are applied to the selected node. It even shows you which fields the rules are defined in, and the exact line numbers at which they're located. This view lists the original rules – not the rules after they've been cascaded or computed. It's like View Source, but for CSS stylesheets rather than HTML.
You’ll often see specified CSS rules that aren’t included by the page itself. For example, there are usually CSS files of the form "resource://," such as resource://gre/res/html.css and resource://gre/res/ua.css. These are Firefox’s default CSS style rules, which are applied before any rules specified by the Web page. Figure 7.20 shows an example of such a rule in the first line of the top panel.
You'll often see specified CSS rules that aren't included by the page itself. For example, there are usually CSS files of the form "resource://," such as resource://gre/res/html.css and resource://gre/res/ua.css . These are Firefox's default CSS style rules, which are applied before any rules specified by the Web page. Figure 7.20 shows an example of such a rule in the first line of the top panel.
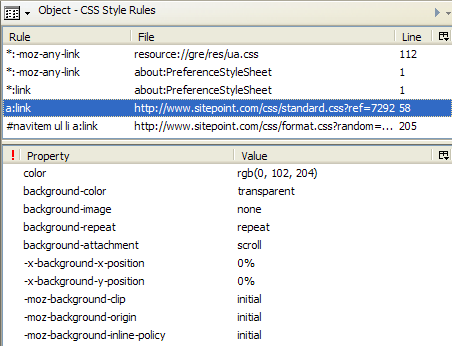
Figure 7.20. Identifying a CSS style rule in the CSS Style Rules view.
Figure 7.20. Identifying a CSS style rule in the CSS Style Rules view.
Select a rule in the top half of this panel, and its CSS properties will display in the bottom half; and – get this – you can add, edit, and delete properties, and observe the effects of your changes in real-time through this panel. In other words, you can observe immediately how your CSS rules will affect the layout, and look and feel of the Web page. Believe me, this is extremely useful for testing out experimental changes, or tweaking a page’s layout. Since the changes occur in real time, there is no need to fall into the usual (and tedious) cycle of: edit file, save file, refresh page in browser, edit file again, and so on. This would be even more useful if it weren’t for the very convenient method of changing a page’s CSS in real-time that we’ll discuss later.
Select a rule in the top half of this panel, and its CSS properties will display in the bottom half; and – get this – you can add, edit, and delete properties, and observe the effects of your changes in real-time through this panel. In other words, you can observe immediately how your CSS rules will affect the layout, and look and feel of the Web page. Believe me, this is extremely useful for testing out experimental changes, or tweaking a page's layout. Since the changes occur in real time, there is no need to fall into the usual (and tedious) cycle of: edit file, save file, refresh page in browser, edit file again, and so on. This would be even more useful if it weren't for the very convenient method of changing a page's CSS in real-time that we'll discuss later.
Let’s walk through a simple example that shows the convenience of this feature. On the sitepoint.com homepage, there’s a little boxed element that acts as a header for the most recent SitePoint articles. It’s shown in Figure 7.21 (but note that the SitePoint site is regularly reworked, so this may change).
Let's walk through a simple example that shows the convenience of this feature. On the sitepoint.com homepage, there's a little boxed element that acts as a header for the most recent SitePoint articles. It's shown in Figure 7.21 (but note that the SitePoint site is regularly reworked, so this may change).

Figure 7.21. SitePoint’s boxed title element.
Figure 7.21. SitePoint's boxed title element.
Let’s suppose that we’re in the mood for tweaking, and want to experiment with center-aligned text in a serif font (Georgia looks quite good). Well, if we have direct access to the CSS files on the sitepoint.com Web page, we can make our changes there, upload the new CSS file, and refresh the page in our browser. Unfortunately, we don’t have that access. This is where the DOM Inspector can be pretty nifty.
Let's suppose that we're in the mood for tweaking, and want to experiment with center-aligned text in a serif font (Georgia looks quite good). Well, if we have direct access to the CSS files on the sitepoint.com Web page, we can make our changes there, upload the new CSS file, and refresh the page in our browser. Unfortunately, we don't have that access. This is where the DOM Inspector can be pretty nifty.
Using the DOM Inspector, we proceed in two steps: find the bit we want to change, then make the change itself.
Using the DOM Inspector, we proceed in two steps: find the bit we want to change, then make the change itself.
First, inspect the page and select the element you want to edit. In this case, that’s the boxed title element. Now, change to the CSS Style Rules view in the Inspector. You should see something like Figure 7.22.
First, inspect the page and select the element you want to edit. In this case, that's the boxed title element. Now, change to the CSS Style Rules view in the Inspector. You should see something like Figure 7.22.
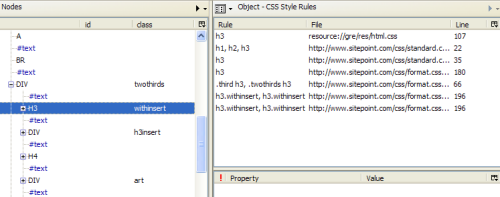
Figure 7.22. Applying CSS style rules to the selected element.
Figure 7.22. Applying CSS style rules to the selected element.
The CSS Style Rules list shows the rules that apply to the selected node, in ascending order of specificity. In other words, as you move down the list, the rules become more specific, and therefore overrule the list items that come before them. Select the second h3 rule, and the DOM Inspector will fill the lower-right pane with the CSS properties applied from that file. Now you’re all set up, and ready to make a change.
The CSS Style Rules list shows the rules that apply to the selected node, in ascending order of specificity. In other words, as you move down the list, the rules become more specific, and therefore overrule the list items that come before them. Select the second h3 rule, and the DOM Inspector will fill the lower-right pane with the CSS properties applied from that file. Now you're all set up, and ready to make a change.
Let’s change the font to our serif font of choice, Georgia. Find the font-family property in the list, and double-click it. You will see the prompt shown in Figure 7.23; this asks you to enter the property’s value.
Let's change the font to our serif font of choice, Georgia. Find the font-family property in the list, and double-click it. You will see the prompt shown in Figure 7.23; this asks you to enter the property's value.
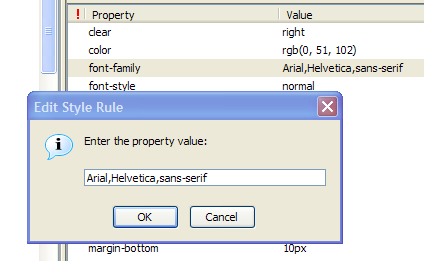
Figure 7.23. Editing a CSS property.
Figure 7.23. Editing a CSS property.
Enter this string in place of the current value: georgia,"times new roman",times.
Enter this string in place of the current value: georgia,"times new roman",times .
Hit OK, and something magical happens. In the original page, the heading displays in our serif font, as you can see in Figure 7.24.
Hit OK, and something magical happens. In the original page, the heading displays in our serif font, as you can see in Figure 7.24.
Figure 7.24. Making SitePoint headings pretty with Georgia.
Figure 7.24. Making SitePoint headings pretty with Georgia.
Now, what about centering the text in that box? Well, you’ll find that no text-align property appears in the available style sheets, so let’s go ahead and add one. To do so, right-click anywhere on the Properties pane and select New Property from the context menu. Fill in text-align when prompted for a property name, and center when prompted for the property’s value. When that’s done, you’ll immediately see the result of your tweaking: the nice, centered, serif font heading shown in Figure 7.25.
Now, what about centering the text in that box? Well, you'll find that no text-align property appears in the available style sheets, so let's go ahead and add one. To do so, right-click anywhere on the Properties pane and select New Property from the context menu. Fill in text-align when prompted for a property name, and center when prompted for the property's value. When that's done, you'll immediately see the result of your tweaking: the nice, centered, serif font heading shown in Figure 7.25.
Figure 7.25. Centering SitePoint’s headings.
Figure 7.25. Centering SitePoint's headings.
If you like the results, just add the changes to your user-defined CSS file to make them permanent. The DOM Inspector doesn’t allow you to change the originating site’s content, of course.
If you like the results, just add the changes to your user-defined CSS file to make them permanent. The DOM Inspector doesn't allow you to change the originating site's content, of course.
The Computed Style View
The Computed Style View
When multiple CSS rules apply to a single element, Firefox combines them to derive a single set of "computed" CSS style rules. The combination (or "resolution") process is based on the rules of precedence specified in the CSS specification. The Computed CSS Style Rules page shown in Figure 7.26 presents this resolved set of rules.
When multiple CSS rules apply to a single element, Firefox combines them to derive a single set of "computed" CSS style rules. The combination (or "resolution") process is based on the rules of precedence specified in the CSS specification . The Computed CSS Style Rules page shown in Figure 7.26 presents this resolved set of rules.
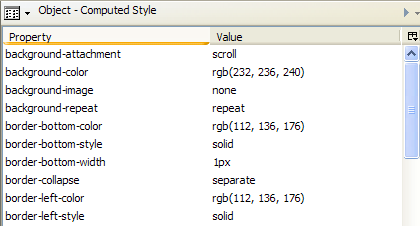
Figure 7.26. Reviewing computed CSS style rules.
Figure 7.26. Reviewing computed CSS style rules.
Using this, and the CSS Style Rules view, you can observe how Firefox resolves CSS rules. Just alter any sheet – or any sheet property – and observe the changes made to the computed result. This is a very practical and experimental way to understand the rules of precedence in CSS.
Using this, and the CSS Style Rules view, you can observe how Firefox resolves CSS rules. Just alter any sheet – or any sheet property – and observe the changes made to the computed result. This is a very practical and experimental way to understand the rules of precedence in CSS.
The JavaScript Object View
The JavaScript Object View
The JavaScript Object view lists the JavaScript objects that can be used to script the selected node. That includes all the traditional page features (access to form elements and links), all the DOM features (for example, adding and removing child nodes, and the nodes themselves), and any script content that’s been added by the page designer (such as handlers and extra form object properties). Figure 7.27 provides a glimpse of the numerous object features that are displayed.
The JavaScript Object view lists the JavaScript objects that can be used to script the selected node. That includes all the traditional page features (access to form elements and links), all the DOM features (for example, adding and removing child nodes, and the nodes themselves), and any script content that's been added by the page designer (such as handlers and extra form object properties). Figure 7.27 provides a glimpse of the numerous object features that are displayed.
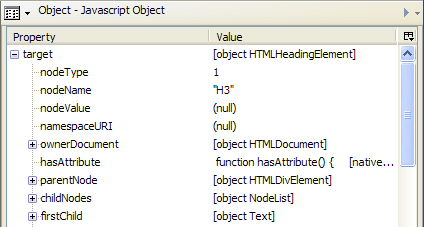
Figure 7.27. Reviewing available JavaScript objects through the JavaScript Object view.
Figure 7.27. Reviewing available JavaScript objects through the JavaScript Object view.
A commonly examined JavaScript object is the target object, which contains many properties and methods of the selected node, and is particularly useful for finding out which methods are available on the DOM node.
A commonly examined JavaScript object is the target object, which contains many properties and methods of the selected node, and is particularly useful for finding out which methods are available on the DOM node.
Editing the DOM Dynamically
Editing the DOM Dynamically
With the DOM Inspector in place, you can edit the DOM of the document under inspection "live." This means that you can add or remove HTML content, including scripts and inline styles. Any changes you make are reflected in the document immediately, without the need to reload any files. Figure 7.28 shows the drop-down menu that provides access to these actions.
With the DOM Inspector in place, you can edit the DOM of the document under inspection "live." This means that you can add or remove HTML content, including scripts and inline styles. Any changes you make are reflected in the document immediately, without the need to reload any files. Figure 7.28 shows the drop-down menu that provides access to these actions.
Reviewing available JavaScript objects through the JavaScript Object view.
Reviewing available JavaScript objects through the JavaScript Object view.
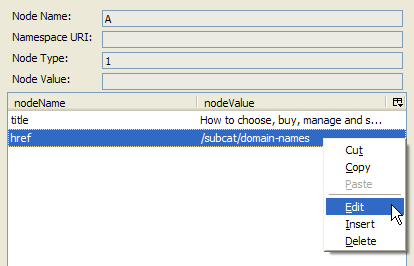
Figure 7.28. Editing the DOM dynamically.
Figure 7.28. Editing the DOM dynamically.
In the DOM view of a document, the child nodes of the selected element are typically its attributes. For example, if an <img> element is selected, it would have child nodes src and alt, among others. So this view is more detailed than a simple hierarchy of tags.
In the DOM view of a document, the child nodes of the selected element are typically its attributes. For example, if an <img> element is selected, it would have child nodes src and alt, among others. So this view is more detailed than a simple hierarchy of tags.
Since you’re able to edit and delete existing nodes, and insert new ones, you can use the DOM Inspector to experiment with different attributes for elements within your Web page. And, as for other parts of the DOM Inspector, you can observe the effect "live." For example, you might want to replace the src attribute of an img tag with another image, thus swapping the images; alternatively, you might want to toy with table column widths in order to see the effect these changes might have on the columns’ proportions.
Since you're able to edit and delete existing nodes, and insert new ones, you can use the DOM Inspector to experiment with different attributes for elements within your Web page. And, as for other parts of the DOM Inspector, you can observe the effect "live." For example, you might want to replace the src attribute of an img tag with another image, thus swapping the images; alternatively, you might want to toy with table column widths in order to see the effect these changes might have on the columns' proportions.
The DOM Inspector also allows you to inspect XUL pages: the pages that comprise the Firefox browser itself. You can inspect so-called chrome URLs to find out how Firefox’s own XUL, JavaScript, and CSS files are coded. Some interesting chrome URLs that are worthy of inspection are shown below.
The DOM Inspector also allows you to inspect XUL pages: the pages that comprise the Firefox browser itself. You can inspect so-called chrome URLs to find out how Firefox's own XUL, JavaScript, and CSS files are coded. Some interesting chrome URLs that are worthy of inspection are shown below.
- To view the browser itself, try chrome://browser/content/browser.xul
To view the browser itself, try chrome://browser/content/browser.xul - To view the Options dialog box, try chrome://browser/content/pref/pref.xul
To view the Options dialog box, try chrome://browser/content/pref/pref.xul - To view the Bookmarks Manager, try chrome://browser/content/bookmarks/bookmarksManager.xul
To view the Bookmarks Manager, try chrome://browser/content/bookmarks/bookmarksManager.xul - To view the JavaScript Console, try chrome://global/content/console.xul
To view the JavaScript Console, try chrome://global/content/console.xul
Viewing these pages will blow your mind! Such investigation is an important first step for those making the leap into developing XUL applications, extensions, or themes.
Viewing these pages will blow your mind! Such investigation is an important first step for those making the leap into developing XUL applications, extensions, or themes.
Warning Editing the CSS or DOM of a document can sometimes have unexpected results. If, in the midst of your DOM or CSS editing, you find that pages aren’t displaying properly or as expected, try restarting Firefox. You may have edited a global property that affects all Web pages, or edited a default Firefox CSS rule. These changes, when made with the DOM Inspector, are temporary; a quick restart will undo your changes and restore the defaults. Editing XUL pages is even more risky: make sure you do your homework before you experiment there.
Warning Editing the CSS or DOM of a document can sometimes have unexpected results. If, in the midst of your DOM or CSS editing, you find that pages aren't displaying properly or as expected, try restarting Firefox. You may have edited a global property that affects all Web pages, or edited a default Firefox CSS rule. These changes, when made with the DOM Inspector, are temporary; a quick restart will undo your changes and restore the defaults. Editing XUL pages is even more risky: make sure you do your homework before you experiment there.
That’s it for this excerpt of Firefox Secrets! What’s next?
That's it for this excerpt of Firefox Secrets ! 下一步是什么?
Download this chapter in PDF format, and you’ll have a copy you can refer to at any time.
Download this chapter in PDF format , and you'll have a copy you can refer to at any time.
Review the book’s table of contents to find out exactly what’s included.
Review the book's table of contents to find out exactly what's included.
Buy your own copy of the book now, right here at SitePoint.com.
Buy your own copy of the book now , right here at SitePoint.com.
We hope you enjoy Firefox Secrets.
We hope you enjoy Firefox Secrets .
翻译自: https://www.sitepoint.com/firefox-secrets/
找不到.jack
找不到.jack_您不了解Jack关于Firefox的知识!相关推荐
- 快消出海系列:轻松找准波动原因--快消品出口额下降归因分析
本文作者:德措吉 Jack 是一家快速消费品出口销售公司的数据业务分析师.最近他在分析中发现出口订单总销售额的波动较大,近期月环比下降达 462% 左右.他希望在错综复杂的的影响因素中快速找到主因:下 ...
- hdu 1599 find the mincost route(找无向图最小环)(floyd求最小环)
ps(我到今天才知道Floyd的核心思想是动态规划==) hdu 1599 find the mincost route(找无向图最小环) 注意!这里写成 #define data 0x3f3f3 ...
- 2013互联网公司找工作--大牛总结(ZJU)
本文系转载 找工作结束,总结(上) 时间总是悄然流逝,眨眼间研究生生涯就要结束了.于是找工作成为了不可避免的过程,从8月份开始,我就启动了找工作的进程.因为妹子是一届的,也需要找工作,而且IT行业历来 ...
- 学计算机的男生生好不好找女朋友,我是计算机的大2学生,我们班上女生极少,我很想找女朋友,请问怎么? 爱问知识人...
2004-10-09 21:45:24 1.最简单直接的方法,在食堂碰到喜欢的女孩直接上去问电话(不排除立刻头顶一盆饭的危险..:P) 2.最需要机缘的方法,这个需要条件,每个学校学生宿舍电话固定,取 ...
- 【网络工程师备考分享】怎么复习,去哪里找真题练习。
一.前言 这是一篇关于中级网络工程师证书备考经验的分享,本人参加的考试是2019年上半年的,证书已经拿到了.首先声明,本人学习很渣,这篇经验分享不适用于能力很强的大佬,只是一个小透明的个人经验分享. ...
- 初级Java学到什么程度就可以找工作了?
零基础Java学到什么程度就可以找工作了? 可以找工作的程度主要看你的目标岗位定位,一般来说学习Java的人群大部分是零基础的学员,目标岗位初级java程序员. 如果是有一定基础想找高级程序员的岗位, ...
- 为什么要学Python爬虫?Python爬虫找工作需要做哪些准备?
Python的火爆,同时也带动了Python爬虫岗位的的极大需求.可能有些人想问了,学Python爬虫真的好找工作吗?要学到什么程度?根据各大招聘网站的数据反馈,目前市场上对Python爬虫工程师的需 ...
- 找实习这段时间的经历总结
1. 写在前面 这篇文章, 主要是这两个月在找实习上的点滴进行梳理和总结, 从3月5号开始准备, 4月3号开始投递再到后面拿实习offer,这期间经历了很多,也感悟了很多,由于这次找的是推荐算法工程师 ...
- 如何找书?如何看书?
一.原因. 1.我必须尽可能地学习.学习需要的知识,提高效率,实践. 2.没有方法是不行的,没有明确的方向是不行的.我必须坚定自己的胃口. 3.学习是有方法的.正如我说的那句:宁可思考一日,不可蛮干十 ...
- Ocelot(三)- 服务发现
作者:markjiang7m2 原文地址:https://www.cnblogs.com/markjiang7m2/p/10907856.html 源码地址:https://gitee.com/Sev ...
最新文章
- MnasNet 测试
- Linux 线程与进程,以及通信
- 几道MySQL索引相关的重点面试题
- 2018~2019-11 20165107 网络对抗技术期末免考 Exp10 Final Powershell学习应用与渗透实践...
- Excel添加读音(中英均可)
- 行业人士谈悄然成功的《星际战甲》所带来的启示
- 职场见闻录(01) - 怎样回答这两个问题?
- 如何在markdown(csdn)中打出某个字符上面的三角帽子符号
- 计算机信息机房,计算机信息中心机房建设标准
- LabVIEW--为控件添加说明信息
- windowns定时关机命令
- 计算机组成原理疑难知识点
- C#对接中国移动短信接口
- 图像处理一 摄像头二值化处理
- 学计算机买笔记本还是平板,学生买平板还是笔记本电脑好
- hadoop组件---面向列的开源数据库(九)--python--python使用thrift连接hbase
- 饱和蒸汽比容计算、 温压补偿系数计算
- Sqlserver (优化Sqlserver数据库)页分裂 和填充因子
- 经济学计算机会成本 会计成本的案例题,案例4:利润在经济学家与会计师眼中的是不同的...
- java作业 温度换算,温度换算-温度转换-温度计算器
热门文章
- 服务器wifi无线放大器,旧路由器改wifi放大器详细教程【图】
- Makefile:14: config-host.mak: No such file or directory
- 2021寒假MISC打卡DAY1
- linux 挂载裸设备,centos挂载裸设备问题
- iPhone手机ipa破解补丁安装方法和ipa软件游戏安装教程(1)
- 计算机不认2t移动硬盘,高手指导win7系统无法识别2T希捷的硬盘的还原技巧
- 如何使用 Apache 设置反向代理
- ABC162 D RGB Triplets
- 《预告 》 明天(9月19日),中国科学院自动化研究所首届智能决策论坛即将开幕!(附带10+位作者演讲主题及摘要)...
- iOS闪退日志的收集和解析