2.4【HarmonyOS鸿蒙开发】堆栈布局StackLayout
作者:韩茹
公司:程序咖(北京)科技有限公司
鸿蒙巴士专栏作家
StackLayout直接在屏幕上开辟出一块空白的区域,添加到这个布局中的视图都是以层叠的方式显示,而它会把这些视图默认放到这块区域的左上角,第一个添加到布局中视图显示在最底层,最后一个被放在最顶层。上一层的视图会覆盖下一层的视图。因此该布局叫做堆栈布局。
它很自由,无论你放多少个组件进去他都是从左上角开始计算,所以你可以用layout_alignment和margin做出随心所欲的布局。
![]()
一、支持的XML属性
StackLayout无自有的XML属性,共有XML属性继承自:Component
| 属性名称 | 中文描述 | 取值 | 取值说明 | 使用案例 |
|---|---|---|---|---|
| id | 控件identity,用以识别不同控件对象,每个控件唯一 | integer类型 | 仅可用于配置控件的id。 | ohos:id="$+id:component_id" |
| theme | 样式 | 引用 | 仅可引用pattern资源。 | ohos:theme="$pattern:button_pattern" |
| width | 宽度,必填项 | float类型,match_parent,match_content |
ohos:width=“20" ohos:width=“10vp" ohos:width=”$float:size_value” |
|
| height | 高度,必填项 | float类型,match_parent,match_content |
ohos:height=“20” ohos:height=“20vp” ohos:height="$float:size_value" |
|
| min_width | 最小宽度 | float类型 |
ohos:min_width=“20" ohos:min_width=“20vp" ohos:min_width=”$float:size_value” |
|
| min_height | 最小高度 | float类型 |
ohos:min_height=“20" ohos:min_height=“20vp" ohos:min_height=”$float:size_value” |
|
| alpha | 透明度 | float类型 | 取值范围在0~1。 |
ohos:alpha=“0.86" ohos:alpha=”$float:value" |
| enabled | 是否启用 | boolean类型 |
ohos:enabled=“true" ohos:enabled=”$boolean:true" |
|
| visibility | 可见性 | visible,invisible,hide | ohos:visibility=“visible” | |
| padding | 内间距 | float类型 | ||
| margin | 外边距 | float类型 |
StackLayout所包含组件可支持的XML属性见下表:
表1 StackLayout所包含组件可支持的XML属性
| 属性名称 | 中文描述 | 取值 | 取值说明 | 使用案例 |
|---|---|---|---|---|
| layout_alignment | 对齐方式 | left | 表示左对齐。 |
可以设置取值项如表中所列, 也可以使用“|”进行多项组合。ohos:layout_alignment="top" ohos:layout_alignment=“top|left” |
| top | 表示顶部对齐。 | |||
| right | 表示右对齐。 | |||
| bottom | 表示底部对齐。 | |||
| horizontal_center | 表示水平居中对齐。 | |||
| vertical_center | 表示垂直居中对齐。 | |||
| center | 表示居中对齐。 |
二、排列方式
2.1 使用默认布局添加组件
StackLayout,一层一层。每个子控件,默认从左上角开始显示,离父容器的声明标签越近,越位于底层。也就是说,越在后面声明的控件,越在上层。
示例代码:
<?xml version="1.0" encoding="utf-8"?>
<StackLayoutxmlns:ohos="http://schemas.huawei.com/res/ohos"ohos:id="$+id:stack_layout"ohos:height="match_parent"ohos:width="match_parent"><Textohos:id="$+id:text1"ohos:height="380vp"ohos:width="match_parent"ohos:text_alignment="bottom|horizontal_center"ohos:text_size="24fp"ohos:text="Layer 1"ohos:background_element="#C71585" /><Textohos:id="$+id:text2"ohos:height="280vp"ohos:width="280vp"ohos:text_alignment="bottom|horizontal_center"ohos:text_size="24fp"ohos:text="Layer 2"ohos:background_element="#FF69B4" /><Textohos:id="$+id:text3"ohos:height="180vp"ohos:width="180vp"ohos:text_alignment="center"ohos:text_size="24fp"ohos:text="Layer 3"ohos:background_element="#FFC0CB" /></StackLayout>
效果图:
![]()
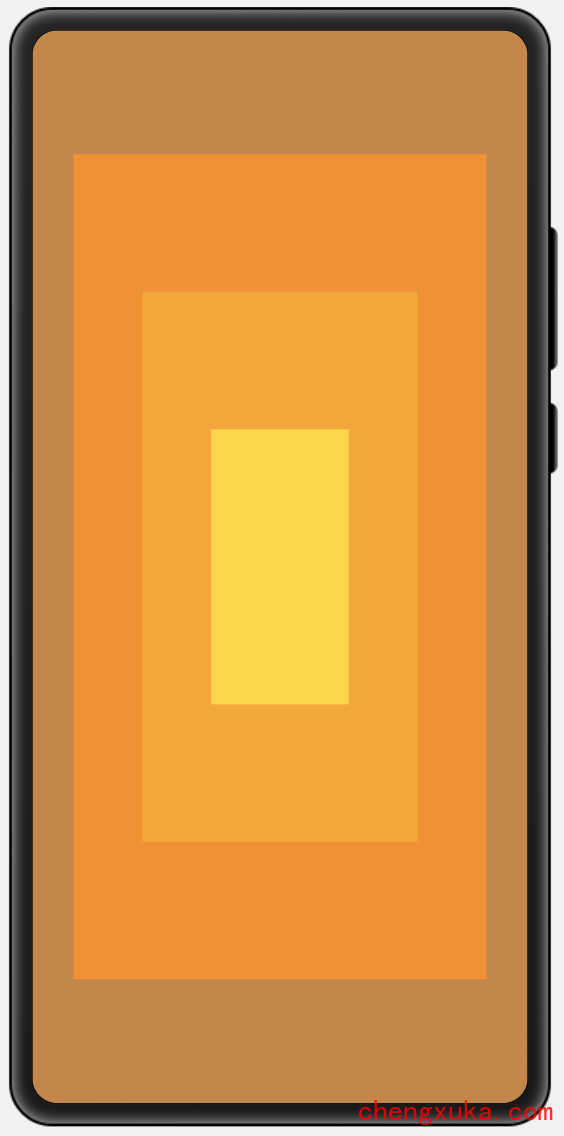
示例代码:
<?xml version="1.0" encoding="utf-8"?>
<StackLayoutxmlns:ohos="http://schemas.huawei.com/res/ohos"ohos:height="match_parent"ohos:width="match_parent"><Textohos:id="$id:text1"ohos:height="match_parent"ohos:width="match_parent"ohos:background_element="#CD853F"/><Textohos:id="$id:text2"ohos:height="600vp"ohos:width="300vp"ohos:background_element="#FF8C00"ohos:layout_alignment="center"/><Textohos:id="$id:text3"ohos:height="400vp"ohos:width="200vp"ohos:background_element="#FFA500"ohos:layout_alignment="center"/><Textohos:id="$+id:text4"ohos:height="200vp"ohos:width="100vp"ohos:background_element="#FFD700"ohos:layout_alignment="center"/>
</StackLayout>
效果图:
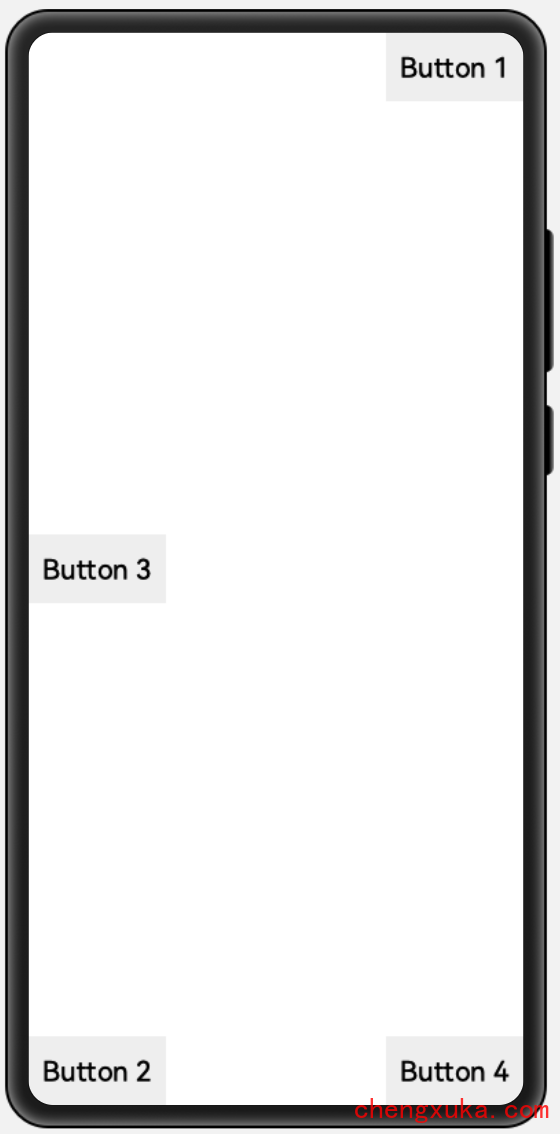
2.2 使用相对位置添加组件
使用layout_alignment属性可以指定组件在StackLayout中的相对位置。
示例代码:
<?xml version="1.0" encoding="utf-8"?>
<StackLayoutxmlns:ohos="http://schemas.huawei.com/res/ohos"ohos:height="match_parent"ohos:width="match_parent"><Buttonohos:height="50vp"ohos:width="100vp"ohos:text="Button 1"ohos:text_size="20fp"ohos:background_element="#eeeeee"ohos:layout_alignment="right"/><Buttonohos:height="50vp"ohos:width="100vp"ohos:text="Button 2"ohos:text_size="20fp"ohos:background_element="#eeeeee"ohos:layout_alignment="bottom"/><Buttonohos:height="50vp"ohos:width="100vp"ohos:text="Button 3"ohos:text_size="20fp"ohos:background_element="#eeeeee"ohos:layout_alignment="vertical_center"/><Buttonohos:height="50vp"ohos:width="100vp"ohos:text="Button 4"ohos:text_size="20fp"ohos:background_element="#eeeeee"ohos:layout_alignment="bottom|right"/></StackLayout>
效果图:
示例代码:
我们可以利用堆栈布局,结合layout_alignment和margin这两个属性,可以任意摆放。特别的方便。
这里负数就是在原来的基础上相反方向移动多少
注意:此处是负数,因为 layout_alignment = “center”
表示水平和垂直方向上居中,基准线为视图水平和垂直方向的中点,
因为鸟在基准线的上方向(负方向),所以为负数)
<?xml version="1.0" encoding="utf-8"?>
<StackLayoutxmlns:ohos="http://schemas.huawei.com/res/ohos"ohos:height="match_parent"ohos:width="match_parent"ohos:orientation="vertical"><!--第一层是背景--><!--   ohos:scale_mode="clip_center"图片缩放模式,可以查看Image的文档 --><Imageohos:height="match_parent"ohos:width="match_parent"ohos:image_src="$media:tiankong"ohos:scale_mode="clip_center"/><!-- 第二层为小鸟,菩萨,跑车负数就是在原来的基础上相反方向移动多少注意:此处是负数,因为 layout_alignment = "center"表示水平和垂直方向上居中,基准线为视图水平和垂直方向的中点,因为鸟在基准线的上方向(负方向),所以为负数)--><Imageohos:height="50vp"ohos:width="50vp"ohos:scale_mode="stretch"ohos:image_src="$media:bird"ohos:layout_alignment="center"ohos:top_margin="-120vp"ohos:left_margin="-40vp"/><!--菩萨--><Imageohos:height="120vp"ohos:width="100vp"ohos:image_src="$media:pusa"ohos:scale_mode="stretch"ohos:layout_alignment="top|right"ohos:top_margin="30vp"ohos:right_margin="40vp"/><!-- 跑车--><Imageohos:height="150vp"ohos:width="150vp"ohos:image_src="$media:car"ohos:scale_mode="stretch"ohos:layout_alignment="horizontal_center|bottom"ohos:bottom_margin="50vp"/>
</StackLayout>
效果图:

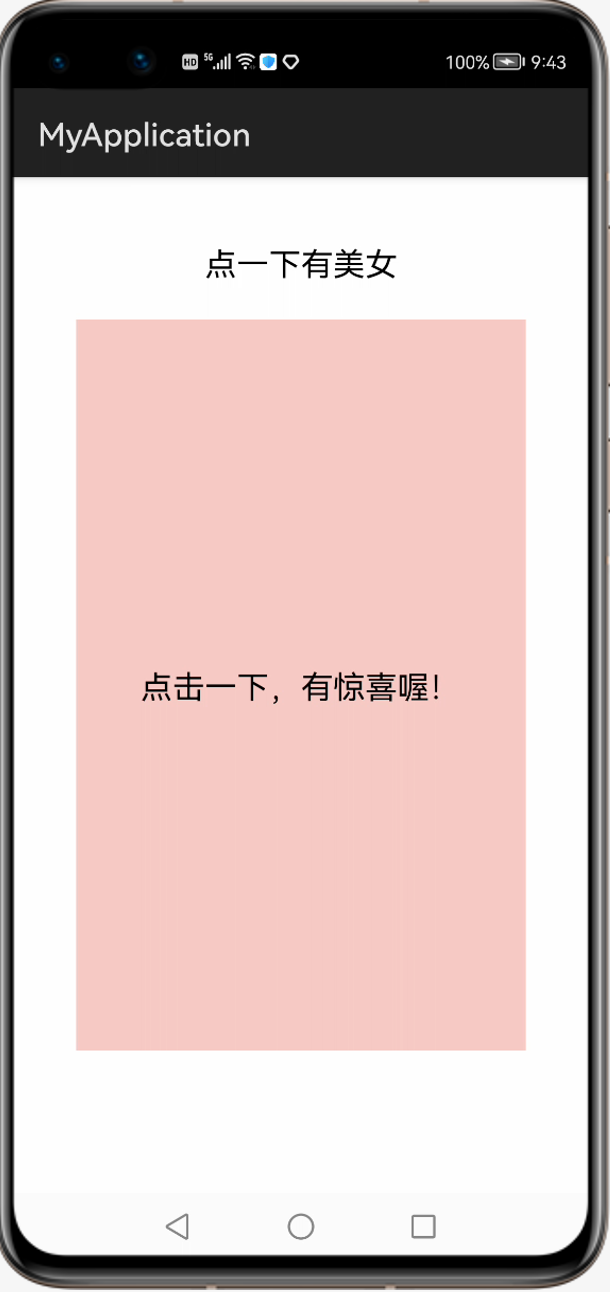
三、写个例子
一个有背景颜色的Text,一个图片,点击Text,显示图片,点击图片,显示Text,预览效果:
首先我们在layout目录 下,新建一个xml文件:demo_stack_layout.xml,代码如下:
<?xml version="1.0" encoding="utf-8"?>
<StackLayoutxmlns:ohos="http://schemas.huawei.com/res/ohos"ohos:height="match_parent"ohos:width="match_parent"ohos:id="$+id:stack_layout"><Textohos:id="$+id:text_msg"ohos:height="match_content"ohos:width="match_content"ohos:layout_alignment="horizontal_center"ohos:text="点一下有美女"ohos:text_size="20fp"ohos:top_margin="40vp"/><Imageohos:id="$+id:image1"ohos:height="match_content"ohos:width="match_content"ohos:image_src="$media:xiaoniu"ohos:layout_alignment="center"ohos:clickable="true"/><Textohos:id="$+id:text1"ohos:height="460vp"ohos:width="280vp"ohos:background_element="#F8CAC5"ohos:layout_alignment="center"ohos:text="点击一下,有惊喜喔!"ohos:text_alignment="center"ohos:text_size="20fp"/></StackLayout>
初始效果:
然后我们修改一下MainAbilitySlice.java的代码:
首先修改一下要显示的布局文件:
@Overridepublic void onStart(Intent intent) {super.onStart(intent);// 指定要展示的xml布局super.setUIContent(ResourceTable.Layout_demo_stack_layout);}
然后获取xml中的控件对象,image对象,text1对象,还有textMsg对象,用于显示提示信息。然后给text1添加点击事件,点击text1的时候,将image对象,显示到前面,并且修改textMsg,更改显示到文本。再给image添加点击事件,点击iamge的时候,将text1对象,显示到前面,并且修改textMsg的文本内容。代码如下:
package com.example.myapplication.slice;import com.example.myapplication.ResourceTable;
import ohos.aafwk.ability.AbilitySlice;
import ohos.aafwk.content.Intent;
import ohos.agp.components.*;public class MainAbilitySlice extends AbilitySlice {@Overridepublic void onStart(Intent intent) {super.onStart(intent);super.setUIContent(ResourceTable.Layout_demo_stack_layout);ComponentContainer stackLayout = (ComponentContainer) findComponentById(ResourceTable.Id_stack_layout);Text textMsg = (Text) findComponentById(ResourceTable.Id_text_msg);Text text1 = (Text) findComponentById(ResourceTable.Id_text1);Image image = (Image) findComponentById(ResourceTable.Id_image1);text1.setClickedListener(new Component.ClickedListener() {@Overridepublic void onClick(Component component) {// 指定的把子元素搬到前面去stackLayout.moveChildToFront(image);textMsg.setText("点一下,带回去,藏起来。。");System.out.println("component--------------------"+component);}});image.setClickedListener(new Component.ClickedListener() {@Overridepublic void onClick(Component component) {stackLayout.moveChildToFront(text1);textMsg.setText("点一下有美女");System.out.println("component--------------------"+component);}});}@Overridepublic void onActive() {super.onActive();}@Overridepublic void onForeground(Intent intent) {super.onForeground(intent);}
}
运行即可。
2.4【HarmonyOS鸿蒙开发】堆栈布局StackLayout相关推荐
- 3.5【HarmonyOS鸿蒙开发】组件RadioButton和RadioContainer
3.5[HarmonyOS鸿蒙开发]组件RadioButton和RadioContainer 作者:韩茹 公司:程序咖(北京)科技有限公司 鸿蒙巴士专栏作家 一.RadioButton RadioBu ...
- HVD Manager 无法通过验证该如何解决 (HarmonyOS鸿蒙开发基础知识)
实战问题 HVD Manager 无法通过验证该如何解决? 解决方案 1.应该是浏览器问题,建议使用IE浏览器打开 2.更换网络试试,通常通过4G或5G热点可以解决 未经授权禁止转载 更多技术交流请加 ...
- 基于小熊派的HarmonyOS鸿蒙开发教程——内核篇
复习时间:貌似很遥远呀!(未定期) 基于小熊派的鸿蒙开发内核篇 一.CMSIS-RTOS2接口 二.HarmonyOS内核开发-任务管理 三.HarmonyOS内核开发-定时器管理 定时器基本概念 定 ...
- HarmonyOS鸿蒙开发入门 :鸿蒙系统介绍
系统定位 HarmonyOS是一款面向万物互联时代的.全新的分布式操作系统. 在传统的单设备系统能力基础上,HarmonyOS提出了基于同一套系统能力.适配多种终端形态的分布式理念,能够支持手机.平板 ...
- (0.2)HarmonyOS鸿蒙开发工具DevEco Studio工程文件目录结构
1.基本不会去动添加修改的一些文件夹 2.主要直接使用操作的文件夹entry 3.开发操作main文件夹 也就是说,我们其实主要就只要用到java,resources两个文件夹和config.json ...
- 3.1【HarmonyOS鸿蒙开发】组件Text
作者:韩茹 公司:程序咖(北京)科技有限公司 鸿蒙巴士专栏作家 Text是用来显示字符串的组件,在界面上显示为一块文本区域.Text作为一个基本组件,有很多扩展,常见的有按钮组件Button,文本编辑 ...
- (0.3)HarmonyOS鸿蒙开发工具DevEco Studio 模拟器使用
1.登录华为账号 2.打开模拟器 3.选择模拟器 4.将程序运行在模拟器 5.当下面的building进度条完成后
- (1.3)HarmonyOS鸿蒙启动程序运行流程
程序启动运行流程: ①解析config.json文件 ②初始化 ③获取入口Ability的全类名(config.json里的module里的mainAbility) ④找到Ability并运行 ⑤运行 ...
- HarmonyOS UI开发 StackLayout(堆栈布局) 的使用
StackLayout是什么 StackLayout 是堆栈布局,直接在屏幕上开辟出一块空白的区域,添加到这个布局中的视图都是以层叠的方式显示,而它会把这些视图默认放到这块区域的左上角,第一个添加到布 ...
最新文章
- mfc 开启指定服务器,用MFC实现消息的发送和接收(含服务器)
- 完美实现SpringBoot+Angular普通登录
- 《看门狗》真人版跑酷!
- mybatis there is no getter named forInteger
- 如何使用智能铃声避免在Android中令人尴尬的大声铃声
- 背包(二维数组版和一维数组版)
- python的pandas库中如何计算每列出现最多的值_Python Pandas中根据列的值选取多行数据...
- java 判断请求为 ajax请求_Java过滤器处理Ajax请求,Java拦截器处理Ajax请求,java 判断请求是不是ajax请求...
- python引用传递_python 是值传递还是引用传递 知乎
- 为什么说ES6的class是语法糖?
- malloc函数用法
- 搜狗微信的链接并转换成永久链
- 实战:高级,高级 让 Kubectl的输出像彩虹一样绚丽多彩-2021.11.13
- c++11的regex使用
- 英文 程序员编程技能描述_程序员最重要的非编程技能
- .NET爬虫获取拼多多商品价格
- 使用J-Link打印日志
- 电脑内存不足怎么处理
- SQL1 插入记录(一)
- EBS功能_PO匹配审批层总结