SSM开发环境的搭建(方式二)
2019独角兽企业重金招聘Python工程师标准>>> 
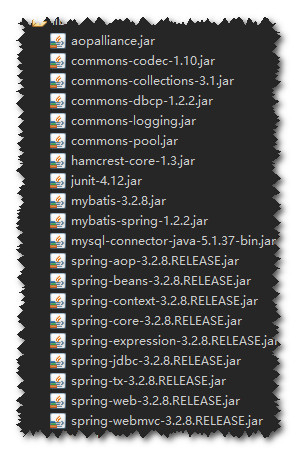
1.导包。
2.配置web.xml.
<?xml version="1.0" encoding="UTF-8"?>
<web-app xmlns:xsi="http://www.w3.org/2001/XMLSchema-instance" xmlns="http://java.sun.com/xml/ns/javaee" xsi:schemaLocation="http://java.sun.com/xml/ns/javaee http://java.sun.com/xml/ns/javaee/web-app_2_5.xsd" id="WebApp_ID" version="2.5"><display-name>SSMenvironment2</display-name><welcome-file-list><welcome-file>index.html</welcome-file><welcome-file>index.htm</welcome-file><welcome-file>index.jsp</welcome-file></welcome-file-list><!-- 加载spring容器 --><context-param><param-name>contextConfigLocation</param-name><param-value>classpath:spring/applicationContext-*.xml</param-value></context-param><listener><listener-class>org.springframework.web.context.ContextLoaderListener</listener-class></listener><!-- springmvc前端控制器 --><servlet><servlet-name>springmvc</servlet-name><servlet-class>org.springframework.web.servlet.DispatcherServlet</servlet-class><!-- contextConfigLocation配置springmvc加载的配置文件(配置处理器映射器、适配器等等) 如果不配置contextConfigLocation,默认加载的是/WEB-INF/servlet名称-serlvet.xml(springmvc-servlet.xml) --><init-param><param-name>contextConfigLocation</param-name><param-value>classpath:spring/springmvc.xml</param-value></init-param><load-on-startup>1</load-on-startup></servlet><servlet-mapping><servlet-name>springmvc</servlet-name><!-- 第一种:*.do,访问以.do结尾 由DispatcherServlet进行解析 第二种:/,所以访问的地址都由DispatcherServlet进行解析,对于静态文件的解析需要配置不让DispatcherServlet进行解析 使用此种方式可以实现 RESTful风格的url 第三种:/*,这样配置不对,使用这种配置,最终要转发到一个jsp页面时, 仍然会由DispatcherServlet解析jsp地址,不能根据jsp页面找到handler,会报错。 --><url-pattern>*.do</url-pattern></servlet-mapping><!-- post乱码过虑器 --><filter><filter-name>CharacterEncodingFilter</filter-name><filter-class>org.springframework.web.filter.CharacterEncodingFilter</filter-class><init-param><param-name>encoding</param-name><param-value>utf-8</param-value></init-param></filter><filter-mapping><filter-name>CharacterEncodingFilter</filter-name><url-pattern>/*</url-pattern></filter-mapping></web-app>
3.在src下建立包。
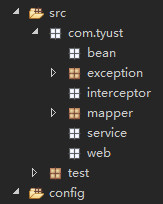
说明:bean包放javabean类,exception包自定义exception类,interceptor包放拦截器类(如果需要的话),mapper包放XxxMapper.java类和XxxMapper.xml配置文件(记住这两个文件的名字一定要相同),service包放Service类,web包放Controller类,test包放test类(若需要的话),config包放spring和mybatis的配置文件。
4.config中配置文件的编写。
config包中的结构(不一定非要一样)。
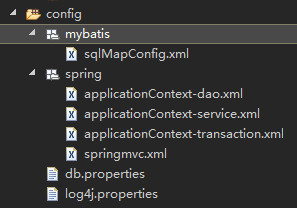
sqlMapConfig.xml(mybatis的配置文件)。
<?xml version="1.0" encoding="UTF-8" ?>
<!DOCTYPE configuration
PUBLIC "-//mybatis.org//DTD Config 3.0//EN"
"http://mybatis.org/dtd/mybatis-3-config.dtd">
<configuration><!-- 全局setting配置,根据需要添加 --><!-- 全局配置参数,需要时再设置 --><settings><!-- 打开延迟加载 的开关 --><setting name="lazyLoadingEnabled" value="true"/><!-- 将积极加载改为消极加载即按需要加载 --><setting name="aggressiveLazyLoading" value="false"/><!-- 开启二级缓存 --><setting name="cacheEnabled" value="true"/></settings><!-- 配置别名 --><typeAliases><!-- 批量扫描别名 --><package name="com.tyust.bean"/></typeAliases><!-- 配置mapper由于使用spring和mybatis的整合包进行mapper扫描,这里不需要配置了。必须遵循:mapper.xml和mapper.java文件同名且在一个目录 --><!-- <mappers></mappers> -->
</configuration>
springmvc.xml
<beans xmlns="http://www.springframework.org/schema/beans"xmlns:xsi="http://www.w3.org/2001/XMLSchema-instance" xmlns:mvc="http://www.springframework.org/schema/mvc"xmlns:context="http://www.springframework.org/schema/context"xmlns:aop="http://www.springframework.org/schema/aop" xmlns:tx="http://www.springframework.org/schema/tx"xsi:schemaLocation="http://www.springframework.org/schema/beans http://www.springframework.org/schema/beans/spring-beans-3.2.xsd http://www.springframework.org/schema/mvc http://www.springframework.org/schema/mvc/spring-mvc-3.2.xsd http://www.springframework.org/schema/context http://www.springframework.org/schema/context/spring-context-3.2.xsd http://www.springframework.org/schema/aop http://www.springframework.org/schema/aop/spring-aop-3.2.xsd http://www.springframework.org/schema/tx http://www.springframework.org/schema/tx/spring-tx-3.2.xsd "><!-- 可以扫描controller、service、...这里让扫描controller,指定controller的包--><context:component-scan base-package="com.tyust.web"></context:component-scan><!-- 静态资源解析包括 :js、css、img、..--><!--  <mvc:resources location="/js/" mapping="/js/**"/><mvc:resources location="/img/" mapping="/img/**"/>--> <!--注解映射器 --><!-- <bean class="org.springframework.web.servlet.mvc.method.annotation.RequestMappingHandlerMapping"/> --><!--注解适配器 --><!-- <bean class="org.springframework.web.servlet.mvc.method.annotation.RequestMappingHandlerAdapter"/> --><!-- 使用 mvc:annotation-driven代替上边注解映射器和注解适配器配置mvc:annotation-driven默认加载很多的参数绑定方法,比如json转换解析器就默认加载了,如果使用mvc:annotation-driven不用配置上边的RequestMappingHandlerMapping和RequestMappingHandlerAdapter实际开发时使用mvc:annotation-driven--><!-- <mvc:annotation-driven conversion-service="conversionService"validator="validator"/> --><!-- 视图解析器解析jsp解析,默认使用jstl标签,classpath下的得有jstl的包--><beanclass="org.springframework.web.servlet.view.InternalResourceViewResolver"><!-- 配置jsp路径的前缀,如下路径是把jsp文件放到WEB-INF下,若不在那里边就不用写WEB-INF了 --><property name="prefix" value="/WEB-INF/jsp/"/><!-- 配置jsp路径的后缀 --><property name="suffix" value=".jsp"/></bean><!-- 自定义参数绑定 --><!-- <bean id="conversionService" class="org.springframework.format.support.FormattingConversionServiceFactoryBean">转换器<property name="converters"><list>日期类型转换<bean class="com.tyust.web.converter.CustomDateConverter"/></list></property></bean> --><!-- 校验器 --><!-- <bean id="validator"class="org.springframework.validation.beanvalidation.LocalValidatorFactoryBean">hibernate校验器<property name="providerClass" value="org.hibernate.validator.HibernateValidator" />指定校验使用的资源文件,在文件中配置校验错误信息,如果不指定则默认使用classpath下的ValidationMessages.properties<property name="validationMessageSource" ref="messageSource" /></bean> -->
<!-- 校验错误信息配置文件 --><!-- <bean id="messageSource"class="org.springframework.context.support.ReloadableResourceBundleMessageSource">资源文件名<property name="basenames">   <list>    <value>classpath:CustomValidationMessages</value> </list>   </property>资源文件编码格式<property name="fileEncodings" value="utf-8" />对资源文件内容缓存时间,单位秒<property name="cacheSeconds" value="120" /></bean> --><!-- 全局异常处理器只要实现HandlerExceptionResolver接口就是全局异常处理器--><!-- <bean class="com.tyust.exception.ExceptionResolver"></bean> --><!-- 文件上传 --><!-- <bean id="multipartResolver"class="org.springframework.web.multipart.commons.CommonsMultipartResolver">设置上传文件的最大尺寸为5MB<property name="maxUploadSize"><value>5242880</value></property></bean> --><!--拦截器 --><!-- <mvc:interceptors>多个拦截器,顺序执行登陆认证拦截器<mvc:interceptor><mvc:mapping path="/**"/><bean class=""></bean></mvc:interceptor><mvc:interceptor>/**表示所有url包括子url路径<mvc:mapping path="/**"/><bean class=""></bean></mvc:interceptor><mvc:interceptor><mvc:mapping path="/**"/><bean class=""></bean></mvc:interceptor></mvc:interceptors> --></beans>
applicationContext-dao.xml
<beans xmlns="http://www.springframework.org/schema/beans"xmlns:xsi="http://www.w3.org/2001/XMLSchema-instance" xmlns:mvc="http://www.springframework.org/schema/mvc"xmlns:context="http://www.springframework.org/schema/context"xmlns:aop="http://www.springframework.org/schema/aop" xmlns:tx="http://www.springframework.org/schema/tx"xsi:schemaLocation="http://www.springframework.org/schema/beans http://www.springframework.org/schema/beans/spring-beans-3.2.xsd http://www.springframework.org/schema/mvc http://www.springframework.org/schema/mvc/spring-mvc-3.2.xsd http://www.springframework.org/schema/context http://www.springframework.org/schema/context/spring-context-3.2.xsd http://www.springframework.org/schema/aop http://www.springframework.org/schema/aop/spring-aop-3.2.xsd http://www.springframework.org/schema/tx http://www.springframework.org/schema/tx/spring-tx-3.2.xsd "><!-- 加载db.properties文件中的内容,db.properties文件中key命名要有一定的特殊规则 --><context:property-placeholder location="classpath:db.properties" /><!-- 配置数据源 ,dbcp --><bean id="dataSource" class="org.apache.commons.dbcp.BasicDataSource"destroy-method="close"><property name="driverClassName" value="#{jdbc.driver}" /><property name="url" value="#{jdbc.url}" /><property name="username" value="#{jdbc.username}" /><property name="password" value="#{jdbc.password}" /><property name="maxActive" value="30" /><property name="maxIdle" value="5" /></bean><!-- sqlSessionFactory --><bean id="sqlSessionFactory" class="org.mybatis.spring.SqlSessionFactoryBean"><!-- 数据库连接池 --><property name="dataSource" ref="dataSource" /><!-- 加载mybatis的全局配置文件 --><property name="configLocation" value="classpath:mybatis/sqlMapConfig.xml" /></bean><!-- mapper扫描器 --><bean class="org.mybatis.spring.mapper.MapperScannerConfigurer"><!-- 扫描包路径,如果需要扫描多个包,中间使用半角逗号隔开 --><property name="basePackage" value="com.tyust.mapper"></property><property name="sqlSessionFactoryBeanName" value="sqlSessionFactory" /></bean></beans>applicationContext-service.xml
<beans xmlns="http://www.springframework.org/schema/beans"xmlns:xsi="http://www.w3.org/2001/XMLSchema-instance" xmlns:mvc="http://www.springframework.org/schema/mvc"xmlns:context="http://www.springframework.org/schema/context"xmlns:aop="http://www.springframework.org/schema/aop" xmlns:tx="http://www.springframework.org/schema/tx"xsi:schemaLocation="http://www.springframework.org/schema/beans http://www.springframework.org/schema/beans/spring-beans-3.2.xsd http://www.springframework.org/schema/mvc http://www.springframework.org/schema/mvc/spring-mvc-3.2.xsd http://www.springframework.org/schema/context http://www.springframework.org/schema/context/spring-context-3.2.xsd http://www.springframework.org/schema/aop http://www.springframework.org/schema/aop/spring-aop-3.2.xsd http://www.springframework.org/schema/tx http://www.springframework.org/schema/tx/spring-tx-3.2.xsd "><context:component-scan base-package="com.tyust.service"/>
</beans>
applicationContext.transcation.xml
<beans xmlns="http://www.springframework.org/schema/beans"xmlns:xsi="http://www.w3.org/2001/XMLSchema-instance" xmlns:mvc="http://www.springframework.org/schema/mvc"xmlns:context="http://www.springframework.org/schema/context"xmlns:aop="http://www.springframework.org/schema/aop" xmlns:tx="http://www.springframework.org/schema/tx"xsi:schemaLocation="http://www.springframework.org/schema/beans http://www.springframework.org/schema/beans/spring-beans-3.2.xsd http://www.springframework.org/schema/mvc http://www.springframework.org/schema/mvc/spring-mvc-3.2.xsd http://www.springframework.org/schema/context http://www.springframework.org/schema/context/spring-context-3.2.xsd http://www.springframework.org/schema/aop http://www.springframework.org/schema/aop/spring-aop-3.2.xsd http://www.springframework.org/schema/tx http://www.springframework.org/schema/tx/spring-tx-3.2.xsd "><!-- 事务管理器 对mybatis操作数据库事务控制,spring使用jdbc的事务控制类
-->
<bean id="transactionManager" class="org.springframework.jdbc.datasource.DataSourceTransactionManager"><!-- 数据源dataSource在applicationContext-dao.xml中配置了--><property name="dataSource" ref="dataSource"/>
</bean><!-- 通知 -->
<tx:advice id="txAdvice" transaction-manager="transactionManager"><tx:attributes><!-- 传播行为 --><tx:method name="save*" propagation="REQUIRED"/><tx:method name="delete*" propagation="REQUIRED"/><tx:method name="insert*" propagation="REQUIRED"/><tx:method name="update*" propagation="REQUIRED"/><tx:method name="find*" propagation="SUPPORTS" read-only="true"/><tx:method name="get*" propagation="SUPPORTS" read-only="true"/><tx:method name="select*" propagation="SUPPORTS" read-only="true"/></tx:attributes>
</tx:advice>
<!-- aop -->
<aop:config><aop:advisor advice-ref="txAdvice" pointcut="execution(* com.tyust.service.impl.*.*(..))"/>
</aop:config></beans>
db.properties
jdbc.driver=com.mysql.jdbc.Driver
jdbc.url=jdbc:mysql://localhost:3306/db_mybatis
jdbc.username=root
jdbc.password=root
log4j.properties
# Global logging configuration\uff0c\u5efa\u8bae\u5f00\u53d1\u73af\u5883\u4e2d\u8981\u7528debug
log4j.rootLogger=DEBUG, stdout
# Console output...
log4j.appender.stdout=org.apache.log4j.ConsoleAppender
log4j.appender.stdout.layout=org.apache.log4j.PatternLayout
log4j.appender.stdout.layout.ConversionPattern=%5p [%t] - %m%n
5.测试mybatis连接数据库是否成功。
6.开发。
转载于:https://my.oschina.net/liddhome/blog/822032
SSM开发环境的搭建(方式二)相关推荐
- ssm如何支持热部署_IntelliJ IDEA基于SpringBoot如何搭建SSM开发环境
之前给大家在博文中讲过如何通过eclipse快速搭建SSM开发环境,但相对而言还是有些麻烦的,今天小编给大家介绍下如何使用IntelliJ IDEA基于SpringBoot来更快速地搭建SSM开发环境 ...
- SpringBoot-从入门到放弃(二) 开发环境的搭建
SpringBoot-从入门到放弃(二) 开发环境的搭建 版权声明:本文为博主原创文章,未经博主允许不得转载. https://blog.csdn.net/z23546498/article/deta ...
- 编译vuejs html,VueJs(2)---VueJs开发环境的搭建和讲解index.html如何被渲染
VueJs开发环境的搭建和讲解初始框架 有关如何搭建vue.js框架我这看了一篇文章,自己也根据它进行搭建环境. 接下来对初始的框架进行讲解,只讲index.html是如何被渲染出来的. 一.启动项目 ...
- ESP32开发环境的搭建和 ESP-IDF支持以下调试方法
ESP32开发环境的搭建 ESP-IDF 支持以下调试方法: 一. JTAG 二. GDB调试 三. 日志系统 四. Core Dump 五. esp32 heap 内存管理简析 ESP32开发环境的 ...
- TypeScript 开发环境的搭建与数据类型
一.Ts的优势 更早的发现错误 任何位置都有代码提示,增加开发效率 类型系统提升了代码的可维护性,重构更容易 使用最新的ES语法 TS类型推断机制,降低成本 二.开发环境的搭建 安装 Node.js ...
- TI cc2541协议栈开发环境的搭建
最近半个月由于项目需要,学习了一下蓝牙4.0的协议栈开发,其实也就是TI公司做好的协议栈的基础上进行修改,不是太难,现在资料也很多. 我是个新手,所以对于新手来说,我的经验应该很有帮助,但文章细节不全 ...
- Spark开发环境的搭建与配置(基于Linux)
目录 一.部署环境安装说明 二.Spark安装 1.Spark下载 2.解压Spark安装包 3.配置环境 4.安装scala(scala要在同一目录下) 一.部署环境安装说明 部署环境VMware+ ...
- python 论坛搭建_Python第一课 - python的开发环境的搭建
Python第一课 - python的开发环境的搭建 一.下载安装Python的安装包 打开官网 https://www.python.org/downloads/windows/ 下载中心 [标记为 ...
- Java开发环境的搭建以及使用eclipse从头一步步创建java项目
原文:出自本人的Linux博客http://blog.csdn.net/unix21/article/details/18813173 一.Java 开发环境的搭建 这里主要说windows环境下怎么 ...
- Java开发环境的搭建以及使用eclipse创建项目
一.Java 开发环境的搭建 这里主要说windows环境下怎么配置Java环境.如果是Linux环境参考本博客另一篇文章即可: Linux环境安装卸载JDK 1.首先安装JDK java的SDK简称 ...
最新文章
- LeetCode | Minimum Depth of Binary Tree
- vs2005之主题与皮肤的学习
- java如何做全局缓存_传智播客JNI第七讲 – JNI中的全局引用/局部引用/弱全局引用、缓存jfieldID和jmethodID的两种方式...
- IDEA中Spring MVC实现图片上传并显示
- 几乎是苹果6倍!华为可穿戴设备出货量Q1同比猛增282%
- 如何才能一统编程语言的江湖?
- python三角网格代码_python中shapely的多多边形三角网格/网格
- Leetcode之路径总和II
- 完美解决win10打开或关闭系统图标网络灰色
- Messenger:使用消息的跨进程通信 (Message.replyTo()的使用)
- Word默认打开方式不对,图标空白的修复方法
- android 仿qq 功能,Android仿QQ、新浪相册的实现
- SQL连接MYSQL出现对象名无效_SQL数据库时提示对象名'XXX' 无效
- 序列化-Kryo的使用详解
- 在计算机内 信息的表现形式是什么,信息的表现形式_现代信息的形式表现为哪四种形态...
- 自然语言处理nlp小姜机器人(闲聊) nlp_xiaojiang-996station GitHub鉴赏官
- java过滤汉字和英文,java判断及过滤汉字
- Linux的root权限安装nvm后可用,切换用户以后报nvm: command not found解决办法
- 【中亦安图】Systemstate Dump分析经典案例(7)
- input输入框去除历史记录