C#编写Windows服务程序图文教程
Windows Service这一块并不复杂,但是注意事项太多了,网上资料也很凌乱,偶尔自己写也会丢三落四的。所以本文也就产生了,本文不会写复杂的东西,完全以基础应用的需求来写,所以不会对Windows Service写很深入。
本文介绍了如何用C#创建、安装、启动、监控、卸载简单的Windows Service 的内容步骤和注意事项。
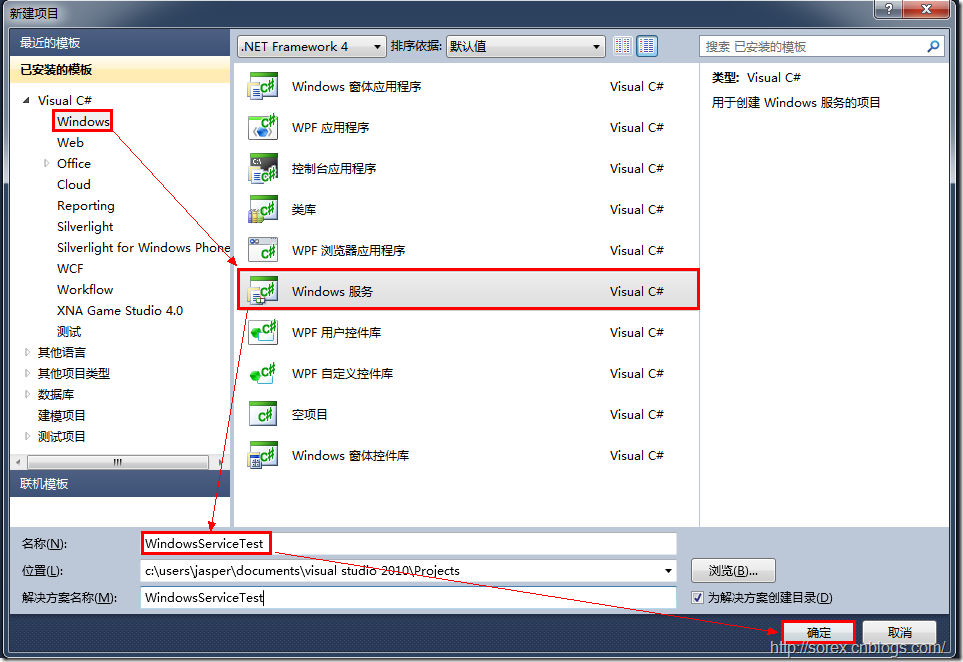
一、创建一个Windows Service
1)创建Windows Service项目
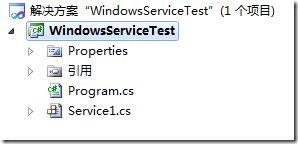
2)对Service重命名
将Service1重命名为你服务名称,这里我们命名为ServiceTest。
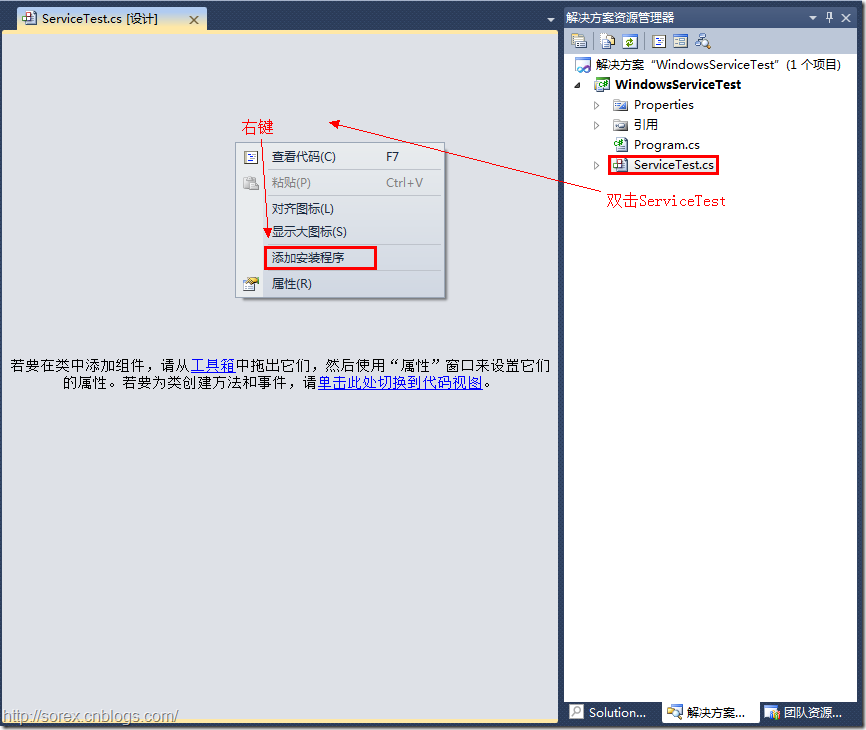
二、创建服务安装程序
1)添加安装程序
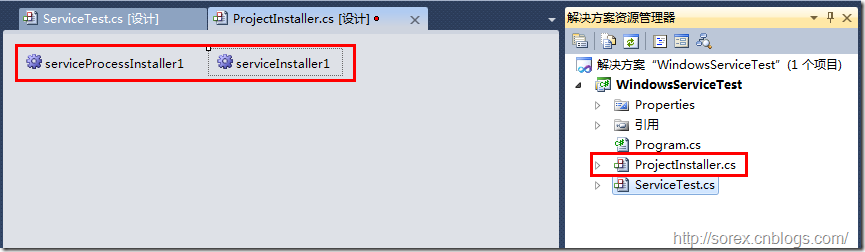
之后我们可以看到上图,自动为我们创建了ProjectInstaller.cs以及2个安装的组件。
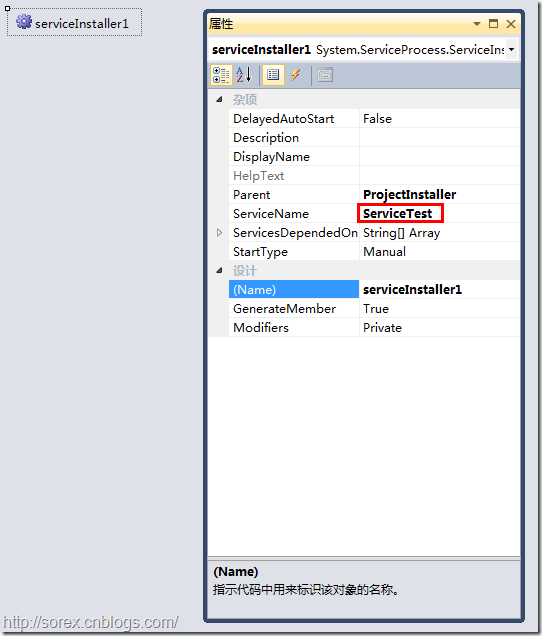
2)修改安装服务名
右键serviceInsraller1,选择属性,将ServiceName的值改为ServiceTest。
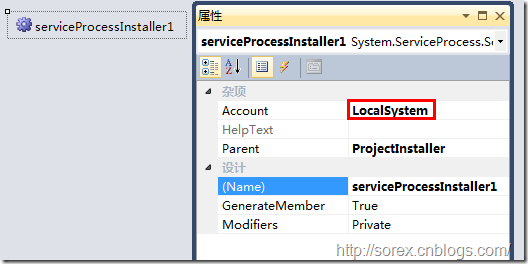
3)修改安装权限
右键serviceProcessInsraller1,选择属性,将Account的值改为LocalSystem。
三、写入服务代码
1)打开ServiceTest代码
右键ServiceTest,选择查看代码。
2)写入Service逻辑
添加如下代码:
using System;
using System.Collections.Generic;
using System.ComponentModel;
using System.Data;
using System.Diagnostics;
using System.Linq;
using System.ServiceProcess;
using System.Text;namespace WindowsServiceTest
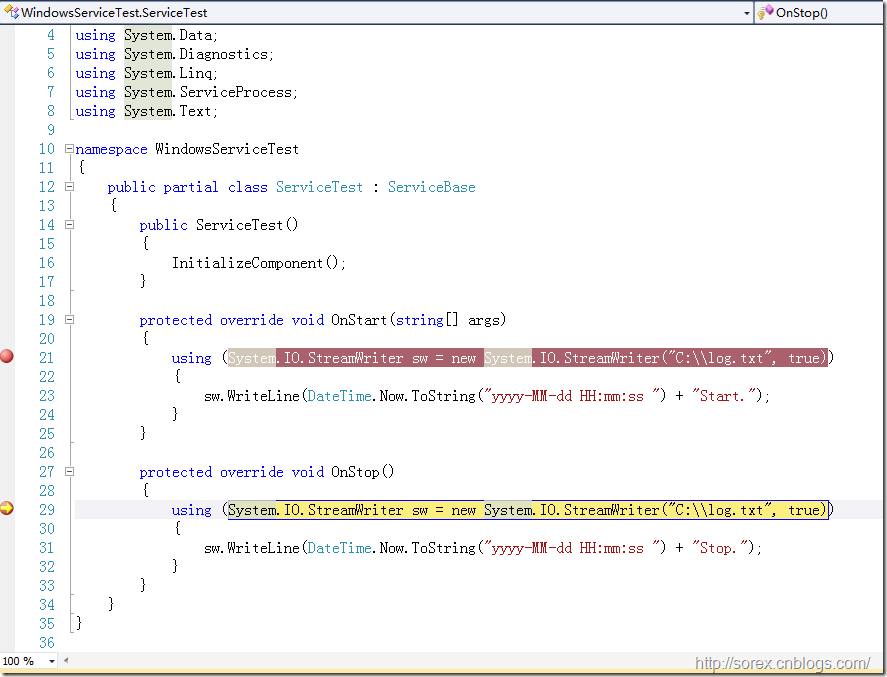
{public partial class ServiceTest : ServiceBase{public ServiceTest(){InitializeComponent();}protected override void OnStart(string[] args){using (System.IO.StreamWriter sw = new System.IO.StreamWriter("C:\\log.txt", true)){sw.WriteLine(DateTime.Now.ToString("yyyy-MM-dd HH:mm:ss ") + "Start.");}}protected override void OnStop(){using (System.IO.StreamWriter sw = new System.IO.StreamWriter("C:\\log.txt", true)){sw.WriteLine(DateTime.Now.ToString("yyyy-MM-dd HH:mm:ss ") + "Stop.");}}}
}
这里我们的逻辑很简单,启动服务的时候写个日志,关闭的时候再写个日志。
四、创建安装脚本
在项目中添加2个文件如下(必须是ANSI或者UTF-8无BOM格式):
1)安装脚本Install.bat
%SystemRoot%\Microsoft.NET\Framework\v4.0.30319\installutil.exe WindowsServiceTest.exe
Net Start ServiceTest
sc config ServiceTest start= auto
2)卸载脚本Uninstall.bat
%SystemRoot%\Microsoft.NET\Framework\v4.0.30319\installutil.exe /u WindowsServiceTest.exe
3)安装脚本说明
第二行为启动服务。
第三行为设置服务为自动运行。
这2行视服务形式自行选择。
4)脚本调试
如果需要查看脚本运行状况,在脚本最后一行加入pause
五、在C#中对服务进行控制
0)配置目录结构
简历一个新WPF项目,叫WindowsServiceTestUI,添加对System.ServiceProcess的引用。
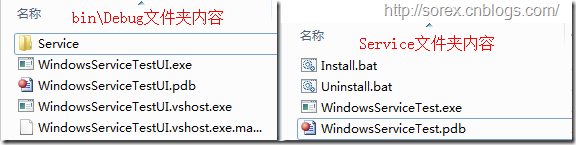
在WindowsServiceTestUI的bin\Debug目录下建立Service目录。
将WindowsServiceTest的生成目录设置为上面创建的Service目录。
生成后目录结构如下图
1)安装
安装时会产生目录问题,所以安装代码如下:
string CurrentDirectory = System.Environment.CurrentDirectory;
System.Environment.CurrentDirectory = CurrentDirectory + "\\Service";
Process process = new Process();
process.StartInfo.UseShellExecute = false;
process.StartInfo.FileName = "Install.bat";
process.StartInfo.CreateNoWindow = true;
process.Start();
System.Environment.CurrentDirectory = CurrentDirectory;
2)卸载
卸载时也会产生目录问题,所以卸载代码如下:
string CurrentDirectory = System.Environment.CurrentDirectory;
System.Environment.CurrentDirectory = CurrentDirectory + "\\Service";
Process process = new Process();
process.StartInfo.UseShellExecute = false;
process.StartInfo.FileName = "Uninstall.bat";
process.StartInfo.CreateNoWindow = true;
process.Start();
System.Environment.CurrentDirectory = CurrentDirectory;
3)启动
代码如下:
using System.ServiceProcess;ServiceController serviceController = new ServiceController("ServiceTest");
serviceController.Start();
4)停止
ServiceController serviceController = new ServiceController("ServiceTest");
if (serviceController.CanStop)serviceController.Stop();
5)暂停/继续
ServiceController serviceController = new ServiceController("ServiceTest");
if (serviceController.CanPauseAndContinue)
{if (serviceController.Status == ServiceControllerStatus.Running)serviceController.Pause();else if (serviceController.Status == ServiceControllerStatus.Paused)serviceController.Continue();
}
6)检查状态
ServiceController serviceController = new ServiceController("ServiceTest");
string Status = serviceController.Status.ToString();
六、调试Windows Service
1)安装并运行服务
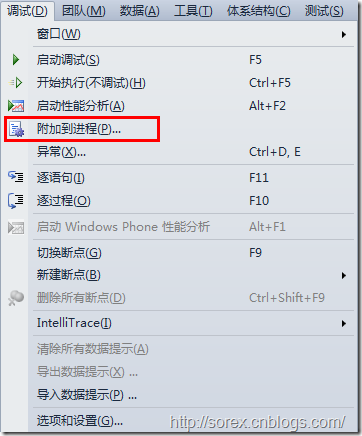
2)附加进程
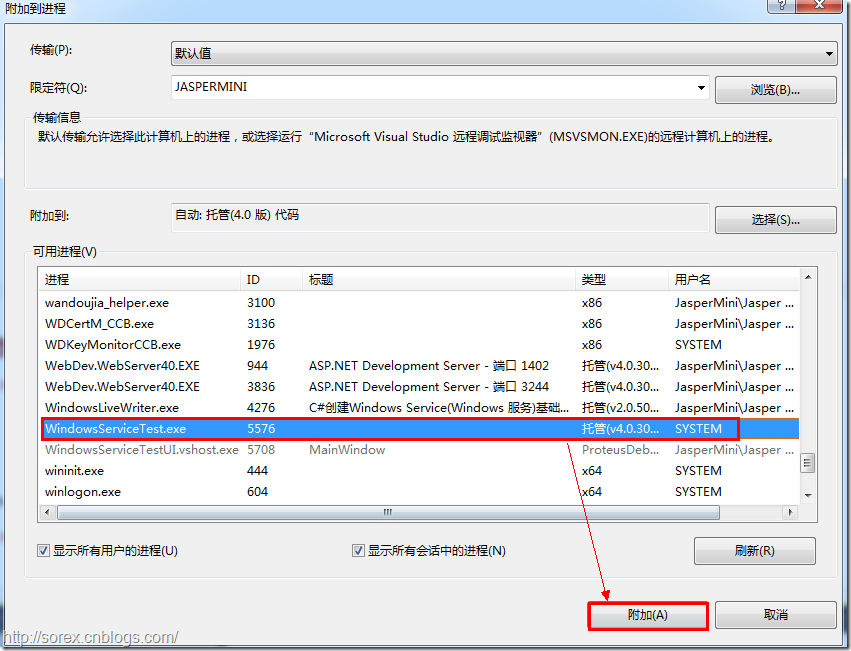
3)在代码中加入断点进行调试
七、总结
本文对Windows service的上述配置都未做详细解释,但是按上述步骤就可以制作可运行的Windows Service,从而达到了工作的需求。
C#编写Windows服务程序图文教程相关推荐
- C语言编写Windows服务程序
C语言编写Windows服务程序 原文:C语言编写Windows服务程序 #include <Windows.h> #include <stdio.h>#define SLEE ...
- php workerman window,【PHP开辟框架】workerman布置到windows服务器图文教程
下面由 workerman php教程栏目给人人引见workerman安排到windows效劳器的要领,愿望对须要的朋侪有所协助! swoole和workerman都能够完成立即通讯的功用,个中swo ...
- macOS 12 Monterey安装Windows 11图文教程
本文是macOS 12 Monterey用Parallels Desktop 17安装Windows 11的图文教程,安装之前需要先下载Parallels Desktop 17与Windows 11原 ...
- 用 C 语言编写 Windows 服务程序的五个步骤
前一段时间我写了一篇通过写服务的形式来达到一些监视程序运行的目的的文章,至于如何在windows下写服务我没有详细介绍,今天就让我们一起看看如何来写服务程序. Windows 服务被设计用于需要在后台 ...
- 编写Windows服务程序,将Python作为Windows服务启动
首先需要安装两个模块. pip install pywin32 -i https://pypi.tuna.tsinghua.edu.cn/simplepip install pyinstaller - ...
- 虚拟机VirtualBox安装windows操作系统(图文教程)
原文地址:http://www.i7086.com/xunijivirtualboxanzhuangwindowscaozuoxitong 一.虚拟机VirtualBox安装准备工作: 1.虚拟机Vi ...
- C#编写Windows服务程序 (服务端),客户端使用 消息队列 实现淘宝 订单全链路效果
需求: 针对 淘宝提出的 订单全链路 产品接入 .http://open.taobao.com/doc/detail.htm?id=102423&qq-pf-to=pcqq.group oms ...
- C#编写Windows服务程序 (服务端),client使用 消息队列 实现淘宝 订单全链路效果
需求: 针对 淘宝提出的 订单全链路 产品接入 .http://open.taobao.com/doc/detail.htm?id=102423&qq-pf-to=pcqq.group oms ...
- Github for Windows使用图文教程
Git已经变得非常流行,连Codeplex现在也已经主推Git.Github上更是充斥着各种高质量的开源项目,比如ruby on rails,cocos2d等等. 对于习惯Windows图形界面的程序 ...
最新文章
- python3最新稳定版本-python3稳定版
- Linux网络安装(PXE + DHCP+TFTP+ Kickstart+ FTP)
- Tkinter的Button组件的使用
- ca证书 linux 导入_Linux CA证书服务器搭建
- 脚本进阶,函数调用实例练习
- 数据为桥迈向智能,渤海财险数据架构智能化演进
- html读取媒体长度,用媒体查询media根据屏幕分辨率大小确定网页宽度
- SQL分组字符串相连
- 4.3.5 导频插入
- java 清理页面缓存数据_清除浏览器缓存的几种方法总结(必看)
- 初步使用ligerui
- 设计模式(四)注册模式 解决:解决全局共享和交换对象
- tensorflow模型ckpt如何查看输入输出节点,以及转uff模型
- 百度网盘开放平台接口,上传、下载等功能PHP详细操作
- Unity打开新项目报错
- W3af简单使用教程
- linux后台开发之什么是缓存系统三座大山
- 不同系统之间数据对接方式
- Robomongo使用教程:踩着前辈的路
- Android 四大组件 -- BroadcastReceiver(广播)
热门文章
- [转] 使用模板自定义 WPF 控件
- vss6 forgot admin password
- 13.PHP_ThinkPHP
- Win64 驱动内核编程-6.内核里操作注册表
- hdu1074 状态压缩dp+记录方案
- hdu 4891 模拟
- 【C 语言】文件操作 ( 按照文本行的方式读写文件 | fgets 函数 | fputs 函数 )
- 【Android 逆向】IDA 工具使用 ( 交叉引用数量设置 | 调试设置 )
- 【Android 插件化】“ 插桩式 “ 插件化框架 ( 类加载器创建 | 资源加载 )
- 【Flutter】StatelessWidget 组件 ( Divider 组件 | Card 组件 | AlertDialog 组件 )