go语言 html 5 gui,仅需简单 5 步,给你的 Golang 程序添加 GUI (使用 Electron )
创建一个 Golang app 是一件简单又轻松的事情,但是有时候你想给你的应用锦上添花:创建一个 GUI!
在本篇文章中,我将通过使用 astilectron 工具中的 bootstrap 以及 bundler 给一个简单的 Golang 程序添加 GUI。
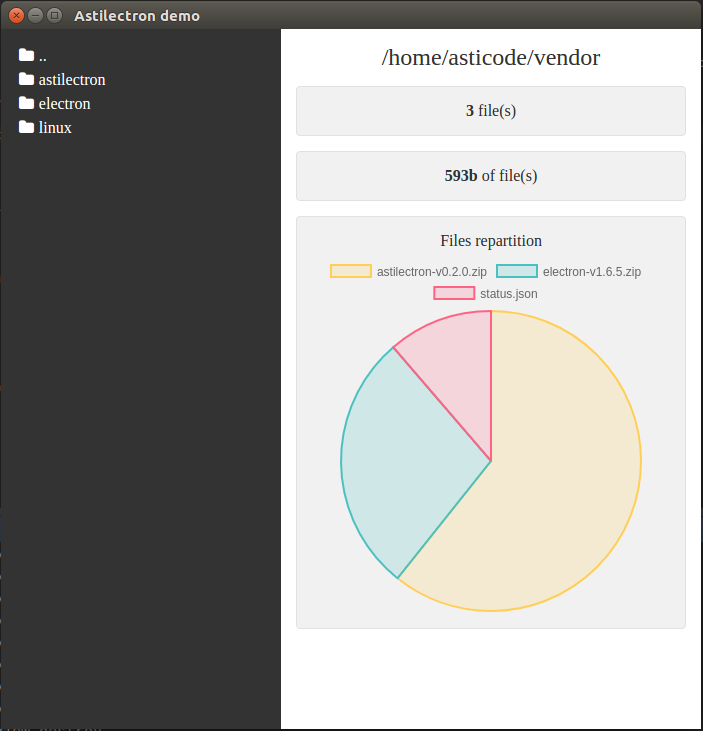
我们的带有 GUI 的 Golang app 能够打开一个文件夹并且展示其中的内容。
你可以在这里找到完成后的 [代码](https://github.com/asticode/go-astilectron-demo) :
## 第一步:组织项目结构
文件夹结构如下:
```
|--+ resources
|--+ app
|--+ static
|--+ css
|--+ base.css
|--+ js
|--+ index.js
|--+ lib
|--+ ... (all the css/js libs we need)
|--+ index.html
|--+ icon.icns
|--+ icon.ico
|--+ icon.png
|--+ bundler.json
|--+ main.go
|--+ message.go
```
你将看到,我们需要 3 种不同格式的图标以完成不同平台的编译:`.icns` 用于 `darwin` 平台、`.ico` 用于 `windows` 平台、`.png` 用于 `linux` 平台。
我们将使用以下 CSS/JS 库:
- [ astiloader ](https://github.com/asticode/js-toolbox)
- [astimodaler](https://github.com/asticode/js-toolbox)
- [astinotifier](https://github.com/asticode/js-toolbox)
- [chartjs](http://www.chartjs.org/)
- [fontAwesome](http://fontawesome.io/)
## 第二步:搭建基础架构
### Go
首先我们需要在 `main.go` 中导入 [astilectron](https://github.com/asticode/go-astilectron) 的 bootstrap 源码包 :
```go
package main
import (
"flag"
"github.com/asticode/go-astilectron"
"github.com/asticode/go-astilectron-bootstrap"
"github.com/asticode/go-astilog"
"github.com/pkg/errors"
)
// Vars
var (
AppName string
BuiltAt string
debug = flag.Bool("d", false, "enables the debug mode")
w *astilectron.Window
)
func main() {
// Init
flag.Parse()
astilog.FlagInit()
// Run bootstrap
astilog.Debugf("Running app built at %s", BuiltAt)
if err := bootstrap.Run(bootstrap.Options{
AstilectronOptions: astilectron.Options{
AppName: AppName,
AppIconDarwinPath: "resources/icon.icns",
AppIconDefaultPath: "resources/icon.png",
},
Debug: *debug,
Homepage: "index.html",
MenuOptions: []*astilectron.MenuItemOptions{{
Label: astilectron.PtrStr("File"),
SubMenu: []*astilectron.MenuItemOptions{
{Label: astilectron.PtrStr("About")},
{Role: astilectron.MenuItemRoleClose},
},
}},
OnWait: func(_ *astilectron.Astilectron, iw *astilectron.Window, _ *astilectron.Menu, _ *astilectron.Tray, _ *astilectron.Menu) error {
w = iw
return nil
},
WindowOptions: &astilectron.WindowOptions{
BackgroundColor: astilectron.PtrStr("#333"),
Center: astilectron.PtrBool(true),
Height: astilectron.PtrInt(700),
Width: astilectron.PtrInt(700),
},
}); err != nil {
astilog.Fatal(errors.Wrap(err, "running bootstrap failed"))
}
}
```
2 个全局变量 `AppName` 和 `BuiltAt` 将会通过 [bundler](https://github.com/asticode/go-astilectron-bundler) 打包自动添加进去。
随后我们将发现我们的主页变成了 `index.html` ,我们将有一个含有 2 个项目( `about` 和 `close` )的菜单并且会出现一个 `700x700` , `中心对齐的` , `#333` 背景色的窗口。
我们要在 go 上添加 `debug` 选项,因为我们需要使用 HTML/JS/CSS 调试工具。
最后我们将指向 `astilectron.Window` 的指针存入全局变量 `w`,以备后续在使用 `OnWait` 选项时,它包含一个在窗口、菜单及其他所有对象被创建时立即执行的回调函数。
### HTML
现在我们需要在 `resources/app/index.html` 中创建我们的 HTML 主页:
```html
index.init();
```
这里没什么特殊的地方,我们声明我们的 `css` 和 `js` 文件,我们设置 html 文件结构并且需要确保我们的 `js` 脚本通过 `index.init()` 进行了初始化
### CSS
现在需要在 `resources/app/static/css/base.css` 文件中创建我们的 CSS:
```css
* {
box-sizing: border-box;
}
html, body {
background-color: #fff;
color: #333;
height: 100%;
margin: 0;
width: 100%;
}
.left {
background-color: #333;
color: #fff;
float: left;
height: 100%;
overflow: auto;
padding: 15px;
width: 40%;
}
.dir {
cursor: pointer;
padding: 3px;
}
.dir .fa {
margin-right: 5px;
}
.right {
float: right;
height: 100%;
overflow: auto;
padding: 15px;
width: 60%;
}
.title {
font-size: 1.5em;
text-align: center;
word-wrap: break-word;
}
.panel {
background-color: #f1f1f1;
border: solid 1px #e1e1e1;
border-radius: 4px;
margin-top: 15px;
padding: 15px;
text-align: center;
}
.stat {
font-weight: bold;
}
.chart_title {
margin-bottom: 5px;
}
```
### JS
然后我们在 `resources/app/static/js/index.js` 中创建 JS :
```javascript
let index = {
init: function() {
// Init
asticode.loader.init();
asticode.modaler.init();
asticode.notifier.init();
}
};
```
通过 `init` 方法正确的将库初始化。
## 第三步:建立起 Go 与 Javascript 间的通信
万事俱备,只欠东风:我们需要将 Go 与 Javascript 建立起通信。
### Javascript 通信 Go
为了让 Javascript 与 Go 进行通信,首先从 Javascript 向 Go 发送一条消息,并且在 GO 接受到消息后执行回调函数:
```javascript
// This will wait for the astilectron namespace to be ready
document.addEventListener('astilectron-ready', function() {
// This will send a message to Go
astilectron.sendMessage({name: "event.name", payload: "hello"}, function(message) {
console.log("received " + message.payload)
});
})
```
同时我们在 Go 中监听来自 Javascript 的消息,并且通过 bootstrap 的 `MessageHandler` 给 Javascript 发送消息:
```go
func main() {
bootstrap.Run(bootstrap.Options{
MessageHandler: handleMessages,
})
}
// handleMessages handles messages
func handleMessages(_ *astilectron.Window, m bootstrap.MessageIn) (payload interface{}, err error) {
switch m.Name {
case "event.name":
// Unmarshal payload
var s string
if err = json.Unmarshal(m.Payload, &path); err != nil {
payload = err.Error()
return
}
payload = s + " world"
}
return
}
```
这是一个简单的例子,将在 js 的输出中打印出 `received hello world` 。
在这种情形中,我们需要更多的逻辑因为我们想要允许打开一个文件夹并且展示其中的内容。
因此我们将下面的代码加入到 `resources/app/static/js/index.js` 中:
```javascript
let index = {
addFolder(name, path) {
let div = document.createElement("div");
div.className = "dir";
div.onclick = function() { index.explore(path) };
div.innerHTML = `` + name + ``;
document.getElementById("dirs").appendChild(div)
},
init: function() {
// Wait for astilectron to be ready
document.addEventListener('astilectron-ready', function() {
// Explore default path
index.explore();
})
},
explore: function(path) {
// Create message
let message = {"name": "explore"};
if (typeof path !== "undefined") {
message.payload = path
}
// Send message
asticode.loader.show();
astilectron.sendMessage(message, function(message) {
// Init
asticode.loader.hide();
// Check error
if (message.name === "error") {
asticode.notifier.error(message.payload);
return
}
// Process path
document.getElementById("path").innerHTML = message.payload.path;
// Process dirs
document.getElementById("dirs").innerHTML = ""
for (let i = 0; i < message.payload.dirs.length; i++) {
index.addFolder(message.payload.dirs[i].name, message.payload.dirs[i].path);
}
// Process files
document.getElementById("files_count").innerHTML = message.payload.files_count;
document.getElementById("files_size").innerHTML = message.payload.files_size;
document.getElementById("files").innerHTML = "";
if (typeof message.payload.files !== "undefined") {
document.getElementById("files_panel").style.display = "block";
let canvas = document.createElement("canvas");
document.getElementById("files").append(canvas);
new Chart(canvas, message.payload.files);
} else {
document.getElementById("files_panel").style.display = "none";
}
})
}
};
```
一旦 Javascript 的 `astilectron` 命名空间准备好,它执行新的 `explore` 方法,该方法会给 Go 发送一条消息,接收返回的信息,并且更新相应的 HTML 。
然后我们将下面代码加入到 `message.go` 中:
```go
package main
import (
"encoding/json"
"io/ioutil"
"os"
"os/user"
"path/filepath"
"sort"
"strconv"
"github.com/asticode/go-astichartjs"
"github.com/asticode/go-astilectron"
"github.com/asticode/go-astilectron-bootstrap"
)
// handleMessages handles messages
func handleMessages(_ *astilectron.Window, m bootstrap.MessageIn) (payload interface{}, err error) {
switch m.Name {
case "explore":
// Unmarshal payload
var path string
if len(m.Payload) > 0 {
// Unmarshal payload
if err = json.Unmarshal(m.Payload, &path); err != nil {
payload = err.Error()
return
}
}
// Explore
if payload, err = explore(path); err != nil {
payload = err.Error()
return
}
}
return
}
// Exploration represents the results of an exploration
type Exploration struct {
Dirs []Dir `json:"dirs"`
Files *astichartjs.Chart `json:"files,omitempty"`
FilesCount int `json:"files_count"`
FilesSize string `json:"files_size"`
Path string `json:"path"`
}
// PayloadDir represents a dir payload
type Dir struct {
Name string `json:"name"`
Path string `json:"path"`
}
// explore explores a path.
// If path is empty, it explores the user's home directory
func explore(path string) (e Exploration, err error) {
// If no path is provided, use the user's home dir
if len(path) == 0 {
var u *user.User
if u, err = user.Current(); err != nil {
return
}
path = u.HomeDir
}
// Read dir
var files []os.FileInfo
if files, err = ioutil.ReadDir(path); err != nil {
return
}
// Init exploration
e = Exploration{
Dirs: []Dir{},
Path: path,
}
// Add previous dir
if filepath.Dir(path) != path {
e.Dirs = append(e.Dirs, Dir{
Name: "..",
Path: filepath.Dir(path),
})
}
// Loop through files
var sizes []int
var sizesMap = make(map[int][]string)
var filesSize int64
for _, f := range files {
if f.IsDir() {
e.Dirs = append(e.Dirs, Dir{
Name: f.Name(),
Path: filepath.Join(path, f.Name()),
})
} else {
var s = int(f.Size())
sizes = append(sizes, s)
sizesMap[s] = append(sizesMap[s], f.Name())
e.FilesCount++
filesSize += f.Size()
}
}
// Prepare files size
if filesSize < 1e3 {
e.FilesSize = strconv.Itoa(int(filesSize)) + "b"
} else if filesSize < 1e6 {
e.FilesSize = strconv.FormatFloat(float64(filesSize)/float64(1024), 'f', 0, 64) + "kb"
} else if filesSize < 1e9 {
e.FilesSize = strconv.FormatFloat(float64(filesSize)/float64(1024*1024), 'f', 0, 64) + "Mb"
} else {
e.FilesSize = strconv.FormatFloat(float64(filesSize)/float64(1024*1024*1024), 'f', 0, 64) + "Gb"
}
// Prepare files chart
sort.Ints(sizes)
if len(sizes) > 0 {
e.Files = &astichartjs.Chart{
Data: &astichartjs.Data{Datasets: []astichartjs.Dataset{{
BackgroundColor: []string{
astichartjs.ChartBackgroundColorYellow,
astichartjs.ChartBackgroundColorGreen,
astichartjs.ChartBackgroundColorRed,
astichartjs.ChartBackgroundColorBlue,
astichartjs.ChartBackgroundColorPurple,
},
BorderColor: []string{
astichartjs.ChartBorderColorYellow,
astichartjs.ChartBorderColorGreen,
astichartjs.ChartBorderColorRed,
astichartjs.ChartBorderColorBlue,
astichartjs.ChartBorderColorPurple,
},
}}},
Type: astichartjs.ChartTypePie,
}
var sizeOther int
for i := len(sizes) - 1; i >= 0; i-- {
for _, l := range sizesMap[sizes[i]] {
if len(e.Files.Data.Labels) < 4 {
e.Files.Data.Datasets[0].Data = append(e.Files.Data.Datasets[0].Data, sizes[i])
e.Files.Data.Labels = append(e.Files.Data.Labels, l)
} else {
sizeOther += sizes[i]
}
}
}
if sizeOther > 0 {
e.Files.Data.Datasets[0].Data = append(e.Files.Data.Datasets[0].Data, sizeOther)
e.Files.Data.Labels = append(e.Files.Data.Labels, "other")
}
}
return
}
```
在接收到正确的信息时,它将执行新的 `explore` 方法,并返回关于目录的有价值的信息。
### 建立从 Go 向 Javascript 通信
为了建立从 Go 向 Javascript 的通信,我们首先需要从 Go 中向 Javascript 发送一条消息并且在 Javascript 收到消息后执行回调。
```go
// This will send a message and execute a callback
// Callbacks are optional
bootstrap.SendMessage(w, "event.name", "hello", func(m *bootstrap.MessageIn) {
// Unmarshal payload
var s string
json.Unmarshal(m.Payload, &s)
// Process message
log.Infof("received %s", s)
})
```
同时我们在 Javascript 中监听来自 Go 的消息并发送一个选项消息给 Go:
```javascript
// This will wait for the astilectron namespace to be ready
document.addEventListener('astilectron-ready', function() {
// This will listen to messages sent by GO
astilectron.onMessage(function(message) {
// Process message
if (message.name === "event.name") {
return {payload: message.message + " world"};
}
});
})
```
这个简单的例子将在 Go 的输出中打印 `received hello world` 。在我们的项目里,我们先将下面的代码加入到 `main.go` 中:
```go
func main() {
bootstrap.Run(bootstrap.Options{
MenuOptions: []*astilectron.MenuItemOptions{{
Label: astilectron.PtrStr("File"),
SubMenu: []*astilectron.MenuItemOptions{
{
Label: astilectron.PtrStr("About"),
OnClick: func(e astilectron.Event) (deleteListener bool) {
if err := bootstrap.SendMessage(w, "about", htmlAbout, func(m *bootstrap.MessageIn) {
// Unmarshal payload
var s string
if err := json.Unmarshal(m.Payload, &s); err != nil {
astilog.Error(errors.Wrap(err, "unmarshaling payload failed"))
return
}
astilog.Infof("About modal has been displayed and payload is %s!", s)
}); err != nil {
astilog.Error(errors.Wrap(err, "sending about event failed"))
}
return
},
},
{Role: astilectron.MenuItemRoleClose},
},
}},
OnWait: func(_ *astilectron.Astilectron, iw *astilectron.Window, _ *astilectron.Menu, _ *astilectron.Tray, _ *astilectron.Menu) error {
w = iw
go func() {
time.Sleep(5 * time.Second)
if err := bootstrap.SendMessage(w, "check.out.menu", "Don't forget to check out the menu!"); err != nil {
astilog.Error(errors.Wrap(err, "sending check.out.menu event failed"))
}
}()
return nil
},
})
}
```
它使得 关于 选项变成可点击的,并且渲染出一个有合适内容的模态框,在 Go app 完成初始化 5s 后它会显示一个提示框。
最后我们将下面的代码加入到 `resources/app/static/js/index.js` 中:
```javascript
let index = {
about: function(html) {
let c = document.createElement("div");
c.innerHTML = html;
asticode.modaler.setContent(c);
asticode.modaler.show();
},
init: function() {
// Wait for astilectron to be ready
document.addEventListener('astilectron-ready', function() {
// Listen
index.listen();
})
},
listen: function() {
astilectron.onMessage(function(message) {
switch (message.name) {
case "about":
index.about(message.payload);
return {payload: "payload"};
break;
case "check.out.menu":
asticode.notifier.info(message.payload);
break;
}
});
}
};
```
它将监听 Go 发送过来的消息并做出相应的反应。
## 第四步: 打包到 app
现在代码已经完成,我们需要确保我们能够以最好的方式把 Golang GUI app 呈现给我们的用户:
- 一个 MacOSX app 给 `darwin` 用户
- 一个含有好看图标的 `.exe` 给 `windows` 用户
- 一个简单的源码文件给 `linux` 用户
幸运的是,我们可以通过 astilectron 的 bundler 来进行操作。
首先我们通过下面命令进行安装:
```
$ go get -u github.com/asticode/go-astilectron-bundler/...
```
然后我们在 `main.go` 中给 bootstrap 添加配置项:
```go
func main() {
bootstrap.Run(bootstrap.Options{
Asset: Asset,
RestoreAssets: RestoreAssets,
})
}
```
然后我们创建配置文件,命名为 `bundler.json` :
```json
{
"app_name": "Astilectron demo",
"icon_path_darwin": "resources/icon.icns",
"icon_path_linux": "resources/icon.png",
"icon_path_windows": "resources/icon.ico",
"output_path": "output"
}
```
最后我们在项目文件夹下运行下面的命令(确保 `$GOPATH/bin` 在你的 `$PATH` 中)
```
$ astilectron-bundler -v
```
## 第五步: 实际效果
啊哈!结果在 `output/-` 文件夹下,快来去试一试 :)

你当然可以打包你的 Golang GUI app 给其他环境,在 bundler 打包文档中查看如何将程序打包到其他环境。
## 结论
感谢 astilectron 的 bootstrap 和 bundler ,有了一点点的组织和结构,给你的 Golang 程序添加 GUI 从未如此简单。
需要指出的是这种方法有 2 个主要的缺点:
- 代码包的大小至少有 50 MB,第一次执行后,文件大小至少将有 200 MB
- 内存的消耗有些疯狂,因为 Electron 并不擅长对内存的管理
但是如果你准备掌握它,那么你在给你的程序添加 GUI 时将非常便利!
享受 GUI 编码的快乐吧!
本文由 GCTT 原创编译,Go语言中文网 荣誉推出
本文由 GCTT 原创翻译,Go语言中文网 首发。也想加入译者行列,为开源做一些自己的贡献么?欢迎加入 GCTT!
翻译工作和译文发表仅用于学习和交流目的,翻译工作遵照 CC-BY-NC-SA 协议规定,如果我们的工作有侵犯到您的权益,请及时联系我们。
欢迎遵照 CC-BY-NC-SA 协议规定 转载,敬请在正文中标注并保留原文/译文链接和作者/译者等信息。
文章仅代表作者的知识和看法,如有不同观点,请楼下排队吐槽
有疑问加站长微信联系(非本文作者))
go语言 html 5 gui,仅需简单 5 步,给你的 Golang 程序添加 GUI (使用 Electron )相关推荐
- 只需简单几步 - 开始玩耍微信小程序
写在前面:博主是一只经过实战开发历练后投身培训事业的"小山猪",昵称取自动画片<狮子王>中的"彭彭",总是以乐观.积极的心态对待周边的事物.本人的技 ...
- mysql插入数据返回主键值_Mysql千万级别数据批量插入只需简单三步!
第一步:配置my.ini文件 文件中配置 bulk_insert_buffer_size=120M 或者更大 将insert语句的长度设为最大. Max_allowed_packet=1M Net_b ...
- 只需简单几步 国行Xbox One就可以完美解除锁服
只需简单几步 国行Xbox One就可以完美解除锁服 我要分享 45 这些天关注国行Xbox One的玩家可谓等来了重大喜讯,因国行Xbox One通过某些方式已经完美破除了锁服,我们也根据目前流出的 ...
- 搭建公司内部论坛 只需简单三步 1 (安装Discuz)
系列文章 搭建公司内部论坛 只需简单三步 1 (安装Discuz) 搭建公司内部论坛 只需简单三步 2 (发布Discuz) 随着公司快速发展,人员也越来越多,但员工人数多也会带来问题, ...
- 本地ping不上虚拟机地址? 只需简单几步即可
本地ping不上虚拟机地址? 只需简单几步即可 问题描述 解决方案 问题描述 虚拟机安装好之后,想要用Xshell连接却连接不上,然后就用本地的cmd窗口进行ping虚拟机测试,发现ping不通 如下 ...
- 给创维电视装鸿蒙,只需简单几步,创维老电视瞬间变超清智能电视!
原标题:只需简单几步,创维老电视瞬间变超清智能电视! 创维电视作为国内电视的"老大哥",无论是传统的大屁股创维电视,还是新型的液晶创维电视在十年前可以说是家家必备,但是随着智能电视 ...
- 搭建公司内部论坛 只需简单三步 2 (发布Discuz)
系列文章 搭建公司内部论坛 只需简单三步 1 (安装Discuz) 搭建公司内部论坛 只需简单三步 2 (发布Discuz) 上一篇 搭建公司内部论坛 只需简单三步 1 (安装Discuz) 在上篇介 ...
- 美食短视频配音怎么做的?其实只需简单几步
美食短视频配音怎么做的?其实只需简单几步 优秀的美食短视频,往往只需要简单的几步就能做好.那么今天,我们就重点来说一说美食短视频配音是怎么做的,其实非常简单. 第一种:一边拍摄,一边配音. 这种美食短 ...
- 影视解说类视频怎么做,只需简单三步,教你制作影视解说短视频
影视解说类视频怎么做,只需简单三步,教你制作影视解说短视频 影视解说类视频往往能够在很短的时间之内就将一部影视剧的大概剧情解说完毕,因此很多喜欢看剧的小伙伴们也跃跃欲试,想要尝试做做影视解说类短视频. ...
最新文章
- c语言贝叶斯分类,基于朴素贝叶斯分类器的文本分类算法(C语言)
- vue 给iframe设置src_vue项目iframe的传值问题
- 043_Card卡片
- 性能测试——房屋租赁系统(Badboy、JMeter)
- linux用if语句编程序,Shell 脚本基础 - 使用 if 语句进行条件检测
- [转贴]暴雪的霸王条款是否合理?
- 联想服务器RD450 配置RAID5阵列图文方法
- 头文件交叉声明的解决办法
- M1 Macbook崩溃了怎么办?
- 云端服务器的稳定方法,云端服务器的问题怎么解决
- 删除node_modules慢【rimraf】
- 百度开源深度学习平台Paddle
- 如何用mysql求质数_PLSQL计算质数
- (转载)从鼠尾草凋谢看中国花花世界的阴影(附EmilMatthew的评论)
- ro素质点模拟器_仙境传说RO:最具人气职业猎人成长攻略手册
- 【考研政治】2021肖八整理(时政部分)
- 插件分享 | 简单免杀绕过和利用上线的 GoCS
- Python之服务巡检
- Rasa 使用ResponseSelector实现FAQ和闲聊
- linux 系统编程之-程序设计
热门文章
- 记录android离屏渲染的一些资料
- 深度学习自学(二十六):人脸数据集
- 便宜php扩展,php扩展【货币问答】- php扩展所有答案 - 联合货币
- mysql行级锁unique_MySQL行级锁,表级锁,页级锁详解
- 从git仓库获取源码_微软开源Scalar,提升操作巨型Git仓库的速度
- linux 内存性能评估,内存性能评估工具vmstat/free/smem使用与解读
- python中函数的名称可以随意命名吗_函数的名称可以随意命名。(3.0分)_学小易找答案...
- python编程从入门到实战16章x轴刻度_PYTHON编程:从入门到实践之数据可视化
- easyUI 属性总结
- Linux命令行上传本地文件到服务器 、 下载服务器文件到本地