(原)red-green Image.合成三维立体效果, 红绿眼镜 3D图 ,三维图片的核心算法。googler.cc上面有完善的程序和源码下载。 网上以前的那个有错误,我纠正了下~!~
www.googler.cc/software.html 下载
unit the3D; //(原)合成三维电影效果,红绿立体图像,无汇编便于理解,觉的有帮助就顶一个,顶的多就发布下一篇图像处理,转帖的话请写明/转帖和原作者: 睿割氏窝老攻 ,QQ 235483710 EMAIL: jennievictor@163.com interface uses Windows, Messages, SysUtils, Variants, Classes, Graphics, Controls, Forms, Dialogs, StdCtrls, ExtCtrls, ComCtrls; type THSVRecord = record H : Double ; S : Double ; V : Double ; end ; TRGBRecord = record R : Byte ; G : Byte ; B : Byte ; end ; TForm1 = class(TForm) RedImg: TImage; GreenImg: TImage; Label2: TLabel; Label3: TLabel; OpenDialog1: TOpenDialog; SaveDialog1: TSaveDialog; ResultImg: TImage; Label4: TLabel; Button1: TButton; Button2: TButton; Button3: TButton; alphaTbr: TTrackBar; Rtbr: TTrackBar; Gtbr: TTrackBar; Label1: TLabel; Image1: TImage; Label5: TLabel; Label6: TLabel; Label7: TLabel; procedure Button2Click(Sender: TObject); //生成红图 function CreateRedBmp : TBitmap ; //生成绿图 function CreateGreenBmp : TBitmap ; //调节背景图亮度对比度 //参数定义 brightness 亮度 // contrast 对比度 function BrightnessAndContrast( brightness : Integer ; contrast : Integer ) : TBitmap ; //生成结果图 function CreateResultBmp( Alpha, TransR, TransG, TransB : Integer ) : TBitmap ; procedure Button1Click(Sender: TObject); procedure Button3Click(Sender: TObject); procedure alphaTbrChange(Sender: TObject); procedure RtbrChange(Sender: TObject); procedure GtbrChange(Sender: TObject); procedure BTbRChange(Sender: TObject); //HSV转为RGB function HSVToRGB(HSV: THSVRecord) : TRGBRecord; //RGB转为HSV function RGBToHSV(RGB : TRGBRecord) : THSVRecord; function max( r,g,b : Integer ) : Integer ; function min( r,g,b : Integer ) : Integer ; procedure FormCreate(Sender: TObject); private { Private declarations } public { Public declarations } ImagePath : string ; RedBmp : TBitmap ; GreenBmp : TBitmap ; hsvRecord : THSVRecord ; rgbRecord : TRGBRecord ; end; var Form1: TForm1; implementation {$R *.dfm} //============================================================================== // 导入红图片 //============================================================================== procedure TForm1.Button2Click(Sender: TObject); begin if OpenDialog1.Execute then begin if OpenDialog1.FileName <> '' then begin ImagePath := OpenDialog1.FileName ; end ; //导入图片 RedImg.Picture.LoadFromFile(ImagePath); Image1.Picture.LoadFromFile(ImagePath); end ; RedBmp := TBitmap.Create ; end; //============================================================================== // 生成红图 //============================================================================== function TForm1.CreateRedBmp: TBitmap; var i,j : Integer ; PRed : PbyteArray; R1, G1, B1: Integer; begin try RedBmp.Assign(RedImg.Picture); RedBmp.PixelFormat := pf24bit ; for i := 0 to RedBmp.Height-1 do begin PRed := RedBmp.ScanLine[i]; for j := 0 to RedBmp.Width-1 do begin B1 := PRed[j*3] ; G1 := PRed[j*3+1] ; R1 := PRed[j*3+2] ; PRed[j*3] := B1 and $00 ; PRed[j*3+1] := G1 and $00 ; PRed[j*3+2] := R1 ; // if PRed[j*3] < 0 then PRed[j*3] := 0 ; // // if PRed[j*3+1] < 0 then PRed[j*3+1] := 0 ; // // if PRed[j*3+2] > 255 then PRed[j*3+2] := 255 ; end ; end ; RedImg.Canvas.Draw( 0,0,RedBmp ); finally RedBmp.Free; end; end; //============================================================================== // 生成绿图 //============================================================================== function TForm1.CreateGreenBmp: TBitmap; var i,j : Integer ; PGreen : PbyteArray; R1, G1, B1: Integer; begin try GreenBmp.Assign(GreenImg.Picture); GreenBmp.PixelFormat := pf24bit ; for i := 0 to GreenBmp.Height - 1 do begin PGreen := GreenBmp.ScanLine[i]; for j := 0 to GreenBmp.Width - 1 do begin B1 := PGreen[j*3] ; G1 := PGreen[j*3+1] ; R1 := PGreen[j*3+2] ; PGreen[j*3] := B1 ; PGreen[j*3+1] := G1 ; PGreen[j*3+2] := R1 and $00 ; end ; end ; GreenImg.Canvas.Draw( 0,0,GreenBmp ); finally GreenBmp.Free; end; end; //============================================================================== // 生成结果图 //============================================================================== function TForm1.CreateResultBmp( Alpha, TransR, TransG, TransB : Integer ): TBitmap; var i,j : Integer ; redBitMap : TBitmap ; greenBitMap : TBitmap ; resultBitMap : TBitmap ; oldBitMap : TBitmap ; redR,redG,redB,greenR,greenG,greenB : Integer ; resultR,resultG,resultB : Integer ; PGreen,PRed,PResult,POld : PbyteArray; begin redBitMap := TBitmap.Create ; greenBitMap := TBitmap.Create ; resultBitMap := TBitmap.Create ; oldBitMap := TBitmap.Create ; redBitMap.Assign(RedImg.Picture) ; greenBitMap.Assign(GreenImg.Picture) ; oldBitMap.Assign( Image1.Picture ) ; try greenBitMap.PixelFormat := pf24bit ; // // for i := 0 to greenBitMap.Height - 1 do // begin // // PGreen := greenBitMap.ScanLine[i]; // // for j := 0 to greenBitMap.Width - 1 do // begin // // PGreen[i] := j ; // // greenR := PGreen[j*3+2] ; // // greenG := PGreen[j*3+1] ; // // greenB := PGreen[j*3] ; // // end ; // // end ; redBitMap.PixelFormat := pf24bit ; for i := 0 to redBitMap.Height - 1 do begin PRed := redBitMap.ScanLine[i]; PGreen := greenBitMap.ScanLine[i]; POld := oldBitMap.ScanLine[i] ; for j := 0 to redBitMap.Width - 1 do begin redR := PRed[j*3+2] ; redG := PRed[j*3+1] ; redB := PRed[j*3] ; greenR := PGreen[j*3+2] ; greenG := PGreen[j*3+1] ; greenB := PGreen[j*3] ; // // PRed[j*3] := ( greenB * Alpha + POld[j*3] * (255 - Alpha) ) div 255 ; // PRed[j*3] := POld[j*3] ; // PRed[j*3] := ( greenB * Alpha + redB * (255 - Alpha) ) div 255 ; // // PRed[j*3+1] := ( greenG * Alpha + redG * (255 - Alpha) ) div 255 ; // // PRed[j*3+2] := (greenR * Alpha + redR * (255 - Alpha) ) div 255 ; // PRed[j*3] := ( redB * Alpha + GreenB * (255 - Alpha) ) div 255 ; PRed[j*3+1] := ( redG * Alpha + GreenG * (255 - Alpha) ) div 255 ; PRed[j*3+2] := (redR * Alpha + GreenR * (255 - Alpha) ) div 255 ; // PRed[j*3] := ( greenB * redB ) div 255 ; // // PRed[j*3+1] := ( greenG * redG ) div 255 ; // // PRed[j*3+2] := (greenR * redR ) div 255 ; end ; end ; ResultImg.Canvas.Draw(0,0,redBitMap); finally greenBitMap.Free; end; end; //============================================================================== // 生成 //============================================================================== procedure TForm1.Button1Click(Sender: TObject); var i,j : Integer ; redBitMap : TBitmap ; greenBitMap : TBitmap ; begin redBitMap := TBitmap.Create ; greenBitMap := TBitmap.Create ; redBitMap := Self.CreateRedBmp ; greenBitMap := Self.CreateGreenBmp ; Self.CreateResultBmp(150,255,255,255) ; // RedImg.Canvas.Draw(0,0,redBitMap); end; //============================================================================== // 打开绿图 //============================================================================== procedure TForm1.Button3Click(Sender: TObject); begin if OpenDialog1.Execute then begin if OpenDialog1.FileName <> '' then begin ImagePath := OpenDialog1.FileName ; end ; //导入图片 GreenImg.Picture.LoadFromFile(ImagePath); end ; GreenBmp := TBitmap.Create ; end; //============================================================================== // 调整ALPHA //============================================================================== procedure TForm1.alphaTbrChange(Sender: TObject); begin Self.CreateResultBmp(alphaTbr.Position,Rtbr.Position,Gtbr.Position,1) ; Label1.Caption := 'Alpha ' + IntToStr(alphaTbr.Position) +' 亮度 '+ IntToStr(Rtbr.Position) + ' 对比度 '+ IntToStr(Gtbr.Position) ; end; //============================================================================== // 调整亮度 //============================================================================== procedure TForm1.RtbrChange(Sender: TObject); begin Self.CreateResultBmp(alphaTbr.Position,Rtbr.Position,Gtbr.Position,1) ; Label1.Caption := 'Alpha ' + IntToStr(alphaTbr.Position) +' 亮度 '+ IntToStr(Rtbr.Position) + ' 对比度 '+ IntToStr(Gtbr.Position) ; BrightnessAndContrast(Rtbr.Position,Gtbr.Position); end; //============================================================================== // 调整对比度 //============================================================================== procedure TForm1.GtbrChange(Sender: TObject); begin Self.CreateResultBmp(alphaTbr.Position,Rtbr.Position,Gtbr.Position,1) ; Label1.Caption := 'Alpha ' + IntToStr(alphaTbr.Position) +' 亮度 '+ IntToStr(Rtbr.Position) + ' 对比度 '+ IntToStr(Gtbr.Position) ; BrightnessAndContrast(Rtbr.Position,Gtbr.Position); end; //============================================================================== // 调整对比度 //============================================================================== procedure TForm1.BTbRChange(Sender: TObject); begin // Self.CreateResultBmp(alphaTbr.Position,Rtbr.Position,Gtbr.Position,Btbr.Position) ; // Label1.Caption := ' 亮度 '+ IntToStr(Rtbr.Position) + ' 对比度 '+ IntToStr(Gtbr.Position) + ' 色相 ' + IntToStr(Btbr.Position) ; end; //============================================================================== //调节背景图亮度对比度 //参数定义 brightness 亮度 // contrast 对比度 //============================================================================== function TForm1.BrightnessAndContrast(brightness, contrast: Integer): TBitmap; var resultBitMap : TBitmap ; i,j,x,y: Integer ; R,G,B : double ; tmpR,tmpG,tmpB,oldValue : Double ; PResult,p : PbyteArray; begin resultBitMap := TBitmap.Create ; resultBitMap.Assign(ResultImg.Picture); //对比度调整 调节后像素点颜色 = ((RGB / 255.0 - 0.5) * contrast + 0.5) * 255 + brightness; try //处理颜色越界 resultBitMap.PixelFormat := pf24bit ; for i := 0 to resultBitMap.Height - 1 do begin PResult := resultBitMap.ScanLine[i]; for j := 0 to resultBitMap.Width - 1 do begin B := PResult[j*3] + brightness ; G := PResult[j*3+1] + brightness ; R := PResult[j*3+2] + brightness ; //越界处理 if R > 255 then R := 255 else if R < 0 then R :=0 ; if G > 255 then G := 255 else if G < 0 then G :=0 ; if B > 255 then B := 255 else if B < 0 then B :=0 ; PResult[j*3] := Round(B) ; PResult[j*3+1] := Round(G) ; PResult[j*3+2] := Round(R) ; end ; end ; for y := 0 to resultBitMap.Height - 1 do begin p := resultBitMap.scanline[y]; for x := 0 to resultBitMap.Width - 1 do begin //确定阀值为128 if (p[x * 3] < 246) and (p[x * 3] > 128) and (p[x * 3 + 1] > 128) and (p[x * 3 + 1] < 246) and (p[x * 3 + 2] > 128) and (p[x * 3 + 2] < 246) then begin p[x * 3] := p[x * 3] + contrast ; p[x * 3 + 1] := p[x * 3 + 1] + contrast ; p[x * 3 + 2] := p[x * 3 + 2] + contrast ; end; if (p[x * 3] > 10) and (p[x * 3] < 128) and (p[x * 3 + 1] > 10) and (p[x * 3 + 1] < 128) and (p[x * 3 + 2] > 10) and (p[x * 3 + 2] < 128) then begin p[x * 3] := p[x * 3] - contrast ; p[x * 3 + 1] := p[x * 3 + 1] - contrast ; p[x * 3 + 2] := p[x * 3 + 2] - contrast ; end; end; end; ResultImg.Canvas.Draw(0,0,resultBitMap); finally resultBitMap.Free ; end; end; //============================================================================== //HSV转为RGB //============================================================================== function TForm1.HSVToRGB(HSV: THSVRecord): TRGBRecord; var H,S,V,R,G,B,i,f,a,bb,c : Integer ; begin if HSV.S = 0 then begin R := Round(HSV.V) ; G := Round(HSV.V) ; B := Round(HSV.V) ; end else begin H := H div 60 ; i := INTEGER(H); end ; f := H - i ; a := V * ( 1 - s ) ; bb := V * ( 1 - s * f ) ; c := V * ( 1 - s * (1 - f ) ) ; case i of 0: begin R := V; G := c; B := a; end ; 1: begin R := bb; G := v; B := a; end ; 2: begin R := a; G := v; B := c; end ; 3: begin R := a; G := bb; B := v; end ; 4: begin R := c; G := a; B := v; end ; 5: begin R := v; G := a; B := bb; end ; end ; Result.R := R ; Result.G := G ; Result.B := B ; end; //============================================================================== //RGB转为HSV //============================================================================== function TForm1.RGBToHSV(RGB: TRGBRecord): THSVRecord; var max,min : Integer ; H ,S ,V : double ; R,G,B : Integer ; begin R := RGB.R ; G := RGB.G ; B := RGB.B ; max := Self.max(R,G,B) ; min := Self.min(R,G,B) ; if R = max then H := (G-B)/(max-min) ; if G = max then H := 2 + (B-R)/(max-min) ; if B = max then H := 4 + (R-G)/(max-min) ; H := H * 60 ; if H < 0 then H := H + 360 ; V := Self.max(R,G,B) ; S := (max-min)/max ; Result.H := H ; Result.S := S ; Result.V := V ; end; function TForm1.max(r, g, b: Integer): Integer; var tmp : Integer ; begin if r > g then tmp := r else tmp := g ; if tmp < b then tmp := b ; Result := tmp ; end; function TForm1.min(r, g, b: Integer): Integer; var tmp : Integer ; begin if r < g then tmp := r else tmp := g ; if tmp > b then tmp := b ; Result := tmp ; end; procedure TForm1.FormCreate(Sender: TObject); begin end; end. unit the3D; //(原)合成三维电影效果,红绿立体图像,无汇编便于理解,觉的有帮助就顶一个,顶的多就发布下一篇图像处理,转帖的话请写明/转帖和原作者: 睿割氏窝老攻 ,QQ 235483710 EMAIL: jennievictor@163.com interface uses Windows, Messages, SysUtils, Variants, Classes, Graphics, Controls, Forms, Dialogs, StdCtrls, ExtCtrls, ComCtrls; type THSVRecord = record H : Double ; S : Double ; V : Double ; end ; TRGBRecord = record R : Byte ; G : Byte ; B : Byte ; end ; TForm1 = class(TForm) RedImg: TImage; GreenImg: TImage; Label2: TLabel; Label3: TLabel; OpenDialog1: TOpenDialog; SaveDialog1: TSaveDialog; ResultImg: TImage; Label4: TLabel; Button1: TButton; Button2: TButton; Button3: TButton; alphaTbr: TTrackBar; Rtbr: TTrackBar; Gtbr: TTrackBar; Label1: TLabel; Image1: TImage; Label5: TLabel; Label6: TLabel; Label7: TLabel; procedure Button2Click(Sender: TO
以上是核心代码
初始图片2张:
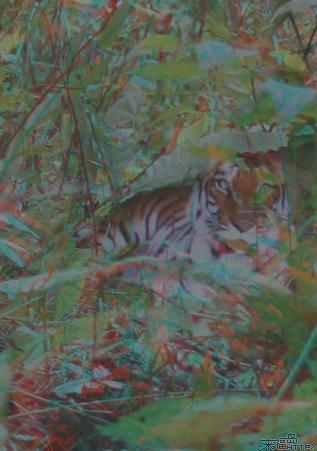
代码生成的图,亮度对比度有点问题,···用PS调下就OK了:
PS改变色相以后:
(原)red-green Image.合成三维立体效果, 红绿眼镜 3D图 ,三维图片的核心算法。googler.cc上面有完善的程序和源码下载。 网上以前的那个有错误,我纠正了下~!~相关推荐
- (已更新)谁是卧底线下发牌器微信小程序源码下载,强大的自定义功能
看名字就知道啦,这是一个谁是卧底的小程序源码 游戏规则: 谁是卧底是一款线下聚会的游戏,考验口才和脑力的同时,也能活跃气氛. 游戏人数为4-12人,游戏角色包括平民,卧底,白板可供用户选择! 游戏步骤 ...
- 谁是卧底线下发牌器微信小程序源码下载
看名字就知道啦,这是一个谁是卧底的小程序源码 游戏规则: 谁是卧底是一款线下聚会的游戏,考验口才和脑力的同时,也能活跃气氛. 游戏人数为4-12人,游戏角色包括平民,卧底,白板可供用户选择! 游戏步骤 ...
- 谁是卧底线下发牌器微信小程序源码下载,强大的自定义功能
看名字就知道啦,这是一个谁是卧底的小程序源码 游戏规则: 谁是卧底是一款线下聚会的游戏,考验口才和脑力的同时,也能活跃气氛. 游戏人数为4-12人,游戏角色包括平民,卧底,白板可供用户选择! 游戏步骤 ...
- 【小程序源码】谁是卧底线下发牌器微信小程序源码下载,强大的自定义功能
看名字就知道啦,这是一个谁是卧底的小程序源码 游戏规则: 谁是卧底是一款线下聚会的游戏,考验口才和脑力的同时,也能活跃气氛. 游戏人数为4-12人,游戏角色包括平民,卧底,白板可供用户选择! 游戏步骤 ...
- 强大的多功能图片处理器微信小程序源码下载图片画框合成
大家好这是以开以图片为主题的一款小程序 里面拥有了多种的图片处理功能,也算是比较强大的一款 另外小编最喜欢的就是里面的图片画框合成这个功能 该功能里面有N种画框模板,然后画框的尺寸根据您的图片自适应处 ...
- 小程序源码:强大的多功能图片处理器微信小程序源码下载图片画框合成-多玩法安装简单
大家好这是以开以图片为主题的一款小程序 里面拥有了多种的图片处理功能,也算是比较强大的一款 另外小编最喜欢的就是里面的图片画框合成这个功能 该功能里面有N种画框模板,然后画框的尺寸根据您的图片自适应处 ...
- JS 实现3D立体效果的首页轮播图(瞬间让你的网站高大上,逼格满满)
还是那句话,废话少说,直接上源代码:http://download.csdn.net/detail/cometwo/9387901 <html> <head> <titl ...
- android listview立体效果,Android 实现ListView 3D效果 - 1
一.有图有真相 二.简单分析 1. ListView 3D实现整体布局使用自定义ListView, 只是继承自ListView父类的父类AdapterView,具体实现可参考之前写的文章: <A ...
- Jupyter notebook中用python matplotlib ax3.plot_surface绘制的三维图(3D图)(三维函数)无法旋转解决办法(%matplotlib notebook)
我们有时在Jupyter中用python绘制三维图时, 会发现无法旋转, 如图: 那么怎么解决呢, 我们只需要在代码中加上%matplotlib notebook这句代码即可: 如图, 在代码最上方加 ...
- css使图片有3d效果,利用CSS3实现3D倾斜视差图片展示特效
特效描述:利用CSS3实现 3D倾斜 视差图片 展示特效.利用CSS3实现3D倾斜视差图片展示特效 代码结构 1. HTML代码 Movies Popular Princess Mononoke Sp ...
最新文章
- ATS cache中的几个数据结构图收集
- java单态模式_Java单态模式
- Websocket实现Java后台主动推送消息到前台
- 智慧城市不是“交钥匙”工程 信息技术是根本
- 关于collect2: cannot find ld的解决办法
- Maven精选系列--POM文件解析
- 分布式锁 基于Redis
- java windows wrapper_Java Service Wrapper 发布windows后台程序的方法
- 减速箱箱体尺寸是怎样计算的_手把手教你解剖减速机
- centos安装mysql5.6系统崩溃_CentOS中安装MySQL5.6报错的解决方法
- PID系统稳定性与零极点的关系
- Python 使用Gmail发送邮件
- Linux那些事儿 之 我是PCI(1)PCI,我们来了
- Coverage基础知识整理
- gnuplot画图技巧总结
- 在Delphi中很精确地控制生成的WORD文档的格式
- Redis的底层数据结构----快速列表_quicklist
- MySQL 数据库之 MMM 高可用架构构建
- 充电宝是如何盗取你的个人隐私的?
- vertical-align 属性 - 垂直对齐方式。
热门文章
- 在上海创业的日子之寻找办公室
- 菜鸟的Android之路-02《eclipse新建android project》
- Spring实战学习笔记整理(4)-AOP(面向切面编程)
- [羊城杯 2020]Easyphp2
- 什么是CTP程序化交易:系统入门
- python 折线图 excel_python - 如何向excel插入新值同时更新对应的折线图
- Bean初始化错误:Instantiation of bean failed; nested exception is java.lang.ExceptionInInitializerError
- HugePages 大内存页
- java输出星号图案_求助:如何用Java打印星号~~
- 移动硬盘计算机管理无法显示,为什么移动硬盘插在电脑上不显示_移动硬盘为什么在电脑上面显示不出来-系统城...