LearnOpenCV学习——平均脸
原文地址: http://www.learnopencv.com/average-face-opencv-c-python-tutorial/
先看实验效果:最右边的人脸是由左边6幅人脸平均得到的。
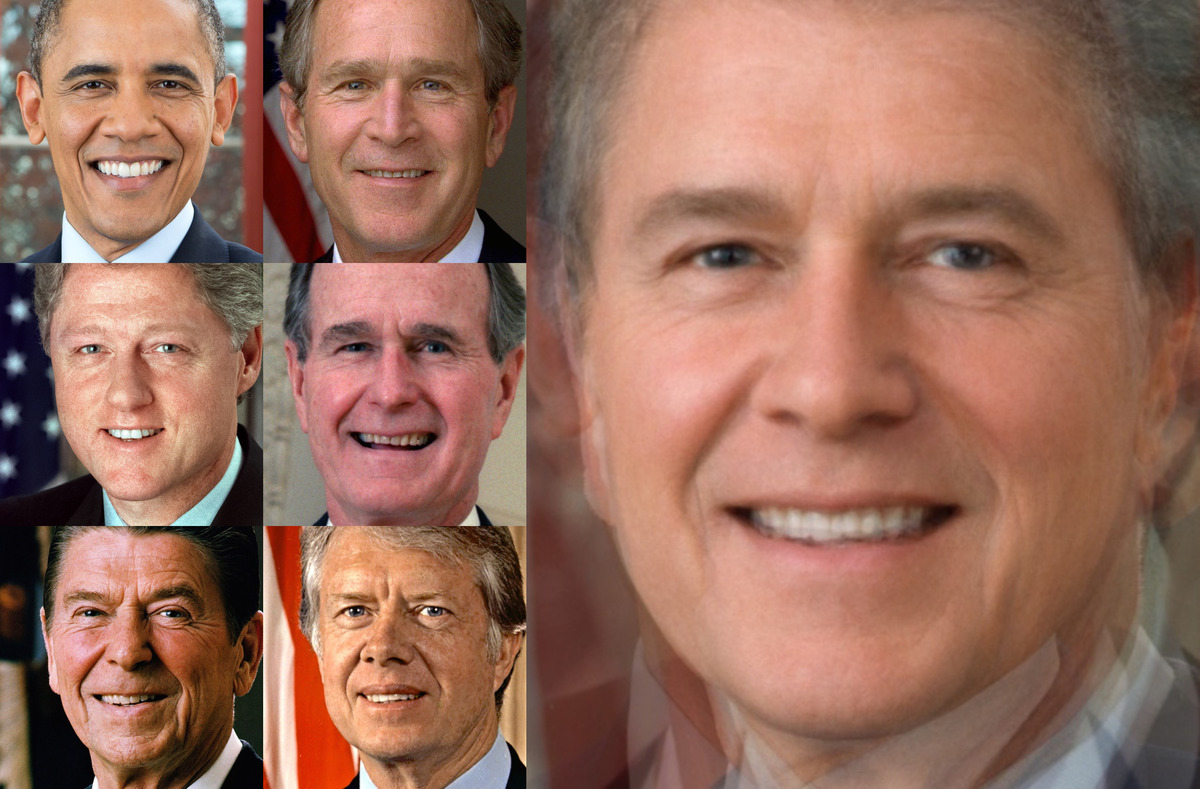
Figure 2 : Average face of US Presidents : Carter to Obama.
实现过程:
1、人脸关键点检测:
采用dlib的关键点检测器,获得人脸的68个关键点。
2、坐标变换:
由于输入图像的尺寸是大小不一的,人脸区域大小也不相同,所以要通过坐标变换,对人脸图像进行归一化操作。
在这里,我们把人脸区域warp成600*600大小,使得左眼(外眼角)位置在(180,200),右眼(外眼角)位置在(420,200)。
选择这两个位置的原因是:我们希望人脸中心在图像高度的1/3位置,并且两个眼睛保持水平,所以我们选择左眼角位置为( 0.3*width, height / 3 ),右眼角位置为(0.7*width , height / 3) 。
dlib关键点检测器,检测到的左外眼角是第36个点,右外眼角为第45个点,如下图:
![]()
利用这两个点计算图像的变换矩阵(similarity transform),该矩阵是一个2*3的矩阵,如下:
如果我们想对一个矩形进行变换,其中x、y方向的缩放因为分别为sx,sy,同时旋转一个角度 ,然后再在x方向平移tx, 在y方向平移ty, 则这样的一个变换矩阵可以写成:
![]()
第一列和第二列是缩放和旋转,第三列是平移。
Given, a point , the above similarity transform, moves it to point using the equation given below:
![]()
利用opencv的estimateRigidTransform方法,可以获得这样的变换矩阵,但遗憾的是,estimateRigidTransform至少需要三个点,所以我们需要构选第三个点,构造方法是用第三个点与已有的两个点构成等边三角形,这样第三个点的坐标为:
![]()
相似变换矩阵计算出来之的一,就可以用它来对图像和landmark进行变换。The image is transformed using warpAffine and the points are transformed using transform.
3、人脸对齐
经过步骤2之后,所有的图像都变成一样大小,并且两个眼睛的位置是保持一致。如果就这样进行平均脸计算的话,会得到下面这种效果,因为除了眼睛对齐了之外,其他点并没有对齐,所以会出现这种效果。
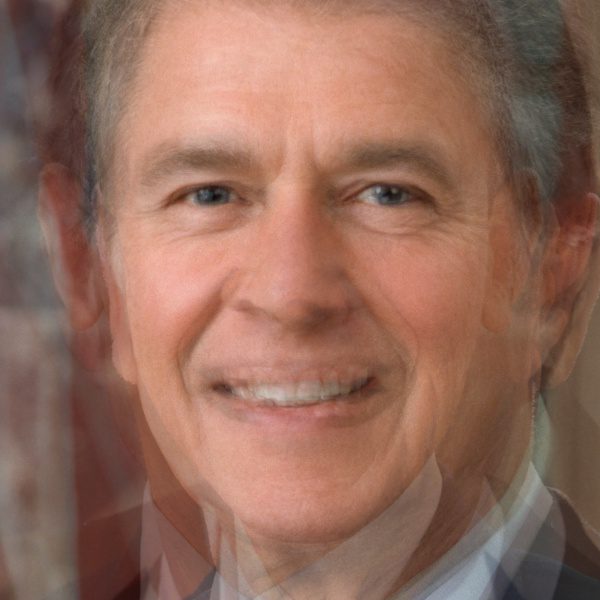
Figure 5 : Result of naive face averaging
其他点怎么对齐呢?我们已经知道输入图像68个点的位置,如果还能知道输出图像68个点的位置,那自然是很容易对齐的。遗憾的是,除了眼睛的位置我们可以事先定义之外,其他点的位置一般很难给出合理的定义。
解决办法是Delaunay Triangulation,具体如下:
(1)Calculate Mean Face Points
计算N张similarity transform之后的输出图像的所有关键点位置的平均值,即平均脸的第i个关键点位置,等于所有经过similarity transform之后的图像的第i个关键点位置的平均值。
(2)Calculate Delaunay Triangulation
利用平均脸的68个关键点,以及图像边界的8个点,计算Delaunay Triangulation,如下图所示。The result of Delaunay triangulation is a list of triangles represented by the indices of points in the 76 points ( 68 face points + 8 boundary points ) array。
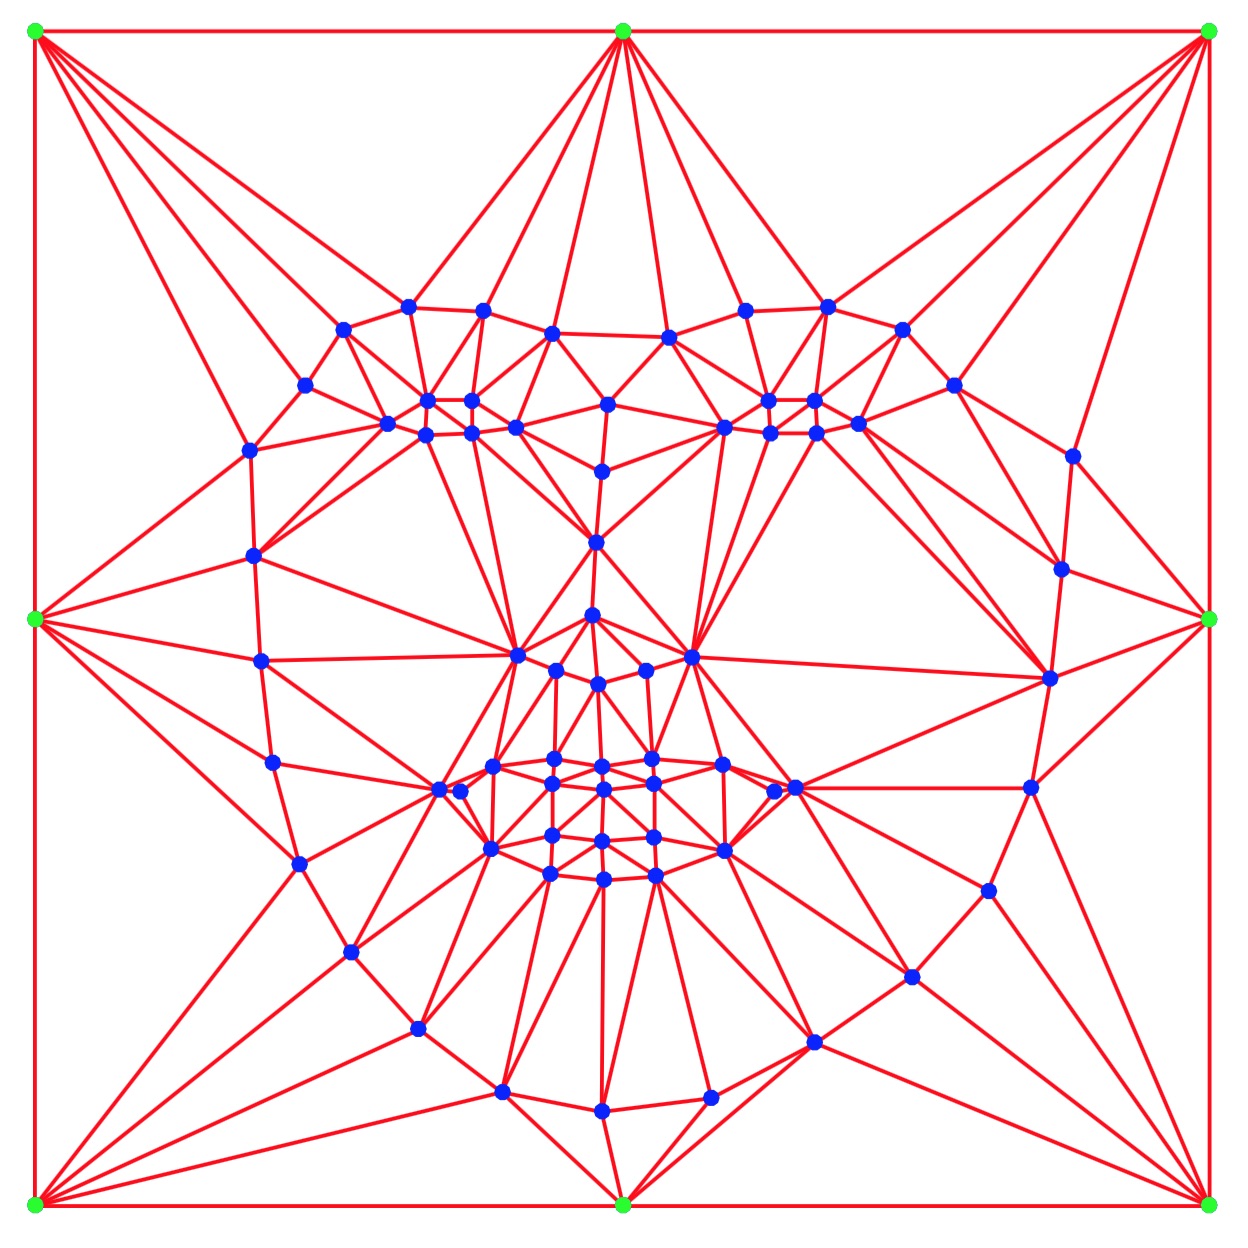
Figure 6 : Delaunay Triangulation of average landmark points.
(3)Warp Triangles
对输入图像(similarity transform之后的图像)和平均脸分别计算Delaunay Triangulation,如图7的left image 和middle image,left image里面的triangle 1对应middle image里面的triangle 1,通过这两个三角形,可以计算一个从输入图像triangle 1到平均脸triangle 1的放射变换,从而把输入图像triangle 1里面的所有像素,变换成平均脸triangle 1的所有像素。其他triangle 也进行同样的操作,得到的结果就如right image所示。
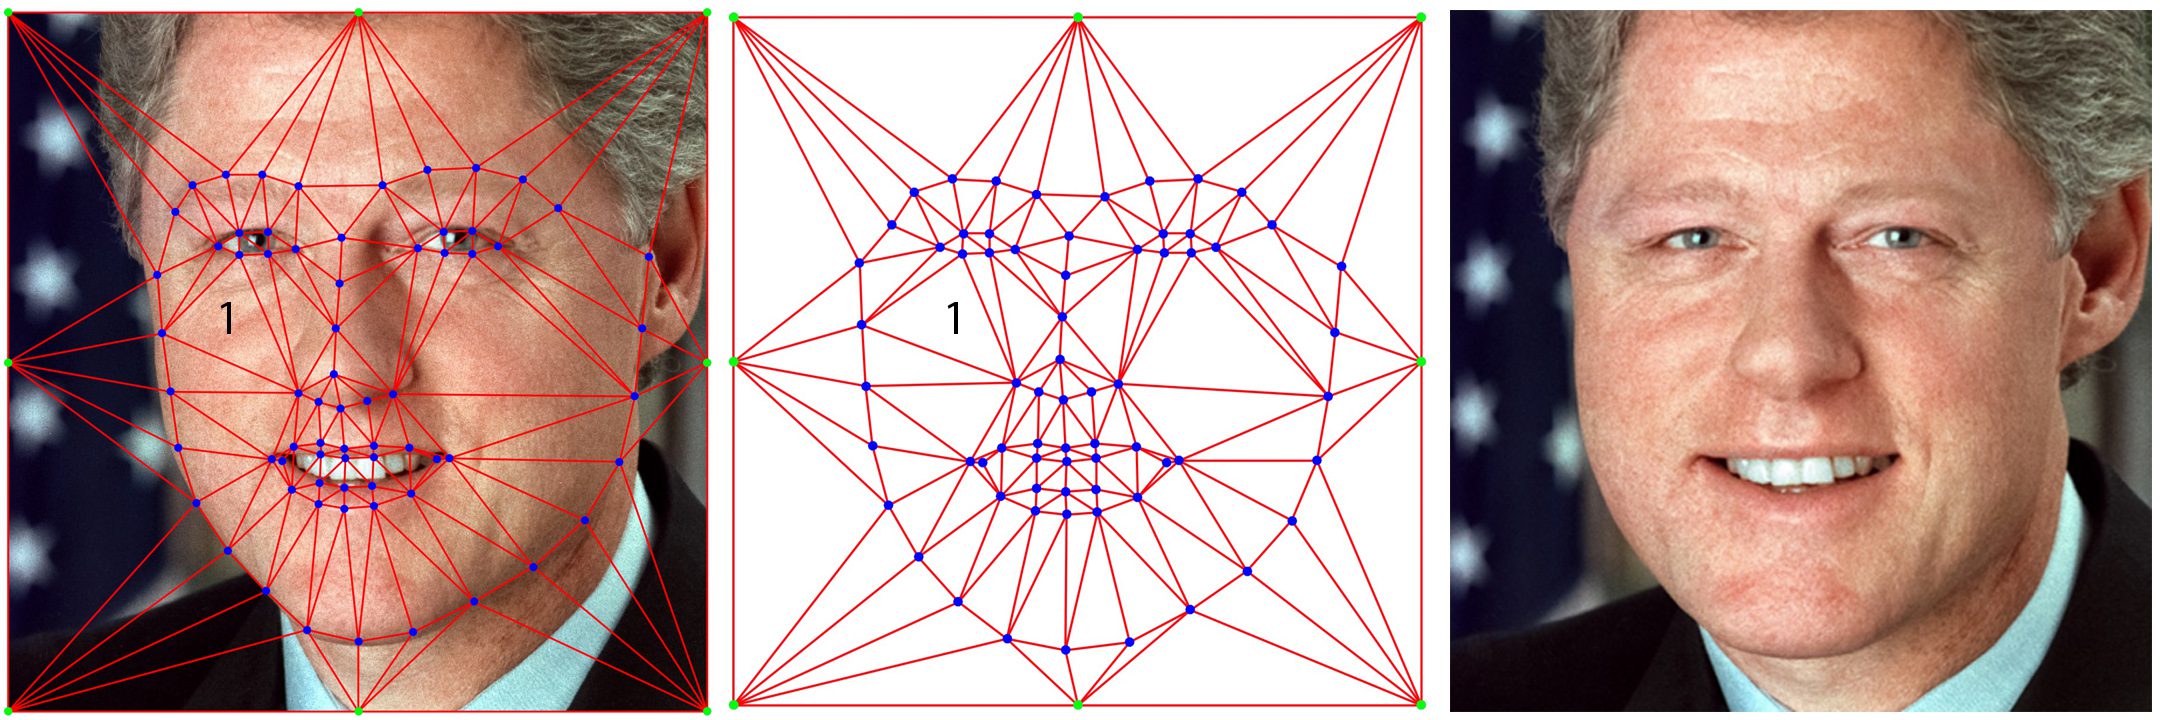
Figure 7 : Image Warping based on Delaunay Triangulation.
The left image shows Delaunay triangles on the transformed input image.
The middle image shows the triangulation on the average landmarks.
The right image is simply the left image warped to the average face
4、人脸平均
经过warp之后,将所有人脸的对应像素的灰度值加起来求平均,即是平均脸图像。
原作者的实验效果:
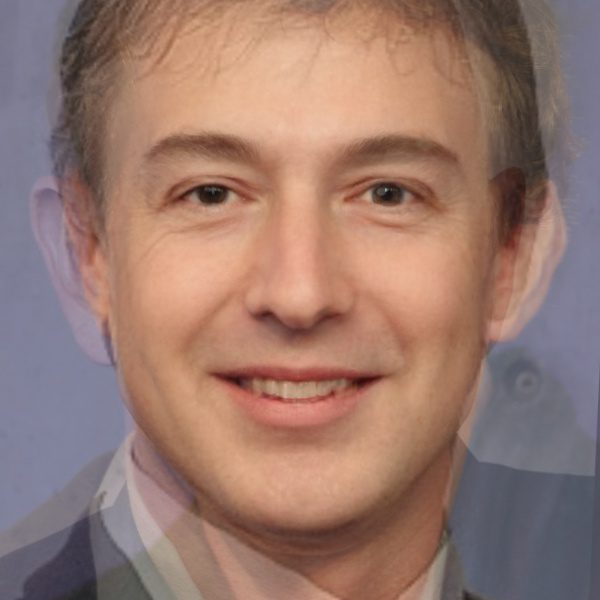
Figure 8 : Facial Average of Mark Zuckerberg, Larry Page, Elon Musk and Jeff Bezos
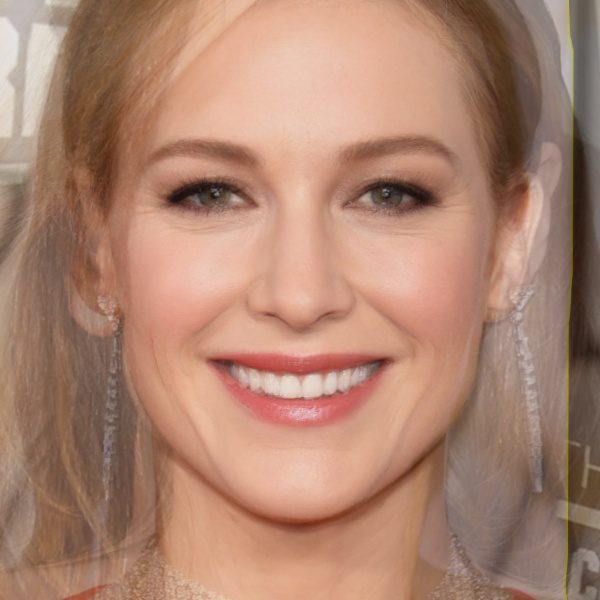
Figure 9 : Facial Average of last four best actress winners : Brie Larson, Julianne Moore, Cate Blanchett and Jennifer Lawrence
还有一个有趣的实验是,将Obama左右镜像的两张图像进行平均之后,得到一张对称脸,如下图:
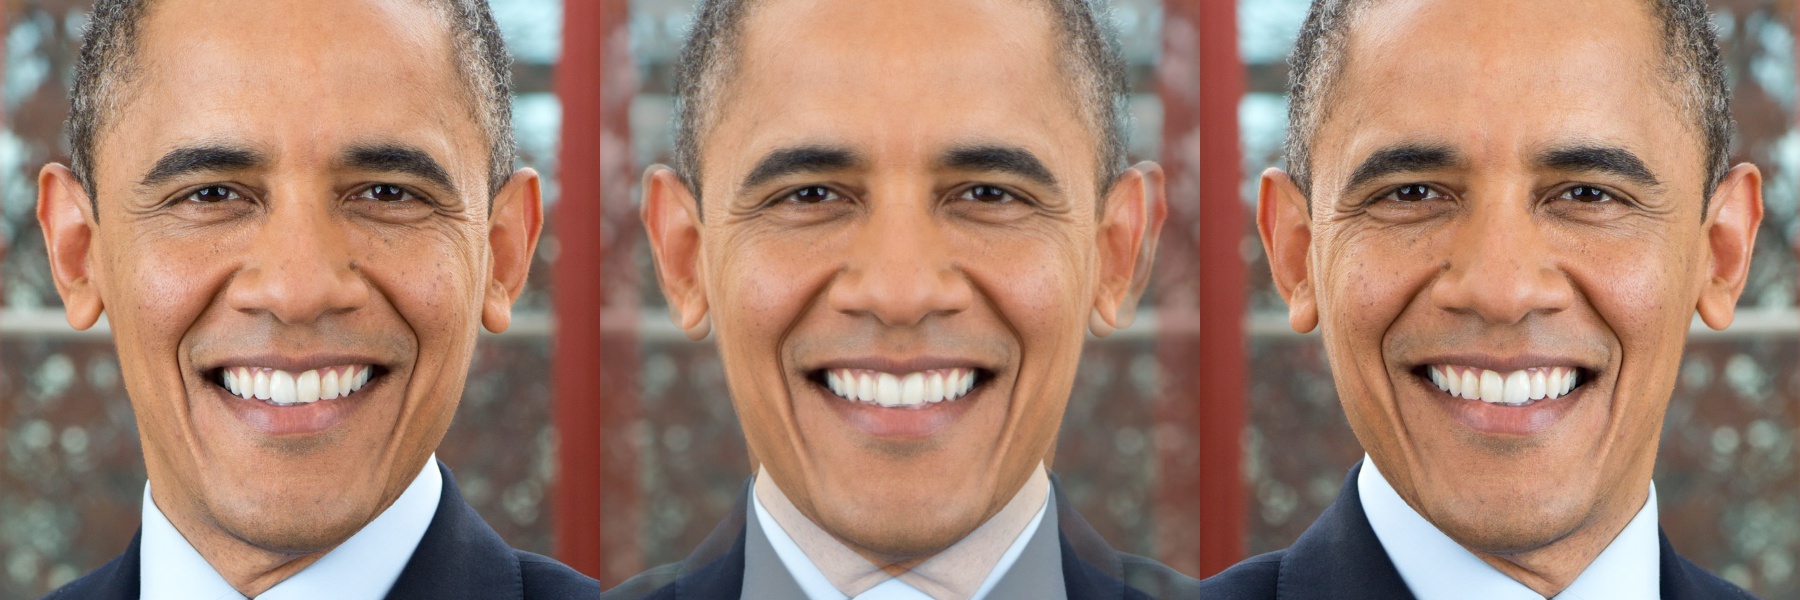
Figure 10 : President Obama made symmetric (center) by averaging his image (left) with its mirror reflection (right).
完整代码:
#!/usr/bin/env python# Copyright (c) 2016 Satya Mallick <spmallick@learnopencv.com>
# All rights reserved. No warranty, explicit or implicit, provided.import os
import cv2
import numpy as np
import math
import sys# Read points from text files in directory
def readPoints(path) :# Create an array of array of points.pointsArray = [];#List all files in the directory and read points from text files one by onefor filePath in os.listdir(path):if filePath.endswith(".txt"):#Create an array of points.points = [];            # Read points from filePathwith open(os.path.join(path, filePath)) as file :for line in file :x, y = line.split()points.append((int(x), int(y)))# Store array of pointspointsArray.append(points)return pointsArray;# Read all jpg images in folder.
def readImages(path) :#Create array of array of images.imagesArray = [];#List all files in the directory and read points from text files one by onefor filePath in os.listdir(path):if filePath.endswith(".jpg"):# Read image found.img = cv2.imread(os.path.join(path,filePath));# Convert to floating pointimg = np.float32(img)/255.0;# Add to array of imagesimagesArray.append(img);return imagesArray;# Compute similarity transform given two sets of two points.
# OpenCV requires 3 pairs of corresponding points.
# We are faking the third one.def similarityTransform(inPoints, outPoints) :s60 = math.sin(60*math.pi/180);c60 = math.cos(60*math.pi/180);  inPts = np.copy(inPoints).tolist();outPts = np.copy(outPoints).tolist();xin = c60*(inPts[0][0] - inPts[1][0]) - s60*(inPts[0][1] - inPts[1][1]) + inPts[1][0];yin = s60*(inPts[0][0] - inPts[1][0]) + c60*(inPts[0][1] - inPts[1][1]) + inPts[1][1];inPts.append([np.int(xin), np.int(yin)]);xout = c60*(outPts[0][0] - outPts[1][0]) - s60*(outPts[0][1] - outPts[1][1]) + outPts[1][0];yout = s60*(outPts[0][0] - outPts[1][0]) + c60*(outPts[0][1] - outPts[1][1]) + outPts[1][1];outPts.append([np.int(xout), np.int(yout)]);tform = cv2.estimateRigidTransform(np.array([inPts]), np.array([outPts]), False);return tform;# Check if a point is inside a rectangle
def rectContains(rect, point) :if point[0] < rect[0] :return Falseelif point[1] < rect[1] :return Falseelif point[0] > rect[2] :return Falseelif point[1] > rect[3] :return Falsereturn True# Calculate delanauy triangle
def calculateDelaunayTriangles(rect, points):# Create subdivsubdiv = cv2.Subdiv2D(rect);# Insert points into subdivfor p in points:subdiv.insert((p[0], p[1]));# List of triangles. Each triangle is a list of 3 points ( 6 numbers )triangleList = subdiv.getTriangleList();# Find the indices of triangles in the points arraydelaunayTri = []for t in triangleList:pt = []pt.append((t[0], t[1]))pt.append((t[2], t[3]))pt.append((t[4], t[5]))pt1 = (t[0], t[1])pt2 = (t[2], t[3])pt3 = (t[4], t[5])        if rectContains(rect, pt1) and rectContains(rect, pt2) and rectContains(rect, pt3):ind = []for j in xrange(0, 3):for k in xrange(0, len(points)):                    if(abs(pt[j][0] - points[k][0]) < 1.0 and abs(pt[j][1] - points[k][1]) < 1.0):ind.append(k)                            if len(ind) == 3:                                                delaunayTri.append((ind[0], ind[1], ind[2]))return delaunayTridef constrainPoint(p, w, h) :p =  ( min( max( p[0], 0 ) , w - 1 ) , min( max( p[1], 0 ) , h - 1 ) )return p;# Apply affine transform calculated using srcTri and dstTri to src and
# output an image of size.
def applyAffineTransform(src, srcTri, dstTri, size) :# Given a pair of triangles, find the affine transform.warpMat = cv2.getAffineTransform( np.float32(srcTri), np.float32(dstTri) )# Apply the Affine Transform just found to the src imagedst = cv2.warpAffine( src, warpMat, (size[0], size[1]), None, flags=cv2.INTER_LINEAR, borderMode=cv2.BORDER_REFLECT_101 )return dst# Warps and alpha blends triangular regions from img1 and img2 to img
def warpTriangle(img1, img2, t1, t2) :# Find bounding rectangle for each triangler1 = cv2.boundingRect(np.float32([t1]))r2 = cv2.boundingRect(np.float32([t2]))# Offset points by left top corner of the respective rectanglest1Rect = [] t2Rect = []t2RectInt = []for i in xrange(0, 3):t1Rect.append(((t1[i][0] - r1[0]),(t1[i][1] - r1[1])))t2Rect.append(((t2[i][0] - r2[0]),(t2[i][1] - r2[1])))t2RectInt.append(((t2[i][0] - r2[0]),(t2[i][1] - r2[1])))# Get mask by filling trianglemask = np.zeros((r2[3], r2[2], 3), dtype = np.float32)cv2.fillConvexPoly(mask, np.int32(t2RectInt), (1.0, 1.0, 1.0), 16, 0);# Apply warpImage to small rectangular patchesimg1Rect = img1[r1[1]:r1[1] + r1[3], r1[0]:r1[0] + r1[2]]size = (r2[2], r2[3])img2Rect = applyAffineTransform(img1Rect, t1Rect, t2Rect, size)img2Rect = img2Rect * mask# Copy triangular region of the rectangular patch to the output imageimg2[r2[1]:r2[1]+r2[3], r2[0]:r2[0]+r2[2]] = img2[r2[1]:r2[1]+r2[3], r2[0]:r2[0]+r2[2]] * ( (1.0, 1.0, 1.0) - mask )img2[r2[1]:r2[1]+r2[3], r2[0]:r2[0]+r2[2]] = img2[r2[1]:r2[1]+r2[3], r2[0]:r2[0]+r2[2]] + img2Rectif __name__ == '__main__' :path = 'presidents/'# Dimensions of output imagew = 600;h = 600;# Read points for all imagesallPoints = readPoints(path);# Read all imagesimages = readImages(path);# Eye cornerseyecornerDst = [ (np.int(0.3 * w ), np.int(h / 3)), (np.int(0.7 * w ), np.int(h / 3)) ];imagesNorm = [];pointsNorm = [];# Add boundary points for delaunay triangulationboundaryPts = np.array([(0,0), (w/2,0), (w-1,0), (w-1,h/2), ( w-1, h-1 ), ( w/2, h-1 ), (0, h-1), (0,h/2) ]);# Initialize location of average points to 0spointsAvg = np.array([(0,0)]* ( len(allPoints[0]) + len(boundaryPts) ), np.float32());n = len(allPoints[0]);numImages = len(images)# Warp images and trasnform landmarks to output coordinate system,# and find average of transformed landmarks.for i in xrange(0, numImages):points1 = allPoints[i];# Corners of the eye in input imageeyecornerSrc  = [ allPoints[i][36], allPoints[i][45] ] ;# Compute similarity transformtform = similarityTransform(eyecornerSrc, eyecornerDst);# Apply similarity transformationimg = cv2.warpAffine(images[i], tform, (w,h));# Apply similarity transform on pointspoints2 = np.reshape(np.array(points1), (68,1,2));        points = cv2.transform(points2, tform);points = np.float32(np.reshape(points, (68, 2)));# Append boundary points. Will be used in Delaunay Triangulationpoints = np.append(points, boundaryPts, axis=0)# Calculate location of average landmark points.pointsAvg = pointsAvg + points / numImages;pointsNorm.append(points);imagesNorm.append(img);# Delaunay triangulationrect = (0, 0, w, h);dt = calculateDelaunayTriangles(rect, np.array(pointsAvg));# Output imageoutput = np.zeros((h,w,3), np.float32());# Warp input images to average image landmarksfor i in xrange(0, len(imagesNorm)) :img = np.zeros((h,w,3), np.float32());# Transform triangles one by onefor j in xrange(0, len(dt)) :tin = []; tout = [];for k in xrange(0, 3) :                pIn = pointsNorm[i][dt[j][k]];pIn = constrainPoint(pIn, w, h);pOut = pointsAvg[dt[j][k]];pOut = constrainPoint(pOut, w, h);tin.append(pIn);tout.append(pOut);warpTriangle(imagesNorm[i], img, tin, tout);# Add image intensities for averagingoutput = output + img;# Divide by numImages to get averageoutput = output / numImages;# Display resultcv2.imshow('image', output);cv2.waitKey(0);
LearnOpenCV学习——平均脸相关推荐
- LearnOpenCV学习——平均脸faceAverage.py
先看实验效果:最右边的人脸是由左边6幅人脸平均得到的. Figure 2 : Average face of US Presidents : Carter to Obama. 实现过程: 1.人脸关 ...
- 计算机视觉 | 优秀实用的OpenCV开源项目汇总
作者:小A Date:2020-06-16 来源:AIRX社区微信公众号 1.Openpose 实时人体.脸.手.脚的关键点检测库 https://github.com/CMU-Perceptual- ...
- [转]【建议收藏】优秀实用的OpenCV开源项目汇总
1.Openpose 实时人体.脸.手.脚的关键点检测库 https://github.com/CMU-Perceptual-Computing-Lab/openpose 2.Learnopencv ...
- GANs学习系列(8):Deep Convolutional Generative Adversarial Nerworks,DCGAN
[前言] 本文首先介绍生成式模型,然后着重梳理生成式模型(Generative Models)中生成对抗网络(Generative Adversarial Network)的研究与发展.作者 ...
- 干货丨 一文概览深度学习中的激活函数
文章来源:机器之心 本文从激活函数的背景知识开始介绍,重点讲解了不同类型的非线性激活函数:Sigmoid.Tanh.ReLU.LReLU.PReLU.Swish,并详细介绍了这些函数的优缺点. 本文介 ...
- Programming Computer Vision with Python (学习笔记四)
上一个笔记主要是讲了PCA的原理,并给出了二维图像降一维的示例代码.但还遗留了以下几个问题: 在计算协方差和特征向量的方法上,书上使用的是一种被作者称为compact trick的技巧,以及奇异值分解 ...
- face recognition[翻译][深度学习理解人脸]
本文译自<Deep learning for understanding faces: Machines may be just as good, or better, than humans& ...
- 图形处理(十三)基于可变形模板的三维人脸重建-学习笔记
基于可变形模板的三维人脸重建-学习笔记 原文地址:http://blog.csdn.net/hjimce/article/details/50331423 作者:hjimce 一.数据库处理: 我们通 ...
- opencv 3和qt5计算机视觉应用开发_【资源分享】有哪些学习openCV的网站或书籍?...
点击上方"蓝色小字"关注我呀 请让我再水一篇文扩充一下我的资源分享专栏吧,跟大家分享一些opencv的书籍和网站. 书籍 先给大家贴个图: 大部分是我到处搜集来的,还有一些是花钱在 ...
- Opencv 深度学习识别性别和检测年龄
目录 1基于CNN的性别分类建模原理 1.1 人脸识别 1.2 性别预测 1.3 年龄预测 1.4 结果 2 代码 参考 本教程中,我们将讨论应用于面部的深层学习的有趣应用.我们将估计年龄,并从单个图 ...
最新文章
- iOS 隐藏导航栏整个视图上移闪屏问题
- zyUpload+struct2完成文件上传
- [转载]安装Oracle11gR2先决条件检查失败的详细解决处理过程
- mysql jdbc 批量_MYSQL 之 JDBC(十四):批量处理JDBC语句提高处理效率
- springboot-vue简单小项目搭建
- mysql主主同步冲突_MySQL主主同步主键冲突处理
- php做游戏登录服务器,游戏登陆服务器php简单实现
- c语言里编译错误c131,C语言题库2.doc
- 用c#开发微信(10) JSSDK 基本用法 分享接口“发送到朋友”
- 利用官方git svn插件迁移svn仓库
- 通用办公报表打印软件
- python乌龟吃鱼小游戏(类和对象及Easygui应用)
- DNSlog平台的搭建
- 仙剑3外传(问情篇)Win7(32/64位)不能运行的完全解决办法【转载】
- 武汉男人一个月要赚多少钱,老婆才不用上班?心碎成渣……
- Google Sheet 学习笔记
- 2023河北工业大学计算机考研信息汇总
- linux 命令:top 详解
- 极具参考价值的Python面试题!从创业公司到一线大厂的所有面经汇总
- 的有效性最好_男士面膜什么牌子好 最好的男士面膜排行榜前十名