复仇者联盟用的什么渲染器_我们正在构建一个惊奇目录阅读器! 复仇者联盟!
复仇者联盟用的什么渲染器
In this tutorial, we’re going to take a look at the Marvel API, a tool provided by Marvel for developers to get access to the 70-plus years of Marvel comics data.
在本教程中,我们将看一下Marvel API ,这是Marvel提供的工具,开发人员可以使用它来访问70多年的Marvel漫画数据。
First, we’ll walk through the steps in which one can acquire the keys needed to make requests to the API. Then, we’ll look at the tools we can use to test out the API. Finally, we’re going to build a website that uses the API.
首先,我们将逐步完成可以获取向API发出请求所需的密钥的步骤。 然后,我们将研究可用于测试API的工具。 最后,我们将建立一个使用API的网站。
报名 (Signing Up)
The first thing we need to do is go to the Marvel Developer Website and click the Get a Key link. We’ll then be provided with the public and private key which we can use to perform requests to the API. If you plan to use the project in production, you can also add your website’s domain name to the list of authorized referrers. This provides a security layer in case you accidentally push your public and private keys to Github.
我们需要做的第一件事是转到Marvel Developer网站 ,然后单击“ 获取密钥”链接。 然后,我们将获得可用于执行对API的请求的公钥和私钥。 如果您打算在生产中使用该项目,则还可以将网站的域名添加到授权引荐来源的列表中。 如果您不小心将公钥和私钥推送到Github,这将提供一个安全层。
有关使用API的重要说明 (Important Notes Regarding the Use of the API)
For limits and rules, please see the attribution, linking and rate limits page of their documentation. Also be sure to read the Marvel API Terms of Use if you’re planning to use the API in production. I’ve summarized it below:
有关限制和规则,请参阅其文档的归因,链接和费率限制页面 。 如果您打算在生产中使用API,请务必阅读Marvel API使用条款 。 我总结如下:
Beware of the API rate limit. At the time of writing of this tutorial the rate limit is 3000 calls per day. That’s applicable to all the endpoints.
提防API速率限制 。 在撰写本教程时,速率限制为每天3000个呼叫。 这适用于所有端点。
Always attribute Marvel as the source when displaying API data and images. Marvel recommends the use of this text: Data provided by Marvel. © 2016 Marvel.
显示API数据和图像时,始终将Marvel视为来源 。 Marvel建议使用以下文本: Marvel提供的数据。 ©2016漫威。
玩API (Playing with the API)
The API comes with an interactive documentation which allows you to easily test all the available API endpoints.
该API带有交互式文档 ,使您可以轻松测试所有可用的API端点。
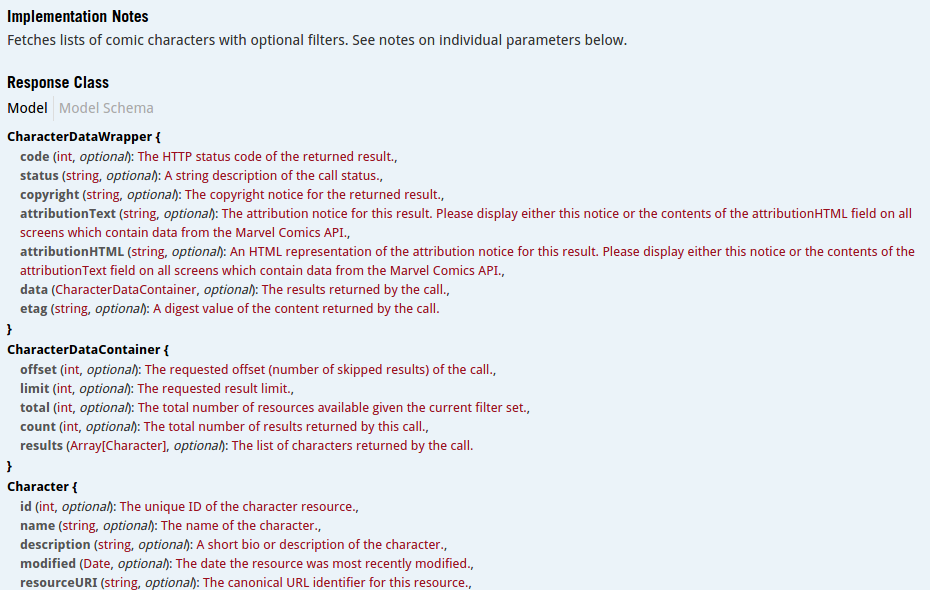
There’s information on the data one can expect:
人们可以期望得到有关数据的信息:
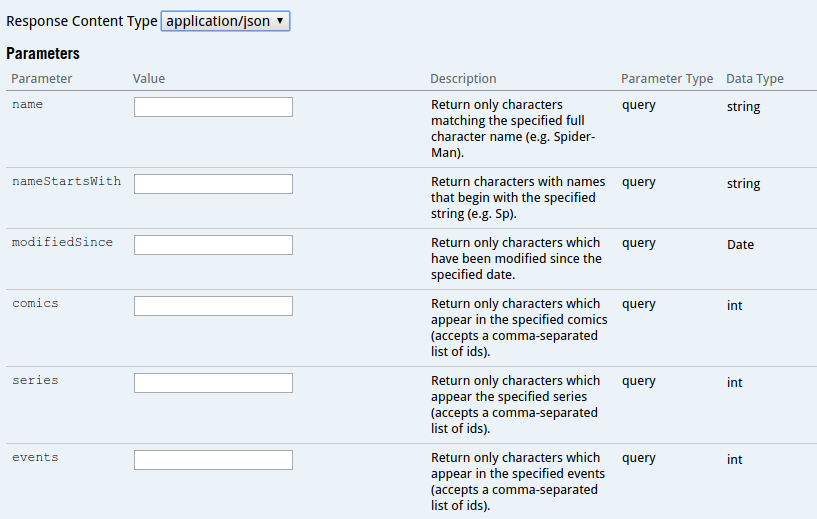
… text fields to specify the different parameters to be submitted for the request:
…文本字段,用于指定要为请求提交的不同参数:
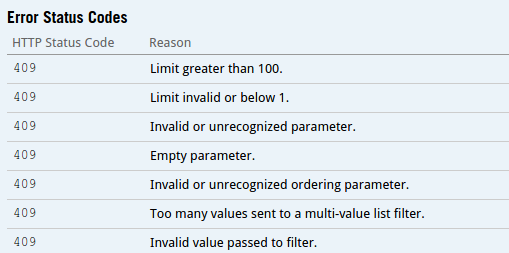
… error status codes:
…错误状态代码:
… the request URL, response body, response code and the response headers:
…请求网址,响应正文,响应代码和响应标头:
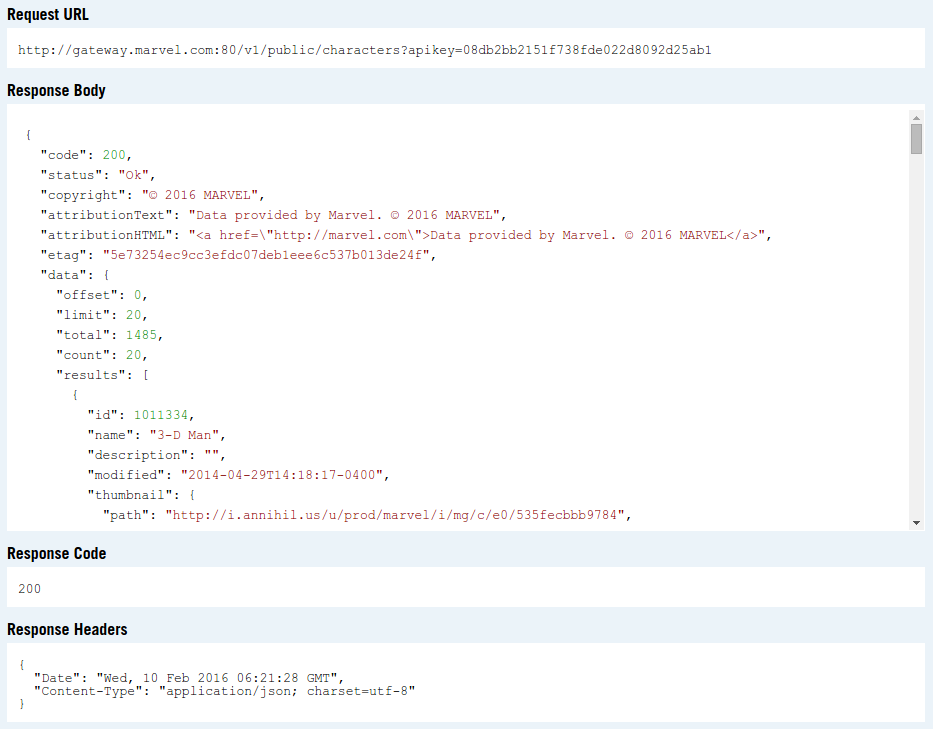
Do note that the request URL won’t actually return anything if you access it outside of the API testing tool. This is because it lacks the required parameters for the request. At the bare minimum, you’ll have to supply the public key, the current unix timestamp, and an md5 hash of the timestamp, and private and public key combined.
请注意,如果您在API测试工具之外访问请求网址,则实际上不会返回任何内容。 这是因为它缺少请求所需的参数。 至少,您必须提供公钥,当前的unix时间戳,时间戳的md5哈希以及私钥和公钥的组合。
<?php
$ts = time();
$public_key = 'your public key';
$private_key = 'your private key';
$hash = md5($ts . $private_key . $public_key);
Once you have those, only then can you perform a request to the API:
一旦有了这些,就可以对API执行请求:
<?php
$query_params = [
'apikey' => $public_key,
'ts' => $ts,
'hash' => $hash
];
//convert array into query parameters
$query = http_build_query($query_params);
//make the request
$response = file_get_contents('http://gateway.marvel.com/v1/public/comics?' . $query);
//convert the json string to an array
$response_data = json_decode($response, true);
We’ll take a look at this in more detail when we get to the section where we start making requests for the app that we’ll be building.
当我们开始向将要构建的应用程序发出请求的部分时,我们将更详细地介绍这一点。
建立网站 (Building the Website)
Hopefully you’ve taken the time to play around with the API tool because now we’re going to start building the website. For this tutorial, we’re going to use Laravel.
希望您花了一些时间来试用API工具,因为现在我们将开始构建网站。 在本教程中,我们将使用Laravel。
composer create-project --prefer-dist laravel/laravel marvel-viewerThe command above will install Laravel in the marvel-viewer directory.
上面的命令会将Laravel安装在marvel-viewer目录中。
Once it’s done, install Guzzle.
完成后,安装Guzzle 。
php composer require guzzlehttp/guzzleCreate a .env file in the root of the project directory and put in the following:
在项目目录的根目录中创建一个.env文件,并输入以下内容:
APP_ENV=local
APP_DEBUG=true
APP_KEY=fxxq7HcbypI36Cil5cmOxO7vWFZu0QOD
CACHE_DRIVER=file
Next, create a marvel.php file under the config directory. Then, return an array containing the private and public key that you got earlier from the Marvel developer website:
接下来,在config目录下创建一个marvel.php文件。 然后,返回一个数组,其中包含您先前从Marvel开发者网站上获得的私钥和公钥:
<?php
return [
'private_key' => 'xxx',
'public_key' => 'yyy'
];
This allows us to call the config function to get those values:
这使我们可以调用config函数来获取这些值:
echo config('marvel.private_key');
echo config('marvel.public_key');
缓存API结果 (Caching API Results)
From the Marvel developer website itself, one of the tips for staying within the rate limits is to cache results. This makes the app more performant, especially for API calls that return lots of data.
从Marvel开发人员网站本身来看,保持速率限制的提示之一就是缓存结果。 这使应用程序更具性能,尤其是对于返回大量数据的API调用。
To start, let’s create a new console command using artisan:
首先,让我们使用artisan创建一个新的控制台命令:
php artisan make:console CacheApiThis will create the app/Console/Commands/CacheApi.php file. Open that up and change the values for the signature and description with the following:
这将创建app/Console/Commands/CacheApi.php文件。 打开它,并使用以下命令更改签名和说明的值:
protected $signature = 'cache:api';
protected $description = 'Saves data from marvel API into the cache';
To register the command for use, open up app/Console/Kernel.php and add it as an item under the $commands array.
要注册使用命令,请打开app/Console/Kernel.php并将其作为项添加到$commands数组下。
protected $commands = [
Commands\Inspire::class,
Commands\CacheApi::class // add this
];
This will let us execute it on the command line like so:
这将使我们在命令行上执行它,如下所示:
php artisan cache:apiTo define what the command will do, go back to the CacheApi.php file and add the following inside the handle function:
要定义该命令将执行的操作,请返回CacheApi.php文件并在handle函数内添加以下内容:
$ts = time();
$hash = md5($ts . config('marvel.private_key') . config('marvel.public_key'));
$client = new Client([
'base_uri' => 'http://gateway.marvel.com/v1/public/',
'query' => [
'apikey' => config('marvel.public_key'),
'ts' => $ts,
'hash' => $hash
]
]);
$endpoints = [
'characters',
'comics'
];
$results_per_page = 20;
$total_page_count = 10;
$minutes_to_cache = 1440; // 1 day
foreach($endpoints as $ep){
$data = [];
for($x = 0; $x <= $total_page_count; $x++){
$query = $client->getConfig('query');
$query['offset'] = $results_per_page * $x;
$response = $client->get('http://gateway.marvel.com/v1/public/' . $ep, ['query' => $query]);
$response = json_decode($response->getBody(), true);
$current_data = $response['data']['results'];
$data = array_merge($data, $current_data);
}
Cache::put($ep, $data, $minutes_to_cache);
}
Let’s break it down. First, we assign all the data required by the Marvel API to a variable. The first one being the current unix timestamp ($ts) and the second being the md5 hash of the concatenated values of $ts, the Marvel private key, and the public key.
让我们分解一下。 首先,我们将Marvel API所需的所有数据分配给一个变量。 第一个是当前的unix时间戳( $ts ),第二个是$ts ,Marvel私钥和公钥的串联值的md5哈希。
$ts = time();
$hash = md5($ts . config('marvel.private_key') . config('marvel.public_key'));
Then, a new Guzzle client is created wherein we supply the base url used by the API and the data required all requests.
然后,创建一个新的Guzzle客户端,其中我们提供API使用的基本URL和所有请求所需的数据。
$client = new Client([
'base_uri' => 'http://gateway.marvel.com/v1/public/',
'query' => [
'apikey' => config('marvel.public_key'),
'ts' => $ts,
'hash' => $hash
]
]);
Define the endpoints whose data will be cached. In this case, we only need to cache the characters and comics data.
定义将要缓存其数据的端点。 在这种情况下,我们只需要缓存字符和漫画数据。
$endpoints = [
'characters',
'comics'
];
Define the total results to be returned by the API for every request, the total number of pages to be requested for each endpoint, and the total number of minutes for which to cache the results. In this case, we only want it to be stored for a day.
定义API针对每个请求返回的总结果,每个端点要请求的页面总数以及缓存结果的分钟总数。 在这种情况下,我们只希望将其存储一天。
$results_per_page = 20;
$total_page_count = 10; // there's a bazillion characters and comics, we don't want to take all day
$minutes_to_cache = 1440; // 1 day
Loop through all the endpoints. For every endpoint, we have a for loop that would execute based on the value for $total_page_count. For every iteration, we get the current query configuration and assign an offset. On the first iteration this would be 0 (20 * 0), on the second it’s 20 (20 * 1), and so on. Then we make the request to the endpoint, convert the response object to an array, and then merge the result with the $data array. Lastly, we put the data into the cache.
遍历所有端点。 对于每个端点,我们都有一个for循环,该循环将根据$total_page_count的值执行。 对于每次迭代,我们都会获取当前的查询配置并分配一个offset 。 在第一次迭代中,该值为0( 20 * 0 ),在第二次迭代中为20( 20 * 1 ),依此类推。 然后,我们向端点发出请求,将响应对象转换为数组,然后将结果与$data数组合并。 最后,我们将数据放入缓存。
foreach($endpoints as $ep){
$data = [];
for($x = 0; $x <= $total_page_count; $x++){
$query = $client->getConfig('query');
$query['offset'] = $results_per_page * $x;
$response = $client->get('http://gateway.marvel.com/v1/public/' . $ep, ['query' => $query]);
$response = json_decode($response->getBody(), true);
$current_data = $response['data']['results'];
$data = array_merge($data, $current_data);
}
Cache::put($ep, $data, $minutes_to_cache);
}
Once that’s done, we can execute the command to begin caching:
完成后,我们可以执行命令开始缓存:
php artisan cache:api路线 (Routes)
The app is only going to have three pages: a page for viewing random comics, a page for viewing the details of a comic, and a page for viewing different characters.
该应用程序只有三页:用于查看随机漫画的页面,用于查看漫画详细信息的页面以及用于查看不同角色的页面。
<?php
Route::get('/comics', 'HomeController@comics');
Route::get('/comics/{id}', 'HomeController@comic');
Route::get('/characters', 'HomeController@characters');
控制者 (Controller)
The controller handles the requests that are coming from the routes. Execute the following command to generate a controller file:
控制器处理来自路由的请求。 执行以下命令以生成控制器文件:
php artisan make:controller HomeControllerThis creates a app/Http/Controllers/HomeController.php file. Add the following to it:
这将创建一个app/Http/Controllers/HomeController.php文件。 向其中添加以下内容:
<?php
namespace App\Http\Controllers;
use Illuminate\Http\Request;
use App\Http\Controllers\Controller;
use GuzzleHttp\Client;
use Cache;
use Illuminate\Pagination\LengthAwarePaginator;
use Illuminate\Support\Collection;
class HomeController extends Controller
{
private $client;
public function __construct(){
$ts = time();
$hash = md5($ts . config('marvel.private_key') . config('marvel.public_key'));
$this->client = new Client([
'base_uri' => 'http://gateway.marvel.com/v1/public/',
'query' => [
'apikey' => config('marvel.public_key'),
'ts' => $ts,
'hash' => $hash
]
]);
}
public function comics(Request $request){
$search_term = '';
if($request->has('query')){
$search_term = $request->input('query');
$query = $this->client->getConfig('query');
$query['titleStartsWith'] = $search_term;
$response = $this->client->get('comics', ['query' => $query]);
$response = json_decode($response->getBody(), true);
$comics = $response['data']['results'];
}else{
$comics = Cache::get('comics');
shuffle($comics);
$comics = array_slice($comics, 0, 20);
}
return view('comics', ['comics' => $comics, 'query' => $search_term]);
}
public function comic($id){
$page_data = [];
$response = $this->client->get('comics/' . $id);
$response = json_decode($response->getBody(), true);
$comic = $response['data']['results'][0];
$page_data['comic'] = $comic;
if(!empty($comic['series'])){
$series_response = $this->client->get($comic['series']['resourceURI']);
$series_response = json_decode($series_response->getBody(), true);
$page_data['series'] = $series_response['data']['results'][0];
}
return view('comic', $page_data);
}
public function characters(Request $request){
$characters = Cache::get('characters');
$current_page = LengthAwarePaginator::resolveCurrentPage();
if(is_null($current_page)){
$current_page = 1;
}
$characters_collection = new Collection($characters);
$items_per_page = 8;
$current_page_results = $characters_collection->slice(($current_page - 1) * $items_per_page, $items_per_page)->all();
$paginated_results = new LengthAwarePaginator($current_page_results, count($characters_collection), $items_per_page);
return view('characters', ['paginated_results' => $paginated_results, 'characters' => $characters]);
}
}
Breaking it down, first we define and initialize the Guzzle client. This is pretty much the same thing we did earlier in CacheApi.php.
分解它,首先我们定义并初始化Guzzle客户端。 这几乎与我们先前在CacheApi.php所做的相同。
private $client;
public function __construct(){
$ts = time();
$hash = md5($ts . config('marvel.private_key') . config('marvel.public_key'));
$this->client = new Client([
'base_uri' => 'http://gateway.marvel.com/v1/public/',
'query' => [
'apikey' => config('marvel.public_key'),
'ts' => $ts,
'hash' => $hash
]
]);
}
The comics function is responsible for serving the comics page. If no query is supplied, this lists out random items fetched from the cache. If a query is supplied it will make a request to the API using that query. Here, we’re supplying the titleStartsWith parameter and then supplying the user input. If you’re feeling lucky, you could also use the title parameter which only returns the direct match of the user input.
comics功能负责提供漫画页面。 如果未提供查询,则将列出从缓存中获取的随机项目。 如果提供查询,它将使用该查询向API发出请求。 在这里,我们提供了titleStartsWith参数,然后提供了用户输入。 如果您感到幸运,还可以使用title参数,该参数仅返回用户输入的直接匹配项。
public function comics(Request $request){
$search_term = '';
if($request->has('query')){
$search_term = $request->input('query');
$query = $this->client->getConfig('query');
$query['titleStartsWith'] = $search_term; //supply the query
//make a request to the api
$response = $this->client->get('comics', ['query' => $query]);
$response = json_decode($response->getBody(), true); //convert response object to array
$comics = $response['data']['results']; //extract the item/s
}else{
$comics = Cache::get('comics'); //get items from the cache
shuffle($comics); //jumble the array
$comics = array_slice($comics, 0, 20); //extract the first 20 items from the jumbled array
}
//return the page with the data
return view('comics', ['comics' => $comics, 'query' => $search_term]);
}
The comic function is responsible for serving detailed comic pages. This still uses the comics endpoint, but this time it has the comic ID appended to the end of the URL, so it will only ask for a single item from the API. Once the individual comic data has been fetched, it uses the series item to fetch more details for that specific series. Think of a series as a collection of stories. We’re using that to get data like creators, characters, and stories. You’ll see how these data are used later on in the views section.
comic功能负责提供详细的漫画页面。 它仍然使用comics端点,但是这一次它在URL的末尾附加了漫画ID,因此它将仅从API请求单个项。 一旦获取了单个漫画数据,它将使用series项目来获取该特定系列的更多详细信息。 将系列视为故事的集合。 我们正在使用它来获取诸如创作者,角色和故事之类的数据。 稍后,您将在视图部分中看到如何使用这些数据。
public function comic($id){
$page_data = [];
//get a specific comic
$response = $this->client->get('comics/' . $id);
$response = json_decode($response->getBody(), true);
$comic = $response['data']['results'][0];
$page_data['comic'] = $comic;
if(!empty($comic['series'])){
//get series data
$series_response = $this->client->get($comic['series']['resourceURI']);
$series_response = json_decode($series_response->getBody(), true);
$page_data['series'] = $series_response['data']['results'][0];
}
return view('comic', $page_data);
}
The characters function is responsible for serving the characters page. Unlike the comics and comic function, this doesn’t directly request data from the API. It only uses the character data that was stored in the cache. Also, it doesn’t select random items but paginates all the available items instead.
characters功能负责提供字符页面。 不同于comics和comic功能,这并不直接从API请求数据。 它仅使用存储在缓存中的字符数据。 另外,它不会选择随机项目,而是对所有可用项目进行分页。
public function characters(Request $request){
$characters = Cache::get('characters');
$current_page = LengthAwarePaginator::resolveCurrentPage();
if(is_null($current_page)){
$current_page = 1;
}
$characters_collection = new Collection($characters);
$items_per_page = 8;
$current_page_results = $characters_collection->slice(($current_page - 1) * $items_per_page, $items_per_page)->all();
$paginated_results = new LengthAwarePaginator($current_page_results, count($characters_collection), $items_per_page);
return view('characters', ['paginated_results' => $paginated_results, 'characters' => $characters]);
}
Let’s break it down – first, we get the characters from the cache:
让我们分解一下-首先,我们从缓存中获取字符:
$characters = Cache::get('characters');Get the current paginator page:
获取当前的分页器页面:
$current_page = LengthAwarePaginator::resolveCurrentPage();If there’s none, we assume that it’s the first page:
如果没有,我们假设它是第一页:
if(is_null($current_page)){
$current_page = 1;
}
Create a collection from the array of characters. This allows us to manipulate the data in a more convenient way. It basically turns your array into something like the results that you get when using Eloquent or the query builder.
从字符数组创建一个集合。 这使我们能够以更方便的方式处理数据。 基本上,它将数组变成类似于使用Eloquent或查询生成器时得到的结果。
$characters_collection = new Collection($characters);Specify the number of items to show per page.
指定每页显示的项目数。
$items_per_page = 8;Extract the items for the current page. Here, we’re calling the slice method to extract a slice of the array.
提取当前页面的项目。 在这里,我们正在调用slice方法来提取数组的一个切片。
$current_page_results = $characters_collection
->slice(($current_page - 1) * $items_per_page, $items_per_page)
->all();
Create the paginated results.
创建分页结果。
$paginated_results = new LengthAwarePaginator($current_page_results, count($characters_collection), $items_per_page);观看次数 (Views)
We only have four views: the comics view for displaying a random list of comics, the comic view which displays a single comic, the characters view which displays a list of characters, and the parent view which all the other views inherit from.
我们只有四个视图:用于显示随机漫画列表的“漫画”视图,用于显示单个漫画的“漫画”视图,用于显示字符列表的“角色”视图以及用于继承其他所有视图的父视图。
漫画视图 (Comics View)
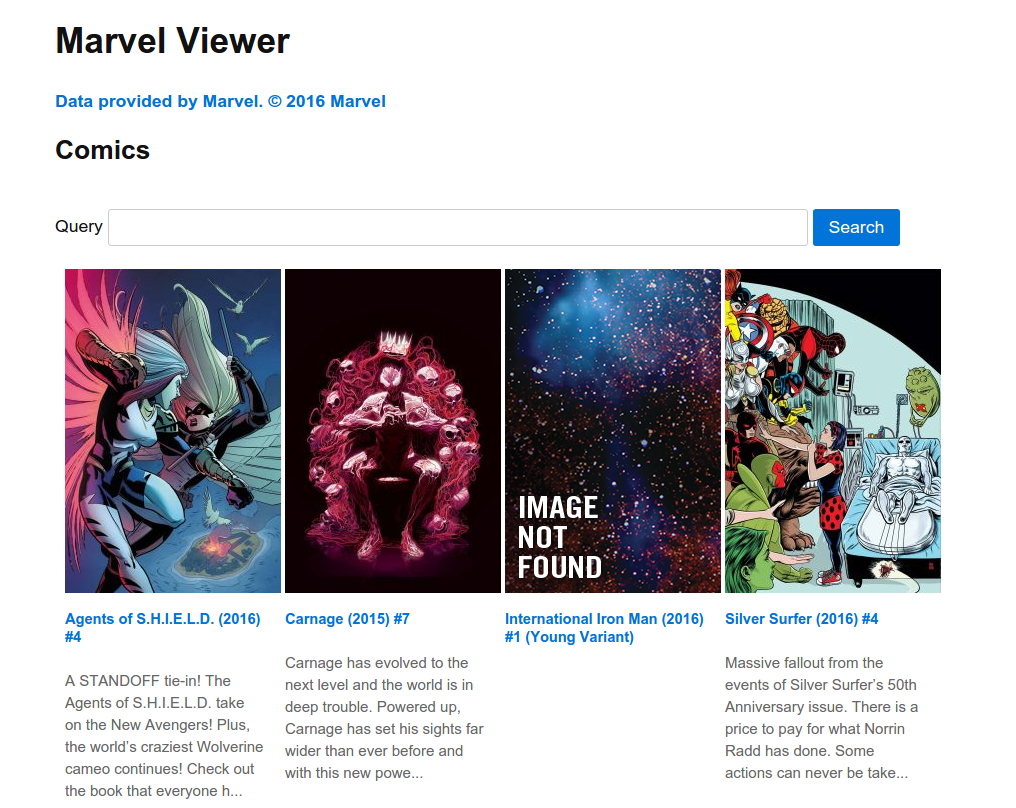
The comics view has a form for entering the user query, and below the form are the results. For each item, the photo, title, and the description of the comic is displayed.
漫画视图具有用于输入用户查询的表格,并且表格下方是结果。 对于每个项目,都会显示照片,标题和漫画的描述。
@extends('layouts.default')
@section('content')
<div id="content">
<h2>Comics</h2>
<form action="/comics">
<p>
<label for="query">Query</label>
<input type="text" name="query" id="query" value="{{ $query }}">
<button>Search</button>
</p>
</form>
<div id="comics" class="results">
@foreach($comics as $com)
<article class="card">
<img src="{{ $com['thumbnail']['path'] }}/portrait_incredible.jpg" alt="{{ $com['title'] }} thumbnail">
<footer>
<h5>
<a href="/comics/{{ $com['id'] }}" class="card-title">{{ $com['title'] }}</a>
</h5>
<p>
{{ str_limit($com['description'], 160) }}
</p>
</footer>
</article>
@endforeach
</div>
</div>
@stop
The link to the photo is constructed by using the thumbnail path then we concatenate the type of image that we want. Here, we’re using the portrait_incredible variant. There are many other image variants that are available – check out the images documentation if you want to know more.
通过使用缩略图路径构建到照片的链接,然后将所需的图像类型连接起来。 在这里,我们使用portrait_incredible变体。 还有许多其他可用的图像变体–如果您想了解更多信息,请查阅图像文档 。
<img src="{{ $com['thumbnail']['path'] }}/portrait_incredible.jpg" alt="{{ $com['title'] }} thumbnail">The title links to the individual comic page:
标题链接到各个漫画页面:
<h5>
<a href="/comics/{{ $com['id'] }}" class="card-title">{{ $com['title'] }}</a>
</h5>
The description is truncated so it wouldn’t mess with the styling for longer descriptions:
该描述被截断,因此不会对较长描述的样式造成干扰:
<p>
{{ str_limit($com['description'], 160) }}
</p>
Here’s what the comics page would look like:
这是漫画页面的样子:
漫画观 (Comic View)
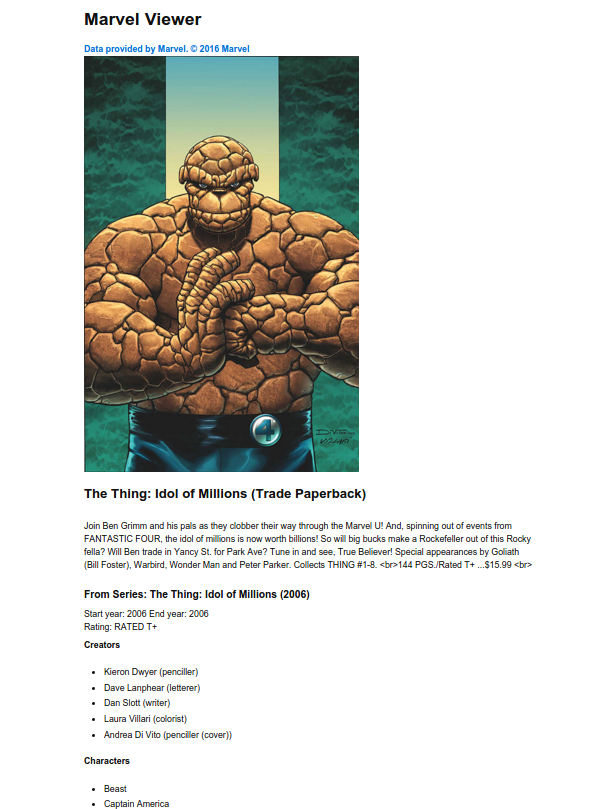
The comic view displays the title, full description, series title, the starting and ending year of the series, the rating, creators, characters, and the stories in the series.
漫画视图显示标题,完整描述,系列标题,系列的开始和结束年份,等级,创作者,角色以及系列中的故事。
@extends('layouts.default')
@section('content')
<div id="content">
<div class="results">
<article>
<img src="{{ $comic['thumbnail']['path'] }}.jpg" alt="{{ $comic['title'] }} thumbnail">
<h2>{{ $comic['title'] }}</h2>
<p>
{{ $comic['description'] }}
</p>
<div id="series">
<h3>From Series: {{ $series['title'] }}</h3>
<div class="years">
<span>Start year: {{ $series['startYear'] }}</span>
<span>End year: {{ $series['endYear'] }}</span>
</div>
<div class="rating">
Rating: {{ $series['rating'] }}
</div>
@if($series['creators']['available'] > 0)
<div class="creators">
<h4>Creators</h4>
<ul>
@foreach($series['creators']['items'] as $creator)
<li>{{ $creator['name'] }} ({{ $creator['role'] }})</li>
@endforeach
</ul>
</div>
@endif
@if($series['characters']['available'] > 0)
<div class="characters">
<h4>Characters</h4>
<ul>
@foreach($series['characters']['items'] as $character)
<li>{{ $character['name'] }}</li>
@endforeach
</ul>
</div>
@endif
@if($series['stories']['available'] > 0)
<div class="stories">
<h4>Stories</h4>
<ul>
@foreach($series['stories']['items'] as $story)
<li>
{{ $story['name'] }} <br>
type: {{ $story['type'] }}
</li>
@endforeach
</ul>
</div>
@endif
</div>
</footer>
</article>
</div>
</div>
@stop
Here’s what the comic page would look like:
这是漫画页面的样子:
人物检视 (Characters View)
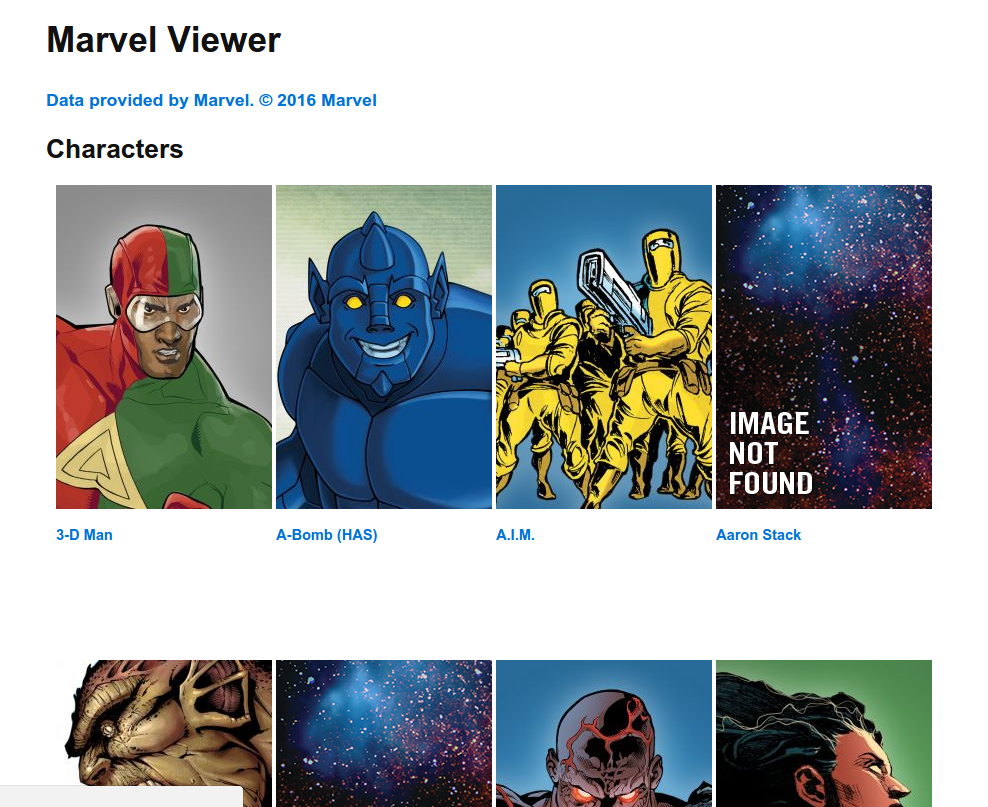
The characters view displays Marvel characters in a paginated view. For each character we’re only displaying the photo and the title. The title links to the wiki page of the character if it’s available. Below the results are the pagination links.
字符视图在分页视图中显示Marvel字符。 对于每个角色,我们仅显示照片和标题。 标题链接到角色的Wiki页面(如果有)。 结果下方是分页链接。
@extends('layouts.default')
@section('content')
<div id="content">
<h2>Characters</h2>
<div id="characters" class="results">
@foreach($paginated_results as $char)
<article class="card">
<img src="{{ $char['thumbnail']['path'] }}/portrait_incredible.jpg" alt="{{ $char['name'] }} thumbnail">
<footer>
<h5>
<a href="{{ getCharacterURL($char) }}" class="card-title">{{ $char['name'] }}</a>
</h5>
</footer>
</article>
@endforeach
</div>
<div id="pagination">
{{ $paginated_results->setPath('characters')->render() }}
</div>
</div>
@stop
Here’s what the characters page is going to look like:
这是字符页面的外观:
父视图 (Parent View)
Create a layouts/default.blade.php file inside the resources/views directory and add the following code:
在resources/views目录中创建一个layouts/default.blade.php文件,并添加以下代码:
<!DOCTYPE html>
<html lang="en">
<head>
<meta charset="UTF-8">
<title>Marvel Viewer</title>
<link rel="stylesheet" href="{{ url('lib/picnic/releases/picnic.min.css') }}">
<link rel="stylesheet" href="{{ url('css/style.css') }}">
</head>
<body>
<div id="wrapper">
<div id="header">
<h1>Marvel Viewer</h1>
</div>
@yield('content')
</div>
</body>
</html>
The parent view yields the main content. What ever we defined in the content section of the child views that we’ve used earlier will get rendered. This is where we also link the stylesheet used by the website.
父视图产生主要内容。 我们将在先前使用的子视图的content部分中定义的content呈现出来。 这也是我们链接网站使用的样式表的地方。
帮手 (Helper)
Earlier we used the getCharacterURL function in the characters view but we haven’t really defined it yet. To define it, create a helpers.php file inside the app directory and add the following code:
之前我们在字符视图中使用了getCharacterURL函数,但尚未真正定义它。 要定义它,请在app目录中创建一个helpers.php文件,并添加以下代码:
<?php
function getCharacterURL($character){
$urls = [];
if(!empty($character['urls'])){
foreach($character['urls'] as $curl){
$urls[$curl['type']] = $curl['url'];
}
}
return (!empty($urls['wiki'])) ? $urls['wiki'] : '#';
}
All this function does is loop through all the available character URLs and then returns the wiki URL if it’s available, or the pound symbol if not.
此功能的作用是循环访问所有可用的字符URL,然后返回Wiki URL(如果可用),否则返回井号()。
Next, open the composer.json file and add it to the files array in the autoload object:
接下来,打开composer.json文件并将其添加到autoload对象中的files数组中:
"autoload": {
"classmap": [
"database"
],
"psr-4": {
"App\\": "app/"
},
"files": [
"app/helpers.php"
]
},
Execute composer dump-autoload for the changes to take effect.
执行composer dump-autoload以使更改生效。
款式 (Styles)
Now it’s time to sprinkle some css to make the app look decent.
现在是时候撒些CSS以使该应用程序看起来不错了。
The parent view uses picnic.css to make things look nicer. You can download the css file here and put it in the specified directory, or use bower or (preferably) BowerPHP to install it.
父视图使用picnic.css使外观看起来更好。 您可以在此处下载css文件并将其放在指定的目录中,或者使用bower或(最好是BowerPHP )安装它。
Here’s the .bowerrc file to be placed in the root directory of the project:
这是.bowerrc文件, .bowerrc放置在项目的根目录中:
{
"directory": "public/lib"
}
Next, create a style.css file under the public/css directory and add the following code:
接下来,在public/css目录下创建一个style.css文件,并添加以下代码:
#wrapper {
width: 900px;
margin: 0 auto;
}
#query {
width: 700px;
}
.card {
width: 200px;
float: left;
margin-left: 10px;
margin-right: 10px;
margin-bottom: 25px;
}
#comics .card {
height: 650px;
}
#characters .card {
height: 450px;
}
.card p {
font-size: 15px;
color: #676767;
}
.card h5 {
line-height: 18px;
}
.results {
overflow: auto;
}
.pagination li {
display: inline-block;
padding: 30px;
list-style: none;
}
结论 (Conclusion)
In this tutorial, you’ve learned how to work with the Marvel API in order to get data about the different comics and characters that were created by Marvel in its 70-plus years of existence. You can access the source code used in this tutorial in this Github repo.
在本教程中,您已经学习了如何使用Marvel API来获取有关Marvel在其70多年的历史中创建的各种漫画和角色的数据。 您可以在Github存储库中访问本教程中使用的源代码。
Have you built anything interesting with their API? Do you have ideas for some cool Marvel-powered apps? Let us know in the comments!
您是否使用他们的API构建了任何有趣的东西? 您是否对基于Marvel的酷应用有任何想法? 让我们在评论中知道!
翻译自: https://www.sitepoint.com/were-building-a-marvel-catalog-reader-avengers-assemble/
复仇者联盟用的什么渲染器
复仇者联盟用的什么渲染器_我们正在构建一个惊奇目录阅读器! 复仇者联盟!相关推荐
- 安卓手机阅读器_罗辑思维旗下得到APP发布全新阅读器,7.8英寸安卓9.0系统
昨天,静读君刚发布了小米多看电纸书众筹的消息:小米也要做电纸书!Kindle将迎来最强挑战者? 没想到,又有一款新的阅读器即将发布:得到阅读器 得到阅读器是由罗辑思维旗下得到APP发布的一款电纸书,与 ...
- python写小说阅读器_用python实现自己的小说阅读器!
前一段时间书荒的时候,在喜马拉雅APP发现一个主播播讲的小说-大王饶命.听起来感觉很好笑,挺有意思的,但是只有前200张是免费的,后面就要收费.一章两毛钱,本来是想要买一下,发现说的进度比较慢而且整本 ...
- python小说阅读器_用python实现自己的小说阅读器
前一段时间书荒的时候,在喜马拉雅APP发现一个主播播讲的小说-大王饶命.听起来感觉很好笑,挺有意思的,但是只有前200张是免费的,后面就要收费.一章两毛钱,本来是想要买一下,发现说的进度比较慢而且整本 ...
- 安卓手机阅读器_【BOOX彩屏】彩色墨水屏阅读器,BOOX Poke2 Color 使用体验
本文为科技媒体"消费电子" 对 BOOX Poke2 Color的评测,已征得作者授权转载. BOOX Poke2 Color 作为BOOX的首款彩色墨水屏阅读器,同时,也是全球首 ...
- kindle 电子书阅读器_您的Kindle不仅仅是电子阅读器:5个隐藏的Kindle功能
kindle 电子书阅读器 It's easy to think of a Kindle as just an eBook reader, but it's so much more than tha ...
- python代码阅读器_用Python代码实现的RSS阅读器示例
玩蛇网python之家这篇文章是关于如何使用Python代码实现RSS阅读器示例,如何用Tkinter等模块方法实现RSS订阅器的编写,参考学习过下面的正试代码后就会明白. 简单的说下RSS阅读器是什 ...
- python多线程下载器_用 python 实现一个多线程网页下载器
学习之 #!/usr/bin/env python # -*- coding:utf-8 -*- import urllib, httplib import thread import time fr ...
- rss阅读器保存html文件,4款在线RSS阅读器使用体验
RSS阅读有以下优点:您可以看到没有广告和图片的标题或文章的概要阅读,这样你不必阅读全文即可知文章讲的一个意思是什么,为您节省时间. RSS阅读器会自动更新你定制的网站内容,保持新闻的及时性.要订阅新 ...
- 因为无聊 自己写的一个 TXT小说阅读器 PC版(winfrom)
应为无聊 自己写的一个 TXT小说阅读器,支持老板键,自动贴边隐藏,划水神器^^ 主要特色: ①支持拖拽txt文件到阅读器中自动打开txt文件,主要代码: //拖拽TXT文件到窗体并加载TXT文件pr ...
最新文章
- java jdk 8u111_8u111-jdk-alpine在java开发中的NullPointerException错误解决方案
- ubuntu 如何右上角显示键盘
- show slave status\G中的Read_Master_Log_Pos和Relay_Log_Pos的(大小)关系
- Java不同压缩算法的性能比较
- 在数据仓储的情况下进一步封装数据库基础操作,此版本为异步版本
- 计算机科学与技术在广西录取分数线,中国计量大学2016年在广西录取分数线(分专业)...
- JAVA——实现json bean实体类的传参校验模板及注解详解
- JavaScript回调函数的高手指南
- 8.1 Ext JS应用测试概览
- Java常见面试题:Oracle JDK 和 OpenJDK 的区别?
- int 转string
- Python常用的19个工具包汇总
- 天天基金网高收益基金列表数据保存到Excle中#python爬虫小试牛刀之openpyxl
- opencv获取不规则图像
- Java——OOP三大特性之封装性(Encapsulation)通俗详细
- STM32+ADS1115使用说明文档
- codevs 1227 方格取数2
- 简单同步firefox书签和IE收藏夹
- 【RST笔记6】scheduler
- 为什么复数域中使用共轭转置而不是转置