使用postfix,cyrus-sasl,courier-authlib,mysql,dovecot,extmail,extman搭建电子邮件系统,可以使用web方式以虚拟账号注册登录邮箱,并且发送接受邮件,实现电子邮件功能。

配置详细步骤如下
搭建dns服务
dns指向
[root@localhost ~]# vim /etc/resolv.conf
nameserver192.168.20.20
[root@mail ~]# mkdir /mnt/cdrom
[root@mail ~]# mount /dev/cdrom /mnt/cdrom
mount: block device /dev/cdrom is write-protected, mounting read-only
[root@mail ~]# cd /mnt/cdrom/Server/
[root@mail Server]# yum install bind
[root@mail Server]# yum install bind-chroot
[root@mail Server]# yum install caching*
[root@mail Server]# cd /var/named/chroot/etc/
[root@mail etc]# cp -p named.caching-nameserver.conf named.conf
[root@mail etc]# vim named.conf
listen-on port 53 { any; };
allow-query{ any; };
allow-query-cache { any; };
match-clients{ any; };
match-destinations { any; };
[root@mail etc]# cd /var/named/chroot/var/named/
[root@mail named]# cp -p localhost.zone a.org.zone
[root@mail named]# vim a.org.zone
$TTL86400
@IN SOA ns.a.org. root (
42 ; serial (d. adams)
3H ; refresh
15M ; retry
1W ; expiry
1D ) ; minimum
IN NS ns.a.org.
nsIN A 192.168.20.20
mailIN A 192.168.20.20
POP3IN CNAME mail
smtpIN CNAME mail
@IN MX 10 mail
[root@mail named]# service named start
启动 named:[确定]
[root@mail named]# rndc reload
server reload successful
[root@mail named]# chkconfig named on
关闭sendmail
[root@mail named]# service sendmail stop
关闭 sm-client:[确定]
关闭 sendmail:[确定]
[root@mail named]# chkconfig sendmail off
安装所需的rpm包
[root@mail named]# yum install httpd php php-mysql mysql mysql-server mysql-devel openssl-devel dovecot perl-DBD-MySQL tcl tcl-devel libart_lgpl libart_lgpl-devel libtool-ltdl libtool-ltdl-devel expect
启动mysql数据库,并给用户设置密码
[root@mail named]# service mysqld start
启动 MySQL:[确定]
[root@mail named]# chkconfig mysqld on
[root@mail named]# mysql
Welcome to the MySQL monitor. Commands end with ; or \g.
Your MySQL connection id is 2
Server version: 5.0.77 Source distribution
Type 'help;' or '\h' for help. Type '\c' to clear the buffer.
mysql> SET PASSWORD FOR root@'localhost'=PASSWORD('redhat');
Query OK, 0 rows affected (0.00 sec)
mysql> SET PASSWORD FOR root@'127.0.0.1'=PASSWORD('redhat');
Query OK, 0 rows affected (0.00 sec)
mysql> FLUSH PRIVILEGES;
Query OK, 0 rows affected (0.00 sec)
mysql> GRANT ALL PRIVILEGES ON *.* TO root@'%' IDENTIFIED BY 'redhat';
Query OK, 0 rows affected (0.00 sec)
mysql> FLUSH PRIVILEGES;
Query OK, 0 rows affected (0.01 sec)
一:安装postfix
[root@mail ~]# tar -zxvf postfix-2.8.2.tar.gz -C /usr/local/src
[root@mail ~]# cd /usr/local/src/
[root@mail src]# cd postfix-2.8.2/
[root@mail postfix-2.8.2]# groupadd -g 2525 postfix
[root@mail postfix-2.8.2]# useradd -g postfix -u 2525 -s /sbin/nologin -M postfix
[root@mail postfix-2.8.2]# groupadd -g 2526 postdrop
[root@mail postfix-2.8.2]# useradd -g postdrop -u 2526 -s /bin/false -M postdrop
[root@mail postfix-2.8.2]# make makefiles 'CCARGS=-DHAS_MYSQL -I/usr/include/mysql -DUSE_SASL_AUTH -DUSE_CYRUS_SASL -I/usr/include/sasl -DUSE_TLS ' 'AUXLIBS=-L/usr/lib/mysql -lmysqlclient -lz -lm -L/usr/lib/sasl2 -lsasl2-lssl -lcrypto'
[root@mail postfix-2.8.2] make
[root@mail postfix-2.8.2] make install
生成别名二进制文件
[root@mail postfix-2.8.2]# newaliases
[root@mail postfix-2.8.2]# postfix start
postfix/postfix-script: starting the Postfix mail system
[root@mail postfix-2.8.2]# postconf -m
btree
cidr
environ
hash
internal
mysql//postfix支持mysql
[root@mail postfix-2.8.2]# postconf -a
cyrus
dovecot
[root@mail postfix-2.8.2]# mkdir /tmp/abc
[root@mail postfix-2.8.2]# cd /tmp/abc/
[root@mail abc]# cp /mnt/cdrom/Server/postfix-2.3.3-2.1.el5_2.i386.rpm./
[root@mail abc]# rpm2cpio postfix-2.3.3-2.1.el5_2.i386.rpm |cpio -id
[root@mail ~]# cd /tmp/abc/etc/rc.d/init.d/
[root@mail init.d]# cp postfix /etc/init.d/
[root@mail init.d]# service postfix start
启动 postfix:[确定]
[root@mail init.d]# chkconfig --add postfix
[root@mail init.d]# chkconfig --list |grep postfix
postfix0:关闭1:关闭2:启用3:启用4:启用5:启用6:关闭
编辑postfix文档
[root@mail init.d]# vim /etc/postfix/main.cf
myhostname = mail.a.org
mydomain = a.org
myorigin = $mydomain
inet_interfaces = all
mydestination = $myhostname, localhost.$mydomain, localhost, $mydomain
mynetworks = 127.0.0.0/8
[root@mail init.d]# service postfix restart
关闭 postfix:[确定]
启动 postfix:[确定]
二:为postfix开启基于cyrus-sasl的认证功能
[root@mail init.d]# vim /etc/postfix/main.cf
############################CYRUS-SASL############################
655 broken_sasl_auth_clients = yes
656 smtpd_recipient_restrictions=permit_mynetworks,permit_sasl_authenticated,reject_invalid_hostname,reject_non_fqdn_hostname,reject_unknown_sender_domain,reject_non_fqdn_sende r,reject_non_fqdn_recipient,reject_unknown_recipient_domain,reject_unauth_pipelining,r eject_unauth_destination
657 smtpd_sasl_auth_enable = yes
658 smtpd_sasl_local_domain = $myhostname
659 smtpd_sasl_security_options = noanonymous
[root@mail init.d]# cd /usr/lib/sasl2/
[root@mail init.d]# cd /usr/lib/sasl2/
[root@mail sasl2]# cp -p Sendmail.conf smtpd.conf
[root@mail sasl2]# vim smtpd.conf
pwcheck_method:saslauthd
mech_list: LOGIN PLAIN
[root@mail sasl2]# service saslauthd start
启动 saslauthd:[确定]
[root@mail sasl2]# chkconfig saslauthd on
[root@mail sasl2]# telnet 127.0.0.1 25
ehlo 127.0.0.1
250-mail.a.org
250-PIPELINING
250-SIZE 10240000
250-VRFY
250-ETRN
250-AUTH PLAIN LOGIN
250-AUTH=PLAIN LOGIN
250-ENHANCEDSTATUSCODES
三:安装Courier authentication library
[root@mail ~]# tar -jxvf courier-authlib-0.63.1.20111230.tar.bz2 -C /usr/local/src/
[root@mail courier-authlib-0.63.1.20111230]# ./configure --prefix=/usr/local/courier-authlib --sysconfdir=/etc --with-authmysql --with-mysql-libs=/usr/lib/mysql --with-mysql-includes=/usr/include/mysql --with-redhat --with-authmysqlrc=/etc/authmysqlrc --with-authdaemonrc=/etc/authdaemonrc --with-ltdl-lib=/usr/lib --with-ltdl-include=/usr/include
[root@mail courier-authlib-0.63.1.20111230]# make
[root@mail courier-authlib-0.63.1.20111230]# make install
[root@mail courier-authlib-0.63.1.20111230]# chmod 755 /usr/local/courier-authlib/var/spool/authdaemon
[root@mail courier-authlib-0.63.1.20111230]# cp /etc/authdaemonrc.dist /etc/authdaemonrc
[root@mail courier-authlib-0.63.1.20111230]# cp /etc/authmysqlrc.dist /etc/authmysqlrc
[root@mail courier-authlib-0.63.1.20111230]# vim /etc/authdaemonrc
authmodulelist="authmysql"
authmodulelistorig="authmysql"
[root@mail courier-authlib-0.63.1.20111230]# vim /etc/authmysqlrc
MYSQL_SERVER localhost
MYSQL_PORT 3306mysql监听的端口
MYSQL_USERNAME extmail数据库的所有者的用户名
MYSQL_PASSWORD extmail密码
MYSQL_SOCKET /var/lib/mysql/mysql.sock
MYSQL_DATABASE extmail
MYSQL_USER_TABLE mailbox
MYSQL_CRYPT_PWFIELD password
MYSQL_UID_FIELD '2525'
MYSQL_GID_FIELD '2525'
MYSQL_LOGIN_FIELD username
MYSQL_HOME_FIELD concat('/var/mailbox/',homedir)
MYSQL_NAME_FIELD name
MYSQL_MAILDIR_FIELD concat('/var/mailbox/',maildir)
[root@mail ~]# cd /usr/local/src/courier-authlib-0.63.1.20111230/
[root@mail courier-authlib-0.63.1.20111230]# cp courier-authlib.sysvinit /etc/init.d/courier-authlib
[root@mail courier-authlib-0.63.1.20111230]# chmod 755 /etc/init.d/courier-authlib
[root@mail courier-authlib-0.63.1.20111230]# service courier-authlib start
Starting Courier authentication services: authdaemond
[root@mail courier-authlib-0.63.1.20111230]# chkconfig --add courier-authlib
[root@mail courier-authlib-0.63.1.20111230]# chkconfig courier-authlib on
[root@mail courier-authlib-0.63.1.20111230]# echo "/usr/local/courier-authlib/lib/courier-authlib" >> /etc/ld.so.conf.d/courier-authlib.conf
[root@mail courier-authlib-0.63.1.20111230]# ldconfig -v
[root@mail courier-authlib-0.63.1.20111230]# ldconfig -pv |grep cour
新建虚拟用户邮箱所在的目录,并将其权限赋予postfix用户:
[root@mail courier-authlib-0.63.1.20111230]# mkdir -pv /var/mailbox
[root@mail courier-authlib-0.63.1.20111230]# chown -R postfix /var/mailbox
修改验证方式
[root@mail courier-authlib-0.63.1.20111230]# vim /usr/lib/sasl2/smtpd.conf
pwcheck_method:saslauthd
mech_list: LOGIN PLAIN
pwcheck_method: authdaemond
log_level: 3
mech_list:PLAIN LOGIN
authdaemond_path:/usr/local/courier-authlib/var/spool/authdaemon/socket
~
[root@mail courier-authlib-0.63.1.20111230]# service saslauthd restart
停止 saslauthd:[确定]
启动 saslauthd:[确定]
[root@mail courier-authlib-0.63.1.20111230]# service courier-authlib restart
Stopping Courier authentication services: authdaemond
Starting Courier authentication services: authdaemond
四:使postfix支持虚拟域和虚拟用户
[root@mail courier-authlib-0.63.1.20111230]# vim /etc/postfix/main.cf
663 ########################Virtual Mailbox Settings########################
664 virtual_mailbox_base = /var/mailbox
665 virtual_mailbox_maps = mysql:/etc/postfix/mysql_virtual_mailbox_maps.cf
666 virtual_mailbox_domains = mysql:/etc/postfix/mysql_virtual_domains_maps.cf
667 virtual_alias_domains =
668 virtual_alias_maps = mysql:/etc/postfix/mysql_virtual_alias_maps.cf
669 virtual_uid_maps = static:2525
670 virtual_gid_maps = static:2525
671 virtual_transport = virtual
672 maildrop_destination_recipient_limit = 1
673 maildrop_destination_concurrency_limit = 1
674 ##########################QUOTA Settings########################
675 message_size_limit = 14336000
676 virtual_mailbox_limit = 20971520
677 virtual_create_maildirsize = yes
678 virtual_mailbox_extended = yes
679 virtual_mailbox_limit_maps = mysql:/etc/postfix/mysql_virtual_mailbox_limit_maps.cf
680 virtual_mailbox_limit_override = yes
681 virtual_maildir_limit_message = Sorry, the user's maildir has overdrawn his diskspacequota, please Tidy your mailbox and try again later.
682 virtual_overquota_bounce = yes
使用extman源码目录下docs目录中的extmail.sql和init.sql建立数据库
[root@mail ~]# tar -zxvf extman-1.1.tar.gz
[root@mail ~]# cd extman-1.1
[root@mail extman-1.1]# cd docs/
[root@mail docs]# mysql -u root -p <extmail.sql
Enter password:
[root@mail docs]# mysql -u root -p <init.sql
Enter password:
[root@mail docs]# mysql -u root -p
Enter password:
Welcome to the MySQL monitor. Commands end with ; or \g.
Your MySQL connection id is 5
Server version: 5.0.77 Source distribution
Type 'help;' or '\h' for help. Type '\c' to clear the buffer.
mysql> show databases;
+--------------------+
| Database|
+--------------------+
| information_schema |
| extmail|
| mysql|
| test|
+--------------------+
4 rows in set (0.00 sec)
mysql> use extmail
Reading table information for completion of table and column names
You can turn off this feature to get a quicker startup with -A
Database changed
mysql> show tables;
+-------------------+
| Tables_in_extmail |
+-------------------+
| alias|
| domain|
| domain_manager|
| mailbox|
| manager|
+-------------------+
5 rows in set (0.00 sec)
mysql>
[root@mail docs]# cp mysql* /etc/postfix/
授予用户extmail访问extmail数据库的权限
[root@mail docs]# mysql -u root -p
Enter password:
Welcome to the MySQL monitor. Commands end with ; or \g.
Your MySQL connection id is 6
Server version: 5.0.77 Source distribution
Type 'help;' or '\h' for help. Type '\c' to clear the buffer.
mysql> GRANT all privileges on extmail.* TO extmail@localhost IDENTIFIED BY 'extmail';
Query OK, 0 rows affected (0.00 sec)
mysql> GRANT all privileges on extmail.* TO extmail@127.0.0.1 IDENTIFIED BY 'extmail';
Query OK, 0 rows affected (0.00 sec)
mysql> FLUSH PRIVILEGES;
Query OK, 0 rows affected (0.00 sec)
mysql> \q
Bye
[root@mail docs]# service postfix restart
关闭 postfix:[确定]
启动 postfix:[确定]
五:配置dovecot
[root@mail docs]# vim /etc/dovecot.conf
mail_location = maildir:/var/mailbox/%d/%n/Maildir
auth default {
mechanisms = plain
passdb sql {
args = /etc/dovecot-mysql.conf
}
userdb sql {
args = /etc/dovecot-mysql.conf
}
[root@mail docs]# vim /etc/dovecot-mysql.conf
driver = mysql
connect = host=localhost dbname=extmail user=extmail password=extmail
default_pass_scheme = CRYPT
password_query = SELECT username AS user,password AS password FROM mailbox WHERE username = '%u'
user_query = SELECT maildir, uidnumber AS uid, gidnumber AS gid FROM mailbox WHERE username = '%u'
[root@mail docs]# vim /etc/postfix/main.cf
home_mailbox = Maildir/
[root@mail docs]# service dovecot restart
停止 Dovecot Imap:[失败]
启动 Dovecot Imap:[确定]
[root@mail docs]# chkconfig dovecot on
[root@mail docs]# service postfix restart
关闭 postfix:[确定]
启动 postfix:[确定]
六:安装Extmail-1.2
[root@mail ~]# tar zxvf extmail-1.2.tar.gz
[root@mail ~]# mkdir -pv /var/www/extsuite
mkdir: 已创建目录 “/var/www/extsuite”
[root@mail ~]# mv extmail-1.2 /var/www/extsuite/extmail
[root@mail ~]# mv extman-1.1 /var/www/extsuite/extman
[root@mail extmail]# cp webmail.cf.default webmail.cf
[root@mail extmail]# vim webmail.cf
SYS_USER_LANG = zh_CN
SYS_MYSQL_USER = extmail
SYS_MYSQL_PASS = extmail
SYS_AUTHLIB_SOCKET = /usr/local/courier-authlib/var/spool/authdaemon/socket
[root@mail extmail]# service httpd start
启动 httpd:httpd: apr_sockaddr_info_get() failed for mail.a.org
httpd: Could not reliably determine the server's fully qualified domain name, using 127.0.0.1 for ServerName
[确定]
[root@mail extmail]# chkconfig httpd on
[root@mail extmail]# vim /etc/httpd/conf/httpd.conf
User postfix
Group postfix
<VirtualHost *:80>
ServerName mail.test.com
DocumentRoot /var/www/extsuite/extmail/html/
ScriptAlias /extmail/cgi /var/www/extsuite/extmail/cgi
Alias /extmail /var/www/extsuite/extmail/html
</VirtualHost>
修改 cgi执行文件属主为apache运行身份用户
[root@mail extmail]# chown -R postfix.postfix /var/www/extsuite/extmail/cgi/
[root@mail extmail]# service httpd restart
停止 httpd:[确定]
启动 httpd:httpd: apr_sockaddr_info_get() failed for mail.a.org
httpd: Could not reliably determine the server's fully qualified domain name, using 127.0.0.1 for ServerName
[确定]
七:安装extman
[root@mail ~]# tar -zxvf extman-1.1.tar.gz
[root@mail ~]# mv extman-1.1 /var/www/extsuite/extman
[root@mail extman]# cp webman.cf.default webman.cf
[root@mail extman]# vim webman.cf
12 SYS_MAILDIR_BASE = /var/mailbox
21 SYS_CAPTCHA_ON = 0
[root@mail extman]# chown -R postfix.postfix /var/www/extsuite/extman/cgi/
[root@mail extman]# vim /etc/httpd/conf/httpd.conf
999 ScriptAlias /extman/cgi /var/www/extsuite/extman/cgi
1000 Alias /extman /var/www/extsuite/extman/html
[root@mail extman]# mkdir -pv /tmp/extman
mkdir: 已创建目录 “/tmp/extman”
[root@mail extman]# chown postfix.postfix /tmp/extman
八:依赖关系解决
[root@mail ~]# tar -zxvf Unix-Syslog-1.1.tar.gz
[root@mail ~]# cd Unix-Syslog-1.1
[root@mail Unix-Syslog-1.1]# perl Makefile.PL
[root@mail Unix-Syslog-1.1]# make
[root@mail Unix-Syslog-1.1]# make install
[root@mail Unix-Syslog-1.1]# service httpd restart
停止 httpd:[确定]
启动 httpd:httpd: apr_sockaddr_info_get() failed for mail.a.org
httpd: Could not reliably determine the server's fully qualified domain name, using 127.0.0.1 for ServerName
[确定]
测试:
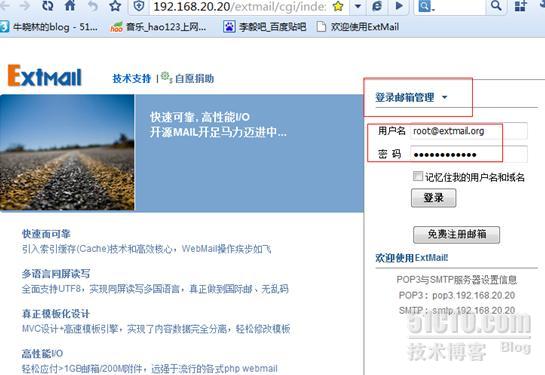
使用默认帐号登录
添加域

查看域列表

注册邮箱


登录邮箱

写邮件

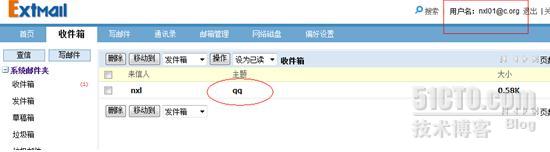
接收邮件
查看日志
[root@mail ~]# tail -f /var/log/maillog
Sep 11 23:18:57 localhost postfix/qmgr[20119]: 3787696647: from=<nxl@a.org>, size=539, nrcpt=1 (queue active)
Sep 11 23:18:57 localhost postfix/virtual[20523]: 3787696647: to=<nxl01@c.org>, relay=virtual, delay=0.17, delays=0.1/0.01/0/0.06, dsn=2.0.0, status=sent (delivered to maildir)
Sep 11 23:18:57 localhost postfix/qmgr[20119]: 3787696647: removed
Sep 11 23:19:41 localhost extmail[20530]: user=<nxl01@c.org>, client=192.168.20.1, module=login, status=loginok